Connect Arduino to Tuya
Last Updated on : 2023-09-18 02:58:59download
This topic describes how to install the Tuya_WiFi_MCU_SDK library on Arduino IDE and connect a device to Tuya.
Background
Tuya has published its official Arduino library. Arduino boards can work with Tuya’s general Wi-Fi module to connect your prototype to Tuya easily. We have reconstructed the library and it is now perfectly compatible with Arduino. You can directly install the library on Arduino IDE without porting the SDK. This can help you get started with a project easily.
Preparation
- You have installed Arduino IDE on your computer.
- You have got the following stuff.
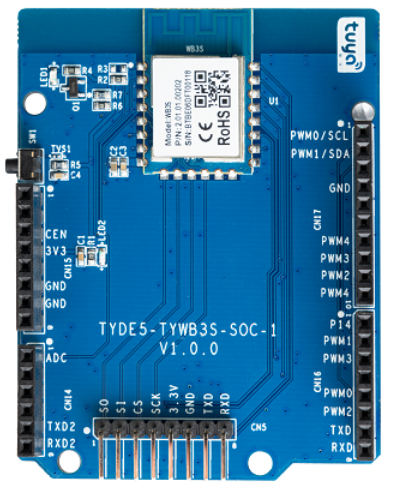
- Tuya Sandwich Wi-Fi communication board or Tuya Wi-Fi general module.
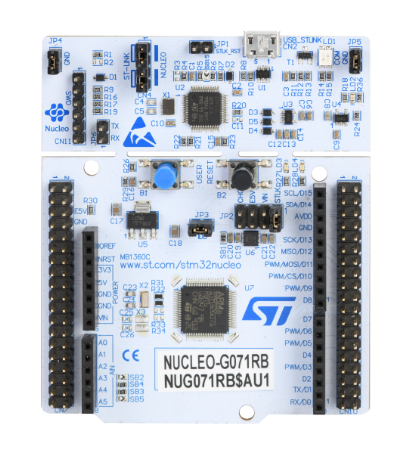
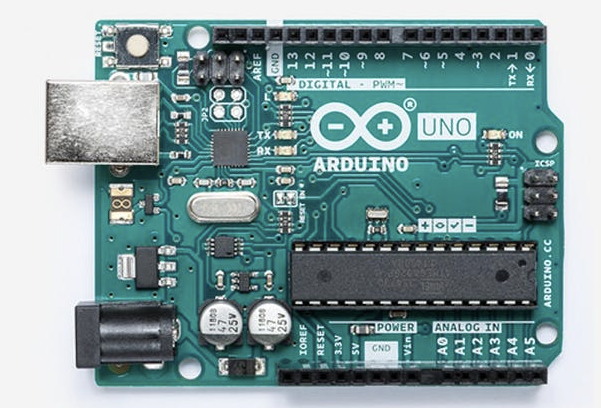
- Any board that supports Arduino library, such as ST Nucleo and Arduino UNO.
- Tuya Sandwich Wi-Fi communication board or Tuya Wi-Fi general module.
- You have installed the Smart Life app on your phone. Download the Smart Life app from Apple Store or mobile app stores.
How it works
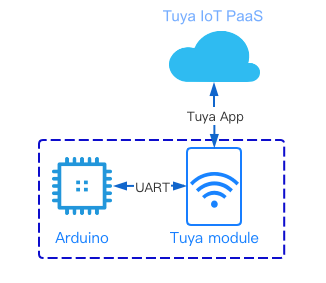
The Arduino board communicates with Tuya’s module that is flashed with general firmware through serial communication. Tuya’s module can send device data to and receive commands from Tuya. The Smart Life app can pair with the device and connect it to Tuya. Tuya_WiFi_MCU_SDK library encapsulates Tuya’s serial protocol, which saves your effort to fully understand every detail of the logic behind it.
Run examples
Before development, you can run an example to grasp the application logic.
Step 1: Install the library
Two approaches available:
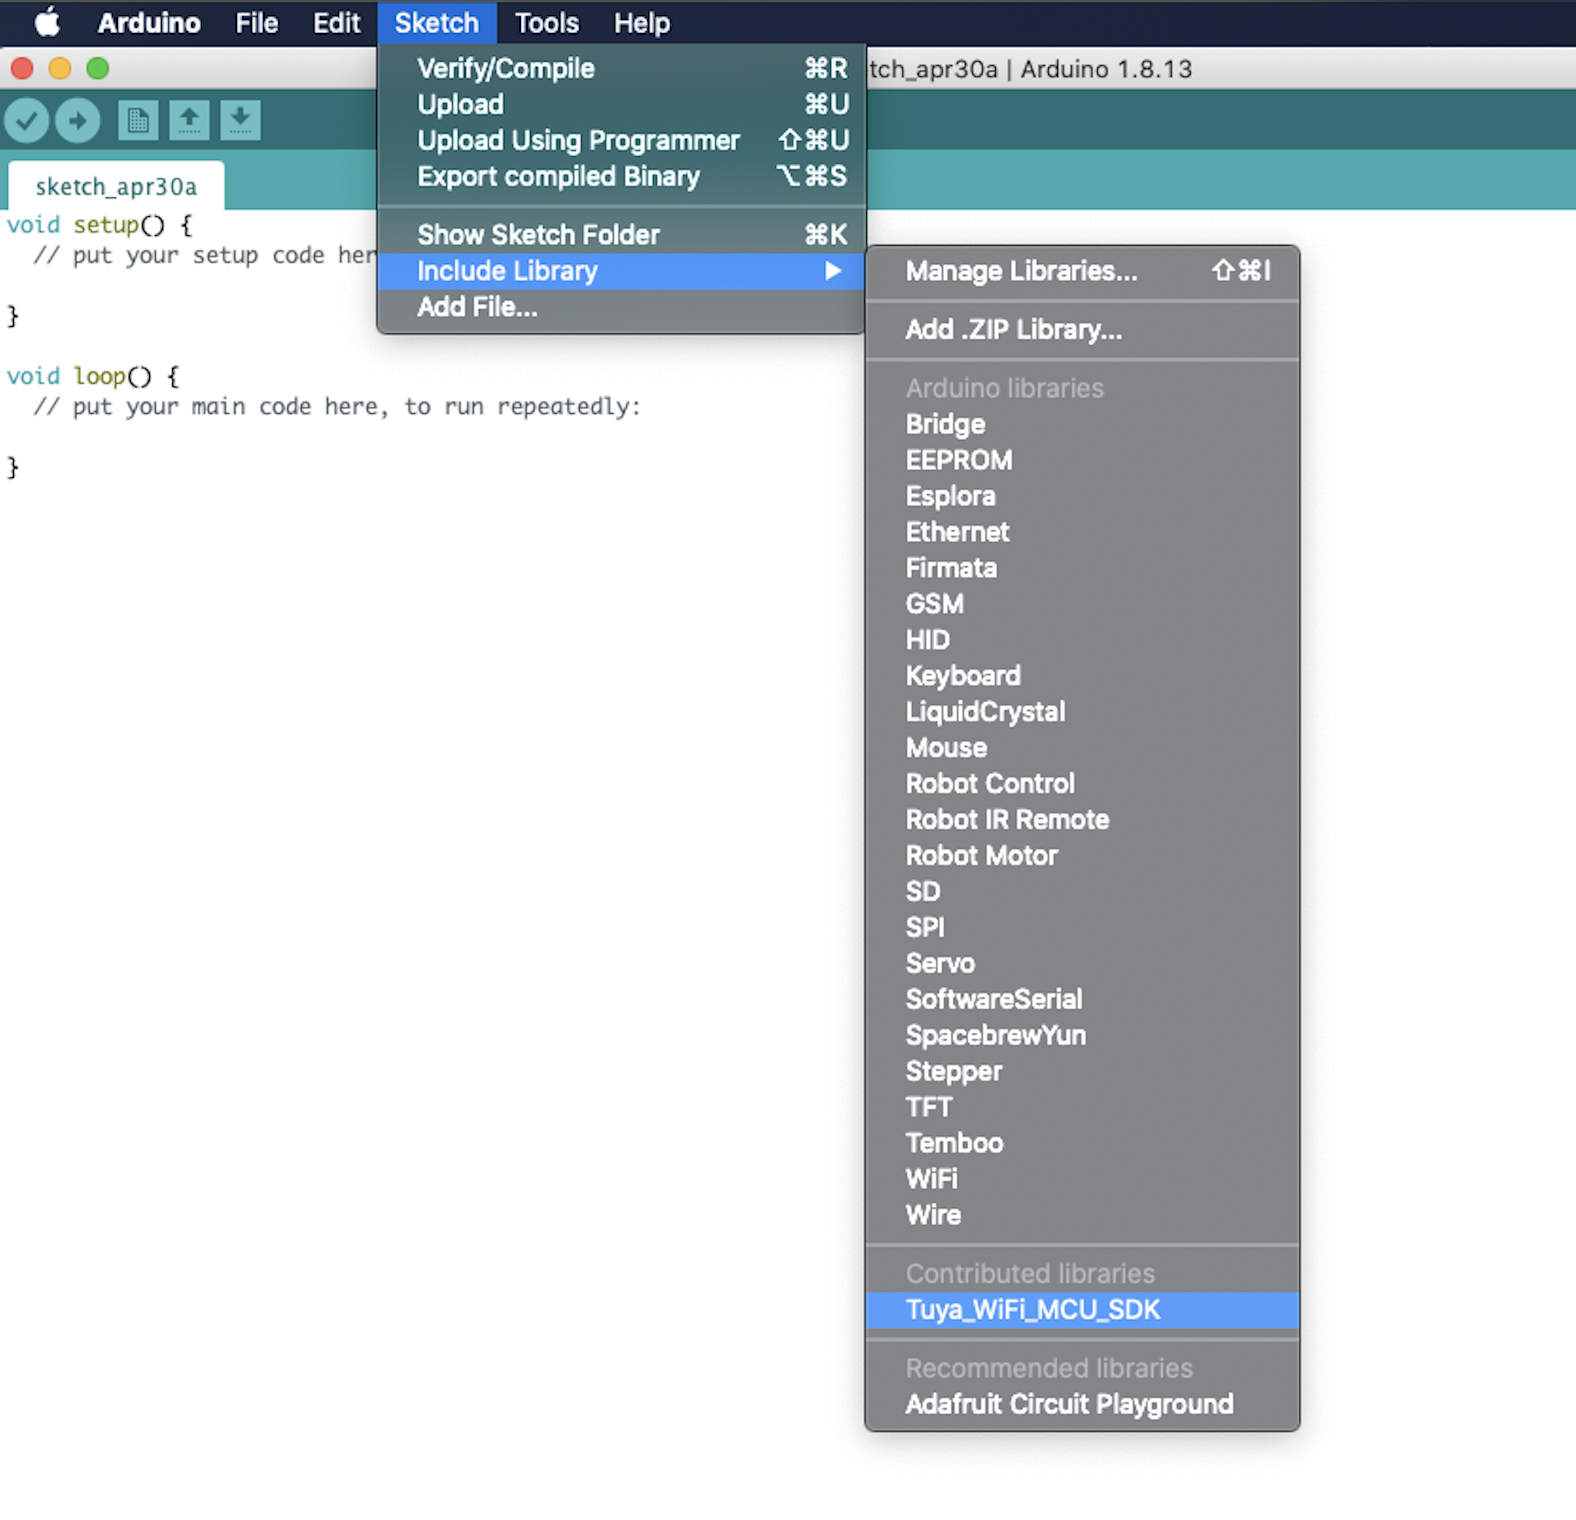
- Open Arduino IDE and click the Sketch menu and then Include Library > Manage Libraries. Find
Tuya_WiFi_MCU_SDKand install. - Download the Tuya_WiFi_MCU_SDK library package. Unzip it and copy all of these files to the libraries folder inside your sketchbook. To find the location of your sketchbook folder, go to the top menu in Arduino IDE:
Windows: File > Preferences.
macOS: Arduino > Preferences.
Restart Arduino IDE and verify that Tuya_WiFi_MCU_SDK appears in the Sketch > Include Library > Contributed libraries.
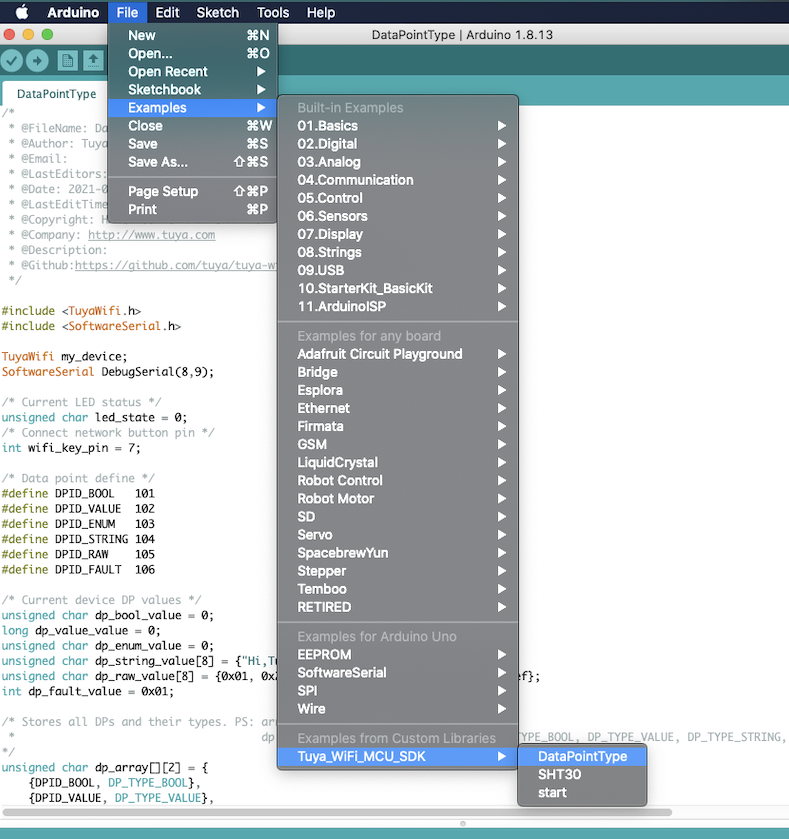
Step 2: Select an example
Our library provides several examples to help you get on board easily.
Start: a basic example that contains a switch data point (DP). You can turn on or off the light with a mobile app.DataPointType: an example to report DP data to the cloud and receive commands from the cloud. Six data types are supported.SHT30: an example of a peripheral.
Step 3: Compile and upload code
After you finish writing the sketch, use the verifying tool to check for errors and compile code. Before uploading, go to Tools > Port, and select the board that is connected to your computer. Then, you are good to upload the code to the board.
Pins 0 and 1 on Arduino are used for communication with Tuya’s board. Before uploading, you need to disconnect Tuya’s board from the Arduino board, or press and hold the reset button on Tuya’s board. The connection between these two boards might interfere with the uploading.

Step 4: Pair the device
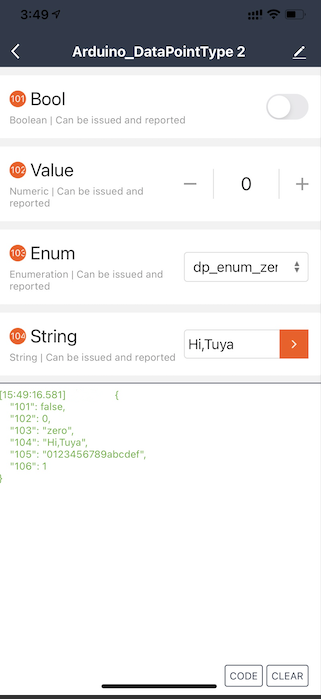
When Pin 7 (key pin) on the Arduino is pulled low, the board will send a pairing command to Tuya’s module. When the module receives this command, the onboard LED_BUILTIN will flicker, indicating that the module enters the pairing mode. Then, use the Smart Life app to pair with the module and test the data communication with the cloud.
The image below shows the control panel of a connected device. We use DataPointType as the example and select a debugging panel on the Tuya IoT Platform.
Is this page helpful?
YesFeedbackIs this page helpful?
YesFeedback


