The developer platform can conveniently manage the mini programs under your account, including version management, code scanning experience, permission management, multi-language configuration, etc. You can also view the data report of the Miniapp to help you analyze and optimize.
To enter the developer platform, you need to use the Tuya IoT account, register Tuya developer account.
List page and management page
The developer platform is divided into a list page and a management page for specific mini programs.
On the list page, you can create new Miniapps and view existing Miniapps. On the management page, you can make specific settings for the Miniapp, release review, etc.
Click New on the list page, fill in the Miniapp name, avatar, type and other relevant information, and click Create when finished.
There will be multiple Miniapps under the developer account, so when creating an Miniapp, a unique Miniapp ID will be generated for each Miniapp, which will be used by the developer to associate, upload, etc. in the developer tool later. The Miniapp ID can be viewed in Admin Page - Development Settings.
The name and avatar of the Miniapp can be changed later in the management page - basic settings, but the Miniapp type cannot be changed.
In version management, you can give priority to scanning the uploaded code, submit it for review and go online, and enable/disable services for the online version.
[Upload code] through developer tools (https://developer.tuya.com/miniapp/guide/start#%E5%9B%9B%E4%B8%8A%E4%BC%A0%E4%BB% A3%E7%A0%81), it will be displayed in the development version list.
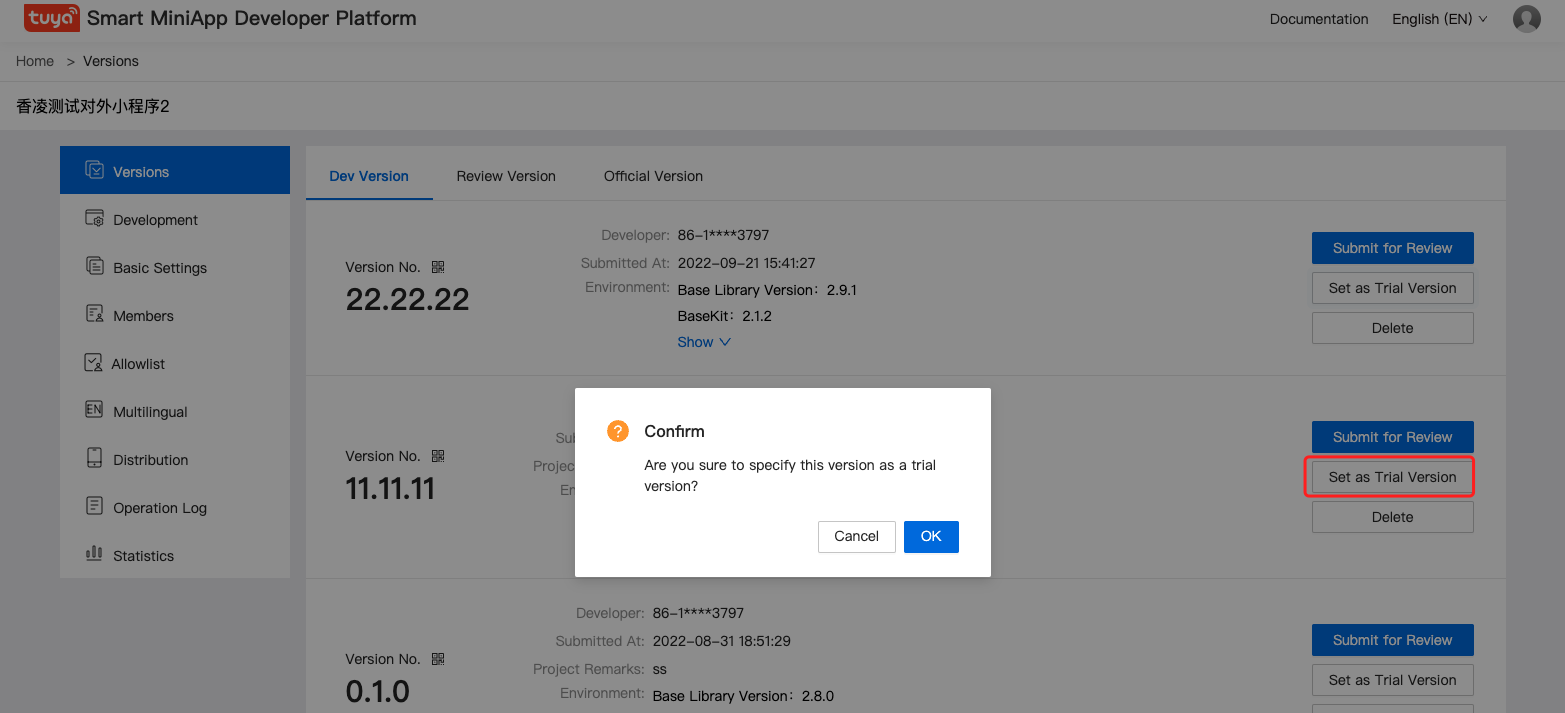
If you want to scan the code in advance to experience a certain version of the Mini Program, you can set the version as the trial version. Scanning accounts need to be configured with a whitelist. For the specific scanning process, please refer to below.
After the development version is submitted for review, it will be moved to the review version, and the internal developer will automatically approve it after 1-2 minutes.
After approval, it can be viewed in the online version. The online version can operate to activate/deactivate the service.
Version Stage | Description | Action Buttons |
Development version | Each uploaded code corresponds to a separate development version | Submit for review, delete |
Experience version | [Optional] Before the official launch, you can set the experience version, so that members can test the experience first | Set as the experience version |
Review Version | In the review stage of the development version, if it does not pass, it needs to be returned for modification according to the reason for rejection. | Different review statuses correspond to different operation buttons. Under review -> withdraw; review -> apply online; fail -> withdraw |
Online Version | Official Version for All Users | Enable, Disable |
Scanning the experience QR code follows the whitelist principle. If the account currently logged into the app is in the experience whitelist, scanning the code will open the experience version of the Miniapp, otherwise it will open the latest online version of the Miniapp.
**So before scanning the experience QR code, be sure to add the experience account to the whitelist so that the experience version Miniapp can be opened correctly. **
Steps to configure the whitelist:
- In Trafficking, select the app and region to be placed.
- Added experience account information to the whitelist.
Trafficking
Which apps can evoke the Miniapp can be specified in trafficking. Select the app you want to deliver and the delivery area.
The app that can be selected for delivery is the OEM App under your IoT account.
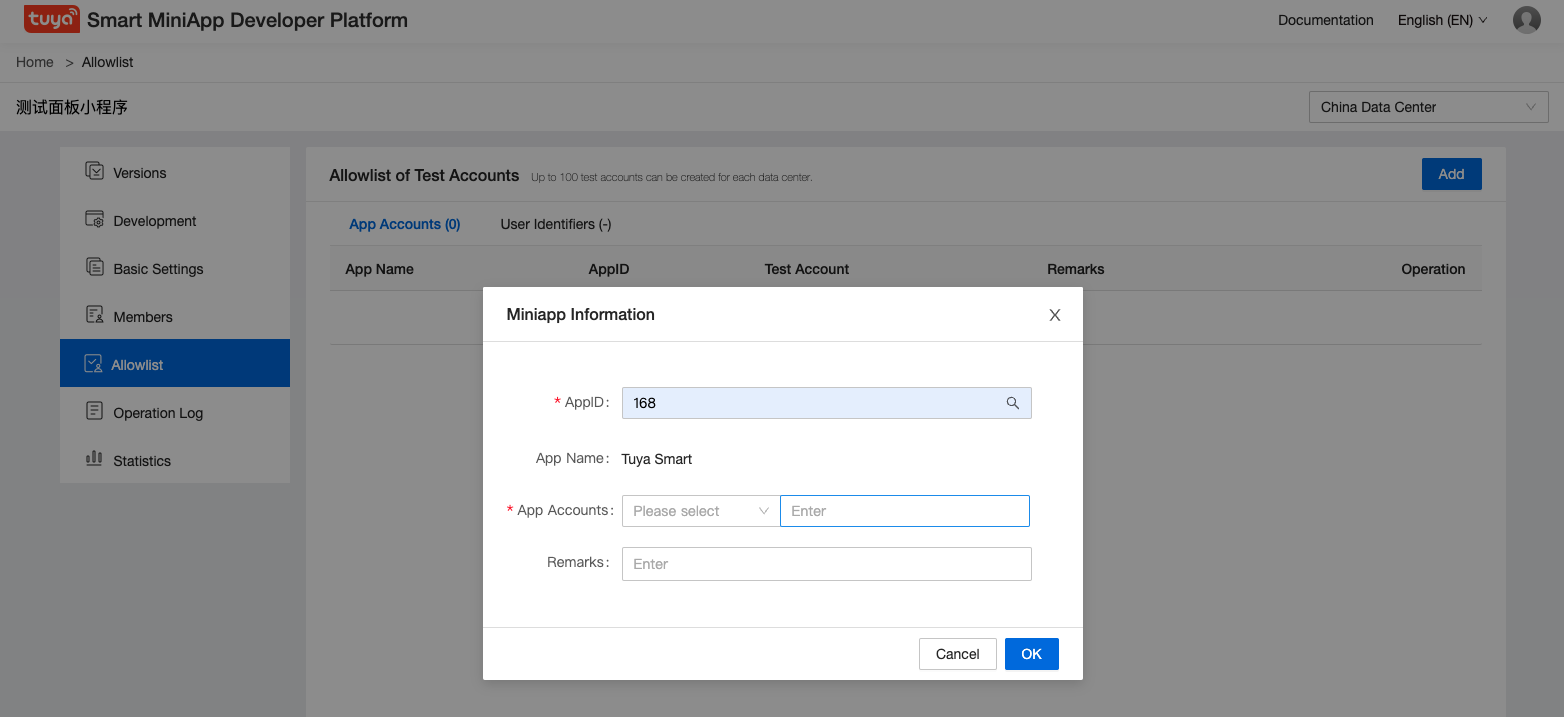
whitelist
Click the Add button in the whitelist, select the App and the corresponding experience account information. Optional apps include default smart life and apps added in trafficking.
Scan code
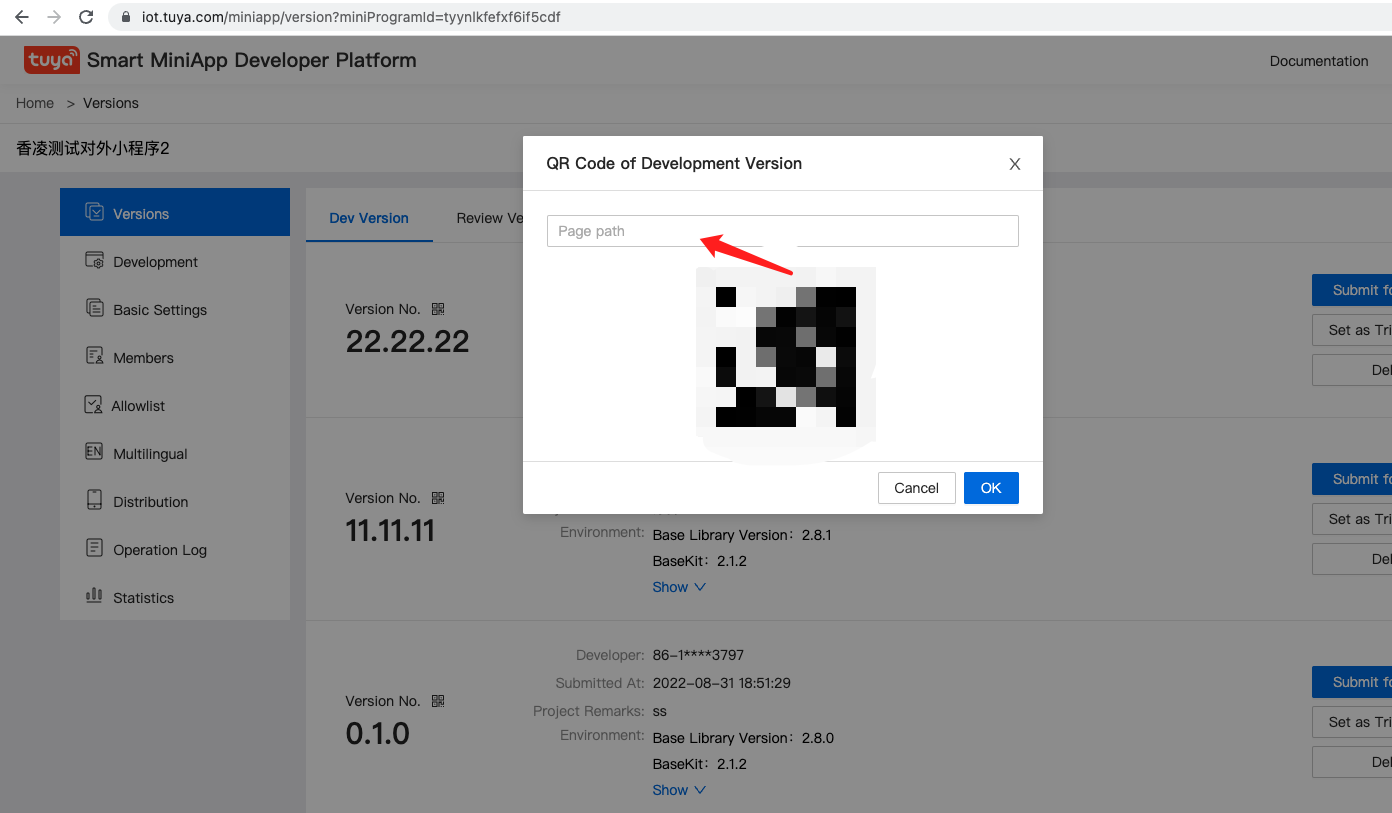
Go back to the version management page, click the experience QR code on the right side of the version set as the trial version.
Enter the QR code configuration page, you can specify the page path opened by scanning the code and the device ID you carry, or you can enter the home page without entering the default. After configuration, you can scan the code with the delivered app.
Panel Miniapp experience
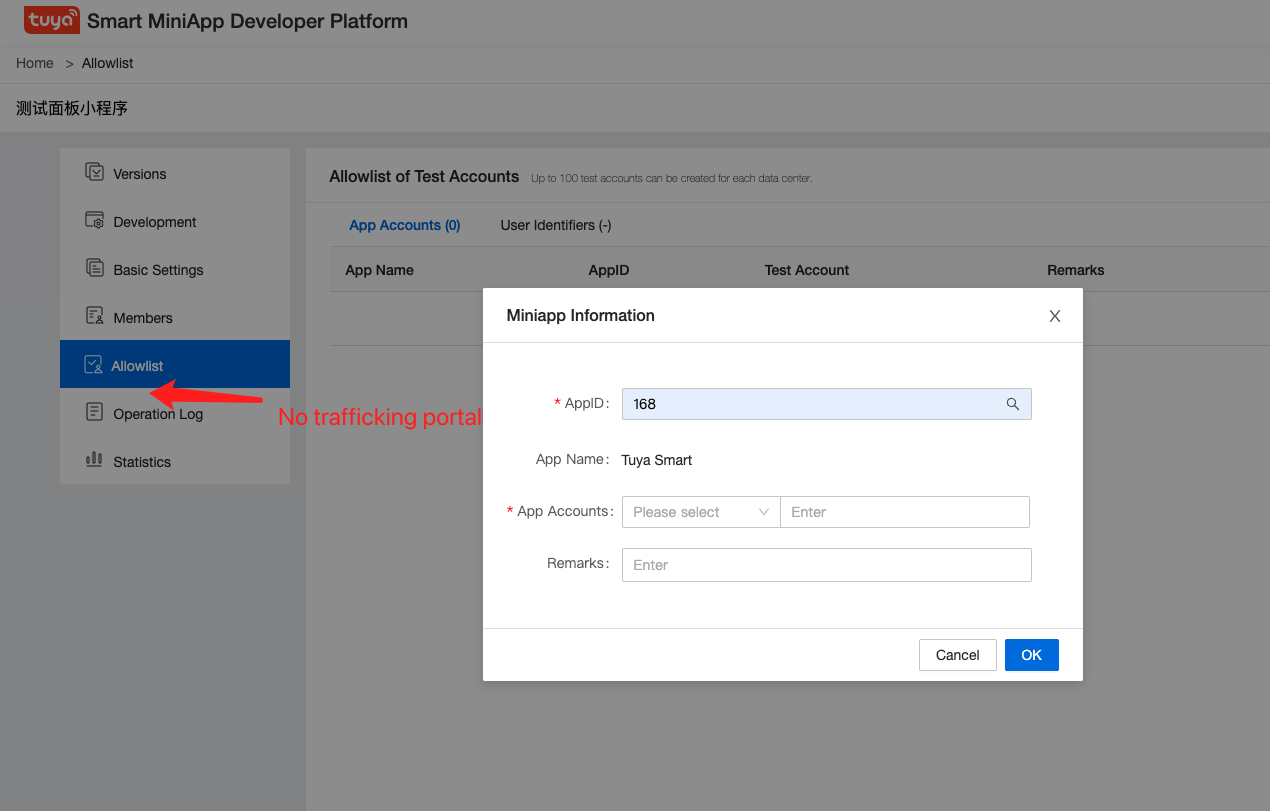
When configuring the experience whitelist of the panel Miniapp, the trafficking configuration step can be omitted. Directly select Smart Life App or OEM App under your IoT account in the whitelist.
When using the experience QR code for the panel Miniapp, you must fill in the virtual device ID/real device ID, so that the corresponding device information can be obtained.
For how to get the device ID, please refer to: [Panel Miniapp - Quick Start - Get deviceId](https://developer.tuya.com/miniapp/panel/quick-start#%E8%8E%B7%E5 %8F%96-deviceid).
**When filling in the real device ID, make sure that the logged-in App account has the permission of the device, or that the group you belong to has the device. **

Symptoms when not properly configured
If the "Mini Program has not been associated with an App" is displayed when scanning the QR code for the experience, it means that the Mini Program needs to be put into the App.
If "No permission to access this version" is displayed when scanning the QR code, you need to add the account to the whitelist.
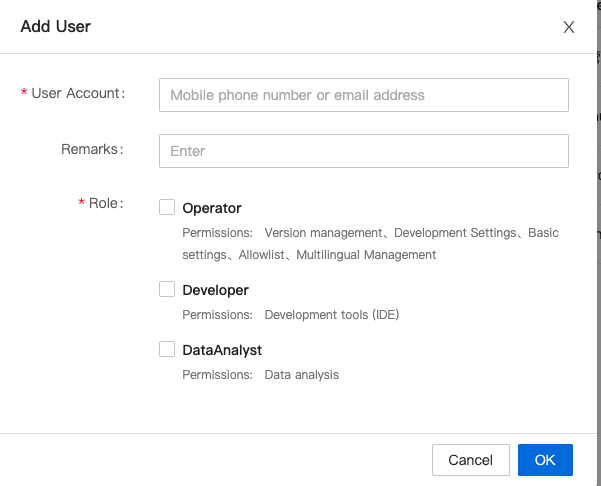
When you need to share Mini Program items with others, you can set roles for others in member management.
- Operator: You can manage various projects on the developer platform, such as version management, development settings, basic settings, whitelisting, multi-language management, etc. But you cannot upload code to the developer platform.
- Developer: You can use developer tools to associate the project for development, debugging, and uploading. However, it is not possible to change various settings of the project on the developer platform.
- Data Analyst: can only view and download data statistics.
Mini Programs should comply with the company's security compliance principles, and we will conduct security checks on domain names and request paths.
If you use the request API or load static resources, you need to configure the domain name in Development Settings.
For configuration method and details, please refer to: Online Audit
Required API | Configuration |
ty.request() | Developer Platform - Development Settings - Multi-zone Server Domain Name |
ty.uploadFile() | Developer Platform - Development Settings - Multi-zone Server Domain Name |
ty.downloadFile() | Developer Platform - Development Settings - Multi-zone Server Domain Name |
Static Resources | Developer Platform - Development Settings - Multi-zone Static Resources |
ty.requestCloud() | Developer Platform - Development Settings - Cloud Capability |
- Congratulations 🎉 for completing this tutorial!
- If you have any questions, you can contact the Tuya Smart MiniApp team