Prerequisites
- Have read the Ray Novice Village Tasks to understand the basics of the Ray framework.
- Have read Develop Universal Panel Based on Ray to understand the basics of Ray panel development.
- The AI image enhancement feature template is developed using
SDM (Smart Device Model). For more information aboutSDM, see the SDM documentation.
Development Environment
For details, see Panel MiniApp > Set up environment.
In some scenarios, images captured by devices may appear dim or overexposed. AI technology can be used to identify and enhance these images to improve their clarity. Many device cameras are wide-angle, which can cause image distortion. AI technology can be used for distortion correction to eliminate image distortion.
Feature Breakdown
- Basic interaction features:
- View comparison of enhanced image processing
- View comparison of distortion correction processing
- AI processing features:
- Enhance images to make them clearer
- Perform distortion correction on images
Create a Panel MiniApp on the Developer Platform
Panel MiniApp development is carried out on the MiniApp Developer platform. Please first go to the MiniApp Developer Platform to complete registration and login.
For detailed steps, see Create a Panel MiniApp.
Create a Project in the IDE Based on the Example Template
Log in to the Tuya MiniApp IDE, then select "Create MiniApp". In the template selection step, choose the "AI Image Enhancement Feature Template".
For detailed steps, see Initialize Project.
After completing the above steps, the initialization of a panel MiniApp development template is complete. The following is an introduction to the project directory:
src/
├── api/                          # API
├── components/                   # Common components
│   ├── icon-font/
│   ├── preview-image/
├── pages/                        # Pages
│   └── home/                     # Home
├── redux/                        # Redux State
│   ├── modules/
├── hooks/                        # Custom Hooks
├── i18n/                         # I18n
├── devices/                      # Device DP Config Data
├── res/                          # Static resources
├── styles/                       # Css
├── utils/                        # Utils
├── constant/                     # Constants Definition
├── app.config.ts                 # MiniApp Config
├── app.less                      # Global css
├── app.tsx                       # Entry
├── composeLayout.tsx             #
├── global.config.ts              # GLobal Config
├── routes.config.ts              # Route config
├── theme.json                    # Theme config
└── variables.less                #
- Region: Available in all regions
- App Version: Tuya App, Smart Life App v6.9.0 and above
- Kit Dependencies:
- BaseKit: v3.0.6
- MiniKit: v3.0.1
- DeviceKit: v4.0.8
- BizKit: v4.2.0
- AIKit: v1.4.3
- baseversion: v2.19.0
- Component Dependencies:
- @ray-js/panel-sdk: "^1.13.1"
- @ray-js/ray: "^1.7.37"
- @ray-js/ray-error-catch: "^0.0.25"
- @ray-js/smart-ui: "^2.1.5"
- @ray-js/cli: "^1.6.1"
Image Import and Selection
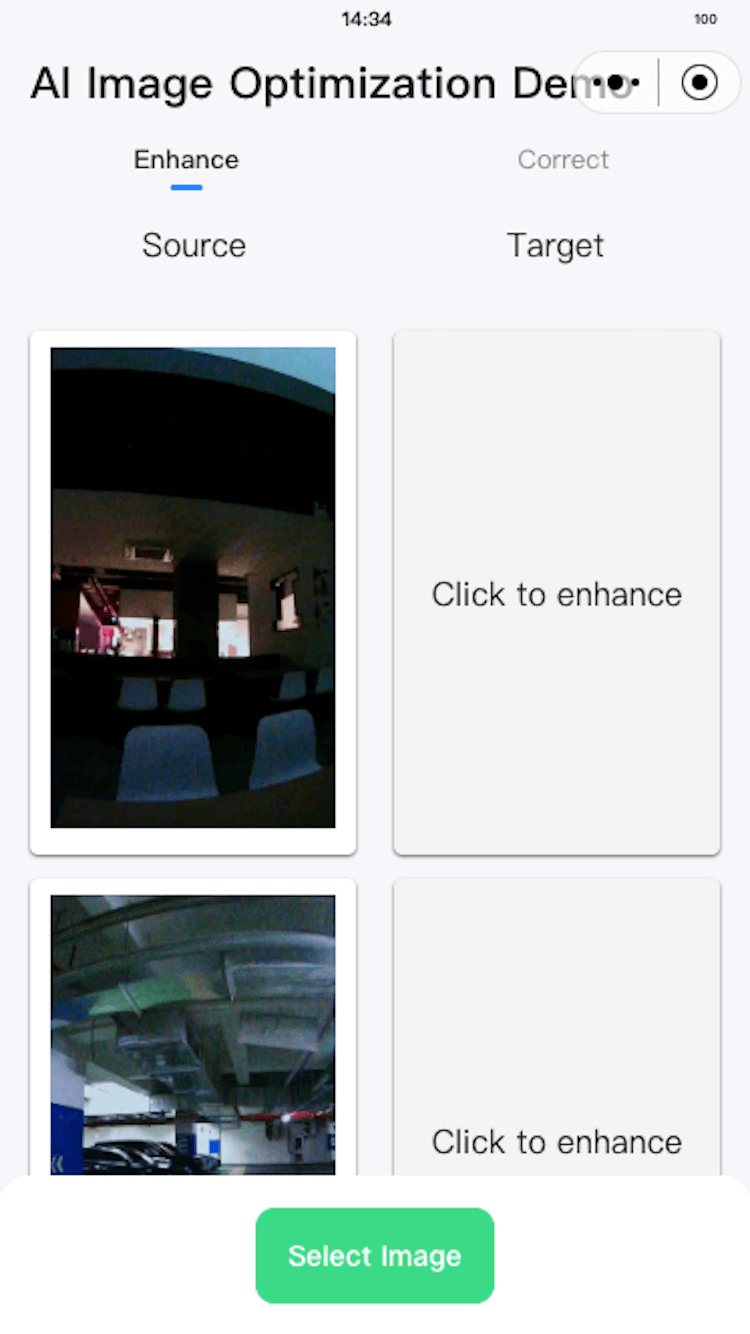
Feature Introduction
The template provides a default image list, allowing users to directly process images from the default list. At the same time, the template allows users to obtain images from the album or by taking photos.
Related Code Snippet
import { chooseImage } from "@ray-js/ray";

// Used to store images selected by the user
const [list, setList] = React.useState<string[]>([]);
const handleSelectImage = useCallback(() => {
  // Select image
  chooseImage({
    success: res => {
      console.log('chooseCropImage success', res);
      setList(prev => [...prev, ...res.tempFilePaths]);
    },
    fail: error => {
      console.error('chooseCropImage fail', error);
    },
  });
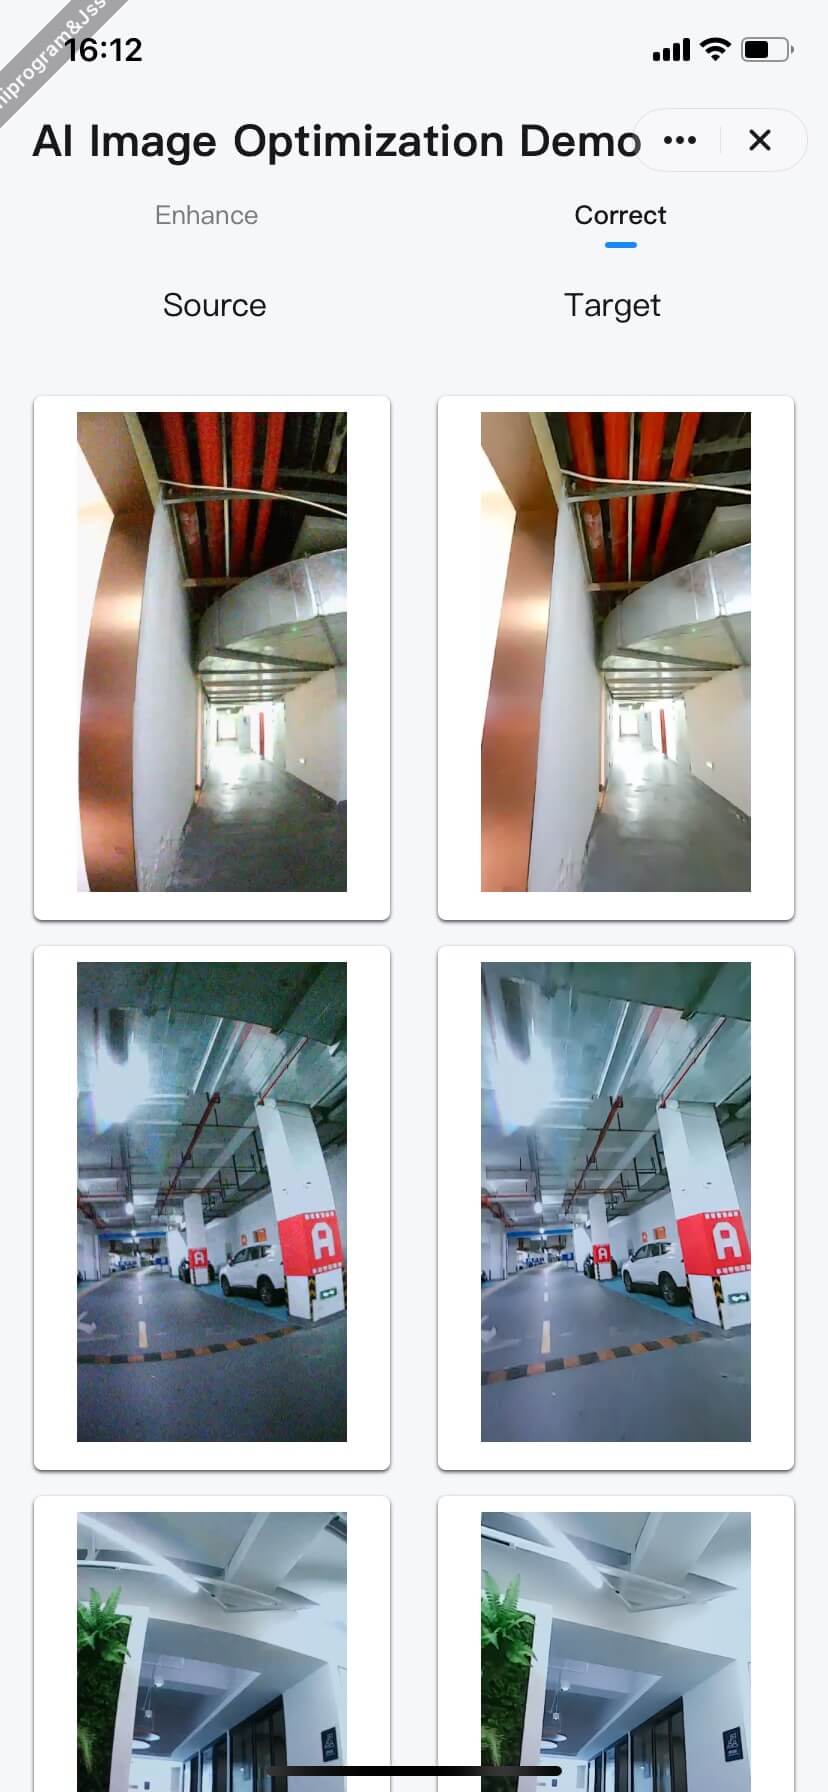
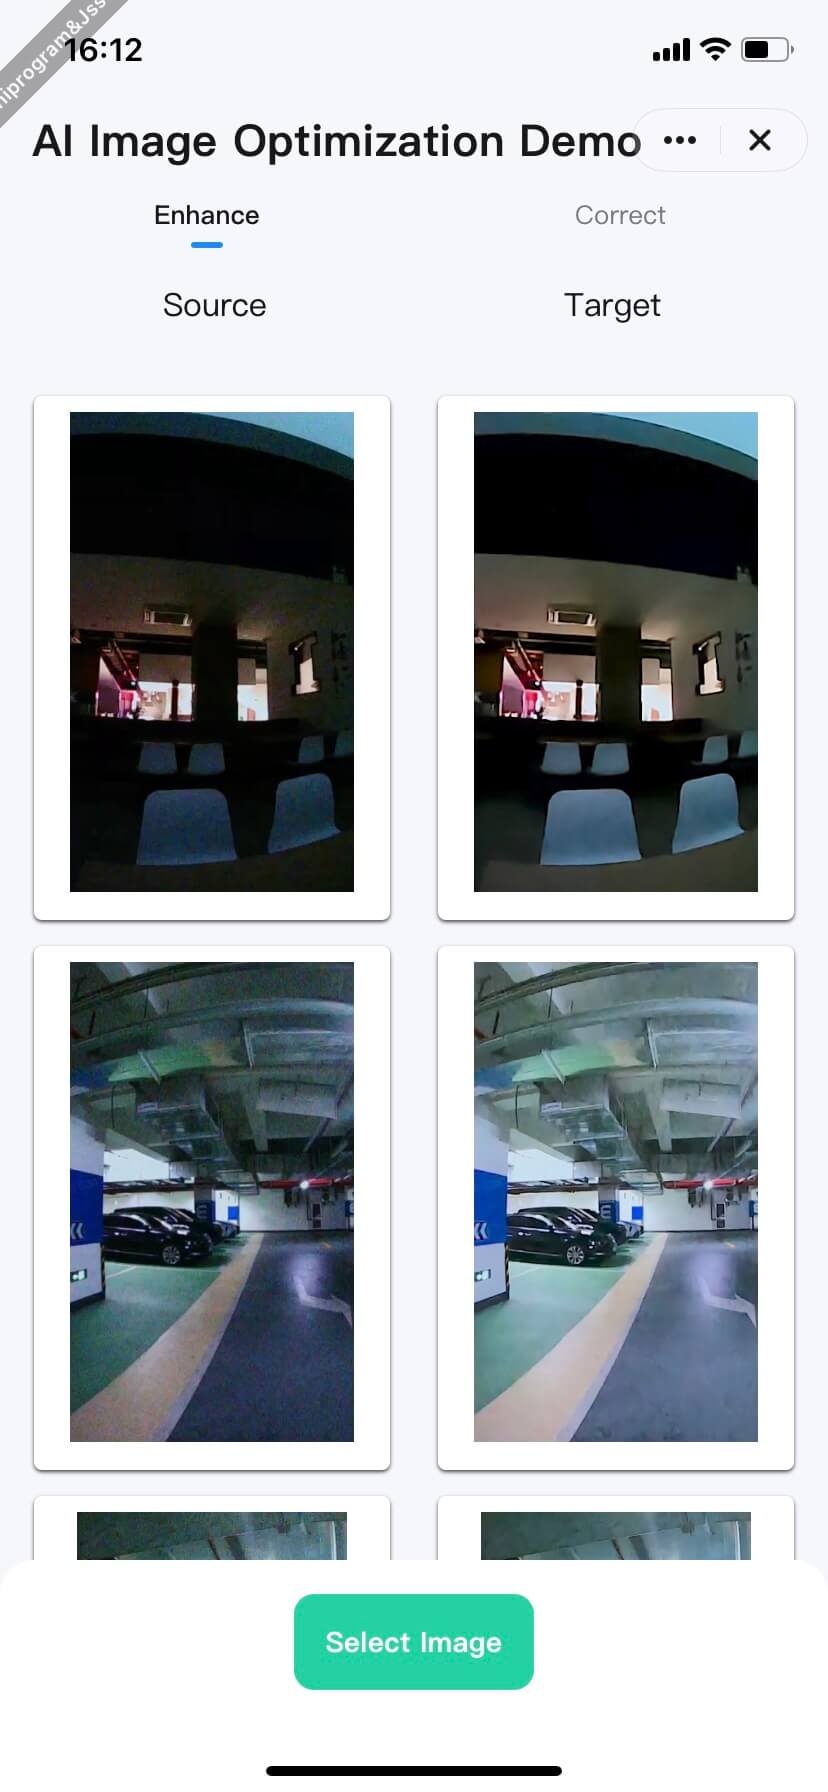
Feature Introduction
By enhancing and correcting image distortion, the user experience when browsing images on the C-end can be improved.
Key API Code Snippet
import { ai, env } from "@ray-js/ray";


/**
 * Currently, the related capability APIs only support single image processing, so here we implement a queue to handle multiple images.
 */
const enhanceImages = [];
let doEnhance = false;

/**
 * Camera distortion parameters
 * Note: Different cameras have different distortion parameters. Please adjust according to the actual camera parameters.
 */
const distortionOptions = {
  interpolationType: 2,
  ratio: 100,
  fCx: 3.108605878126431e2,
  fCy: 6.257166314880553e2,
  fFx: 7.084082701155164e2,
  fFy: 7.065142640307738e2,
  fK1: -0.291356681546637,
  fK2: 0.083781361060513,
  fK3: -0.011253071088971,
  fP1: 3.256053844769221e-4,
  fP2: 4.136029216106517e-4,
};

/**
 /**
  * Process enhanced image
  * @param data
  * @returns
  */
const handleEnhance = (data) => {
  if (doEnhance) {
    return;
  }
  doEnhance = true;
  ai.enhanceClarityForImage({
    inputImagePath: data.src,
    outputImagePath: `${env.USER_DATA_PATH}/ai_enhanced_image`,
    enhanceType: 5,
    success: res => {
      // Image clarity enhancement completed, now check if distortion correction is needed
      if (data.type === 'correct') {
        ai.enhanceCalibrationForImage({
          inputImagePath: res.outputImagePath,
          outputImagePath: `${env.USER_DATA_PATH}/ai_enhanced_image`,
          ...distortionOptions,
          success: res1 => {
            // AI distortion correction succeeded
            data.resolve(res1.outputImagePath);
          },
          fail: error => {
            // AI distortion correction failed
            data.reject(error);
          },
          complete: () => {
            doEnhance = false;
            if (enhanceImages.length > 0) {
              handleEnhance(enhanceImages.shift());
            }
          },
        });
      } else {
        data.resolve(res.outputImagePath);
        doEnhance = false;
        if (enhanceImages.length > 0) {
          handleEnhance(enhanceImages.shift());
        }
      }
    },
    fail: error => {
      // AI failed to process the image
      data.reject(error);
      doEnhance = false;
      if (enhanceImages.length > 0) {
        handleEnhance(enhanceImages.shift());
      }
    },
  });
};

/**
 /**
  * Enhance image
  * @param src
  * @param type
  * @returns
  */
export const enhanceImage = (src, type) => {
  return new Promise<string>((resolve, reject) => {
    enhanceImages.push({
      src,
      type,
      resolve,
      reject,
    });
    if (!doEnhance) {
      handleEnhance(enhanceImages.shift());
    }
  });
};
For a detailed introduction to the specific AI technology solution, see: Video Solution—Video Subject Highlighting Solution
For detailed API information, see: Developer Documentation—AI Basic Package
- Congratulations 🎉 on completing this tutorial!
- If you have any questions, feel free to contact the Tuya Smart MiniApp team.