基于涂鸦 Home Assistant 插件开发智能设备驱动教程
概况
本文介绍如何基于涂鸦官方 Home Assistant 插件开发设备驱动程序的过程。
HomeAssistant 是一款基于 Python 的智能家居开源系统,支持接入众多品牌的智能家居设备,可以轻松实现设备的语音控制、自动化等。Home Assistant 有一个简单的、适合移动设备的界面来控制你的所有设备,且不会将任何数据存储在云端,以保护个人隐私。
目前它是 Github 最火的 IoT 智能硬件开源项目。Home Assistant 基于树莓派硬件创造了很多智能家居玩法,在开发者领域有着比较高的口碑和用户群体。
以下为部分参考资料:
物料清单
苹果电脑
数量:1用于安装软件完成基础操作,使用终端工具连接树莓派,以及进行驱动开发。
树莓派
数量:1用于安装 Ubuntu Server、Home Assistant 以及后续的开发工作。
无线路由器
数量:1用于将树莓派连接到网络。
microSD 卡
数量:1用于安装 Ubuntu Server,并作为树莓派的存储设备。
读卡器
数量:1用于将 microSD 卡连接至电脑。
步骤
第 1 步:搭建开发环境
Home Assistant Core 基于 Python 开发,支持在 ODROID、Raspberry Pi、ASUS Tinkerboard、Intel NUC、Windows、macOS、Linux 等平台上运行。
本文以在 macOS 上通过 Home Assistant Core 的方式,在树莓派上安装开发环境为例进行介绍,详细安装过程请参考 基于树莓派搭建 Home Assistant 开发环境。第 2 步:配置插件环境
- 下载 涂鸦官方 Home Assistant 插件。
- 进入 Home Assistant 配置目录,例如 macOS 的
~/.homeassistant目录。
关于如何进入配置目录,请参考 基于树莓派搭建 Home Assistant 开发环境 - 通过 Samba 访问 Home Assistant 文件夹。 - 在配置目录中创建名为 custom_components 的文件夹以及其中名为 tuya 的子文件夹。
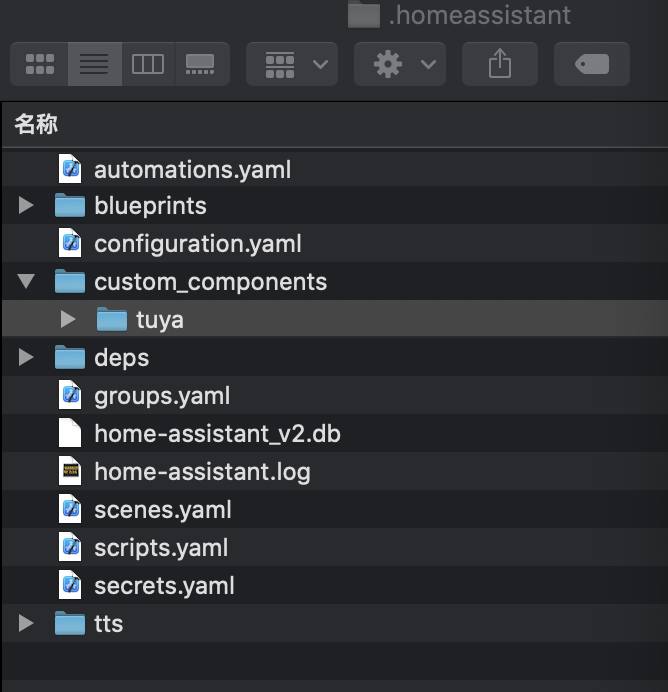
- 将插件解压到 tuya 文件夹中。
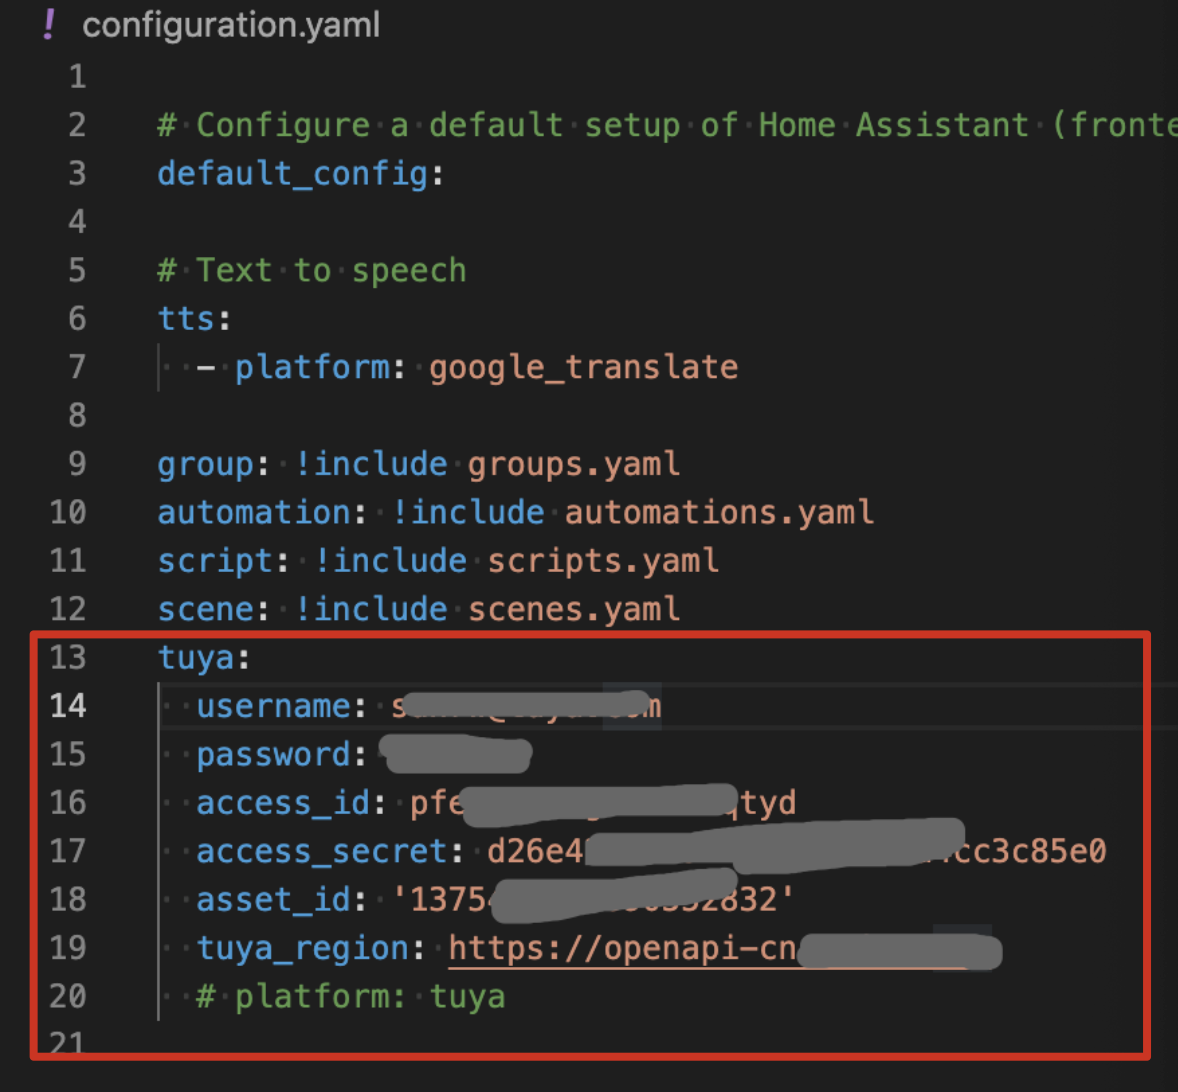
- 以文本编辑方式打开配置目录中的 configuration.yaml 文件,参考 IoT 平台账号注册流程获取应用信息,并将应用信息填写至文件中。具体填写格式如下图所示。
第 3 步:初始化插件
配置完成后,可以运行 Home Assistant 来调用 __init__.py 文件中 aysnc_setup 启动插件初始化流程。
__init__.async_setup
async def async_setup(hass, config):
    """Set up the Tuya integration."""

    conf = config.get(DOMAIN) ## 从配置文件 configuration.yaml中读取信息
    print('Tuya async setup conf %s \n' % conf)
    if conf is not None:
        async def flow_init() -> Any:
            try:   ## 进入 config_flow.py 中 初始化流程
                result = await hass.config_entries.flow.async_init(
                    DOMAIN, context={"source": SOURCE_IMPORT}, data=conf
                )
            except Exception as inst:
                print(inst.args)
            print("Tuya async setup flow_init")
            return result
        # await hass.async_add_executor_job(
        hass.async_create_task(
            flow_init()
        )

    return True
TuyaConfigFlow.async_step_user
__init__.py 文件中先执行 async_setup 至 TuyaConfigFlow.async_step_import 后,再执行async_step_user。
    async def async_step_user(self, user_input=None, is_import=False):
        _LOGGER.debug('TuyaConfigFlow.async_step_user start, is_import=', is_import)

        errors = {}
        if user_input is not None:
			## 尝试使用配置信息进行登录
            response = await self.hass.async_add_executor_job(self._try_login, user_input)
            if response.get('success', False):
                return self.async_create_entry(
                    title=user_input[CONF_USERNAME],
                    data=user_input,
                )
            else:
                errors['base'] = 'code={}, msg={}'.format(response.get('code', 0), response.get('msg', ''))
                if is_import == True:
                    return self.async_abort(reason=errors['base'])

		## 如果没有配置过信息,弹窗提供登录表单走录入流程
        return self.async_show_form(
            step_id='user',
            data_schema=DATA_SCHEMA_USER,
            errors=errors,
        )
__init__.async_setup_entry
async def async_setup_entry(hass: HomeAssistant, entry: ConfigEntry):
    print("tuya.__init__.async_setup_entry-->", entry.data)

	## 执行_init_tuya_sdk,进行初始化
    success = await hass.async_add_executor_job(_init_tuya_sdk, hass, entry.data)
    if not success:
        return False

    ## 根据tuya->ha 类型关联表,进行ha设备初始化
    for platform in set(TUYA_TYPE_TO_HA.values()):
        print("tuya async platform-->", platform)
        hass.async_create_task(
            hass.config_entries.async_forward_entry_setup(
                entry, platform
            )
        )

    return True
第 4 步:基于插件开发驱动
本文基于涂鸦插件体系,介绍如何开发插座的驱动。
前提条件
开发之前需要现在 Home Assistant 开发者主页 查找适合于插座的 Home Assistant 设备模型,比如 Switch。
然后根据 Home Assistant 设备 entity 文档 启动开发流程。操作步骤
- 在 custom_components/tuya 插件目录下新建 switch.py 文件。
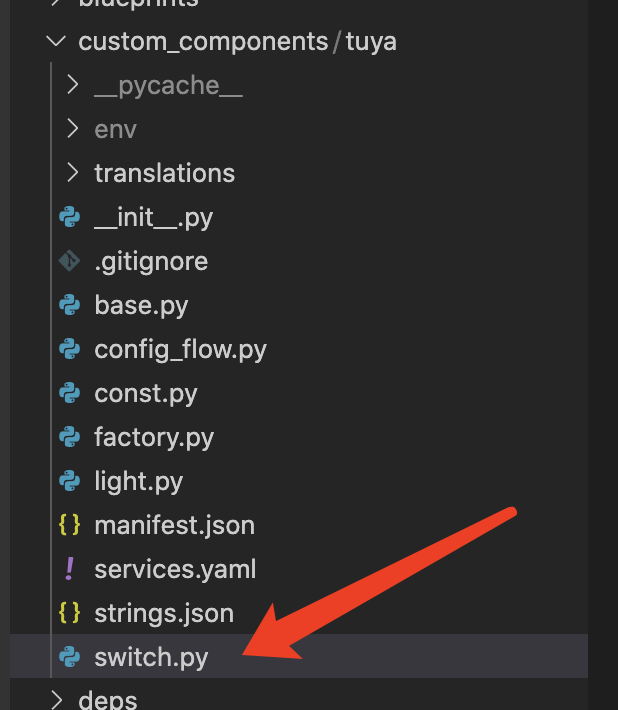
- 新建 async_setup_entry 方法,用作初始化。
该方法从缓存中读取 haDevices。根据匹配的设备类型,此处应为 switch,新建 Home Assistant 设备 entity 示例如下:async def async_setup_entry(hass: HomeAssistant, entry: ConfigEntry, async_add_entities): print('tuya.switch.async_setup_entry') haDevices = [] for haDevice in hass.data[DOMAIN]['haDevices']: if haDevice.platform == 'switch': haDevices.append(haDevice) async_add_entities(haDevices) - 新建 TuyaHaSwitch 作为涂鸦插座在 Home Assistant 中的新定义 entity。
根据 Home Assistant 设备 entity 文档,实现需要的 Properties 和 Methods,比如开关Methods的turn_on、turn_off 和 Properties 的is_on。示例如下:class TuyaHaSwitch(TuyaHaDevice, SwitchEntity): """Tuya Switch Device.""" platform = 'switch' # ToggleEntity @property def is_on(self) -> bool: """Return true if switch is on.""" return self.tuyaDevice.status.get(DPCODE_SWITCH, False) def turn_on(self, **kwargs: Any) -> None: """Turn the switch on.""" self.tuyaDeviceManager.publishCommands(self.tuyaDevice.id, [{'code': DPCODE_SWITCH, 'value': True}]) def turn_off(self, **kwargs: Any) -> None: """Turn the device off.""" self.tuyaDeviceManager.publishCommands(self.tuyaDevice.id, [{'code': DPCODE_SWITCH, 'value': False}])
- 在 custom_components/tuya 插件目录下新建 switch.py 文件。
小结
完成该步骤后,一个基础的开关驱动已经在 Home Assistant 插件中实现。
关于驱动的生命周期,可参考 Home Assistant 开发者官网介绍。
该内容对您有帮助吗?
是我要提建议