前提条件
- 已阅读 小程序开发指南(基础篇),了解小程序开发的基础知识。
- 已了解如何使用 Cocos 开发框架来构建游戏项目。
构建内容
您可以利用小程序开发构建出一个小游戏项目,并充分利用小程序的扩展能力:
- 小程序内运行离线 Web 小游戏
- 小游戏调用小程序 API
所需条件
- 智能生活 App
- Tuya MiniApp IDE
- Cocos Creator
- NVM 及 Node 开发环境(建议使用 18.x 系列版本)
- Yarn 依赖管理工具
详见 智能小程序 >搭建环境。
开发者平台创建智能小程序
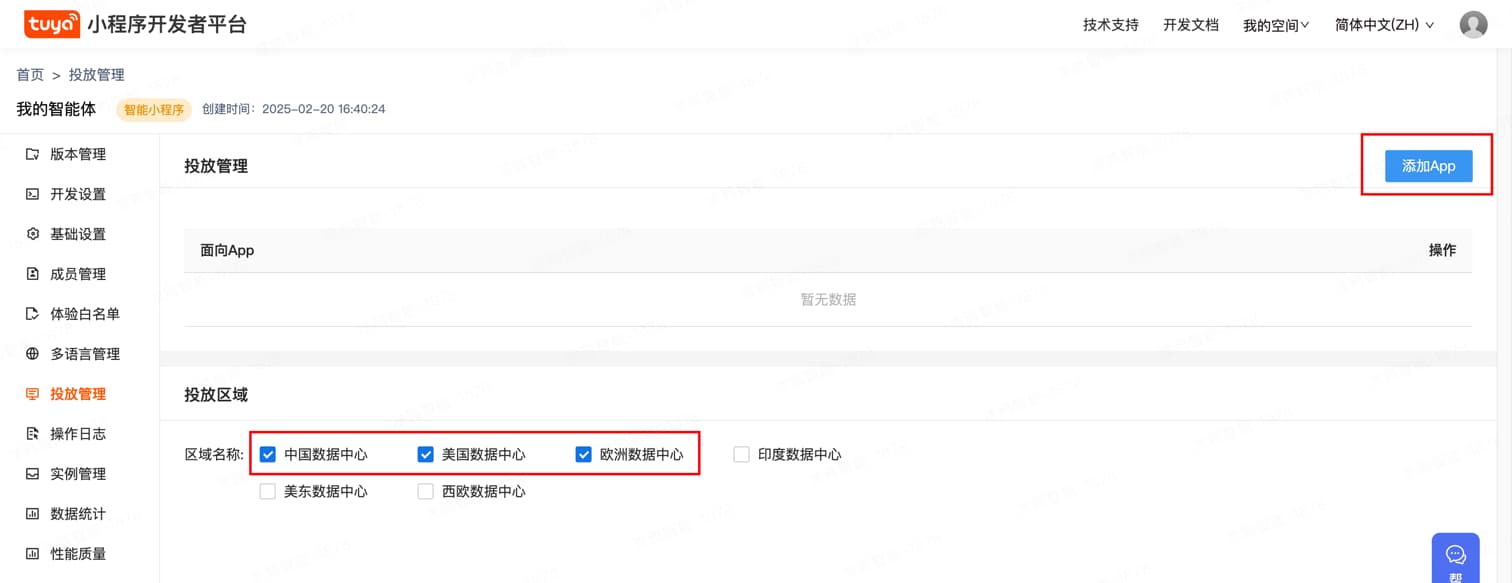
智能小程序的开发在 小程序开发者 平台上进行操作,首先请前往 小程序开发者平台 完成平台的注册登录。
在平台上创建一个小程序后,单击 添加 App 将小程序投放到您的 OEM App 中,并选择您想发布的数据中心。
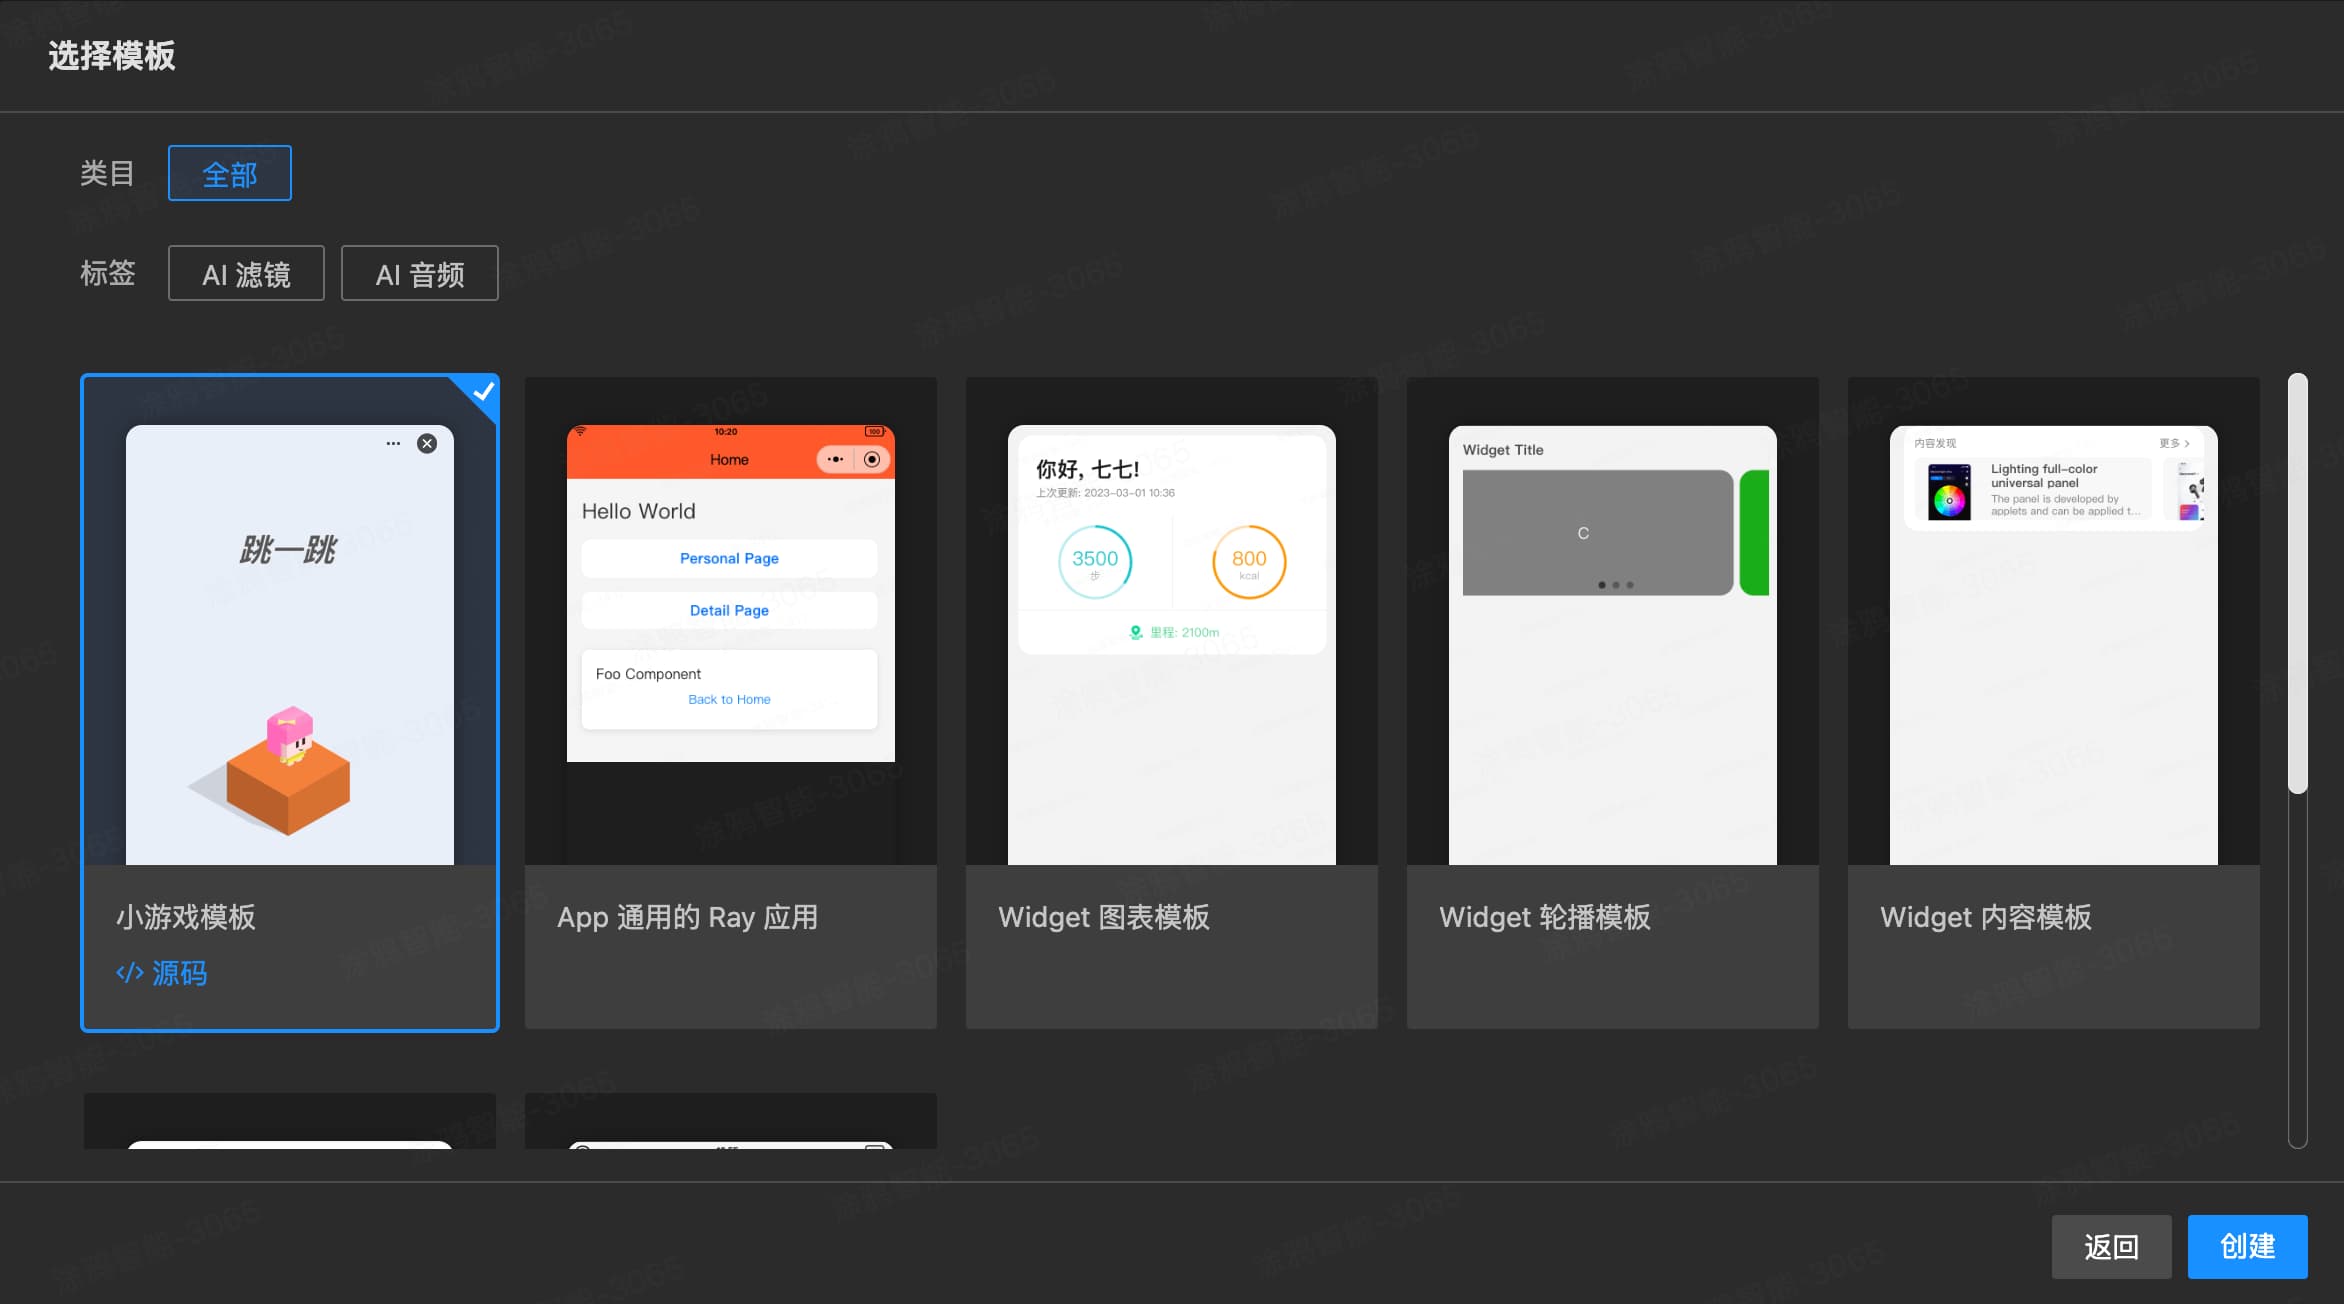
创建本地工程
接下来,创建本地工程,需要在 Tuya MiniApp IDE 上进行操作, 选择模板为 小游戏模板 来创建一个智能小程序工程。
App 版本
智能生活 v6.3.0 及以上版本。
Kit 依赖
在项目中的 project.tuya.json 添加以下依赖:
{
  "dependencies": {
    "BaseKit": "3.0.1",
    "MiniKit": "3.0.0",
    "BizKit": "3.0.1"
  },
  "baseversion": "2.21.10"
}
安装 Cocos Dashboard 和 Cocos Creator
下载 Cocos Creator 并安装。模板项目使用的 Cocos Creator v2.4.13,开发者可以根据实际情况选择版本。
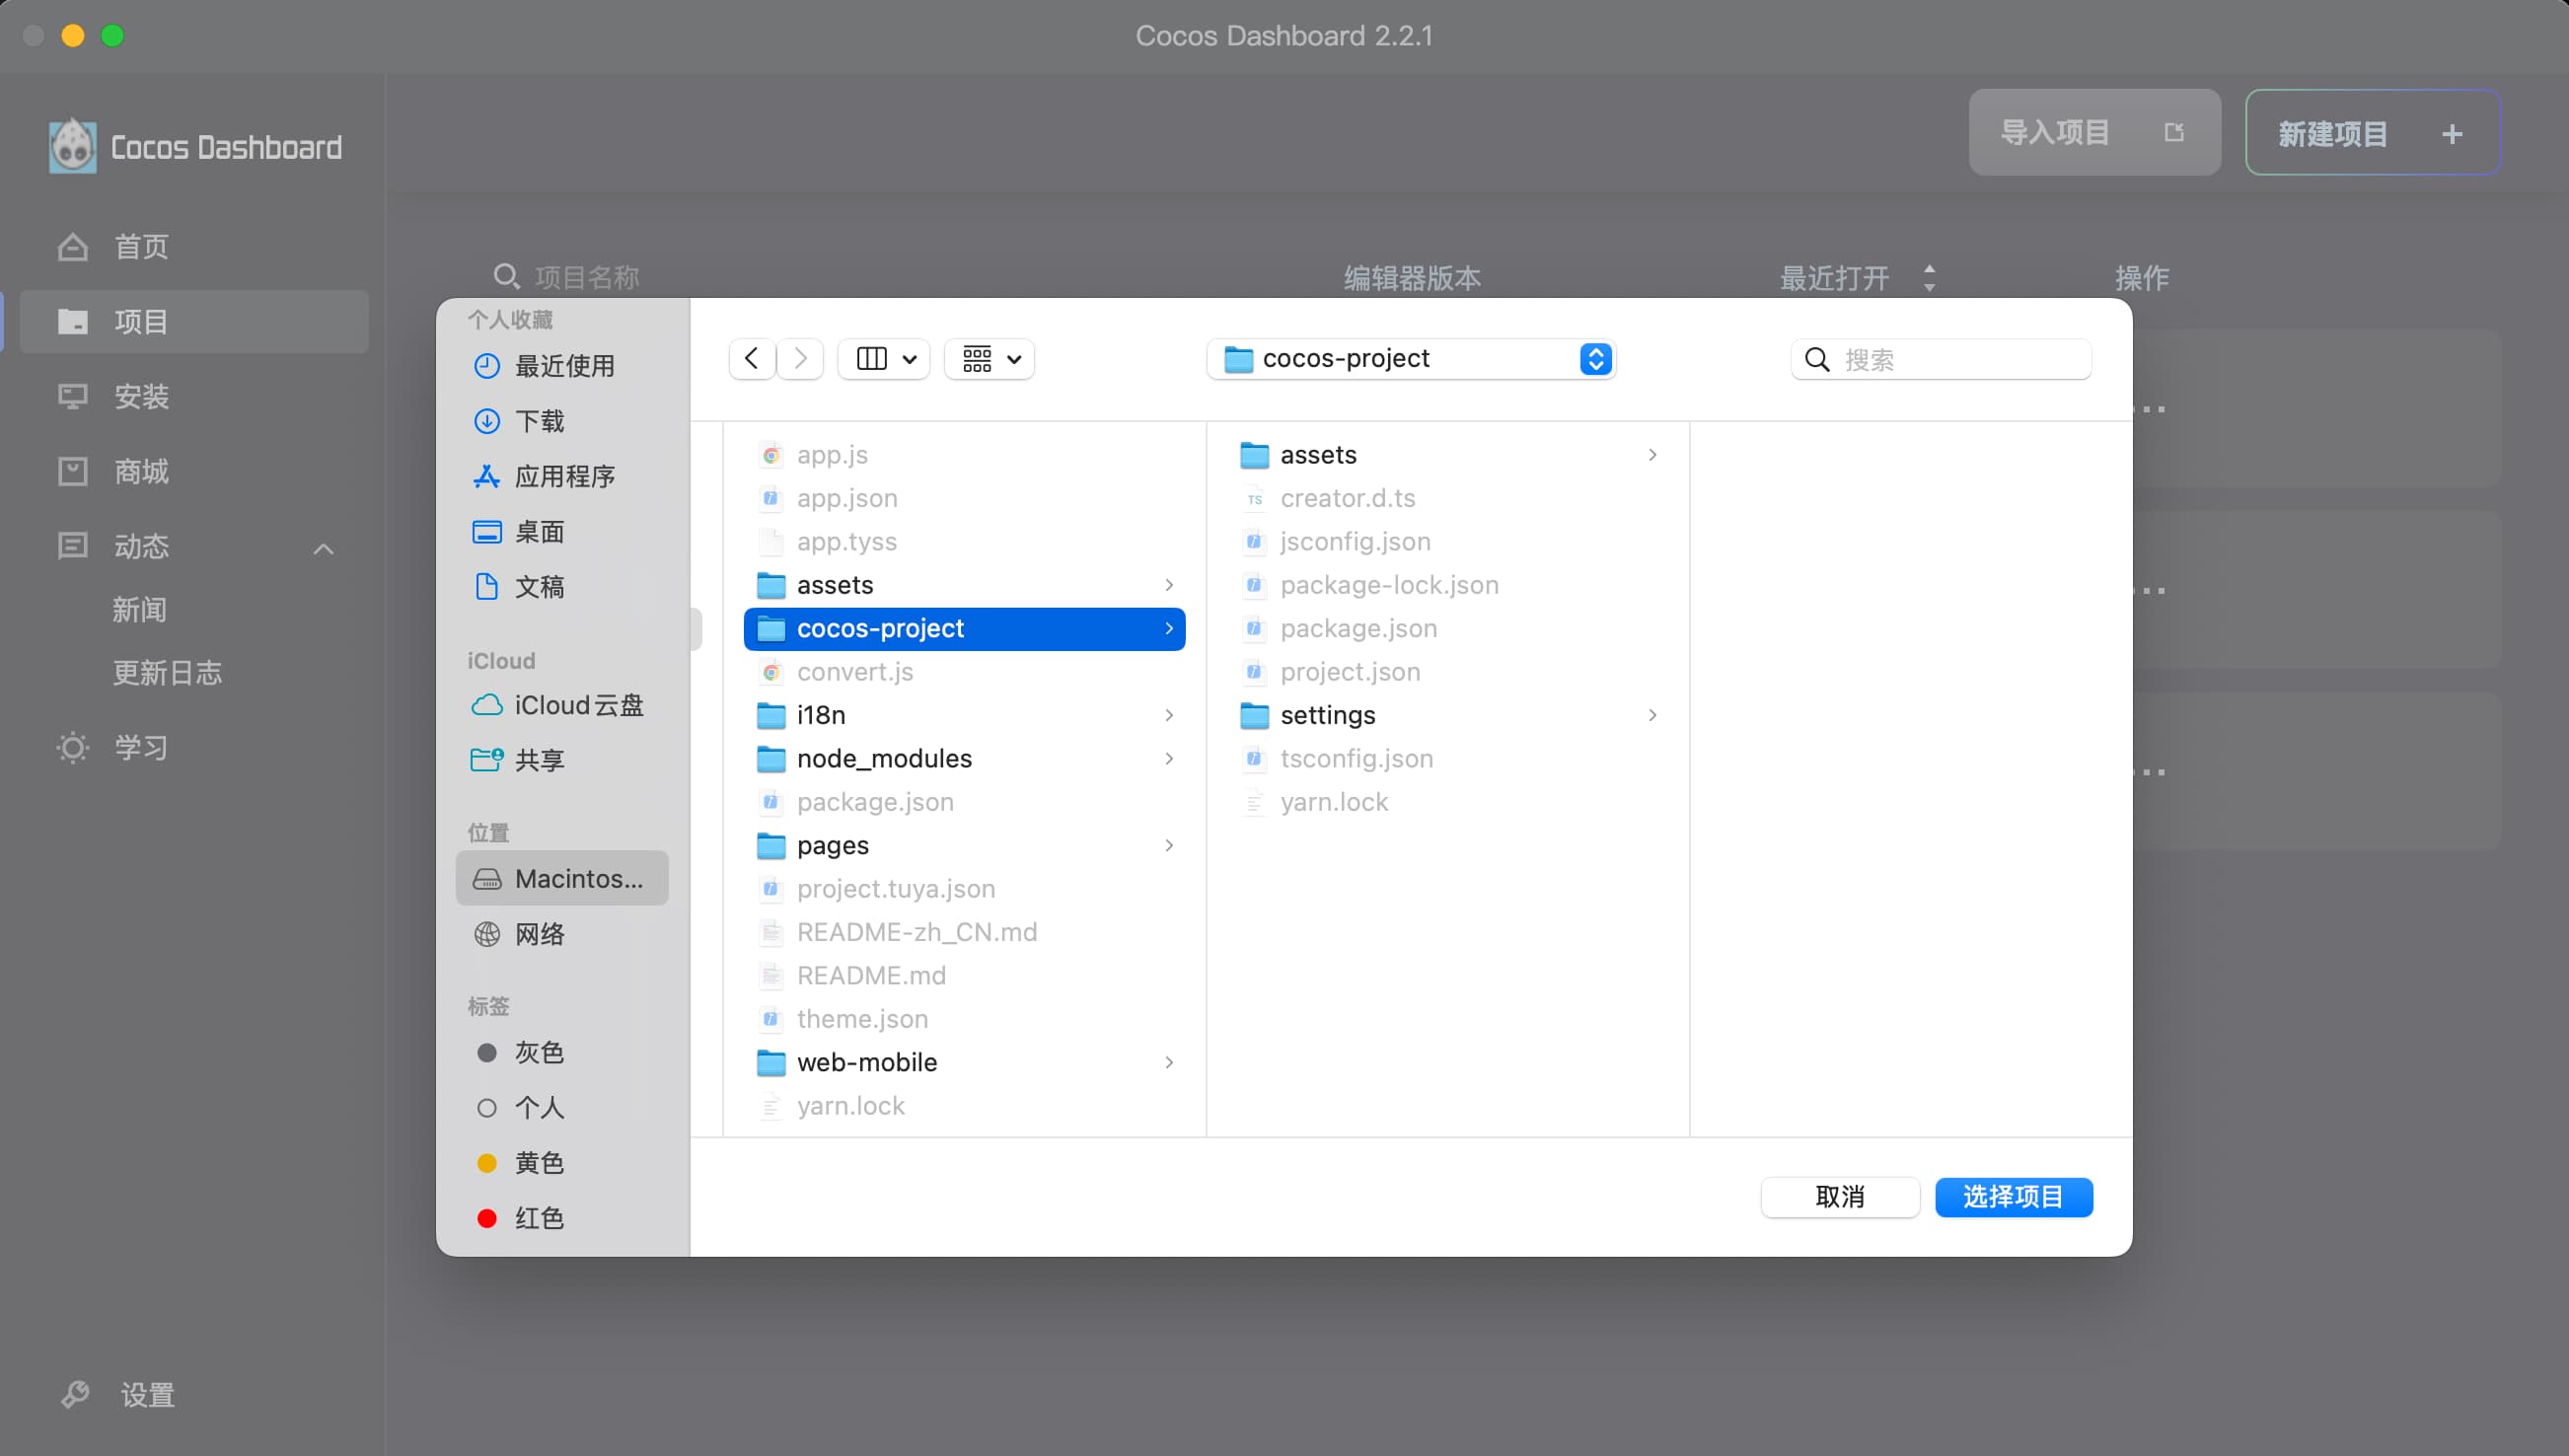
导入 Cocos 项目
把模板项目下的 cocos-project/ 文件夹导入到 Cocos Creator 中
代码开发
在游戏入口文件中添加 onMiniEnvReady 回调,等待小程序环境准备完成才可以调用小程序 API
import { onMiniEnvReady, ty } from '@ray-js/mini-game-sdk'

const { ccclass, property } = cc._decorator

const miniEnvReadyPromise = new Promise((resolve) => {
  onMiniEnvReady(() => {
    resolve(true)
  })
})

@ccclass
export class MenuScene extends cc.Component {
  @property(cc.Node)
  private nodeLoading: cc.Node = null

  async onLoad() {
    await miniEnvReadyPromise
    console.log('MenuScene onMiniEnvReady')

    // API 测试
    ty.showToast({
      icon: 'success',
      title: 'Mini env ready',
    })

    this.nodeLoading.active = false
  }

  onBtnStart() {
    cc.director.loadScene('game')
  }

  onBtnDebug() {
    cc.director.loadScene('debug')
  }
}
此时,您可以在 Cocos 项目中调用小程序 API。例如:
import { ty } from '@ray-js/mini-game-sdk'
const { ccclass, property } = cc._decorator

@ccclass
export class DebugScene extends cc.Component {
  showToast() {
    ty.showToast({
      icon: 'success',
      title: 'Toast Title',
    })
  }

  navigateTo() {
    ty.navigateTo({
      url: '/pages/foo/index',
    })
  }

  getLaunchOptions() {
    ty.getLaunchOptions({
      success: (res) => {
        ty.showToast({
          icon: null,
          title: JSON.stringify(res),
        })
      },
    })
  }

  getUserInfo() {
    ty.getUserInfo({
      success: (res) => {
        ty.showToast({
          icon: null,
          title: JSON.stringify(res),
        })
      },
    })
  }

  backToHome() {
    cc.director.loadScene('menu')
  }
}
在逻辑层可以直接使用 I18n.t() 获取多语言。例如:
import { I18n } from '@ray-js/mini-game-sdk'
addSocre(s) {
  this.scoreLabel.string = I18n.t('game.score') + this.score
}
在视图层可以创建一个 LabelI18n 组件获取多语言。例如:
import { I18n } from '@ray-js/mini-game-sdk'

const { ccclass, property } = cc._decorator

@ccclass
export default class LabelI18n extends cc.Component {
  @property({ tooltip: 'The key to retrieve the language-specific text.' })
  languageKey: string = ''

  @property(cc.Label)
  label: cc.Label | null = null

  private _lableTextAsDefault = true

  onLoad() {
    if (!this.label) {
      this.label = this.getComponent(cc.Label)
    }
    this.updateText()
  }

  updateText() {
    let text: string = I18n.t(this.languageKey)

    if (this._lableTextAsDefault && (!text || text === this.languageKey)) {
      text = ''
    }
    if (this.label) {
      this.label.string = text || this.label.string
    }
  }
}
Cocos 项目构建时发布平台选择 Web Mobile,发布路径选择 **../**将打包产物放到本项目的根目录
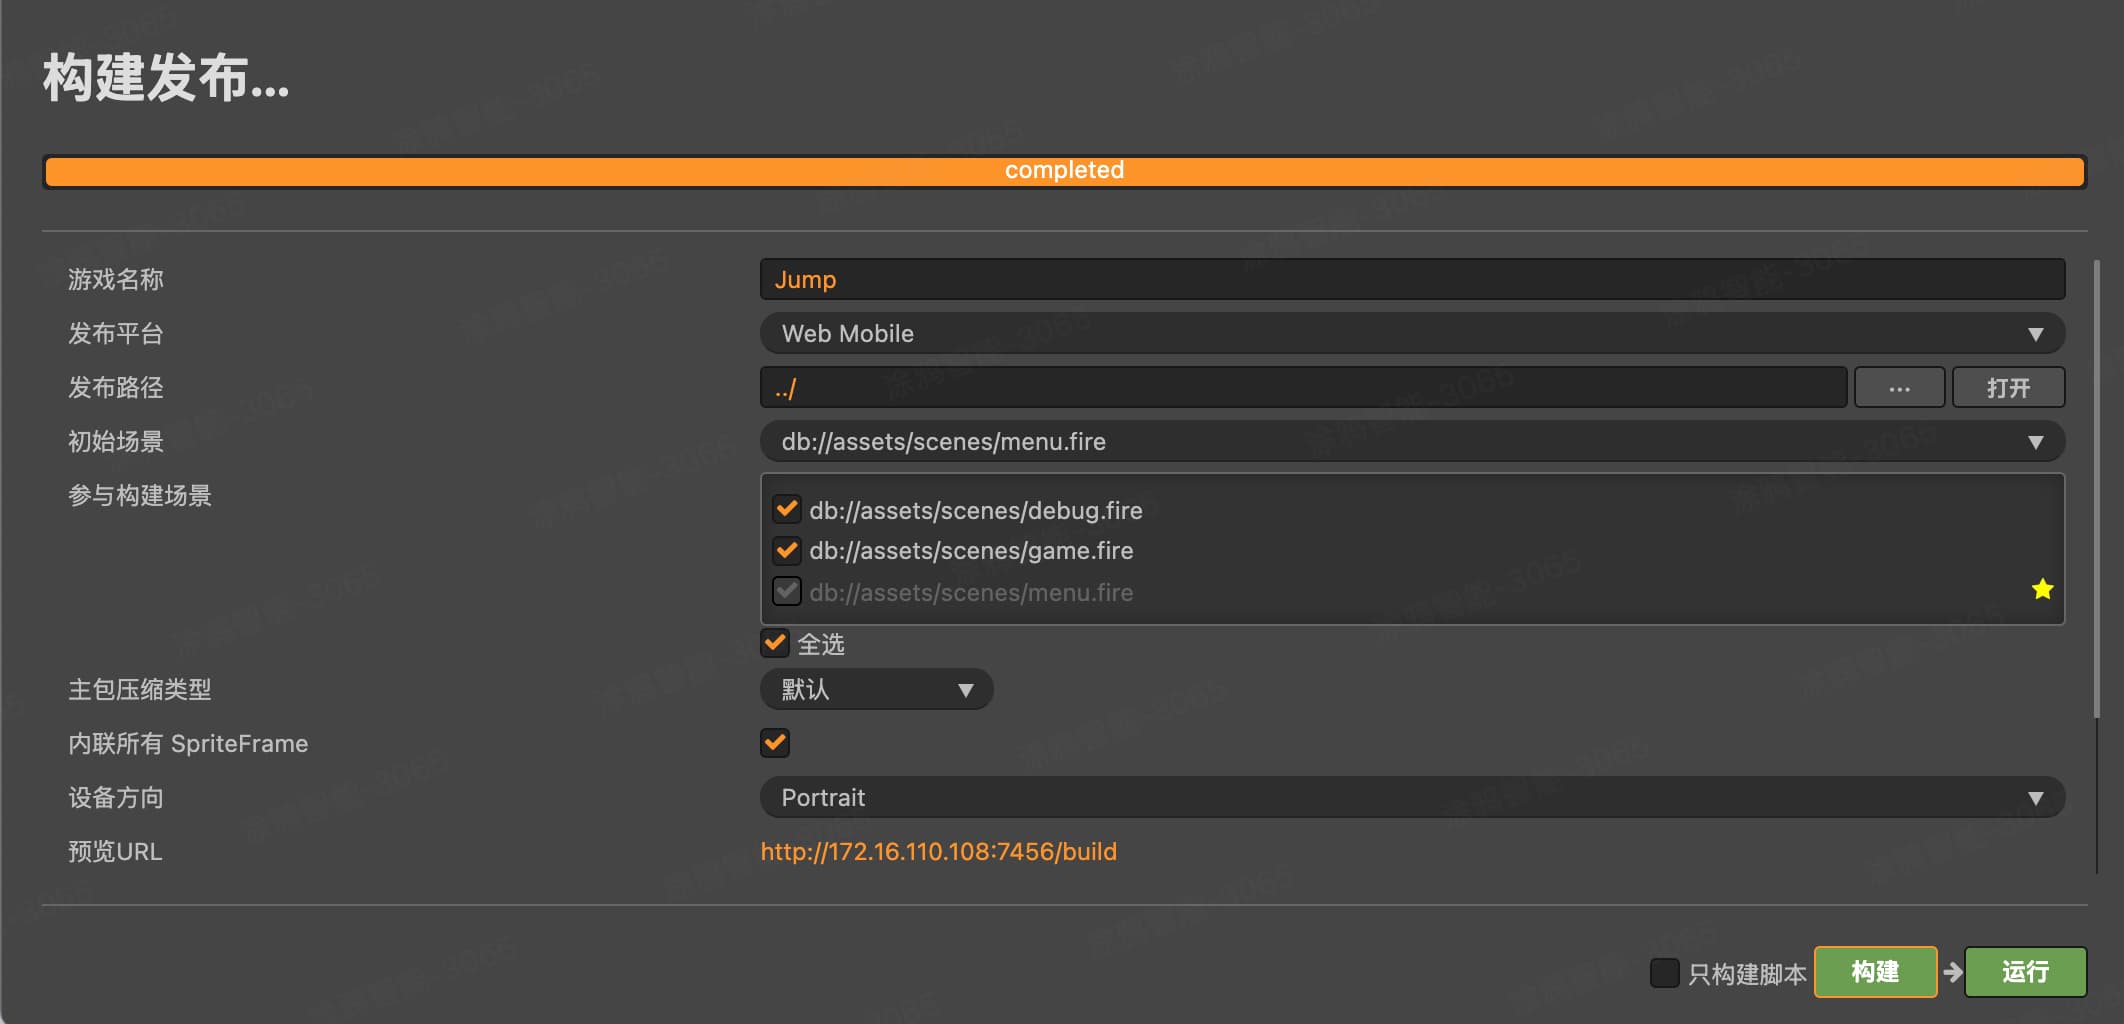
然后把小程序项目发布到体验版即可。
- 恭喜你 🎉 完成了本教程的学习!
- 有任何问题可以联系涂鸦智能小程序团队