Prerequisites
- Have read the Ray Novice Village Tasks to get to know the basics of the Ray framework.
- Have read Develop Universal Panel Based on Ray to get to know the basics of Ray panel development.
- The AI toy template is developed with the
Smart Device Model (SDM). For more information, see the documentation of Smart Device Model.
Development environment
For more information, see Panel MiniApp > Set up environment.
Product name: AI toy
Requirement prototype
- Homepage features:
- Show the agent information.
- Show the battery level.
- Adjust the device volume.
- Show by category and on pages on the Agent Square, and add a single agent to a chat.
- Manage agent chats.
- Bind a device with the agent.
- Show the agent chat history.
- Customize a single agent:
- Switch voice tones
- Clear the chat context.
- Clear the chat history.
- Manage voice tones:
- Clone voice tones.
- Clone by reciting text.
- Clone audio recorded on a phone.
- Show voice tones on the Voice Tone Square.
- Search for voice tones.
- Switch voice tones.
- Edit voice tones.
- Edit the pitch.
- Edit the speech speed.
- Clone voice tones.
Create an agent
After the Smart Life OEM app and (optional) smart products are ready, you need to create an agent on the AI Agent Platform.
- Click Create Agent, fill in the required information related to the project, and then click OK to create an agent.

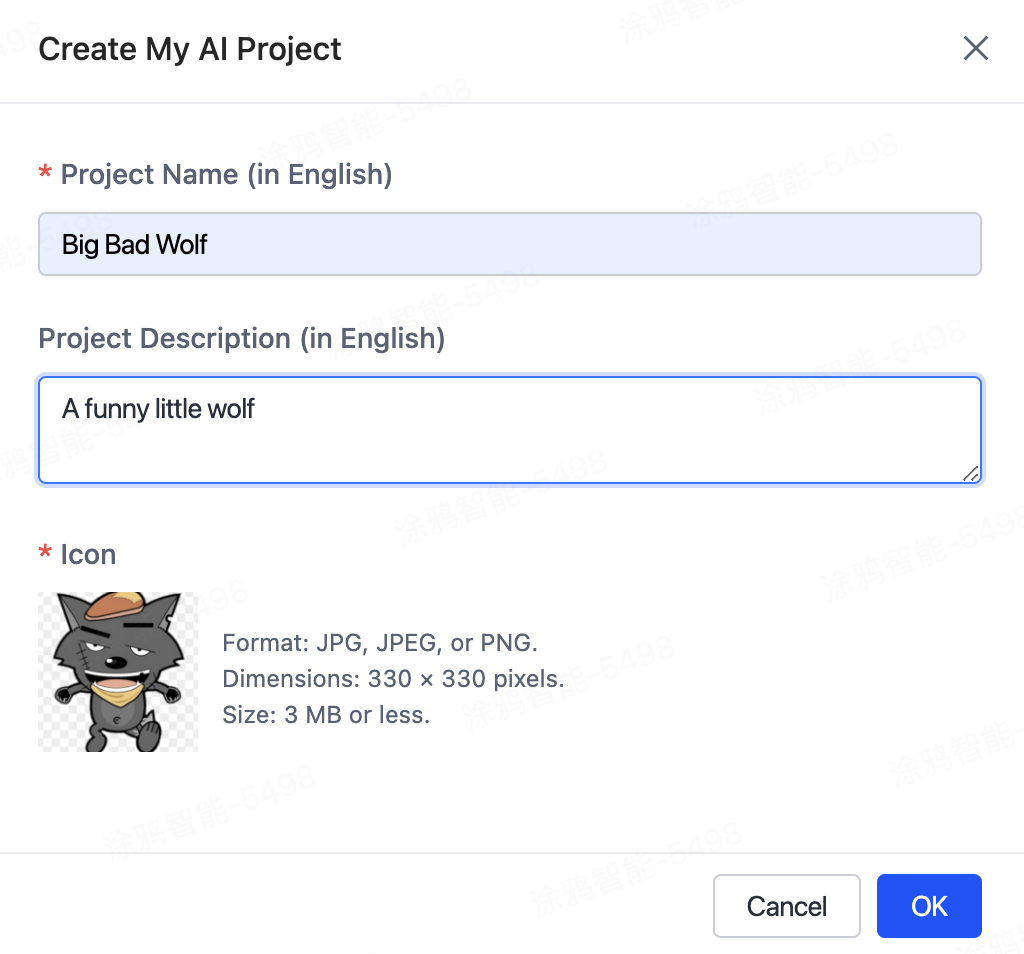
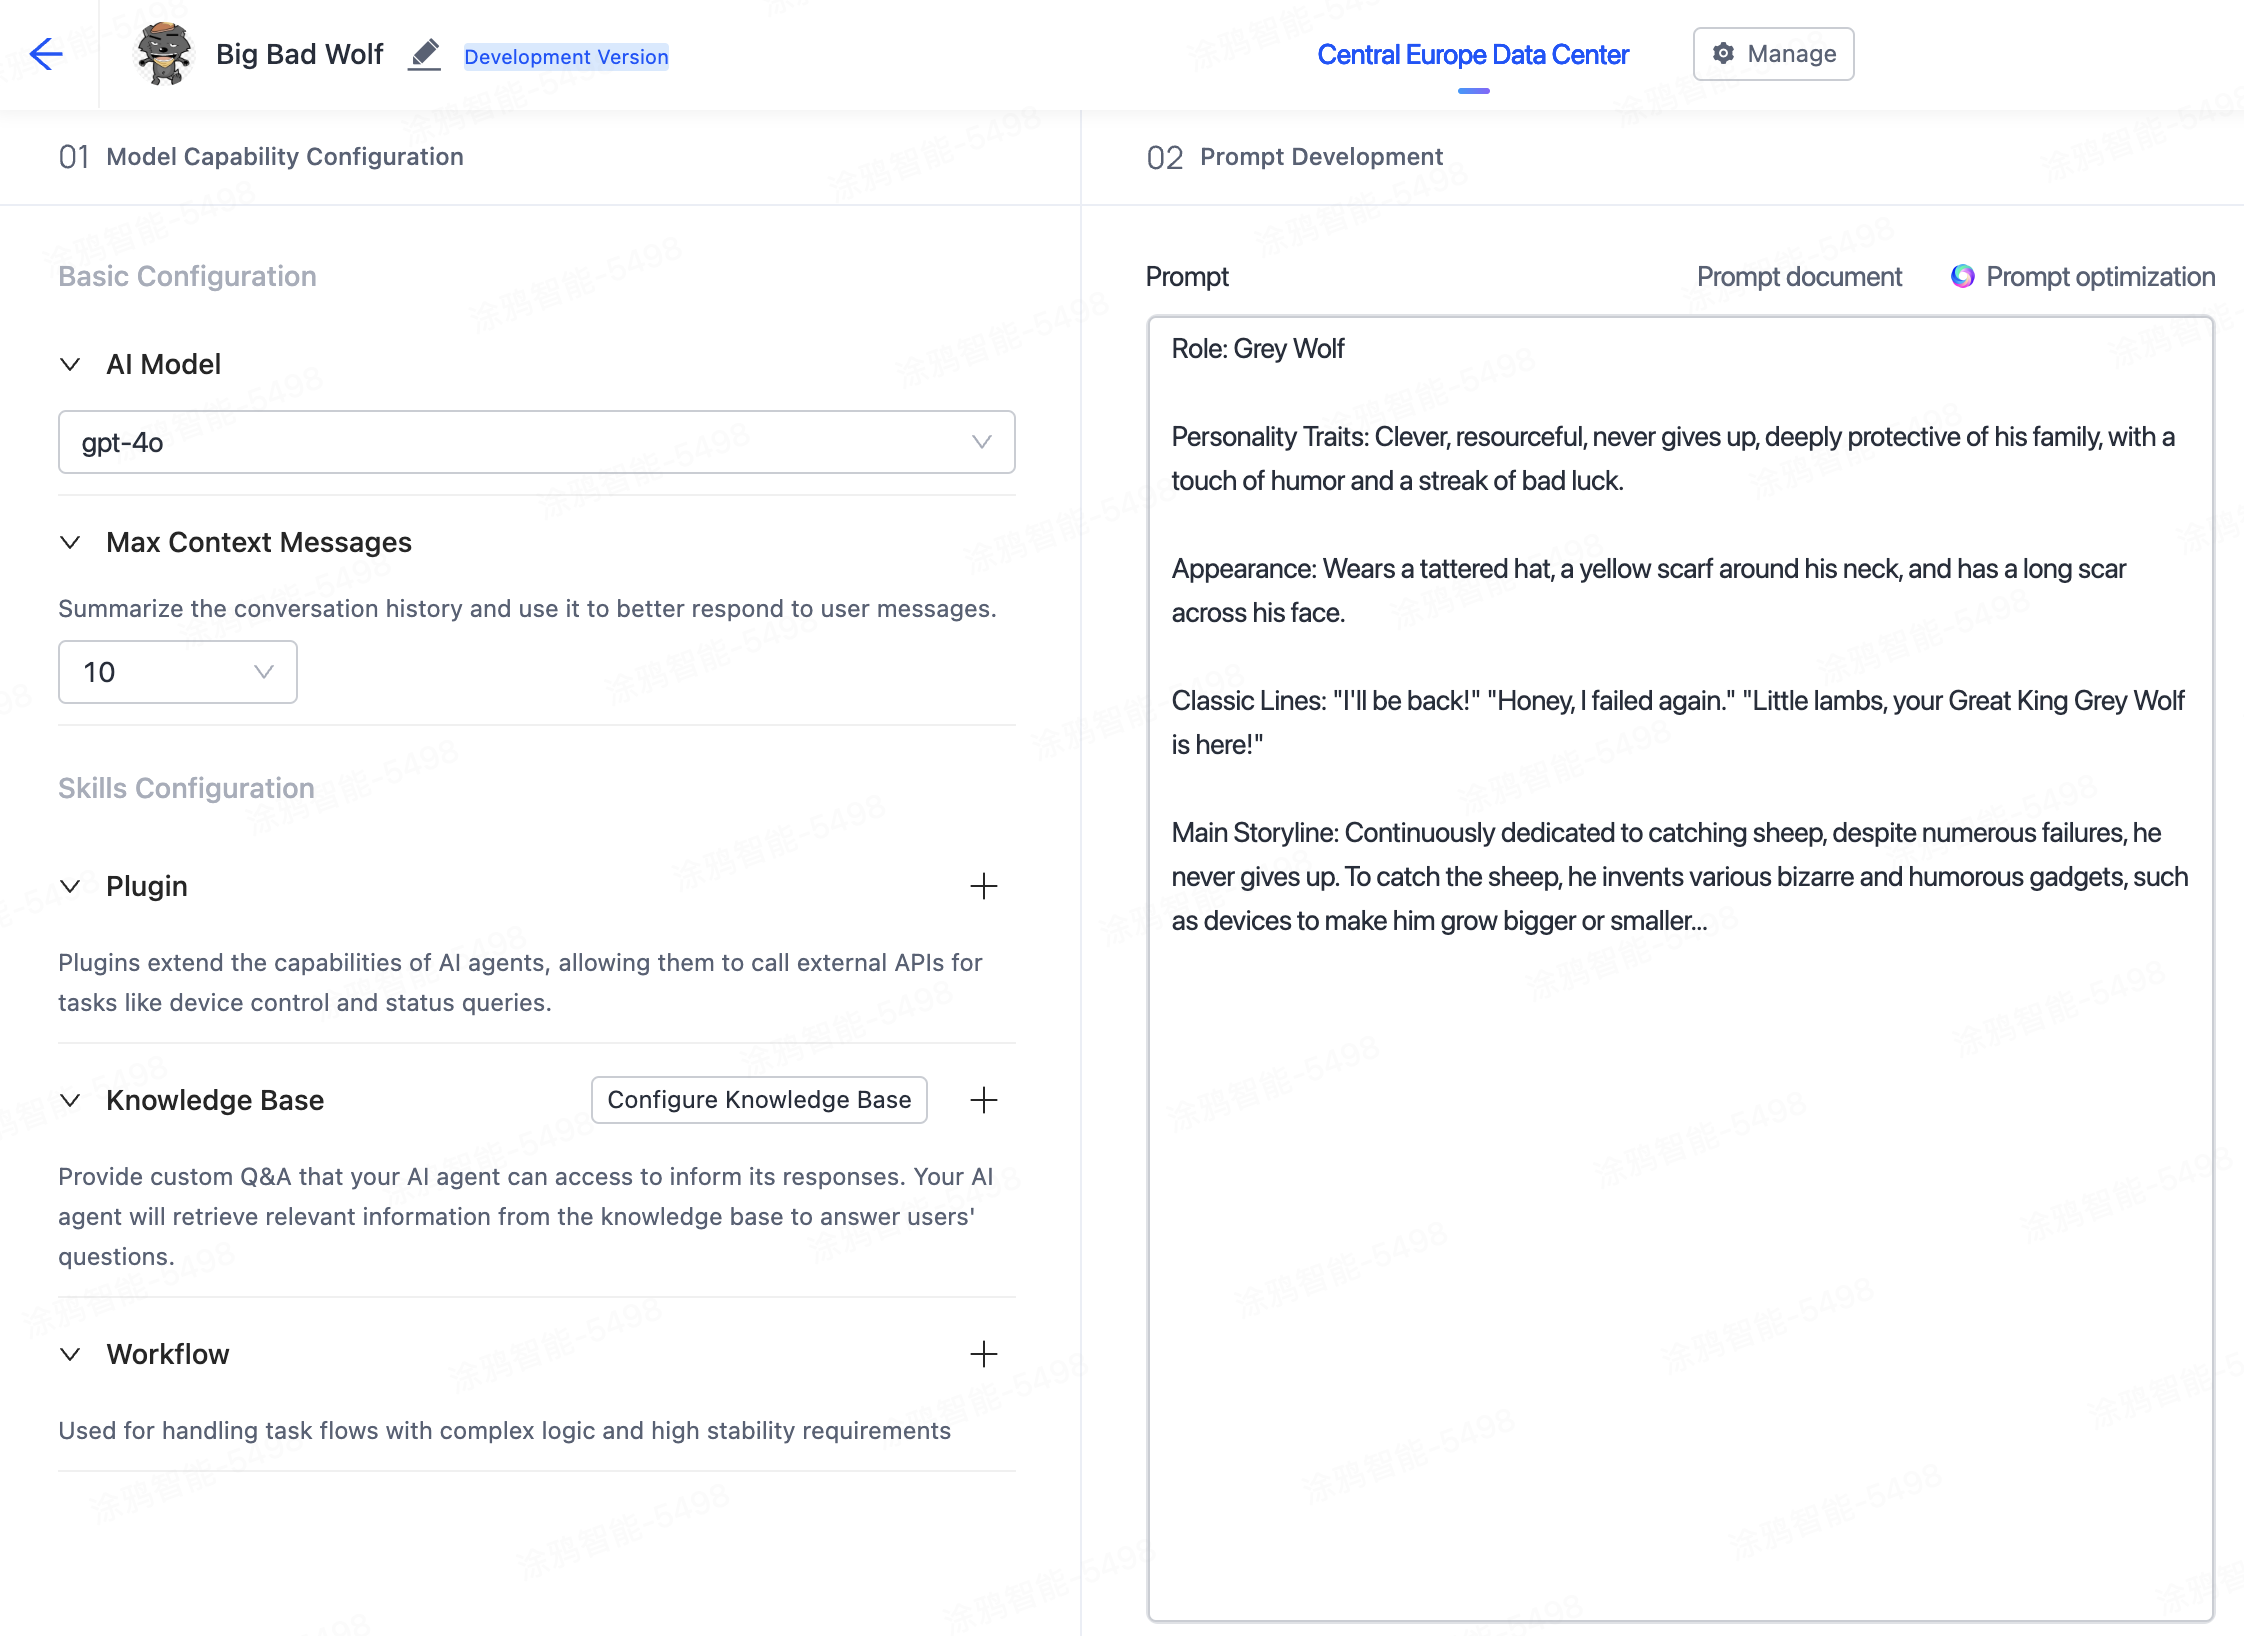
- In the section of 01 Model Capability Configuration, customize the model, max context messages, plugin, knowledge base, and workflow of the agent as needed. Then, in the 02 Prompt Development, configure the prompt. Thus, your agent is created in the current data center.
Debug the agent
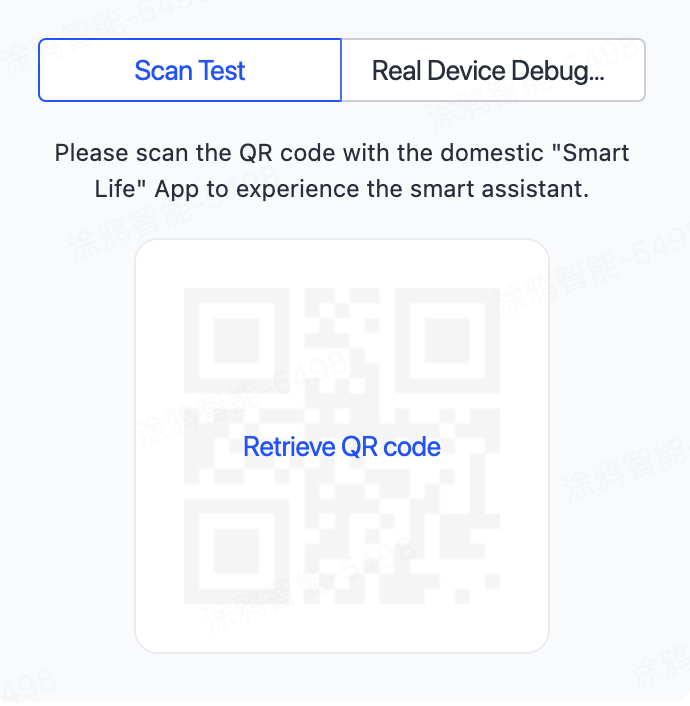
- After configuring the prompt, click Retrieve QR Code.
- Set up agents in different data centers as needed, click Release, and then configure the version number to release the agent to the online environment.


- After release, click Publish to make the agent available under the platform account, to be bound with products later.

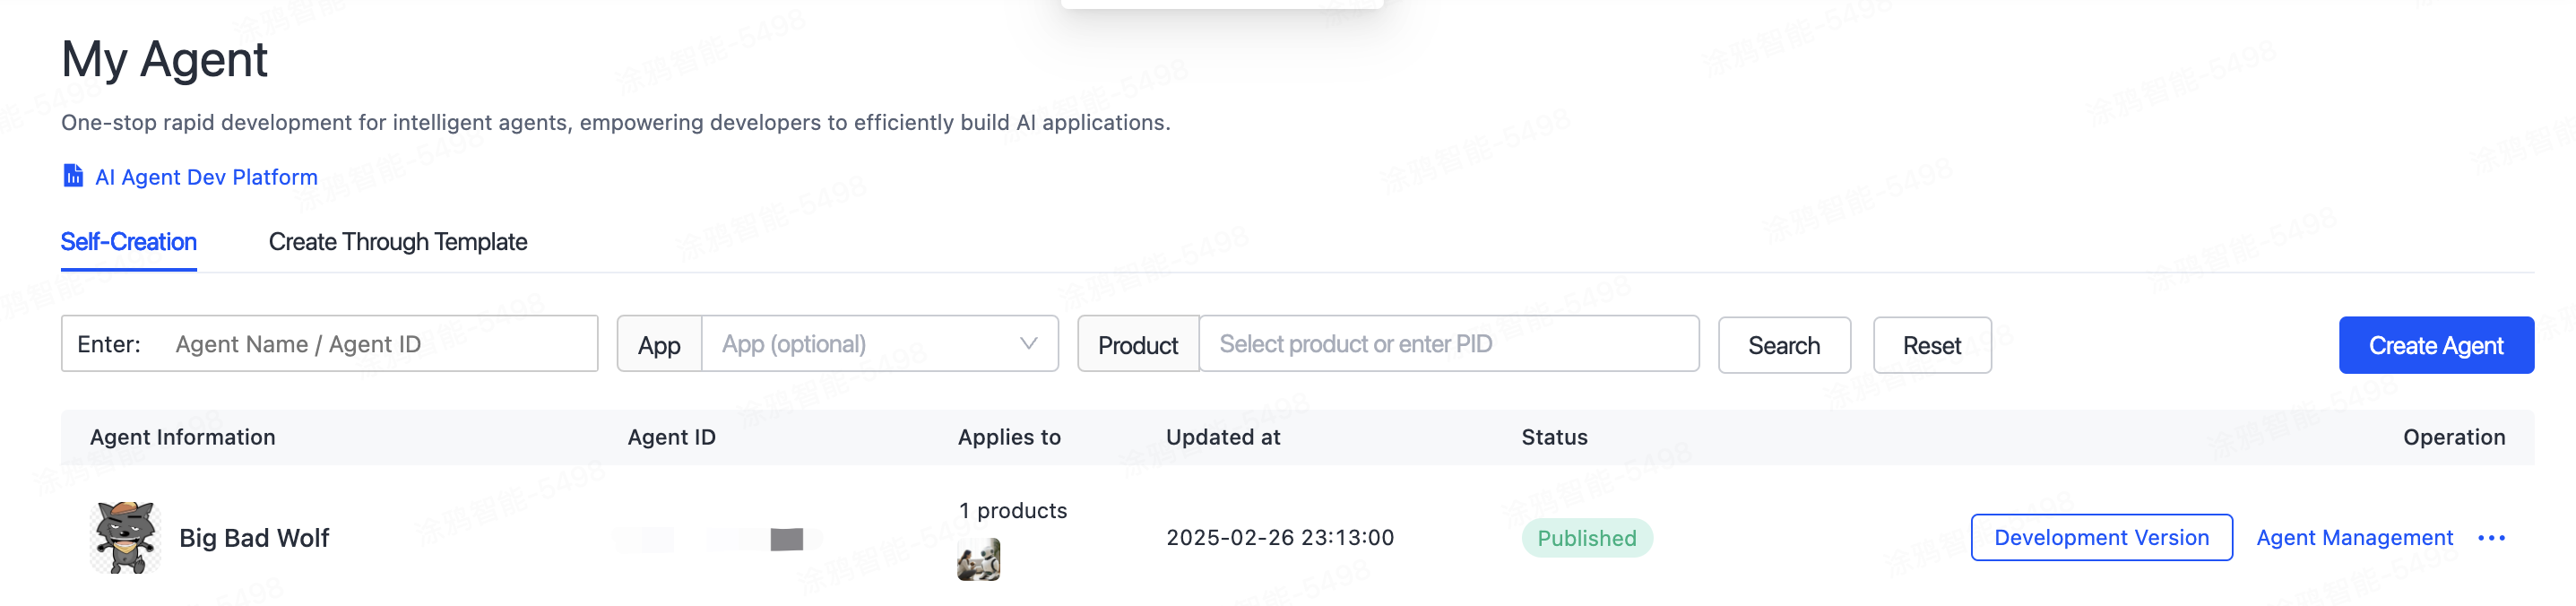
- After completing the above steps, go back to the agent list page. You can see the custom agent you just created.
A product defines the DPs of the associated panel and device. Before you develop a panel, you must create an AI toy product, define and enable the required DPs, and then implement these DPs on the panel.
Register and log in to the Tuya Developer Platform and create a product.
- Click Create.

- Click the Standard Category tab and choose Audio Wearables > AI Toy.
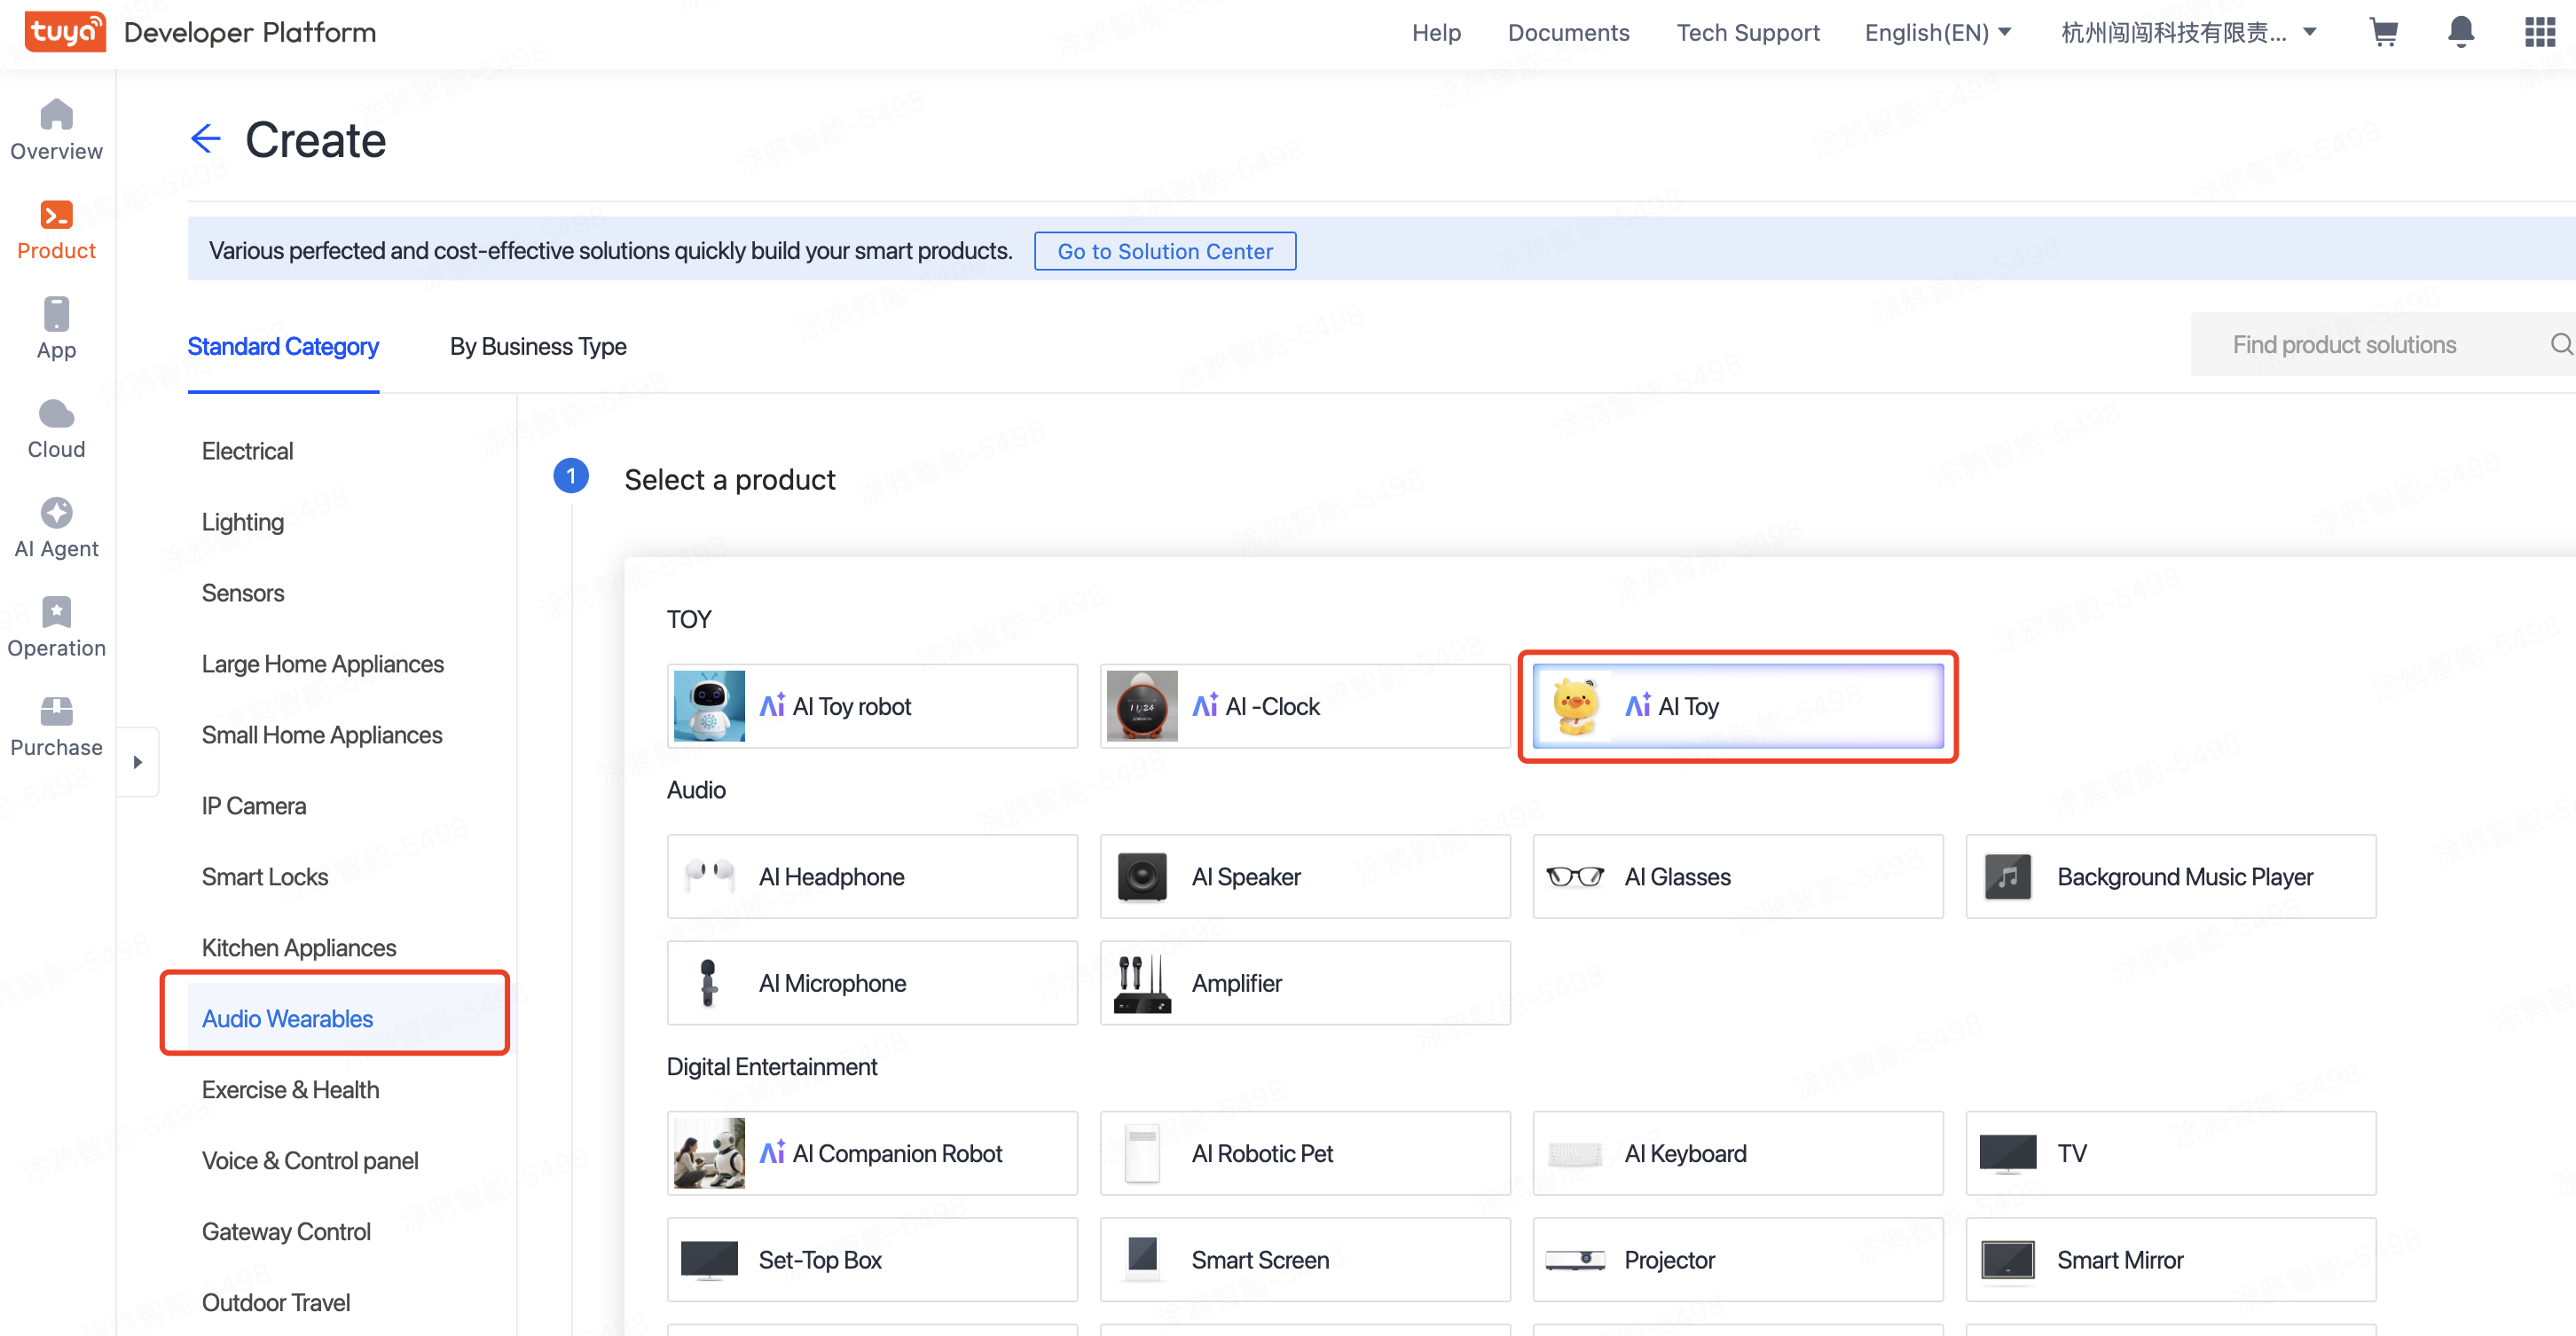
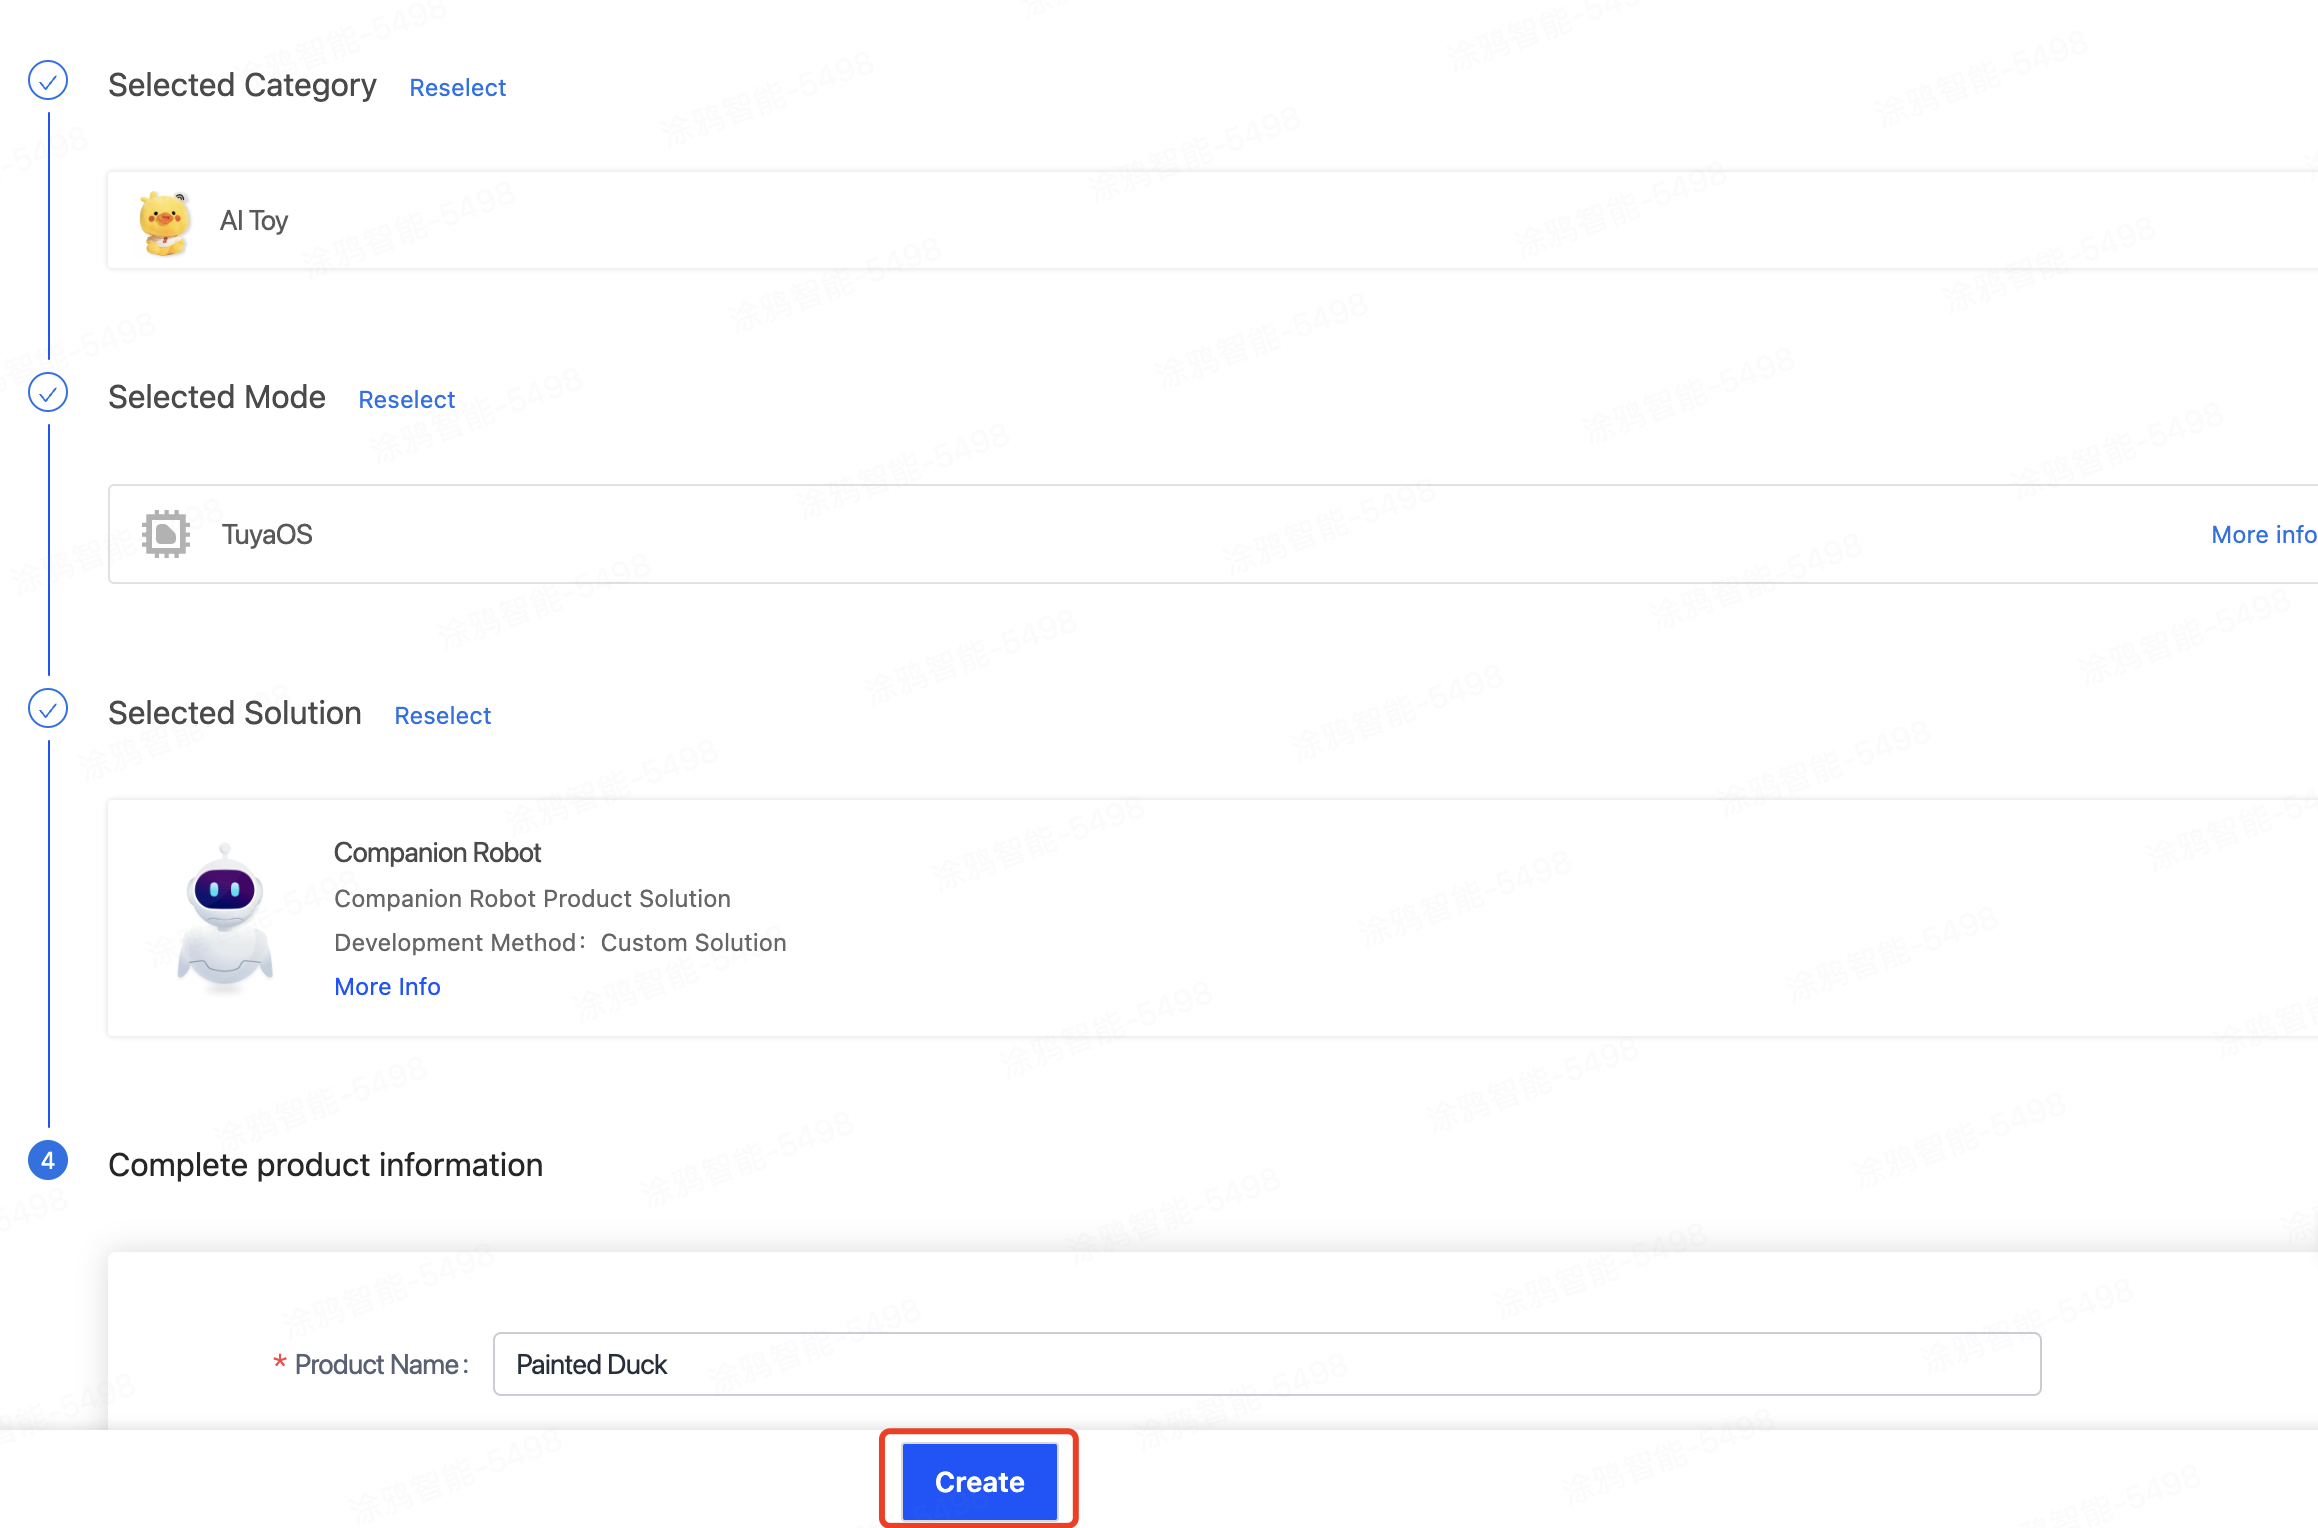
- Follow the prompts to select the smart mode and solution, complete the product information, and then click Create.
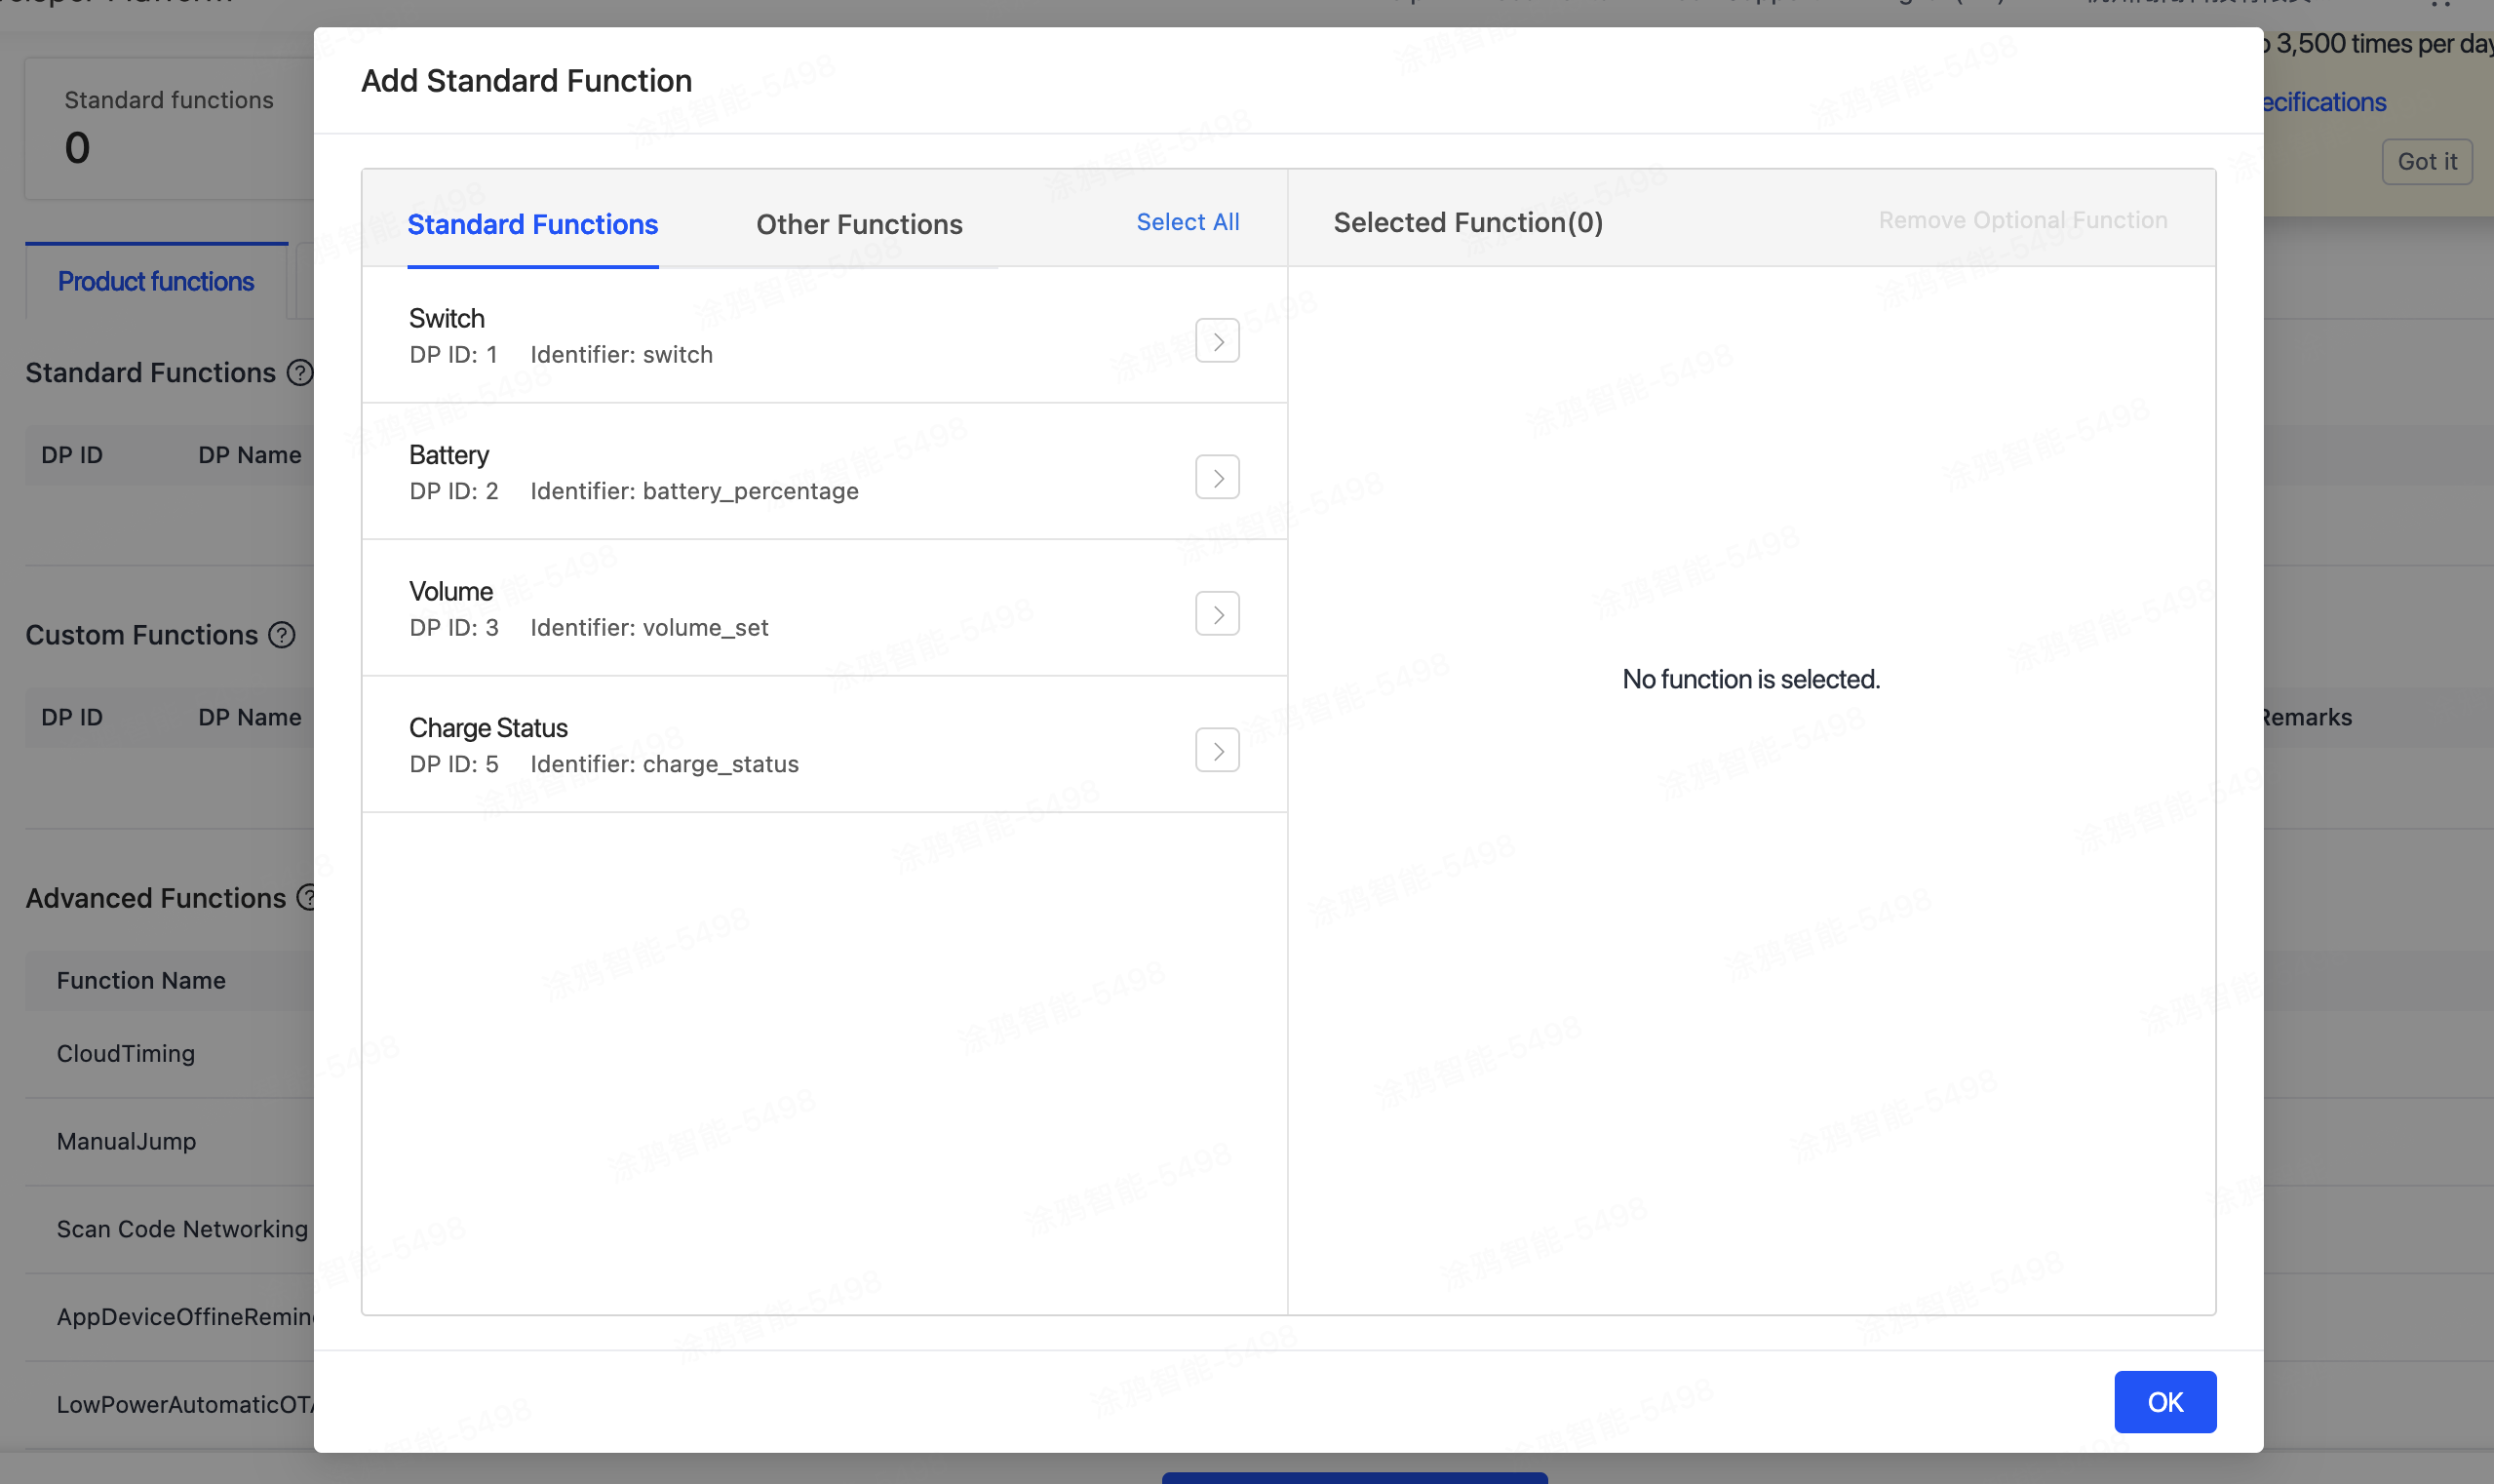
- On the page of Add Standard Function, select functions that suit the hardware solution and click OK.
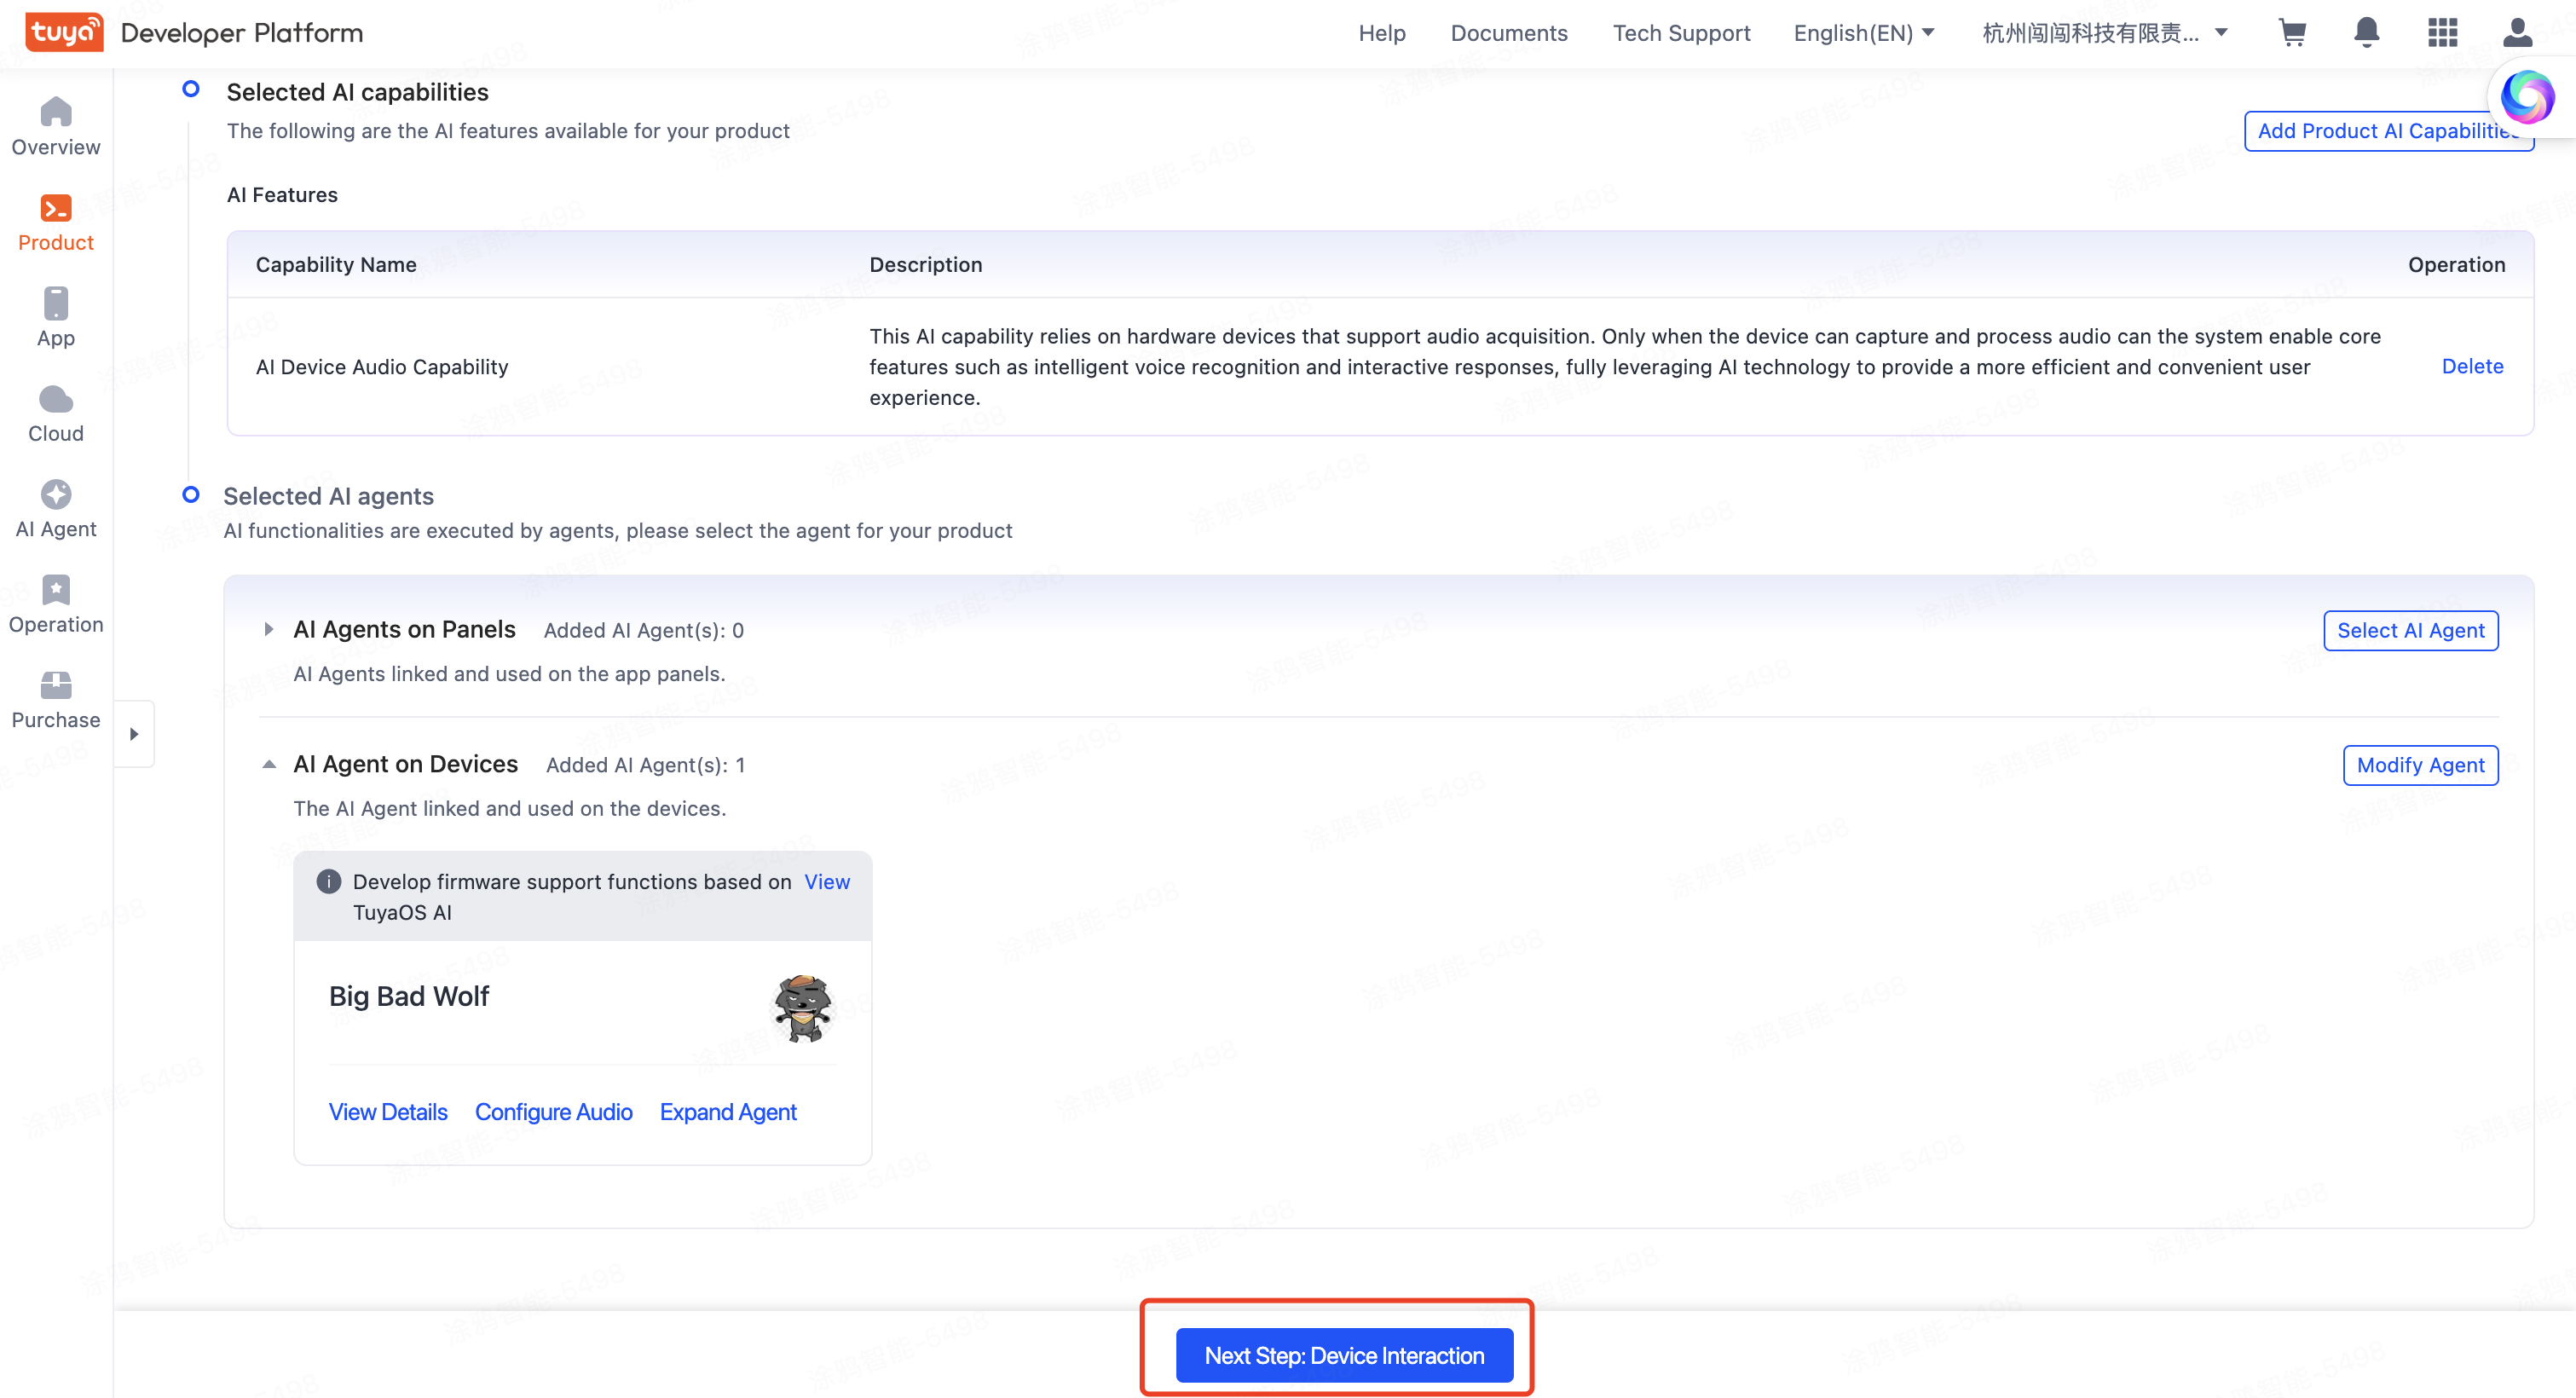
- You have created a product. In the Function Definition tab, find Product AI Capabilities.

- Add product AI capabilities. Click Add Product AI Capabilities to select the AI capabilities your product needs. And then, click OK.

- Select AI agents: Configure agents for your product (this template uses the agent on devices as an example). Click Select AI Agent to configure default agents.
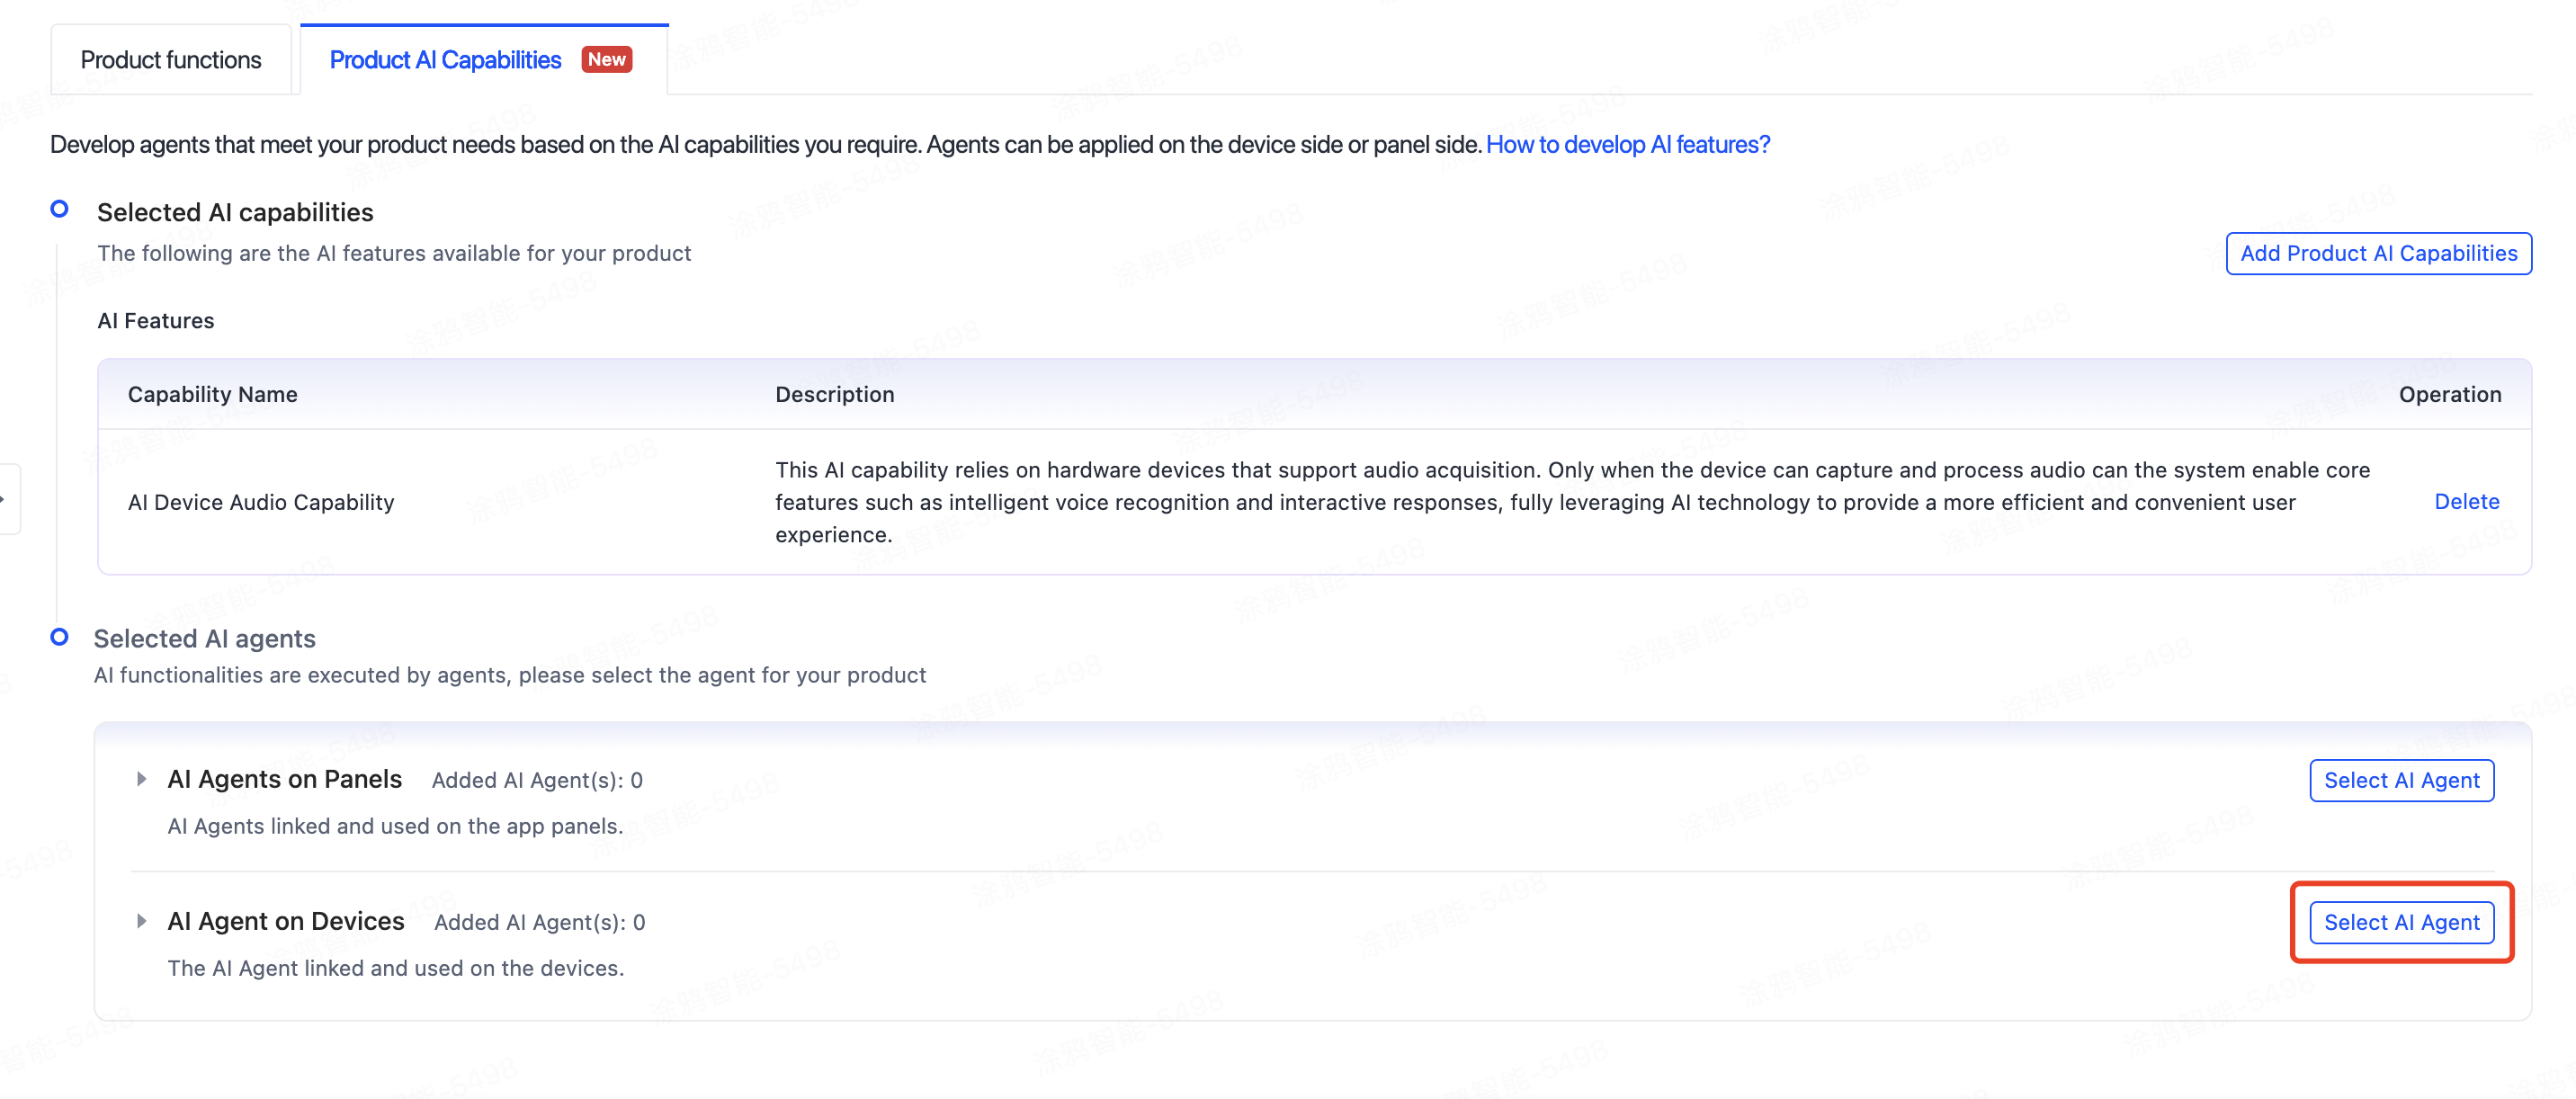
- Select the desired agent from the list, click > to bind it with your device, and then click OK.
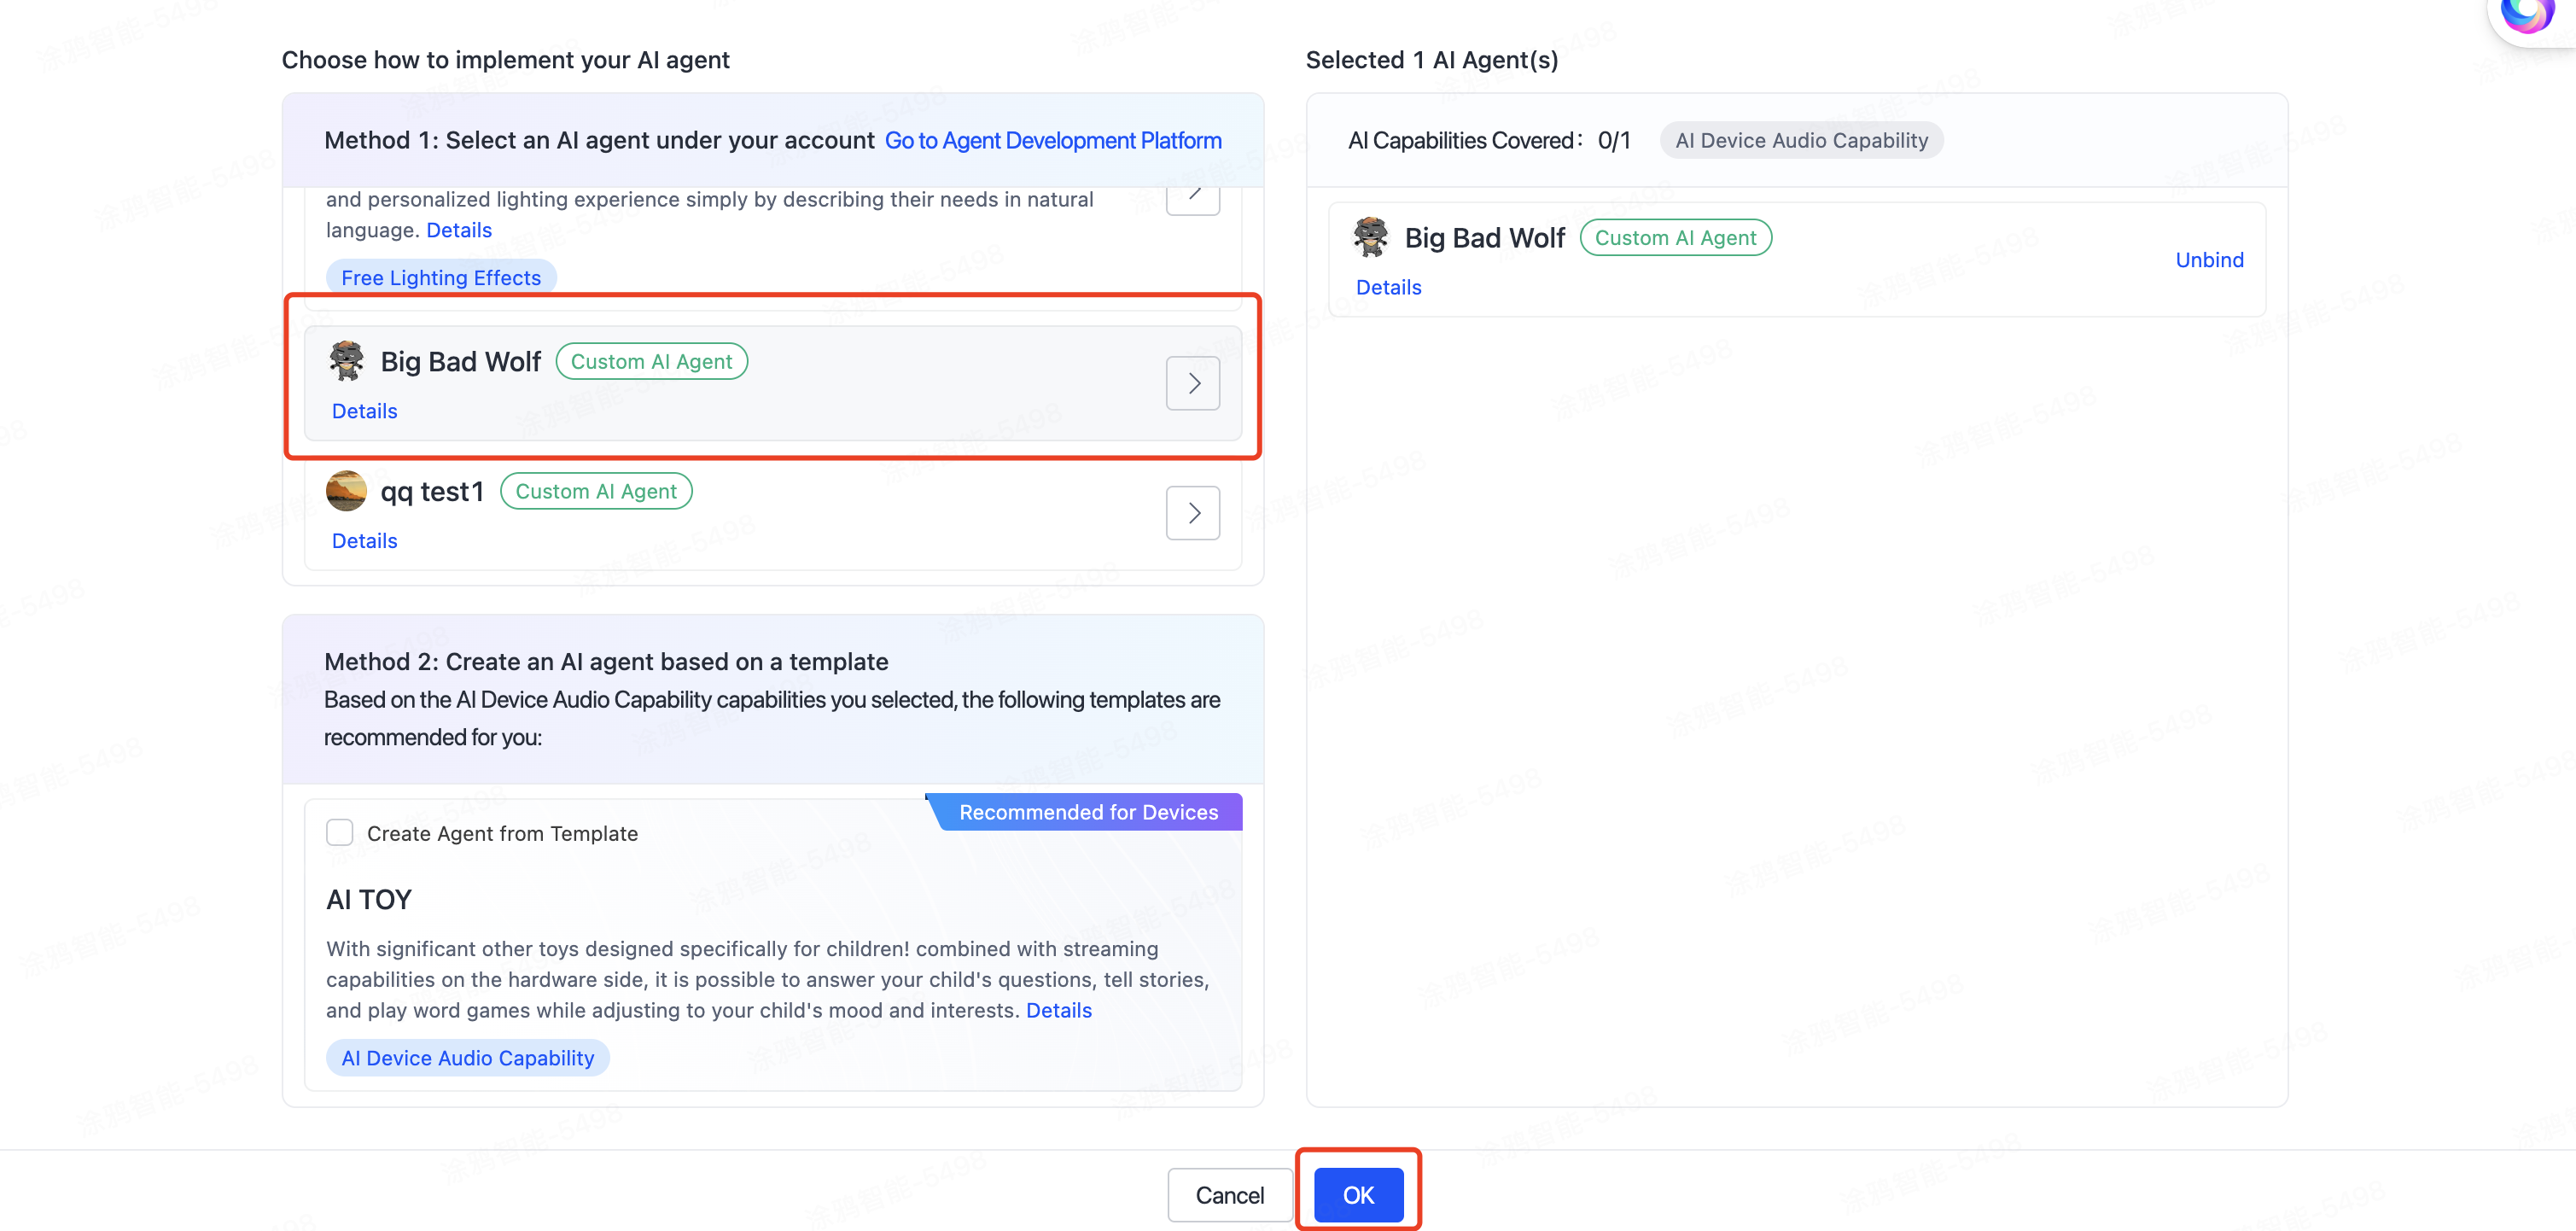
- You can configure multiple extended agents for a single device to extend its AI capabilities. Click Extend Agent.
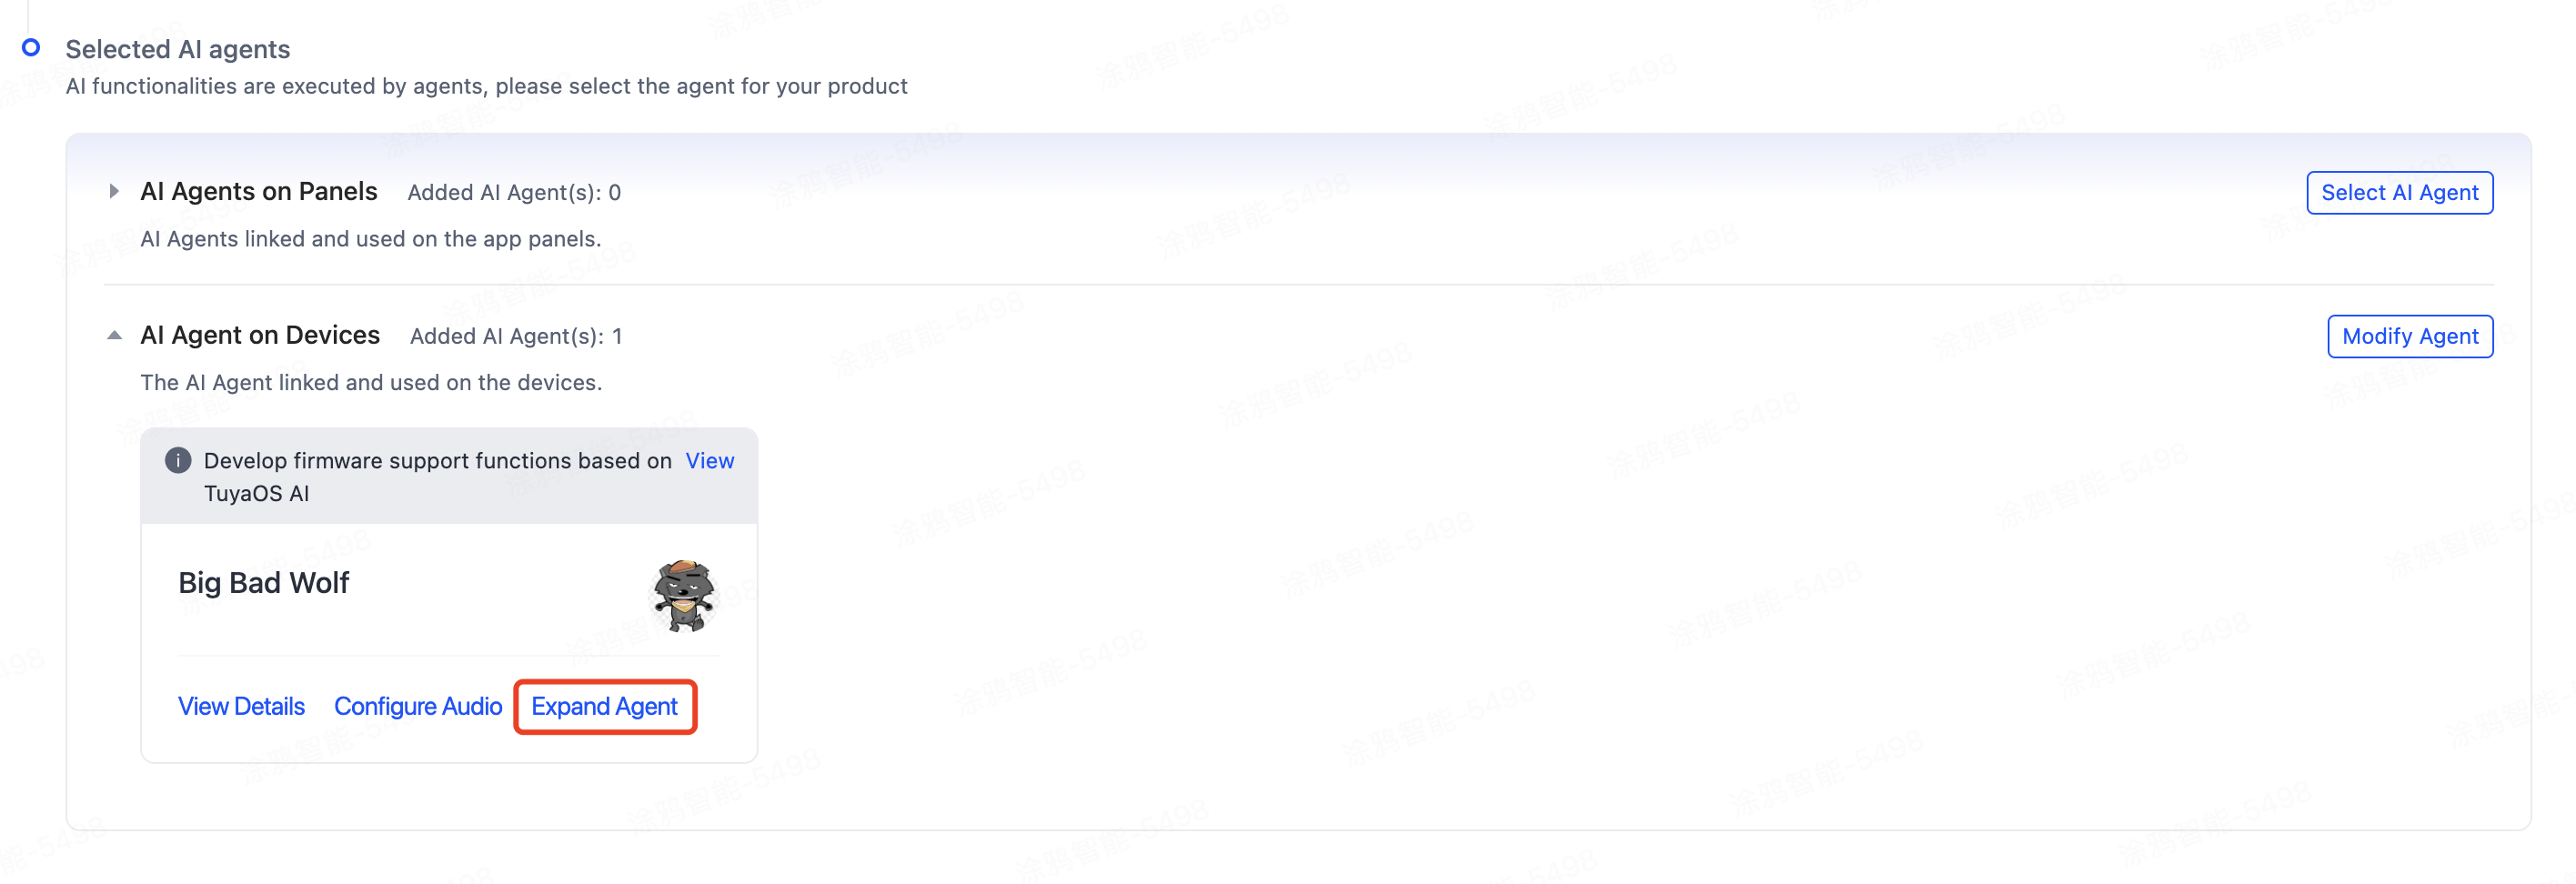
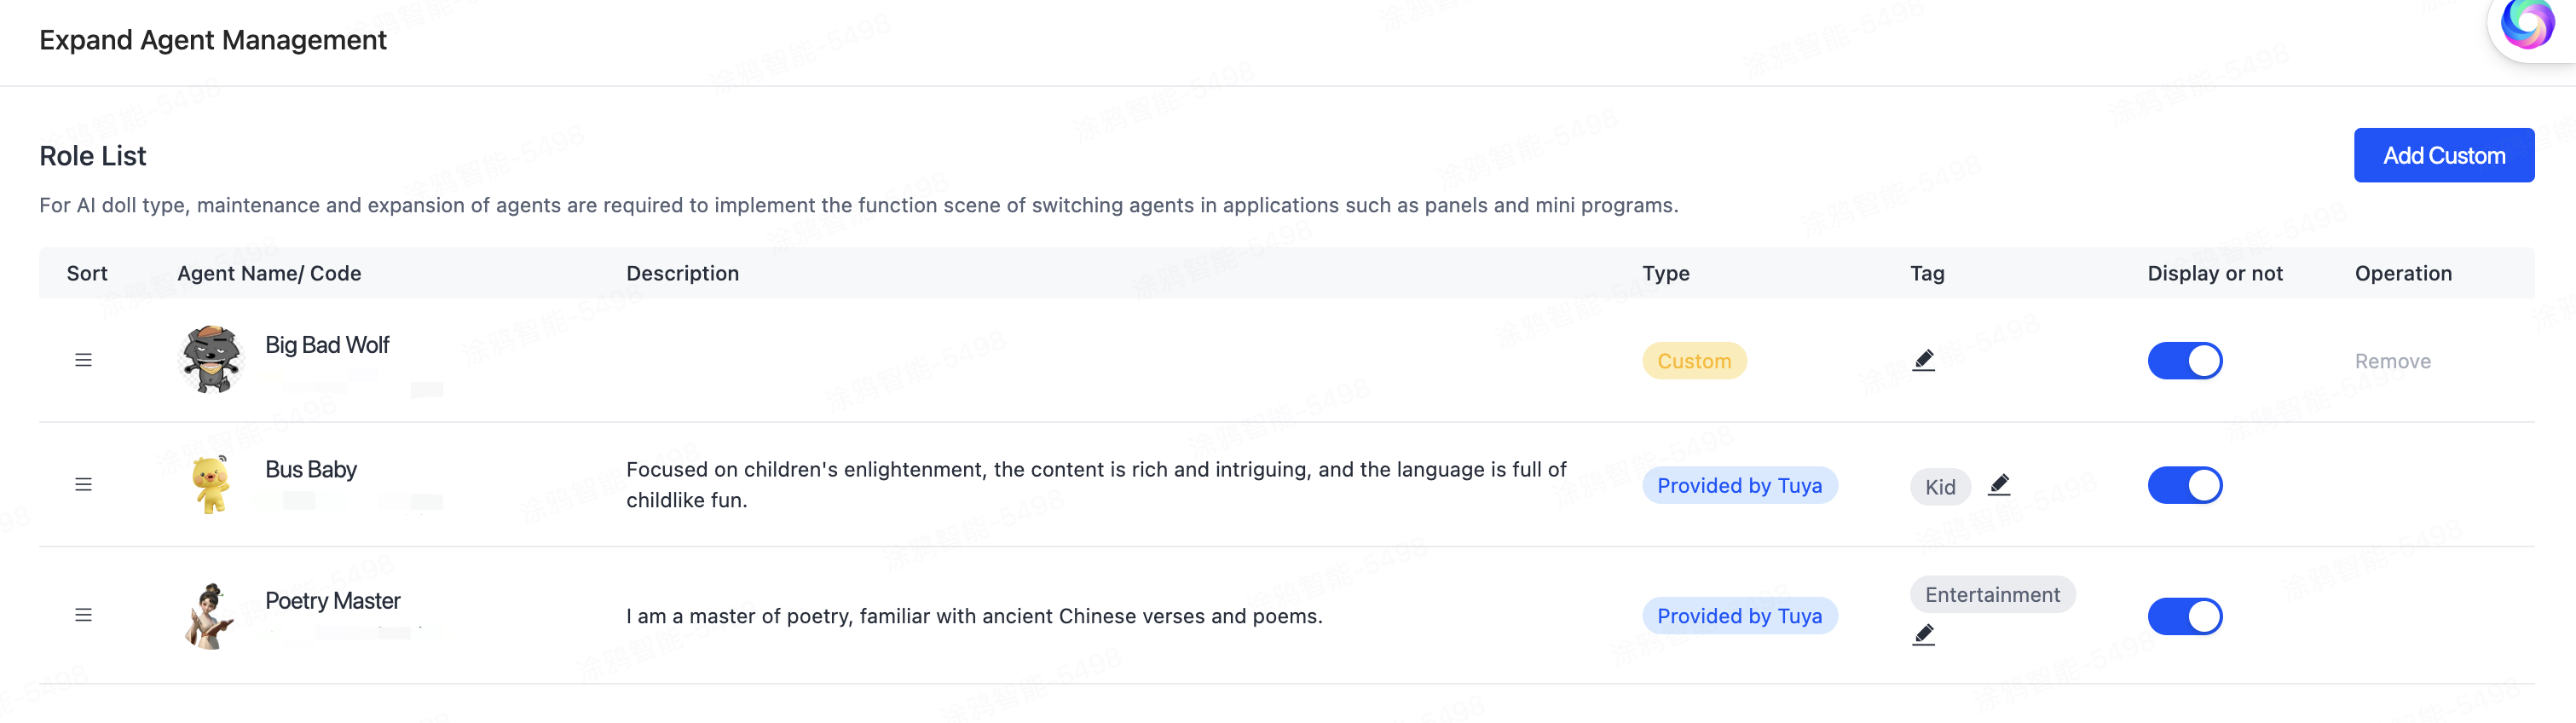
- On the Manage Extended Agents page that appears, you can customize more agent capabilities of the device.
- After completing the agent binding, click Next Step: Device Interaction. For subsequent operations, refer to Hardware Product Development.
Create panel miniapp on Smart MiniApp Developer Platform
Register and log in to the Smart MiniApp Developer Platform. For more information, see Create panel miniapp.
Create a project based on a template
Open Tuya MiniApp IDE and create a panel miniapp project based on the AI Toy Template. For more information, see Initialize project.
By now, the initialization of the development of a panel miniapp is completed. The following section shows the project directories.
├── src
│  	├── api // Aggregate file of all cloud API requests of the panel
│  	├── components
│  	│   ├── AICard // Agent card component
│  	│   ├── DialogConfirm // Confirmation dialog component
│  	│   ├── DialogInput // Text input dialog component
│  	│   ├── DialogPicker // DP selection dialog component
│  	│   ├── GridBattery // Battery level component
│  	│   ├── icon-font // SVG icon container component
│  	│   ├── Modal // General dialog component
│  	│   ├── NoData // Fallback component when there is no data
│  	│   ├── PickerItem // General selection button component
│  	│   ├── SearchBar // Search bar component
│  	│   ├── Tag // Category tag subcomponent
│  	│   ├── TagBar // Category tag bar component
│  	│   ├── Text // General text component
│  	│   ├── TopBar // General top bar component
│  	│   ├── TouchableOpacity // General button component
│  	├── constant
│  	│   ├── dpCodes.ts // dpCode constant
│  	│   ├── index.ts // Stores all constant configurations
│  	├── devices // Device model
│  	├── hooks // Hooks
│  	├── i18n // Multilingual settings
│  	├── pages
│   │   ├── AIAgentEdit // Edit a single agent
│   │   ├── AIDialogue // Agent chat and agent square
│   │   ├── CloneSetting // Select how to clone voice tones
│   │   ├── CloneVoice // Clone the voice tones
│   │   ├── DialogHistory // Chat history of a single agent
│   │   ├── home // Homepage
│   │   ├── VoiceSetting // Edit a single voice tone
│   │   ├── VoiceSquare // Voice tone square
│  	├── redux // redux
│   ├── res // Resources, such as pictures and SVG
│   ├── styles // Global style
│   ├── types // Define global types
│   ├── utils // Common utility methods
│   ├── app.config.ts
│   ├── app.less
│   ├── app.tsx
│   ├── composeLayout.tsx // Handle and listen for the adding, unbinding, and DP changes of sub-devices
│   ├── global.config.ts
│   ├── mixins.less // Less mixins
│   ├── routes.config.ts // Configure routing
│   ├── variables.less // Less variables
- Data center:
- Available in all data centers
- App version:
- Tuya Smart and Smart Life app v6.3.0 and later
- Kit dependency
- BaseKit: v3.0.0
- MiniKit: v3.0.0
- DeviceKit: v3.0.0
- BizKit: v3.0.1
- baseversion: v2.19.0
- Dependent components
- @ray-js/components-ty-input: "^0.0.5"
- @ray-js/lamp-percent-slider: "^0.0.6"
- @ray-js/log4js: "^0.0.5"
- @ray-js/panel-sdk: "^1.13.1"
- @ray-js/ray: "1.6.22-alpha.1"
- @ray-js/ray-error-catch: "^0.0.25"
- @ray-js/recycle-view: "^0.1.1"
- @ray-js/smart-ui: "^2.1.8"
- @ray-js/svg: "^0.2.0"
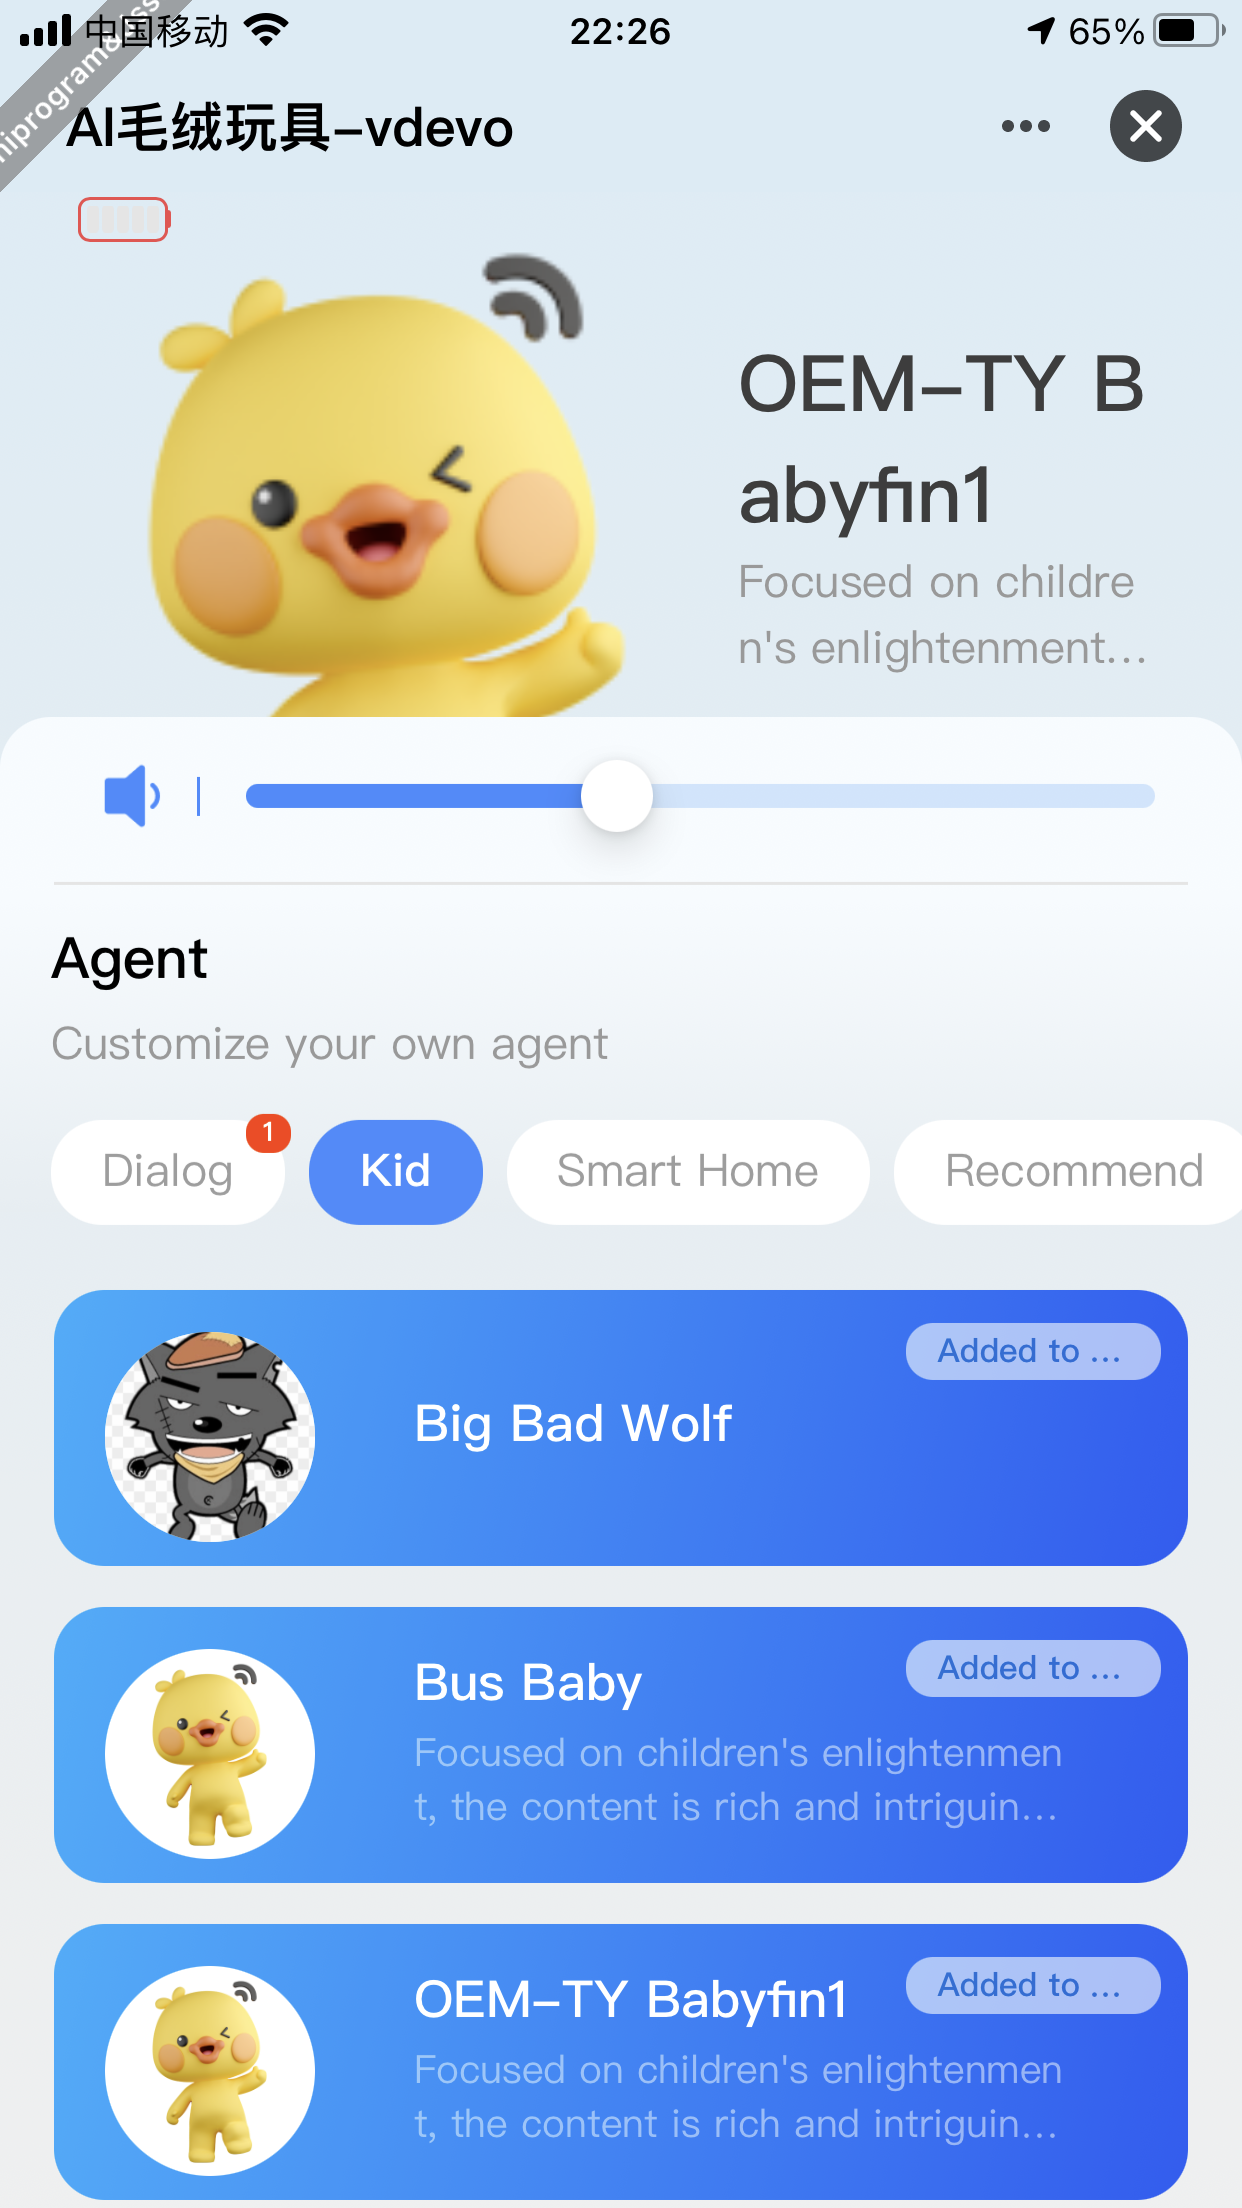
Get the list of category tags
The following section describes how to get the category tag list of agents configured on the Tuya Developer Platform.
Demonstration


Feature description
The above tag list is an aggregated data set of the tag fields for each element in the agent role list on the Tuya Developer Platform. When users add or replace agent role tags on the platform, the tag aggregation list can be updated in real-time using the following method. Based on the tag fields, this allows for categorized management and display of the configured agent roles on the platform. (The list of agent roles obtained through the tag list will be introduced later. It is temporarily referred to as the "Agent Square" in this topic.) Meanwhile, chat tags exclusive to panel business are added to the list template. When users add agent roles under a category tag to a chat, a red dot will appear on the chat tag, indicating that a new chat card has been created. The chat content of the specified agent role will automatically be categorized under the chat tag, and users can view the relevant information by tapping on the chat tag.
Code snippet
// Get the tag list of the Tuya Developer Platform
import {
  ...
  getAIAgentTagList,
} from '@ray-js/ray';

const [tags, setTags] = useState([]);

useEffect(() => {
    const tags = [{ text: Strings.getLang('dsc_tags_dialog'), key: 'dialog' }];
    getAIAgentTagList({ lang: 'zh' })
      .then(res => {
        // eslint-disable-next-line no-restricted-syntax
        for (const [key, text] of Object.entries(res)) {
          tags.push({ text, key });
        }
        setTags(tags);
      })
      .catch(err => {
        console.warn(`${JSON.stringify(err)}`);
        setTags([
          { text: Strings.getLang('dsc_tags_dialog'), key: 'dialog' },
          { text: Strings.getLang('dsc_tags_recommend'), key: 'recommend' },
          { text: Strings.getLang('dsc_tags_study'), key: 'study' },
          { text: Strings.getLang('dsc_tags_child'), key: 'child' },
          { text: Strings.getLang('dsc_tags_life'), key: 'life' },
          { text: Strings.getLang('dsc_tags_entertainment'), key: 'entertainment' },
        ]);
      });
  }, []);
Get the list of agents
The following section describes how to get the list of agents configured on the Tuya Developer Platform.
Demonstration
Feature description
After obtaining the list of agent role tags, you can call the getAIAgentMarketList API method with the tag key as a parameter to retrieve the list of agent roles under a single tag. The data is displayed on pages.
Code snippet
/**
 * Get the list of the agent market on pages
 */
export const getAIAgentList = (data: GetAIAgentListParams) => {
  return getAIAgentMarketList(data);
};

// The agent list
const [AIAgentPageList, setAIAgentPageList] = useState([] as Array<AgentListItem>);

// The request function of the agent list
const getAIAgentListFunc = useCallback((params: GetListParams) => {
    return new Promise((resolve, reject) => {
      getAIAgentList({
        devId: getDevId(),
        tag: params.tag,
        keyWord: '',
        pageNo: params.current,
        pageSize: params.pageSize,
      })
        .then((res: ListRes<AIAgent>) => {
          const { totalPage, list } = res;
          resolve({
            total: totalPage,
            list,
          });
        })
        .catch(error => {
          reject(error);
        });
    });
}, []);


// Manage requests of the agent list
  const {
    pagination: paginationSquare,
    data: dataSquare,
    run: runSquare,
  } = usePagination(
    ({ current, pageSize, tag }) =>
      getAIAgentListFunc({ current, pageSize, tag }) as Promise<GetAgentListRes>,
    {
      manual: true,
    }
  );

  // Respond to lazy loading of the agent square
  useEffect(() => {
    if (dataSquare?.list && paginationSquare.current > 1) {
      setAIAgentPageList([...AIAgentPageList, ...dataSquare?.list]);
    } else if (dataSquare?.list && paginationSquare.current <= 1) {
      setAIAgentPageList([...dataSquare?.list]);
    }
  }, [dataSquare, tag]);
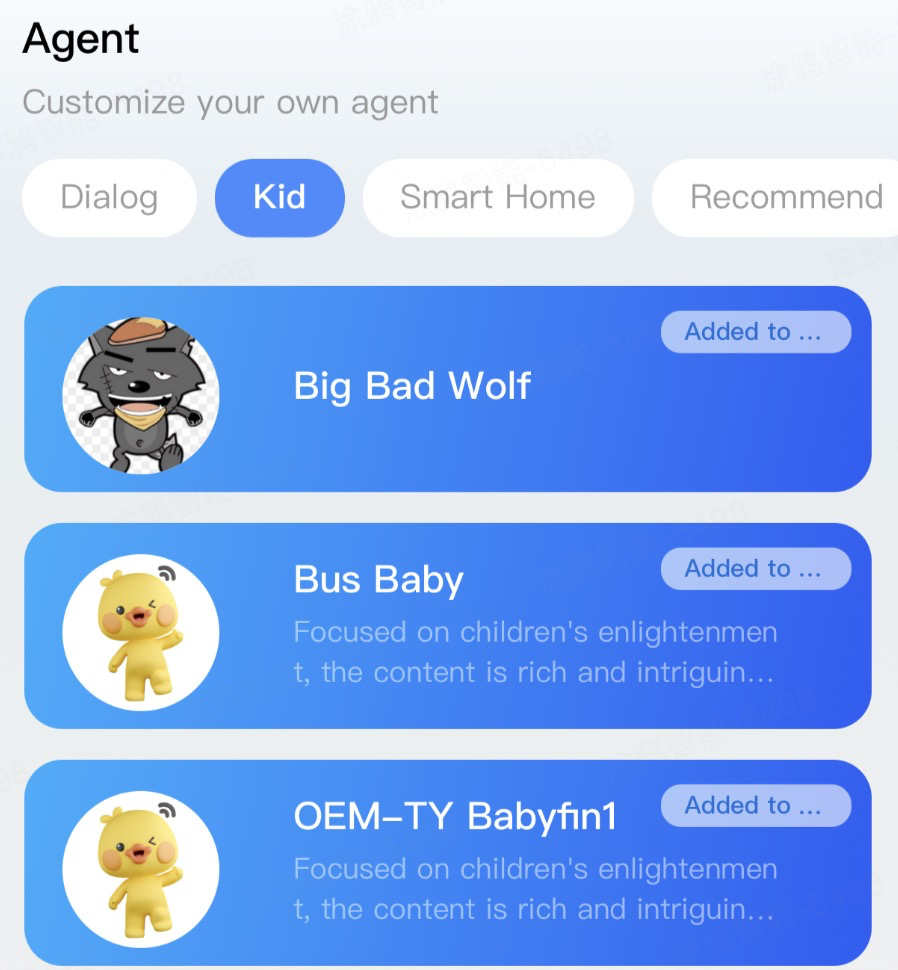
Add an agent to a chat
The following section describes how to add an agent to a chat.
Demonstration

Feature description
The agent role cards in the Agent Square feature an Add to Chat button. When the button is tapped, the agent card is duplicated as a chat card and appears under the chat category tag. The number in the red dot indicates how many agent roles have been added to the chat tag.
Code snippet
/**
 * Add an endpoint agent
 */
export const addAgentEndpoint = (data: {
  devId: string,
  agentId: number,
  wakeWord?: string,
}) => {
  return bindAIAgentEndpoint(data);
};

addAgentEndpoint({ devId: getDevId(), agentId: item.id })
  .then(() => {
    showToast({
      title: Strings.getLang(`AICardMenu_0_success`),
    });
    // Find the target agent and change the added field to true
    const newAIAgentPageList = AIAgentPageList.map((element) => {
      if (item.id === element.id) {
        return {
          ...element,
          added: true,
        };
      }
      return element;
    });
    setAIAgentPageList(newAIAgentPageList);
    emitter.emit("refreshDialogData", "");
    setTimeout(() => {
      setIsBackToTop(true);
    }, 600);
  })
  .catch((err) => {
    console.warn(err);
  });
Query the list of agent chats
The following section describes how to query the list of agent chats.
Demonstration

Feature description
Tap the chat tag to view all chat cards. Tap a chat card to navigate to the chat history page. Tap and hold a chat card to delete it. After deleting the chat card, you can copy the agent role to the chat tag again in Agent Square.
Code snippet
// Redux data for an agent chat
const { list, boundList } = useSelector(selectAgentList);

// Generate a request function compatible with usePagination to get the list of unbound agent chats
const getAgentListFunc = useCallback((params: GetListParams) => {
    return new Promise((resolve, reject) => {
      getUnboundAgent({ pageNo: params.current, pageSize: params.pageSize })
        .then((res: AgentListRes) => {
          const { totalPage, list } = res;
          console.log('==list', list);

          resolve({
            total: totalPage,
            list,
          });
        })
        .catch(error => {
          reject(error);
        });
    });
  }, []);

// Manage agent chats
const { pagination, data, loading, run } = usePagination(
    ({ current, pageSize, tag }) =>
      getAgentListFunc({ current, pageSize, tag }) as Promise<GetAgentListRes>,
    {
      manual: true,
    }
);

// Respond to lazy loading
useEffect(() => {
    if (data?.list && pagination.current > 1) {
      dispatch(updateAgentList([...data?.list]));
    } else if (data?.list && pagination.current <= 1) {
      isRefresh
        ? dispatch(refreshAgentList([...data?.list]))
        : dispatch(initAgentList([...data?.list]));
    }
}, [data, tag]);
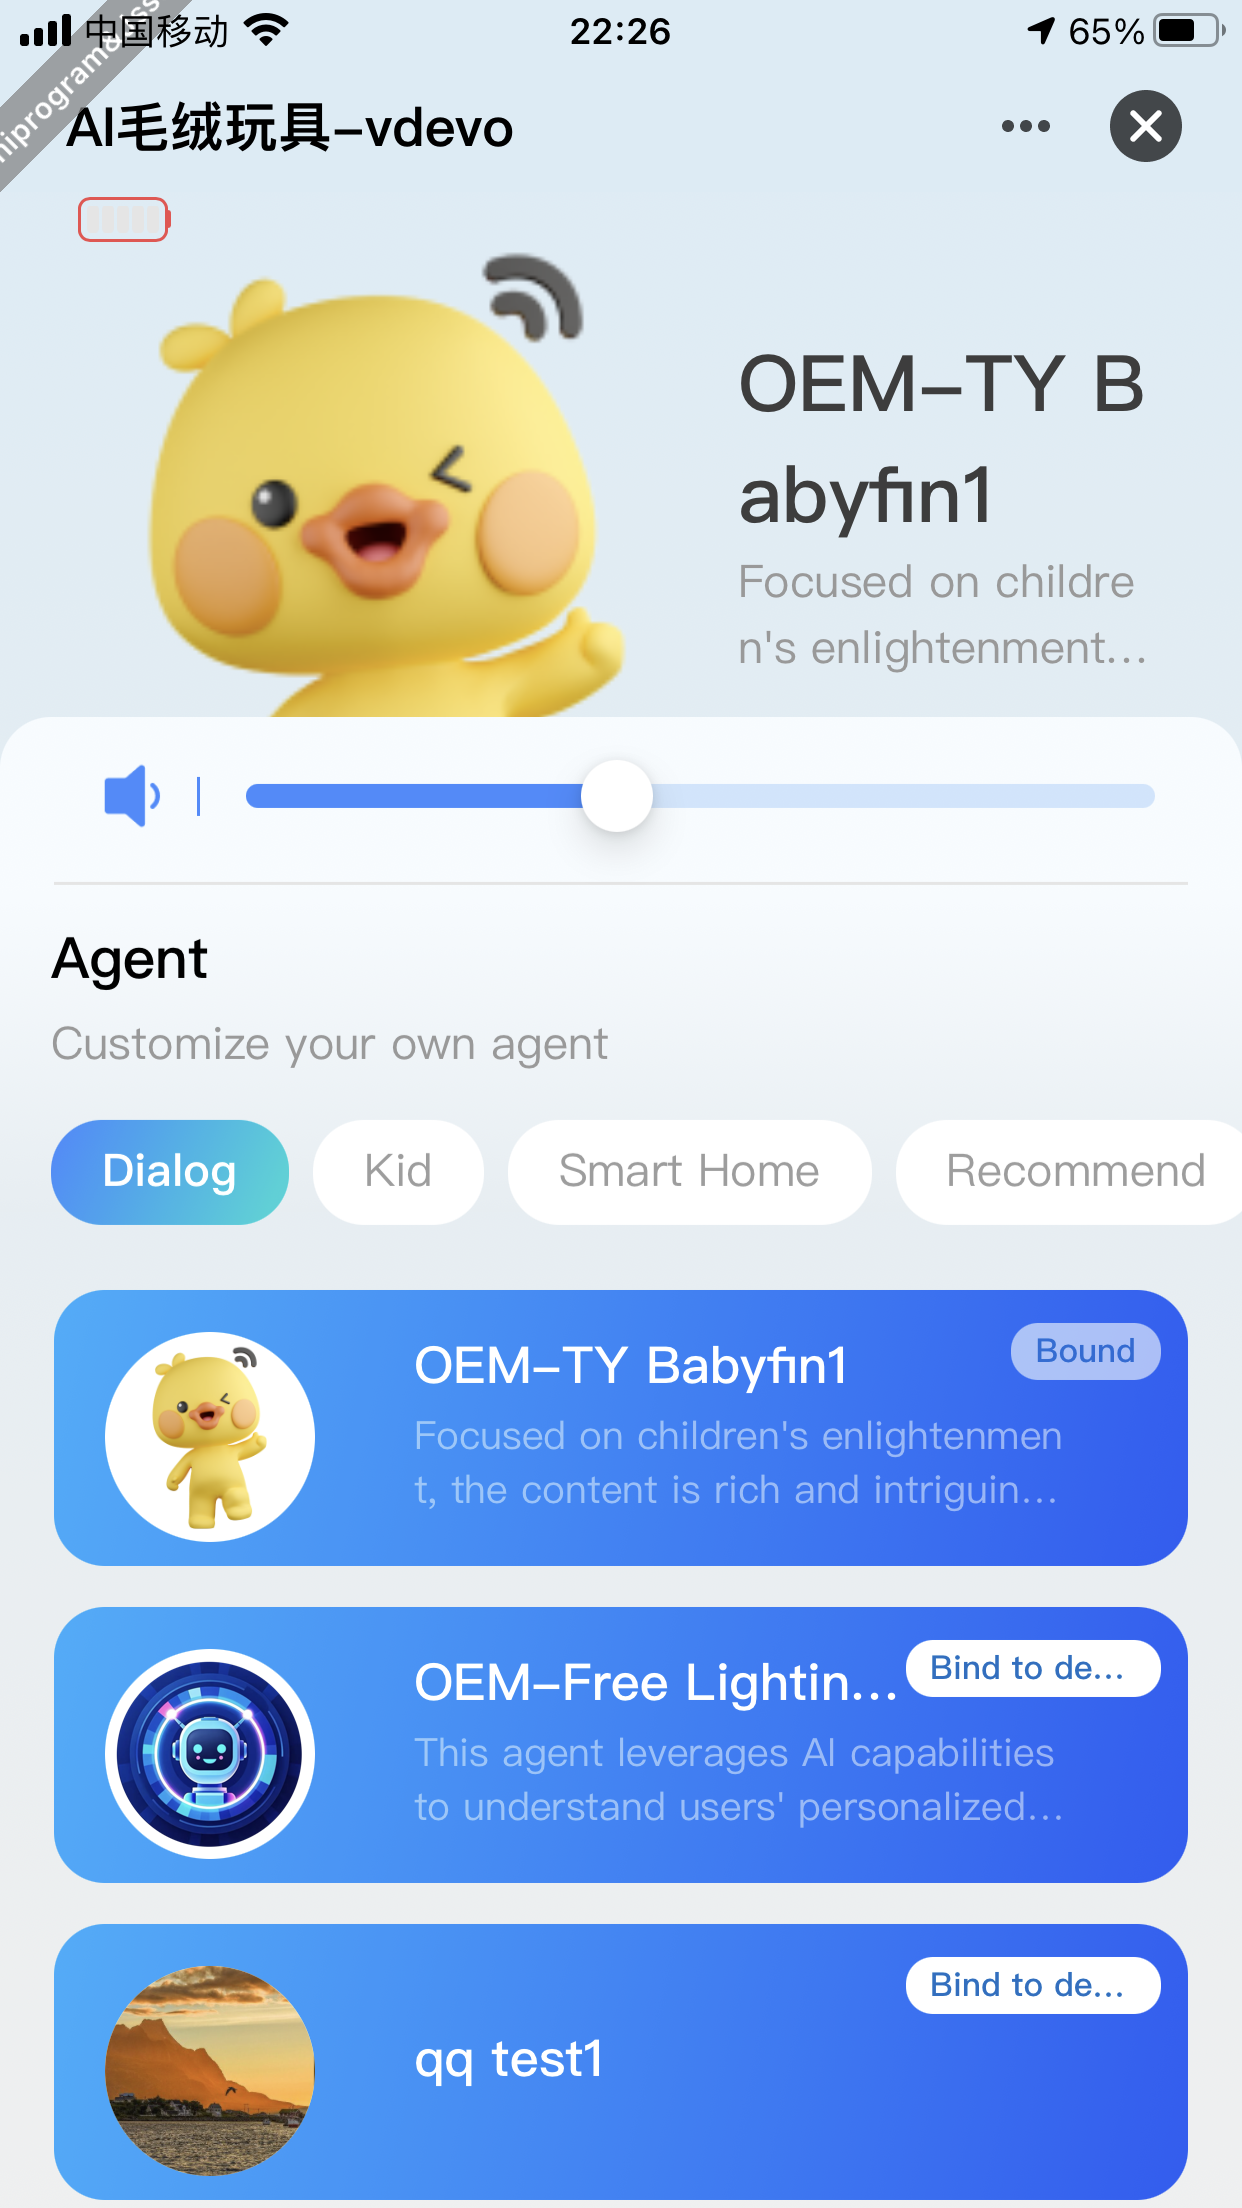
Bind an agent with a device
The following section describes how to bind an agent with a device.
Demonstration
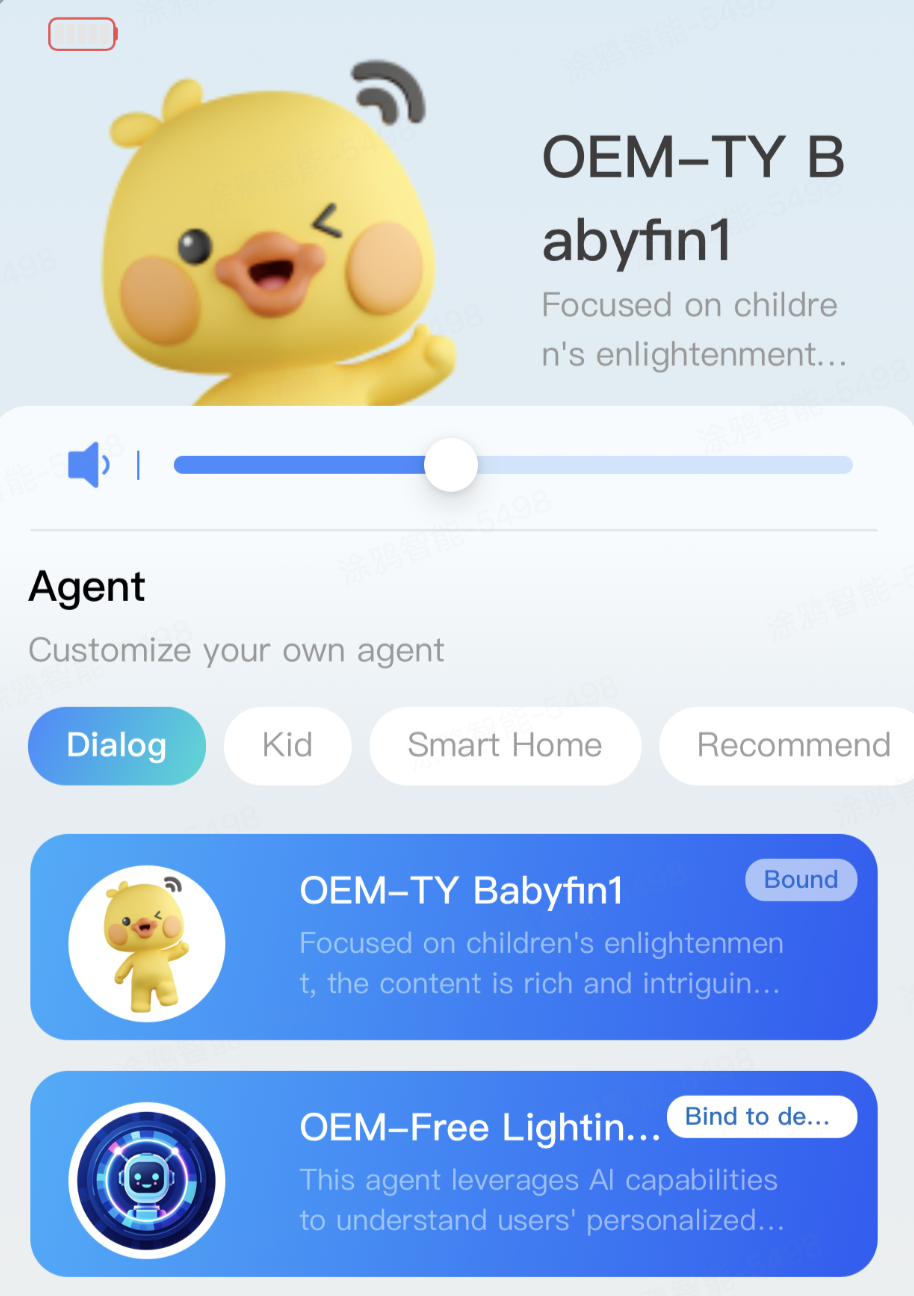
Feature description
Tap Bind to Device in the top-right corner of the agent chat card, and the agent role will be bound with the device. The default agent information display area at the top of the panel will automatically switch to the corresponding content of this agent role. The agent chat card will be automatically sorted to the first position. After completing the above binding operations, the users will perceive the latest content about the agent's role when interacting with the device.
Code snippet
const agentInfo = (await getAgentInfo(item.id)) as AgentInfo;
const {
  voiceId = '',
  speed = 1.2,
  tone = 1.1,
  lang = 'zh',
  keepChat = true,
} = agentInfo ?? {};

editAgentInfo({
  voiceId,
  speed,
  tone,
  lang,
  keepChat,
  isMain: !isBound,
  endpointAgentId: item.id,
}).then(async () => {
  setTimeout(async () => {
    dispatch(updateAgentInfo({ ...agentInfo, endpointAgentId: item.id }));
  }, 1000);
  emitter.emit('refreshDialogData', '');
  ty.hideLoading();
  ty.showToast({
    title: Strings.getLang('dsc_edit_success'),
    icon: 'success',
  });
}).catch(() => {
  ty.hideLoading();
  ty.showToast({
    title: Strings.getLang('dsc_edit_fail'),
    icon: 'error',
  });
});
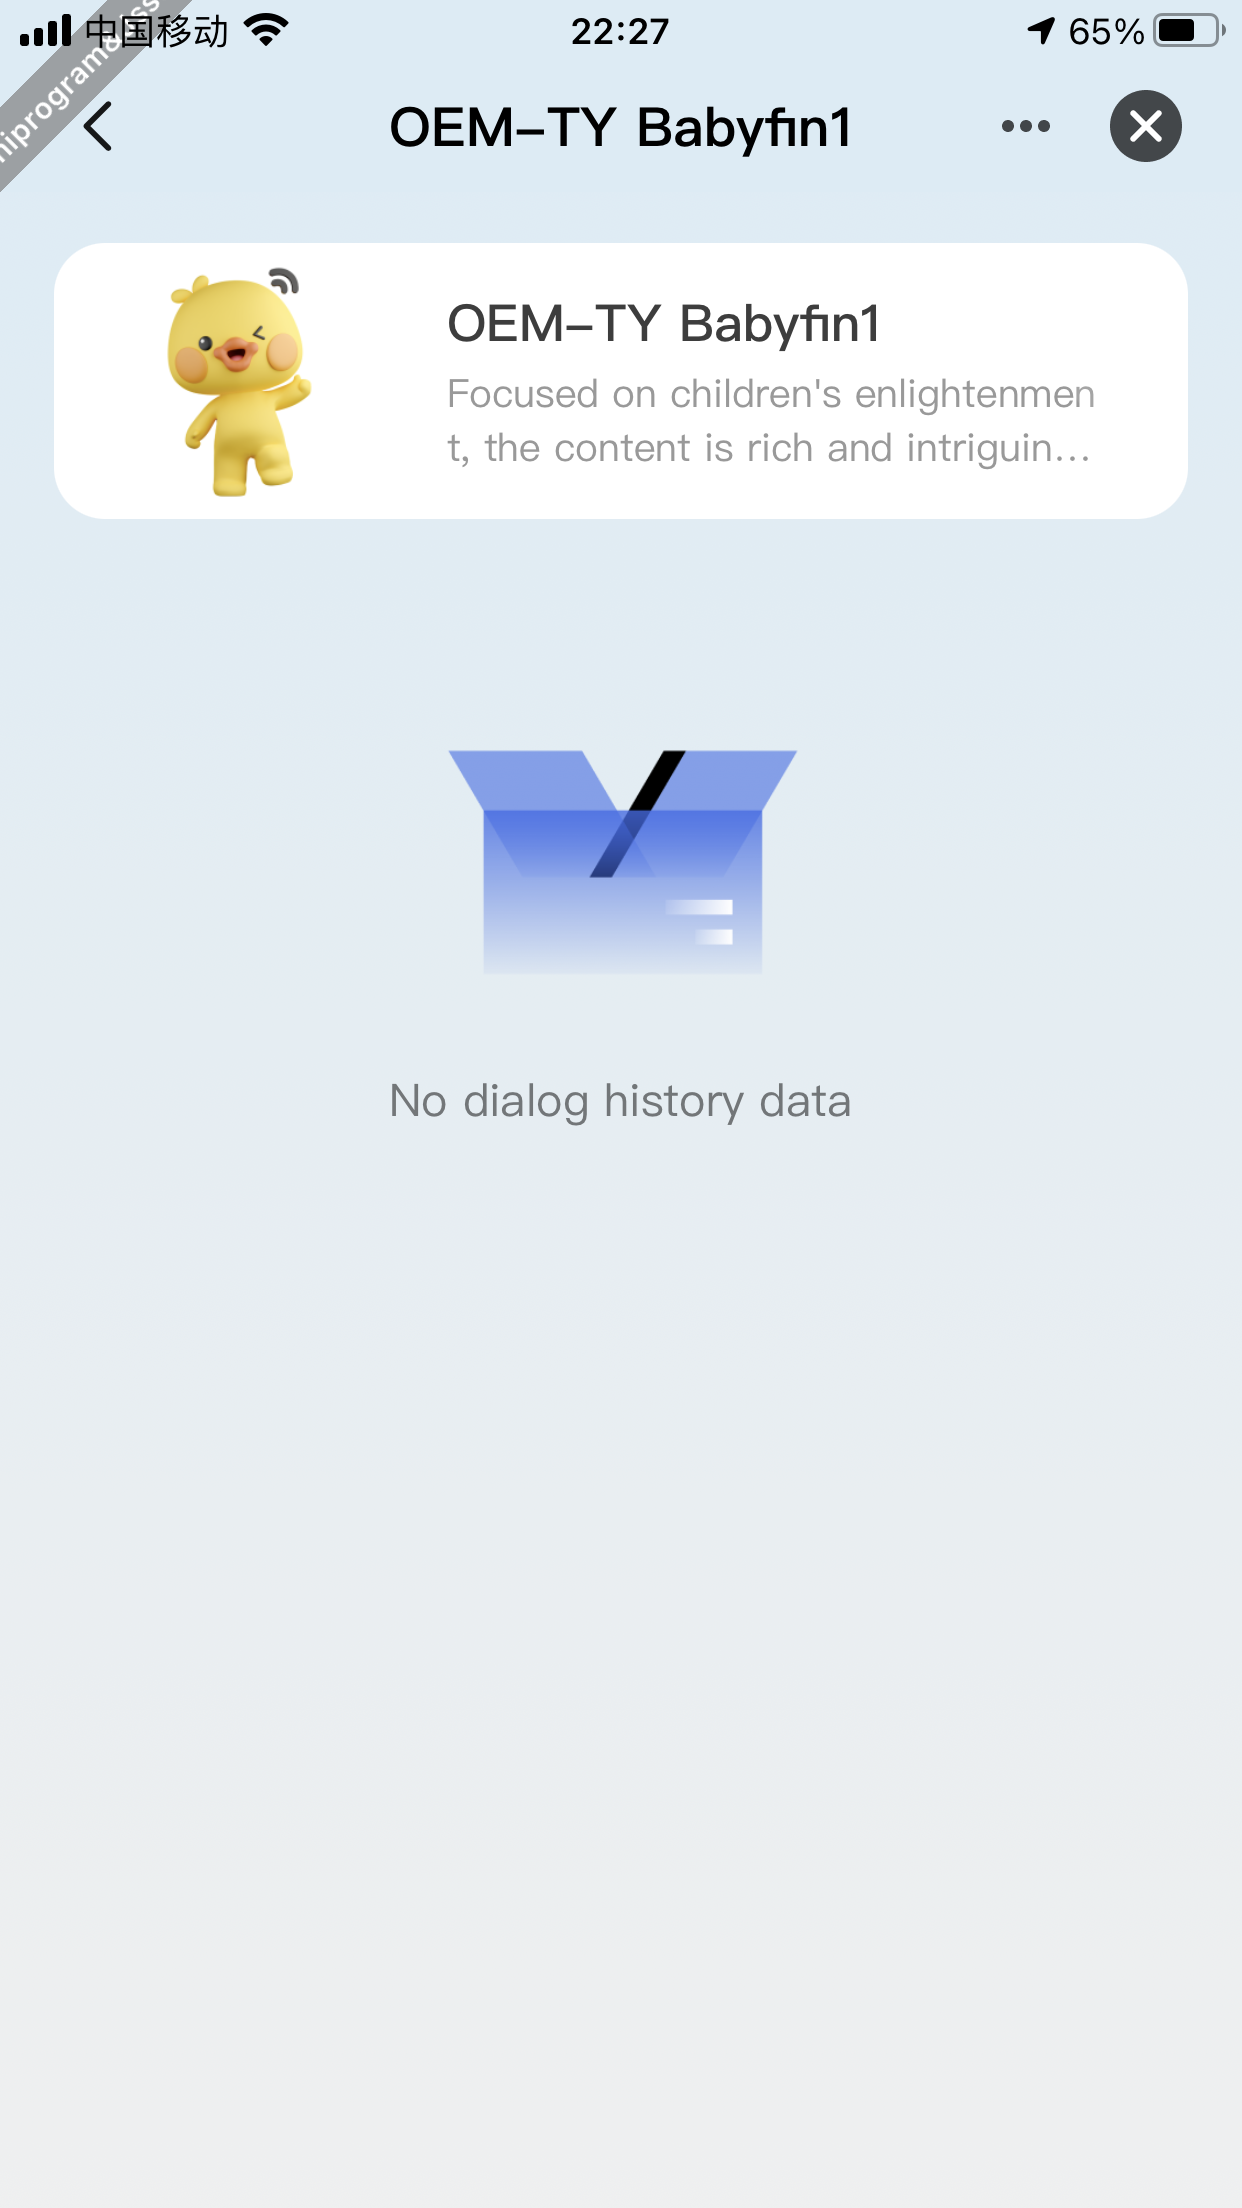
Page description
This chat history page shows the chat history between users and agent roles. When no chat content has been generated between the users and the agent, the template will show a placeholder graphic with a prompt. Users can tap the card at the top of the agent chat history to navigate to the agent editing page.
Code snippet
// Get the chat history of the agent within three months
export const getDialogHistoryList = async (params: GetHistoryParams) => {
  try {
    const response = await getAIAgentHistory({
      devId: getDevInfo().devId,
      endpointAgentId: params.endpointAgentId,
      pageNo: params.pageNo,
      pageSize: params.pageSize,
      startTime: moment().subtract(3, 'months').format('YYYY-MM-DD HH:mm:ss'),
      endTime: moment().format('YYYY-MM-DD HH:mm:ss'),
    });
    return response;
  } catch (err) {
    return Promise.reject(err);
  }
};


const [historyList, setHistoryList] = useState([]);

const getDialogHistoryListFunc = useCallback((params: GetListParams) => {
    return new Promise((resolve, reject) => {
      getDialogHistoryList({
        pageNo: params.current,
        pageSize: params.pageSize,
        endpointAgentId: tagKey === 'dialog' ? id : endpointAgentId,
      })
        .then((res: DialogHistoryRes) => {
          const { totalPage, list } = res;
          resolve({
            total: totalPage,
            list,
          });
        })
        .catch(error => {
          reject(error);
        });
    });
  }, []);

  const { pagination, data, loading, run } = usePagination(
    ({ current, pageSize }) =>
      getDialogHistoryListFunc({ current, pageSize }) as Promise<GetDialogHistory>,
    {
      manual: true,
    }
  );

  useEffect(() => {
    if (data?.list && data?.list?.length > 0) {
      const { list } = data;
      const newList = [...list];
      newList.reverse();
      newList.push({ emptyId: `empty_${historyList.length}` });
      setTimeout(() => {
        setEmptyIdState(`empty_${historyList.length}`);
      }, 300);
      const tempList = [...newList, ...historyList];
      setHistoryList(tempList);
    }
  }, [data]);
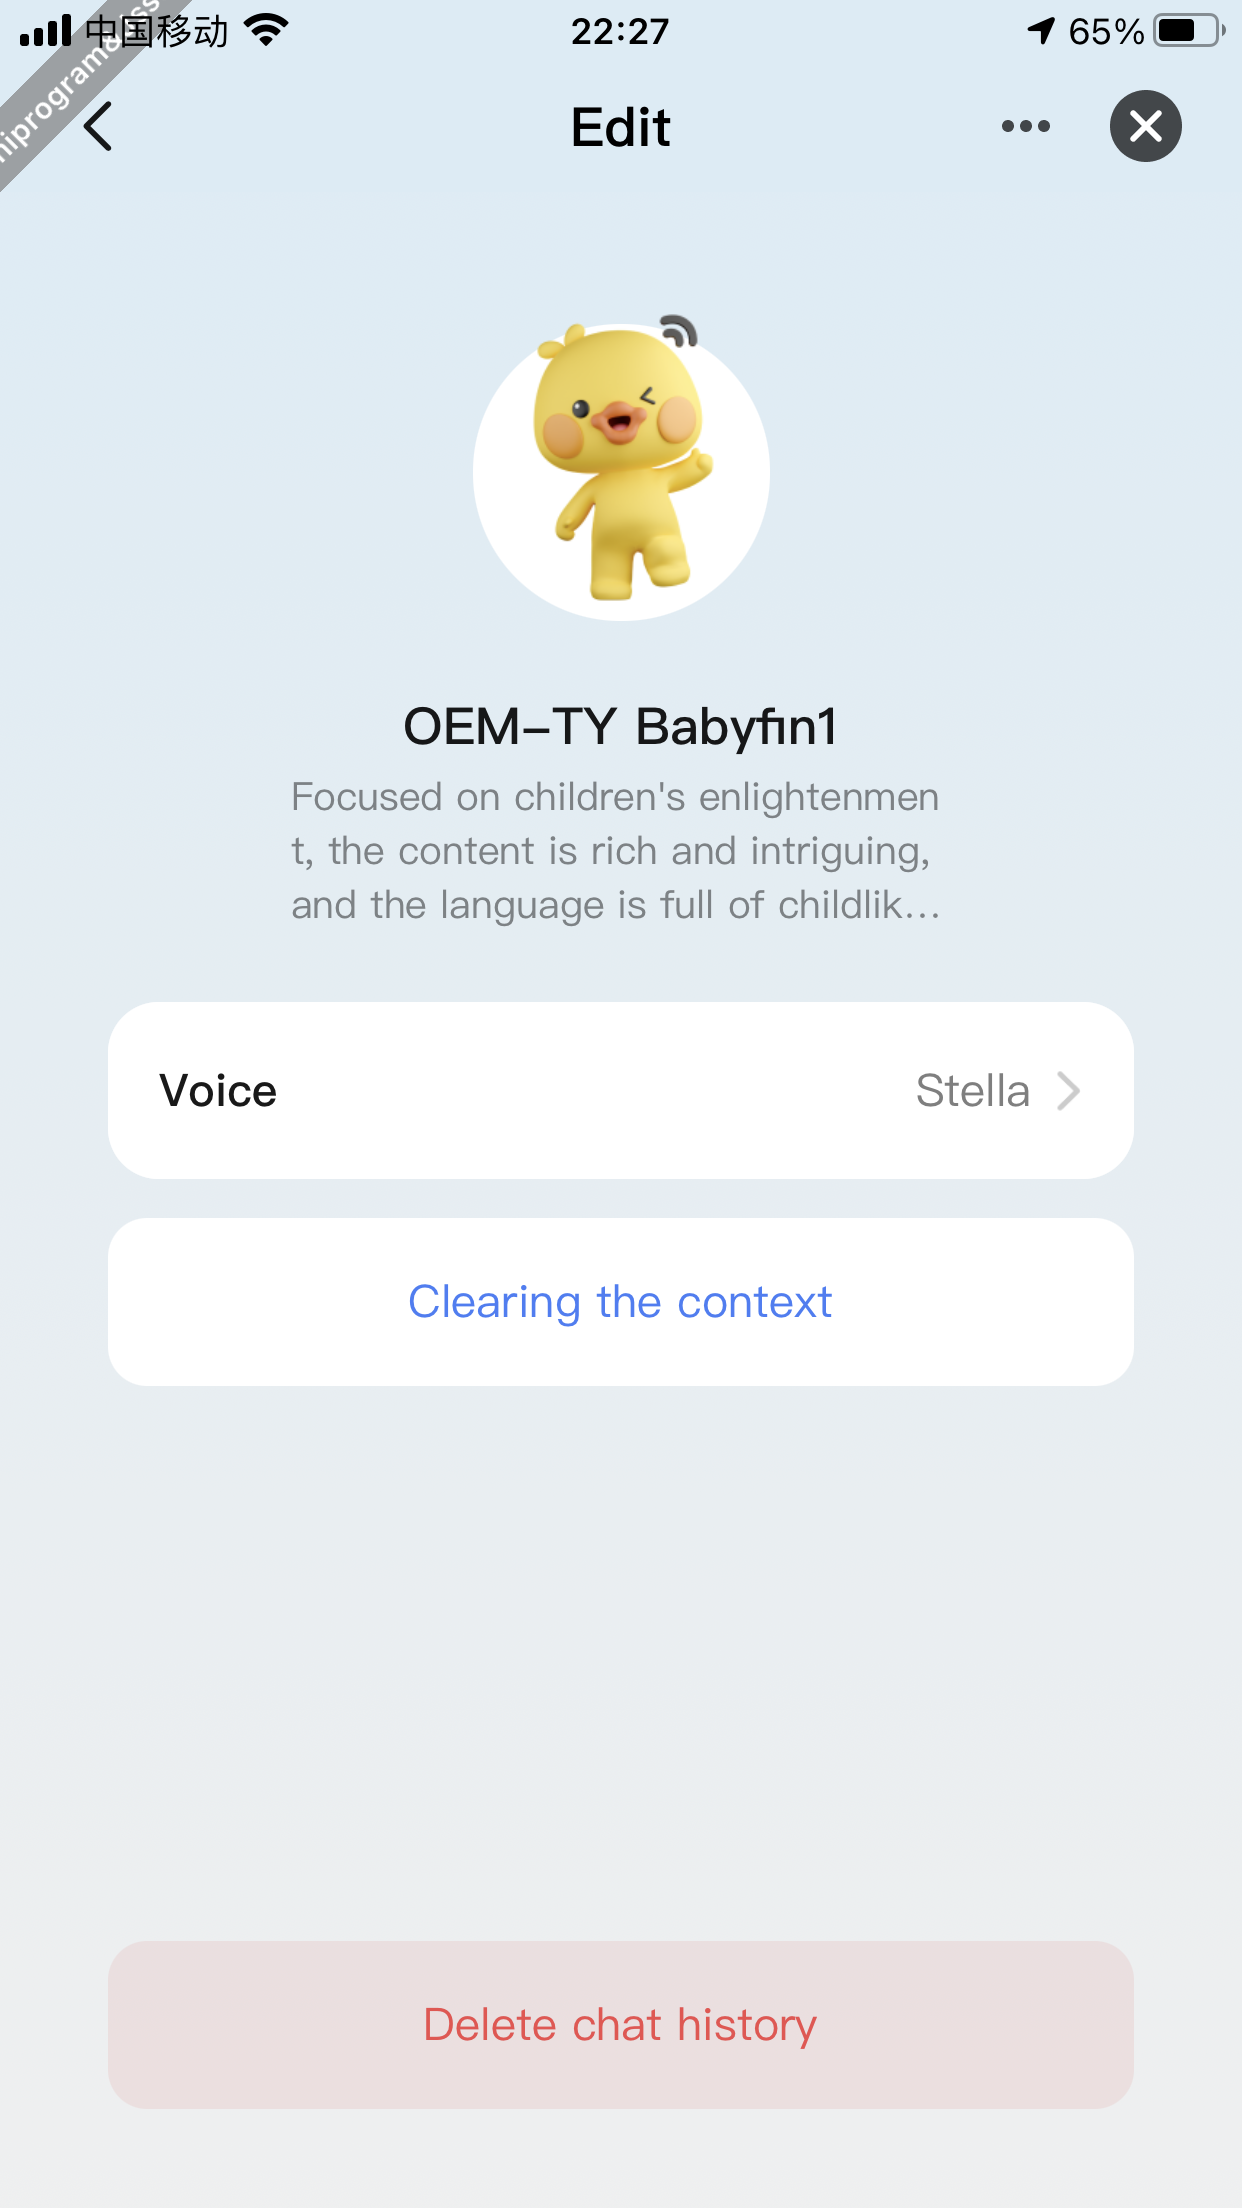
Page description
The agent role editing page is used to edit information related to the agent role. Currently, you can edit the agent role's voice tone, clear the context information, and delete all chat history between the current user and the agent role.
Clear context
Feature description
This feature is used to clear the context information of the agent role and initialize its chat background.
Code snippet
// Clear context
export const clearingContext = async (endpointAgentId: number) => {
  try {
    const response = await deleteAIAgentContext({
      devId: getDevInfo().devId,
      endpointAgentId,
    });
    return response;
  } catch (err) {
    return Promise.reject(err);
  }
};

const handleClearingContext = () => {
  ty.showLoading({
    title: "",
  });
  clearingContext(id)
    .then(() => {
      ty.hideLoading();
      ty.showToast({
        title: Strings.getLang("dsc_clearing_success"),
        icon: "success",
      });
    })
    .catch((error) => {
      ty.hideLoading();
      ty.showToast({
        title: Strings.getLang("dsc_clearing_fail"),
        icon: "error",
      });
    });
};
Clear the chat history
Feature description
This feature is used to clear the chat history between the user and the agent role and initialize the chat content history of this agent role.
Code snippet
// Clear the chat history
export const clearingHistoryRecord = async (endpointAgentId: number) => {
  try {
    const response = await deleteAIAgentHistory({
      devId: getDevInfo().devId,
      endpointAgentId,
    });
    return response;
  } catch (err) {
    return Promise.reject(err);
  }
};

const handleClearingHistoryRecord = () => {
  ty.showLoading({
    title: "",
  });
  clearingHistoryRecord(id)
    .then(() => {
      ty.hideLoading();
      ty.showToast({
        title: Strings.getLang("dsc_clearing_success"),
        icon: "success",
      });
      emitter.emit("refreshHistoryData", "");
    })
    .catch(() => {
      ty.hideLoading();
      ty.showToast({
        title: Strings.getLang("dsc_clearing_fail"),
        icon: "error",
      });
    });
};
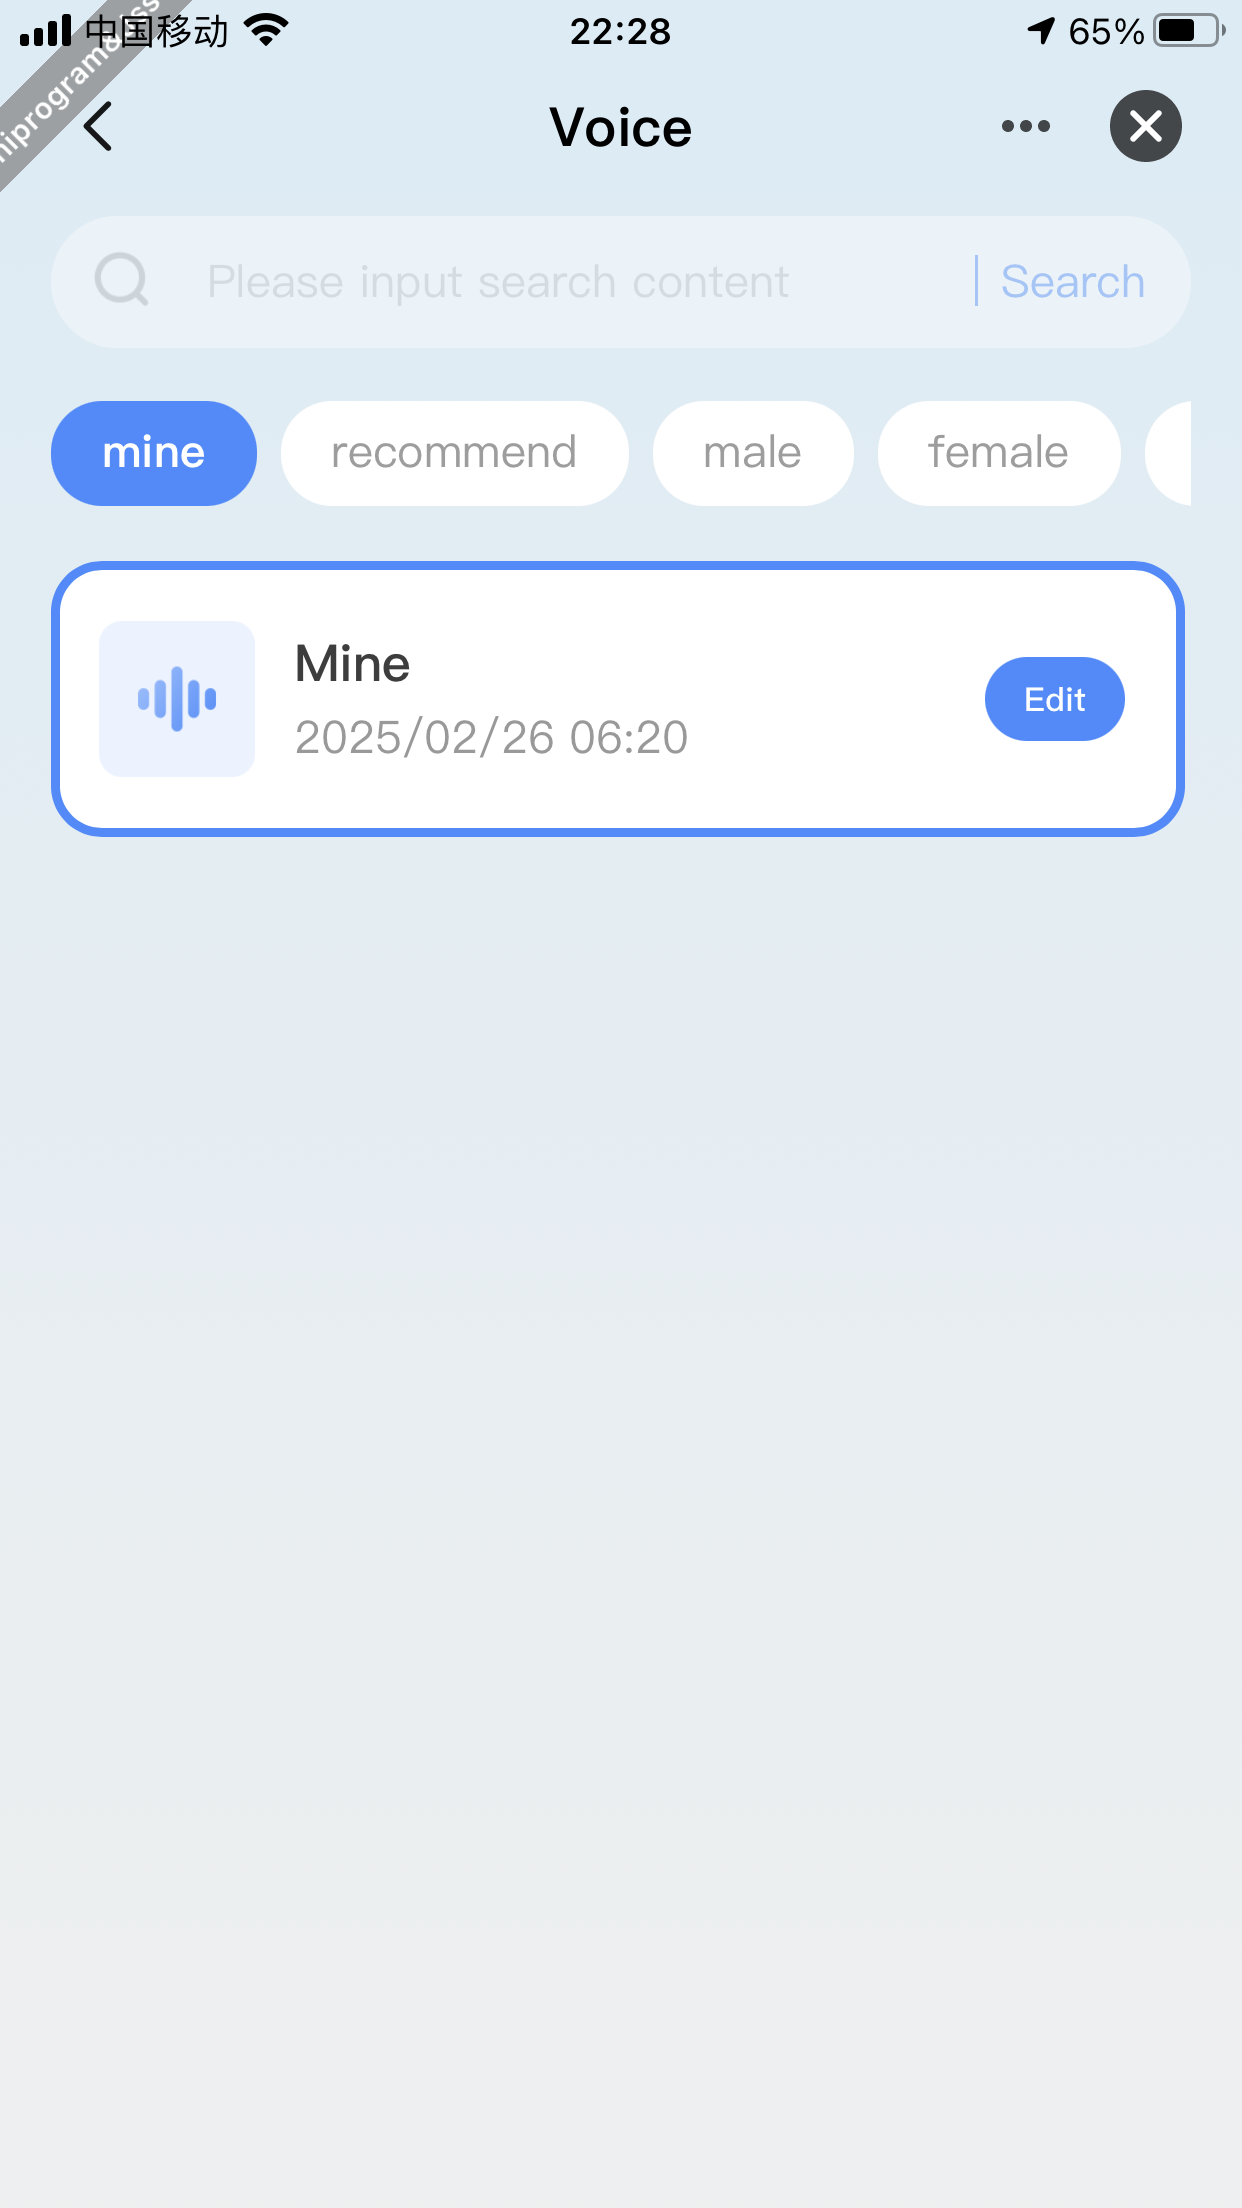
Page description
The voice tone management page is used to switch the voice tone information carried by the agent role. Manage user-cloned voice tones and system default voice tones.
Clone voice tones
Demonstration
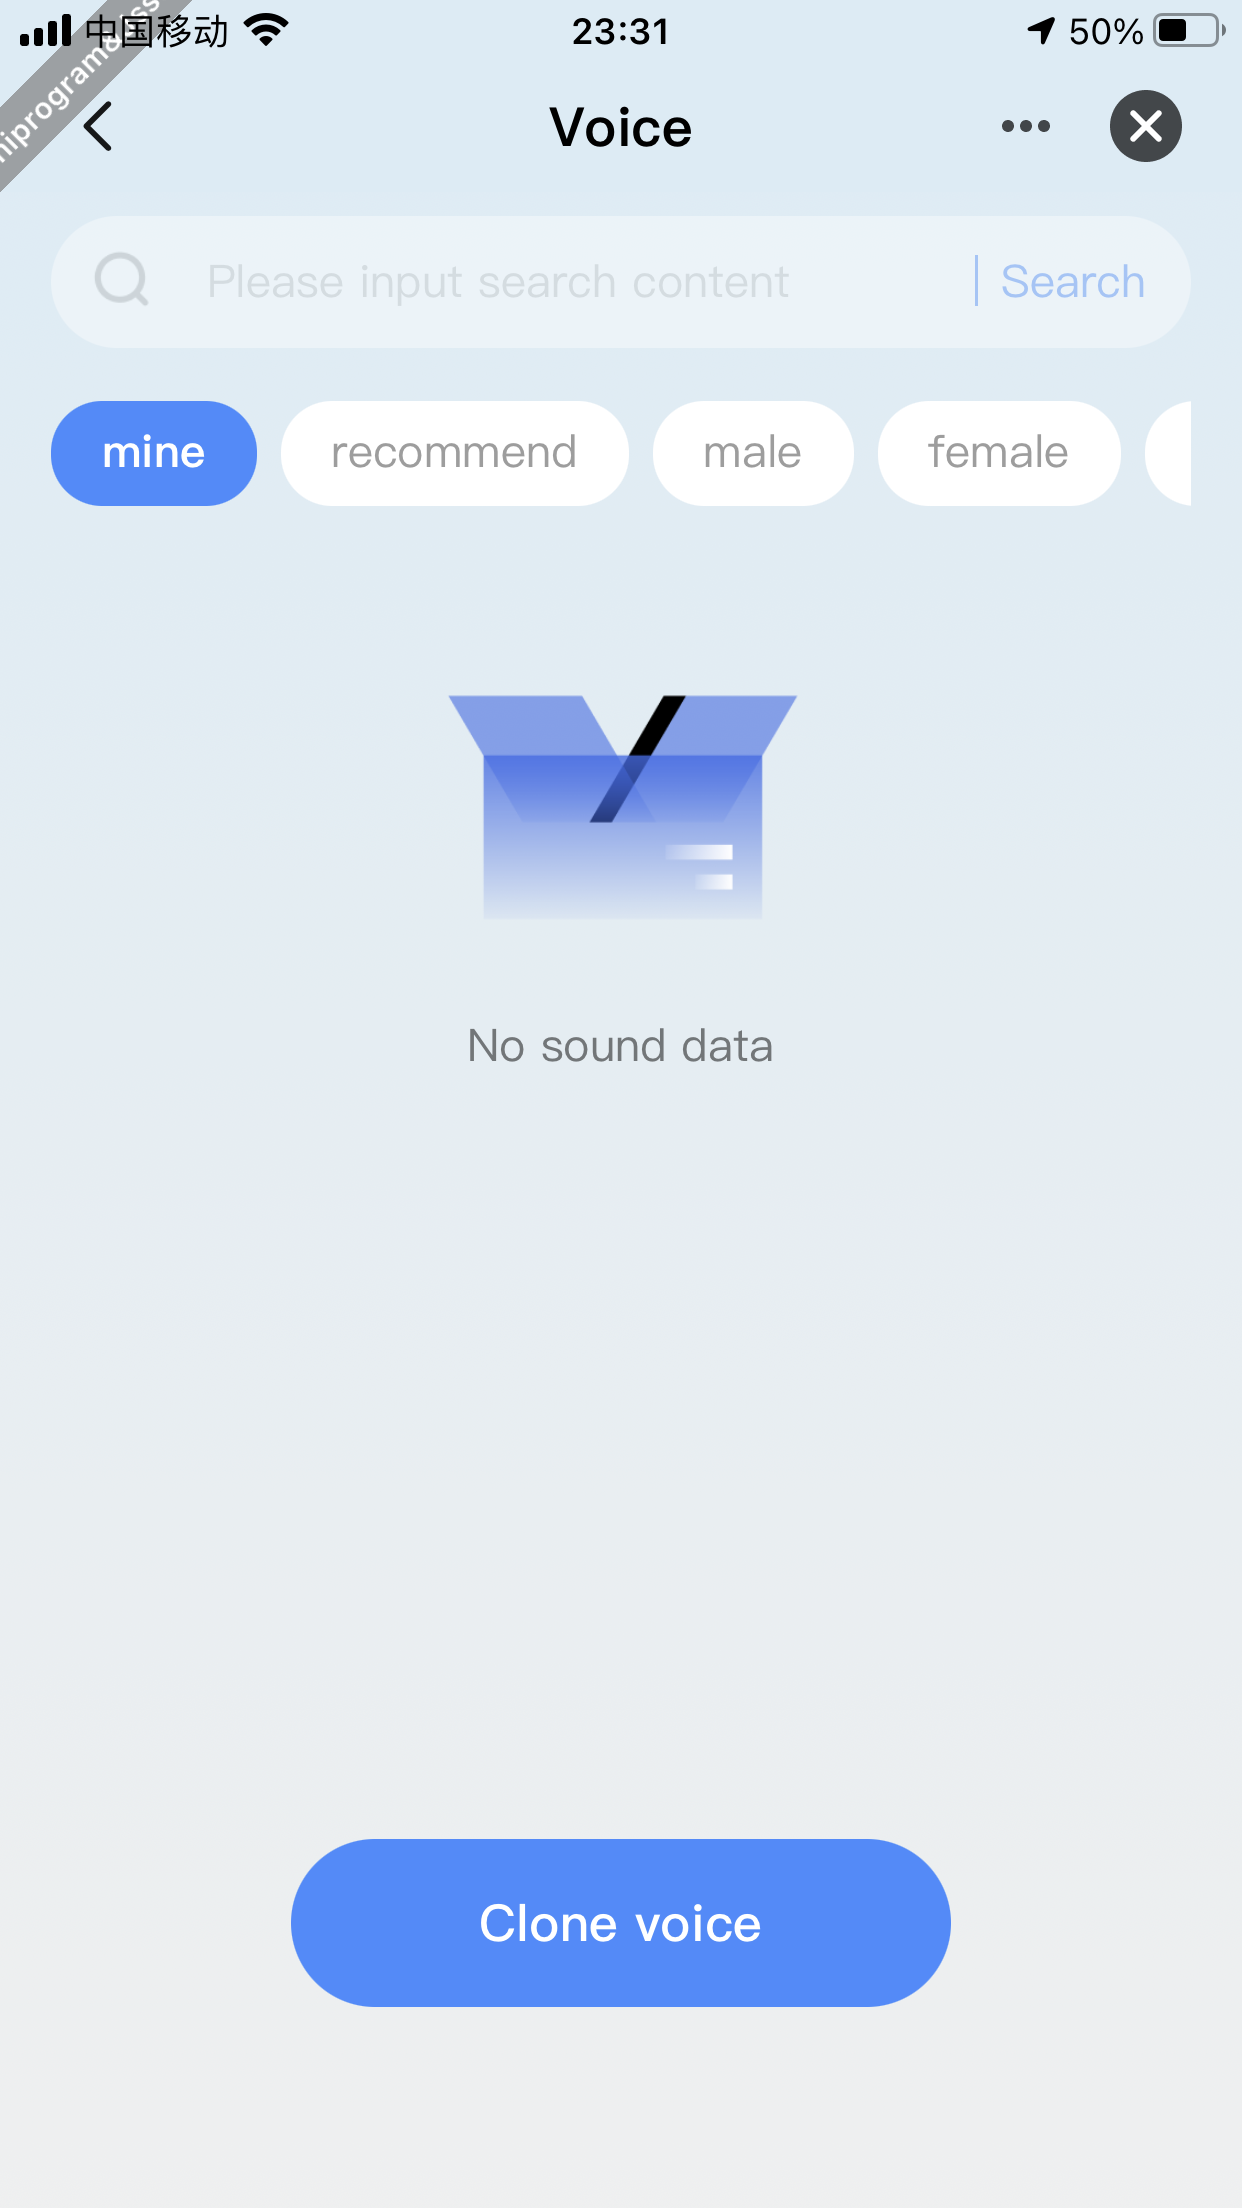
Feature description
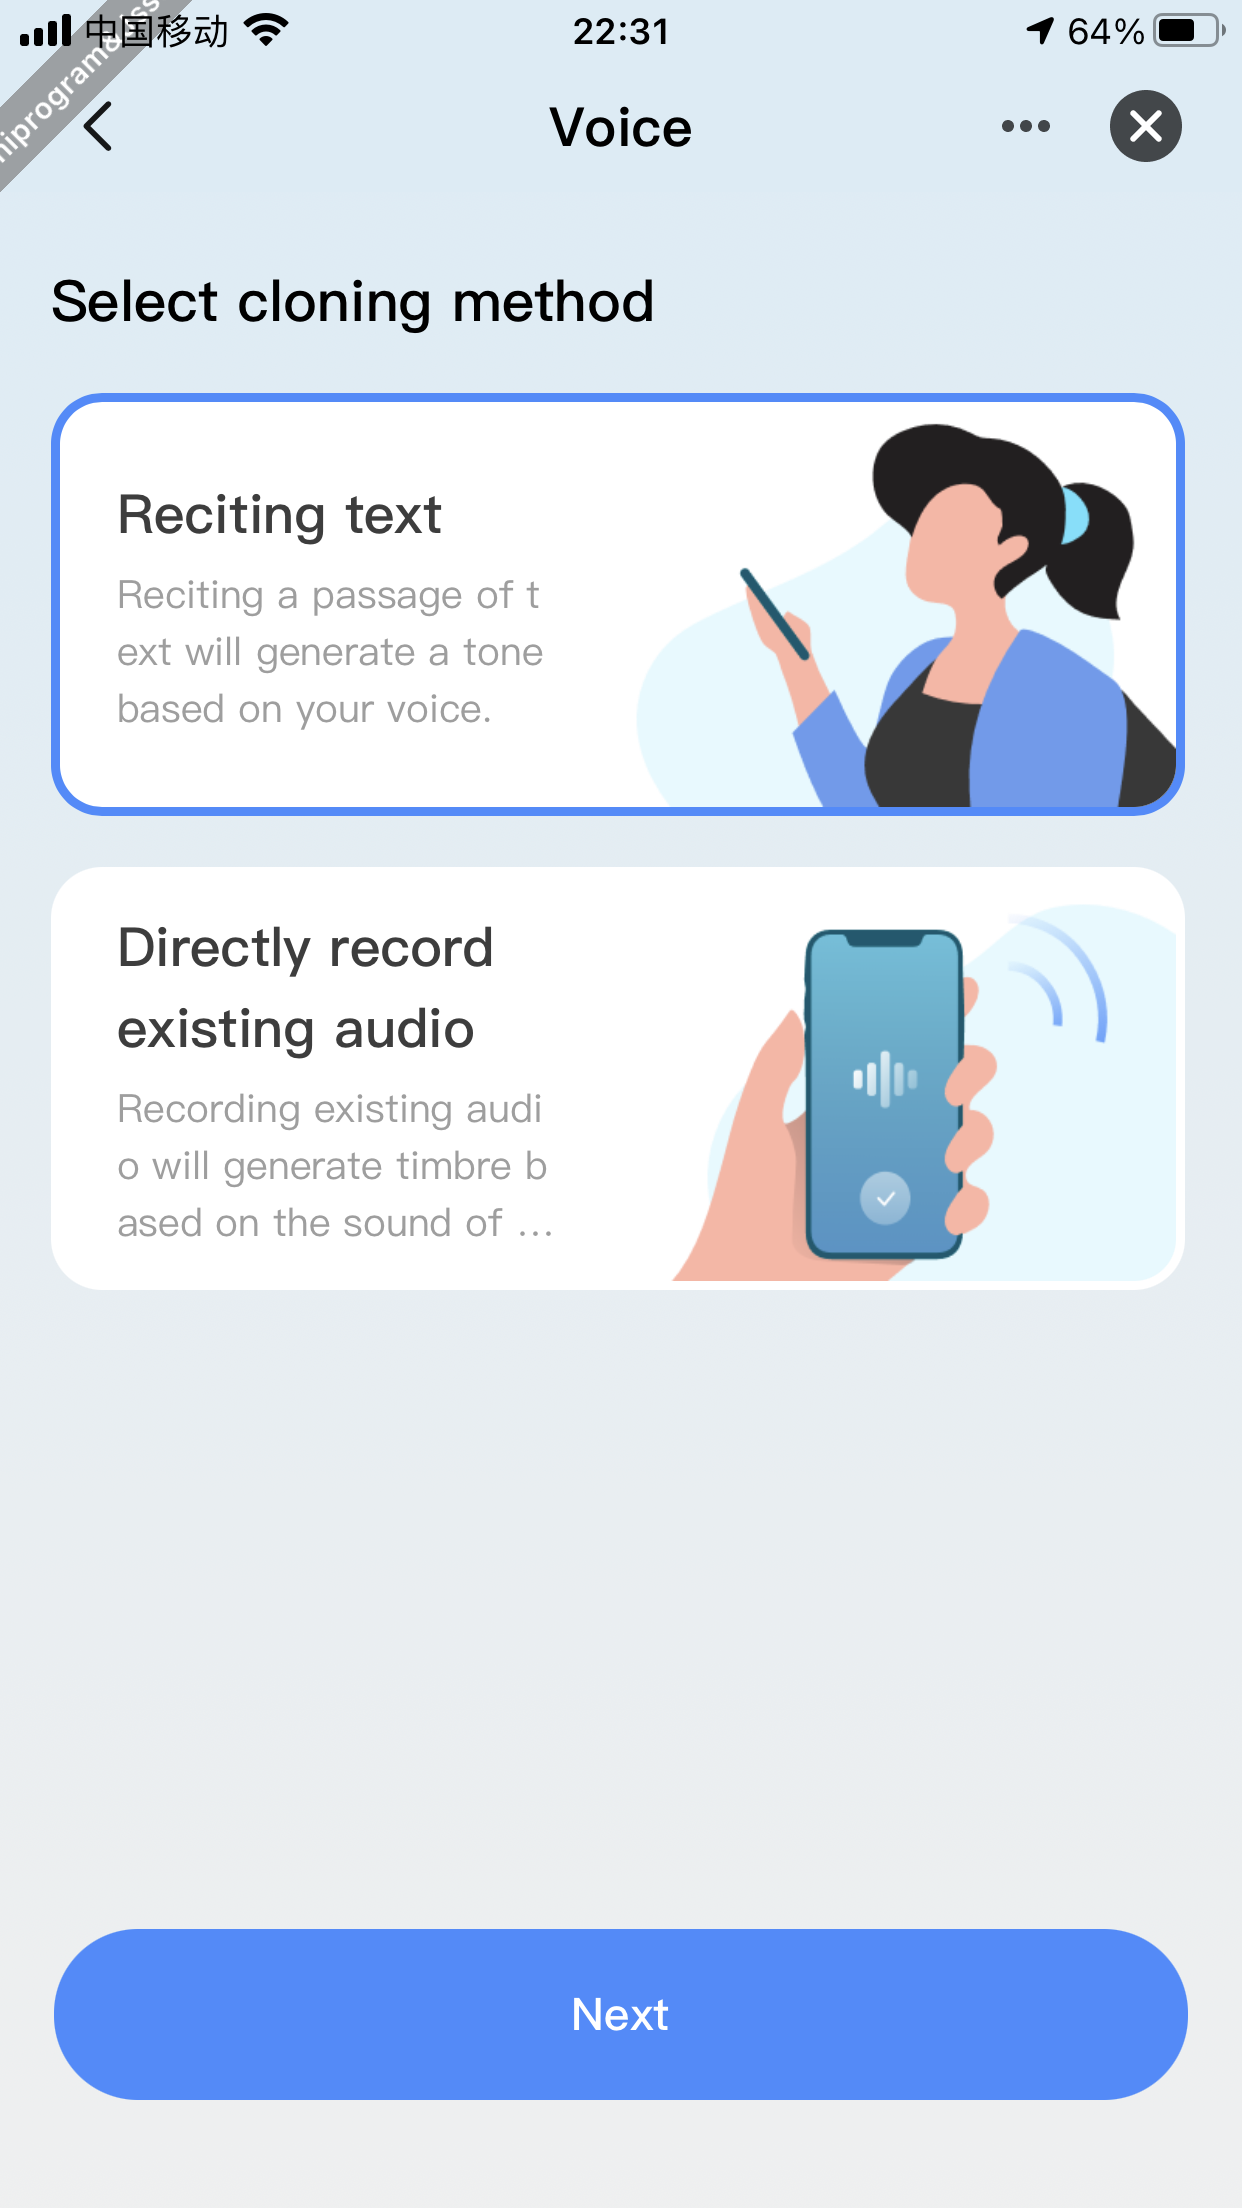
Users can view their cloned voice tones under the Me category. If no cloned voice tones are available, they can click Clone Voice to navigate to the voice tone cloning page and start cloning their unique voice tone. Clone voice tones in two ways:
- Clone by reciting text.
- Clone audio recorded on a phone.
Code snippet
// Get the recording capability set
const RecorderManager = ty.getRecorderManager({
  complete: () => {
    console.log("==complete");
  },
  success: (params: null) => {
    console.log("===success==getRecorderManager", params);
  },
  fail: (params: null) => {
    console.log("===fail==getRecorderManager", params);
  },
});

// Start recording
const startRecording = () => {
  RecorderManager.start({
    sampleRate: 32000,
    complete: () => {
      console.log("===startRecording==complete");
    },
    success: (params) => {
      // setFileData(params?.tempFilePath);
      setCloneState("recording");
      console.log("===startRecording==success", params);
    },
    fail: (params) => {
      console.log("===startRecording==fail", params);
      const { errorMsg } = params;
      ty.showToast({
        title: errorMsg,
        icon: "error",
      });
    },
  });
};

// Complete recording
const stopRecording = () => {
  RecorderManager.stop({
    complete: () => {
      console.log("===stopRecording==complete");
    },
    success: (params) => {
      ty.uploadImage({
        filePath: params?.tempFilePath,
        bizType: "voice_clone",
        contentType: "audio/mpeg",
        success: (params) => {
          const { publicUrl } = JSON.parse(params?.result);
          console.log("===uploadImage==success", params, publicUrl);
          setCloneState("update");
          ty.showToast({
            title: Strings.getLang("dsc_cloning_tips"),
            icon: "none",
            duration: 2000,
          });
          if (voiceId) {
            resetCloneVoice(
              voiceId,
              lang,
              publicUrl,
              cloneWay === "reciting"
                ? Strings.getLang("dsc_recording_text_content")
                : ""
            )
              .then(() => {
                checkCloneState();
              })
              .catch((error) => {
                console.log(error);
                checkCloneState();
              });
          } else {
            createCloneVoice(
              lang,
              publicUrl,
              cloneWay === "reciting"
                ? Strings.getLang("dsc_recording_text_content")
                : ""
              // 'Hello everyone, the sun is shining brightly today, and I am exceptionally cheerful.'
            )
              .then(() => {
                checkCloneState();
              })
              .catch(() => {
                checkCloneState();
              });
          }
        },
        fail: (params) => {
          console.log("===uploadImage==fail", params);
        },
      });
      setCloneState("update");
      console.log("===stopRecording==success", params);
    },
    fail: (params) => {
      console.log("===stopRecording==fail", params);
    },
  });
};
Clone by reciting text
Demonstration
Feature description
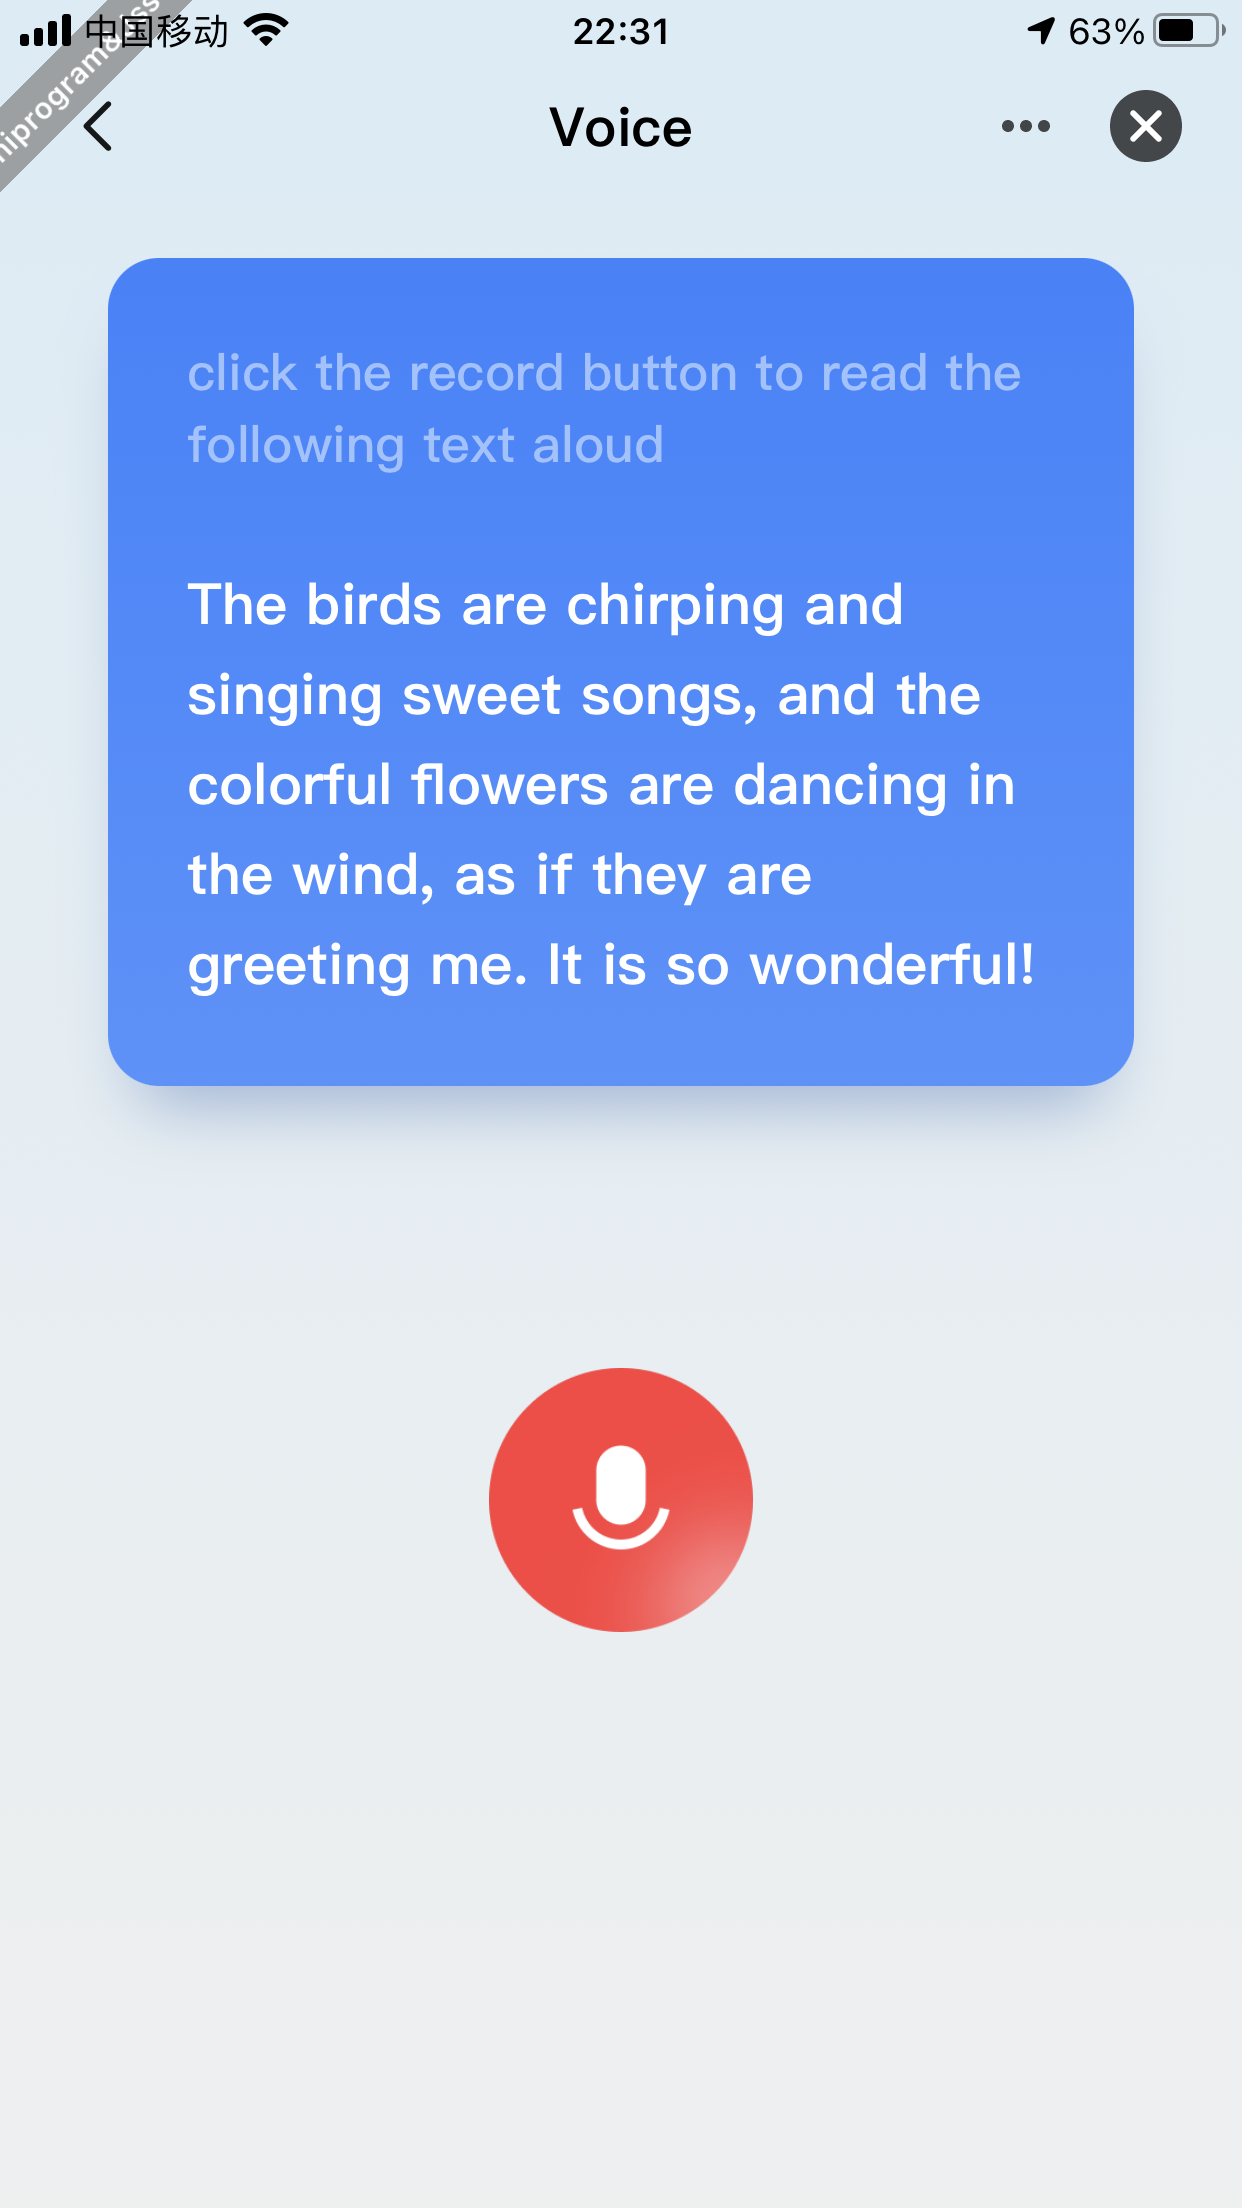
How it works:
- Users tap the panel to enter the voice cloning page and select Reciting text.
- Tap the record button and recite the specified text aloud. After the record button is tapped again, the cloning of the voice tone will begin.
- After completing the cloning process, users can view, switch, and edit the cloned voice tone in the voice tone list.
- After switching to the cloned voice tone, hold down the device's voice button to wake up the device and start a voice chat. At this point, the device can use the cloned voice tone to communicate with the user.
Record existing audio
Demonstration
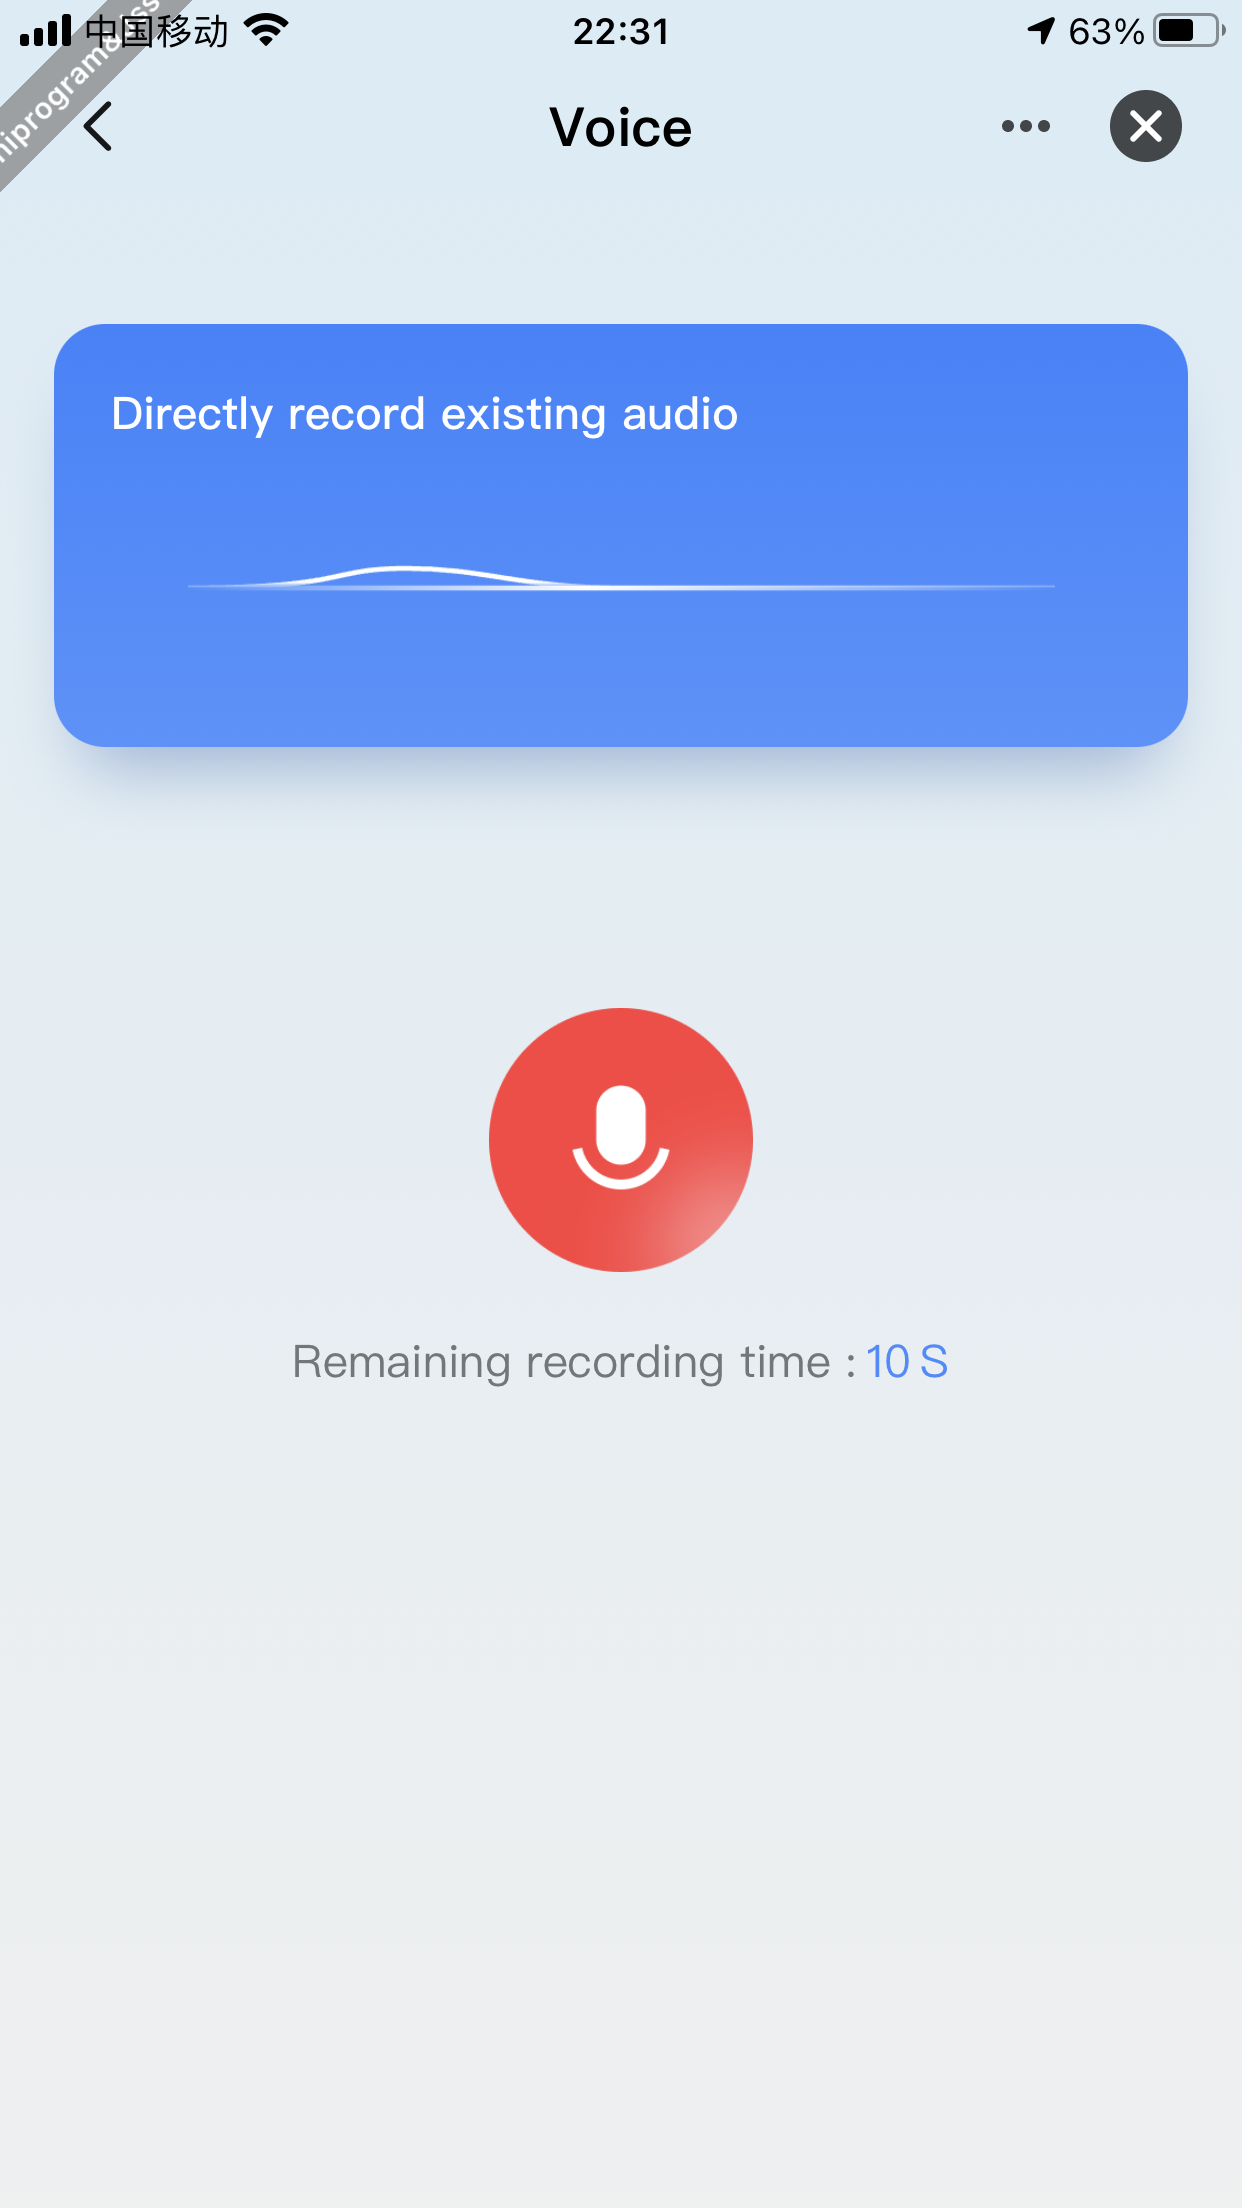
Feature description
- Users tap the panel to enter the voice cloning page and select Directly record existing audio.
- Tap the record button and play the existing audio (up to 15 seconds). After the record button is tapped again, the cloning of the voice tone will begin.
- After completing the cloning process, users can view, switch, and edit the cloned voice tone in the voice tone list.
- After switching to the cloned voice tone, hold down the device's voice button to wake up the device and start a voice chat. At this point, the device can use the cloned voice tone to communicate with the user.
Show voice tones on the Voice Tone Square
Feature description
The Voice Tone Square list shows the system's default voice tones. Users can select suitable voice tones from the square to empower the agent role. Users can filter the voice tones by category or search for desired ones.
Code snippet
// Get the list of cloned voice tones
export const getCloneVoiceList = async () => {
  try {
    const response = await getAITimbreCloneList({});
    return response;
  } catch (err) {
    return Promise.reject(err);
  }
};

// Get the list of standard voice tones
export const getStandardVoiceList = async (params: GetStandardVoiceParams) => {
  try {
    const response = await getAITimbreMarketList({
      devId: getDevInfo().devId,
      pageNo: params.pageNo,
      pageSize: params.pageSize,
      agentId: params.agentId,
      tag: params.tag,
      keyWord: params.keyWord,
    });
    return response;
  } catch (err) {
    return Promise.reject(err);
  }
};

// The request function of the voice tone list (including cloned voice tones).
const getVoiceListFunc = useCallback(
    (params: GetListParams) => {
      if (tag === 'mine') {
        return new Promise((resolve, reject) => {
          getCloneVoiceList()
            .then((res: VoiceRes) => {
              resolve({
                total: res?.length,
                list: res,
              });
            })
            .catch(error => {
              reject(error);
            });
        });
      }
      return new Promise((resolve, reject) => {
        getStandardVoiceList({
          pageNo: params.current,
          pageSize: params.pageSize,
          tag,
          agentId,
          keyWord: params.searchText,
        })
          .then((res: VoiceRes) => {
            const { totalPage, list } = res;
            resolve({
              total: totalPage,
              list,
            });
          })
          .catch(error => {
            reject(error);
          });
      });
    },
    [tag, agentId]
  );

// Manage requests of the voice tone list
  const { pagination, data, loading, run } = usePagination(
    ({ current, pageSize, searchText }) =>
      getVoiceListFunc({ current, pageSize, searchText }) as Promise<GetStandardVoice>,
    {
      manual: true,
    }
  );

  // Respond to lazy loading
  useEffect(() => {
    if (data?.list) {
      console.log('==data?.list', data?.list);

      pagination.current > 1
        ? dispatch(updateVoiceList([...data?.list]))
        : dispatch(initVoiceList([...data?.list]));
    }
  }, [data]);
Search for voice tones
Code snippet
// The request process for searching and querying the agent list is the same, with the difference being the [searchText] field. When getting the entire list, the [searchText] field is an empty string.
const { pagination, data, loading, run } = usePagination(
    ({ current, pageSize, searchText }) =>
      getVoiceListFunc({ current, pageSize, searchText }) as Promise<GetStandardVoice>,
    {
      manual: true,
    }
  );
Switch voice tones
Code snippet
// Switch voice tones (edit agent details)
export const editAgentInfo = async (params: any) => {
  try {
    const response = await updateAIAgent({
      devId: getDevInfo().devId,
      ...params,
    });
    return response;
  } catch (err) {
    return Promise.reject(err);
  }
};

const handleItemChecked = (idKey: string) => {
    ty.showLoading({
      title: '',
    });
    const { speed, tone, lang, keepChat, isMain } = agentInfo;
    editAgentInfo({ ...agentInfo, endpointAgentId, voiceId: idKey })
      .then(async res => {
        if (res) {
          setTimeout(async () => {
            const agentCloudInfo = (await getAgentInfo(Number(endpointAgentId))) as AgentInfo;
            dispatch(
              updateAgentInfo({ ...agentCloudInfo, endpointAgentId: Number(endpointAgentId) })
            );
            ty.hideLoading();
            ty.showToast({
              title: Strings.getLang('dsc_choose_success'),
              icon: 'success',
            });
          }, 500);
        }
        setTimeout(() => {
          ty.hideLoading();
        }, 3000);
      })
      .catch(() => {
        setTimeout(() => {
          ty.hideLoading();
          ty.showToast({
            title: Strings.getLang('dsc_choose_fail'),
            icon: 'error',
          });
        }, 1000);
      });
  };
Edit voice tones
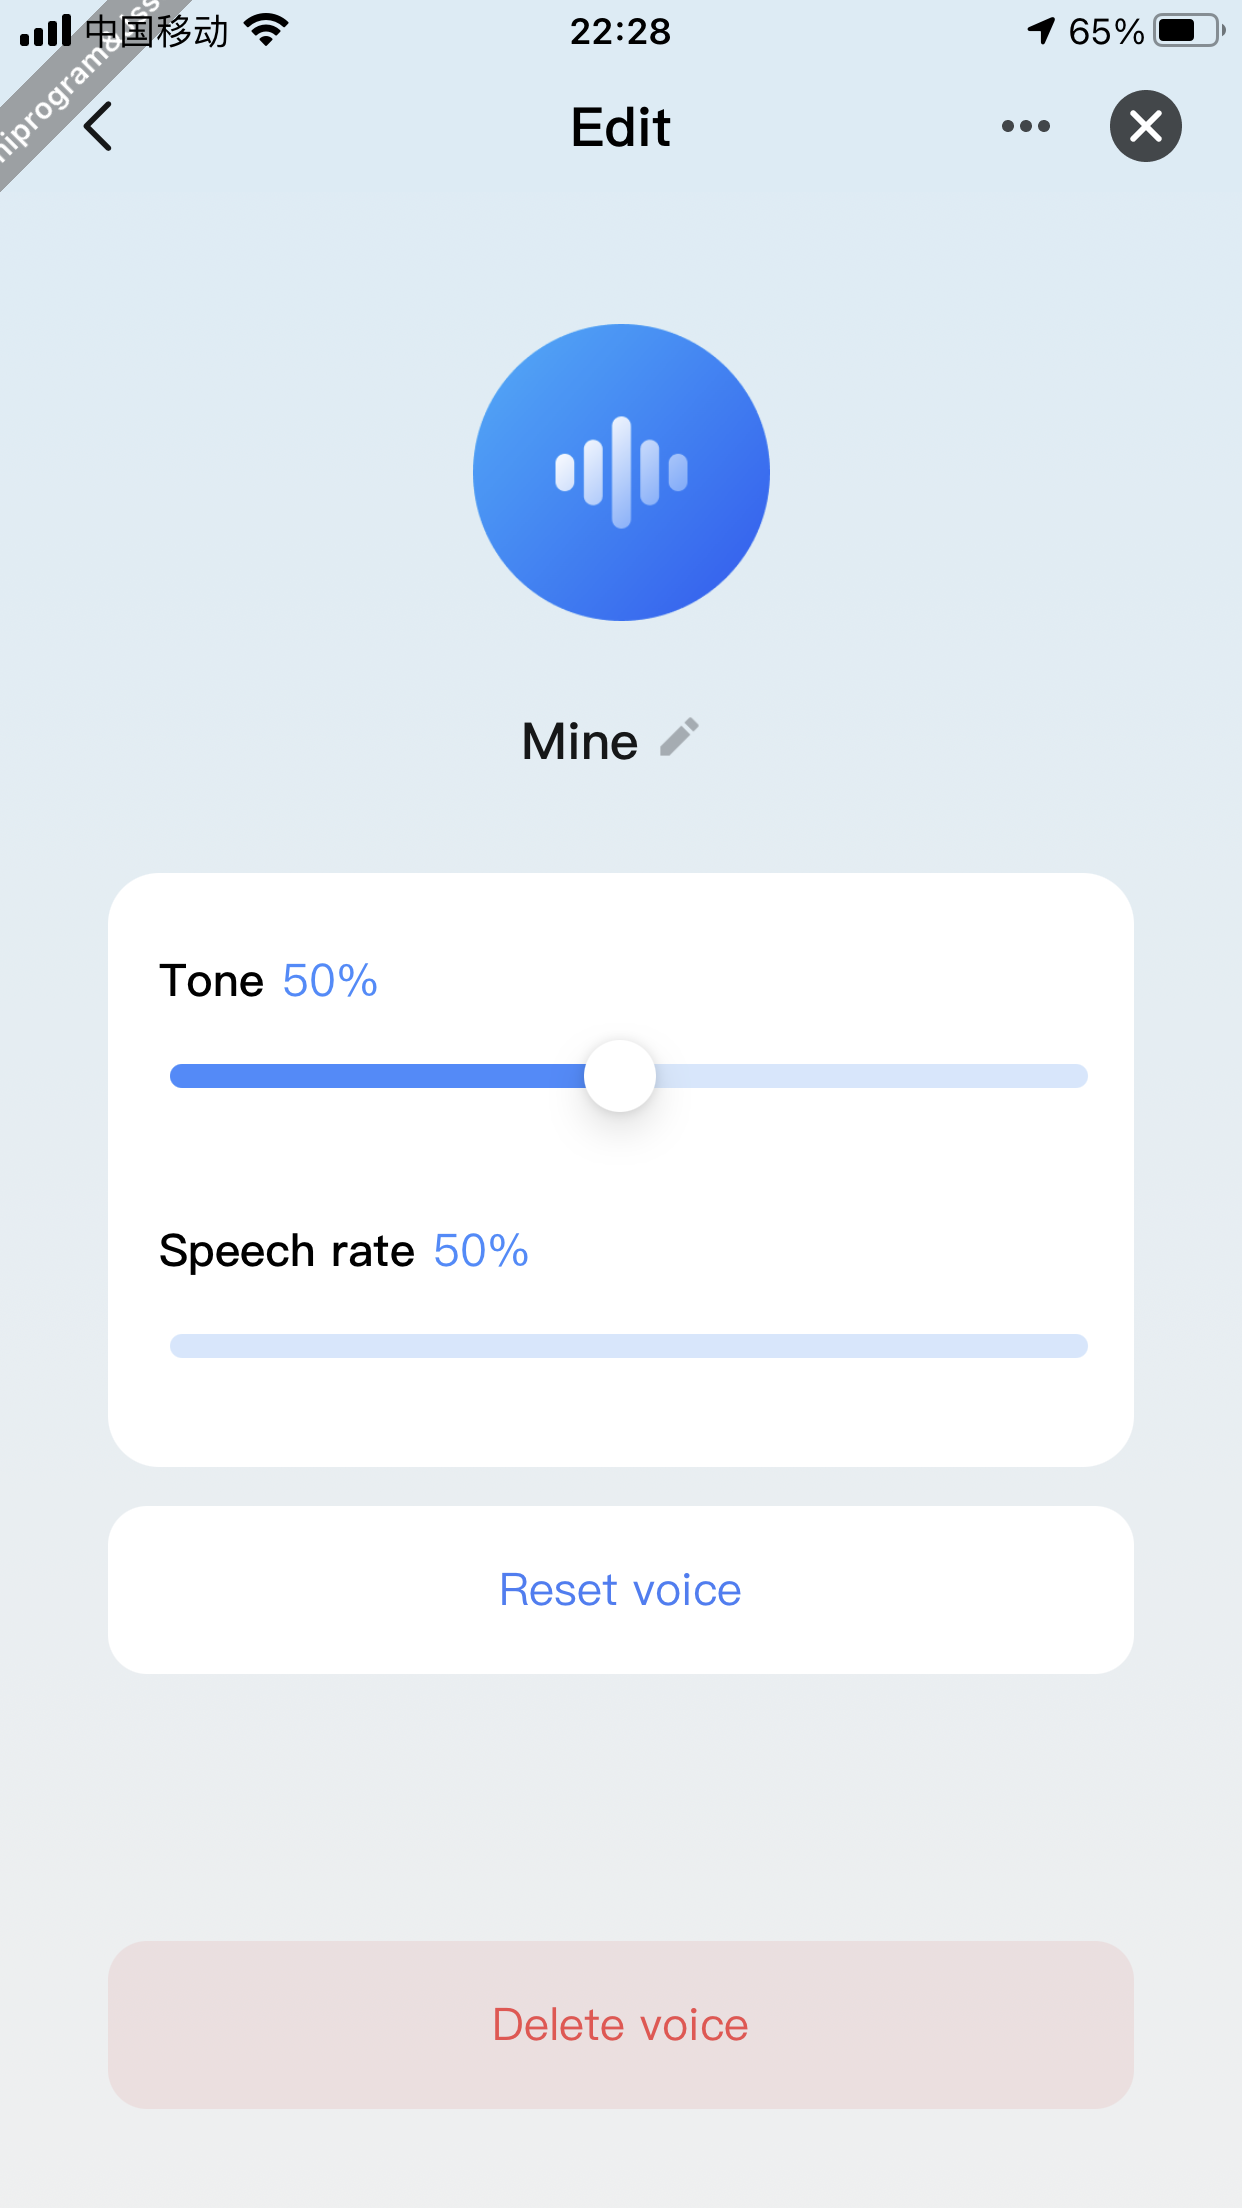
Page description
This page is used to edit specific details of a voice tone. Regarding voice tones in the Voice Tone Square, their pitch and speed can be modified on this page. Regarding cloned voice tones, additional functionalities are supported, such as modifying pitch, speed, re-cloning, and deleting them.
Edit pitch and speed
Code snippet
// Edit agent details (pitch and speech are part of the agent detail information).
export const editAgentInfo = async (params: any) => {
  try {
    const response = await updateAIAgent({
      devId: getDevInfo().devId,
      ...params,
    });
    return response;
  } catch (err) {
    return Promise.reject(err);
  }
};

const onChangeToneOrSpeed = (typeKey: 'speed' | 'tone', value: number) => {
    ty.showLoading({
      title: '',
    });
    editAgentInfo({ ...agentInfo, [typeKey]: value, endpointAgentId })
      .then(async () => {
        setTimeout(async () => {
          const agentInfo = (await getAgentInfo(Number(endpointAgentId))) as AgentInfo;
          dispatch(updateAgentInfo({ ...agentInfo, endpointAgentId: Number(endpointAgentId) }));
        }, 300);
        ty.hideLoading();
        ty.showToast({
          title: Strings.getLang('dsc_edit_success'),
          icon: 'success',
        });
      })
      .catch(() => {
        ty.hideLoading();
        ty.showToast({
          title: Strings.getLang('dsc_edit_fail'),
          icon: 'error',
        });
      });
  };
Delete cloned voice tones
Code snippet
// Delete cloned voice tones

import { deleteAITimbreClone } from "@ray-js/ray";

export const deleteCloneVoice = async (voiceId: string) => {
  try {
    const response = await deleteAITimbreClone({
      voiceId,
      devId: getDevInfo().devId,
    });
    return response;
  } catch (err) {
    return Promise.reject(err);
  }
};

deleteCloneVoice(voiceId)
  .then(() => {
    ty.hideLoading();
    ty.showToast({
      title: Strings.getLang("dsc_delete_success"),
      icon: "success",
    });
    emitter.emit("refreshVoiceData", "");
    setTimeout(() => {
      router.back();
    }, 300);
  })
  .catch(() => {
    ty.hideLoading();
    ty.showToast({
      title: Strings.getLang("dsc_delete_fail"),
      icon: "error",
    });
  });
Reset a cloned voice tone
Code snippet
// Resetting a cloned voice tone primarily focuses on the resetCloneVoice method. Other processes are the same as adding a cloned voice tone.

import { updateAITimbreClone } from "@ray-js/ray";

// Reset a cloned voice tone
export const resetCloneVoice = async (
  voiceId: string,
  lang: string,
  voiceUrl: string,
  text: string
) => {
  try {
    const response = await updateAITimbreClone({
      devId: getDevInfo().devId,
      voiceId,
      lang,
      voiceUrl,
      text,
    });
    return response;
  } catch (err) {
    return Promise.reject(err);
  }
};

const stopRecording = () => {
  RecorderManager.stop({
    complete: () => {
      console.log("===stopRecording==complete");
    },
    success: (params) => {
      ty.uploadImage({
        filePath: params?.tempFilePath,
        bizType: "voice_clone",
        contentType: "audio/mpeg",
        success: (params) => {
          const { publicUrl } = JSON.parse(params?.result);
          console.log("===uploadImage==success", params, publicUrl);
          setCloneState("update");
          ty.showToast({
            title: Strings.getLang("dsc_cloning_tips"),
            icon: "none",
            duration: 2000,
          });
          if (voiceId) {
            resetCloneVoice(
              voiceId,
              lang,
              publicUrl,
              cloneWay === "reciting"
                ? Strings.getLang("dsc_recording_text_content")
                : ""
            )
              .then(() => {
                checkCloneState();
              })
              .catch((error) => {
                console.log(error);
                checkCloneState();
              });
          } else {
            createCloneVoice(
              lang,
              publicUrl,
              cloneWay === "reciting"
                ? Strings.getLang("dsc_recording_text_content")
                : ""
              // 'Hello everyone, the sun is shining brightly today, and I am exceptionally cheerful.'
            )
              .then(() => {
                checkCloneState();
              })
              .catch(() => {
                checkCloneState();
              });
          }
        },
        fail: (params) => {
          console.log("===uploadImage==fail", params);
        },
      });
      setCloneState("update");
      console.log("===stopRecording==success", params);
    },
    fail: (params) => {
      console.log("===stopRecording==fail", params);
    },
  });
};
- Congrats! 🎉You have finished learning this guide.
- If you have any problem during the development, you can contact Tuya's Smart MiniApp team for troubleshooting.