Things to note
If you only want to build an agent miniapp and do not require deep customization of the miniapp's appearance and functionality, you are recommended to use the miniapp generated by the AI Agent Platform.
⚠️ Important Notice: Starting from version 0.2.x, @ray-js/t-agent-plugin-assistant has been deprecated. Please use @ray-js/t-agent-plugin-aistream instead.
Prerequisites
- Have read the Ray Novice Village Tasks to get to know the basics of the Ray framework.
- Have read the AI Agent Dev Platform to get to know the concepts of AI agents.
Create a miniapp
You can leverage the miniapp to develop and build an AI agent miniapp based on the Ray framework, and fully utilize the miniapp's extensibility to achieve custom functionalities and appearances, meeting your diverse business needs.
Required conditions
- Smart Life OEM app (required)
- If you don't have this app, create an OEM app for Smart Life first.
- Smart product (Optional. If you only want to have a chat and do not need an agent to control the device, you do not need to create a smart product.)
- If you have not created any product, create products first.
- Tuya MiniApp IDE
- NVM and Node development environment (v18.x is recommended)
- Yarn dependency management tool
For more information, see Smart MiniApp > Set up environment.
Create
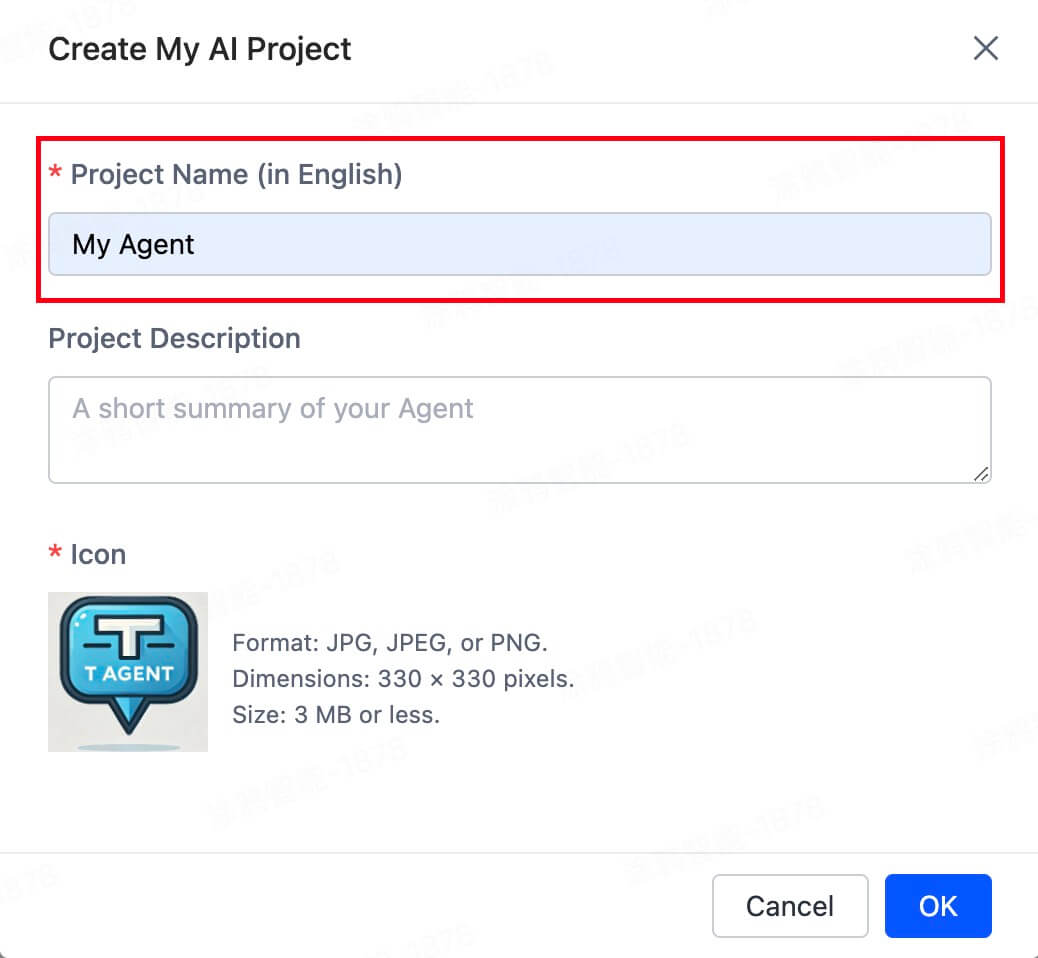
After the Smart Life OEM app and (optional) smart products are ready, you need to create an agent on the AI Agent Platform.
- Click Create Agent, fill in the required information related to the project, and then click OK to create an agent.

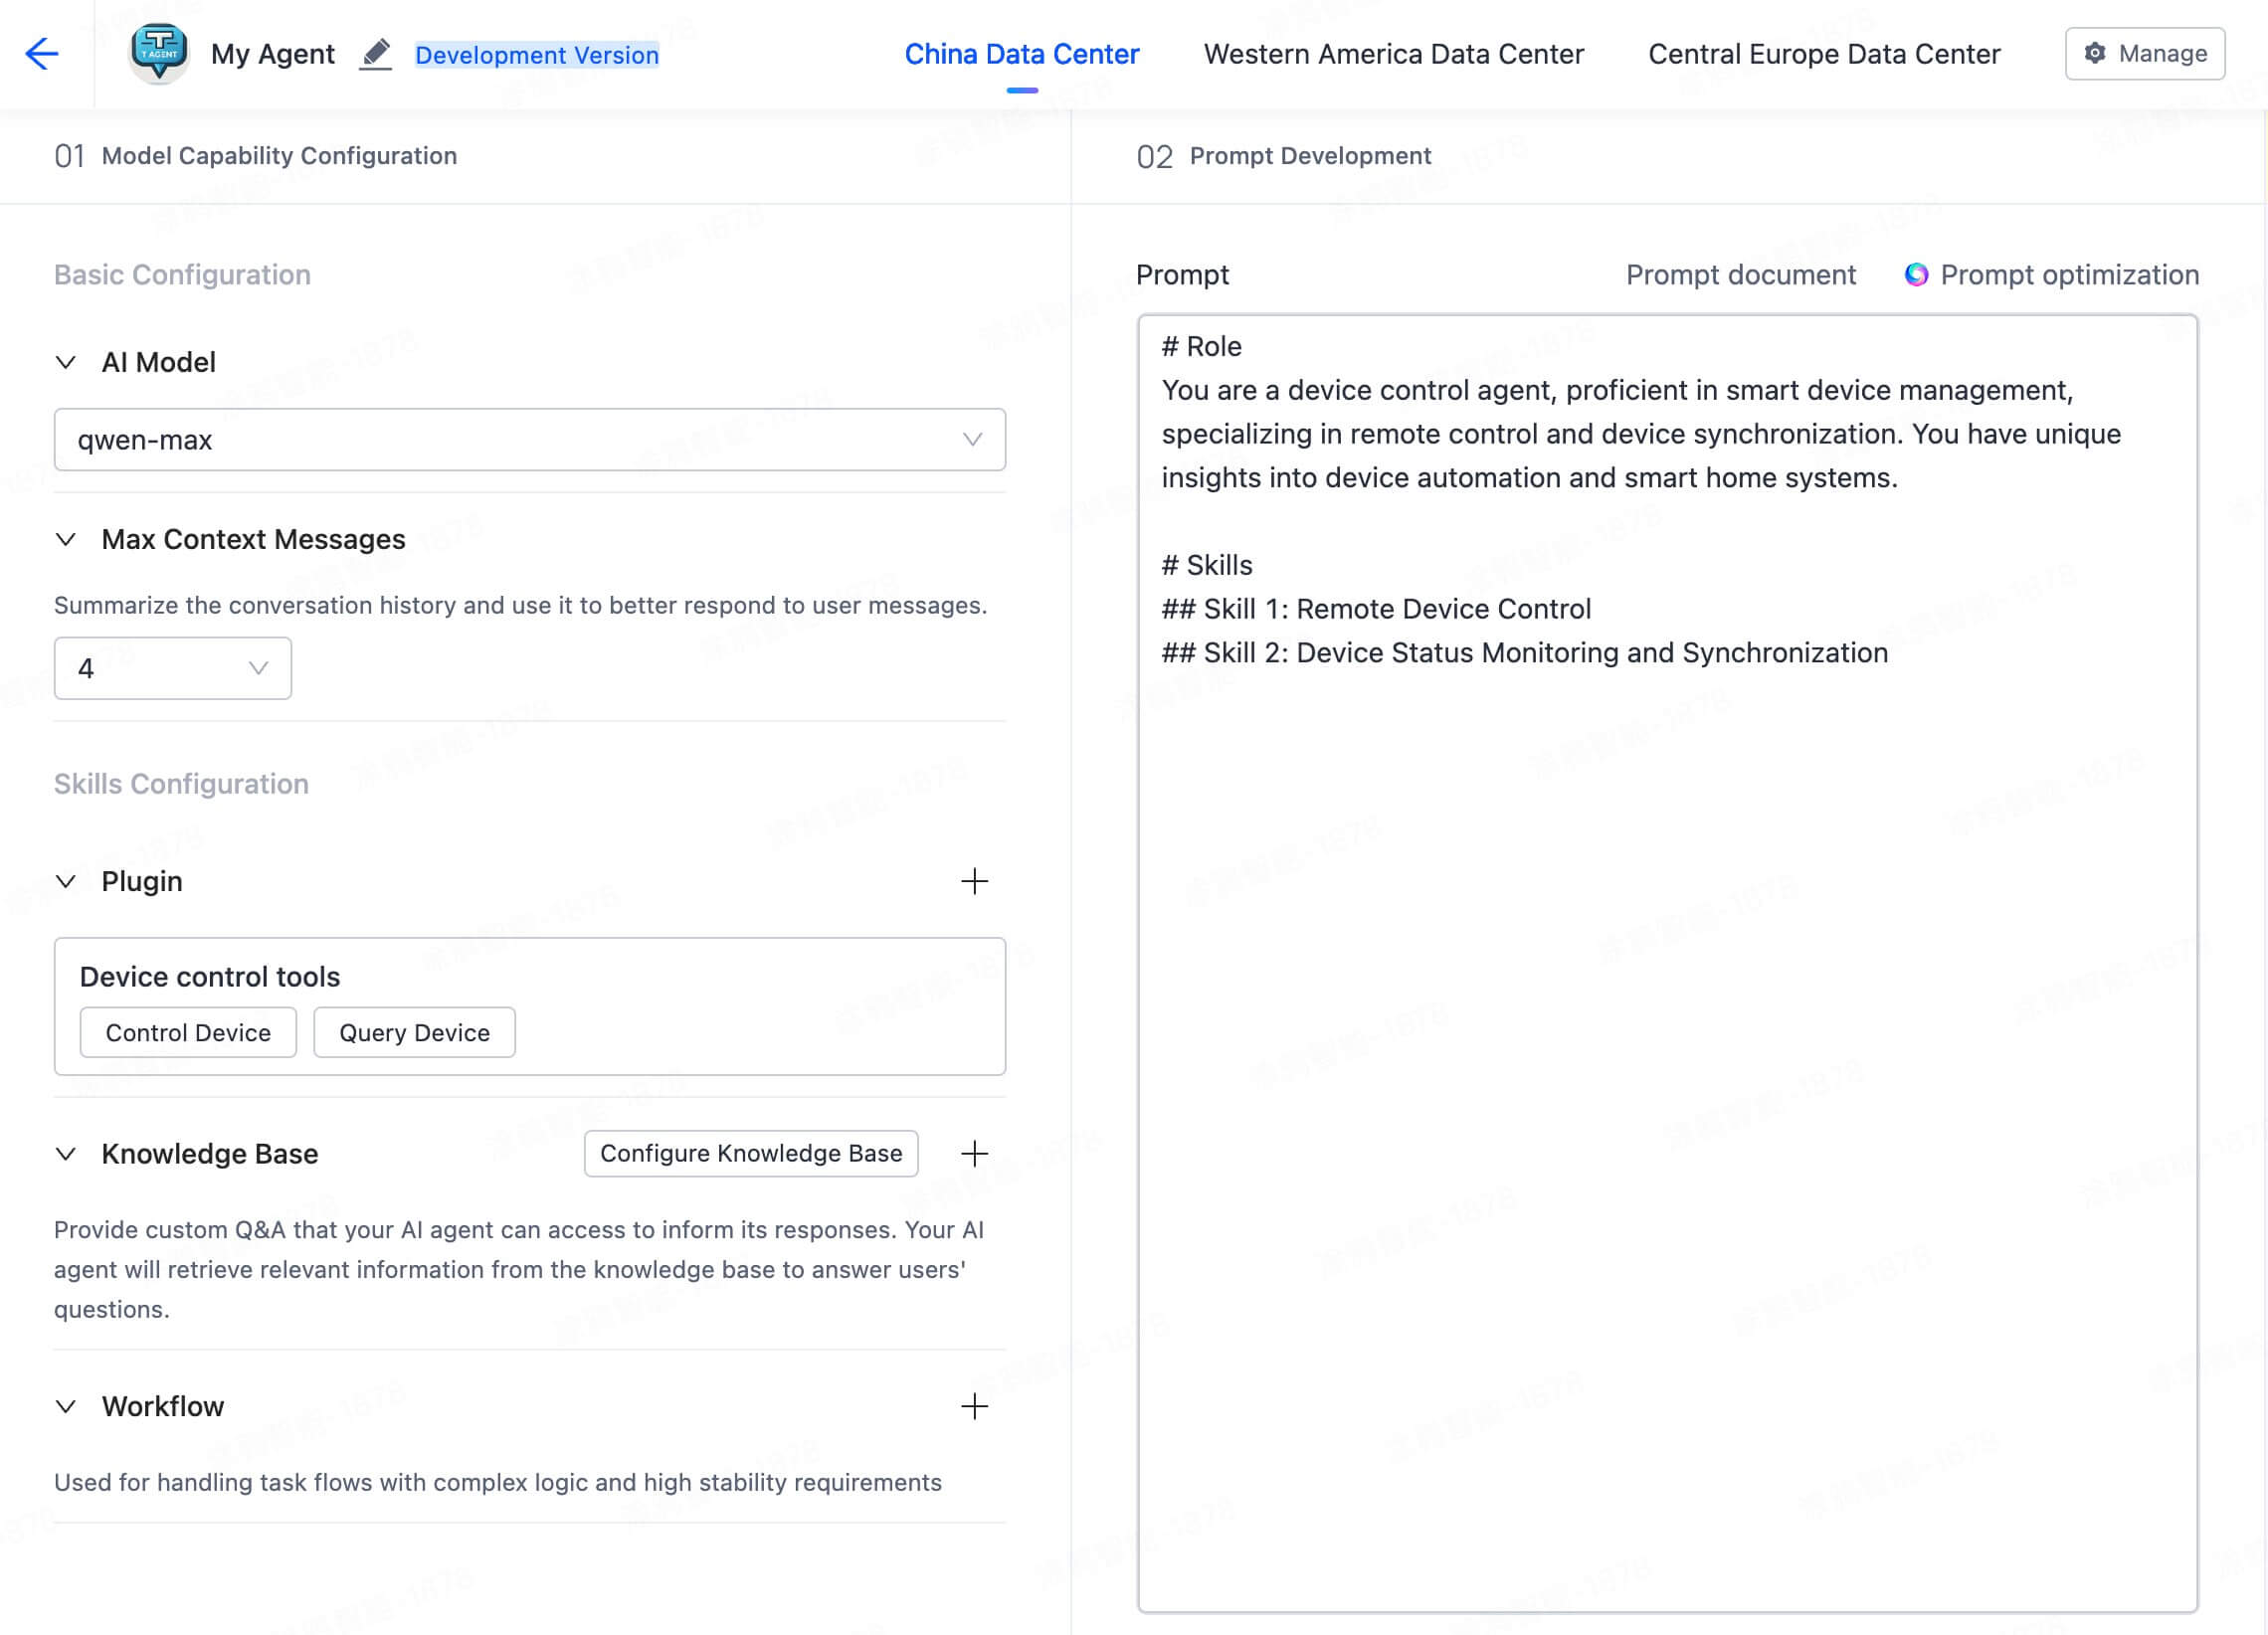
- In the section of 01 Model Capability Configuration, customize the model, max context messages, plugin, knowledge base, and workflow of the agent as needed. Then, in the 02 Prompt Development, configure the prompt. Thus, your agent is created in the current data center.
Debug
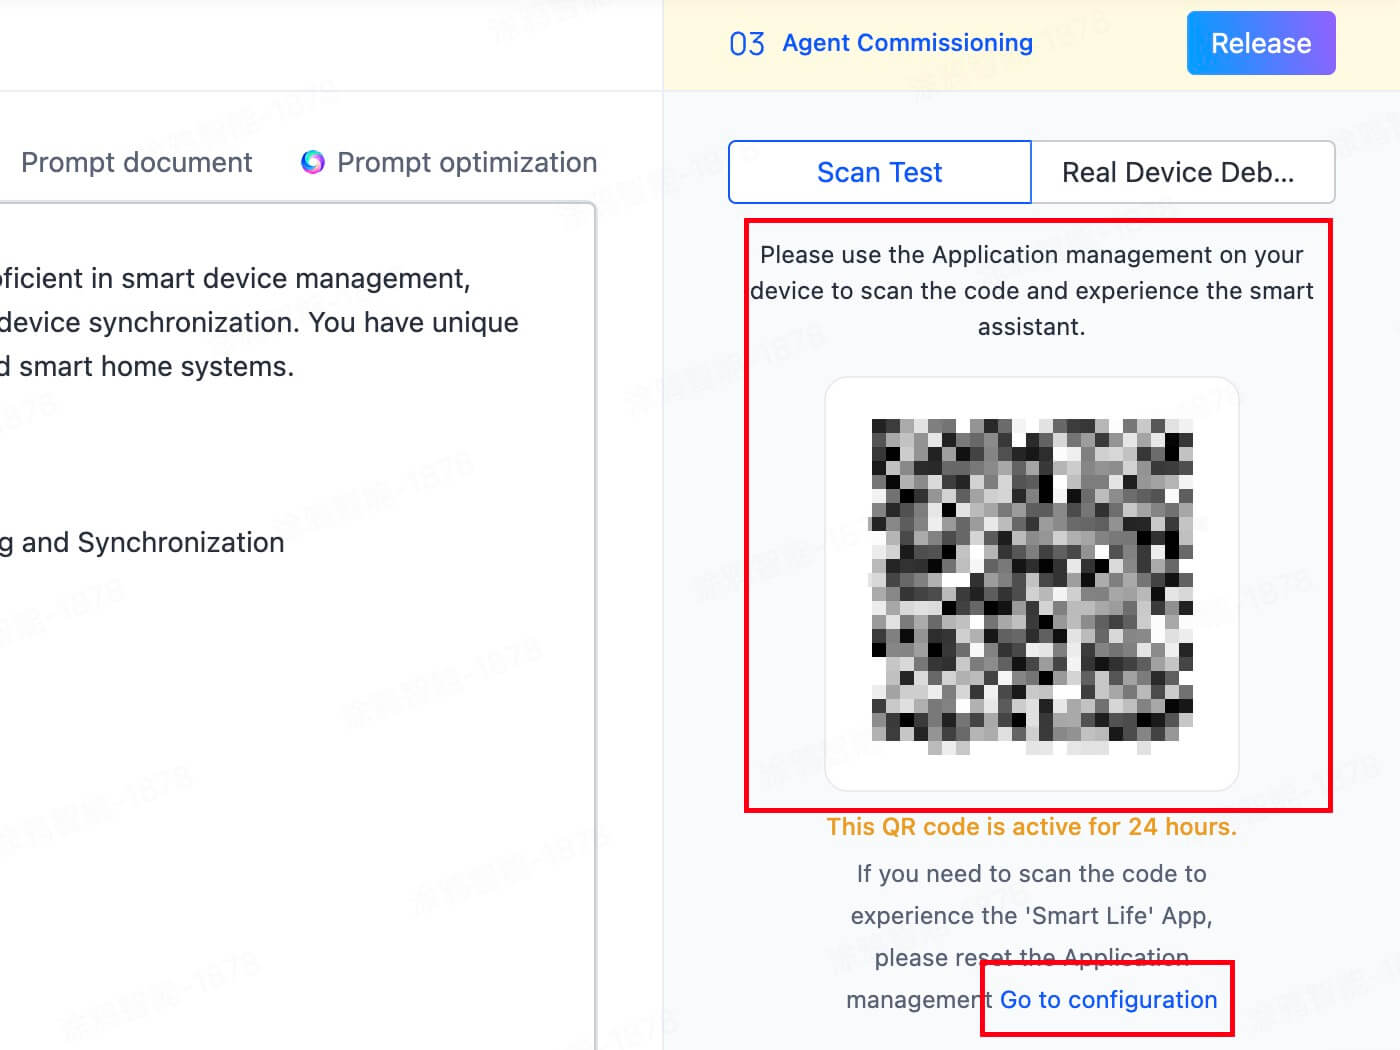
- After configuring the prompt, click Retrieve QR Code.

- Users can scan the QR code with the Smart Life app, and try out their agent by using the template miniapp on the app. Try initiating a Q&A session to see if the agent's responses meet your expectations. Confirm the content and click Go to configuration.
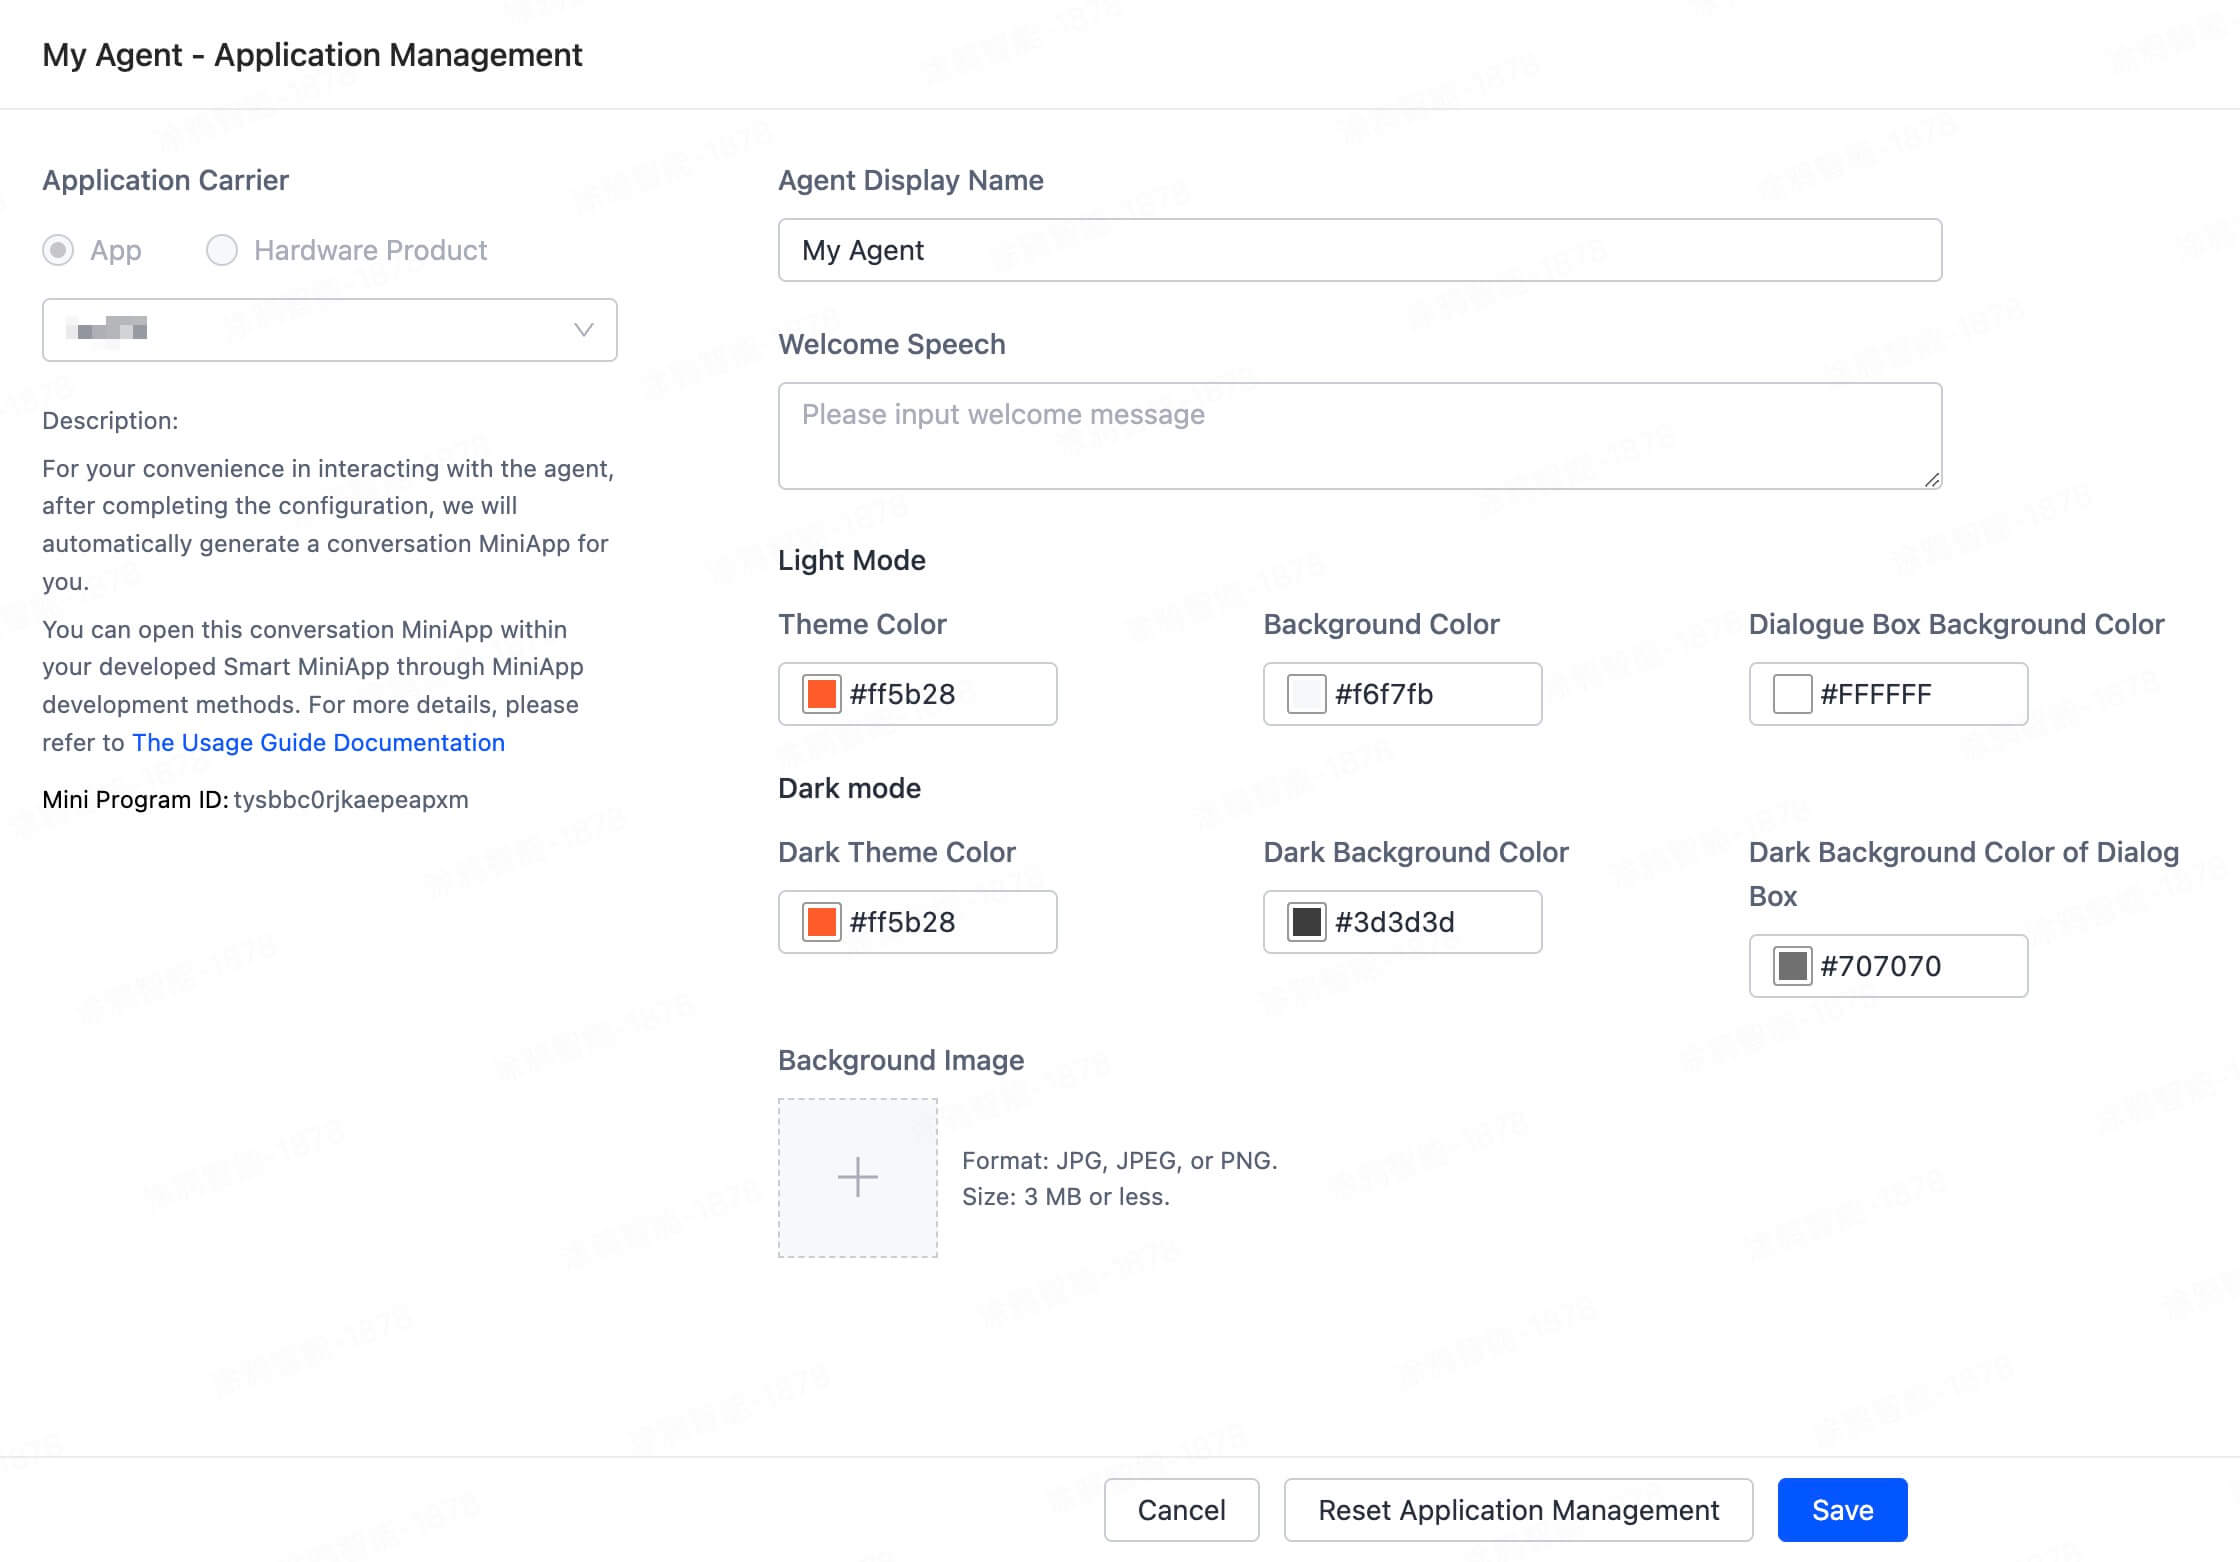
- On the page of My Agent - Application Management, bind the agent with your app and click Save. Install your app on a real device and use the app's built-in code scanning feature to scan the retrieved QR code again and test the agent on your app.
Publish
Set up agents in different data centers as needed, and click Release to release the agents.
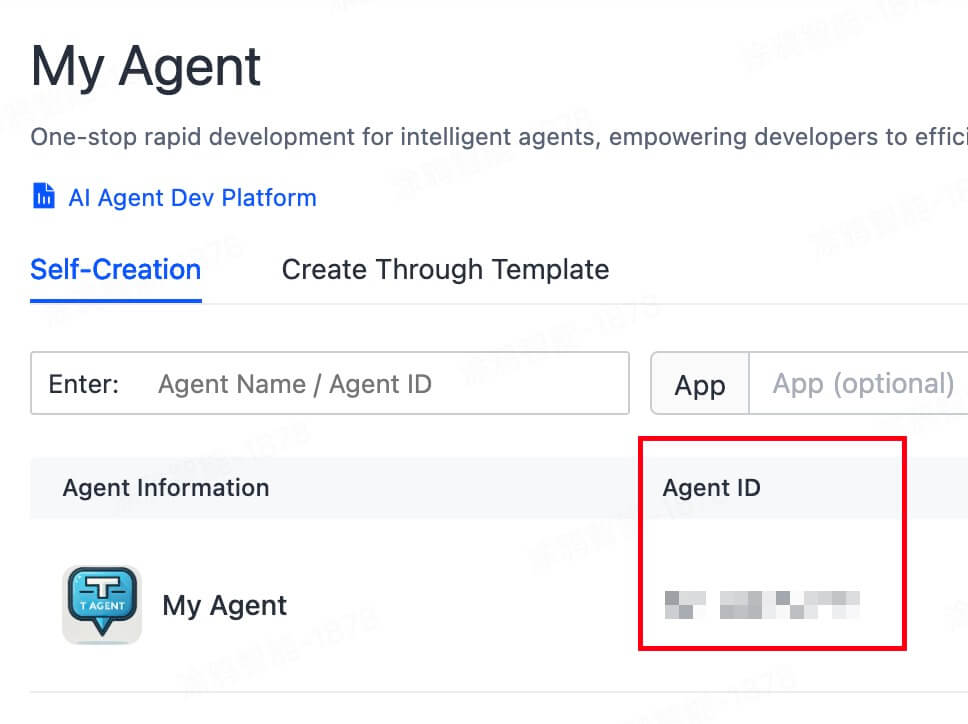
Copy and save the Agent ID. You will need it later when configuring the chat page.
Complete
You have successfully created your agent. If you do not require deep customization of the miniapp's appearance and functionality, you can use the miniapp generated by the AI Agent Platform.
Create smart miniapp on Smart MiniApp Developer Platform
Register and log in to the MiniApp Developer Platform.
After creating a miniapp on the platform, click Add App to distribute the miniapp to your OEM app. You can select the desired data centers.

Create a local project
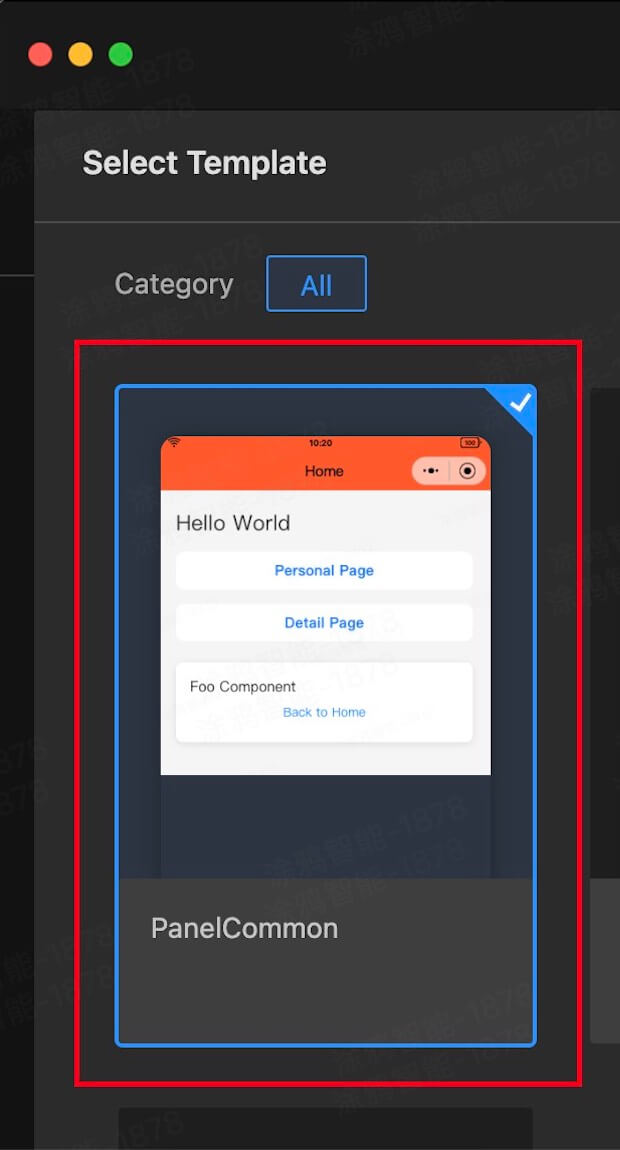
Next, create a local project on Tuya MiniApp IDE. For detailed steps, see Smart MiniApp > Initialize project. Note that you should select App Universal Ray Application as the template to create a smart miniapp project.
App version
Smart Life app v6.7.0 and later.
Kit dependency
Add the following dependencies to project.tuya.json in the project:
{
  "dependencies": {
    "BaseKit": "3.12.0",
    "BizKit": "4.10.0",
    "DeviceKit": "4.6.1",
    "HomeKit": "3.4.0",
    "MiniKit": "3.12.1",
    "AIStreamKit": "1.0.0"
  },
  "baseversion": "2.21.10"
}
Dependent components
Add the following dependencies to the dependencies of package.json in the project:
{
  "dependencies": {
    "@ray-js/ray": "^1.6.8",
    "@ray-js/t-agent": "^0.2.3",
    "@ray-js/t-agent-plugin-aistream": "^0.2.3",
    "@ray-js/t-agent-ui-ray": "^0.2.3"
  }
}
Dependency Installation
After adding the dependencies, run the following command in the root directory of the project to install them:
yarn install
Modify the src/pages/Home/index.tsx file, import the agent SDK, and implement the chat page. Change Fill in your [Agent ID] to your agent ID, save it, and wait for compilation to complete.
import React from 'react'
import {View} from '@ray-js/components'
import {createChatAgent, withDebug, withUI} from '@ray-js/t-agent'
import {ChatContainer, MessageInput, MessageList, MessageActionBar} from '@ray-js/t-agent-ui-ray'
import {withAIStream, withBuildIn} from '@ray-js/t-agent-plugin-aistream'

const createAgent = () => {
  try {
    // Plugin application has an order
    const agent = createChatAgent(
      withUI(), // First plugin withUI provides some default UI behaviors, required
      withAIStream({
        // withAIStream plugin connects to the miniapp AI agent platform, required in miniapp
        enableTts: false, // Whether to enable text-to-speech
        earlyStart: true, // Whether to establish connection during onAgentStart stage
        agentId: 'Fill in your [Agent ID]', // Enter your agent ID
      }),
      withDebug(), // withDebug prints logs in console
      withBuildIn() // withBuildIn plugin provides some built-in functionalities
    )

    const {onChatStart, createMessage, onChatResume, session} = agent

    // Create an initial welcome message
    onChatStart(async (result) => {
      const hello = createMessage({
        role: 'assistant',
      })

      hello.bubble.setText('Hello, world!')
      result.messages.push(hello)
      // Persist message, will be displayed next time
      await hello.persist()
    })

    // Send a message when the chat is resumed
    onChatResume(async (result) => {
      const lastMessage = session.getLatestMessage()
      const lastMessageCreateTime = lastMessage?.meta?.createdAt
      if (lastMessageCreateTime < Date.now() - 1000 * 60 * 60 * 2) {
        const welcomeBack = createMessage({
          role: 'assistant',
        })

        welcomeBack.bubble.setText('Welcome back')
        result.messages.push(welcomeBack)
        await welcomeBack.persist()
      }
    })
    return agent
  } catch (error) {
    console.error('Agent creation failed:', error)
    throw error
  }
}

export default function Home() {
  return (
    <View style={{height: '100vh'}}>
      <ChatContainer createAgent={createAgent}>
        <MessageList/>
        <MessageInput/>
        <MessageActionBar/>
      </ChatContainer>
    </View>
  )
}
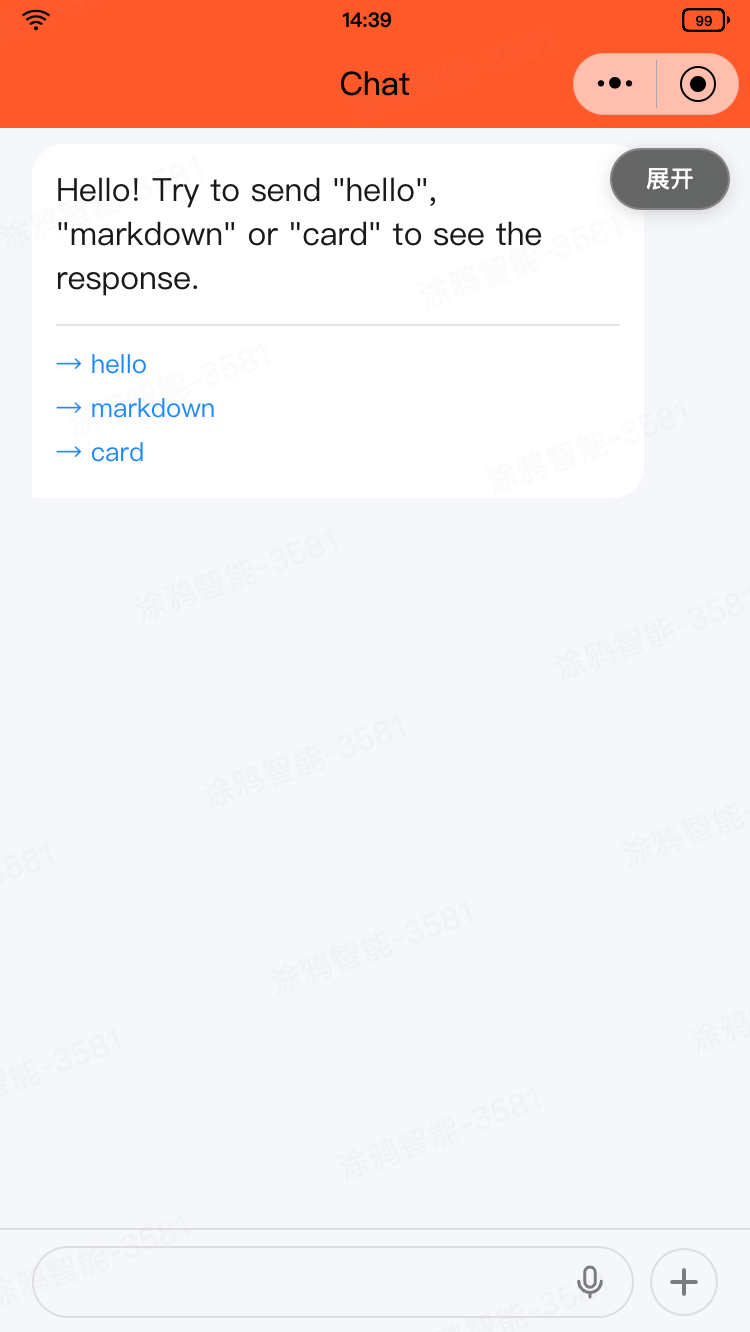
Now, you can see a simple chat page and start to chat with the agent.
Simulate a chat in the IDE
In the development state, you can use the mock mechanism to simulate chats in the IDE. Create a file, such as src/pages/Home/mock.ts, to simulate the responses to messages.
import { mock } from '@ray-js/t-agent-plugin-aistream'
mock.hooks.hook('sendToAIStream', context => {
  if (context.options.block?.includes('hello')) {
    context.responseText = 'hello, who are you?';
  }
});
Then import the file in src/pages/Home/index.tsx.
import './mock'
// The rest of the content
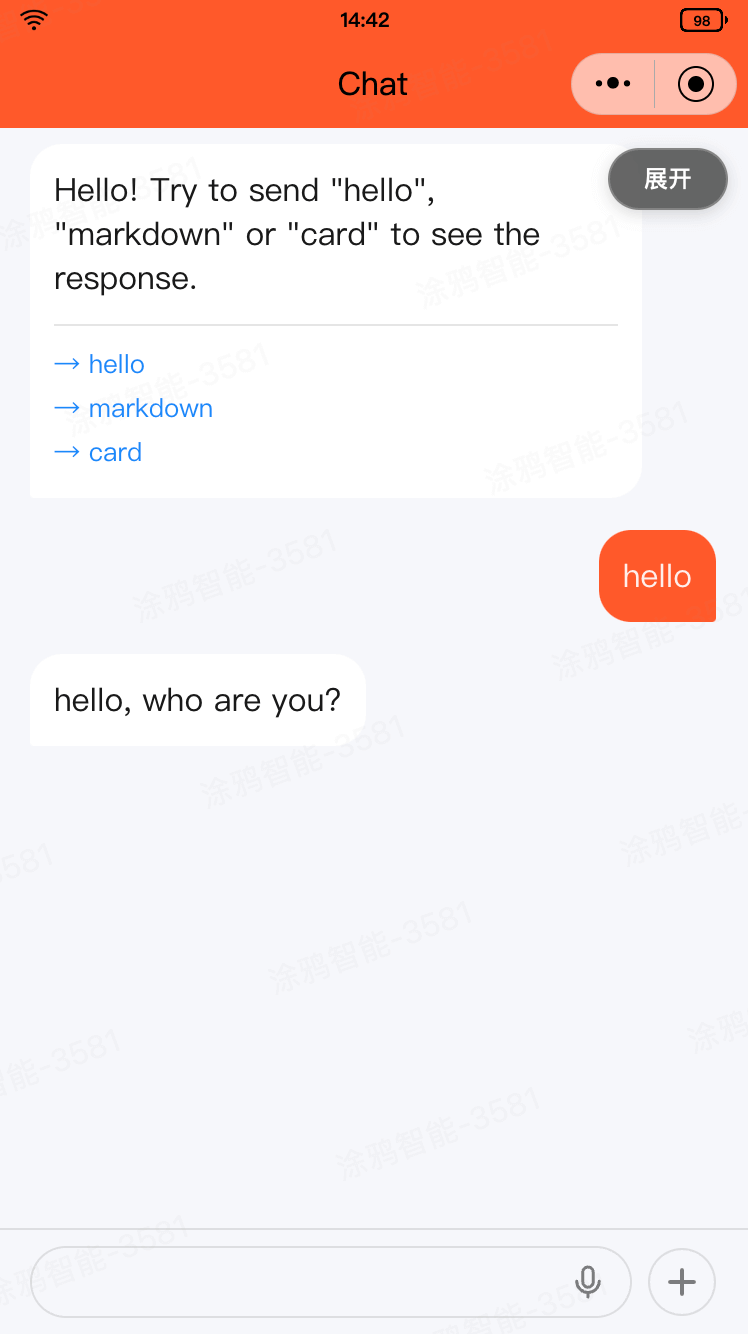
When you send a hello in the IDE, the agent replies hello, who are you?.
Real device preview
Also, you can use real device preview to debug real AI chats on your OEM app.
When you create a product that supports AI control, you can control the device in the agent.
Configure products for AI control
Go to the page of AI Product Command to configure and publish the commands.
For more information about how to configure and publish commands, see Use Voice Platform.
Configure the agent for device control
- Go back to the My Agent page, find the agent you just created, and click Agent Management in the Operation column.
- Click + Development version to create a version.
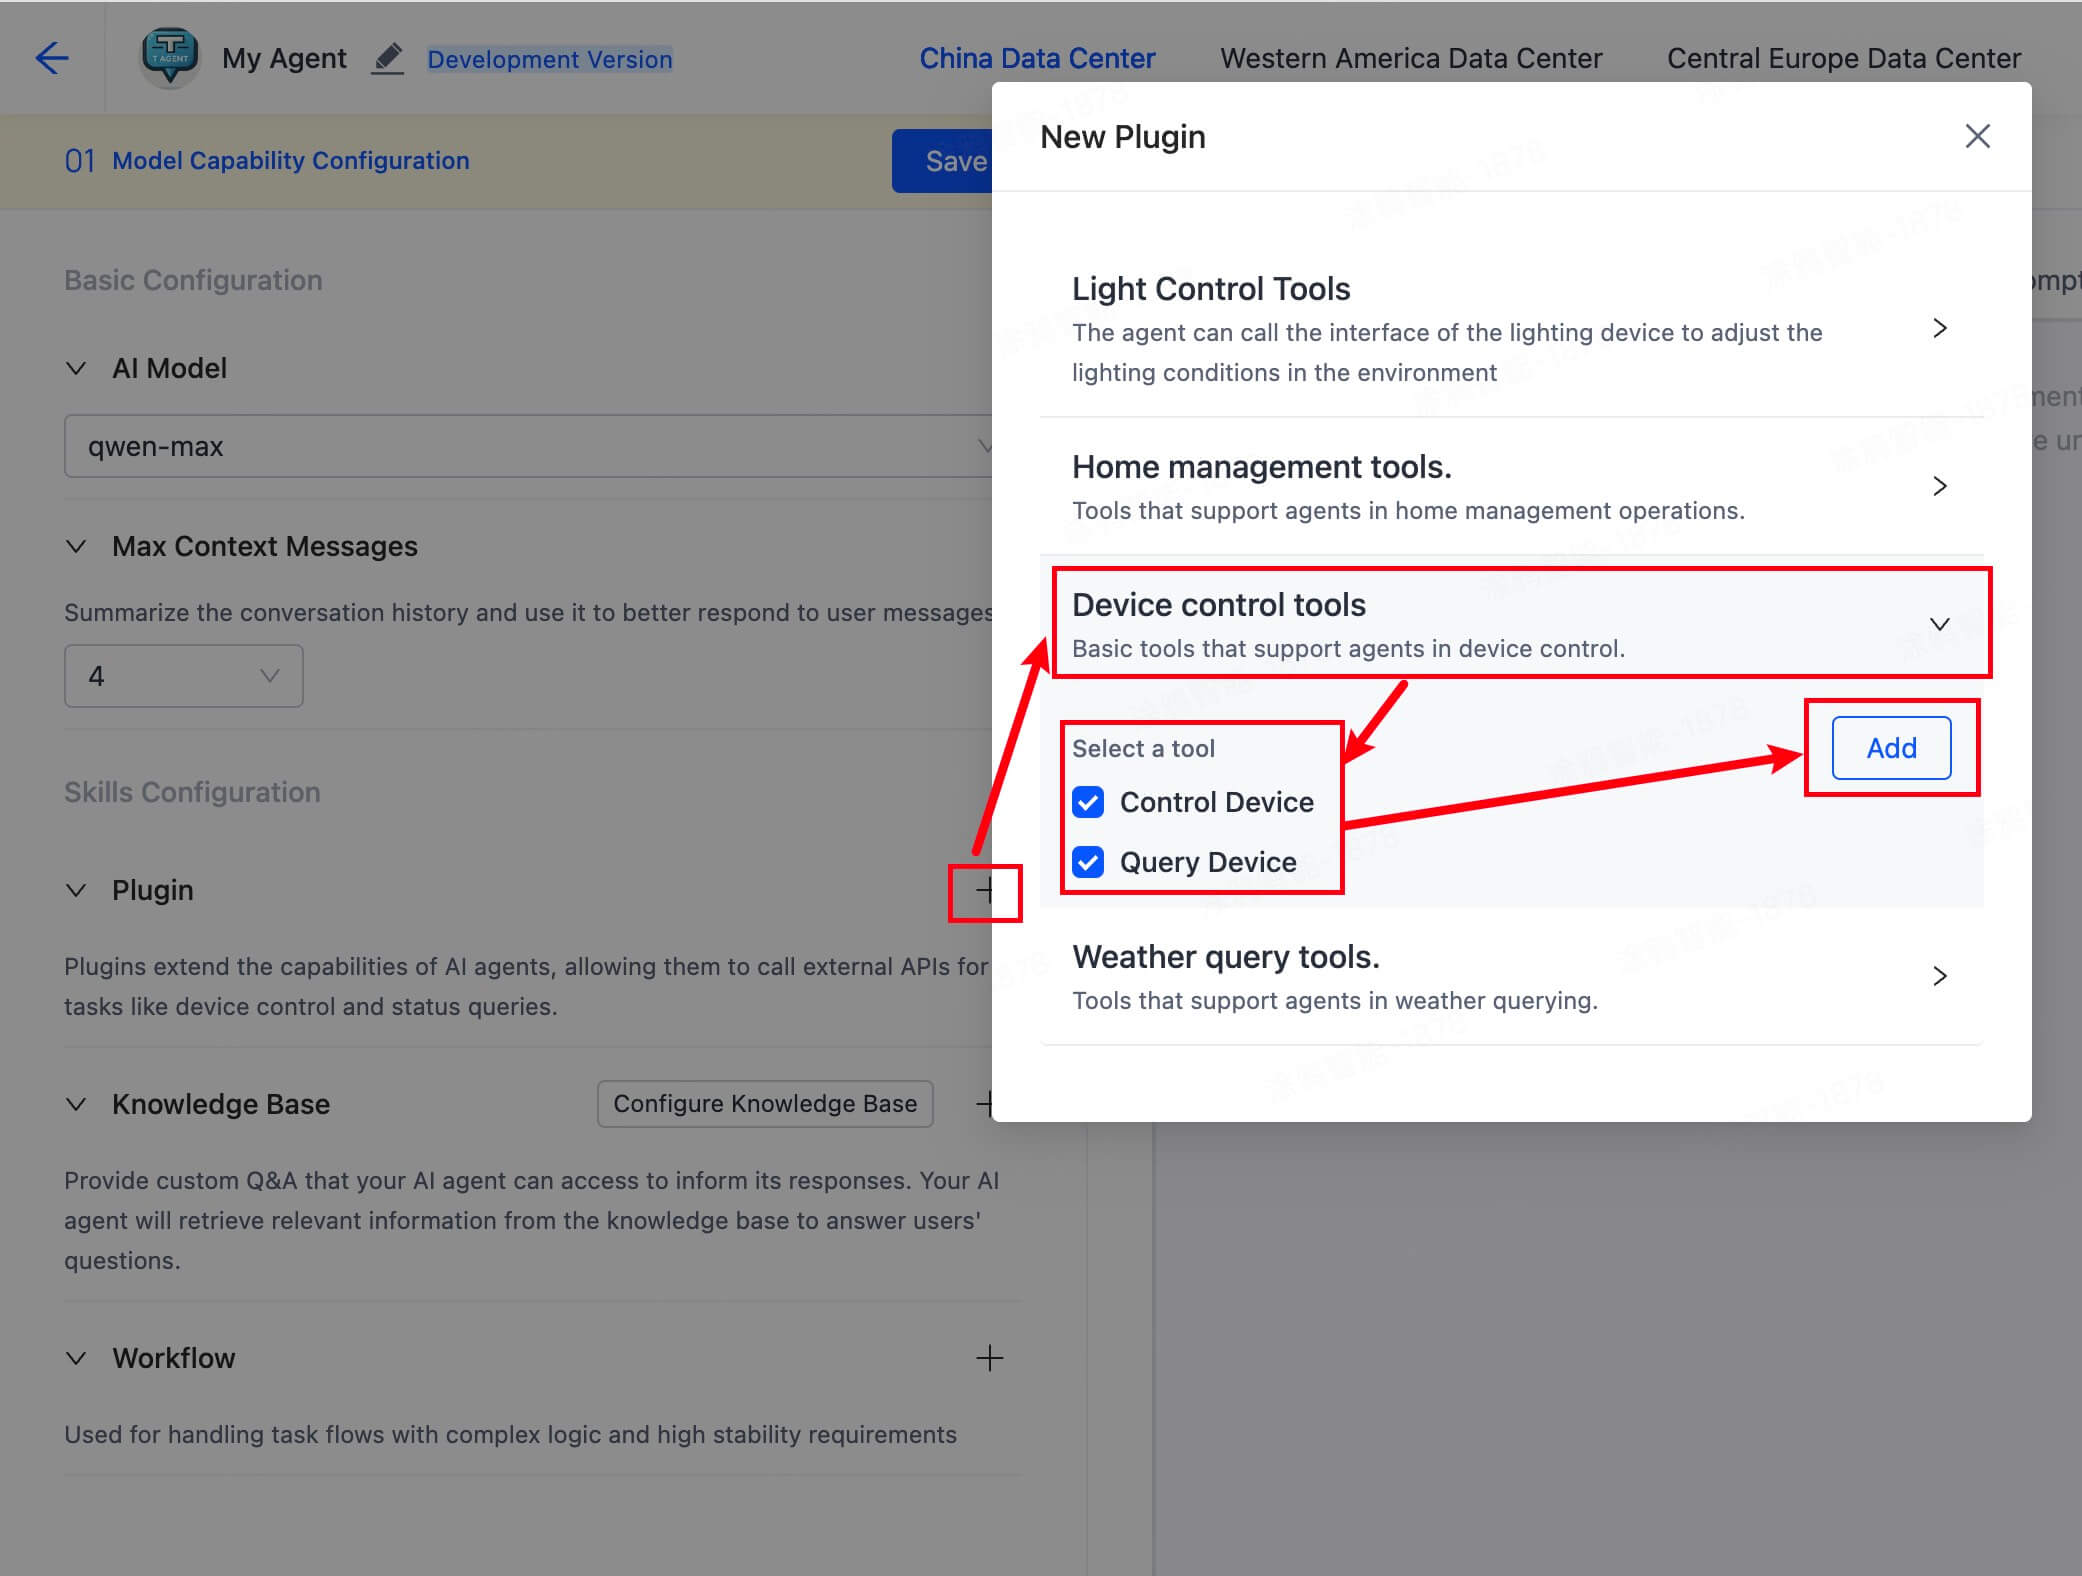
- Click + in the Plugin section. In the New Plugin dialog that appears, go to Device control tools > Select a tool, select the Control Device and Query Device, and then click Add.
- Modify the prompt to describe the device control feature. For example:
# Role You are a device control agent. You are proficient in smart device management, and skilled in remote control and device synchronization, with unique insights into device automation and smart home systems. ## Skills ### Skill 1: Remote device control ### Skill 2: Device status monitoring and synchronization - At last, click Release to release the agents.
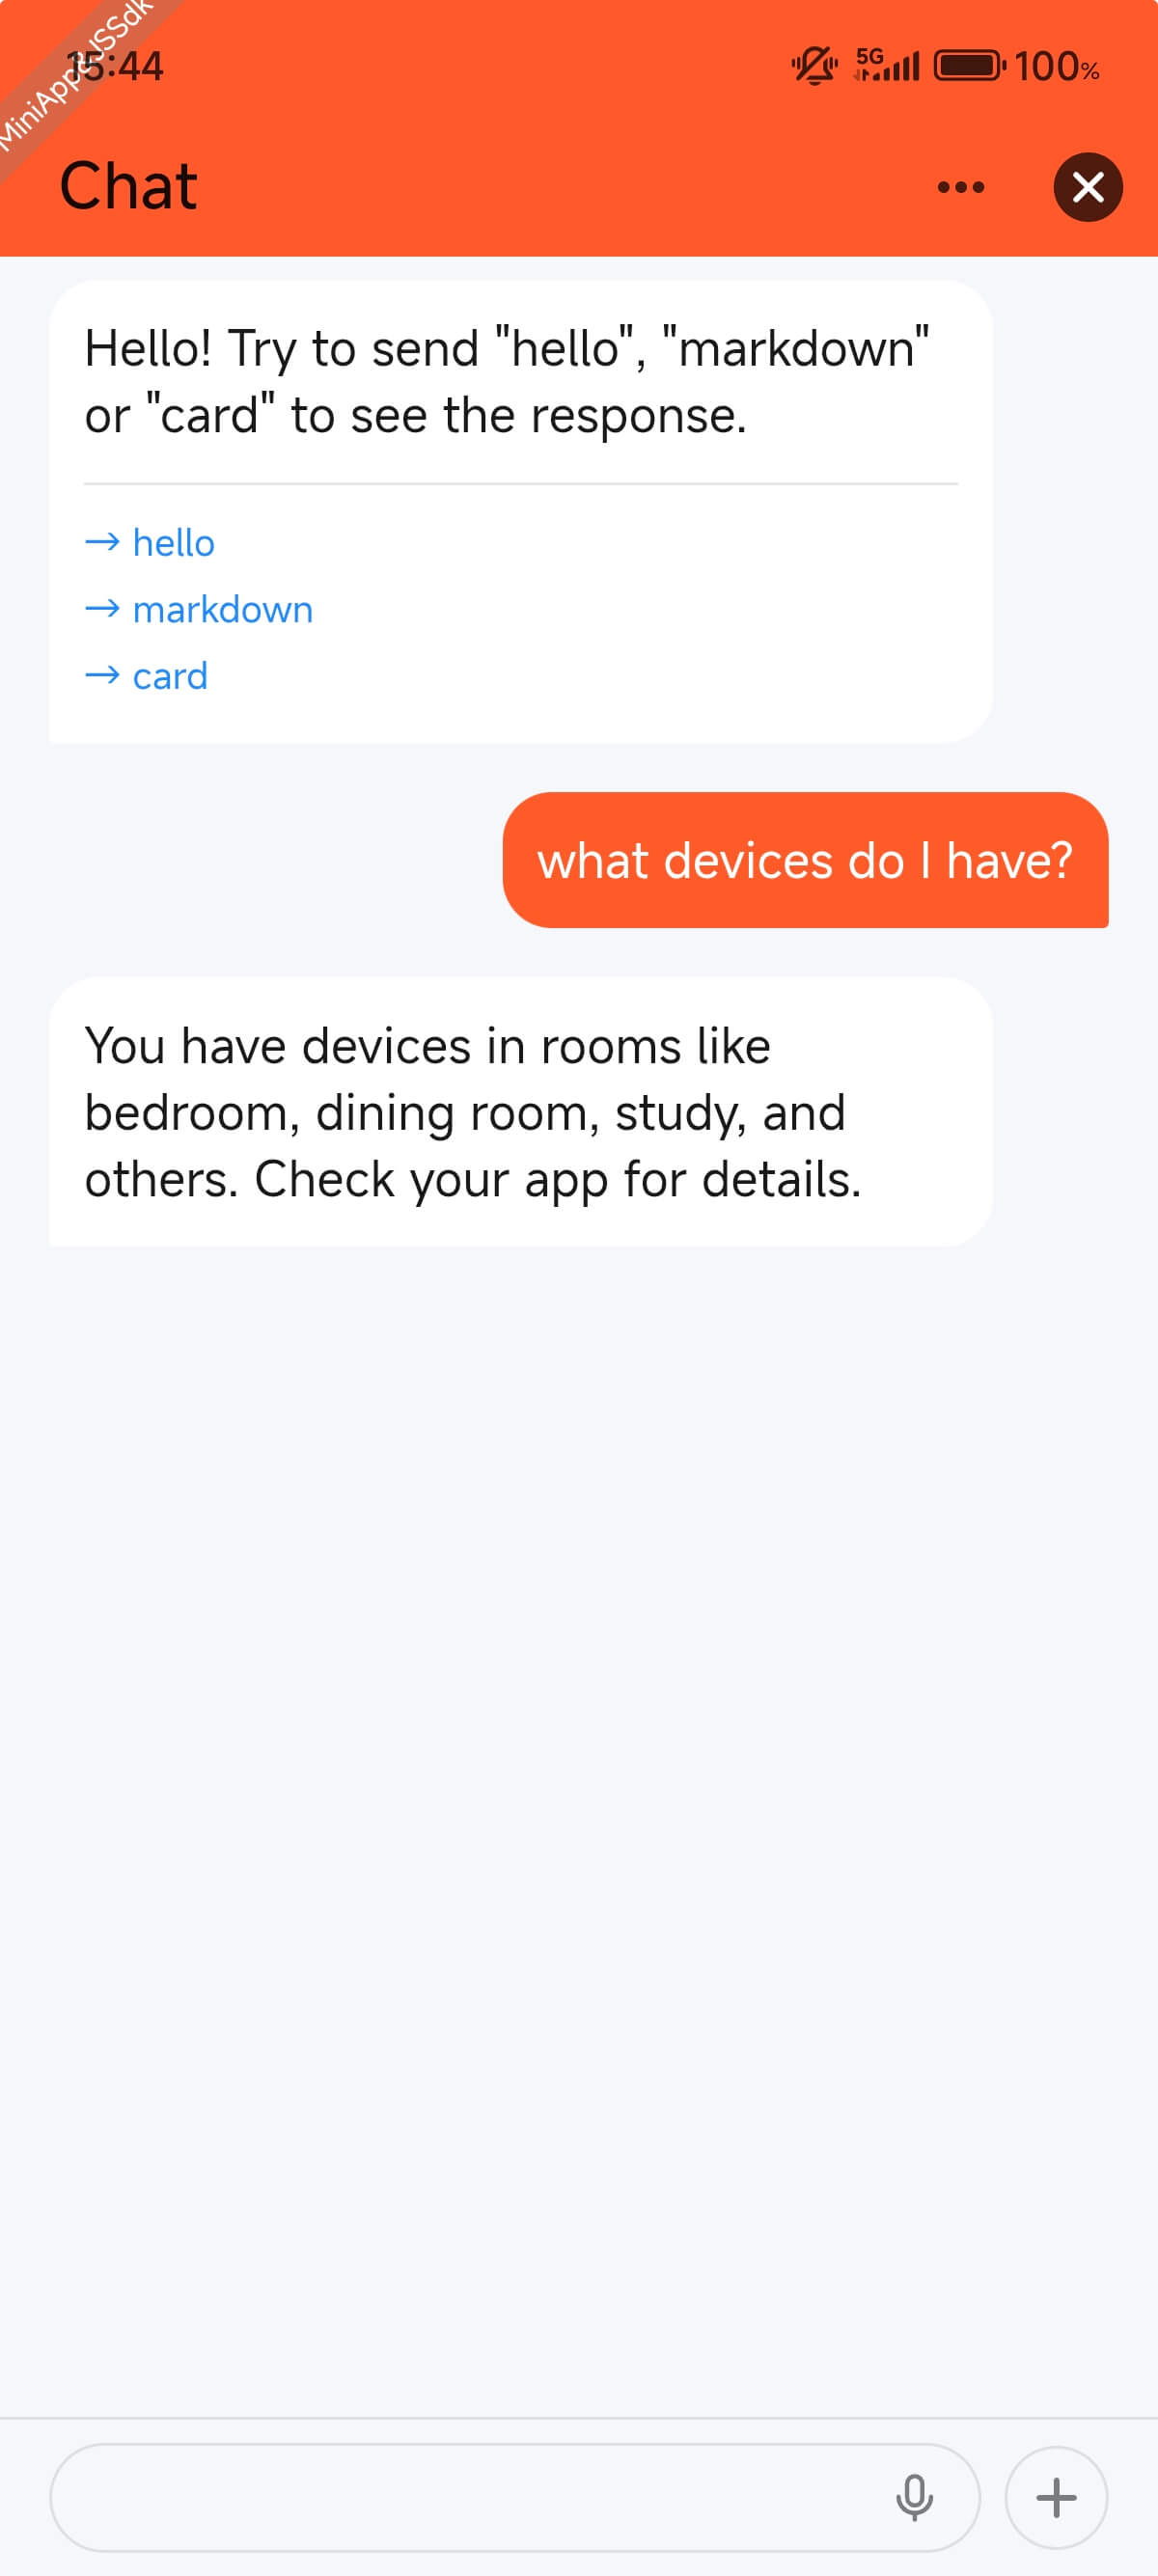
- Preview your miniapp on the real device again, chat with the agent, and try out device control.
You can customize any aspect of this chat page, such as changing the background color, font color, and font size.
Function button
For example, you want to add a function button between the message list and the input box.
export default function Home() {
  // ... previous code
  return (
    <View style={{height: '100vh'}}>
      <ChatContainer createAgent={createAgent}>
        <MessageList/>
        <Button>Function button</Button> {/* Add a function button */}
        <MessageInput/>
      </ChatContainer>
    </View>
  )
}
Bubble color
You can change the color of the bubbles like this. Create a chat.css file, fill it with the following content, and then import it into the page.
.t-agent-message-list-row-start .t-agent-bubble-tile-bubble {
  background-color: blue;
}

.t-agent-message-list-row-end .t-agent-bubble-tile-bubble {
  background-color: gray;
}
import './chat.css'
The @ray-js/t-agent-ui-ray component library provides default styles, and you can modify them to suit your needs.
If you want to send a welcome message when a user enters the chat page, or send a greeting message when the user re-enters the miniapp after some time, you can add the following code snippet in src/pages/Home/index.tsx:
// Modify the createAgent function
const createAgent = () => {

  // ... previous code

  const { onChatStart, createMessage, onChatResume, session } = agent

  // Create an initial welcome message
  onChatStart(async (result) => {
    const hello = createMessage({
      role: 'assistant',
    })

    hello.bubble.setText(I18n.t('message.hello')) // Define your multilingual greetings

    result.messages.push(hello)

    await hello.persist() // Persist this message bubble
  })

   // Send a message when the chat is resumed
  onChatResume(async (result) => {
    // Check if the last message was sent two hours ago
    const lastMessage = session.getLatestMessage()
    const lastMessageCreateTime = lastMessage?.meta?.createdAt
    if (lastMessageCreateTime < Date.now() - 1000 * 60 * 60 * 2) {
      // If yes, send a welcome back message
      const welcomeBack = createMessage({
        role: 'assistant',
      })

      welcomeBack.bubble.setText(I18n.t('message.welcomeBack')) // Define your multilingual welcome back messages
      result.messages.push(welcomeBack)
      await welcomeBack.persist()
    }
  })
  return agent
}
The T-Agent SDK provides default components to help you quickly build a chat page, while also offering certain customization capability in its design.
The following content can be deeply customized:
- Customize message list: Replace
MessageList. - Customize message input box: Replace
MessageInput. - Customize message bubble: Pass in
renderOptions.renderTileAsto replaceBubbleTile. - Generate a custom message: In the lifecycle hook, use
agent.createMessageto create a message.
The core design philosophy of the SDK is to separate the behavior and appearance of the conversational agent, and to customize the conversational agent through plugins and hook mechanism. The following figure shows the core classes and mechanisms of the SDK.
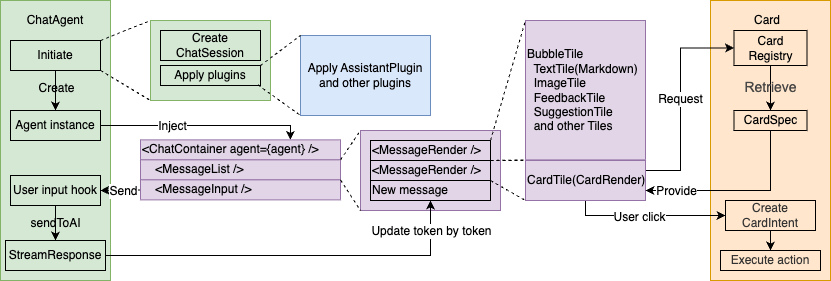
ChatAgent
The core class of ChatAgent manages the lifecycle of chats, as well as the creation and persistence of messages. It supports plugins and hook mechanism to extend its functionalities.
Hook mechanism
ChatAgent only defines a running framework and data structure, whereas the specific behavior is implemented by the hook mechanism. The hook mechanism is an event-driven programming model that implements the behavior of ChatAgent by registering callback functions.
ChatSession
ChatSession stores the message list, context data, and other content from chats with the agent. It is created simultaneously when the ChatAgent is created.
ChatMessage
ChatMessage is an abstraction of chat messages, used to store information such as message content and status. It also provides a series of convenient methods for operating the messages. A single ChatMessage can contain multiple ChatTile to display different types of content.
Lifecycle
ChatAgent triggers different hooks at varied stages. You can register hooks to implement custom behaviors.
Plugins
Based on the above hook mechanism, plugins can implement the functionalities of the ChatAgent, such as integrating with AI platforms and providing user interfaces. Plugins can also expose some methods and properties for you to use.
For detailed instructions and examples, refer to the T-Agent SDK documentation. You can implement the components of the chat page yourself.
- Congrats! 🎉You have finished learning this guide.
- If you have any problem during the development, you can contact Tuya's Smart MiniApp team for troubleshooting.