教程:iOS 用户账号注册和登录实践
涂鸦 Smart App SDK iOS 版提供了即全面又灵活的 Smart App 用户的管理方式。本教程涵盖了用户登录、注册、退出、密码找回、用户信息修改等流程,提供了详细的 Objective C 示例代码,供您参考。
通过学习本教程,您可以了解到如何:
- 使用手机号注册后登录涂鸦开发者平台,并绑定自己的邮箱账号。
- 使用邮箱账号注册后登录涂鸦开发者平台。
- 在开发者平台配置并使用微信或Google账号登录涂鸦开发者平台。
- 查看并修改用户账号信息,如密码和昵称等。
环境要求
在您开始本教程前,请先确保您已经 :
-
在涂鸦智能开发者平台注册账号并创建App,获取 SDK 的 AppKey,AppSecret。参考 准备工作。
-
使用 CocoaPods 将涂鸦 iOS App SDK 集成到您的项目中。参考 快速集成。
说明:如果您在集成 SDK 后,使用模拟器编译报错,请参考 环境报错排查。
效果展示
学习完本教程,您可以创建一个类似以下 iOS App 的 Demo。

背景信息
无论是使用手机号码或邮箱地址注册的账号,您需要提供 countryCode 参数(国家区号),用于就近选择涂鸦 IoT 的可用区。如中国大陆为86,美国为1。各个可用区的数据是相互独立的,因此在 中国大陆(86) 注册的账号,在 美国(1) 无法使用(提示用户不存在)。有关可用区相关概念,请参考 涂鸦云平台介绍。
在该模块中,您将频繁地调用对象 ThingSmartUser。它是一个单例,存储了当前用户的所有信息及相关的登录注册方法。详情请参考 用户数据模型。
手机号码或邮箱注册和登录
查询验证码服务可用地区
为了加强用户信息的数据安全,涂鸦优化验证码和添加了账号限制。只有验证码服务可用的地区,才可以发送验证码。验证方式如下:
-
思路:先查询开发者账号是否已经在从涂鸦开发者平台开通验证码服务的可用地区列表。
-
接口:从涂鸦开发者平台获取该开发者账号已经开通购买的可用地区列表。
- (void)getWhiteListWhoCanSendMobileCodeSuccess:(ThingSuccessString)success failure:(ThingFailureError)failure; -
示例:
[[ThingSmartUser sharedInstance] getWhiteListWhoCanSendMobileCodeSuccess:^(NSString *regions) { } failure:^(NSError *error) { }]; -
返回:返回值
regions表示一个或多个国家或地区,以,隔开的字符串,例如86和01。可用区编号列表,请参考 涂鸦云平台介绍。 -
开通:目前中国大陆默认已开通验证码服务。若您希望自己的应用发布在其他国家或地区,则必须验证开通地区,并联系您的涂鸦客户经理或 提交工单 开通该服务。
获取手机号码注册账号的验证码
- 思路:手机号注册与邮箱注册流程类似,用户必须先获取验证码。
- 接口:在 Smart App SDK 最新版本中,邮箱注册原有的发送验证码接口
sendVerifyCodeByRegisterEmail:已经废弃。涂鸦将发送验证码的接口重新整合,现在,无论是手机或是邮箱,您都可以使用统一的获取验证码接口在注册及后续密码修改,验证码登录,信息完善等操作中获取相应的验证码。 - 示例:
NSString * region = [[ThingSmartUser sharedInstance] getDefaultRegionWithCountryCode:countryCode]; [[ThingSmartUser sharedInstance] sendVerifyCodeWithUserName:userName // phone number or email address region:region countryCode:countryCode // NSString ,like 86 or 01 type:1 // code type , 1: verification code register, success:^{ // request success } failure:^(NSError *error) { // request fail // get error details from error.localizedDescription }];注意:请确保所传参数
type为1,否则将无法正常注册。
使用手机号码注册账号
-
思路:使用手机号码注册账号需要上传国家码,手机号码,密码以及获取到的验证码。详情请参考 手机号注册。
-
方法:
[[ThingSmartUser sharedInstance] registerByPhone:countryCode //country code ,like 86 or 1
		phoneNumber:phone
		password:password
		code:code  // VerifyCode
		success:^{

				// register success

		} failure:^(NSError *error) {

				// register fail
			// get error details  from   error.localizedDescription

	}];
使用手机号码登录账号
-
思路:使用手机号码注册账号成功后,用户就可以使用手机号登录到平台系统。详情请参考 手机号登录。
-
示例:
[[ThingSmartUser sharedInstance] loginByPhone:countryCode
		phoneNumber:phone
		password:password
		success:^{

				// login successfully

		} failure:^(NSError *error) {

			// login fail
	}];
账号绑定用户邮箱地址
-
思路:当用户使用手机号登录后,还可以绑定用户的邮箱账号。成功后,用户就可以同时使用邮箱登录账号。同样的,您需要首先调用
sendBindingVerificationCodeWithEmail获取验证码,请注意,绑定邮箱的验证码为单独接口。 -
获取验证码示例:
[[ThingSmartUser sharedInstance] sendBindingVerificationCodeWithEmail:userName countryCode:countryCode success:^{ // request scuuessfully } failure:^(NSError *error) { // request fail }]; -
绑定邮箱示例:
[[ThingSmartUser sharedInstance] bindEmail:account
		withCountryCode:countryCode
		code:code
		sId:[ThingSmartUser sharedInstance].sid
		success:^{

			// binding successfully

		} failure:^(NSError *error) {

			// binding fail

}];
使用用户邮箱注册账号
-
思路:与手机号注册类似,使用邮箱注册账号需要上传国家码,邮箱地址,密码以及获取到的验证码。详情请参考 邮箱注册。
-
示例:
[[ThingSmartUser sharedInstance] registerByEmail:countryCode
		email:email
		password:password
		code:code
		success:^{

		//register successfully

		} failure:^(NSError *error) {

			//register fail

		}];
使用邮箱登录账号
-
思路:当用户使用邮箱注册账号成功后,就可以使用该邮箱登录到 App。详情请参考 邮箱登录。
-
示例:
[[ThingSmartUser sharedInstance] loginByEmail:countryCode email:email password:password success:^{ // login successfully } failure:^(NSError *error) { // login fail }]; -
下一步:登录成功后,
[ThingSmartUser sharedInstance]会在一定时间内保存用户的登录信息,您可以实现如短期内免登录的功能。在登录页加入以下代码,如用户短期内登录过,在每次App启动时可跳过登录环节。// if user had login if ([ThingSmartUser sharedInstance].isLogin) { // ,navigate to main page directly }
通过第三方平台账号登录
涂鸦 Smart App SDK 为您提供了常用的第三方登录接口。如微信,QQ,谷歌,Facebook 等。本教程以苹果、微信、谷歌登录为例进行说明。
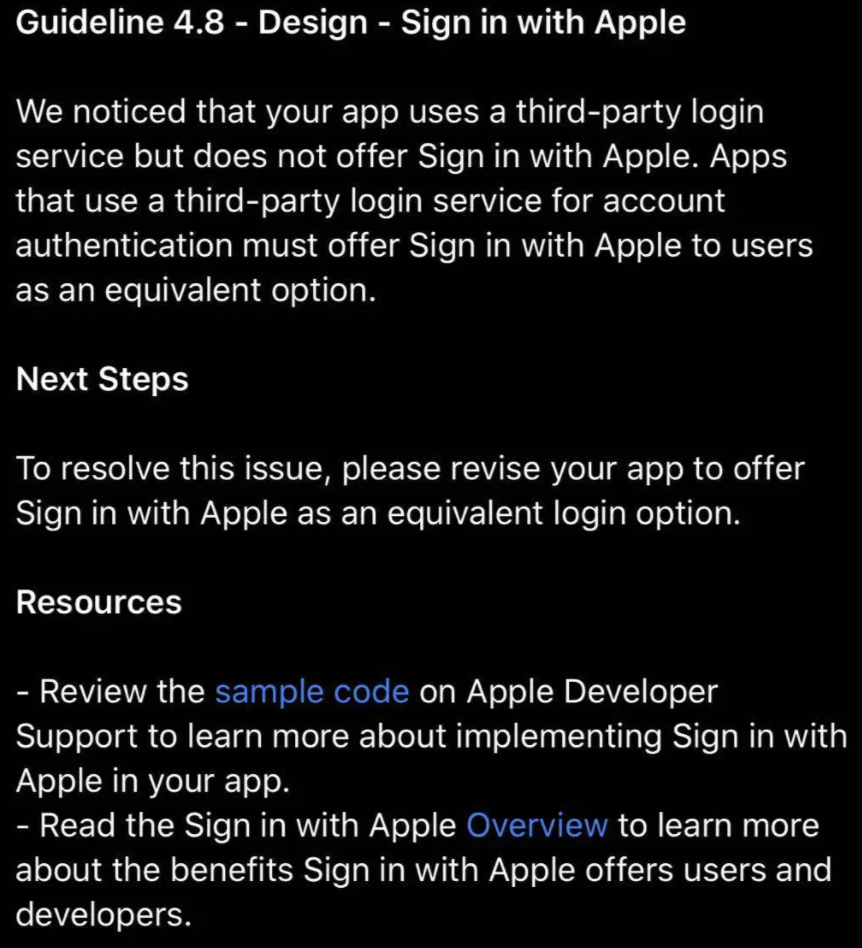
通过 Sign In with Apple 登录
注意:根据苹果 App Store 的审核要求,如果您的应用开启了三方登录功能(例如微信、QQ、Facebook登录),则必须开启 Sign In with Apple 功能,否则可能无法通过审核。
具体实现步骤如下,更多关于配置可参考 iOS 证书制作:
-
在苹果后台打开该选项,并且重新生成
Profiles配置文件,并安装到Xcode。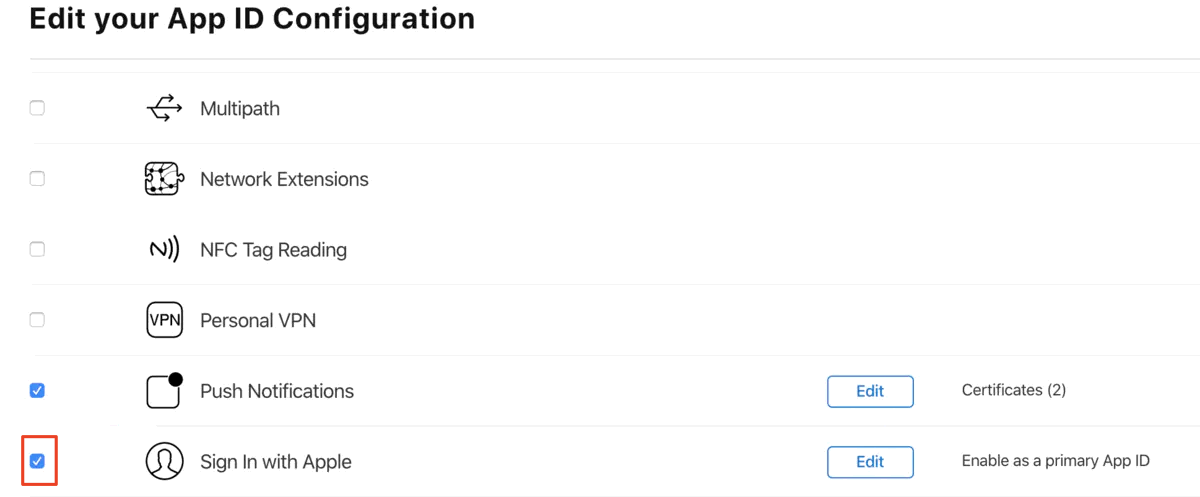
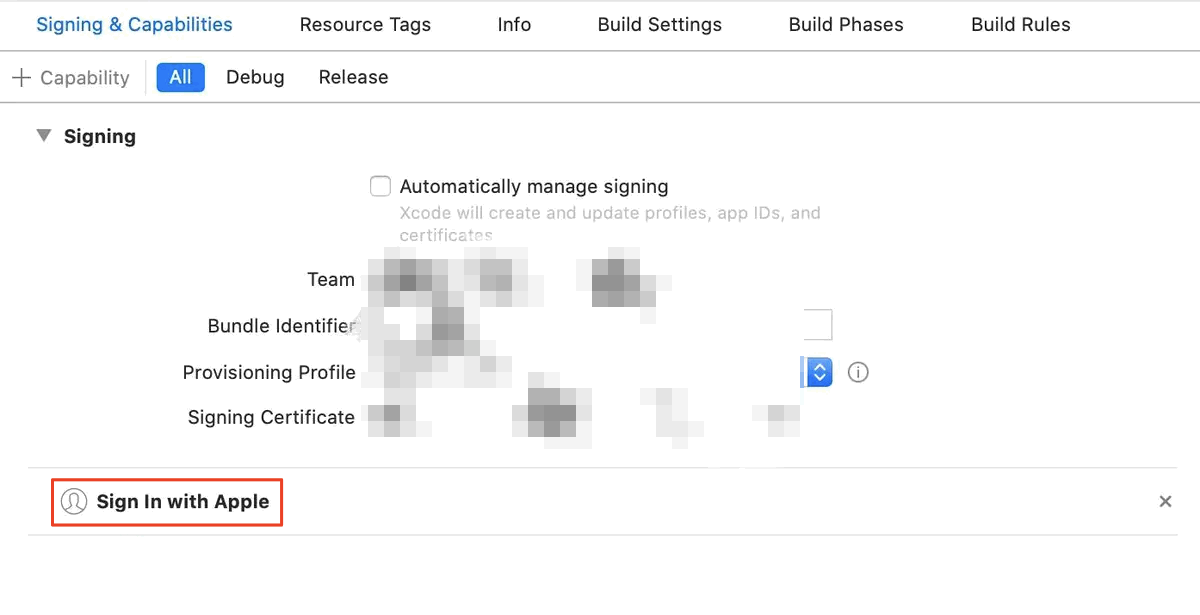
-
在 Xcode Signing & Capabilities 中添加 Sign In With Apple,如下图。
-
配置完成后,在业务逻辑中获取授权码和验证。
示例代码:
-
添加 Sign In with Apple 登录按钮,设置
ASAuthorizationAppleIDButton相关布局,并添加按钮点击响应事件。苹果也允许自定义苹果登录按钮的样式,详情请参考《苹果文档》 Human Interface Guidelines。if (@available(iOS 13.0, *)) { // Sign In With Apple Button ASAuthorizationAppleIDButton *appleIDBtn = [ASAuthorizationAppleIDButton buttonWithType:ASAuthorizationAppleIDButtonTypeDefault style:ASAuthorizationAppleIDButtonStyleWhite]; // appleIDBtn.frame = CGRectMake(30, self.view.bounds.size.height - 180, self.view.bounds.size.width - 60, 100); [appleIDBtn addTarget:self action:@selector(handleAuthorizationAppleIDButtonPress) forControlEvents:UIControlEventTouchUpInside]; [self.view addSubview:appleIDBtn]; }- (void)handleAuthorizationAppleIDButtonPress{ if (@available(iOS 13.0, *)) { // A mechanism for generating user authorization requests based on the user's Apple ID ASAuthorizationAppleIDProvider *appleIDProvider = [[ASAuthorizationAppleIDProvider alloc] init]; // Create a new AppleID authorization request ASAuthorizationAppleIDRequest *appleIDRequest = [appleIDProvider createRequest]; // Contact information requested during the user authorization period appleIDRequest.requestedScopes = @[ASAuthorizationScopeFullName, ASAuthorizationScopeEmail]; // Founded by ASAuthorizationAppleIDProvider authorization request management authorization requests of the controller ASAuthorizationController *authorizationController = [[ASAuthorizationController alloc] initWithAuthorizationRequests:@[appleIDRequest]]; // Sets the authorization controller to notify the agent of the success and failure of the authorization request authorizationController.delegate = self; // Sets the agent that provides the presentation context in which the system can present the authorization interface to the user authorizationController.presentationContextProvider = self; // Start the authorization flow during controller initialization [authorizationController performRequests]; } } -
获取授权码
获取授权码需要在代码中实现两个代理回调
ASAuthorizationControllerDelegate、ASAuthorizationControllerPresentationContextProviding分别用于处理授权登录成功和失败、以及提供用于展示授权页面的 Window,代码如下:#pragma mark - delegate - (void)authorizationController:(ASAuthorizationController *)controller didCompleteWithAuthorization:(ASAuthorization *)authorization{ NSLog(@"finish:::%@", authorization.credential); NSLog(@"%s", __FUNCTION__); NSLog(@"%@", controller); NSLog(@"%@", authorization); if ([authorization.credential isKindOfClass:[ASAuthorizationAppleIDCredential class]]) { // login by ASAuthorizationAppleIDCredential ASAuthorizationAppleIDCredential *appleIDCredential = authorization.credential; NSString *user = appleIDCredential.user; NSString *familyName = appleIDCredential.fullName.familyName; NSString *givenName = appleIDCredential.fullName.givenName; NSString *email = appleIDCredential.email; // NSData *identityToken = appleIDCredential.identityToken; // NSData *authorizationCode = appleIDCredential.authorizationCode; // Create an account in your system. }else if ([authorization.credential isKindOfClass:[ASPasswordCredential class]]){ // Sign in using an existing iCloud Keychain credential. ASPasswordCredential *passwordCredential = authorization.credential; NSString *user = passwordCredential.user; NSString *password = passwordCredential.password; }else{ NSLog(@"Authorization information is inconsistent"); } } // Callback for authorization failure - (void)authorizationController:(ASAuthorizationController *)controller didCompleteWithError:(NSError *)error{ // Handle error. NSLog(@"Handle error:%@", error); switch (error.code) { case ASAuthorizationErrorCanceled: errorMsg = @"user canceled the authorization request"; break; case ASAuthorizationErrorFailed: errorMsg = @"Authorization request failed"; break; case ASAuthorizationErrorInvalidResponse: errorMsg = @"The authorization request response is invalid"; break; case ASAuthorizationErrorNotHandled: errorMsg = @"The authorization request could not be processed"; break; case ASAuthorizationErrorUnknown: errorMsg = @"The authorization request failed for unknown reason"; break; default: break; } } // which window to display content - (ASPresentationAnchor)presentationAnchorForAuthorizationController:(ASAuthorizationController *)controller{ return self.view.window; }
在授权登录成功回调中,您可以拿到以下几类数据:
- UserID:Unique, stable, team-scoped user ID,苹果用户唯一标识符,该值在同一个开发者账号下的所有 App 下是一样的。您可以用该唯一标识符与自己后台系统的账号体系绑定起来,这与微信、QQ等第三方登录流程基本一致。
- Verification data:Identity token, code,验证数据,用于传给您的后台服务器,然后服务器再向苹果的身份验证服务端验证。授权登录请求数据的有效性和真实性,请参考《苹果文档》Sign In with Apple REST API。
- Account information:Name, verified email,苹果用户信息,包括全名、邮箱等。
获取成功后,您就可以使用涂鸦提供的 苹果登录接口 实现苹果登录。
[[ThingSmartUser sharedInstance] loginByAuth2WithType:@"ap"  // fixed value
		countryCode:@"your_country_code"
		accessToken:credential.identityToken extraInfo:{@"userIdentifier": credential.user, @"email": credential.email, @"nickname": credential.fullName.nickname, @"snsNickname": credential.fullName.nickname}   // you could get them from above code
		success:^{
		// login successfully
	} failure:^(NSError *error) {
		// login failed
	}];
通过腾讯微信登录
使用微信登录之前,您需要在微信开发者平台上按照提示注册账号,并按照微信开放平台的提示完成开发者资质认证。参考 微信登录申请流程。
您还需要将获得的 App ID 和 App Secret 填入 涂鸦开发者平台,详情见下图:
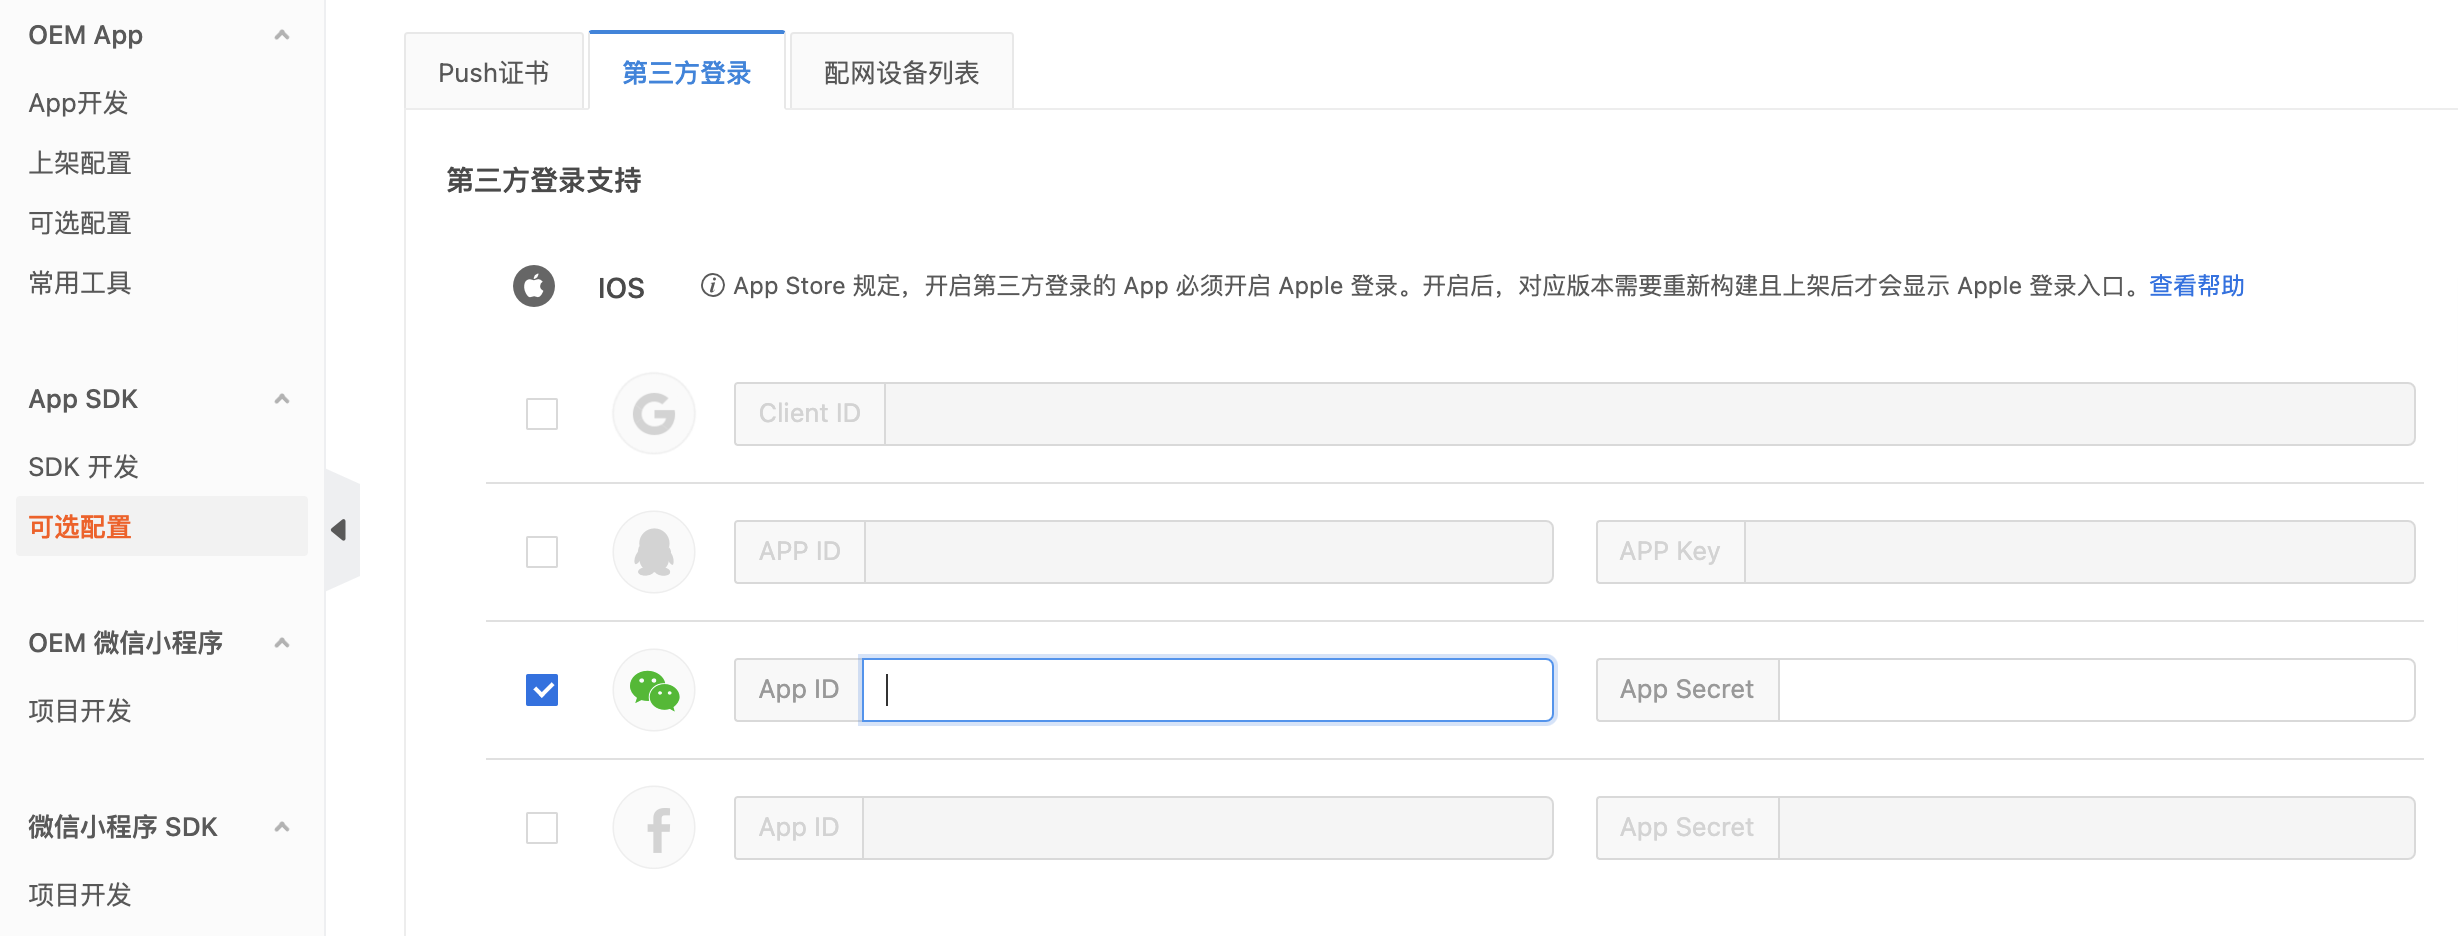
完成后您就可以调用 微信登录 接口完成微信登录。
[[ThingSmartUser sharedInstance] loginByWechat:@"your_country_code"
		code:@"wechat_code"
		success:^{
				// NSLog(@"login success");
		} failure:^(NSError *error) {
	// NSLog(@"login failure: %@", error);
		}];
通过谷歌账号登录
与微信登录类似,您需要登录 Google开发者平台配置应用信息并将产生的 Google 身份平台授权的 Client ID 填入 涂鸦开发者平台。申请流程,请参考 申请 Google 登录。
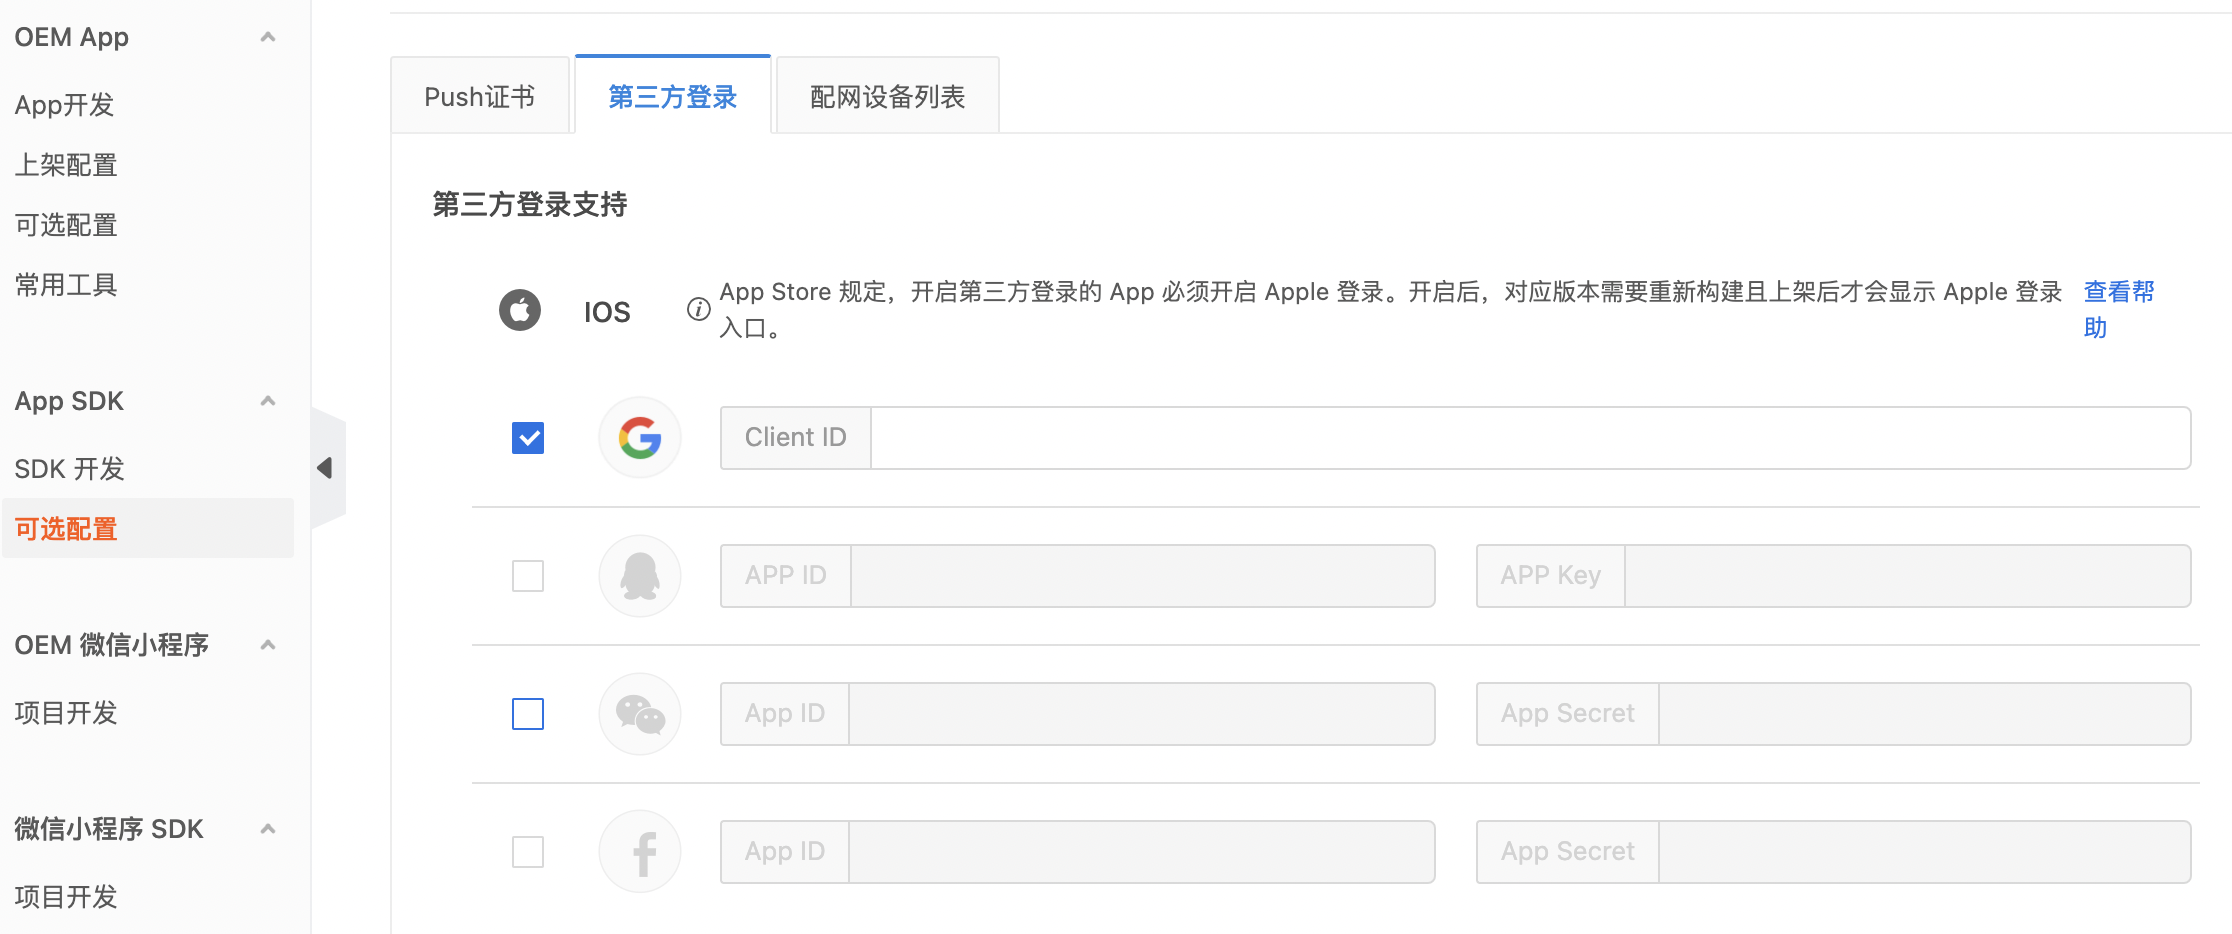
接下来,您就可以调用谷歌登录接口完成谷歌登录。
[[ThingSmartUser sharedInstance] loginByAuth2WithType:@"gg"  // fixed value
		countryCode:countryCode // like 86 or 01
		accessToken:accessToken  //client ID
		extraInfo:@{@"pubVersion": @1}
		success:^{
		//  login success
	} failure:^(NSError *error) {
		// login failed
	}];
注意:若用户在中国大陆使用谷歌登录,您需要首先确保用户的设备可以访问谷歌服务。
修改用户账号信息
登录成功后您可以修改用户信息如昵称,密码,地区等。本教程演示如何修改用户昵称和登录密码。更多修改信息的接口调用可参考 用户信息修改。
修改用户昵称
通过手机号和邮箱注册的账号来进行登录,可以通过调用修改昵称接口来设置账号昵称。第三方登录,如微信登录默认昵称为微信用户名,不支持修改。示例代码如下:
[[ThingSmartUser sharedInstance] updateNickname:nickName
		success:^{
				// update success

		}failure:^(NSError *error) {
			//update failed

		}];
修改成功后,[ThingSmartUser sharedInstance] 会立刻更新用户信息。
修改账号密码
用户可以在登录后或忘记密码时,通过账号及验证码验证的方式重设密码。过程与注册类似,您需要首先调用 发送验证码 接口。注意,此时参数 type 所传值为3。
NSString * region = [[ThingSmartUser sharedInstance] getDefaultRegionWithCountryCode:countryCode];

[[ThingSmartUser sharedInstance] sendVerifyCodeWithUserName:userName // phone number or email address
		region:region
		countryCode:countryCode // NSString ,like 86 or 01
		type:3     // code type , 3: password reset,
		success:^{
				// request success
		} failure:^(NSError *error) {
				// request fail
				// get error details  from   error.localizedDescription
		}];
获取成功后分别使用手机号或邮箱账号重设密码。
通过手机号码修改密码示例
[[ThingSmartUser sharedInstance] resetPasswordByPhone:countryCode
		phoneNumber:phone
		newPassword:password
		code:code  //VerifyCode
		success:^{

				//reset success

		} failure:^(NSError *error) {

				// reset failed

		}];
修改邮箱地址示例
[[ThingSmartUser sharedInstance] resetPasswordByEmail:countryCode
		email:email
		newPassword:password
		code:code  //VerifyCode
		success:^{

				//reset success

		} failure:^(NSError *error) {

				// reset failed

		}];
监听 Session 过期
用户登录后修改了密码,或长时间未登录时,会返回 Session 过期 的错误。此时,您需要监听 ThingSmartUserNotificationUserSessionInvalid 通知,跳转至登录页面重新登录。
[[NSNotificationCenter defaultCenter] addObserver:self selector:@selector(sessionInvalid) name:ThingSmartUserNotificationUserSessionInvalid object:nil];
-(void)sessionInvalid {

	//back to login page

}
退出登录
- 思路:账号退出登录,或切换称其他账号。
- 接口:退出登录
- 示例:
[[ThingSmartUser sharedInstance] loginOut:^{

			//logout success

		} failure:^(NSError *error) {

			// logout failed

		}];
注销用户账号
- 思路:注销账号会永久停用并删除以下用户账户中的所有信息。涂鸦为用户保留了7天的缓冲期,在此期间用户希望撤回注销只需要重新登录账号即可。
- 接口:注销账号
- 示例:
[ThingSmartUser sharedInstance] cancelAccount:^{

				//cancel account success

		} failure:^(NSError *error) {

		// cancel account failed

		}];
环境报错排查
-
问题现象:在最新型号的Macbook(M1 芯片)上,若使用Xcode12集成编译 SDK 后使用模拟器编译会报以下错误。
building for iOS Simulator, but linking in object ... file built for iOS, for architecture arm64 -
问题原因:这是由于新版本 Xcode 12 更改了编译架构的设置方式。
-
解决方法:解决上述报错可以在新版 Xcode12 中设置。
- 在 PROJECT > Build Setting > Architectures > Excluded Architectures > 设置排除的编译架构指令集为"arm64"。
说明:建议只设置 Debug 模式,Release 模式还是要支持 arm64 的,否则打包后无法在真机上安装。您需要在主工程和 Pods 同时添加。
- 选择 PROJECT > Build Setting > User-Defined > 选中 VALID_ARCHS,直接按 Delete 键,来删除 User-Defined 中的 VALID_ARCHS (如有)栏,即可用的编译架构指令集的设置。
- 在 PROJECT > Build Setting > Architectures > Excluded Architectures > 设置排除的编译架构指令集为"arm64"。
该内容对您有帮助吗?
是意见反馈该内容对您有帮助吗?
是意见反馈