快速集成
更新时间:2024-08-26 08:14:42下载pdf
本文介绍如何使用 CocoaPods 将涂鸦智能生活 App SDK 快速集成到您的项目中。SDK 要求 iOS 版本不低于 9.0。
SDK 版本
- 如果您采用的 5.x.x 以下版本 SDK,请提前根据 迁移指南 进行升级。
- 若您已经集成过低版本 SDK,更新至 5.0 SDK 后,请删除项目中的低版
t_s.bmp安全图片文件,并从 涂鸦开发者平台 上获取新的 5.0 版本 App 密钥。 - 从 4.0.0 版本智能生活 App SDK 开始,SDK 分为开发版和正式版。详情请参考 产品定价。开发版 SDK 仅供开发使用,请勿直接商用。如需上架商用,请前往平台购买正式版。购买正式版 SDK 后:
- 需在涂鸦开发者平台重新构建正式版 SDK 并下载。
- 重新在项目中集成正式版 SDK。
集成 SDK
构建和下载 SDK
-
前往 涂鸦开发者平台。
-
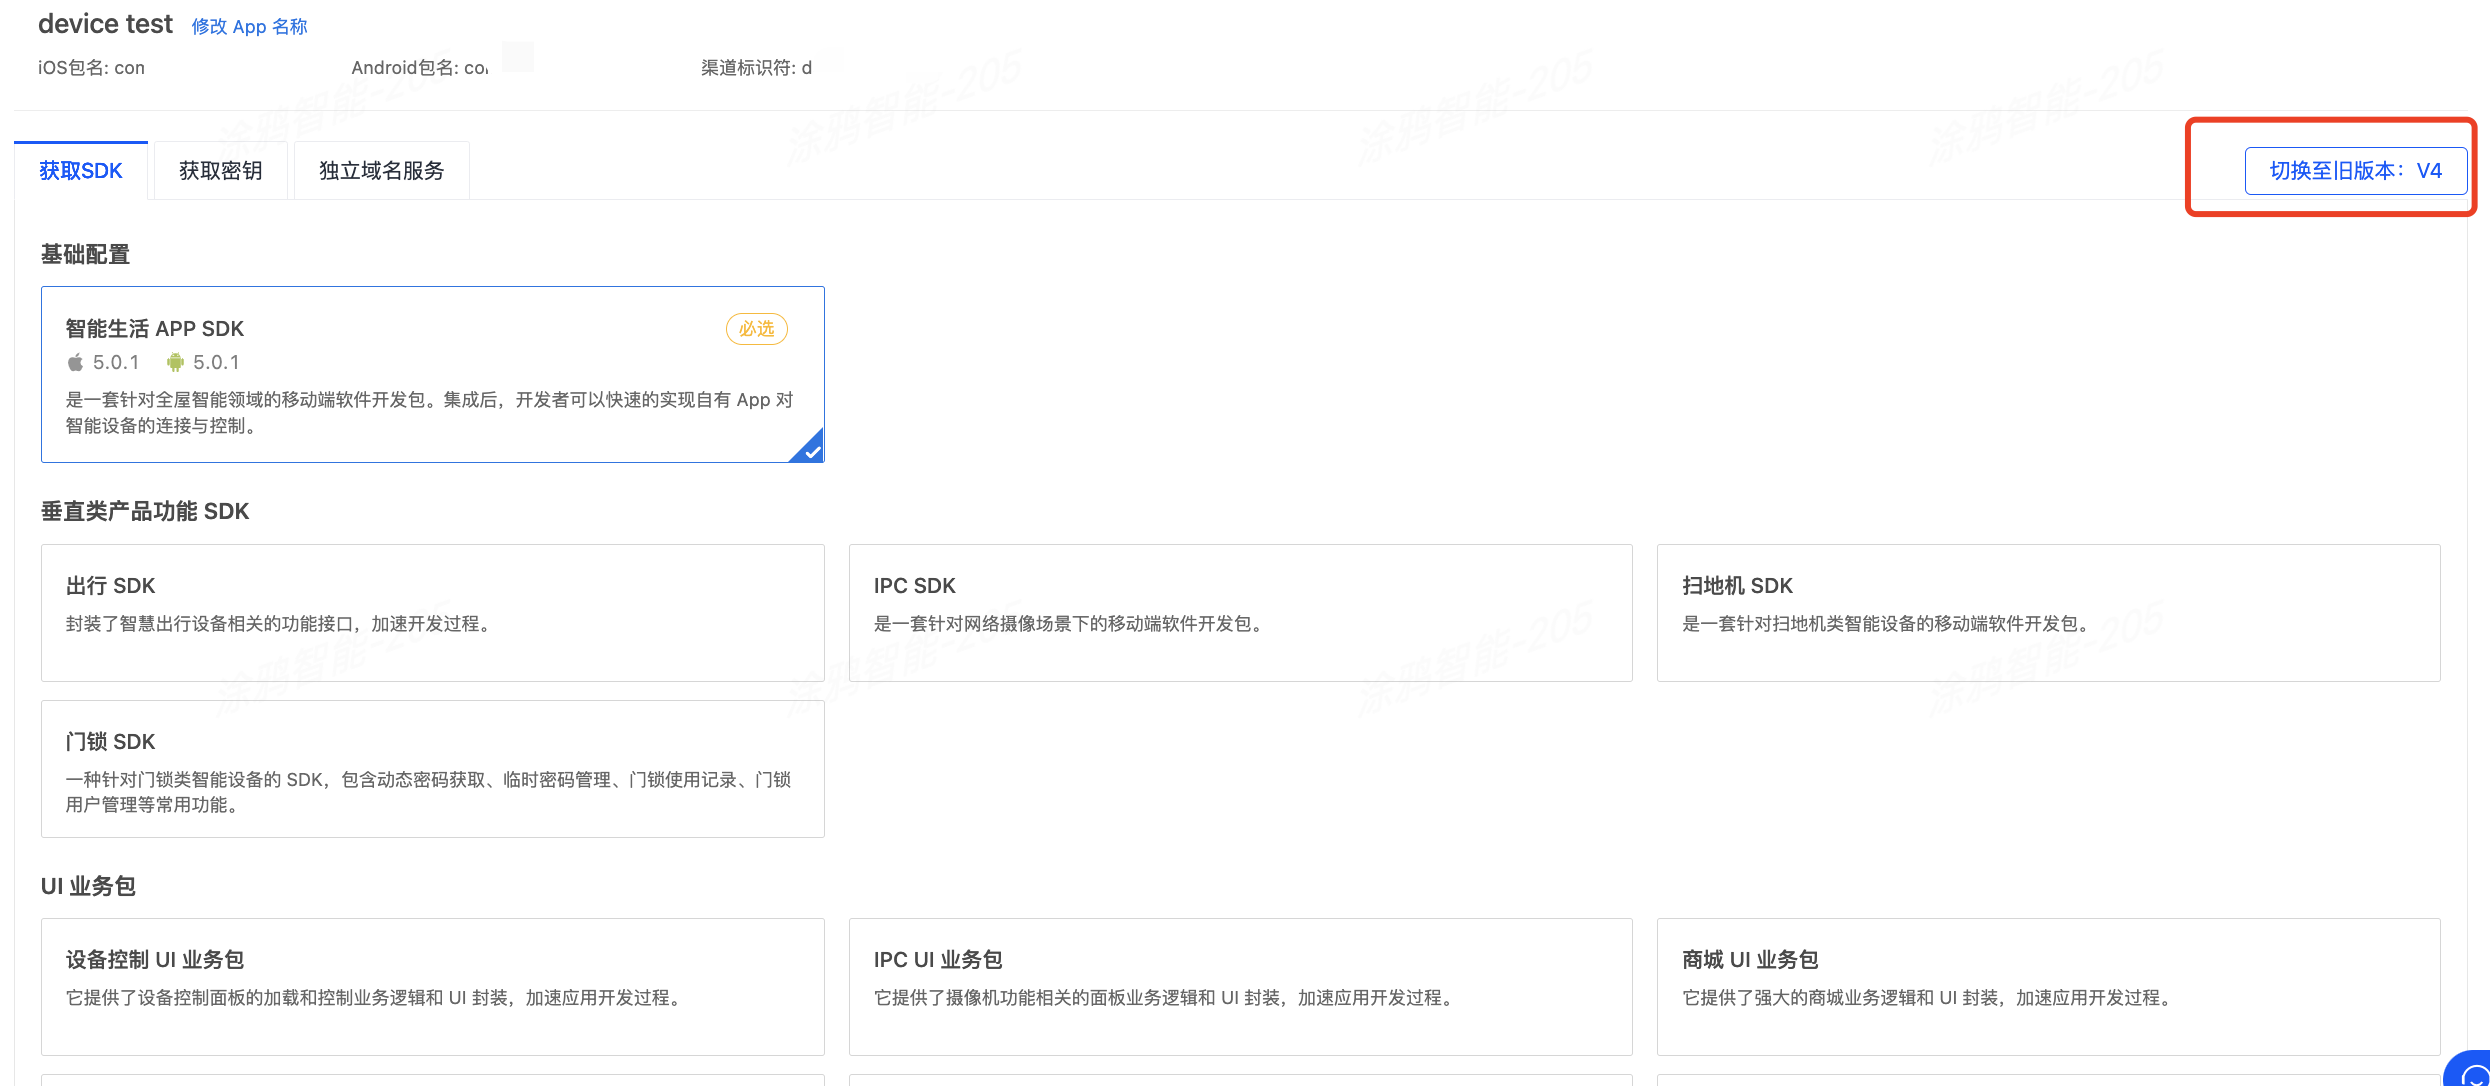
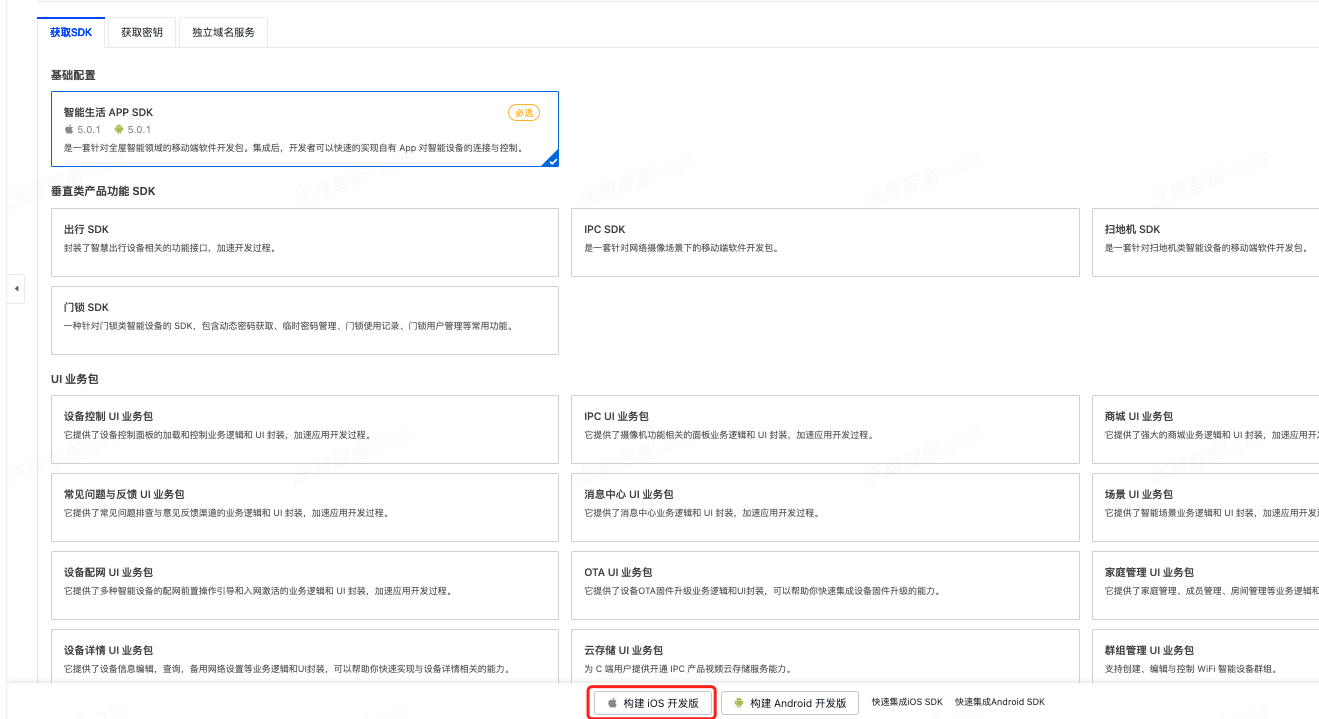
选择 5.x.x 版本 SDK 或其他 UI 业务包。
若之前使用过低版本 SDK,右上角可切换版本。

-
选择构建 SDK。

-
构建完成后,下载 SDK 进行集成。

-
解压
ios_core_sdk.tar.gz,得到以下两个重要文件信息:Build:存放您的 App 专属安全 SDK,它和 App 密钥信息一样重要,请妥善保管,谨防资源泄漏或对外公开。ThingSmartCryption.podspec:用于在引用、集成使用 5.0 SDK。
-
(建议)将以上两个文件与
podfile保持同级存放,便于后续引用操作。 -
ThingSmartBusinessExtensionKit是ThingSmartHomeKit的高级封装组件,不仅包含了ThingSmartHomeKit的所有功能,还提供了更多便捷的扩展能力。因此,我们更推荐直接使用ThingSmartBusinessExtensionKit。
使用 CocoaPods 集成
-
更新 CocoaPods 至最新版本。CocoaPods 的使用请参考 CocoaPods 官方文档。
-
在
Podfile文件中添加以下内容:source 'https://github.com/tuya/tuya-pod-specs.git' platform :ios, '11.0' target 'Your_Project_Name' do # 从涂鸦开发者平台(platform.tuya.com)构建和获取 ThingSmartCryption # 购买正式版后,需重新在涂鸦开发者平台构建 SDK 并重新集成 # ./ 代表将 ios_core_sdk.tar.gz 解压之后所在目录与 podfile 同级 # 若自定义存放目录,可以修改 path 为自定义目录层级 pod "ThingSmartCryption", :path =>'./' pod "ThingSmartHomeKit" # ThingSmartBusinessExtensionKit 不仅包含了 ThingSmartHomeKit 的所有功能,还提供了更多便捷的扩展能力。 pod "ThingSmartBusinessExtensionKit" end target 'Your_Extension_Target_Name' do # 所有扩展程序 target ,只要引入 ThingSmartHomeKit 则必须同时引入 ThingSmartCryption pod "ThingSmartCryption", :path =>'./' pod "ThingSmartHomeKit" # ThingSmartBusinessExtensionKit 不仅包含了 ThingSmartHomeKit 的所有功能,还提供了更多便捷的扩展能力。 pod "ThingSmartBusinessExtensionKit" end -
如果您的 App 包含扩展程序
target,例如 Siri 和 Widget,确保Podfile配置正确。 -
在项目根目录下,执行
pod update命令进行集成。
初始化 SDK
-
在 Target > General 中打开项目设置,修改
Bundle Identifier为您在 涂鸦开发者平台 设置的 iOS 包名。 -
在项目的
PrefixHeader.pch文件添加以下内容:#import <ThingSmartHomeKit/ThingSmartKit.h>如果是 Swift 项目,可以在
xxx_Bridging-Header.h桥接文件中添加以下内容:#import <ThingSmartHomeKit/ThingSmartKit.h> -
若集成了
ThingSmartBusinessExtensionKit组件,可以引入以下头文件:#import <ThingSmartBusinessExtensionKit/ThingSmartBusinessExtensionKit.h>如果是 Swift 项目,可以在
xxx_Bridging-Header.h桥接文件中添加以下内容:#import <ThingSmartBusinessExtensionKit/ThingSmartBusinessExtensionKit.h> -
打开
AppDelegate.m文件,在[AppDelegate application:didFinishLaunchingWithOptions:]方法中初始化 SDK。
配置 ThingSmartHomeKit
- (void)startWithAppKey:(NSString *)appKey secretKey:(NSString *)secretKey;
参数说明
| 参数 | 说明 | 来源 |
|---|---|---|
| appKey | App 唯一凭证信息 | 访问 涂鸦开发者平台的 SDK 详情页,选择目标 App,并单击 获取密钥 页签 |
| secretKey | App 密钥 key | 访问 涂鸦开发者平台的 SDK 详情页,选择目标 App,并单击 获取密钥 页签 |
| bundleId | iOS App 应用包名 | 访问 涂鸦开发者平台的 SDK 详情页,选择目标 App,并找到 iOS 应用包名 |
示例代码
Objective C:
[[ThingSmartSDK sharedInstance] startWithAppKey:<#your_app_key#> secretKey:<#your_secret_key#>];
Swift:
ThingSmartSDK.sharedInstance()?.start(withAppKey: <#your_app_key#>, secretKey: <#your_secret_key#>)
配置 ThingSmartBusinessExtensionKit
在 App 启动后调用 loadConfig 配置业务拓展 SDK。
    - (BOOL)application:(UIApplication *)application didFinishLaunchingWithOptions:(NSDictionary *)launchOptions
    {
        [ThingSmartBusinessExtensionConfig setupConfig];
        return YES;
    }
至此,准备工作已经全部完毕。了解 ThingSmartBusinessExtensionKit 入门请参考 业务拓展 SDK 开发教程。
打开 Debug 模式
在开发的过程中可以开启 Debug 模式,打印日志用于分析问题。
Objc:
#ifdef DEBUG
    [[ThingSmartSDK sharedInstance] setDebugMode:YES];
#else
#endif
Swift:
#if DEBUG
   ThingSmartSDK.sharedInstance()?.debugMode = true
#else
#endif
语言设置
接口返回的错误信息与文案等,将会根据您工程所支持的多语言和用户手机的当前语言来显示。如果想要支持某种语言,可以在工程中的 Localization 中添加您想要支持的语言。
演示工程主要介绍了 SDK 开发流程,以及一些简单的业务逻辑。在开发 App 之前,建议先按照本文完成演示工程的操作。
配置 Widget 工程
Widget 创建步骤如下:
-
修改
Podfile。target 'Your_Extension_Target_Name' do # 1. 所有扩展程序 target ,只要引入 ThingSmartHomeKit 则必须同时引入 ThingSmartCryption # 2. 从涂鸦开发者平台(platform.tuya.com)构建和获取 ThingSmartCryption # 购买正式版后,需重新在涂鸦开发者平台构建 SDK 并重新集成 # ./ 代表将 ios_core_sdk.tar.gz 解压之后所在目录与 podfile 同级 # 若自定义存放目录,可以修改 path 为自定义目录层级 pod "ThingSmartCryption", :path =>'./' pod "ThingSmartHomeKit" end post_install do | installer | installer.pods_project.targets.each do | target | target.build_configurations.each do | config | config.build_settings['APPLICATION_EXTENSION_API_ONLY'] = 'NO' end end end- 配置
Target,在Target中按需引入组件或 SDK。 - 需要注意,引入 SDK 的同时必须引入
ThingSmartCryption。
- 配置
-
设置
AppGroups。- 开启
AppGroups权限。 - 在 SDK 初始化之前,给 SDK 设置 App Groups Name。
AppGroups只有付费开发者账号才能创建权限,所以免费开发者账号不能调试 Widget 应用。
- 开启
-
使用
AppKey和AppSecret初始化 SDK。 -
在用
AppKey初始化 SDK 之前,设置 App Groups Name。[ThingSmartSDK sharedInstance].appGroupId = APP_GROUP_NAME; [[ThingSmartSDK sharedInstance] startWithAppKey:SDK_APPKEY secretKey:SDK_APPSECRET];
Demo App
智能生活 App SDK 示例工程 Demo 仅用于演示体验,请勿直接商用。更多详情,请访问 《涂鸦开发服务协议》。
准备 Demo
在 准备工作 阶段,您可以获取 iOS 版本 SDK 的 AppKey 和 AppSecret。
集成 SDK 时,请确认 BundleId、AppKey 和 AppSecret 是否与涂鸦开发者平台上的信息一致,任意一个不匹配会导致 SDK 无法使用。
从 5.0 SDK 切换到其他 SDK 版本后,需重替换为对应版本的密钥信息和更换集成方式
Demo 概述
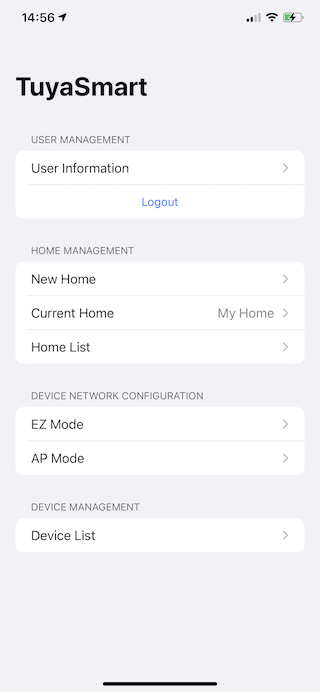
演示工程提供了 Swift 与 Objective-C 的版本,请访问 Swift 示例 与 Objective-C 示例 获取演示工程。工程主要包括了以下功能:
-
用户账号注册及登录
-
用户信息管理
-
家庭管理
-
Wi-Fi 快连和热点模式配网
-
设备控制

常见问题
SING_VALIDATE_FALED
该内容对您有帮助吗?
是意见反馈该内容对您有帮助吗?
是意见反馈


