Develop Tuya-Compatible Home Assistant Drivers
Overview
Home Assistant is a Python-based open-source smart home system. It supports smart home devices of multiple brands, ensuring easy voice control and automation of devices. Home Assistant provides an all-in-one and mobile-friendly interface for you to control smart devices. It allows you to run the system on a local server without interactions with the cloud. This way, your privacy can be better protected.
It is one of the most trending IoT open-source projects in GitHub. Playing with Home Assistant based on Raspberry Pi is very popular with smart home geeks.
For more information, see the following reference:
Materials
Mac computer
Count:1Used to install the software and connect to Raspberry Pi using Terminal.
Raspberry Pi
Count:1Used to install Ubuntu Server and Home Assistant.
Wireless router
Count:1Connect Raspberry Pi to the internet.
microSD card
Count:1Used to install Ubuntu Server and store files and data.
SD card reader
Count:1Connect the microSD card to the computer.
Steps
Step 1: Set up development environment
Home Assistant Core is developed based on Python and can run on ODROID, Raspberry Pi, ASUS Tinker board, Intel NUC, Windows, macOS, Linux, and more.
We have set up the development environment on Raspberry Pi by using Home Assistant Core. For more information, see Set up Home Assistant Development Environment on Raspberry Pi.Step 2: Configure integration environment
-
Download Tuya official Home Assistant integration.
-
Go to the Home Assistant configuration directory, for example,
~/.homeassistantfor macOS. For more information about directory configuration, see Access Home Assistant through Samba. -
Create a folder named
custom_componentsin the configuration directory and a subfolder namedtuya.
-
Extract the Tuya integration to the
tuyafolder. -
Open the
configuration.yamlfile with a text editor. See Register with Tuya IoT Platform to get the required information and complete related fields, as shown below.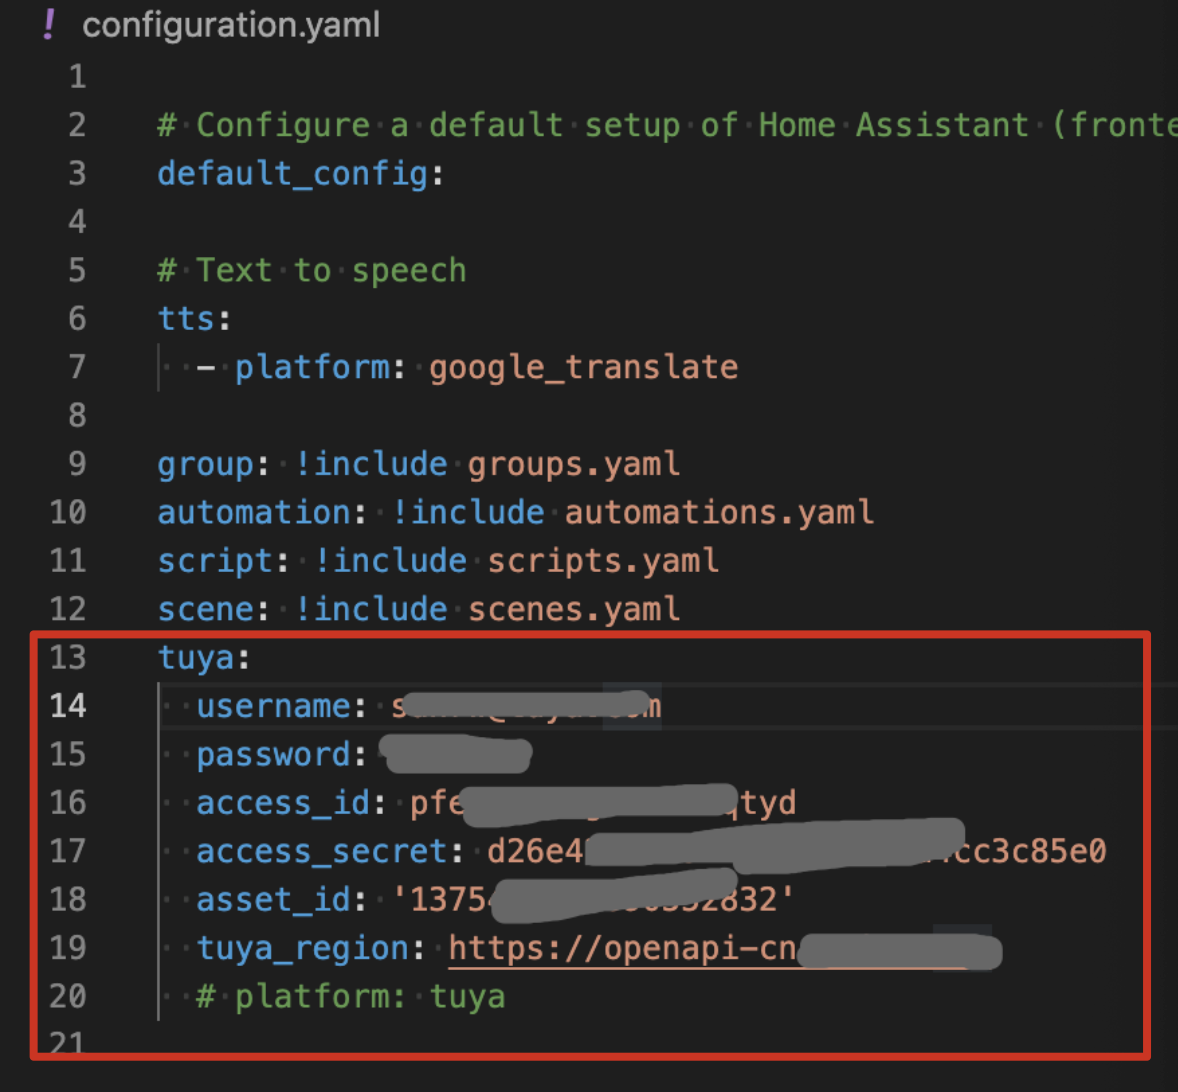
-
Step 3: Initialize integration
Once the configuration is completed, you can run Home Assistant to call
aysnc_setupin the __init__.py file to start the plugin initialization process.__init__.async_setup
async def async_setup(hass, config): """Set up the Tuya integration.""" conf = config.get(DOMAIN) ## Read information from configuration.yaml print('Tuya async setup conf %s \n' % conf) if conf is not None: async def flow_init() -> Any: try: ## Go to config_flow.py to proceed with initialization result = await hass.config_entries.flow.async_init( DOMAIN, context={"source": SOURCE_IMPORT}, data=conf ) except Exception as inst: print(inst.args) print("Tuya async setup flow_init") return result # await hass.async_add_executor_job( hass.async_create_task( flow_init() ) return TrueTuyaConfigFlow.async_step_userIn the __init__.py file, execute
async_setupuntilTuyaConfigFlow.async_step_importand then executeasync_step_user.async def async_step_user(self, user_input=None, is_import=False): _LOGGER.debug('TuyaConfigFlow.async_step_user start, is_import=', is_import) errors = {} if user_input is not None: ## Try to log in with the configuration information response = await self.hass.async_add_executor_job(self._try_login, user_input) if response.get('success', False): return self.async_create_entry( title=user_input[CONF_USERNAME], data=user_input, ) else: errors['base'] = 'code={}, msg={}'.format(response.get('code', 0), response.get('msg', '')) if is_import == True: return self.async_abort(reason=errors['base']) ## If no information has been configured, set a pop-up window to guide the user to configure information. return self.async_show_form( step_id='user', data_schema=DATA_SCHEMA_USER, errors=errors, )__init__.async_setup_entry
async def async_setup_entry(hass: HomeAssistant, entry: ConfigEntry):
    print("tuya.__init__.async_setup_entry-->", entry.data)

	## Execute _init_tuya_sdk for initialization
    success = await hass.async_add_executor_job(_init_tuya_sdk, hass, entry.data)
    if not success:
        return False

    ## Initialize Home Assistant devices according to the tuya->ha type mapping table.
    for platform in set(TUYA_TYPE_TO_HA.values()):
        print("tuya async platform-->", platform)
        hass.async_create_task(
            hass.config_entries.async_forward_entry_setup(
                entry, platform
            )
        )

    return True
Step 4: Develop driver based on integration
This section describes how to develop a driver for sockets.
Prerequisites
Before development, go to the Home Assistant developer website to find an entity that fits the socket, such as the switch. Follow the Switch Entity to develop a driver for sockets.
Procedure
-
Create a new
switch.pyfile in thecustom_components/tuyadirectory.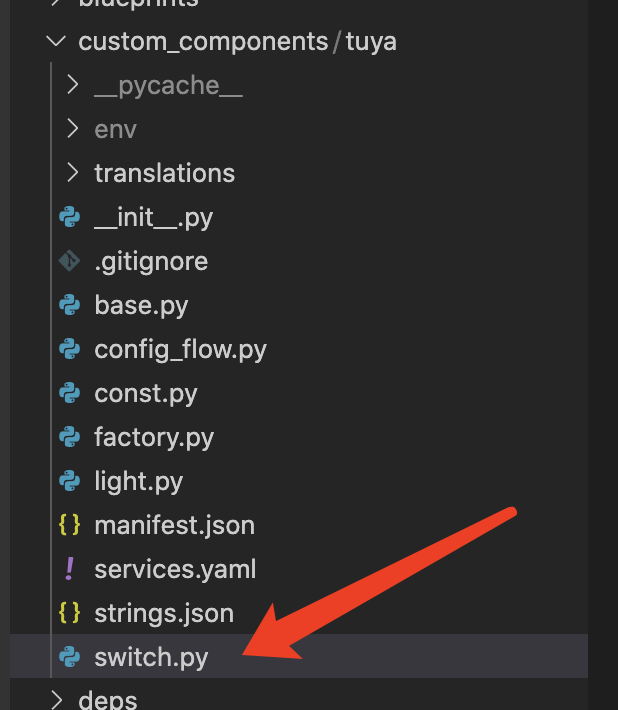
-
Create a new
async_setup_entrymethod for initialization.
This method readshaDevicesfrom the cache. The switch is the matched type so we create a new device entity as follows.async def async_setup_entry(hass: HomeAssistant, entry: ConfigEntry, async_add_entities): print('tuya.switch.async_setup_entry') haDevices = [] for haDevice in hass.data[DOMAIN]['haDevices']: if haDevice.platform == 'switch': haDevices.append(haDevice) async_add_entities(haDevices) -
Create a new
TuyaHaSwitchas the defined entity for Tuya sockets in Home Assistant. Based on the Switch Entity, implement the requiredPropertiesandMethods, such asturn_onandturn_offfor switch’sMethodsandis_onforProperties.Sample code:
class TuyaHaSwitch(TuyaHaDevice, SwitchEntity):
"""Tuya Switch Device."""

platform = 'switch'

# ToggleEntity

@property
def is_on(self) -> bool:
    """Return true if switch is on."""
    return self.tuyaDevice.status.get(DPCODE_SWITCH, False)

def turn_on(self, **kwargs: Any) -> None:
    """Turn the switch on."""
    self.tuyaDeviceManager.publishCommands(self.tuyaDevice.id, [{'code': DPCODE_SWITCH, 'value': True}])

def turn_off(self, **kwargs: Any) -> None:
    """Turn the device off."""
    self.tuyaDeviceManager.publishCommands(self.tuyaDevice.id, [{'code': DPCODE_SWITCH, 'value': False}])
-
Summary
After this step is completed, you have implemented a basic switch driver.
For more information about the driver’s lifecycle, see Setting up an entry.
Is this page helpful?
YesSuggestions


