Tuya Wind IDE
Tuya Wind IDE (integrated development environment) provides comprehensive facilities to TuyaOS EasyGo developers.
Background
Tuya Wind IDE is provided as an extension of Visual Studio Code (VS Code) and is available in both English and Chinese. You log in to this IDE with the account of the Tuya Developer Platform. Tuya Wind IDE manages, distributes, and updates the TuyaOS EasyGo development kits, enabling a consistent development experience across hosts and programming tools.
Installation environment
Tuya Wind IDE supports the following environments:
-
Linux virtual machine (VM) on Windows host, or Linux VM: used for developing most networked products, cellular products, gateways, control panels, IP cameras (IPCs), and network video recorders (NVRs).
-
Windows: used for developing most sub-devices.
-
macOS: only supports browsing and permission request for TuyaOS development frameworks, not for downloading.
Prerequisites
- If you use a Linux virtual machine (VM) on a Windows host throughout the development, see Step 1: Install Linux VM environment and then see the section Install IDE for the following operations.
- If you use a Linux host (or VM) or a Windows system throughout the development, skip Step 1: Install Linux VM environment.
Step 1: Install Linux VM environment
Install VM software, VirtualBox or VMware, and create a VM. Install Ubuntu 20.04 or above version on the VM. It is recommended to set the RAM of the VM to 8G.
-
VirtualBox:
-
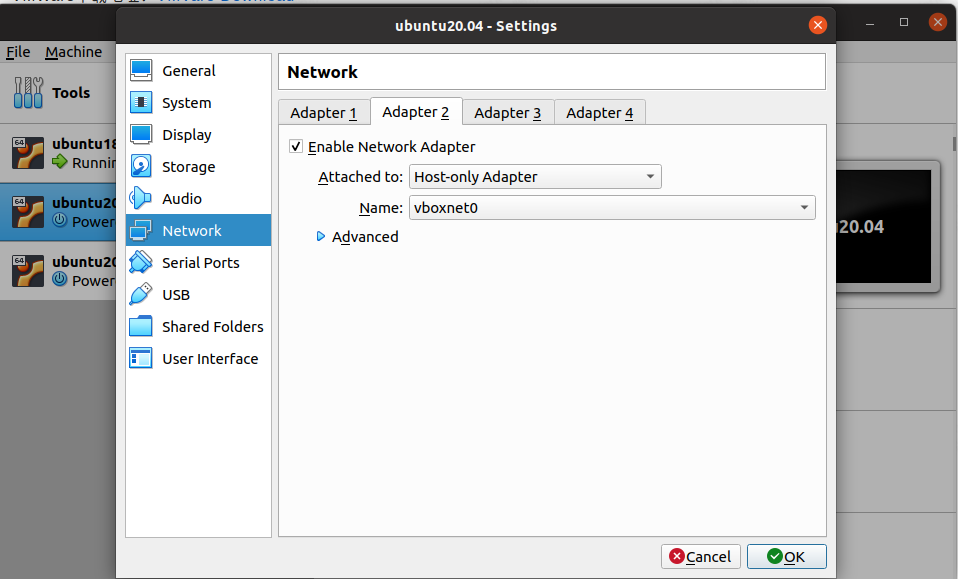
If you use VirtualBox, set the Adapter 2 to Host-only Adapter to ensure VS Code on Windows can connect to the VM via SSH.
-
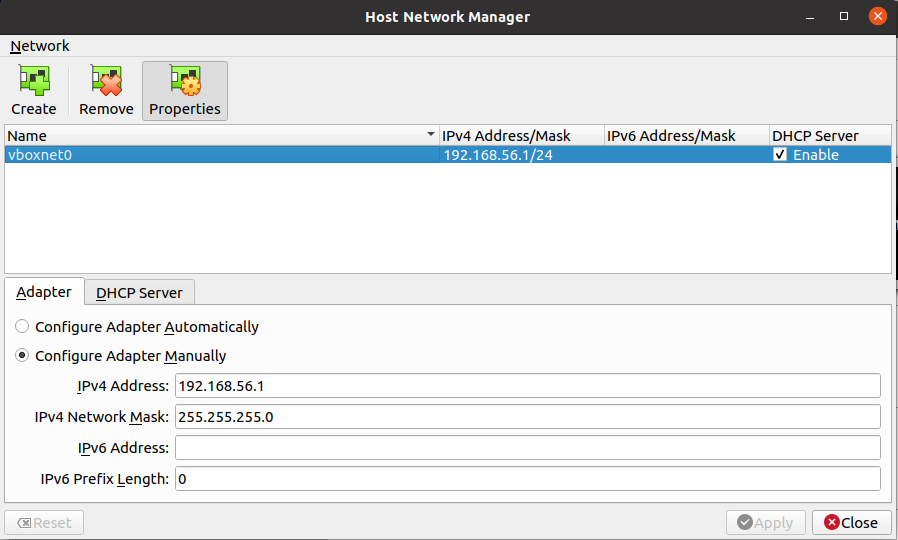
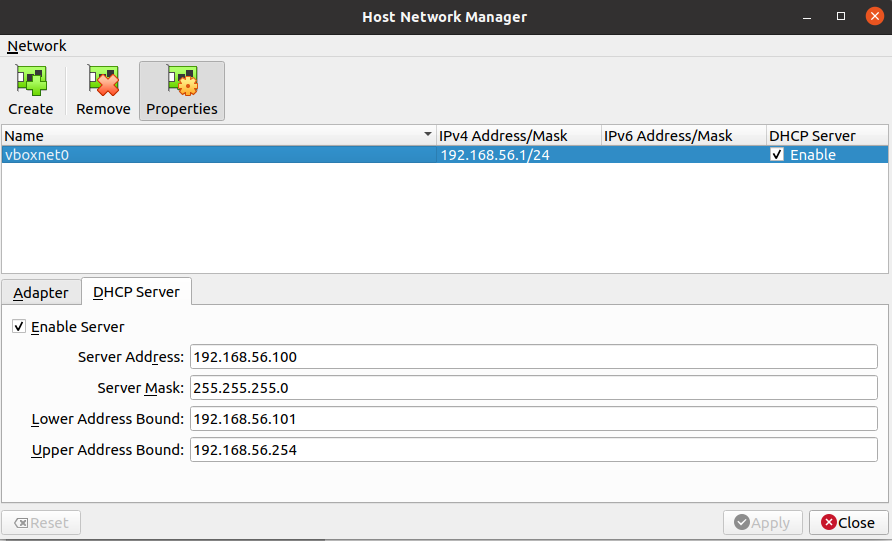
If you cannot create Host-only Adapter, on the main VirtualBox window, choose File > Host Network Manager and configure as shown below. Or visit this website for troubleshooting.
-
Power on your VM and get the IP address of your VM.

-
Install the necessary software on the virtual machine.
sudo apt install openssh-server openssh-client build-essential lib32stdc++6
-
If you only use a Linux VM throughout the development, see the section Install IDE for the following operations.
Step 2: Enable SSH login without password
Windows 10 or 11 has a built-in SSH client.
On the Windows host, run the following commands in PowerShell to configure an SSH login without password.
-
Assume the username of the VM is
vscode. -
The IP address of the VM is
192.168.56.105.
-
Generate an SSH key.
ssh-keygen -t rsa -b 4096 -
Specify the username and IP address of your VM.
$USER_AT_HOST="vscode@192.168.56.105" -
Specify the location where the public key to upload resides.
$PUBKEYPATH="$HOME\.ssh\id_rsa.pub" -
Register the public key. You are required to enter the username and password of the server.
$pubKey=(Get-Content "$PUBKEYPATH" | Out-String); ssh "$USER_AT_HOST" "mkdir -p ~/.ssh && chmod 700 ~/.ssh && echo '${pubKey}' >> ~/.ssh/authorized_keys && chmod 600 ~/.ssh/authorized_keys"
Step 3: Install Remote SSH extension
-
Install and open VS Code.
-
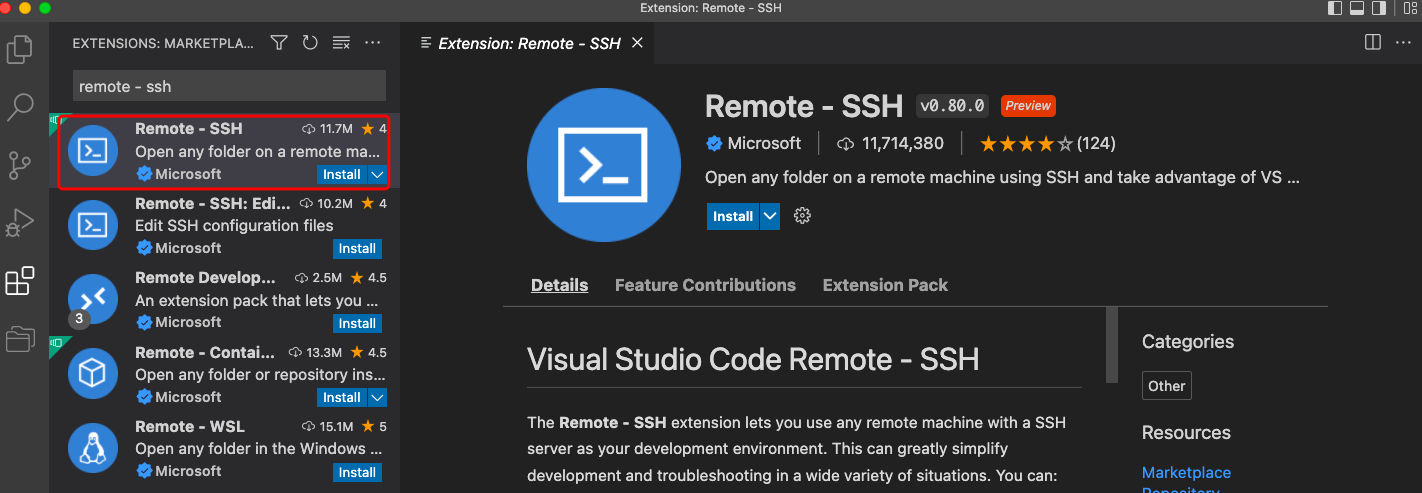
Click Extensions in the left navigation pane. Search for and install Remote - SSH.
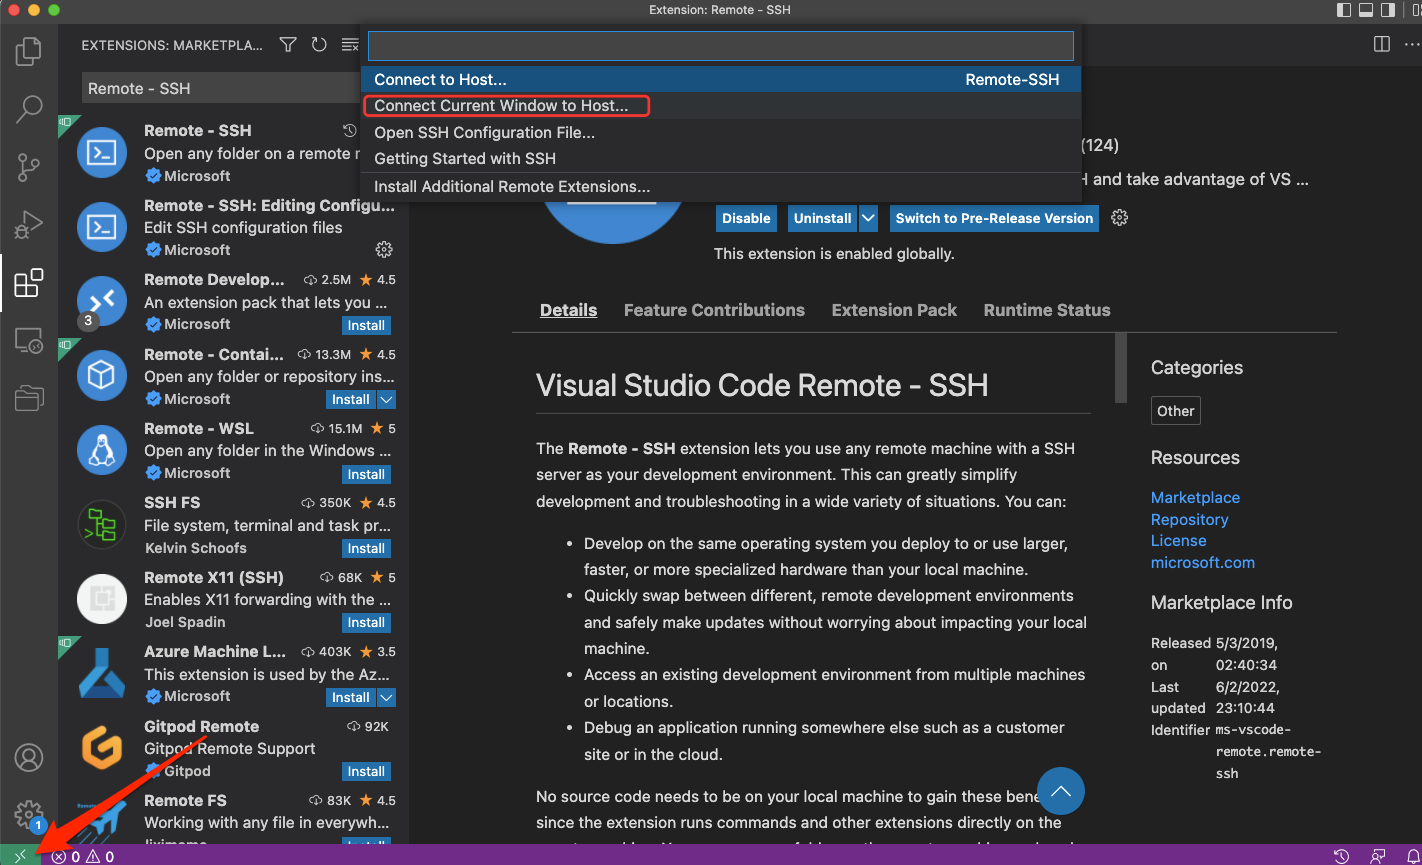

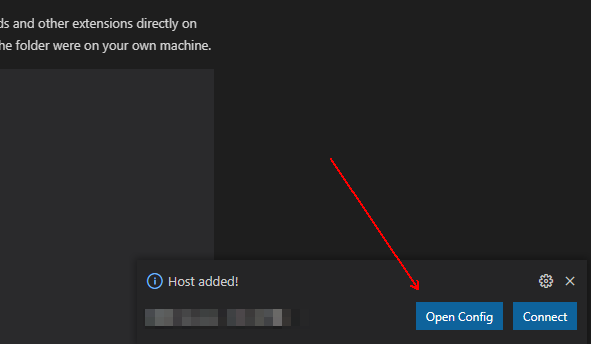
-
Set up and connect to SSH. This example uses the IP address
192.168.56.105.
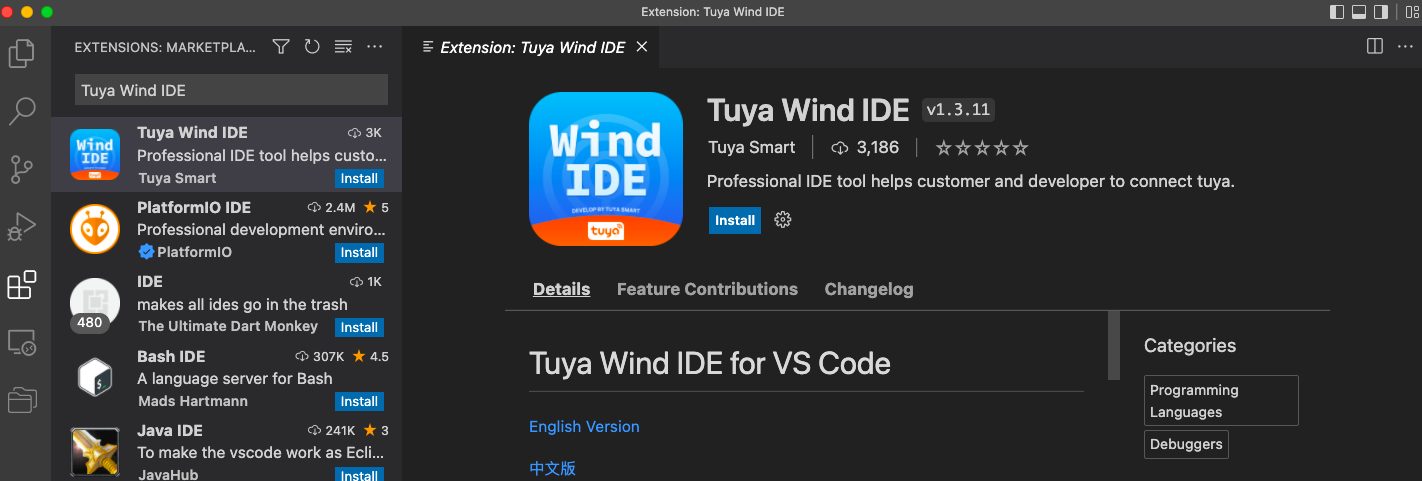
Install IDE
Install VS Code on your Windows computer.
Open VS Code. Search for and install Tuya Wind IDE as shown in the following figures.
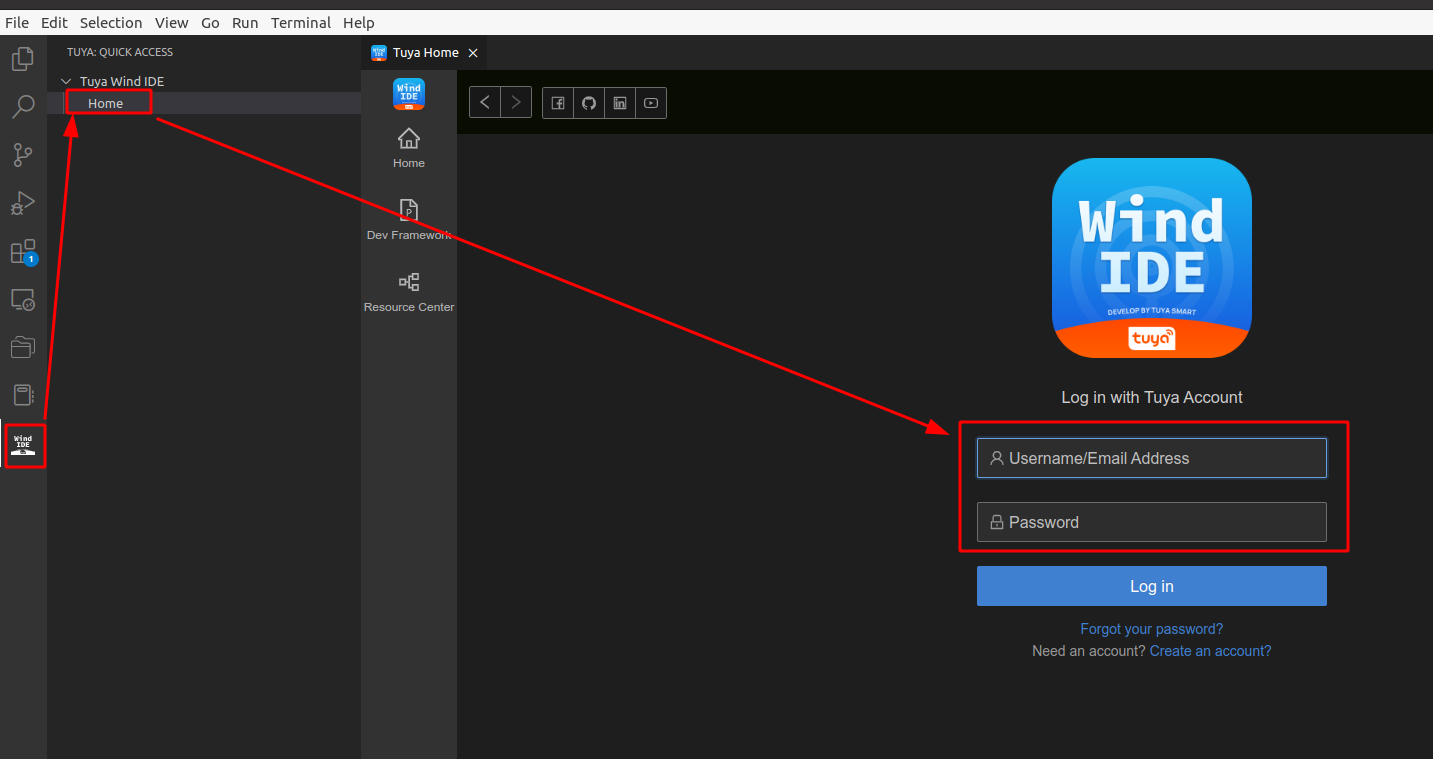
Log in
Open the login page as shown in the following figure. Log in to the IDE with the account of the Tuya Developer Platform.
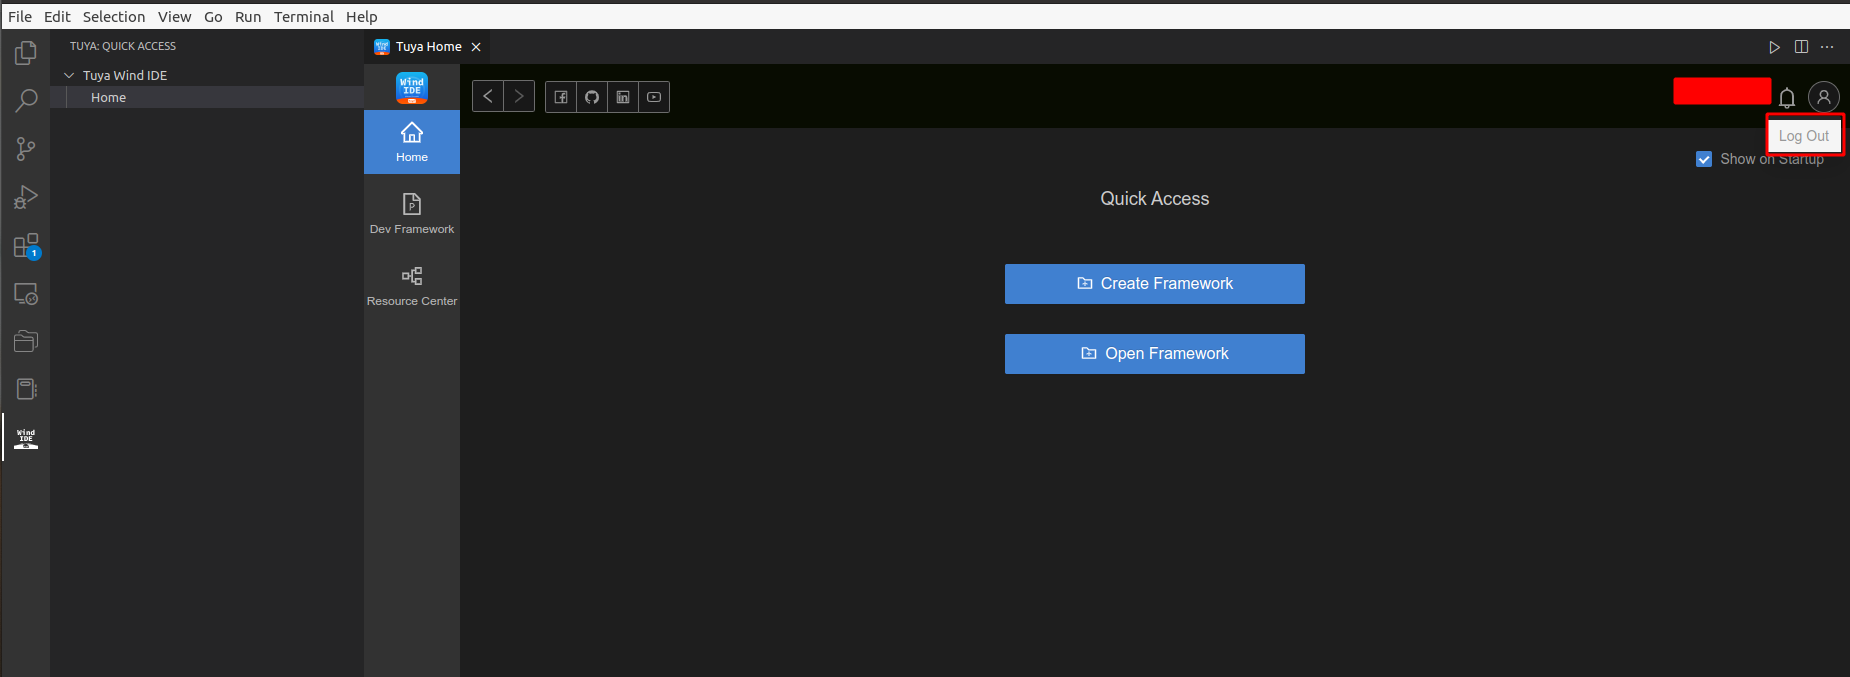
Log out
Click the account icon in the top right corner and click Log Out.
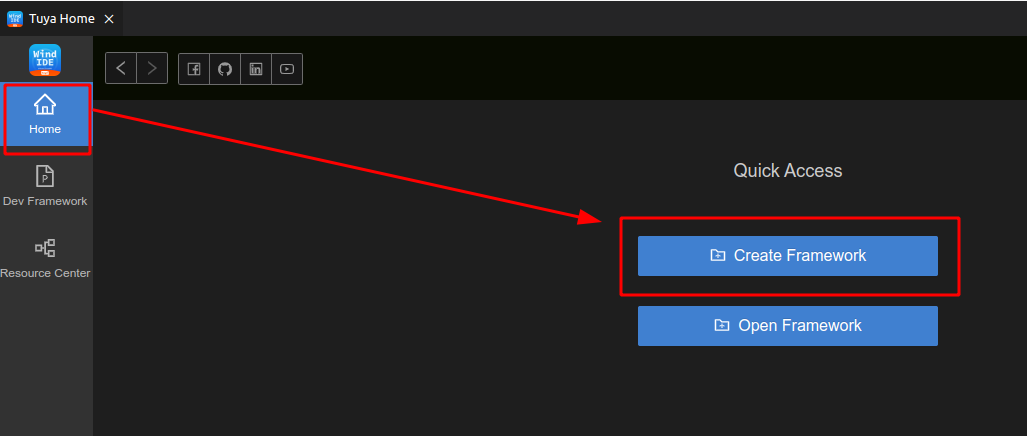
Download development framework
Choose Home > Create Framework.
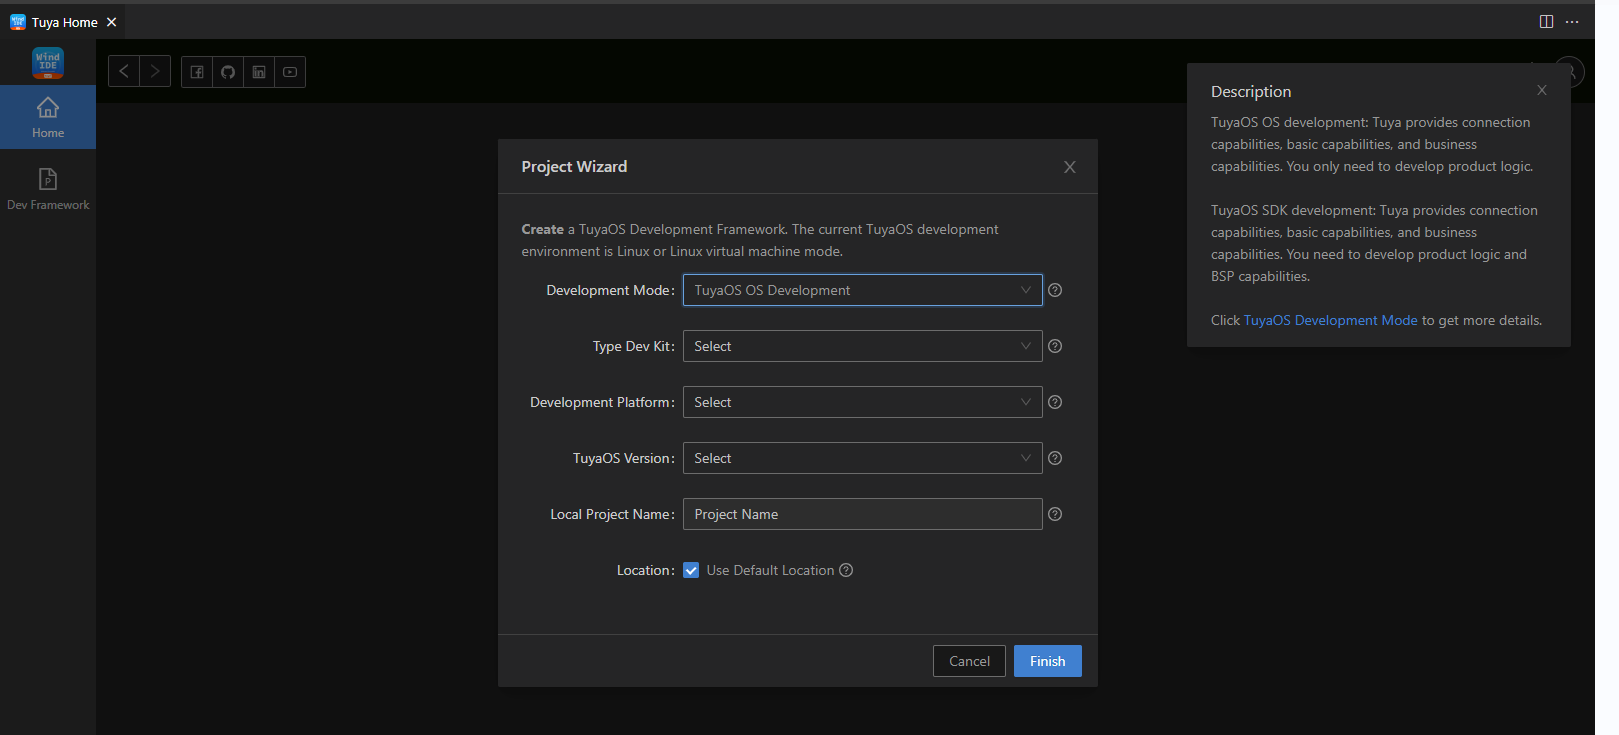
Complete the required fields on the TuyaOS Framework Wizard. The following table lists the parameters and their description.
| Parameter | Description |
|---|---|
| Development mode |
|
| Type development kit | Various development kits are provided in terms of development frameworks and application scenarios. |
| Development platform | The chip platform that a development framework supports. Choose the chip platform according to the processor, manufacturer, category, and model. |
| TuyaOS version | The version number is in the format xx.xx.xx. |
| Local project name | Give your project a name. |
| Location | Use the default location or enter a custom location.Note: If you use a custom location, make sure that you have the write permission for the specified directory. |
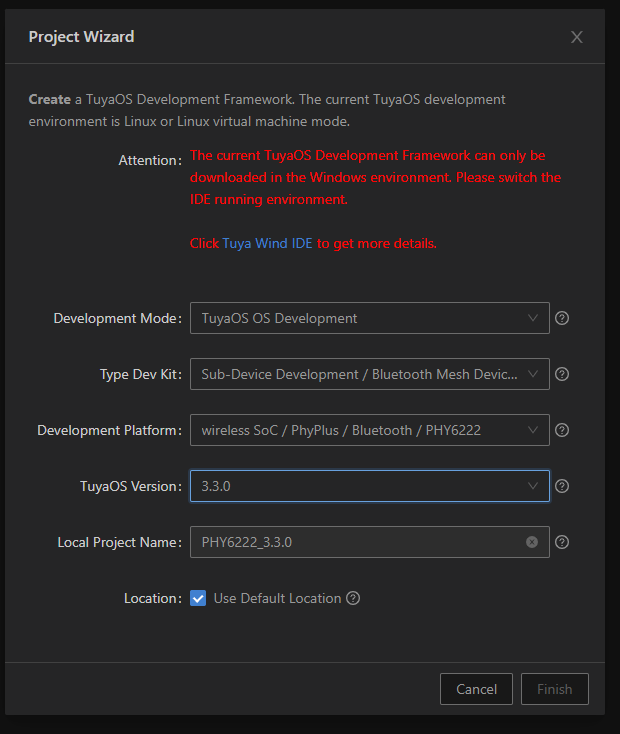
You can click the link in the pop-up window to learn more about the development mode and type development kit you choose.
-
Development framework:
-
Type development kit:

-
Be sure to download the TuyaOS development framework in the correct development environment and use that framework accordingly. Click Finish to download the development kit.
Context menu
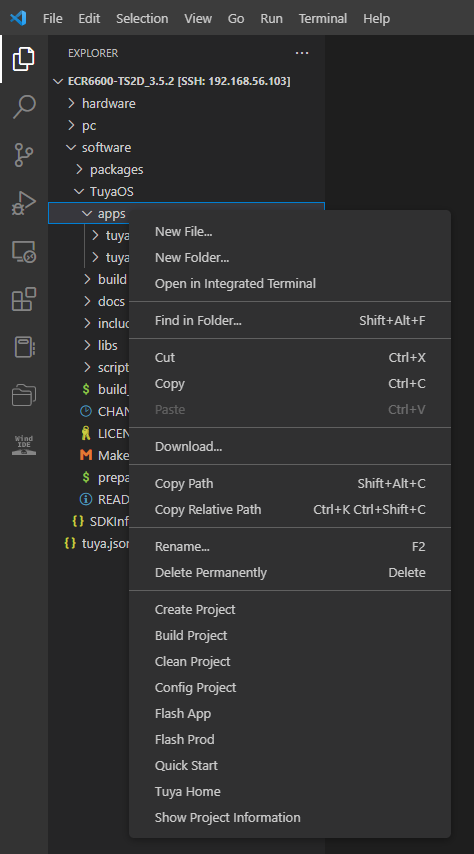
In the following table:
-
{project}represents the path of the current TuyaOS development framework. -
{project}/software/apps/{application}represents the path of the application of the current TuyaOS development framework.Context menu Feature Scope Create Project Create an application. {project}/software/apps Build Project Build the current application. {project}/software/apps/{application} Clean Project Clean the build of the current application. {project}/software/apps/{application} Config Project Configure the current application with a graphical interface (GUI). This action applies to product development kits that support dynamic configurations. {project}/software/apps/{application} Flash App/Flash Prod Flash firmware to hardware. This action applies to Windows environments only. {project}/software/apps/{application} Quick Start Development framework documentation. {project}/software/subdirectory Tuya Home Log in or out of your account, and download or import a TuyaOS development framework. {project}/software/subdirectory Show Project Information The information about all the development frameworks in the current VS Code workspace. {project}/software/subdirectory
Actions on development frameworks
You have a product development kit opened in the workspace.
Expand the software directory in Explorer. Right-click on software or any subdirectory and choose Show Project Information. Click Development Framework in the left navigation pane of Tuya Home. The information about the development framework is displayed on the right side of the screen.
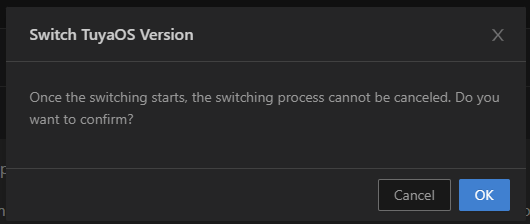
Switch between development frameworks (Linux environment only)
If the development framework has multiple versions, you will see a drop-down menu next to TuyaOS Version.
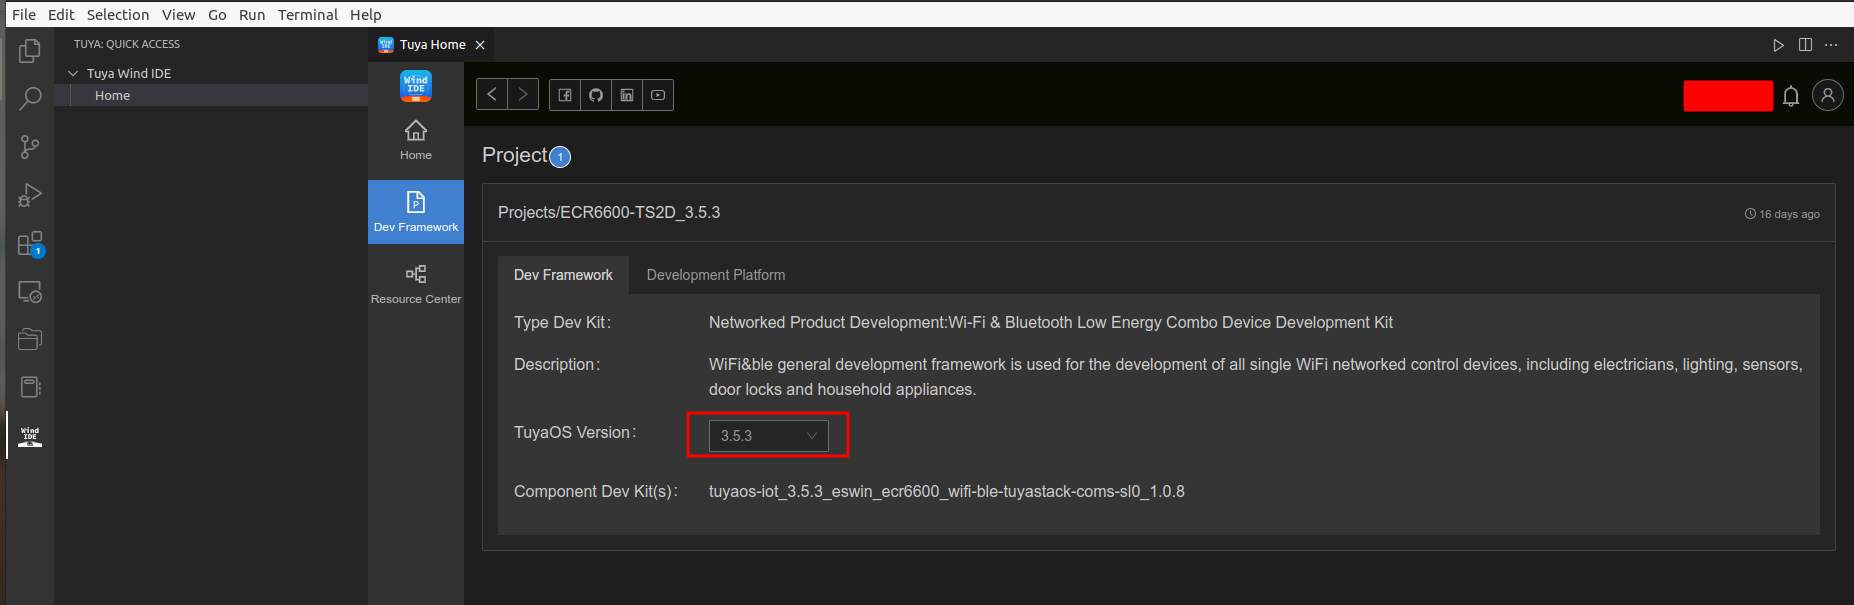
Select the desired TuyaOS version from the drop-down menu.
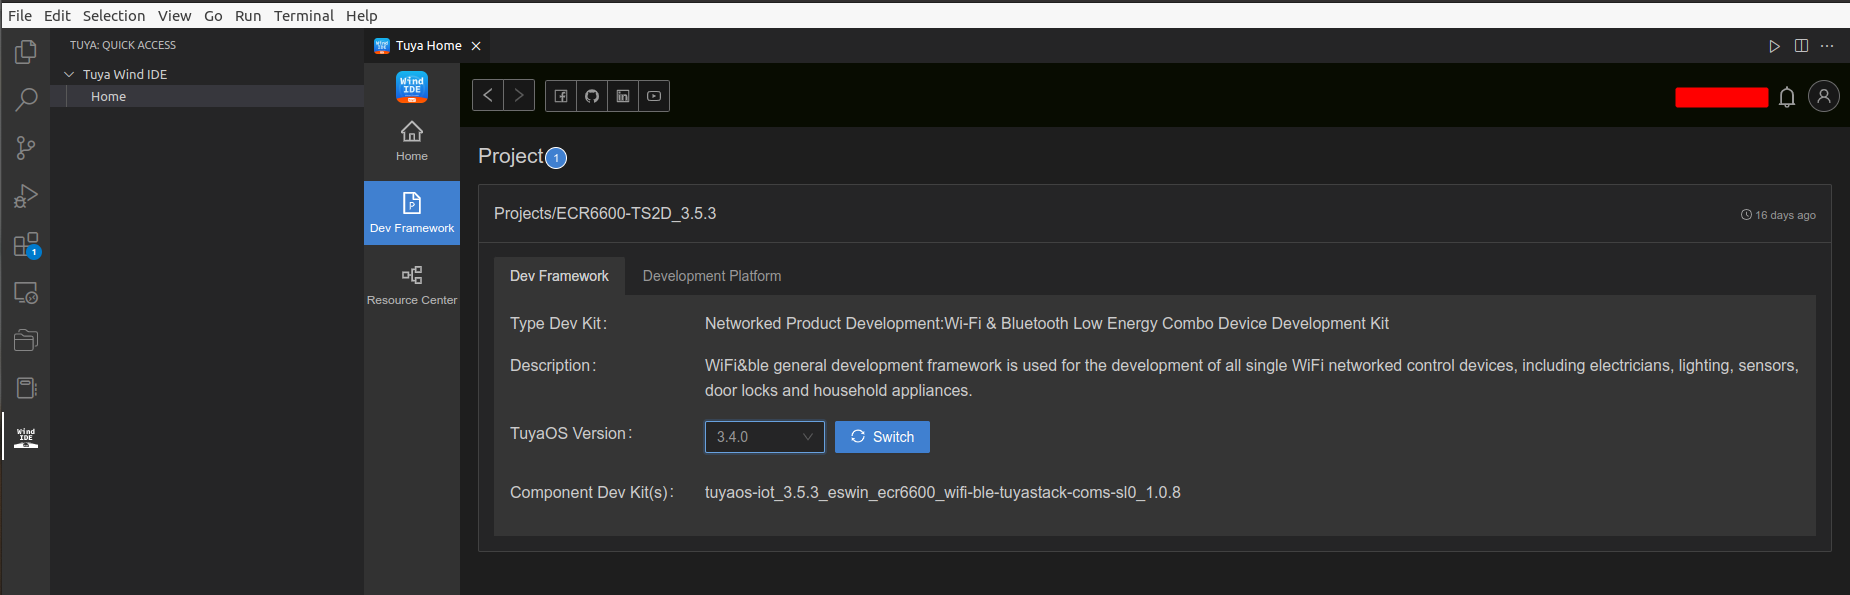
Click Switch to change to that version.
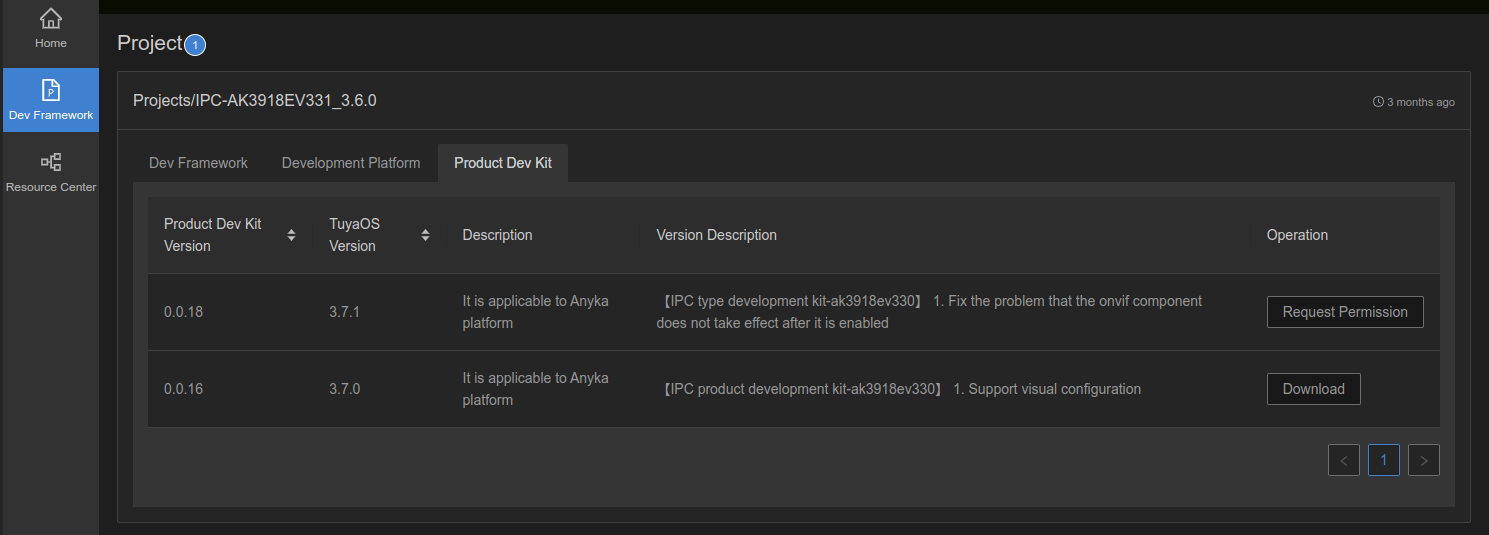
Download product development kit
If a TuyaOS development framework provides a product development kit to download, the Product Dev Kit tab will appear on the page of Dev Framework information.
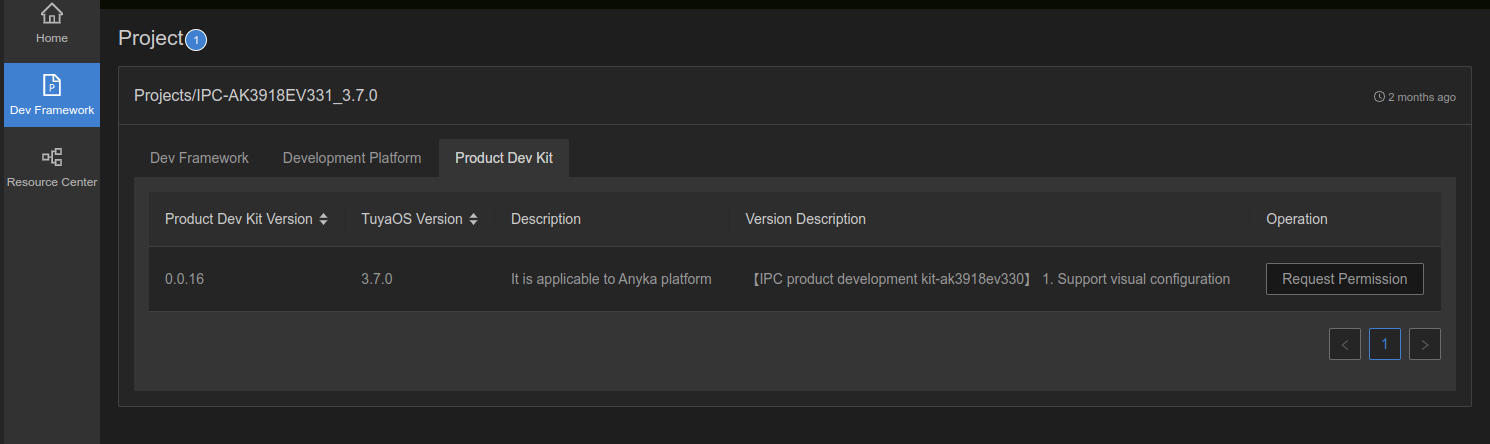
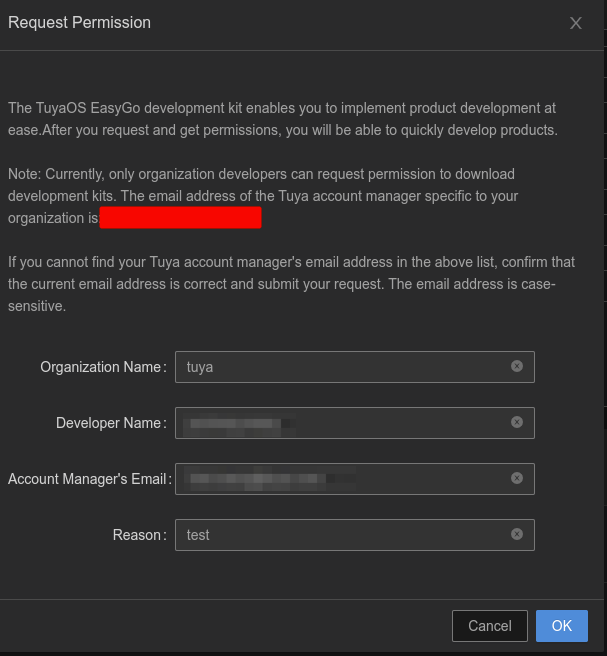
Click Request Permission and complete the required information accurately to get access to the product development kit.
Request Permission is only available to enterprise developers, so be sure to enter the correct email address of the account manager that you are in touch with. If you have questions about the required information, contact your account manager.
-
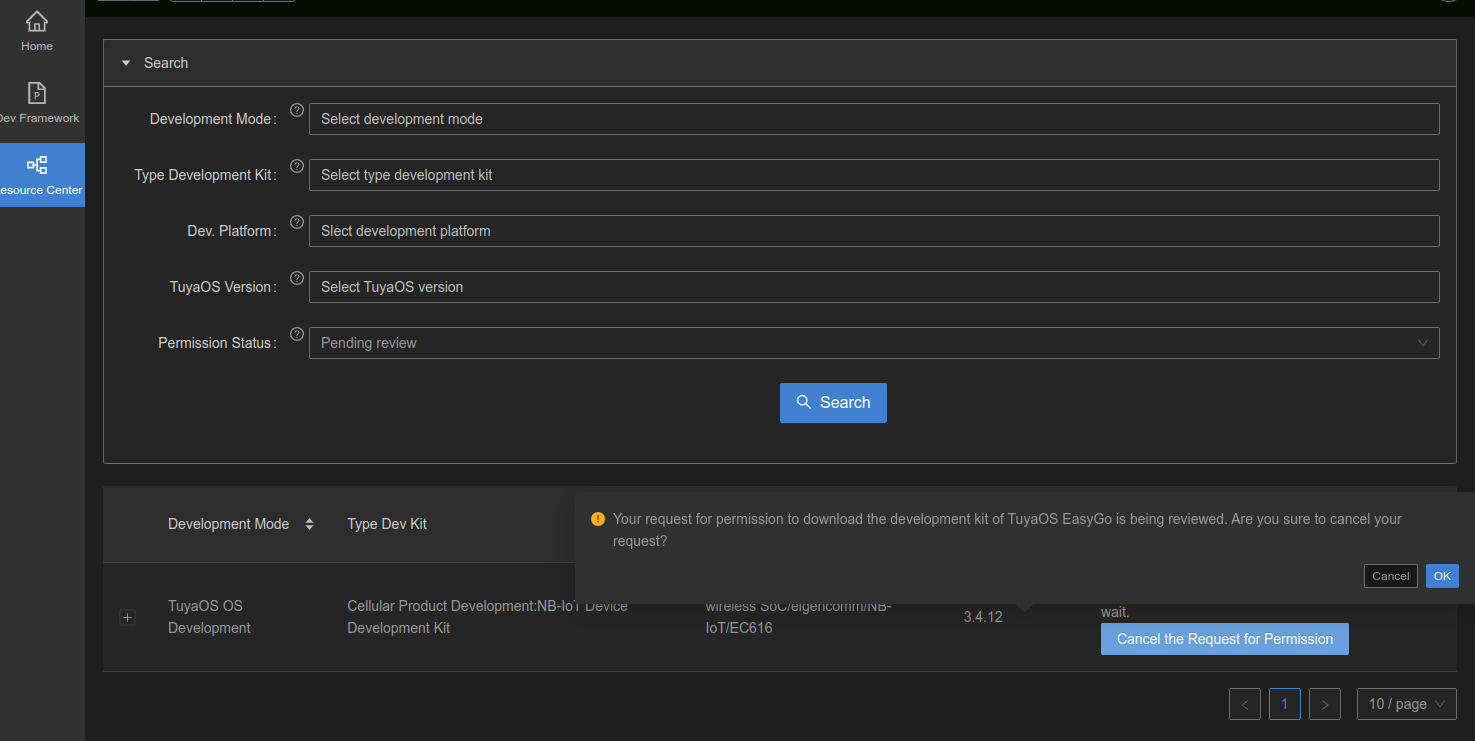
After you submit the request, you will get a message saying Your request for permission is being reviewed. Please wait. You can Cancel the Request for Permission during the review process.

-
After approval, you can download the requested product development kit.
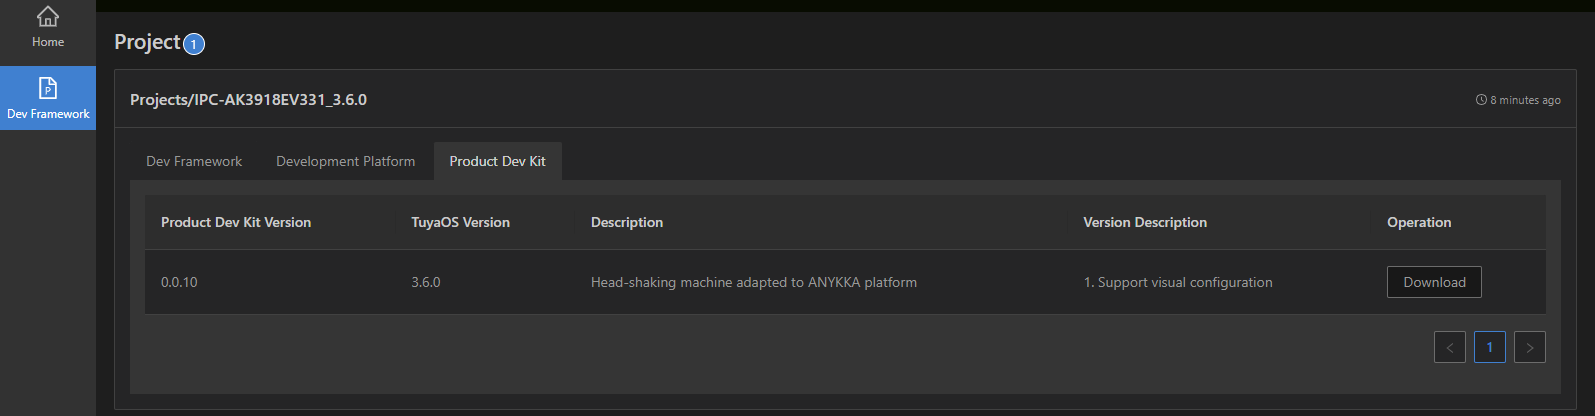
-
The downloaded product development kit will be found in the directory
software/TuyaOS/appsin the workspace.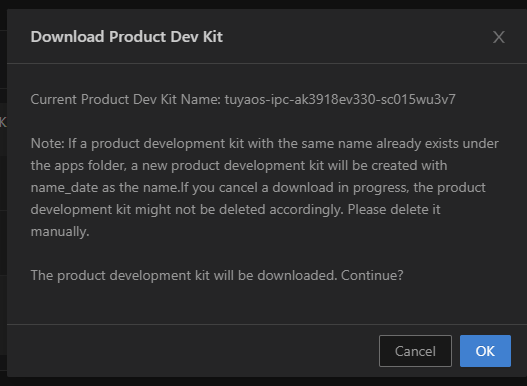
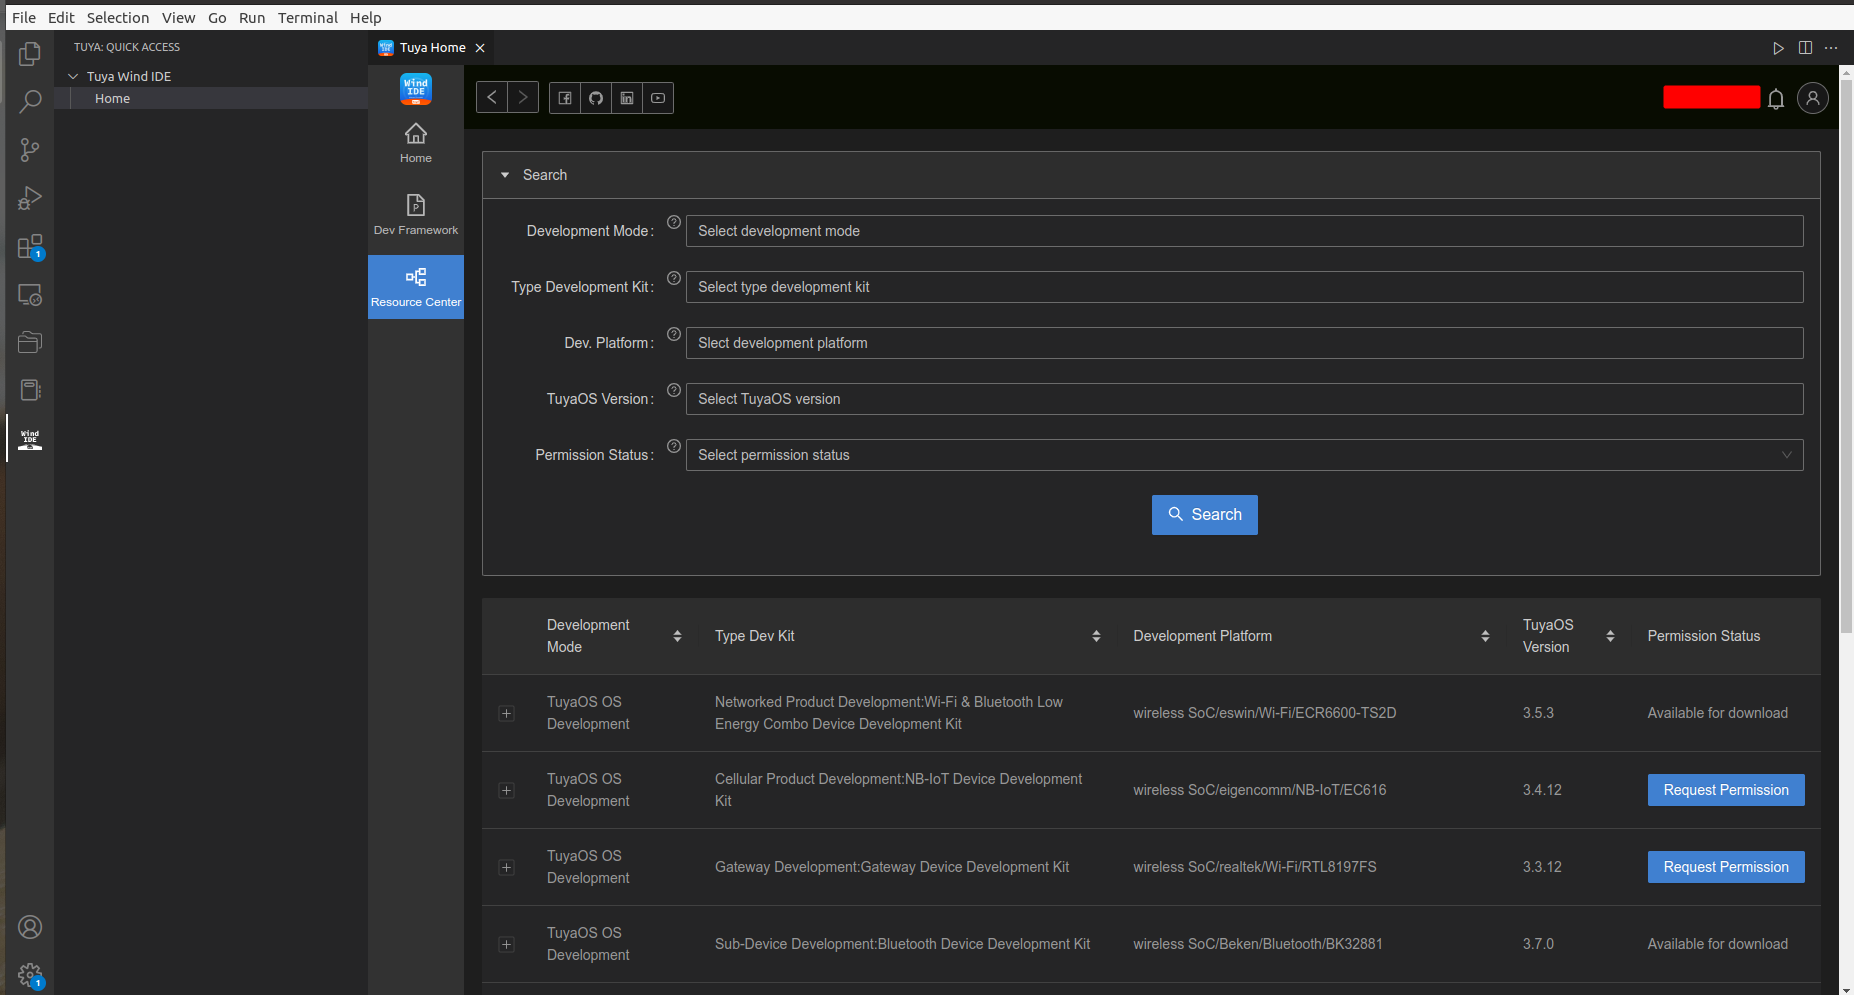
View resource center
-
Click Search in the top left corner of the Resource Center screen to show or hide the search box. You can narrow down your search by using multiple search fields including Development Mode (multi-select), Type Development Kit (multi-select), Dev. Platform (multi-select), TuyaOS Version (multi-select), and Permission Status (single-select). If you leave a field blank, no criteria are considered for that field in the search.
The search results are displayed as a list below the search box. You can sort results by Development Mode, Type Dev Kit, Development Platform, or TuyaOS Version separately, or using weighted sorting.
- Separate sorting: Click a table header to sort by that field.
- Weighted sorting: The priority from high to low is Development Mode > Type Dev Kit > Development Platform > TuyaOS Version. Suppose that you have sorted the results by Development Mode. After you click Type Dev Kit, the results will be sorted by that field without changing the order of the Development Mode column. If you then click Development Platform, the results will be sorted by that field, with the order of Development Mode and Type Dev Kit columns unchanged.
-
You can request permission to download a development kit of TuyaOS EasyGo and cancel a request that is in the review state. After your request is approved, the target development kit will be available to download.
Create an application
Expand the software/TuyaOS/apps directory in Explorer. Right-click on the apps folder and choose Create Project.
Build an application
-
Expand the
software/TuyaOS/apps/xxxdirectory in Explorer. Right-click on thexxxfolder and choose Build Project. If the path is incorrect, you will get an error message in the lower right corner.
If there is only one demo in the
appsdirectory, the demo folder is shown behind theappsdirectory in Explorer due to the design of VS Code. You need to choose and right-click on the subdirectory ofapps. Otherwise, you will get an error message in the lower right corner. -
Choose Build Project, enter the version number of the build in the format
x.x.x, and hit the Enter key to confirm. The version number of the application for Bluetooth mesh and Beacon takes the formatx.xand for other protocols,x.x.xis used.
-
Wait for the IDE terminal to download the toolchain and build the project. The directory where the built firmware resides is shown in the terminal window.

Clean a build
-
Expand the
software/TuyaOS/apps/xxxdirectory in Explorer. Right-click on thexxxfolder and choose Clean Project.
If there is only one demo in the
appsdirectory, the demo folder is shown behind theappsdirectory in Explorer due to the design of VS Code. You need to choose and right-click on the subdirectory ofapps. Otherwise, you will get an error message in the lower right corner. -
Choose Clean Project, enter the version number of the build in the format
x.x.x, and hit the Enter key to confirm. The version number of the application for Bluetooth mesh and Beacon takes the formatx.xand for other protocols,x.x.xis used.
Flash firmware
- If your environment is a Linux virtual machine on Windows, find the flashing tool in the
pc/toolsdirectory. You can use the provided tools for firmware flashing and verification on Windows. - You can use the Flash App and Flash Prod features on the context menu to flash the firmware.
- Expand the
software/TuyaOS/apps/xxxdirectory in Explorer. Right-click on thexxxfolder and choose Flash App.- Flash App erases data on the user area.
- Expand the
software/TuyaOS/apps/xxxdirectory in Explorer. Right-click on thexxxfolder and choose Flash Prod.- Flash Prod erases all the data.
View TuyaOS documentation
-
Right-click on
softwareor other subdirectories and choose Quick Start.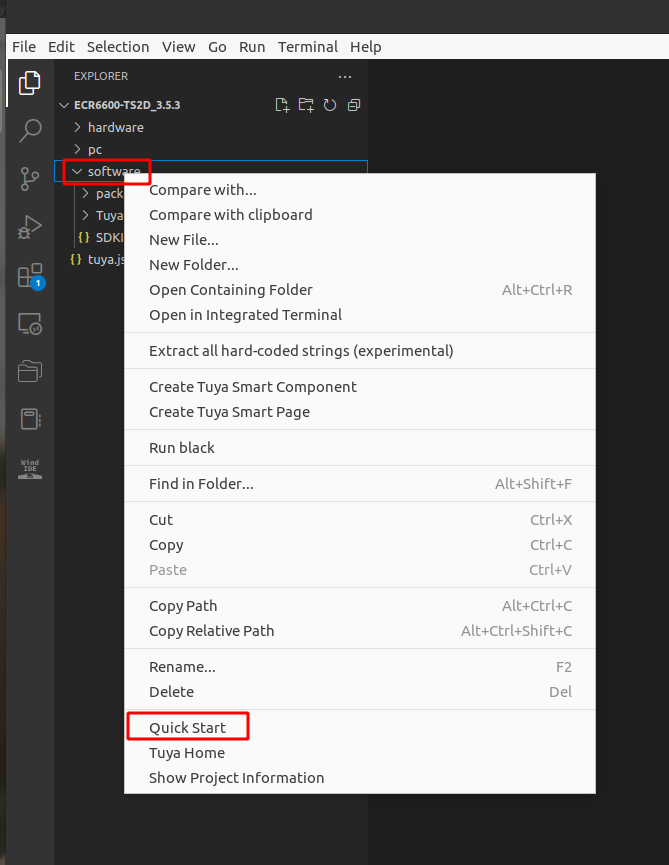
-
TuyaOS documentation navigation appears.
TuyaOS development documentation includes:
hardwaredirectory: documentation for embedded software development.pc/toolsdirectory: documentation for programs running on the host, such as the flashing tool.softwaredirectory: documentation for demos and APIs.
What you can do:
-
You can always go back to the documentation hub page by clicking TuyaOS Documentation Navigation in the top left corner.
-
Check TuyaOS API documentation.
-
Check TuyaOS demo documentation.
Directory structure of API reference
-
Homepage: describes the current development kit.
-
Related webpages/developer guide: describes the development process, process diagram, and things to note.
-
Struct: provides information about the structs for use.
-
Files: describes functions, definitions, enumeration, macros, and more.
-
Search box: searches for any information about development with global search (default) and filters (such as structs and files).
Fuzzy search is supported. For example, if you enter the character
a, all relevant information will be returned.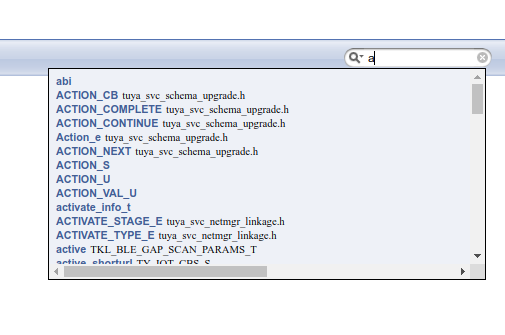
Debug
Install a preferred debugging extension on VS Code.
Is this page helpful?
YesFeedbackIs this page helpful?
YesFeedback


