Control Fingerbot with Tuya Cloud Development Platform OpenAPI
Overview
Amazing Fingerbot
Recently, there has been a buzz all over the world about Fingerbot from Adaprox. Fingerbot can switch lights via app, activate vacuum with voice, and remotely power on your office PC. Fingerbot can remotely control various switches and buttons.
The most impressive thing about Fingerbot is that it can make the original non-smart devices Smart at a Low Cost.
Fingerbot can help you achieve the following features.
-
Remote control: When you are out exercising, you can remotely control the air conditioner at home through the app. You will be greeted with a comfortable room temperature when you arrive at home.
-
Voice control: When watching a drama on the sofa, you can remotely control the robot vacuum by voice.
-
Timing: A cup of coffee is ready for you every morning, getting you energized for the day ahead. Put water in the tub for you every night in advance, relieving you from a hard day.
The Power behind Fingerbot
Why is Fingerbot so powerful?
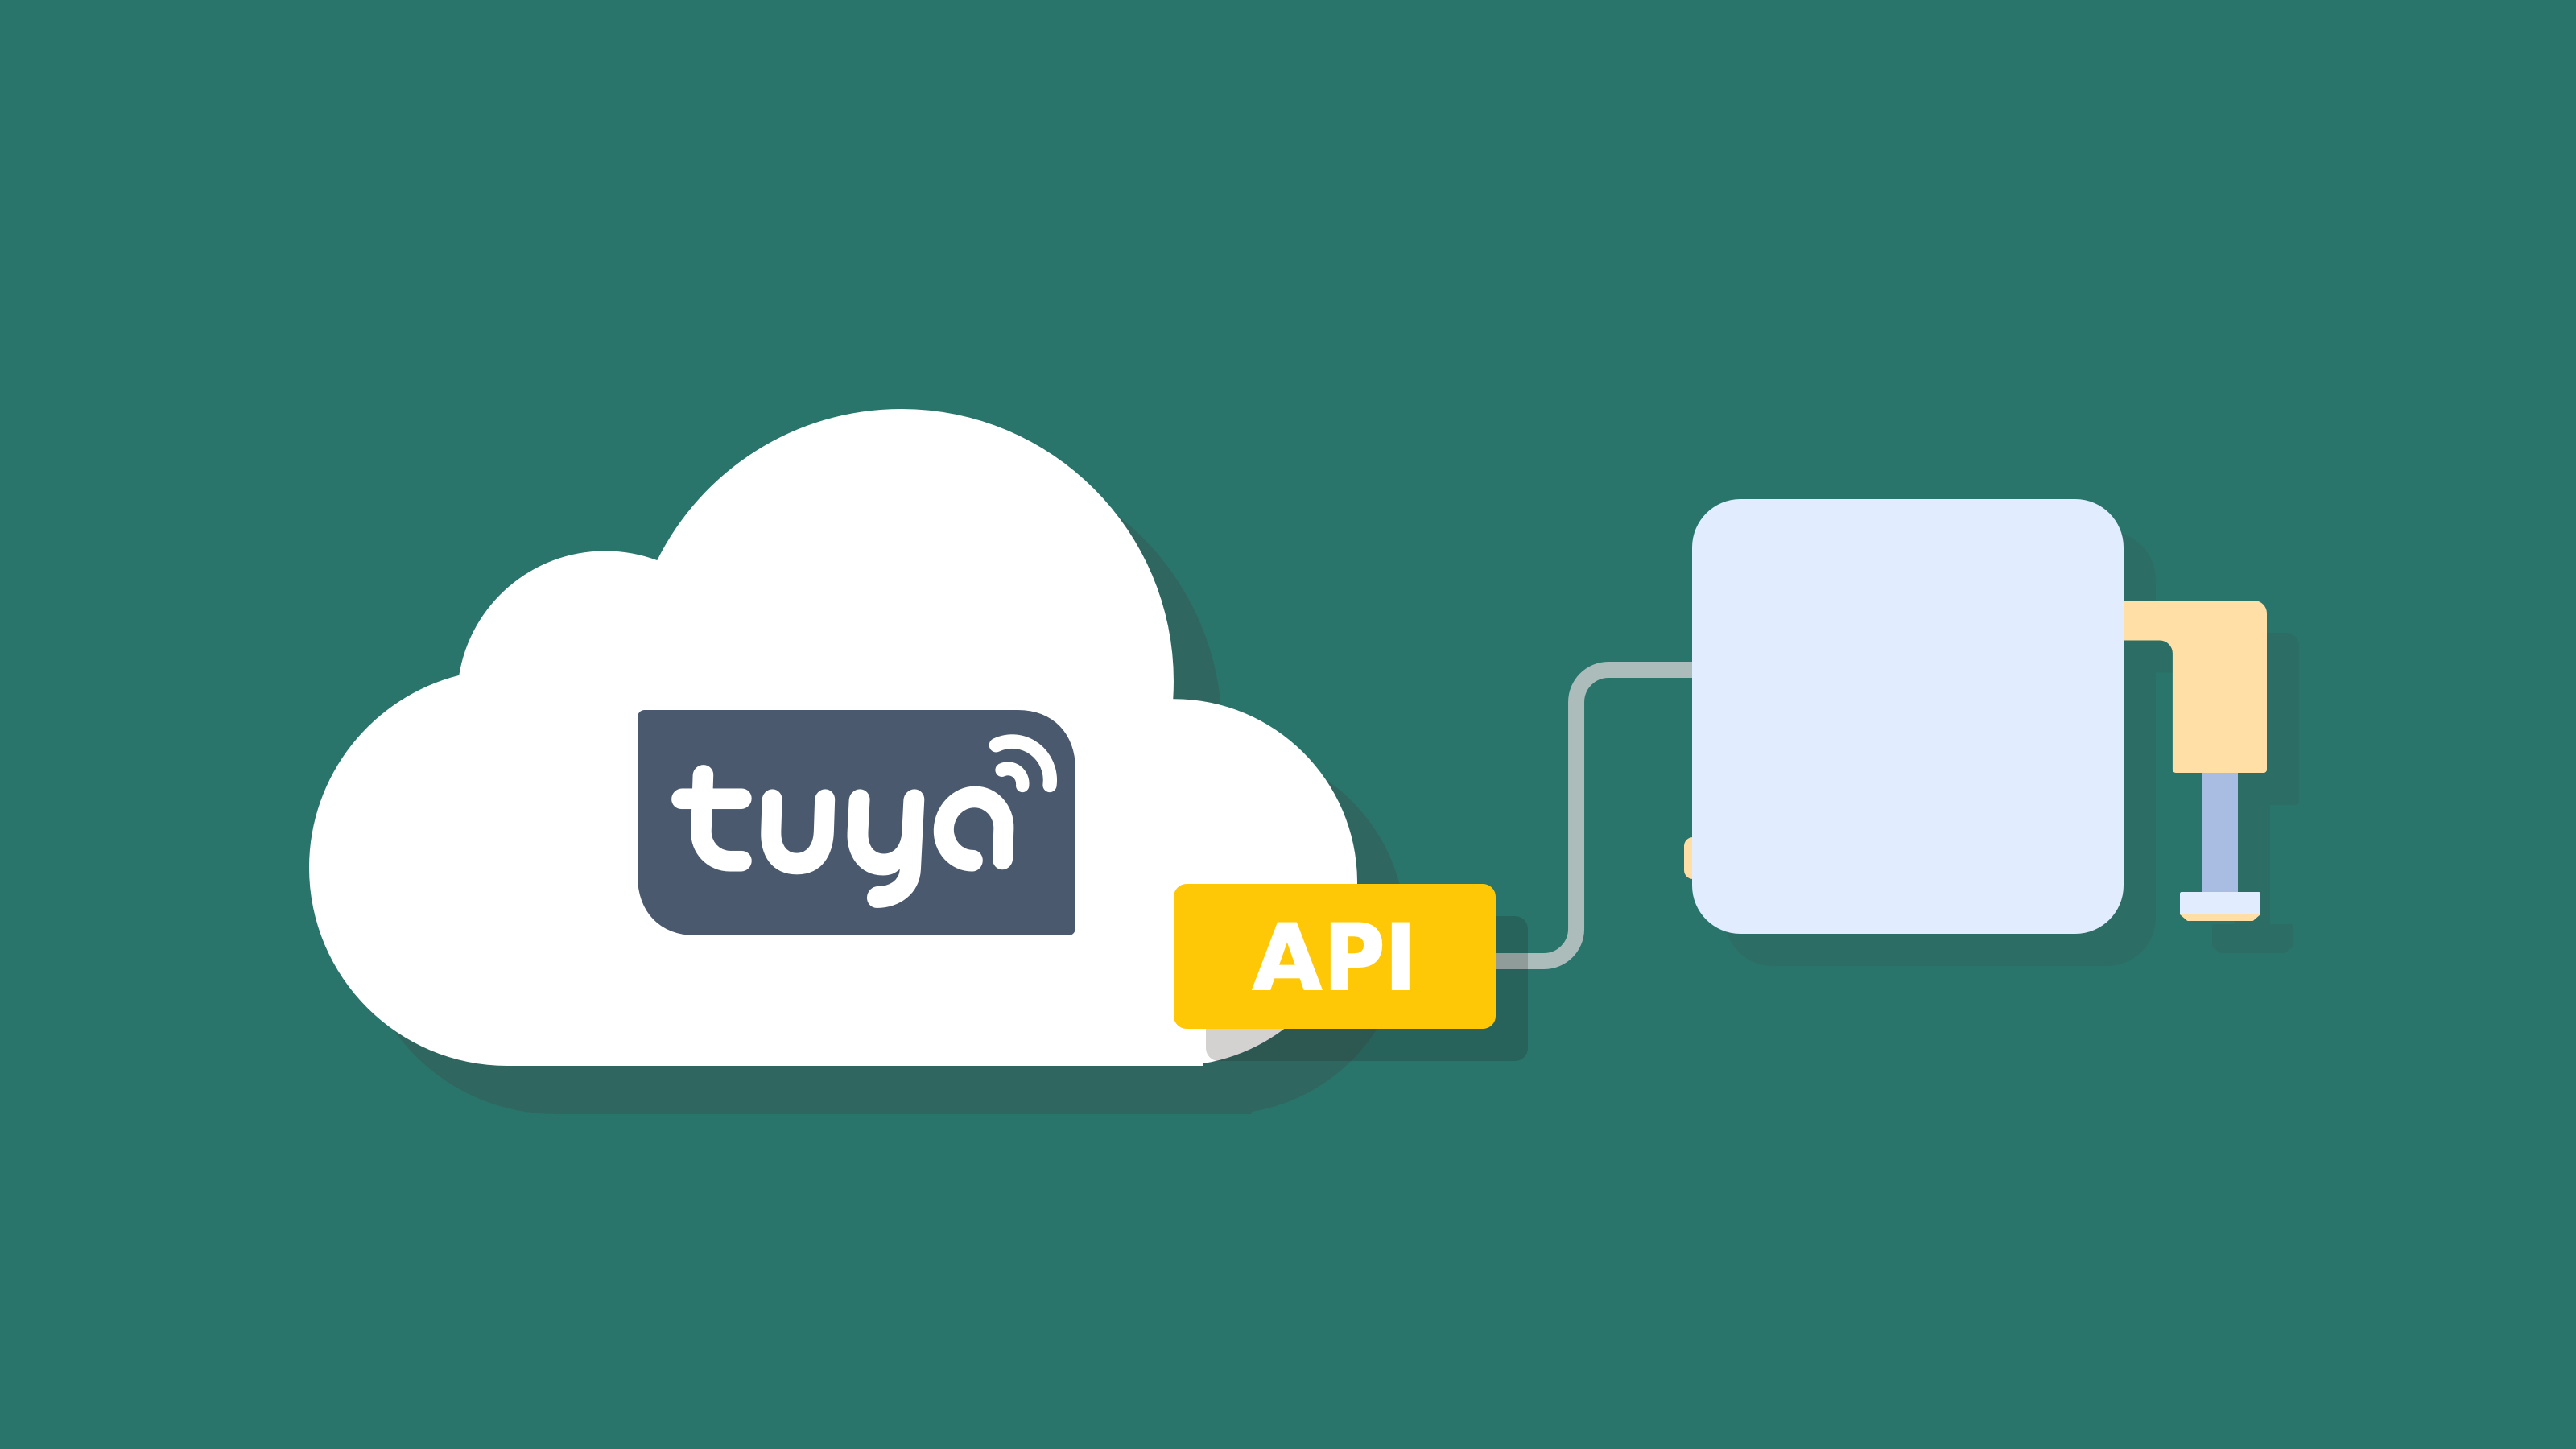
Fingerbot is backed by Tuya Cloud Development Platform, an open IoT cloud platform from Tuya Smart. This platform provides various cloud services including OpenAPI for application developers, equipment manufacturers, and solution providers, covering common capabilities for core scenarios such as device control, smart home, and, scene automation.
All IoT devices connected to Tuya IoT Cloud can be controlled by the cloud through authorization and API calls. You can implement the development of internal business logic by calling APIs. Device status listening is opened in the form of message queues to enable the third-party developers to monitor device status and to achieve the linkage between different devices.
Materials
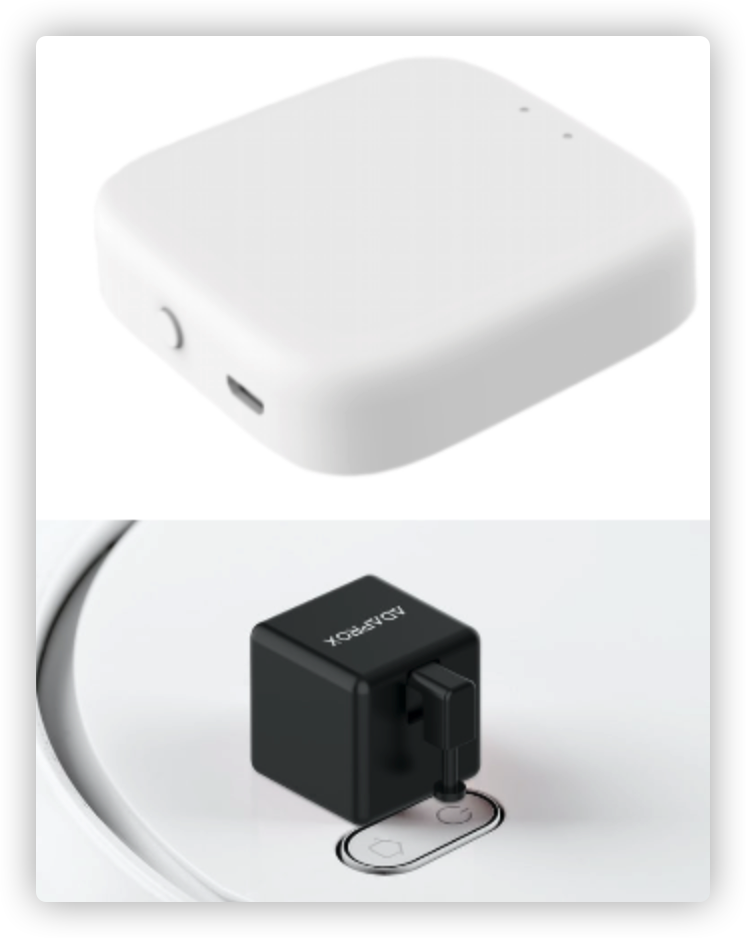
Smart gateway
Count:1The basic function of a gateway is to convert the communication protocols to achieve communication between devices with different protocols. Cloud connection capability and protocol type are two basic attributes of the gateway.more
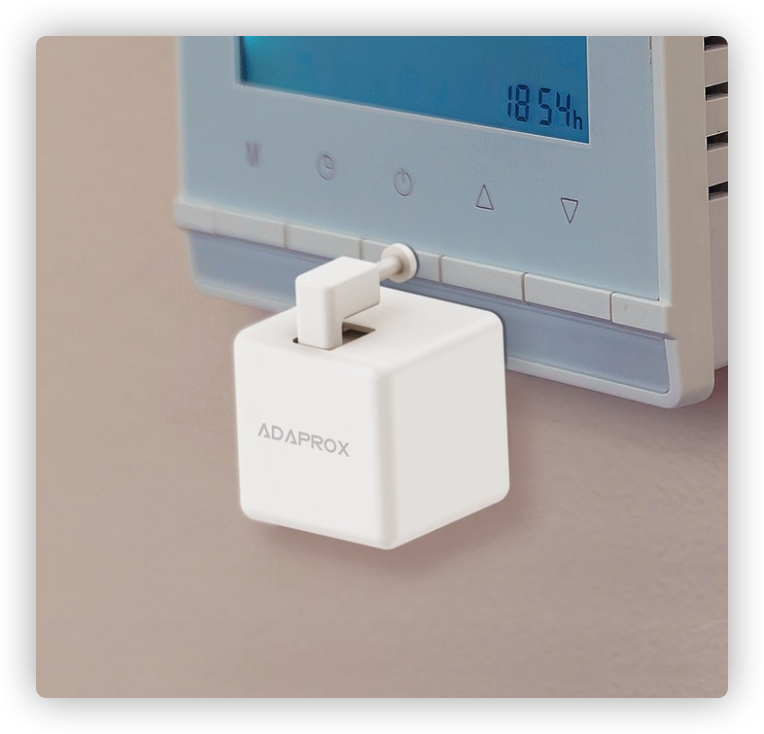
Fingerbot
Count:1Fingerbot is the tool which can make the original non-smart devices Smart with Remote control, Voice control, Timing features at a Low Cost.more
Steps
Preparation
Step 1: Connect the smart gateway and Fingerbot to the Tuya Smart app
- Follow the prompts to make the smart gateway and Fingerbot ready for pairing. Usually you can press the ON button to make them ready for pairing.
- On the Tuya Smart app, discover and link devices.
Step 2: Link Fingerbot on the Tuya IoT Platform
- Create a smart home project.
- Log in to Tuya IoT Platform.
- Click Cloud in the left navigation bar.
- Go to Cloud > Projects and click Create.
- On the Create Project page, configure Project Name, Description, and Industry. In the Project Type field, select Smart Home from the dropdown list.
- Click Create to complete project creation.
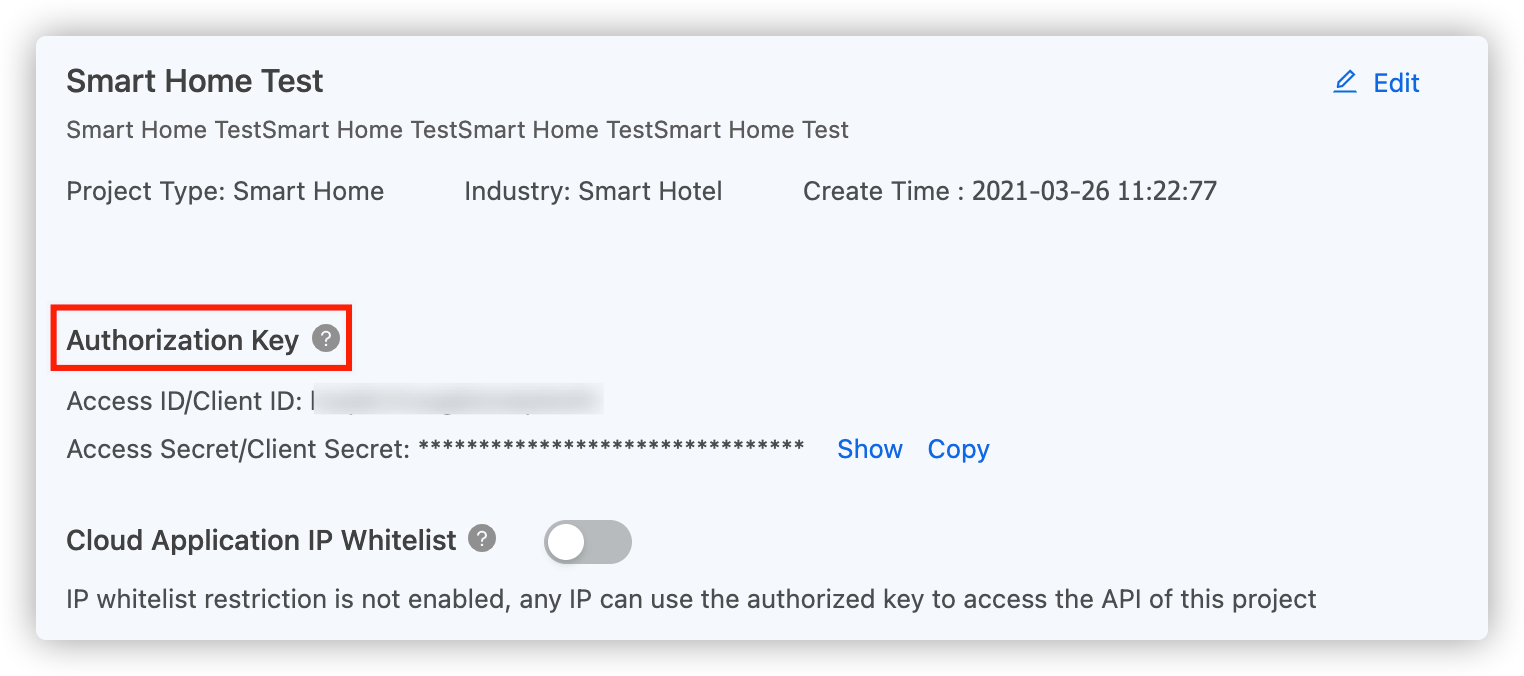
- Click the created project to enter the details page and get the Authorization Key to call APIs.
- Link the device by the app account and copy the device ID
device_idof Fingerbot to clipboard for later use.- Click the Link Devices tab.
- On the Link Devices page, click Link devices by app account and click Add App Account.
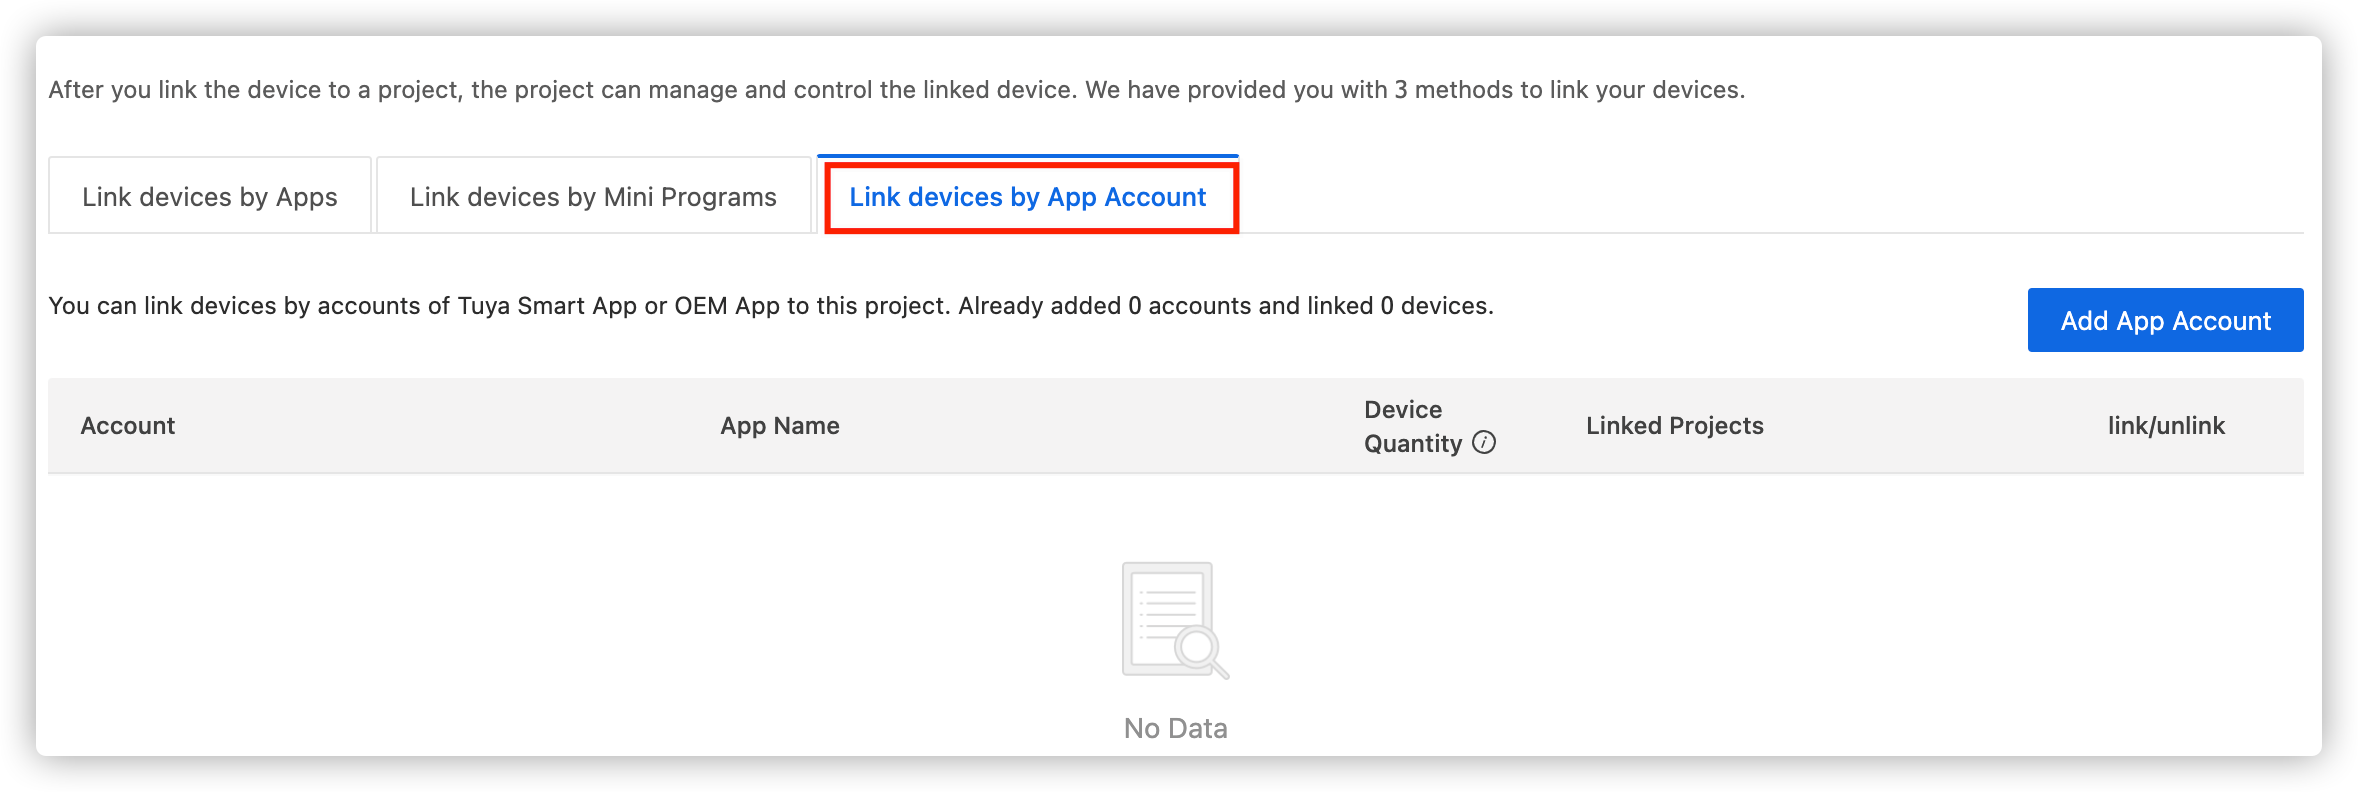
- On the Scan QR code page, you can scan the QR code with the Tuya Smart app.
- Click Confirm.
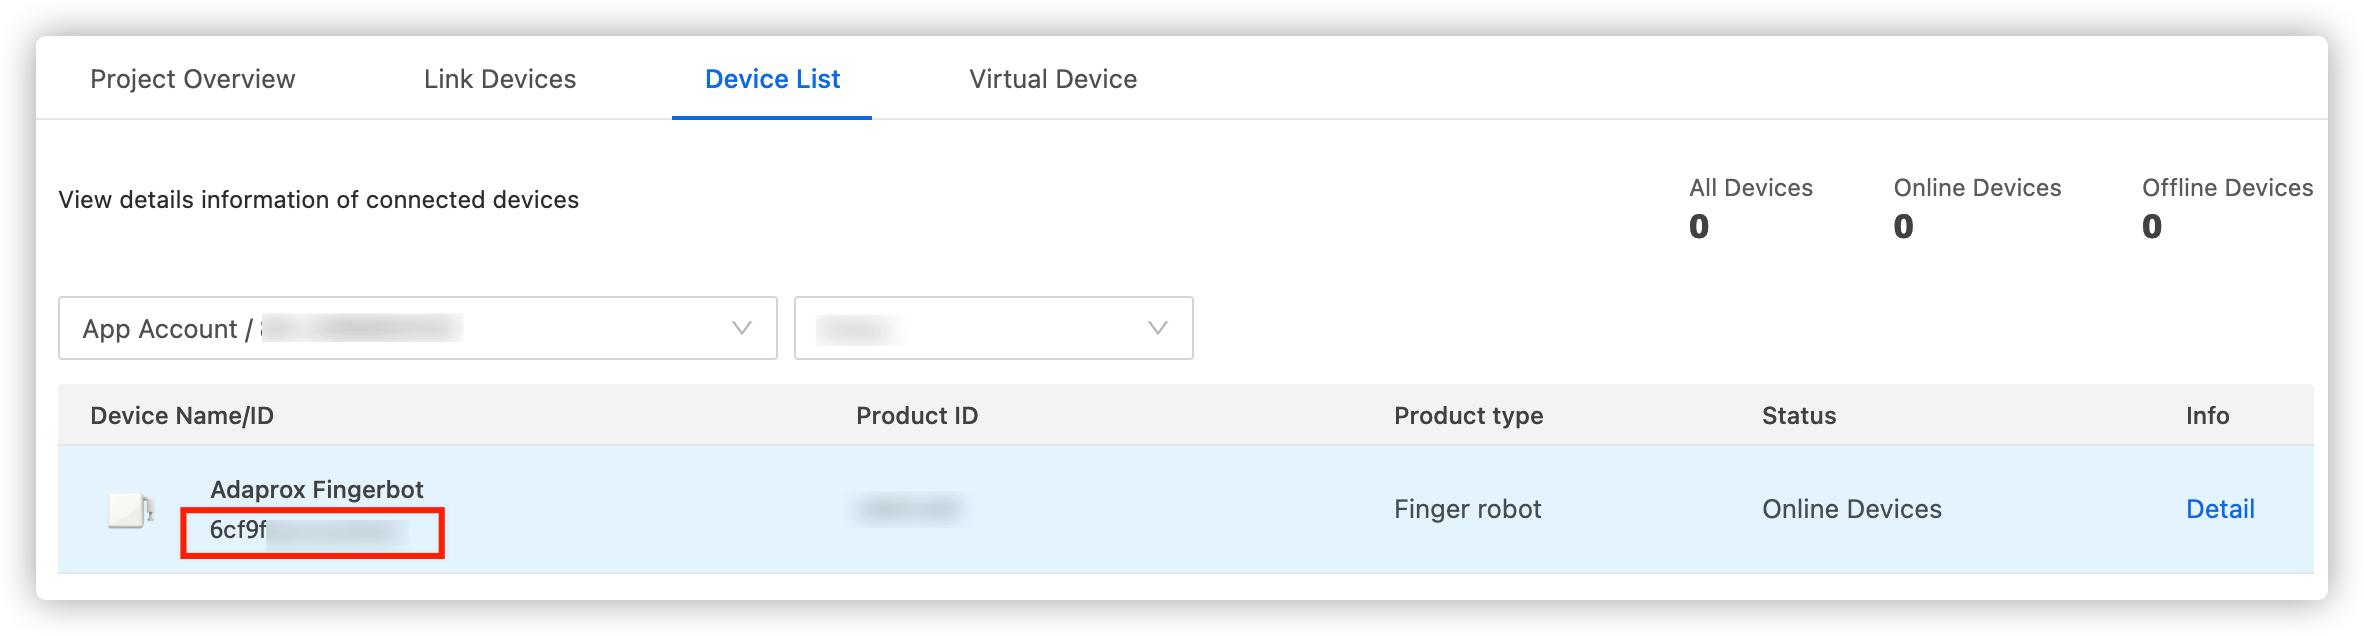
- Find the Fingerbot device ID on the Projects > Device List page.
- Request API permissions.
- Click Cloud > API Management > API Products.
- On the All Products page, click the API products: Authorization and Smart Home Devices Management.
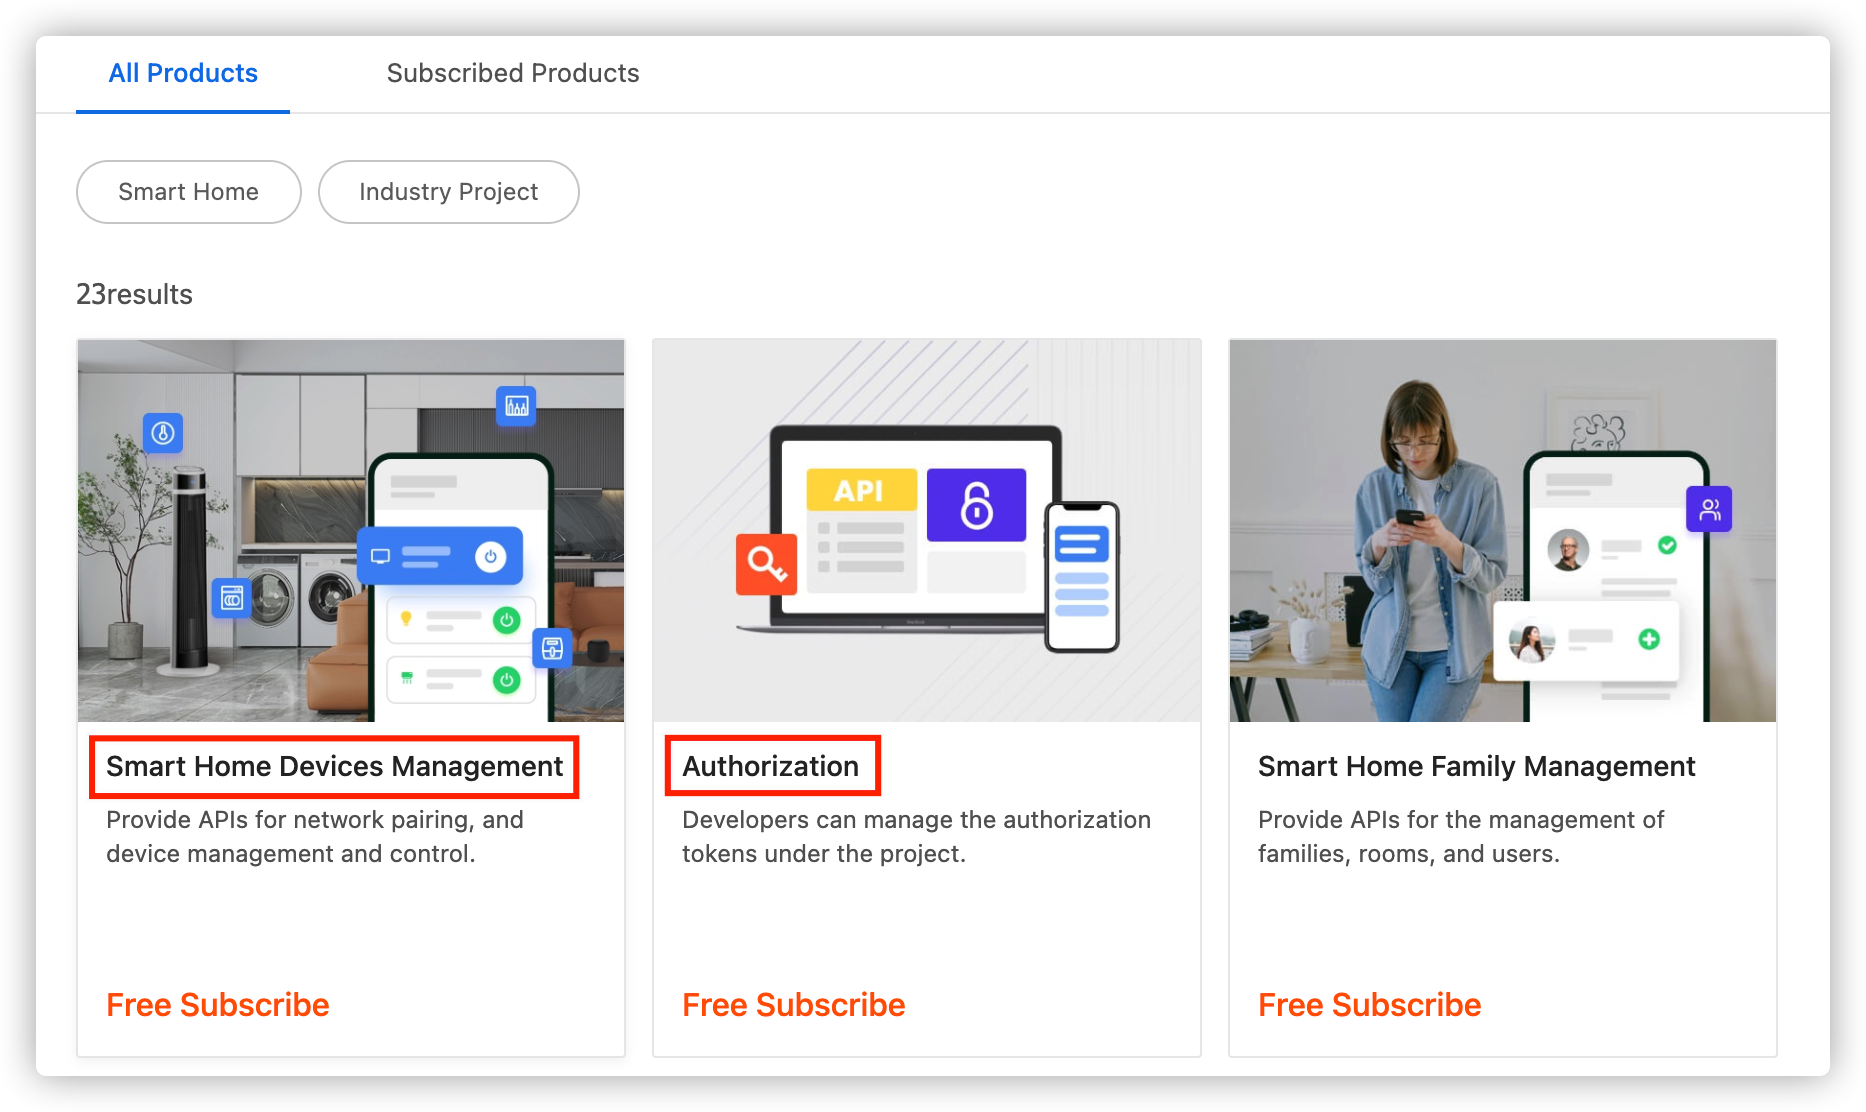
- On the detail page of the API product, click Subscribe.
- On the displayed page, select the service and payment method, and click Buy now.
- On the detailed page of the API product, click the Project tab > New Authorization.
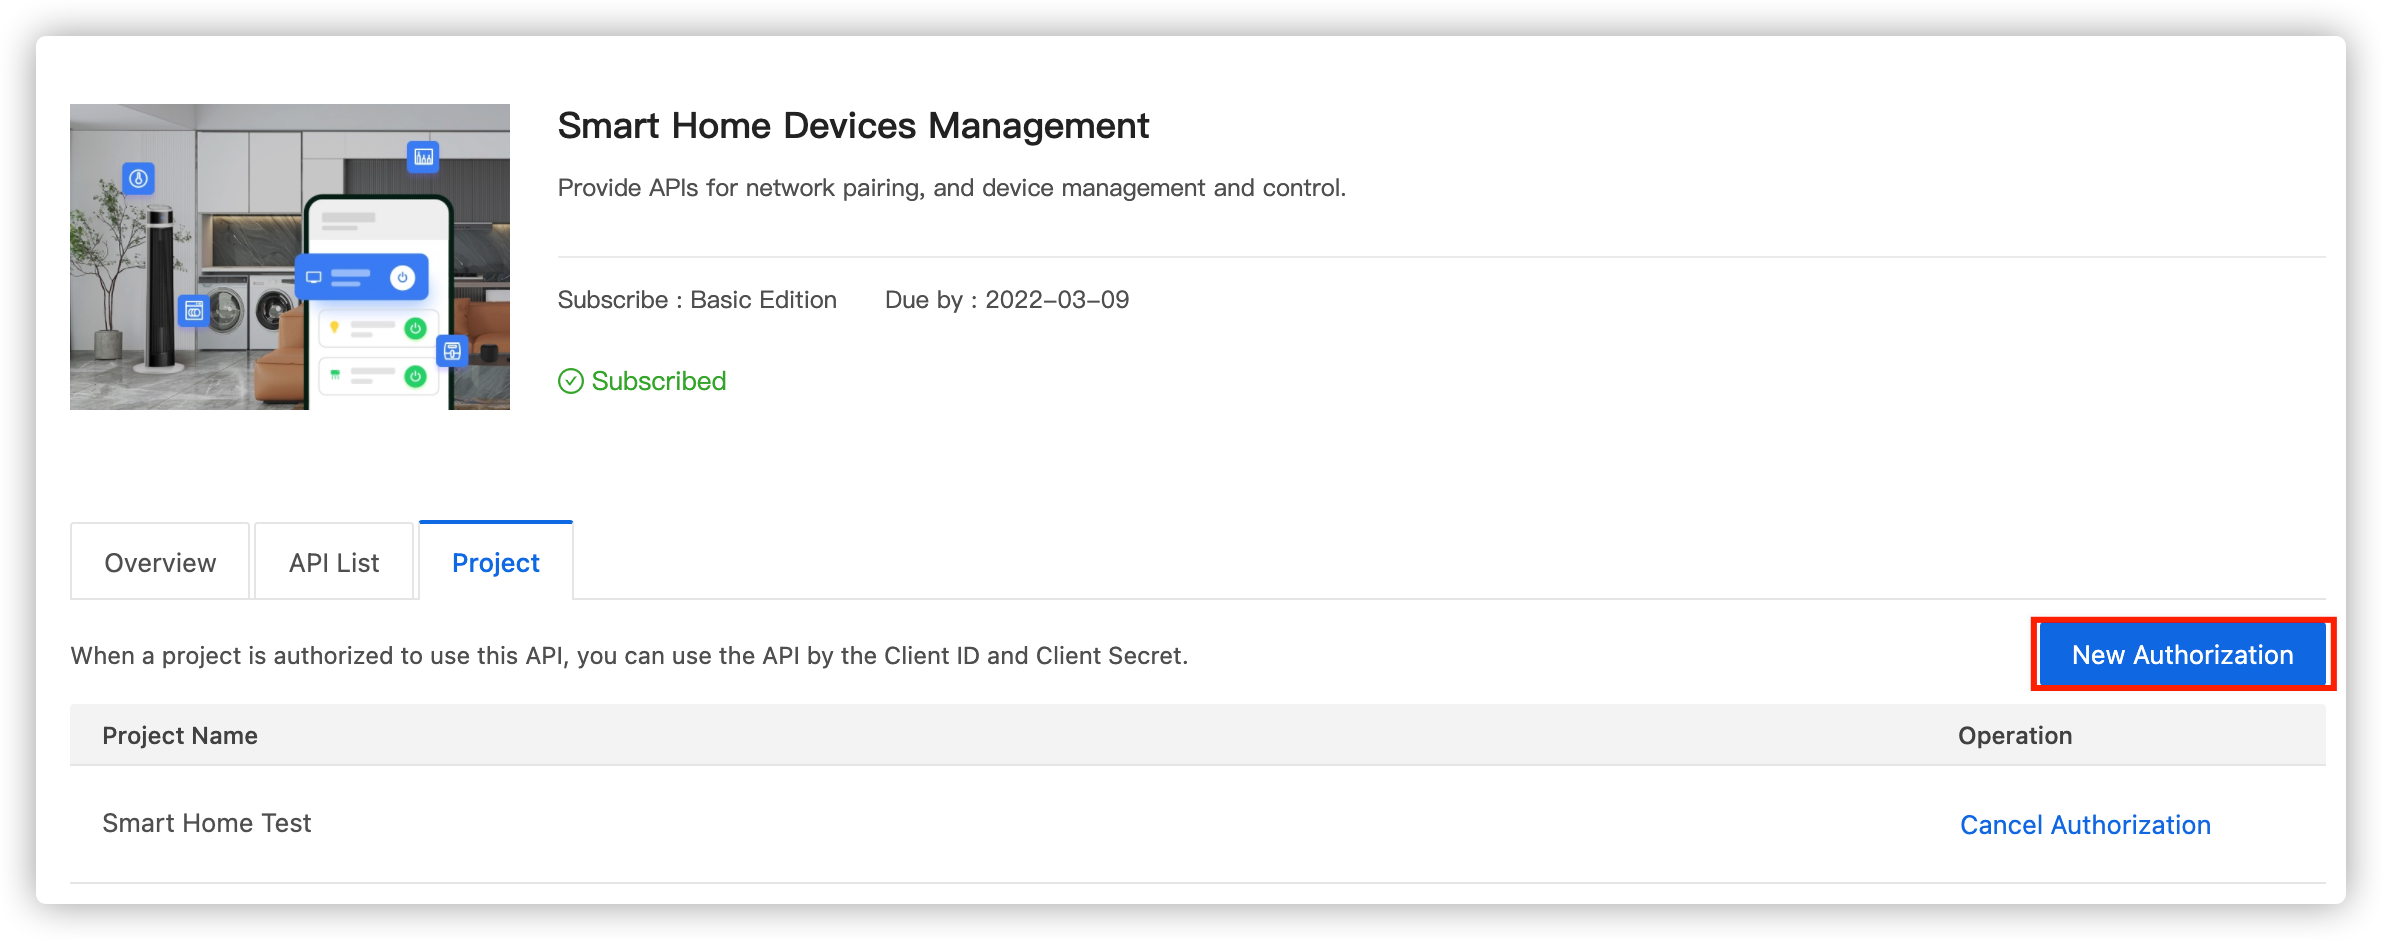
- In the New Authorization dialog, select a project for authorization.
- Click OK to complete authorization.
Step 3: Control the Fingerbot
-
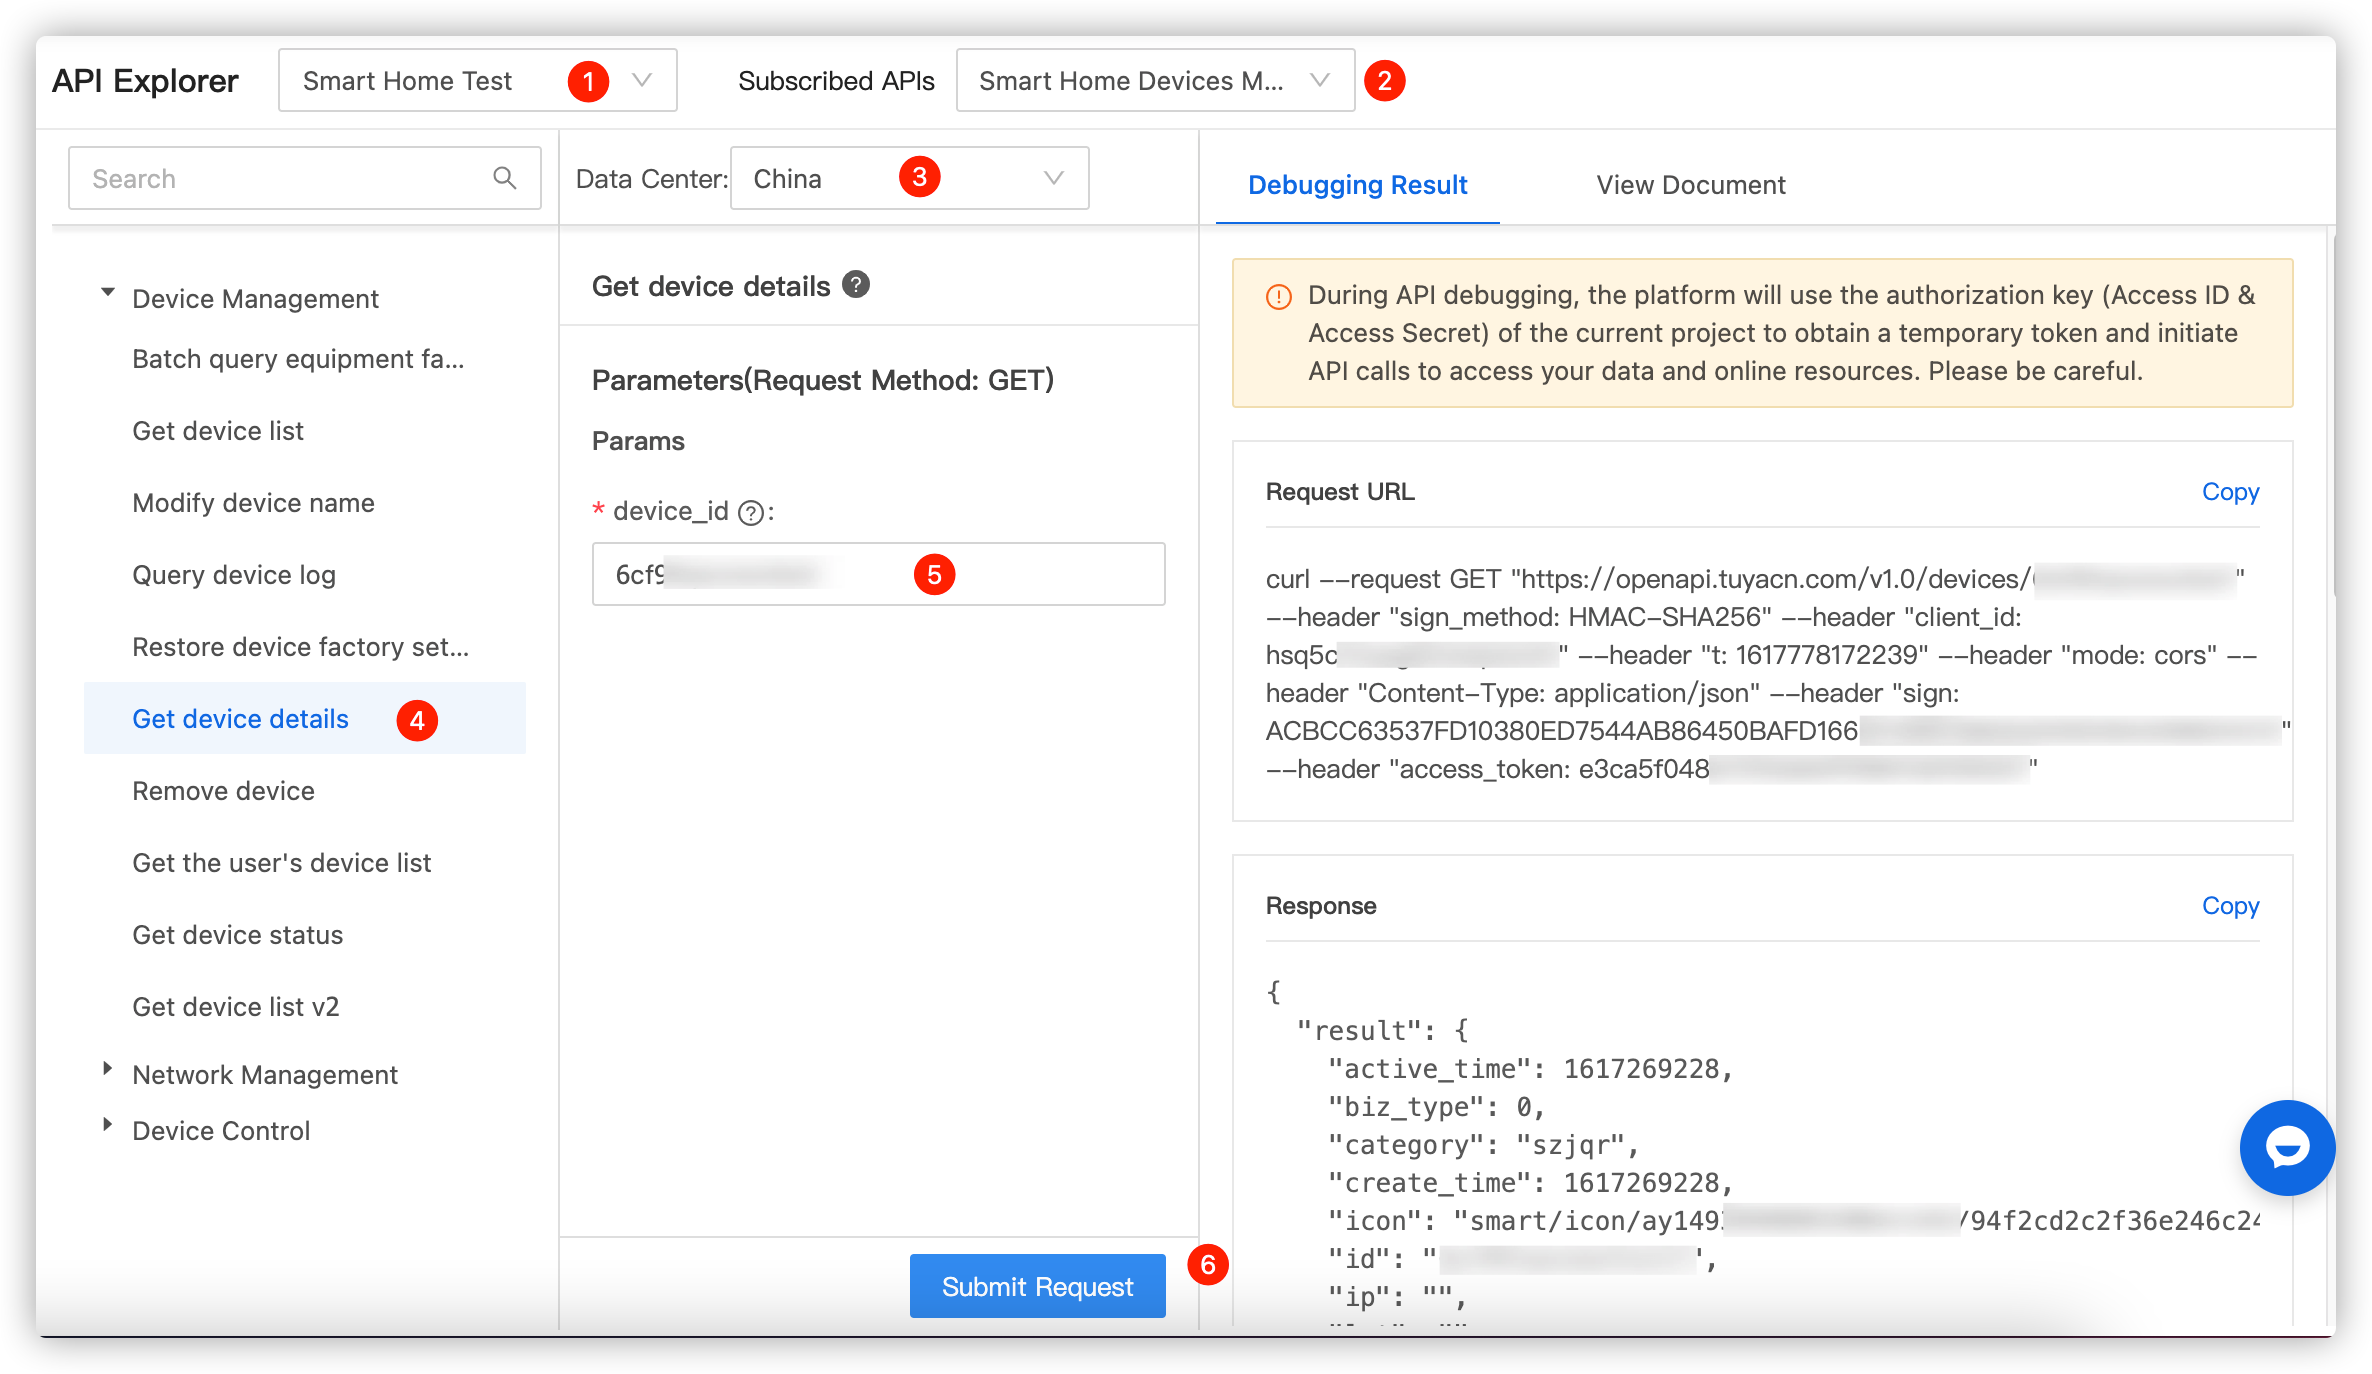
Call the Get device details API to get the current status of the device.
- Click Cloud > API Management > API Explorer.
- On the API Explorer page, you can make an API call.
- Select the project.
- Select the specified API product of Smart Home Devices Management.
- Select an endpoint. For more information, see Endpoints.
- Select Device Management > Get device details API.
Note: Click the View Document tab to view the parameter description.
- Enter the Fingerbot device ID in the
device_idsfield. - Click Submit Request.
-
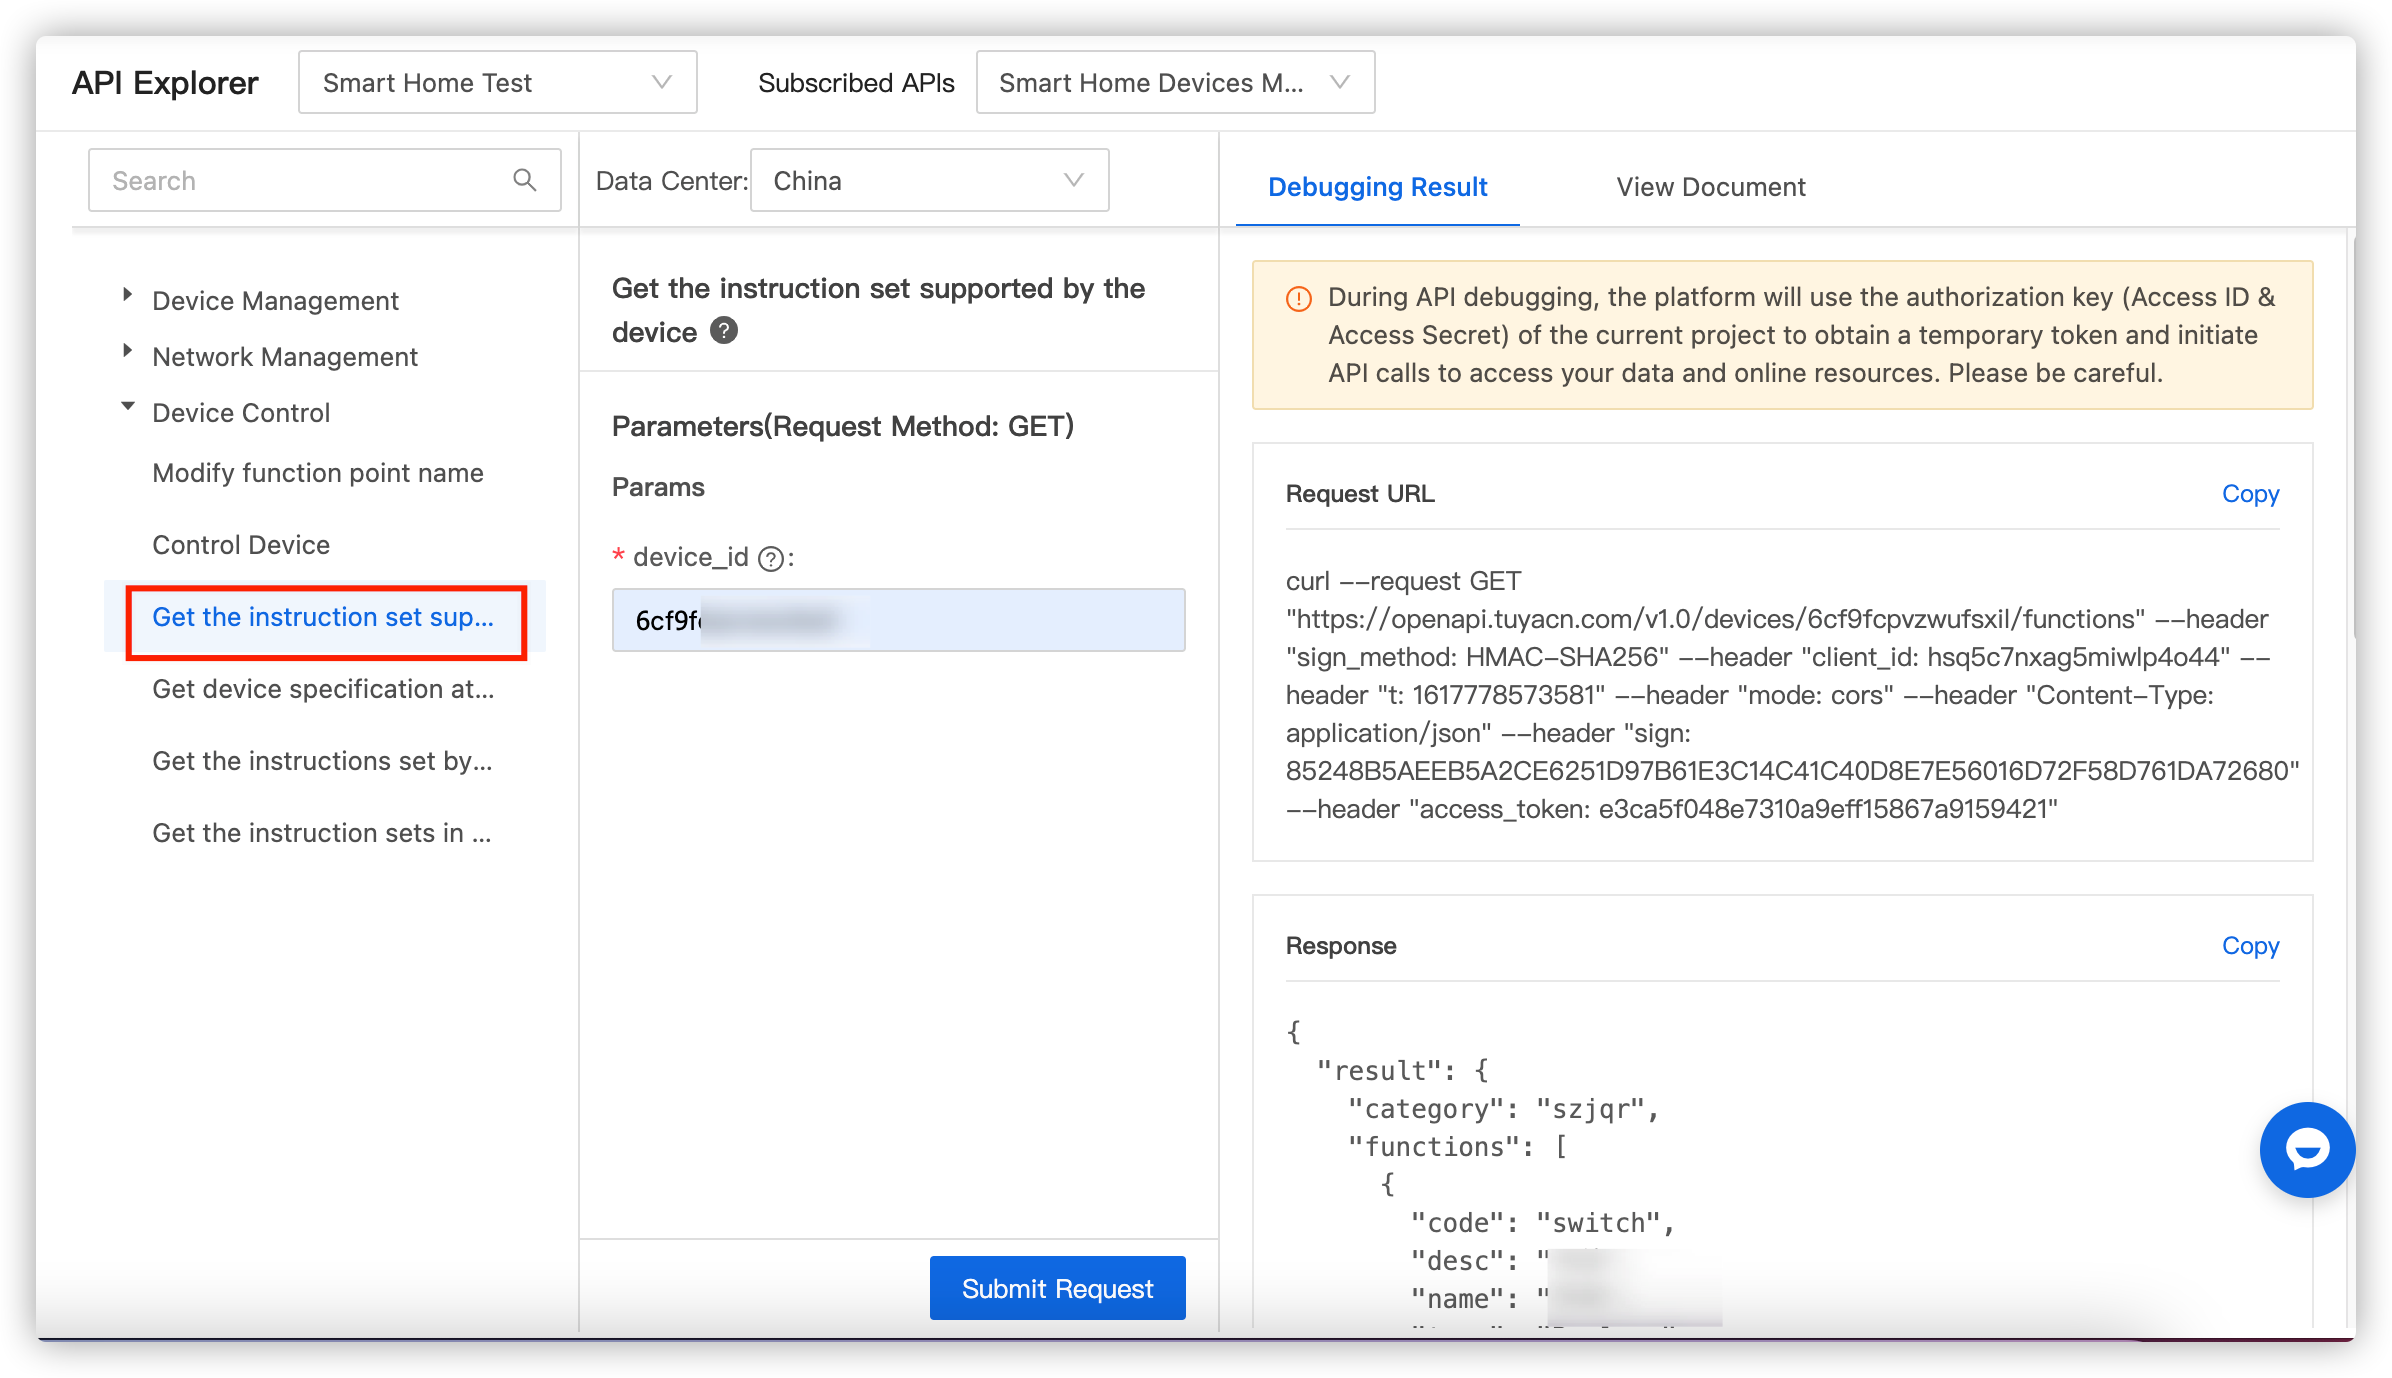
In the Device Control section, call the Get the instruction set supported by the device API to get the instructions supported by the device.
-
In the Device Control section, call the Control Device API to send a
switchcommand. Fingerbot is turned on or off.- Turn on:
{ "code": "switch", "value":true } - Turn off:
{ "code": "switch", "value":false }
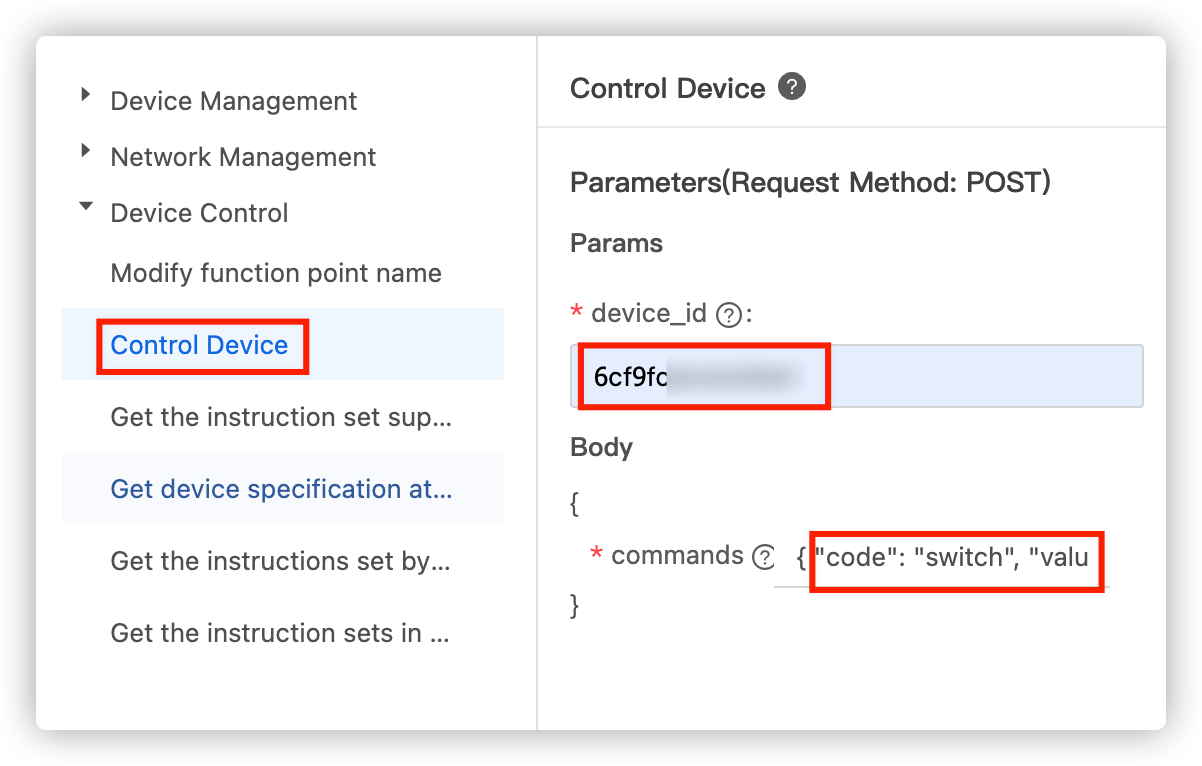
- Turn on:
More control instructions
You can also use the Control Device API to set the timing and working mode of Fingerbot. The example instructions are as follows:
- Set the click mode:
{"code": "mode","value":click} - Set the pull mode:
{"code": "mode","value":switch}
For more control instructions, please refer to the Get the instruction set supported by the device API.
Discover more features
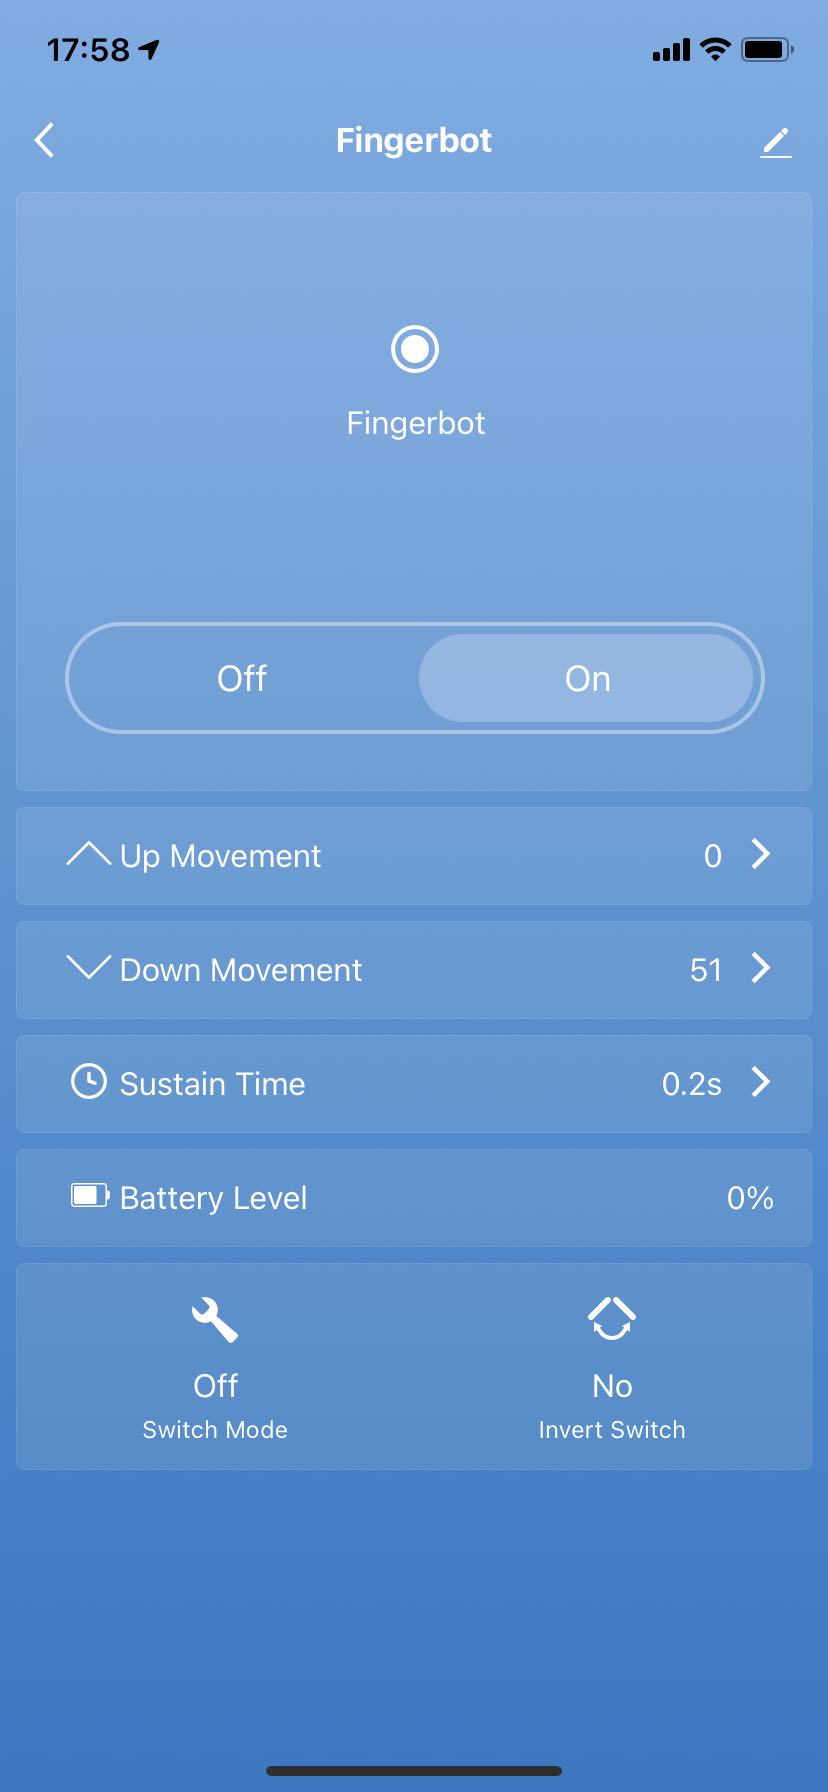
After linking Fingerbot to the Tuya Smart app [iOS|Android], you can view device information or update device settings on the App interface.
- Information display: device status, MAC address, shared devices, and firmware version.
- Set the up movement and down movement of the Fingerbot arm.
- Set the sustain time.
- Display the battery level.
- Check whether the invert switch mode is enabled.
Is this page helpful?
YesSuggestions


