Designing a prototype of smart door sensor product (MCU access)

Overview
Smart door sensors play an important role in the field of smart security, and it is used in more and more applications. Not sure if the doors and windows are closed after leaving home? You can open your phone to confirm that. This tutorial describes how to use the Tuya sandwich development board and Arduino to complete a prototype of an smart door sensor product.
Materials
Steps
Step 1: Overview
The MCU solution is different from the SoC solution. The driver code of the sensor and networking module is written in the MCU. You can develop the MCU code independently and have more playability. Before development, you must have an overall understanding of the program to facilitate subsequent development.
Regarding the door sensor kit in the Tuya sandwich development board, the sensor board reed switch outputs high and low levels to the MCU control board according to the opening and closing state of the door. The MCU is connected to the Wi-Fi communication board through the serial port.
By using the Tuya smart app to configure the network, the door sensor can be displayed and controlled on your phone and linked with other smart devices. The MCU model is STM32G071RB, and the Arduino IDE for programming is used, which can be easily transplanted to each Arduino series development board.
Step 2: Hardware connection
The Tuya sandwich development board sensor kit consists of the following parts.
-
Door sensor function board, which has two reed switches, one trigger output is low and one trigger output is high. You can choose according to the actual situation.
-
Wi-Fi MCU communication board, which is based on the Tuya TYWE3S module and working for the connection. The module is burned with general firmware, and the MCU is connected to the Tuya serial port protocol, and therefore the module, App, and cloud platform can be used together.
-
MCU control board is based on the ST official NUCLEO-G071RB development board, responsible for sensor data reception and module communication control. The NUCLEO-G071RB development board supports the Arduino interface.
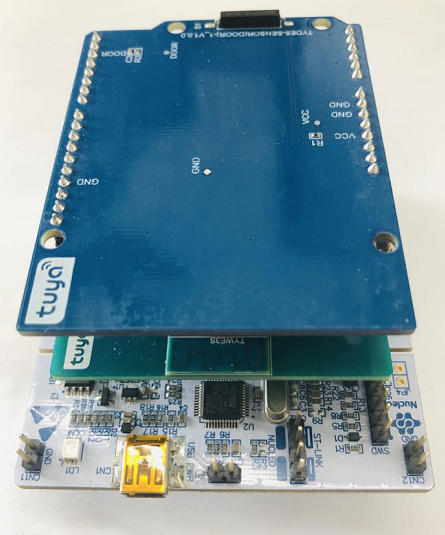
After assembling the control board, communication board and function board of the sandwich development board kit, it is shown as follows.
-
Step 3: Module debugging during software development
The software development is based on Arduino to achieve protocol interaction between MCU, sensors, and modules. Firstly, the communication between the MCU and the module can be adjusted to realize network configuration of the App, and the MCU data is transmitted to the App.
Step 3.1: Environment setting up
For detailed instruction on environment setting up of sandwich development board, see MCU Development environment setup.
The preceding reference talks about how to add the ST development board to the Arduino IDE, and integrate the STM32CubeProgrammer to realize the compilation and download function. You must read it carefully.
Step 3.2: Downloading the development kit
Create a project, and then refer to the tutorial for transplanting the Tuya MCU SDK development kit MCU Quick Start for more information.
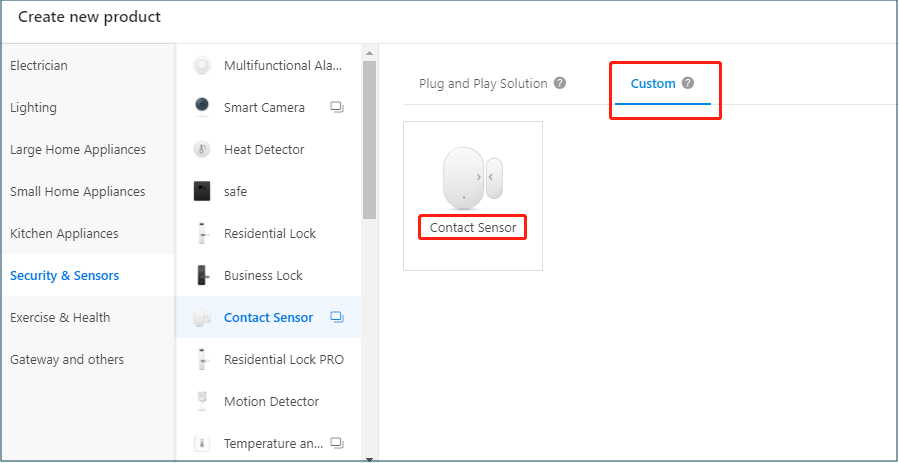
During the creation of the product, you must choose Security & Sensors > Contact Sensor > Custom > Contact Sensor, shown as follows. When the MCU is connected, select a custom solution before downloading to the MCU development package.
The function is selected according to your own needs. Here, the basic function DP recommends that you select the door sensor, fault alarm, and battery level.

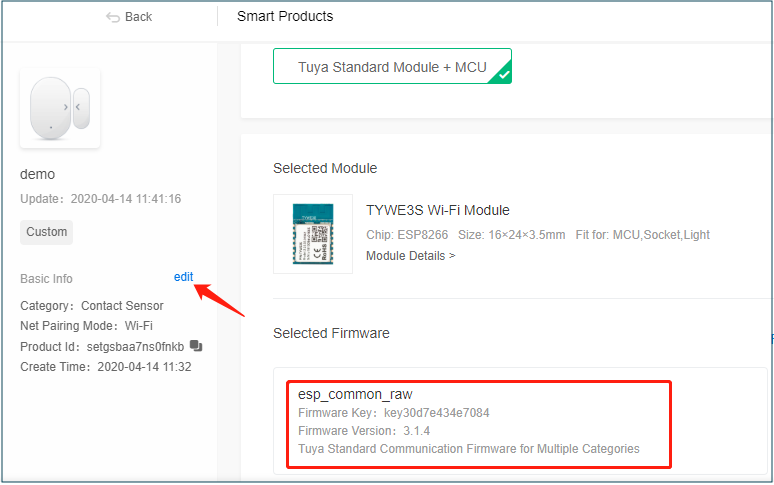
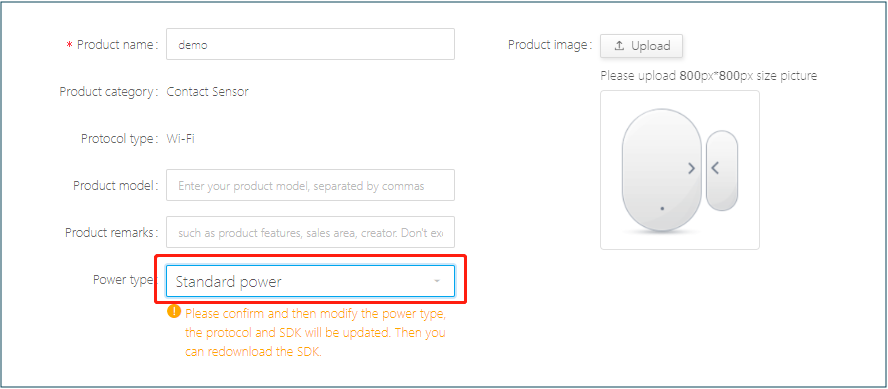
When choosing the firmware, note that the default firmware of the Wi-Fi module is general firmware, rather than the low-power firmware. You must change the power consumption type to standard power consumption. The firmware selects standard general firmware before you can download to the relevant MCU development kit.
Step 3.3: Porting and debugging
For detailed instruction on migration and debugging, see MCU Quick Start.
Note: After successful transplantation, you will see the selected product panel. Next, you must write the logic code to get the state of the reed switch.
Step 4: Sensor debugging during software development
The reed switch is affected by the magnetic force, and the output state is high or low level, so the MCU only needs to read the IO state and determine the state of the door sensor. The code sample of reading the IO status is shown as follows.
int ledPin = 13; // LED connected to digital pin 13
int inPin = 7;   // Pushbutton connected to digital pin 7
int val = 0;     // A variable to store the read value

void setup()
{
  pinMode(ledPin, OUTPUT);      // Sets the digital pin 13 as output
  pinMode(inPin, INPUT);      // Sets the digital pin 7 as input
}

void loop()
{
  val = digitalRead(inPin);   // Reads the input pin
  digitalWrite(ledPin, val);    // Sets the LED to the value of the button
}
The MCU needs to transmit the data to the App for display, and the reporting function is as follows.
mcu_dp_bool_update(DPID_DOORCONTACT_STATE,Data door sensor); // Boolean type data reportingStep 5: Scene linkage for extended function
After all functions are debugged, the App can receive the data of the door sensor. The most common scenario of smart sensors is to collect sensor data to link with other products. If you have Tuya ecological devices or development boards, they can configure the scene linkage function on the App side. For more information, see Scenario Connection Settings.
Summary
By leveraging the Tuya Smart platform, the Tuya sandwich development board, Arduino IDE programming, you can quickly set up a smart door sensor product prototype.
Is this page helpful?
YesSuggestions


