Designing lighting product prototype (PWM, development free)
Overview
Technology is constantly progressing, and more and more smart homes are entering our daily life. Smart lights are commonly used at home and the workplace.
After the smart lights are installed, you can easily adjust the indoor color and brightness by using App, and can set different lighting scene for different occasions, creating a warm, relaxing, interesting and inspiring living space, which greatly enriches our lives.
Based on the Tuya Smart platform, a smart light can be developed simply and quickly. This tutorial introduces how to use the Tuya sandwich development board to quickly complete a smart light product prototype.
Materials
Steps
Step 1: Creating products
-
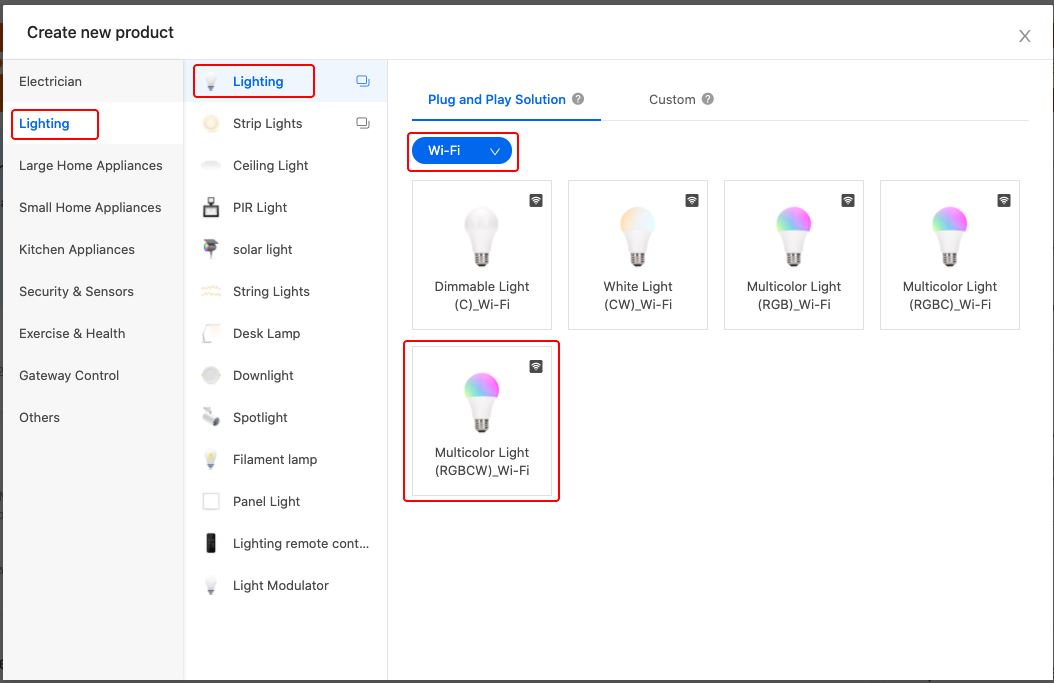
Log on to Tuya IoT platform, create a multicolor light (RGBCW) _Wi-Fi lighting product.
-
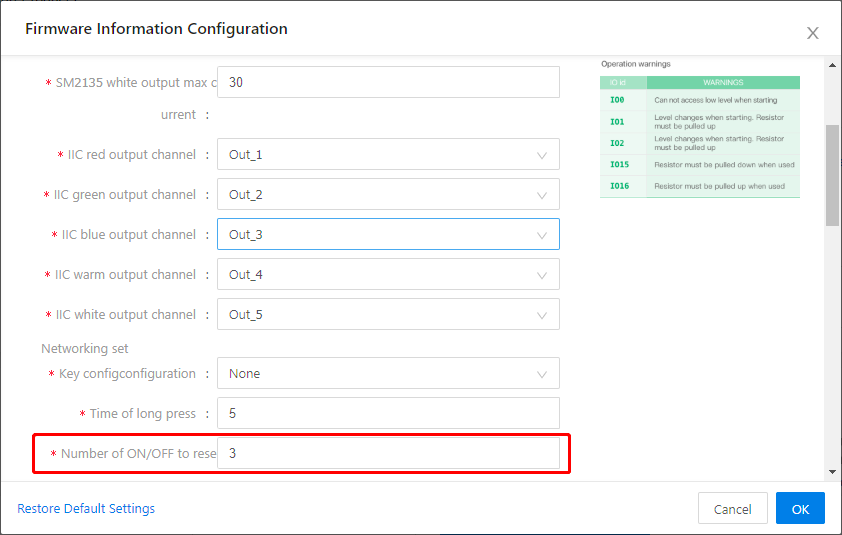
Select the function and display panel of the product, and configure the firmware information according to the hardware circuit of the sandwich development board. For more information, see Creating a Plug-and-Play RGBCW Lamp on the Tuya Smart Platform.
Sandwich development board is used in this demo, you need to configure the firmware information as follows.
Setting Configuration Red drive pin-R GPIO13 Green drive pin-G GPIO4 Blue drive pin-B GPIO5 White drive pin-C/Bright GPIO14 Warm drive pin-W/CCT GPIO12 Others The default 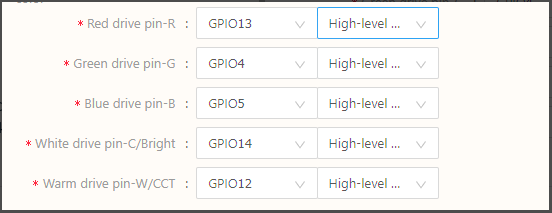
-
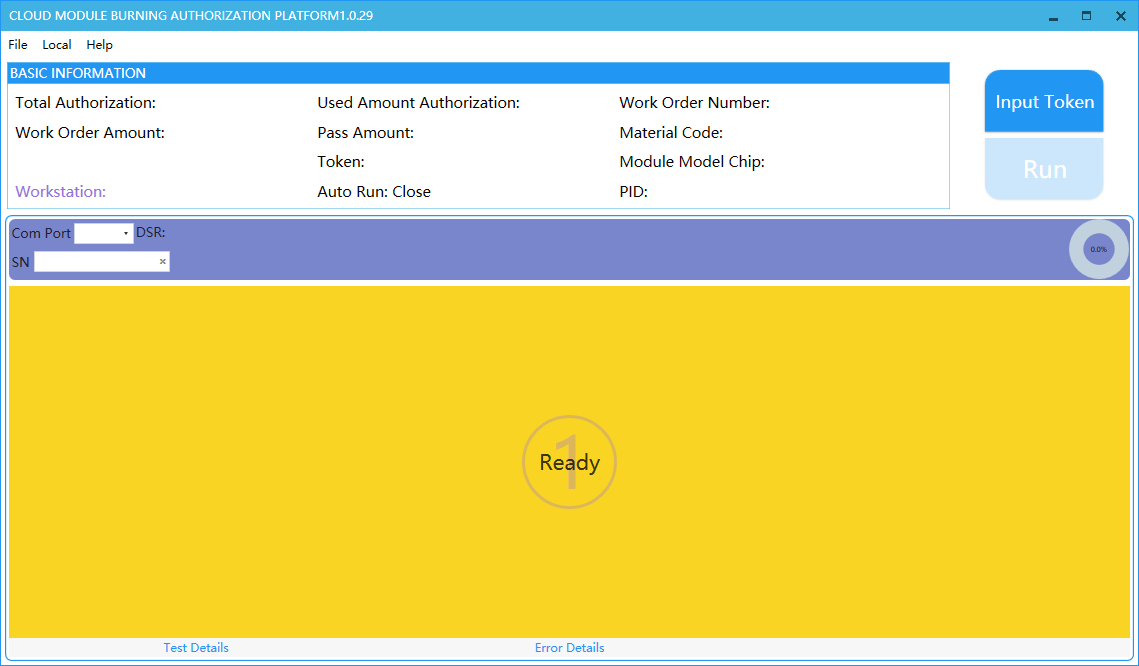
Step 2: Downloading firmware
To make the device have the configuration function of the first step, you must download the relevant configuration information into the module, and attach it to Tuya Sandwich Evaluation Kits,
-
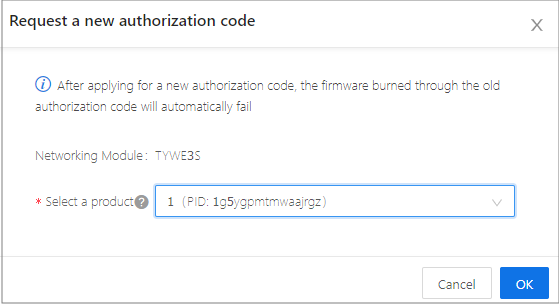
Visit the Tuya sandwich development board management platform, and register the development board, apply for an authorization code and an account.
-
Choose the authorization code, log on the software, and enter the authorization code to download. For more information, see Download firmware and authorization code process.
-
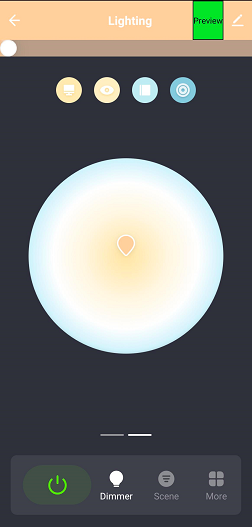
Step 3: Network configuration test of App
In this demo, the control light is powered on and off for three times.
If the light flickers rapidly, it enters the network configuration state. You can connect and use it via Tuya Smart app, choose lighting (Wi-Fi) category, for the next operation under the orders of the APP, connect the device to the cloud, you can use the App to control the device now.

Step 4: Smart speaker test for extended function
Tuya provides the most popular smart speaker control devices, such as Amazon Alexa. You can visit the IoT Platform Value-added Service, activate the speaker service.
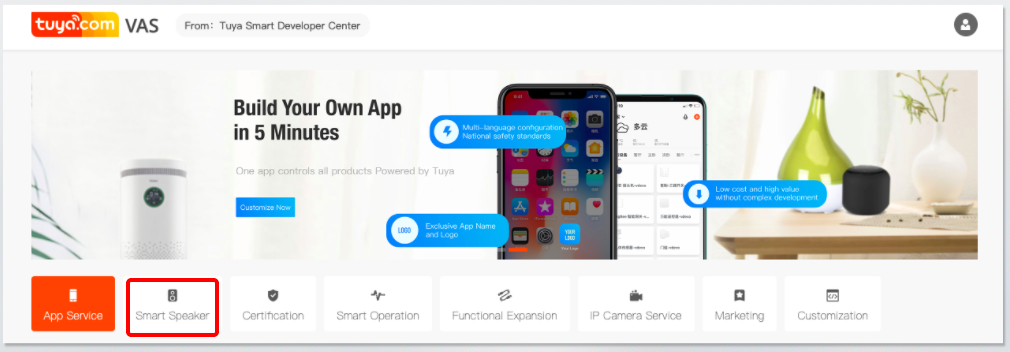
You can view the brand of the speaker at the product details page. Subsequently, you can refer to the Quick Guide of Using Amazon Echo to Control Smart Devices to grant the device to the smart speaker platform. Also, you can use the smart speaker to control the device, for more information, see Third-party Access.
Step 5: Production test for extended function
During mass production, you must test the communication and control capabilities of the products to spot the defective products, and guarantee the quality of the products. Tuya integrates the test process at the time of production into the module, for more information, see Production test of Wi-Fi lighting products.
Summary
Based on the Tuya platform and the Tuya sandwich development board, the prototype construction of a smart lighting product can be completed quickly and conveniently, which greatly accelerated the development of the product.
Is this page helpful?
YesSuggestions


