Prototype a Smart Switch Module with Tuya Wi-Fi Module SDK
Overview
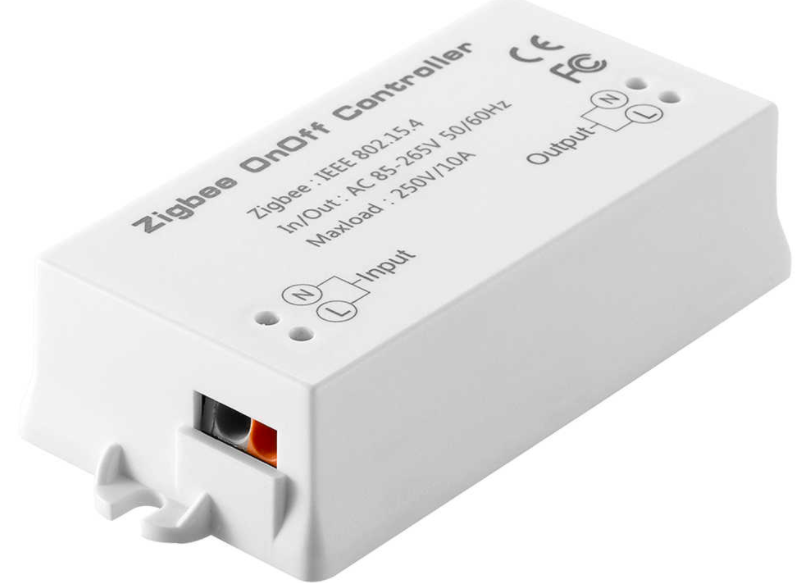
A smart switch module is also called an on-off controller. Users can easily add it to switches, sockets, lights, and electrical circuits, and switch on or off the circuit through a mobile phone to achieve an easy and smart solution of the appliance control. As one of the most popular smart DIY devices, the smart switch module has been favored by smart device developers for its low cost and convenient operation. And it has become a best-selling product for smart home automation.
This tutorial describes how to use the Tuya Sandwich Evaluation Kit to quickly prototype a smart switch module with the WB3S Wi-Fi module and Tuya module SDK.
Materials
Tuya Sandwich function board of switch module
Count:1AC on/off control and energy monitoring.more
Tuya Sandwich Wi-Fi SoC master control board (WB3S)
Count:1Various Wi-Fi+BLE SoC development-free firmware downloaded from the Tuya IoT Platform can be used in combination with relevant function boards, or you can develop your firmware based on the module SDK.more
Tuya Sandwich DC power supply board
Count:1Power other components of the Tuya Sandwich Evaluation Kit.more
5V Micro USB adapter or 12V adapter
Count:1Power the power board.more
Steps
Step 1: Create a product and download the development materials
-
Log in to the Tuya IoT Platform.
-
Create a custom development switch module with Wi-Fi and BLE communication protocols by referring to the Create Products topic.
-
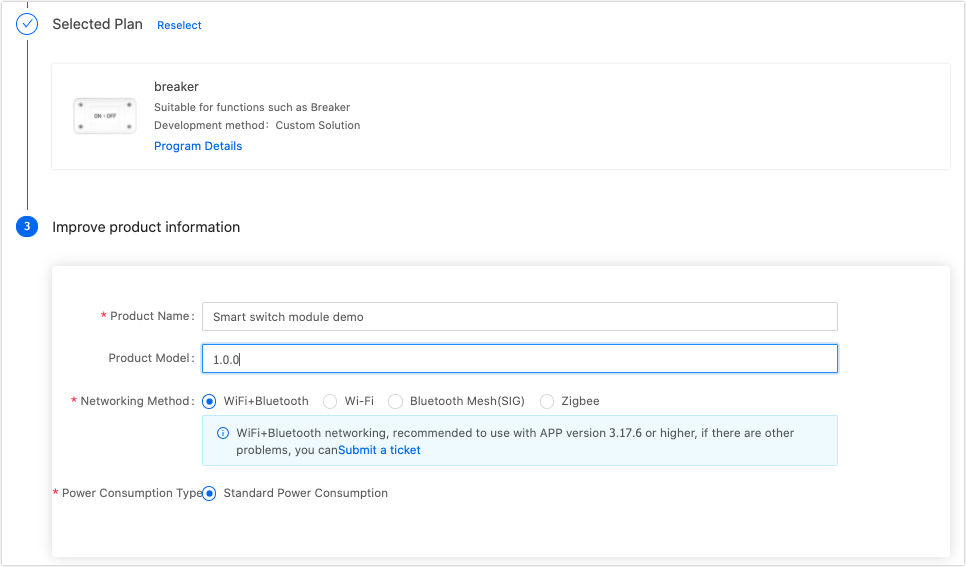
Select and add functions for the switch module. The functions added in this tutorial are shown in the following figure.

-
Choose a mobile app panel that suits the product. For detailed steps, see Design App UI.
-
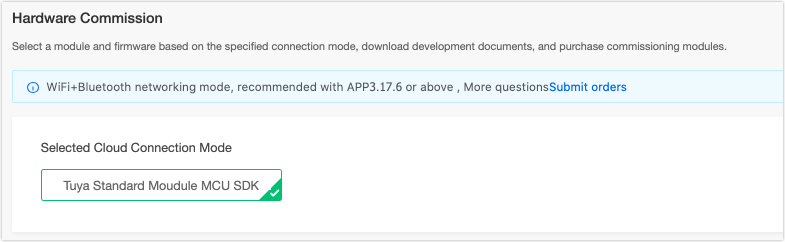
At the Hardware Commission stage, select the Tuya module SDK development method and select a WB3S module.
-
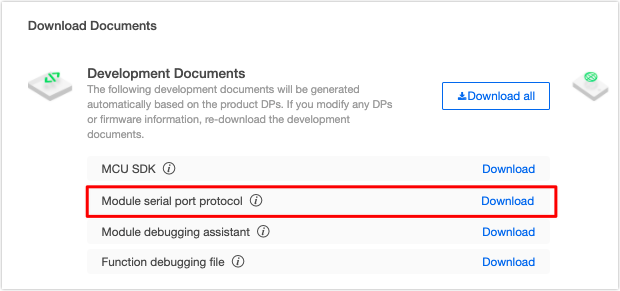
At the material download area, download the corresponding SDK.
-
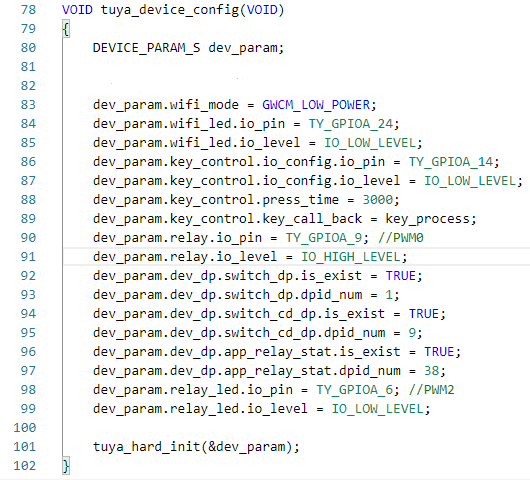
Step 2: Refer to the demo file and customize the parameters
After the downloaded SDK is decompressed, you can open the
appsfolder, which contains related application demo and documentation. In this step, you can refer to the socket demo and modify the following two lines to specify functions for the switch module.-
Change the
PRODUCT_KEYin thetuya_device.hfile to the PID of your switch module.
-
Modify the pin configuration of the
tuya_device_configfunction in thetuya_device.hfile, and make changes on the I/O ports according to the hardware circuit of the Tuya Sandwich Evaluation Kit.
-
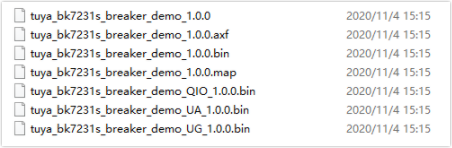
After modifying the code snippets in the demo, compile and generate the firmware for burning.
-
Step 3: Burn firmware and authorize the development board
Go back to the Tuya IoT Platform. In this step, upload your custom firmware and perform the burning and authorization operations.
-
In the Hardware Develop stage of the switch module development, find the Select Firmware area, and click the Select Customize Firmware button.
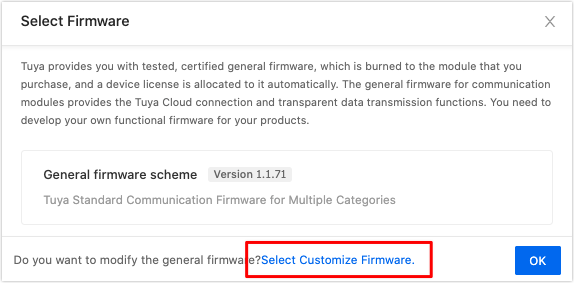
-
Add the custom firmware according to the instructions. The Firmware Name and Chipset Platform can be confirmed in your downloaded demo files. In this tutorial, they are
tuya_bk7231s_breaker_demoandBK7231Srespectively. -
Upload the custom firmware generated in the preceding steps to the Tuya IoT Platform.
-
Follow the instructions on the page to upload the firmware.
-
Refer to the section of obtaining the authorization code for burning in Firmware Burning and Authorization topic, burn the custom firmware into the module, and authorize it. After the authorization is successful, the switch module can be connected to the Tuya IoT Platform.
-
Step 4: Network test on app
According to the demo code snippets, the switch module is ready to be connected after you press and hold the joystick on the function board for 5 seconds. And the network pairing mode is SmartConfig. In this step, you will connect the smart switch to the Tuya IoT Platform by using the Tuya Smart app.
-
Refer to the Introduction of Public App to install the Tuya Smart app on your phone.
-
Press and hold the joystick on the function board, and the smart switch is ready to be connected after the indicator flickers quickly.
-
Activate the Bluetooth on the phone and open the Tuya Smart app.
-
The switch module will be scanned and prompted on the Tuya Smart app.
-
Follow the prompts to complete the following steps and connect the switch module to the Tuya IoT Platform.
-
Now, you can use the Tuya Smart app to control the device.
-
Step 5: (Optional) Enable the smart speaker service
Tuya supports controlling devices through the most popular smart speakers, such as Amazon Echo. The following steps only describe the general procedure. For more information, see Third-party Integration Service.
-
Go to the Tuya Value-added services and choose smart speaker service.

-
Choose a speaker service and follow the instructions on the page to subscribe to the service.
-
After the review is passed, you can view the enabled smart speaker service icons in the product overview.
Also, you can open the Tuya Smart app, find your smart switch module, and check whether the speaker service is subscribed.
-
According to the smart speaker service you have subscribed to, associate the smart switch to the smart speaker, and then you can use the smart speaker to control the device.
For more information, see the related documentation, for example, the Use Amazon Echo to Control Smart Devices.
-
Summary
Congratulations on completing the prototype development of a smart switch. You can quickly and easily build smart product prototypes from scratch and accelerate the development process by using the Tuya IoT Platform and Tuya Sandwich Evaluation Kit.
Is this page helpful?
YesSuggestions


