Designing a plug prototype (SoC, development free)
Overview
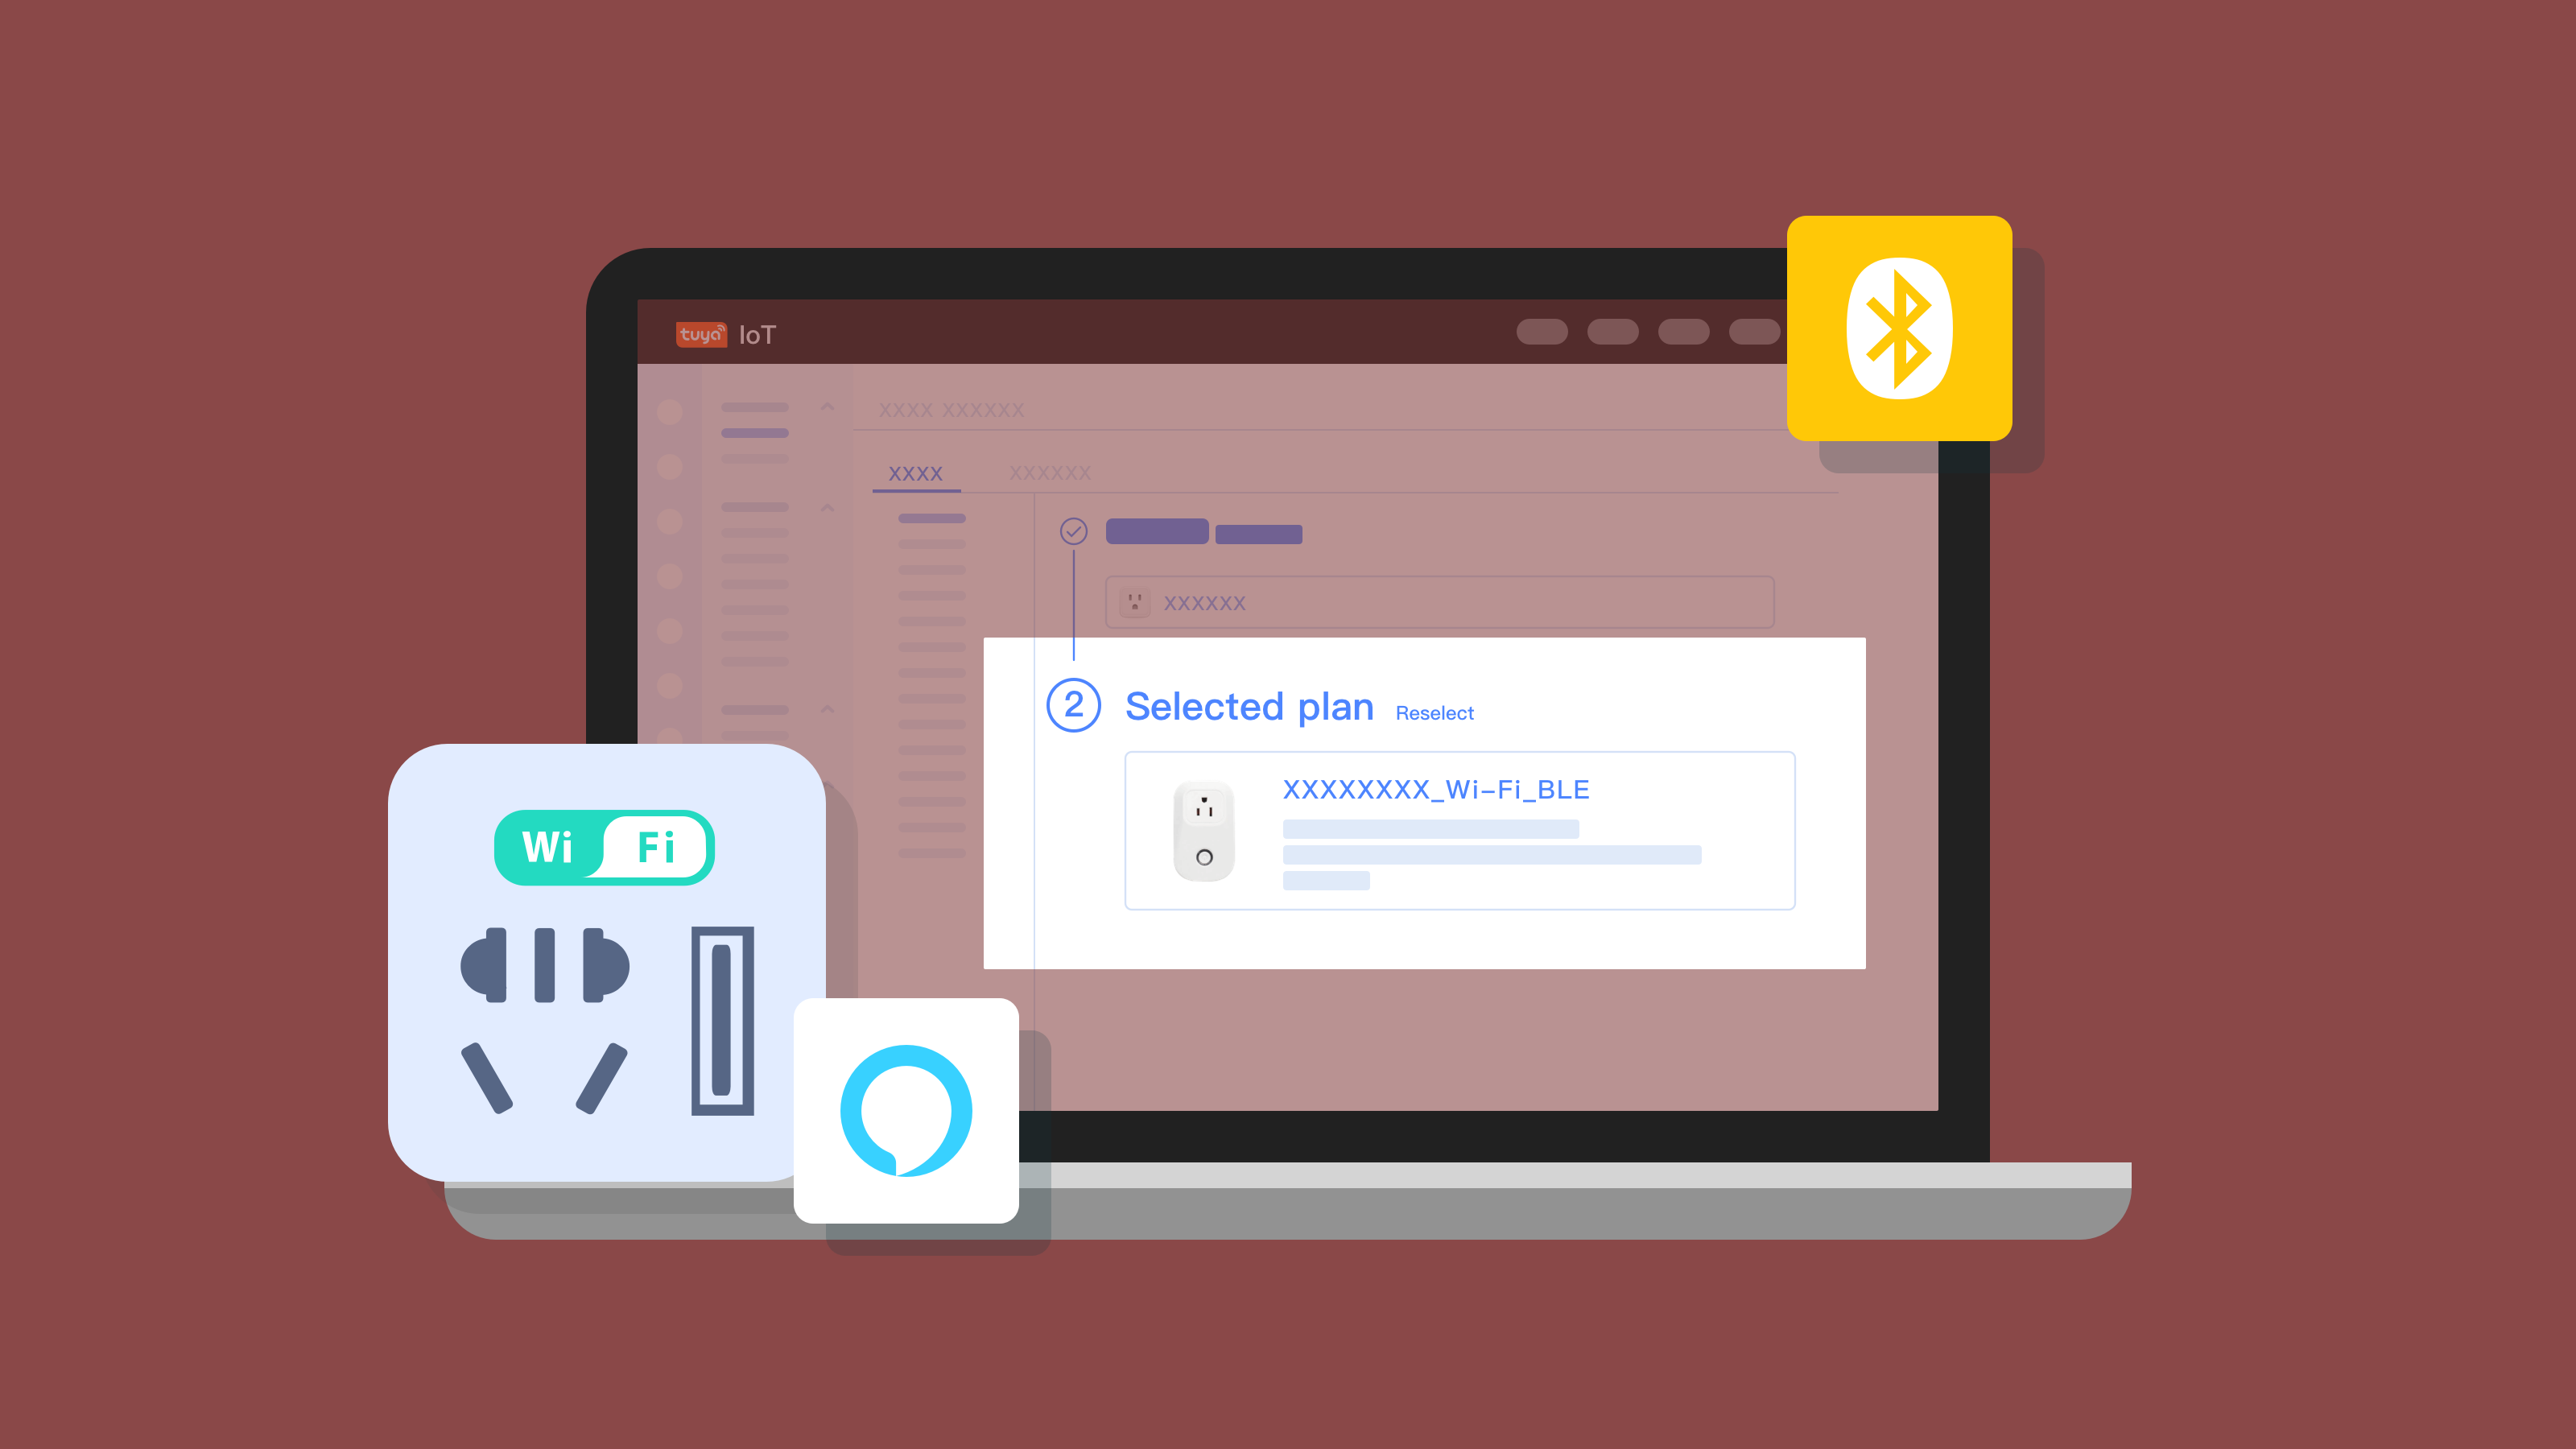
Technology is constantly progressing, and more and more smart homes are entering our daily life. Smart plugs are commonly used at home and the workplace. By using smart plugs, you can remotely control the connected appliances, use smart speakers to control appliances, and view the status of appliances in real-time.
This tutorial describes how to use the Tuya sandwich development board to devise a smart plug prototype.
Materials
Steps
Step 1: Creating product
-
Log in to Tuya IoT Platform.
-
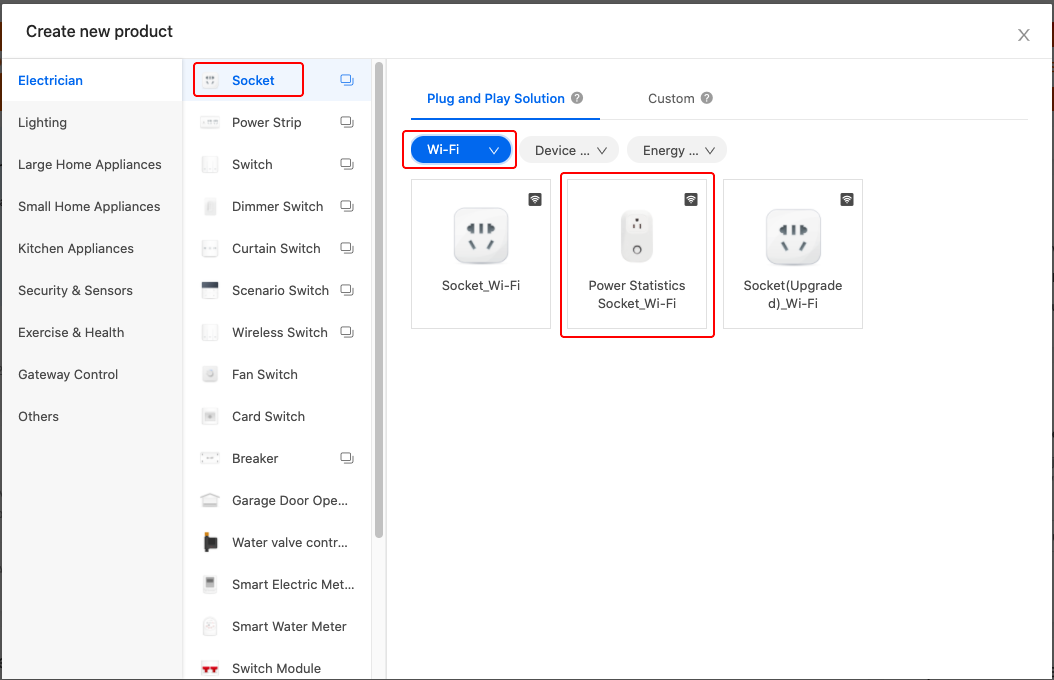
Create a Power Statistics Socket_Wi-Fi product, select the function and display panel of the product, and configure the firmware information according to the hardware circuit of the sandwich development board. The operation flow is shown in the following picture. For more information, see Creating a Development-free Smart Power Statistics Socket on the Tuya Smart Platform.
Sandwich development board is used in this demo, you need to configure the firmware information as follows.
Setting Configuration Relay GPIO15, High-level Others The default 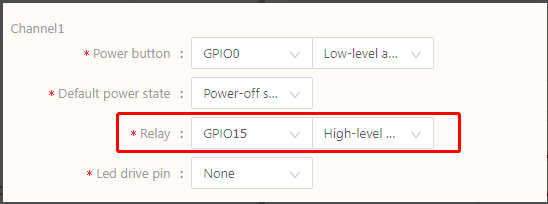
-
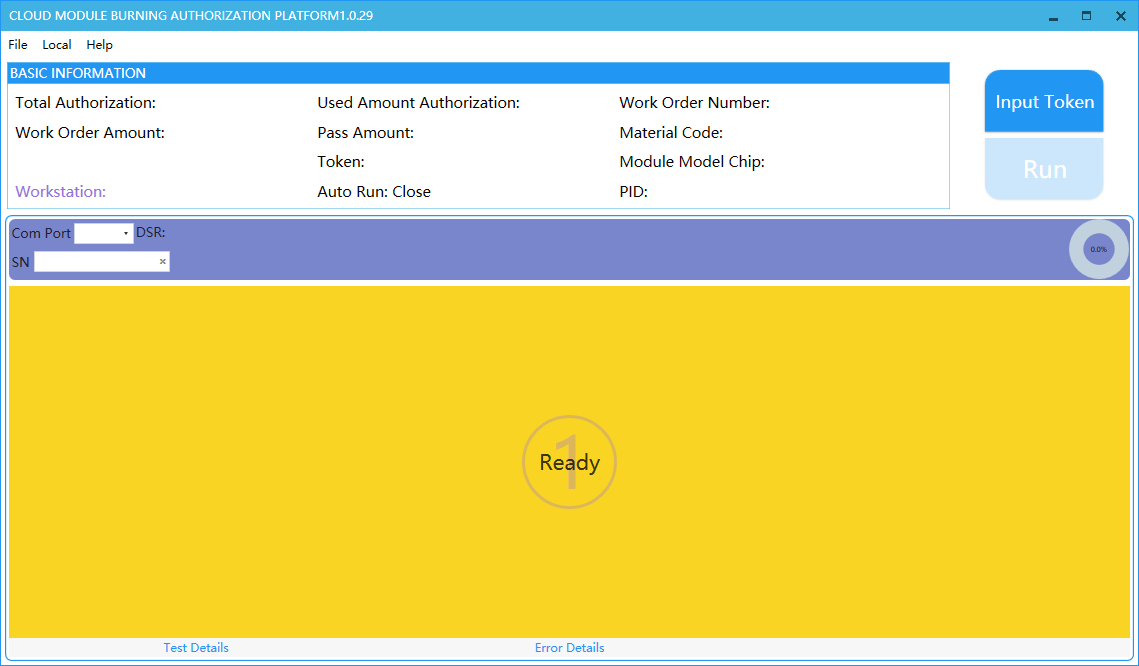
Step 2: Downloading the firmware
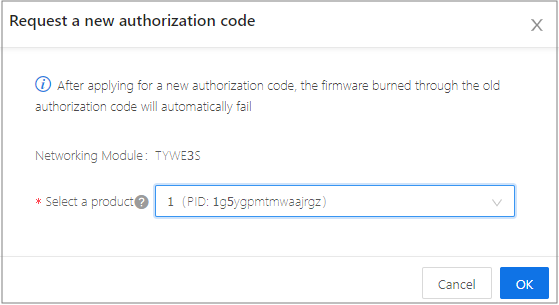
To make the device have the configuration function of the first step, you must download the relevant configuration information into the module and attach it to management platform of the Tuya sandwich development board. Set the development board and apply for the authorization software and account for downloading, select the product authorization code created in the first step, log on to the authorization software, enter the authorization code. The operation process is shown in the figure below. For more information, see Download firmware and authorization code process.
Step 3: Network configuration test for App
During this step, you should make the device to enter the network configuration state.
In this example, press and hold the button on the function board of the plug for more than 3 seconds. When the indicator flashes, the device enters the network configuration state. At this time, use the Tuya smart APP to add the device, choose the socket (Wi-Fi) category, follow the APP prompts for the next operation, connect the device to the cloud, you can use the APP to control the device.
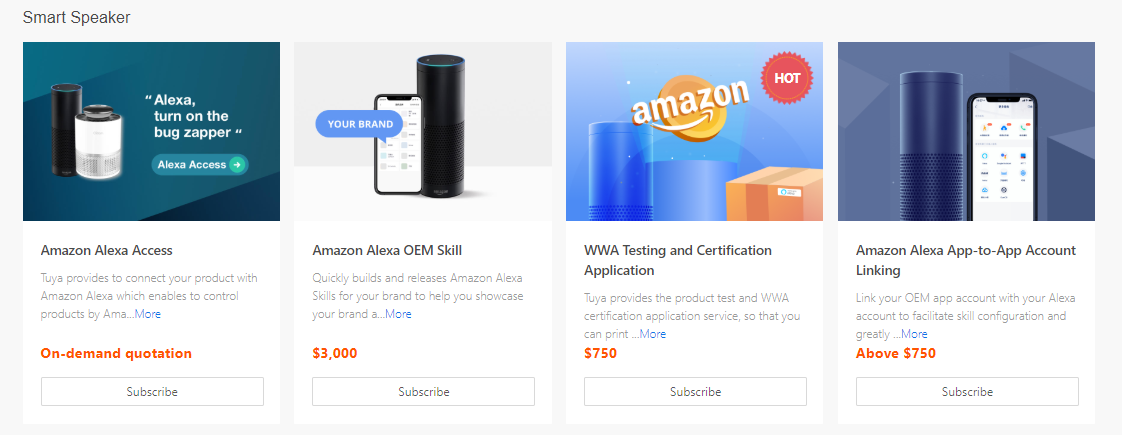
Step 4: Smart speaker test for extended function
Tuya supports popular smart speaker control devices in the market, such as Amazon Alexa.
Visit the Tuya Value-added Service, apply for and activate the speaker service. Later, you can see the corresponding speaker icon on the information page of the product. Refer to Quick Guide of Using Amazon Echo to Control Smart Devices to associate the device to the smart speaker platform. Now you can use the smart speaker to control the device. For more information, see Third-party Access.
Step 5: Energy statistics calibration for extended function
Products with power statistics function must be calibrated to guarantee the accuracy of the power test.
In addition, when the product is mass-produced, the communication and control capabilities of the product must be tested to spot defective products and ensure the quality of the product.
Summary
By leveraging the Tuya platform and the Tuya sandwich development board, the prototype of the smart plug can completed conveniently and quickly, which greatly accelerated the development of the product.
Is this page helpful?
YesSuggestions


