End-to-End Development
Overview
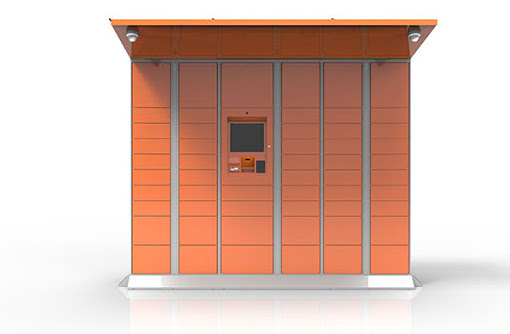
In recent years, IoT-based smart lockers have been widely used in the logistics and service industries. For example, SF Express Hive Box lockers and Cainiao smart lockers provide the last-mile delivery solutions. These solutions can avoid crowds in special periods, particularly during the epidemic.
This demo describes how to prototype a campus IoT-based smart locker with a few simple steps on the Tuya IoT Platform. The smart locker prototype is created based on the Tuya microcontroller unit (MCU) SDK low-code development. The following components are used for the development: the Tuya Sandwich Wi-Fi MCU communication board (WB3S), Tuya Sandwich DC power supply board, STM32 development board, door lock driver, and other required components.
Steps
Build the product framework
The campus IoT-based smart locker management system consists of the following IoT-based components:
-
Smart locker: includes the lock driver board, Tuya Sandwich Wi-Fi MCU communication board, Tuya Sandwich DC power supply board, and STM32 development board.
-
Tuya Cloud Development Platform: supports device management and control.
-
WeChat mini program that is developed based on the Tuya Mini Program SDK: allows users to scan a WeChat QR code to open the locker and store or pick up parcels.
-
Management platform that runs on a developer server: manages the user list, device list, and storage and pick-up records, and supports administrator authorization to open the locker.

Hardware of the smart locker
The smart locker uses the following hardware:
-
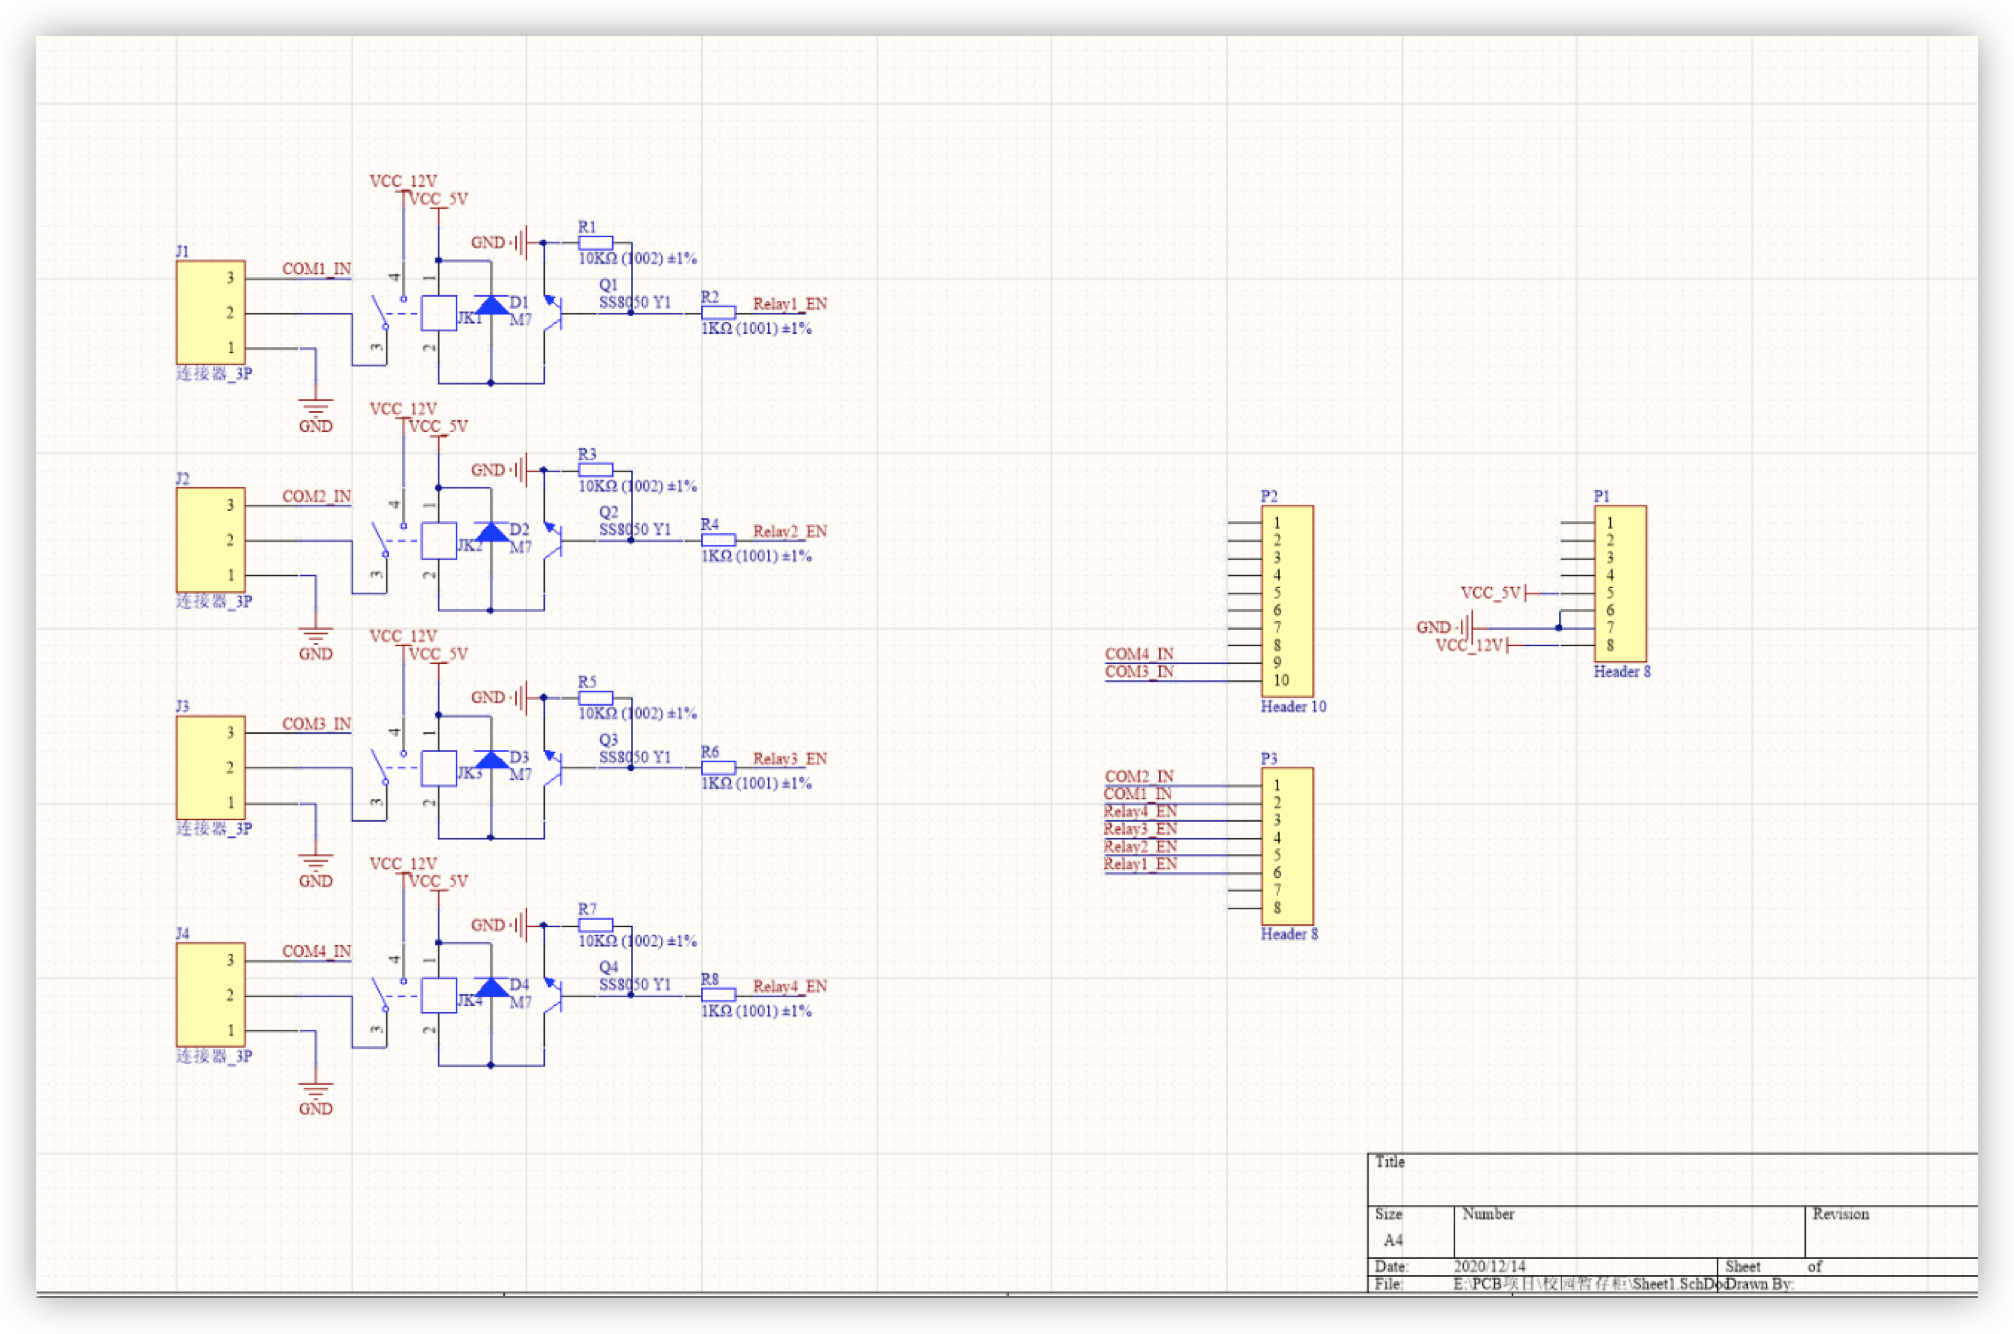
Lock driver board. The following figure shows how the lock driver board works.
-
Tuya Sandwich Wi-Fi MCU communication board
-
STM32 development board
-
Tuya Sandwich DC power supply board
The following figures show the PCB assembly (PCBA).

Assemble the Printed Circuit Board (PCB) and develop embedded software
Embedded software of the smart locker
The smart locker is implemented through MCU integration. Perform the following development steps:
-
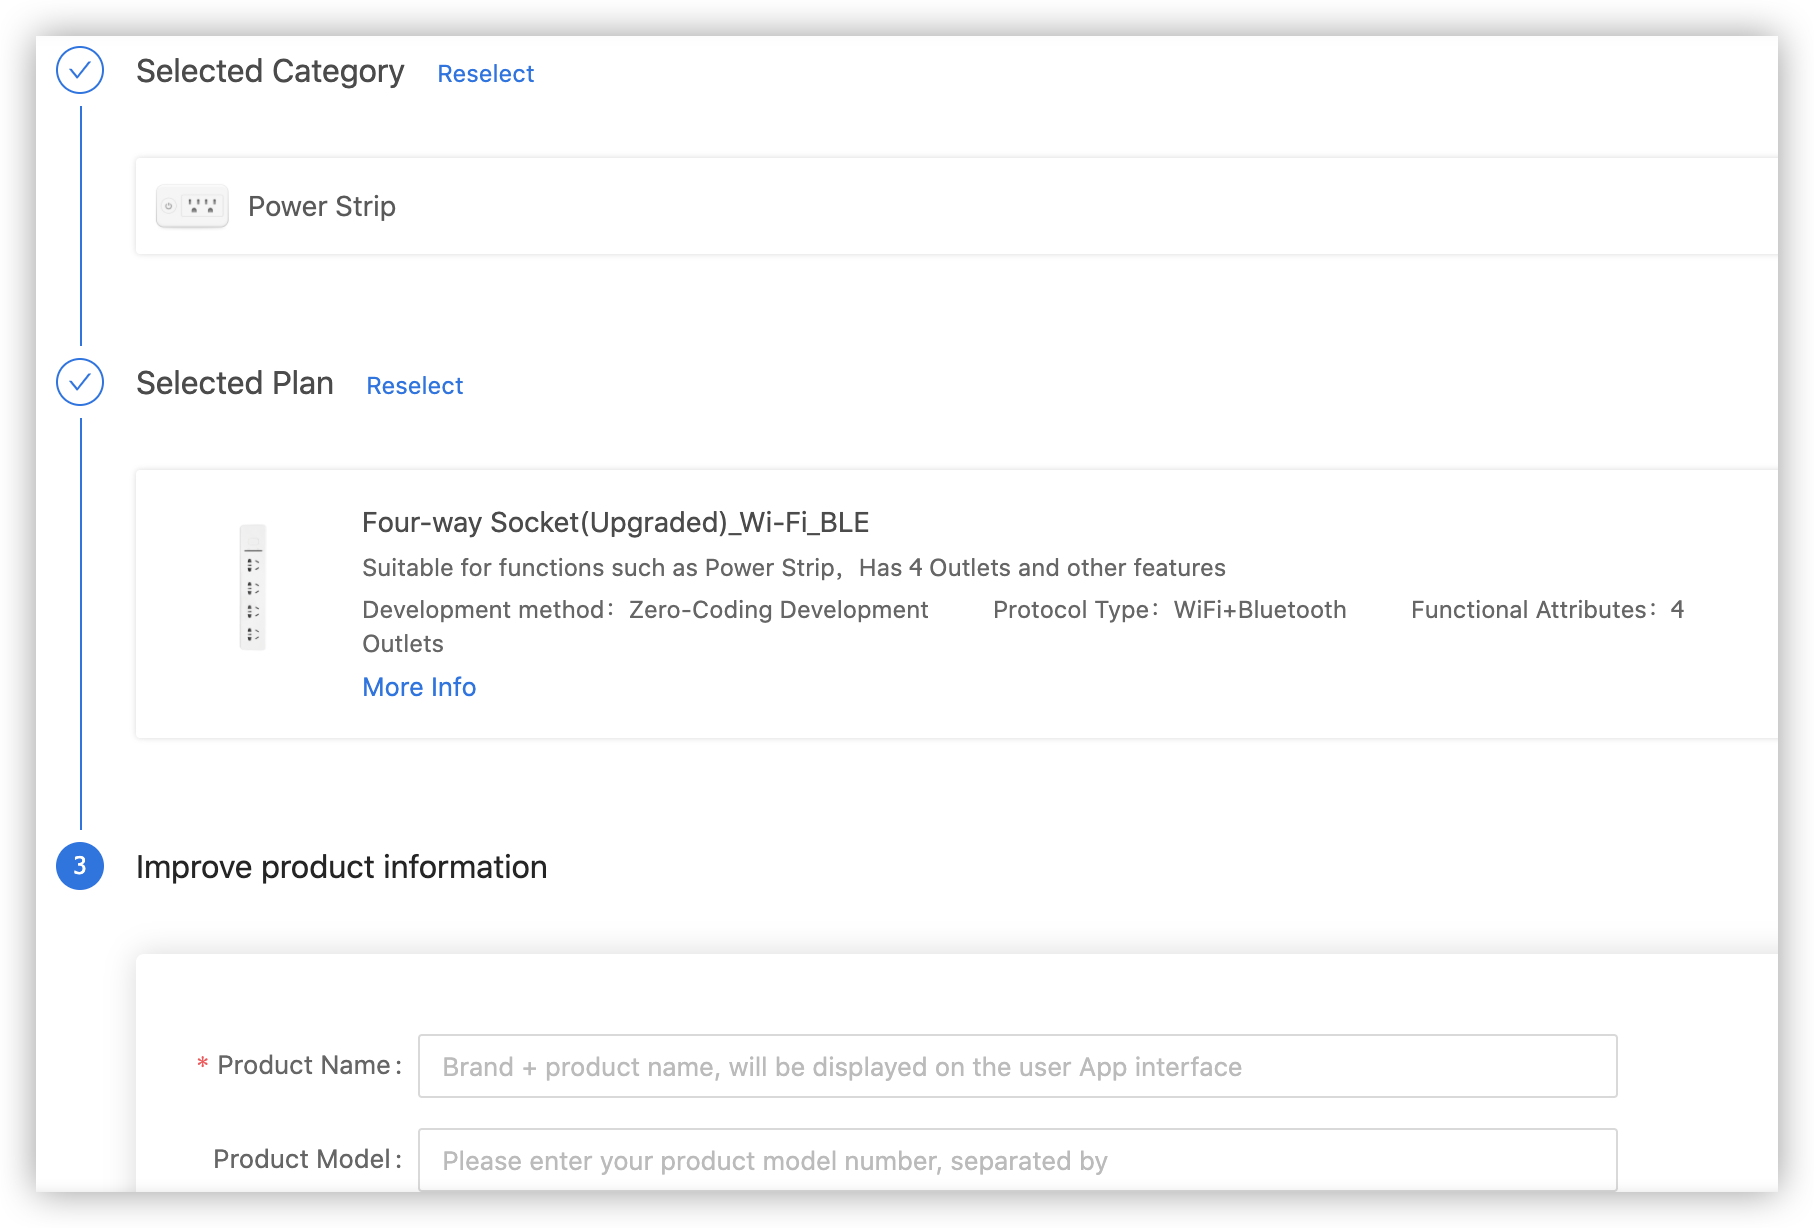
Select the Four-way Socket(Upgraded)_Wi-Fi_BLE plan on the Tuya IoT Platform to create a four-outlet power strip. For more information, see Create Products.
This prototype belongs to the Power Strip category that provides similar data points (DPs) as those defined by the developer for the smart locker.
-
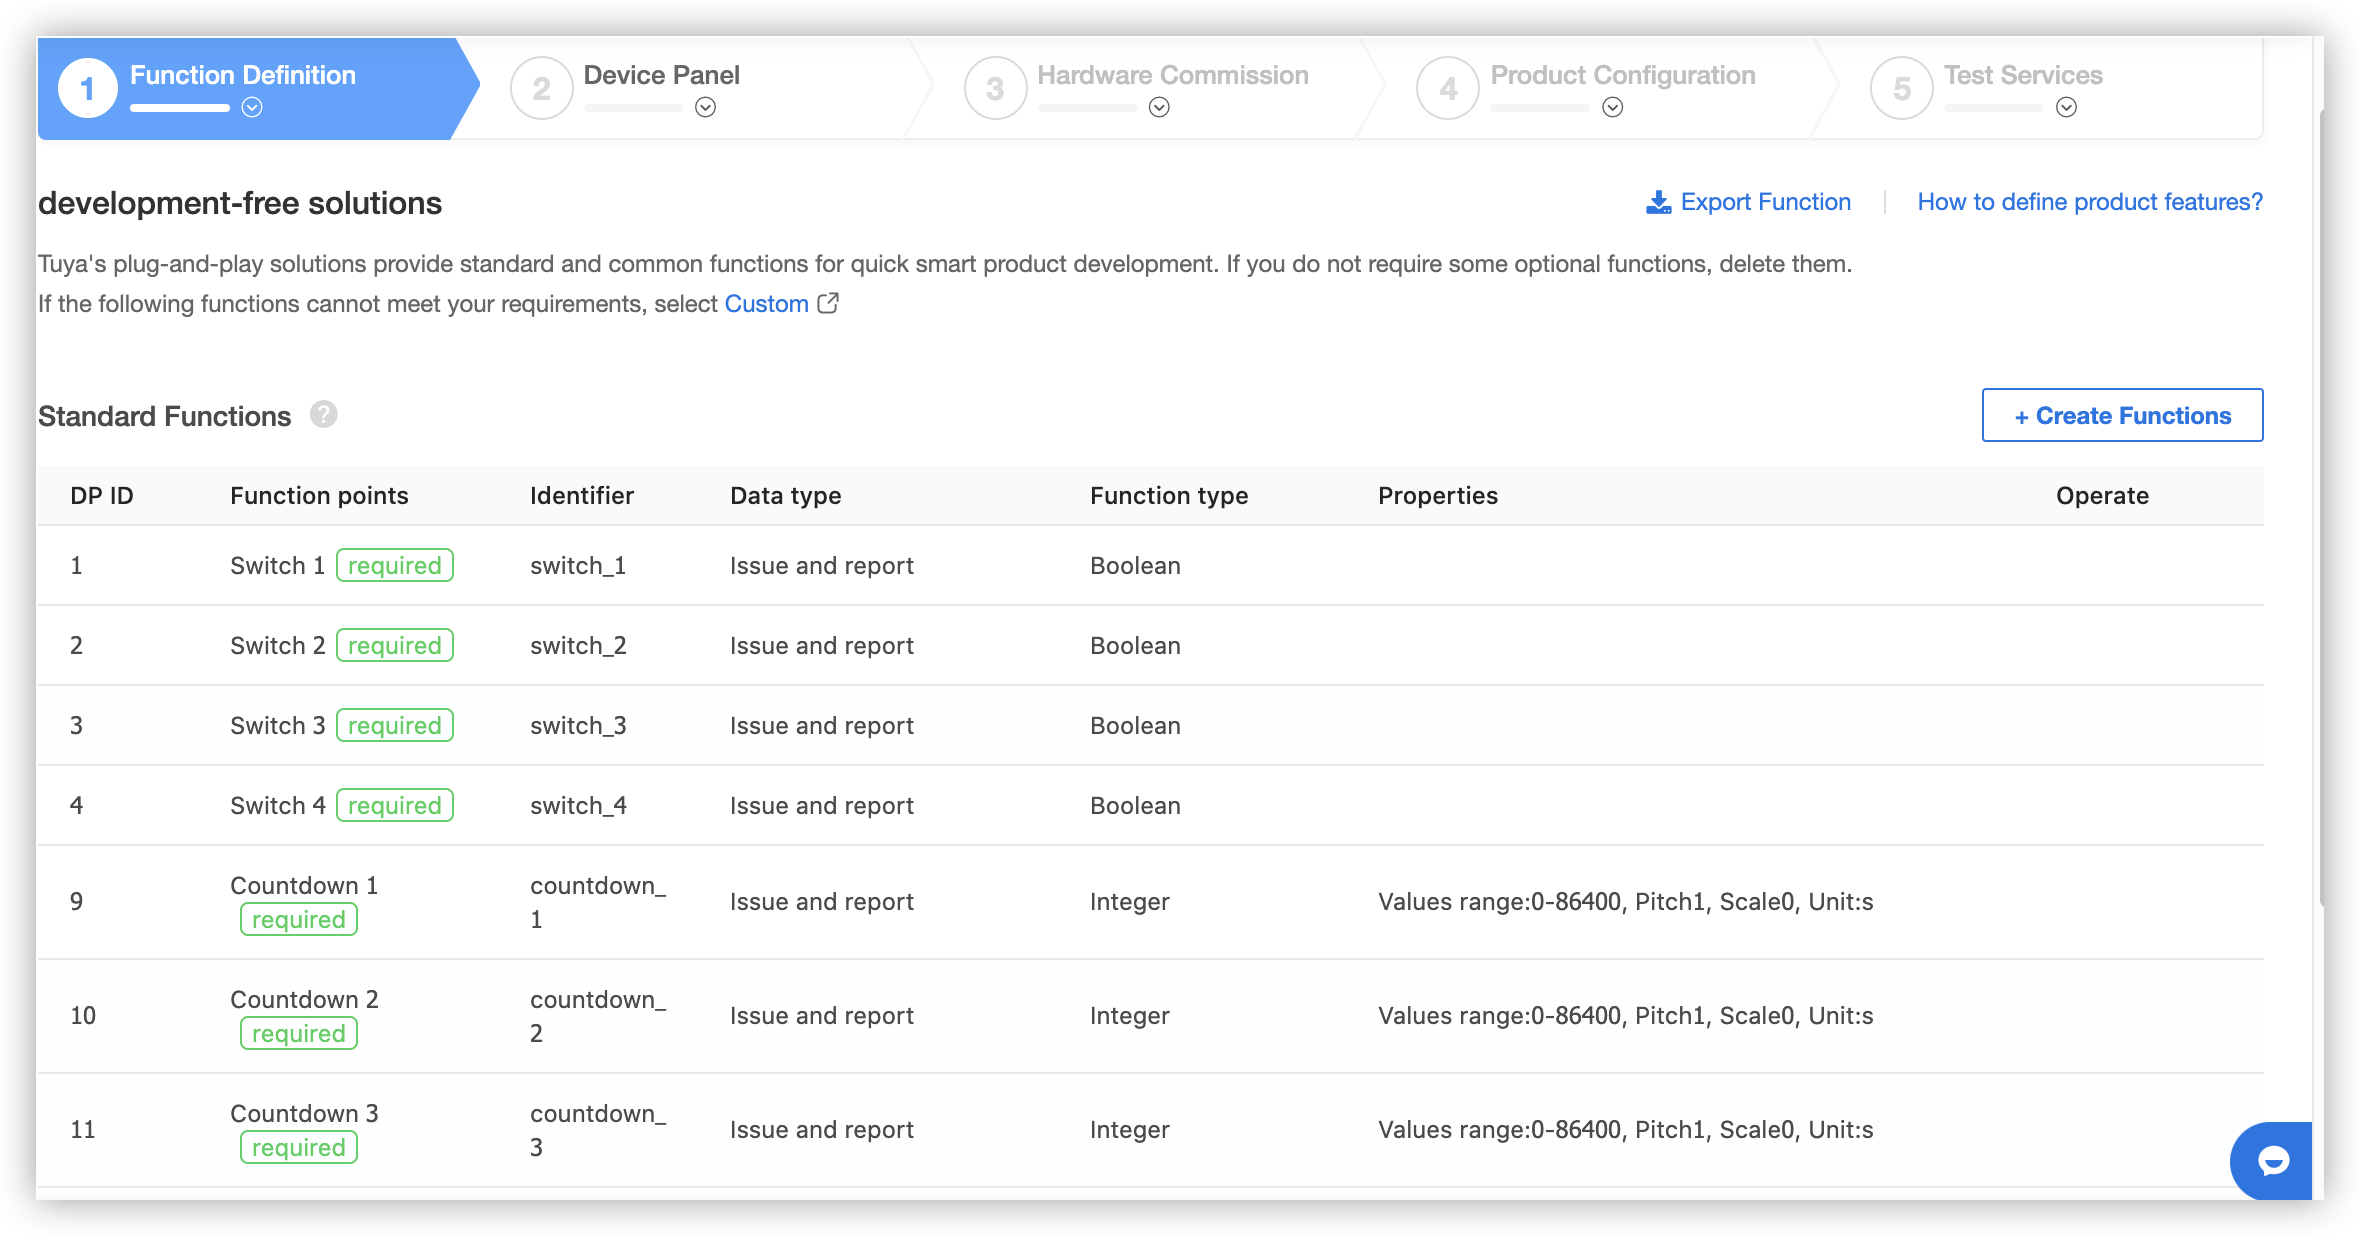
In the Function Definition step, select the DPs that are required by the smart locker.
Four DPs are selected to support four cabinet locks in this demo.
-
In the Hardware Development step, select the required module, such as the WBR3 module. Then, download the MCU SDK in the Download Documents section.


-
Configure the development board and port the SDK to the development board.
STM32CubeMX and CLion are used in this demo to develop STM32 MCU. The following figure shows the peripheral of the MCU.
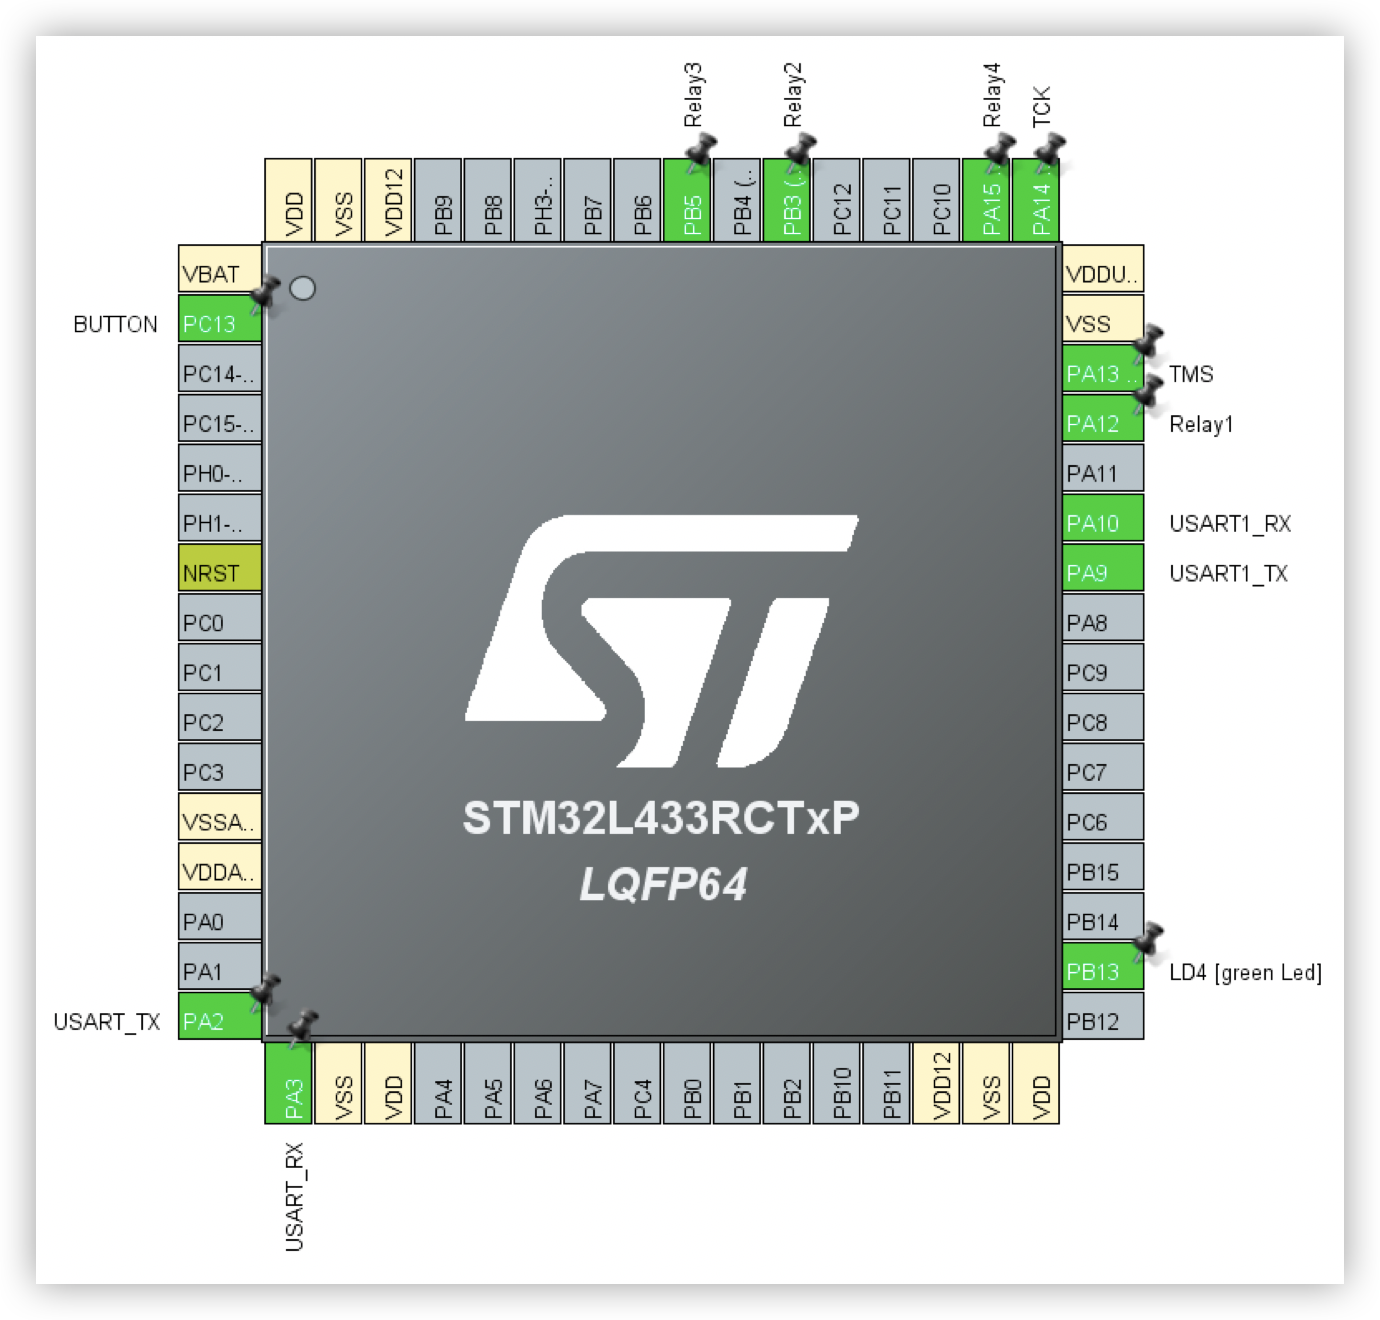
The MCU provides a serial port that supports the communication with Tuya's development board and four general-purpose input/output (GPIO) pins to control four relays. The following three functions are implemented with Tuya MCU SDK:
- Receive and send data through serial ports
- Initialize and run the SDK
- Get the network status and connect the device to the network
Receive and send data through serial ports
The serial port uses a register to send data.

Set the transmit function to Protocol.c of the SDK.

The serial port uses Universal Asynchronous Receiver/Transmitter (UART) interrupts to receive data.
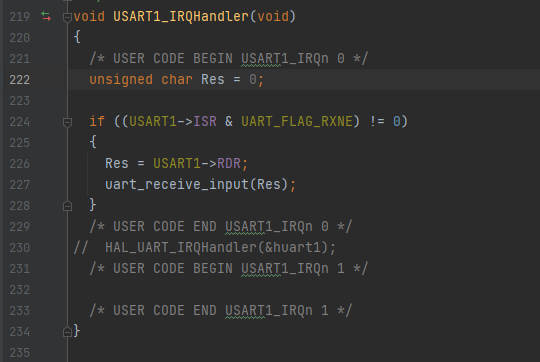
Enable UART interrupts in the main function.
__HAL_UART_ENABLE_IT(&huart1, UART_IT_RXNE);
Initialize and run the SDK
Set wifi_protocol_init and wifi_uart_service in the main function and main loop.
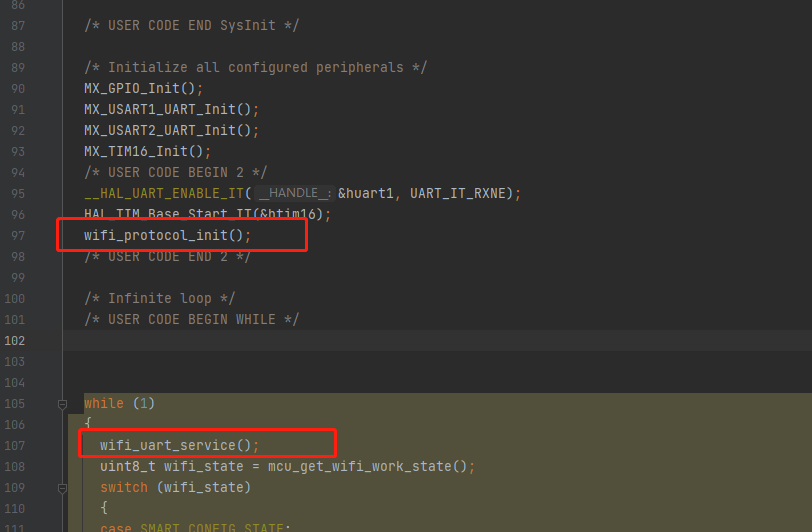
Use mcu_get_wifi_work_state to get the network status of the current module and connect the device to the network.
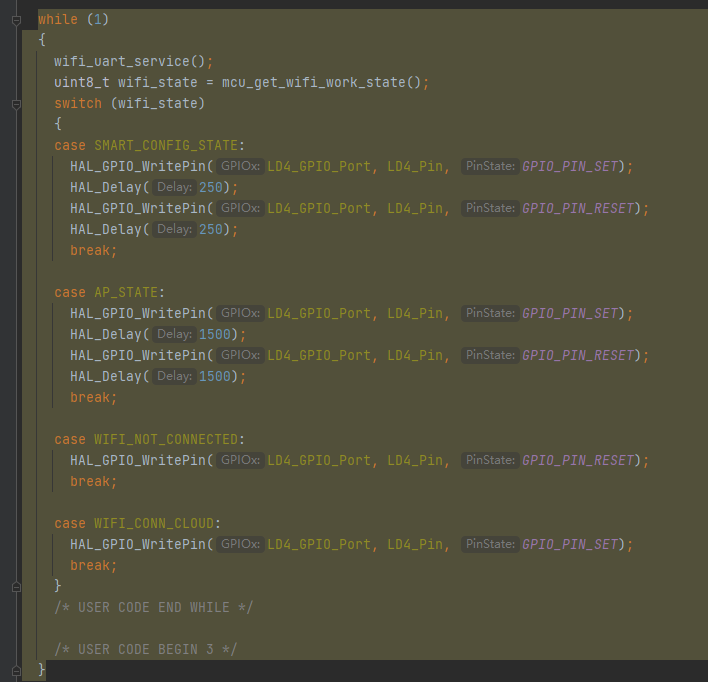
Reset the network settings
The SDK supports the Wi-Fi Easy Connect mode and access point (AP) pairing mode.
Use mcu_reset_wifi() in mcu_api.c of the SDK to reset the module and start the pairing process.
Control a relay to unlock a cabinet
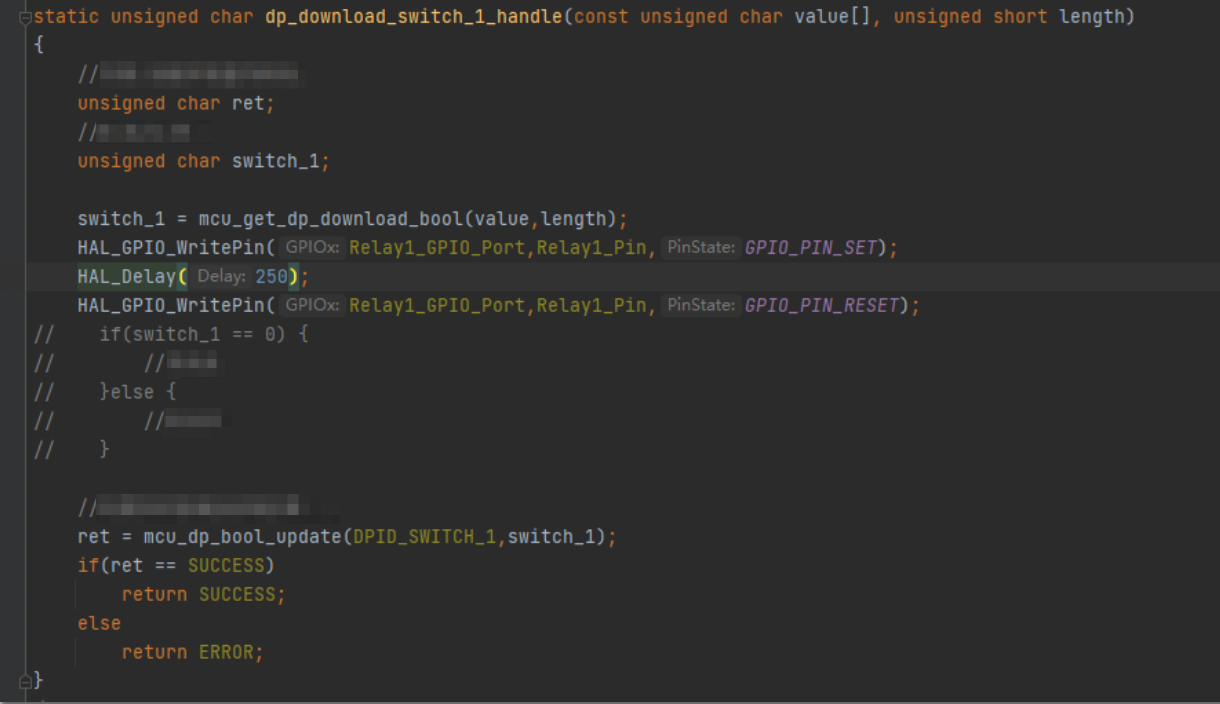
Apply a high-level trigger of 250 ms to a GPIO pin to electrify the lock core and eject the lock hook. The following example describes how to control a relay and unlock a cabinet. Switch 1 is used in this example. The control method is similar for other switches.
Connect to the Tuya Cloud Development Platform
The device information query and device control functions of the Tuya Cloud Development Platform are used to develop the backend environment. The Tuya Cloud Development Platform supports the SDK for Java and the backend environment is developed based on the PHP programming language. Therefore, you can call API operations of the Tuya Cloud Development Platform to create a class and support multiple functions. For example, you can implement simple authentication, get device information, and control devices.
The following code block shows how to create the class and implement the required functions:
<? php

namespace sdk;

use think\cache\driver\Redis;

define("client_id", "Requested on the [Tuya IoT Platform](https://iot.tuya.com/).");
 define("secret", "Requested on the [Tuya IoT Platform](https://iot.tuya.com/).");
 define("APIURL", 'https://openapi.tuyacn.com');
 // define("redisarr", '192.168.31.3');

class tuyasdk
 {
     private $access_token;
     private $refresh_token;
     private $uid;
     private $expire_time;

    public function Requestopen($devicesid)
     {
         $data = $this->get_devices($devicesid);
         $data = json_decode($data, true);
         // var_dump($data);
         if ($data['success']) {
             foreach ($data['result']['status'] as $lock) {
                 if (! $lock['value']) {
                     $data = $this->set_device($devicesid, $lock['code'], true);
                     $data = json_decode($data, true);
                     if ($data['success']) {
                         return $lock['code'];
                     }
                 }
             }
         }
         return false;
     }

    public function Requestclose($devicesid, $lockcode)
     {
         $data = $this->set_device($devicesid, $lockcode, false);
         $data = json_decode($data, true);
         return $data['success'];
     }

    public function get_devices($devicesid)
     {
         $this->get_token();
         $data = $this->queryheader_business();

        $requestdata = $this->query_curl("GET", APIURL . "/v1.0/devices/" . $devicesid, $data, "");
         return $requestdata;
     }

    public function get_devices_list($page_no, $page_size, $product_id)
     {
         $this->get_token();
         $data = $this->queryheader_business();
         $requestdata = $this->query_curl("GET", APIURL . "/v1.0/devices? page_no=" . $page_no . "&page_size=" . $page_size . "&product_id=" . $product_id, $data, "");
         return $requestdata;
     }

    public function set_device($devicesid, $comkey, $state)
     {
         $postdata = array();
         $postdata["commands"][0]["code"] = $comkey;
         $postdata["commands"][0]["value"] = $state;
         $postdata = json_encode($postdata);

        $this->get_token();
         $data = $this->queryheader_business();
         $requestdata = $this->query_curl("POST", APIURL . "/v1.0/devices/" . $devicesid . "/commands", $data, $postdata);
         return $requestdata;
     }


    private function access_token()
     {
         $data = $this->queryheader_token();
         $requestdata = $this->query_curl("GET", APIURL . "/v1.0/token? grant_type=1", $data, "");
         $arraydata = json_decode($requestdata, true);

        if ($arraydata['success'] == "true") {

            $this->access_token = $arraydata['result']['access_token'];
             $this->refresh_token = $arraydata['result']['refresh_token'];
             $this->expire_time = time() + $arraydata['result']['expire_time'];
             $this->uid = $arraydata['result']['uid'];

            $tokendata = array();
             $tokendata['access_token'] = $this->access_token;
             $tokendata['refresh_token'] = $this->refresh_token;
             $tokendata['expire_time'] = $this->expire_time;
             $tokendata['uid'] = $this->uid;
             $tokendata = json_encode($tokendata);
             $this->set_token($tokendata);

            return true;
         }
         return false;
     }


    private function get_token()
     {
         $redis = new Redis();
         // $redis->connect(redisarr, 6379);
         // $redis->auth('demo');
         $data =  $redis->get('token');
         $arraydata = json_decode($data, true);

        $this->access_token = $arraydata['access_token'];
         $this->refresh_token = $arraydata['refresh_token'];
         $this->expire_time = $arraydata['expire_time'];
         $this->uid = $arraydata['uid'];

        if ($this->expire_time  - time() < 3) {
             $this->access_token();
         }
         // $redis->close();
     }

    private function set_token($data)
     {
         $redis = new Redis();
         // $redis->connect(redisarr, 6379);
         // $redis->auth('demo');
         $redis->set('token', $data);
         // $redis->close();
     }

    private function queryheader_business()
     {
         list($t1, $t2) = explode(' ', microtime());
         $time = (float)sprintf('%.0f', (floatval($t1) + floatval($t2)) * 1000);

        $Message = client_id . $this->access_token . $time;
         $sha256data = hash_hmac('sha256', $Message, secret, false);
         $sign = strtoupper($sha256data);

        $headerdata = array(
             'client_id:' . client_id,
             'sign:' . $sign,
             'sign_method:HMAC-SHA256',
             't:' . $time,
             'lang:ch',
             'access_token:' . $this->access_token,
             'Content-Type:application/json'
         );
         return $headerdata;
     }

    private function queryheader_token()
     {
         list($t1, $t2) = explode(' ', microtime());
         $time = (float)sprintf('%.0f', (floatval($t1) + floatval($t2)) * 1000);

        $Message = client_id . $time;
         $sha256data = hash_hmac('sha256', $Message, secret, false);
         $sign = strtoupper($sha256data);

        $headerdata = array(
             'client_id:' . client_id,
             'sign:' . $sign,
             't:' . $time,
             'sign_method:HMAC-SHA256',
             'lang:ch'
         );
         return $headerdata;
     }
     private function query_curl($typequery, $url, $headerdata = array(), $bodydata = array())
     {
         $curl = curl_init();

        curl_setopt($curl, CURLOPT_URL, $url);
         curl_setopt($curl, CURLOPT_HTTPHEADER, $headerdata);
         curl_setopt($curl, CURLOPT_RETURNTRANSFER, 1);
         curl_setopt($curl, CURLOPT_HEADER, false);
         curl_setopt($curl, CURLOPT_SSL_VERIFYPEER, false);
         // curl_setopt($curl, CURLOPT_SSL_VERIFYHOST, false);

        if ($typequery == "POST") {
             curl_setopt($curl, CURLOPT_POST, true);
             curl_setopt($curl, CURLOPT_POSTFIELDS, $bodydata);
         } else {
             curl_setopt($curl, CURLOPT_POST, false);
         }
         $tmpInfo = curl_exec($curl);
         curl_close($curl);
         return $tmpInfo;
     }
 }
Develop the WeChat mini program
Unlock a cabinet to store parcels
-
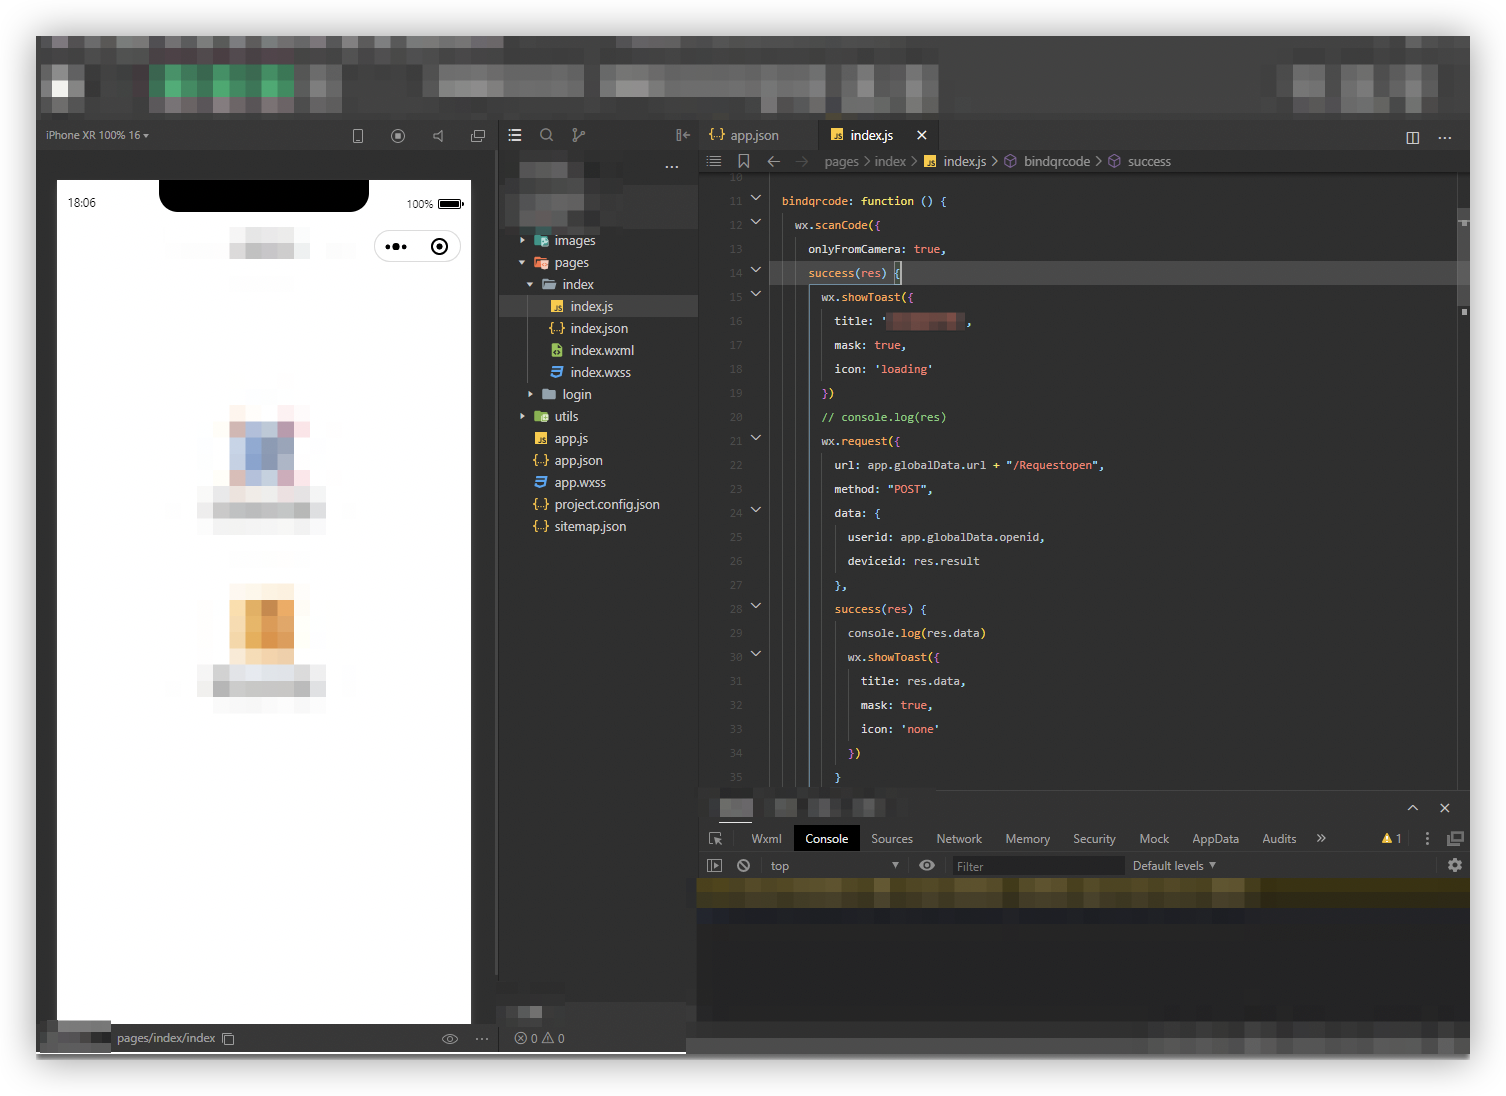
Process: 1. The user opens the QR code for storage. 2. The user scans the QR code. 3. The smart locker reports the scan result that includes the user ID and device ID to the cloud. 4. The cloud requests to unlock the specified cabinet. 5. The cabinet is unlocked to store parcels.
-
The following code block shows how to implement the process.
Unlock a cabinet to pick up parcels
-
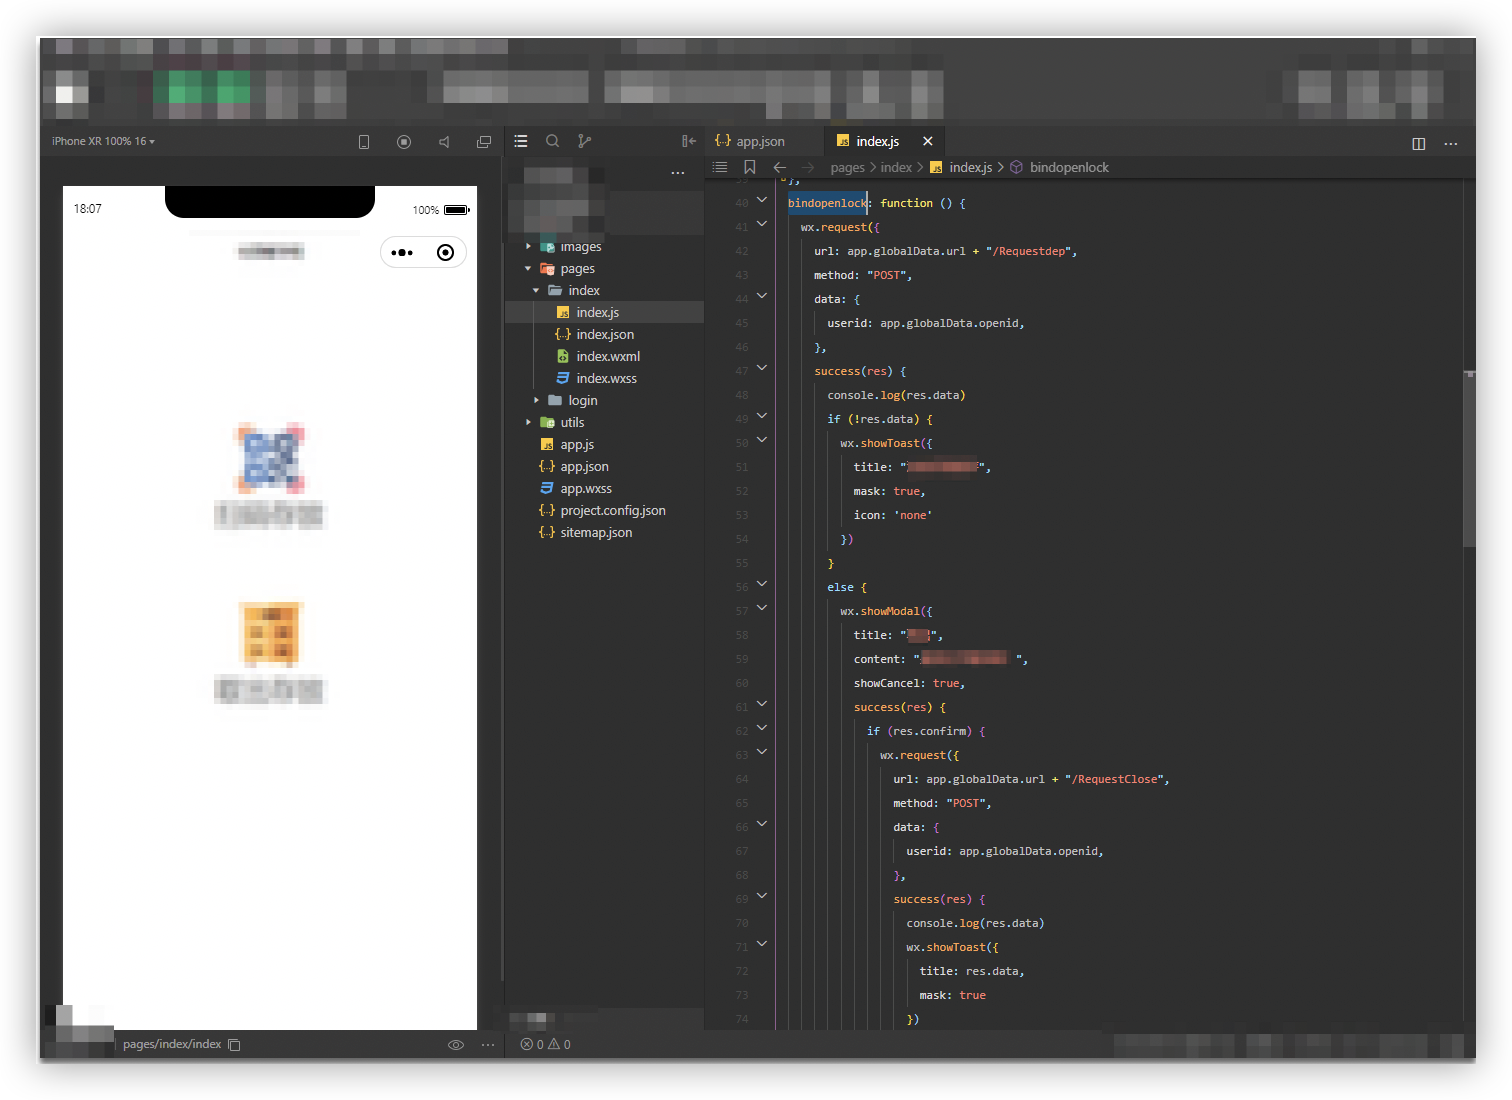
Process: 1. The user opens the QR code for pickup. 2. The cloud checks whether the user has parcels to be picked up from the smart locker. 3. If the parcels exist in the smart locker, the cloud requests to unlock the specified cabinet. If not, the cloud returns a message to indicate that no parcels are available for pick-up.
-
The following code block shows how to implement the process.
Develop the smart locker management platform
The smart locker management platform is developed based on the ThinkPHP5 framework and Xadmin frontend framework.
List of users
-
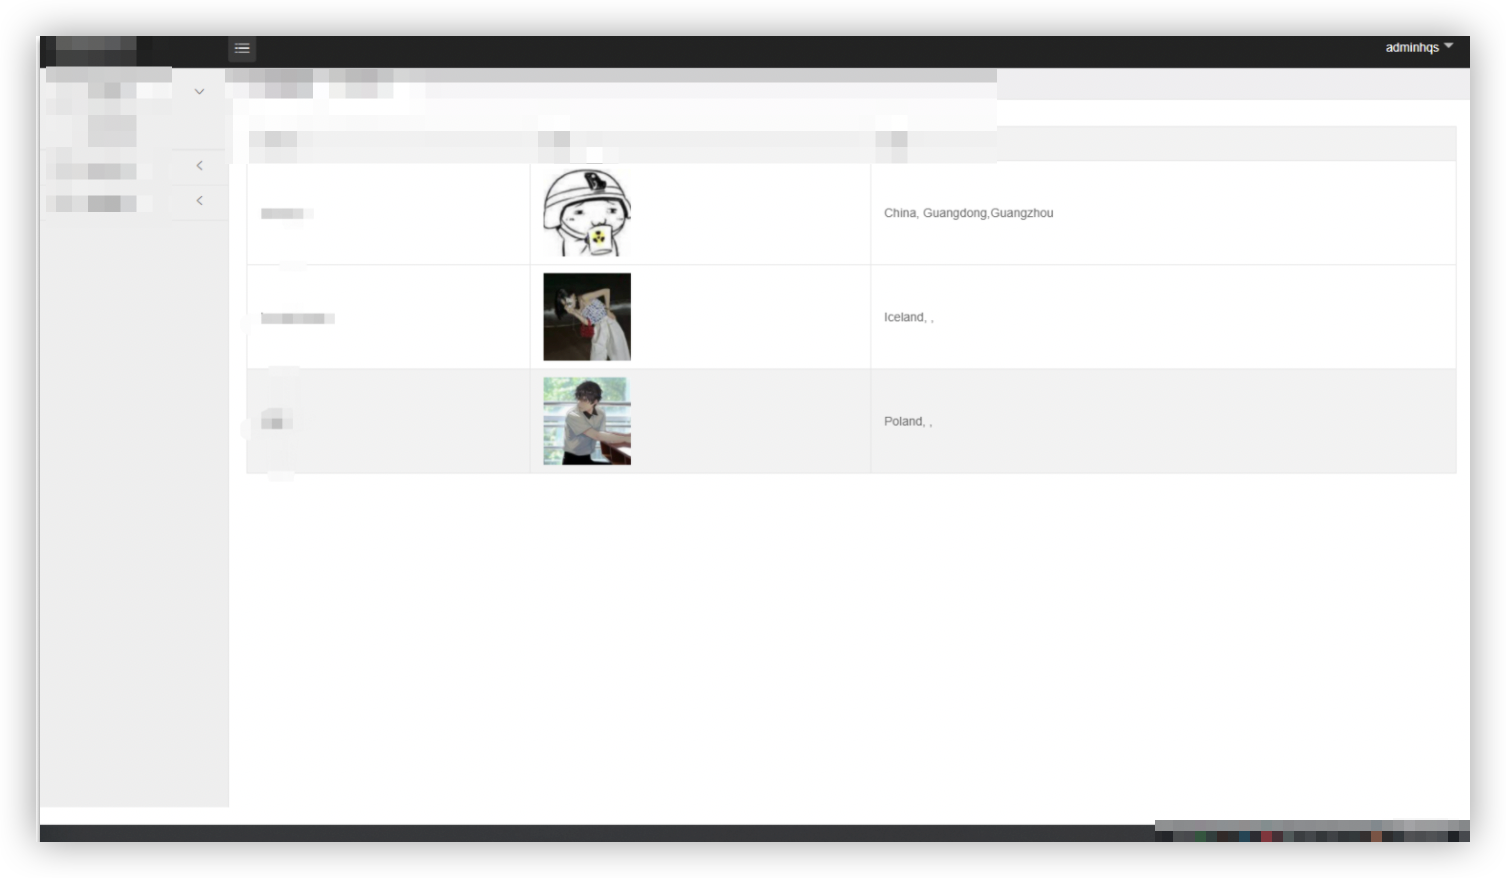
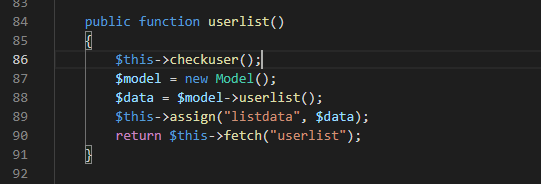
Process: 1. The user authorizes the mini program to get the user information. 2. The mini program makes API requests to register the user and write to the database. The database tables are traversed when the list of users is queried.
-
The following code block shows how to implement the process.

Storage records
-
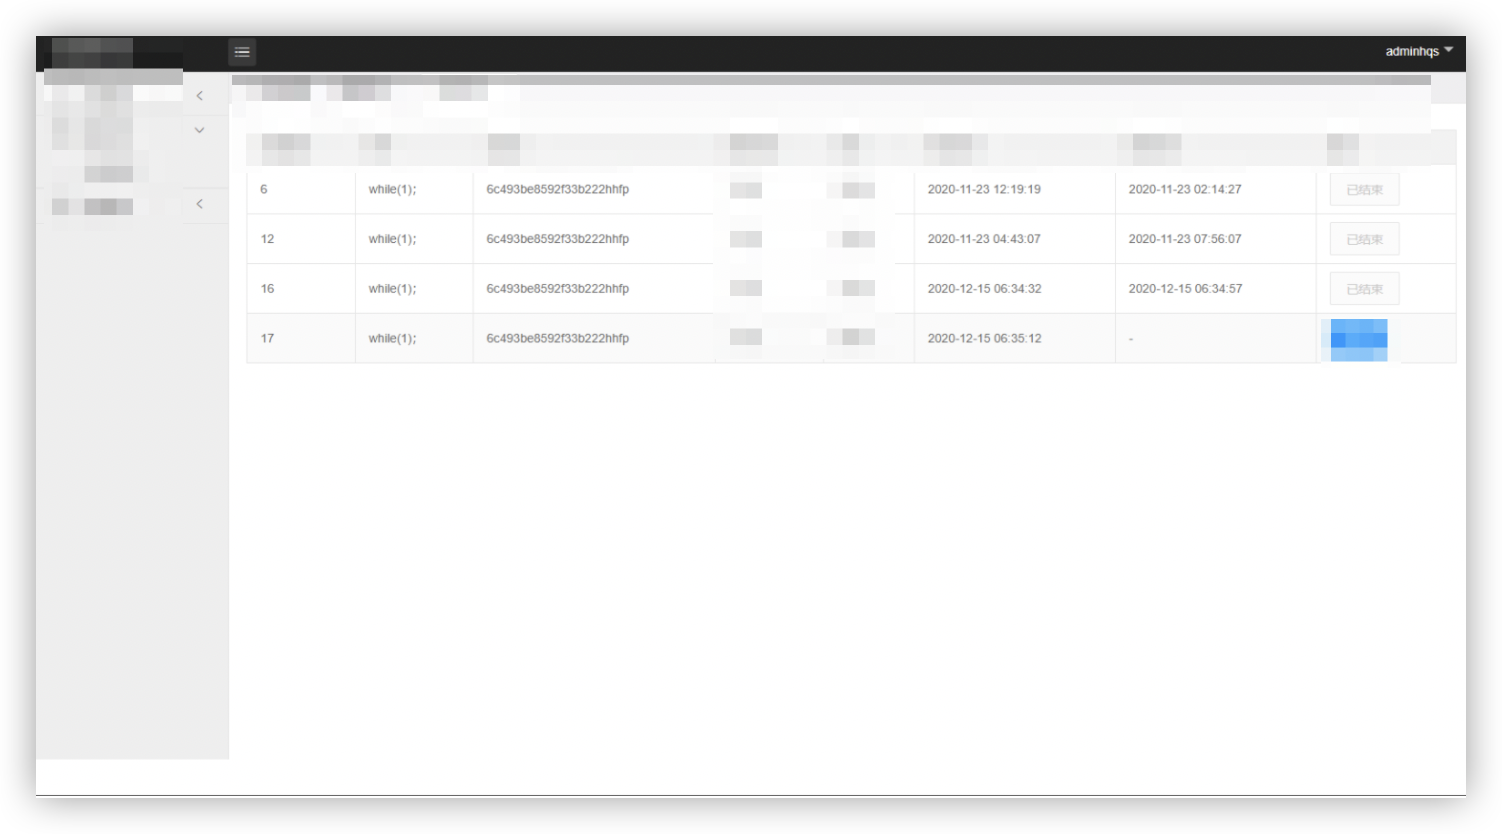
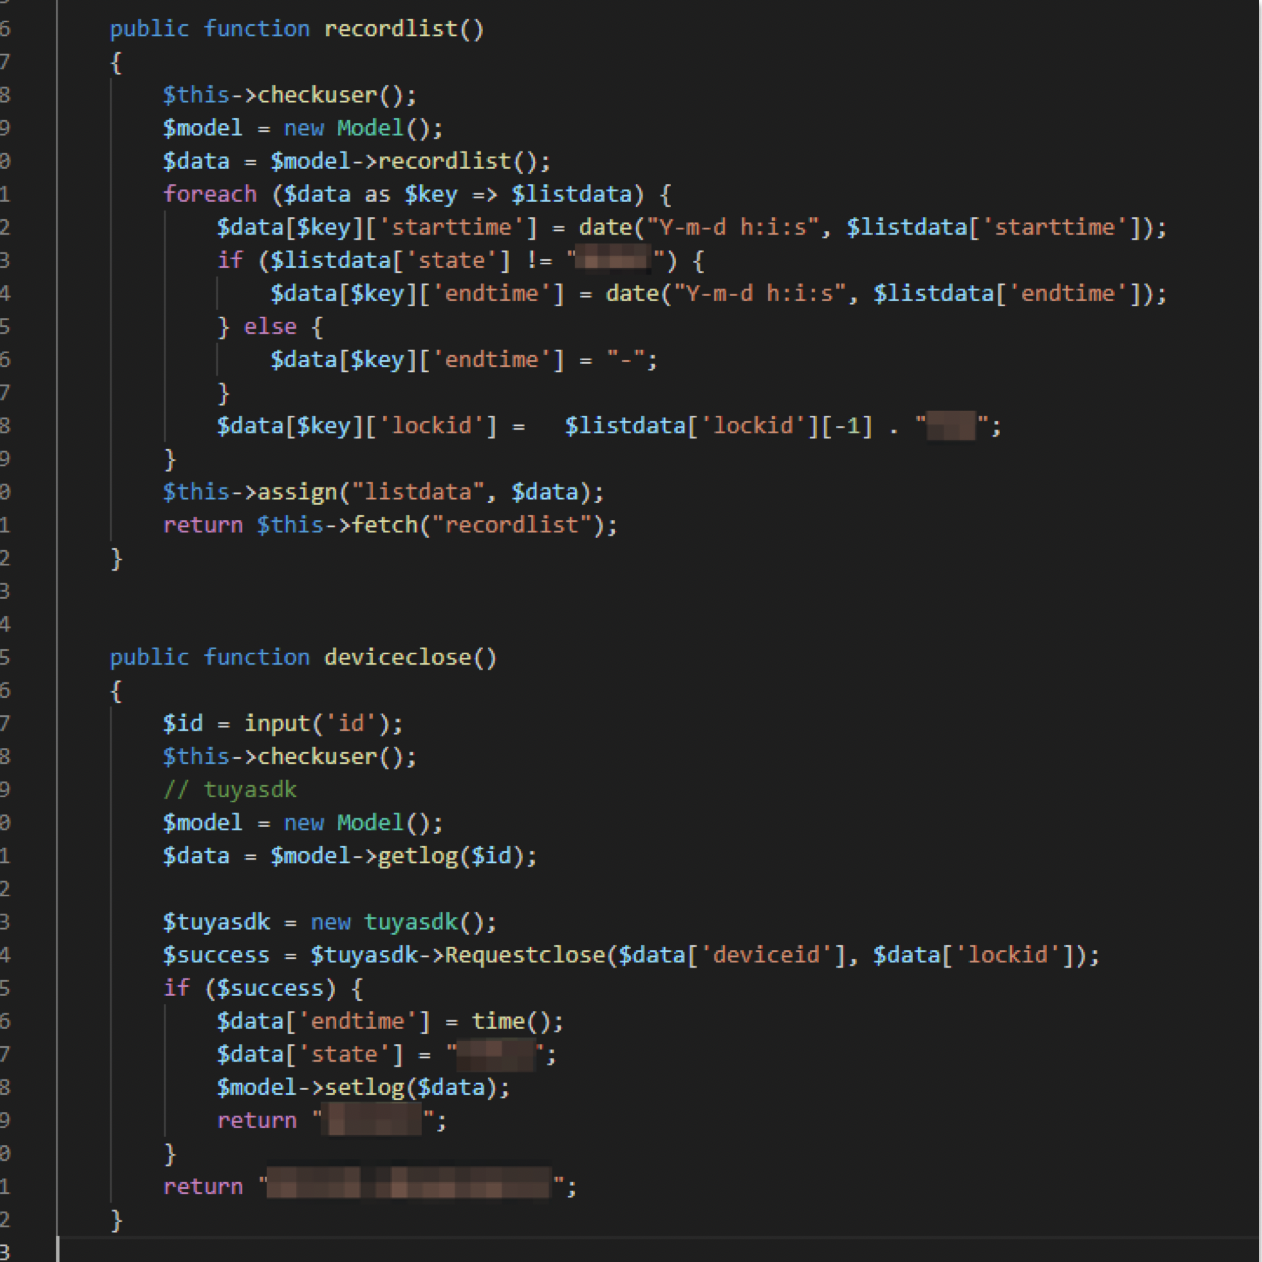
Process: The management platform gets the smart locker storage records from the database and traverses the records. The administrator unlocks a cabinet by communicating with the frontend based on the device ID. To unlock a cabinet, the administrator taps the unlocking button on the smart locker management platform to send the device ID to the backend. The backend queries the device ID and cabinet number in the database based on the device ID and calls the SDK to control the smart locker.
-
The following code block shows how to implement the process.
List of devices
-
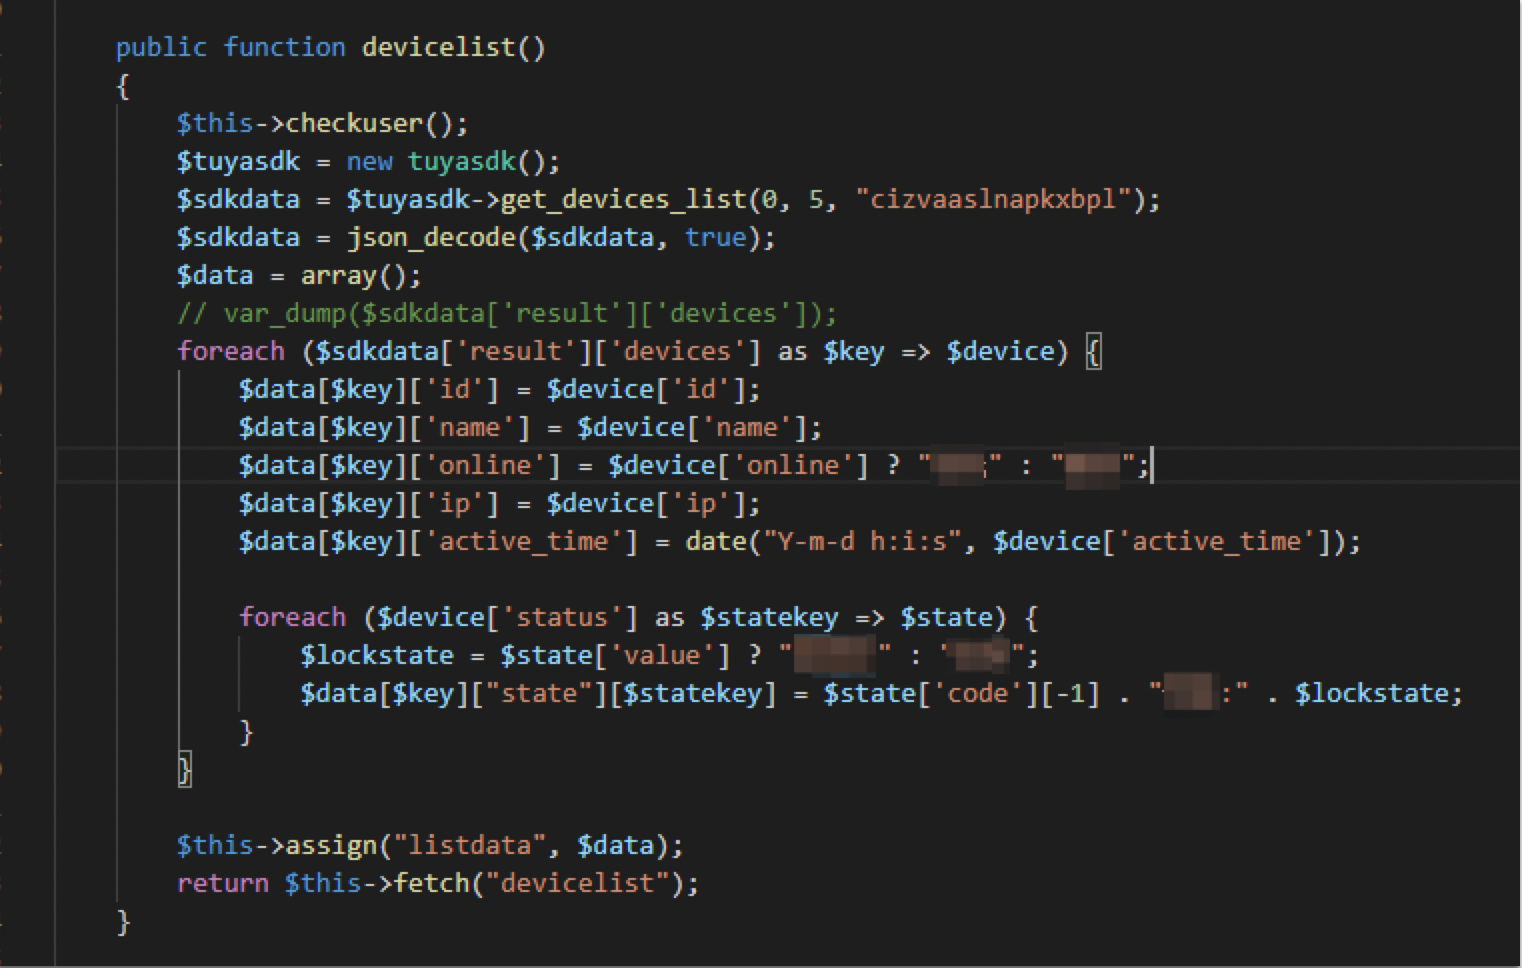
Process: The management platform gets the list of devices and sends the list to the frontend. This allows the frontend to traverse the list of devices.

-
The following code block shows how to implement the process.
Summary
The Tuya IoT Platform provides developers with convenient IoT development tools and services. This allows developers to simplify connections to devices and support IoT application development and scenario services.
The Content you are browsing is publicized by registered users of Tuya DeveloperPlatform, and the copyright of which belongs to the original author. Tuya DeveloperPlatform does not own the copyright of the Content, nor undertake any liability. Tuya Developer Platform makes no representations or warranties that the Content is not in violation or infringement of any right. You should acknowledge and understand that your reproduction, adaptation, transmission, or other action with respect to the Contentshall conform to all applicable laws and regulations and shall acquire the requiredlicense of the related licensor. All the consequences (including but not limited to infringement, breach of contract, damage, disputes with a third party, etc.) resulted therefrom shall be borne by yourself. You can refer to the 《Tuya Developer Platform User Agreement》for the terms and conditions relating to the intellectual property rights of Content. If you find any suspected infringing content, please contact the Platform immediately to report and send relevant evidence. Once verified, the Platform will immediately delete the suspected infringing content.


