Build an App for Android to Manage Fingerbot

Overview
Recently, there has been a buzz all over the world about Fingerbots from Adaprox. Fingerbots can be used to switch on or off lights with a few taps on your app, and remotely power on your office PC with a voice assistant. Fingerbots support remote control of various switches and buttons.
Fingerbots are the ideal, cost-effective choice for you to retrofit your non-smart appliances into IoT devices with a few simple steps.
Materials
Smart gateway
Count:1The basic function of a gateway is to convert the communication protocols to achieve communication between devices with different protocols. Cloud connection capability and protocol type are two basic attributes of the gateway.more
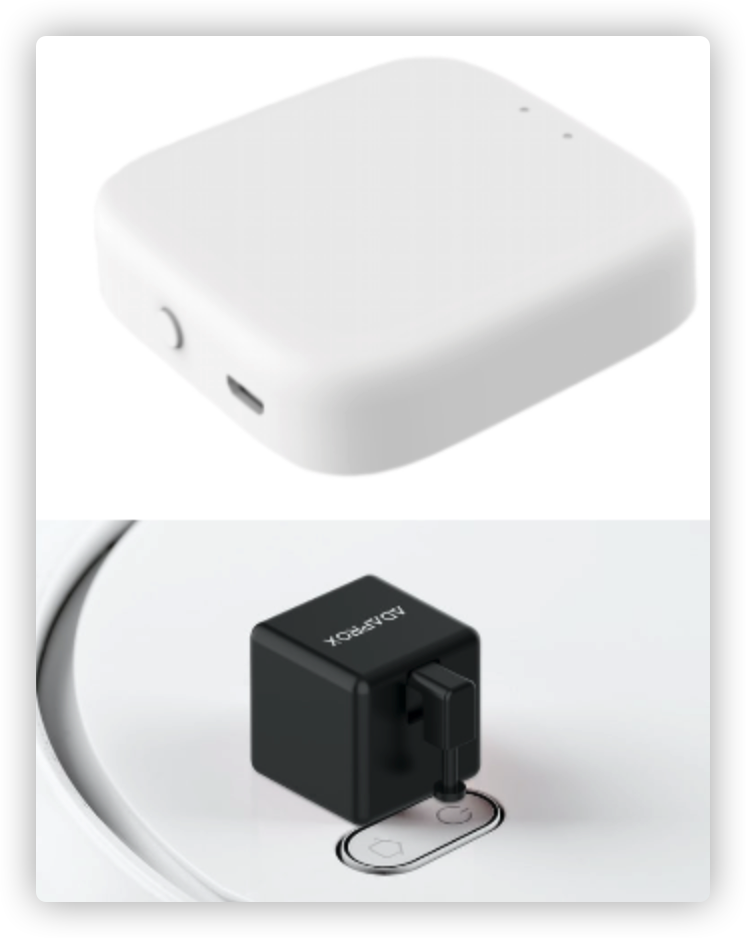
Fingerbot
Count:1Fingerbot is the tool which can make the original non-smart devices Smart with Remote control, Voice control, Timing features at a Low Cost.more
Steps
Preparation
- A smart gateway
- A Fingerbot
Step 1: Get the key information of the App SDK
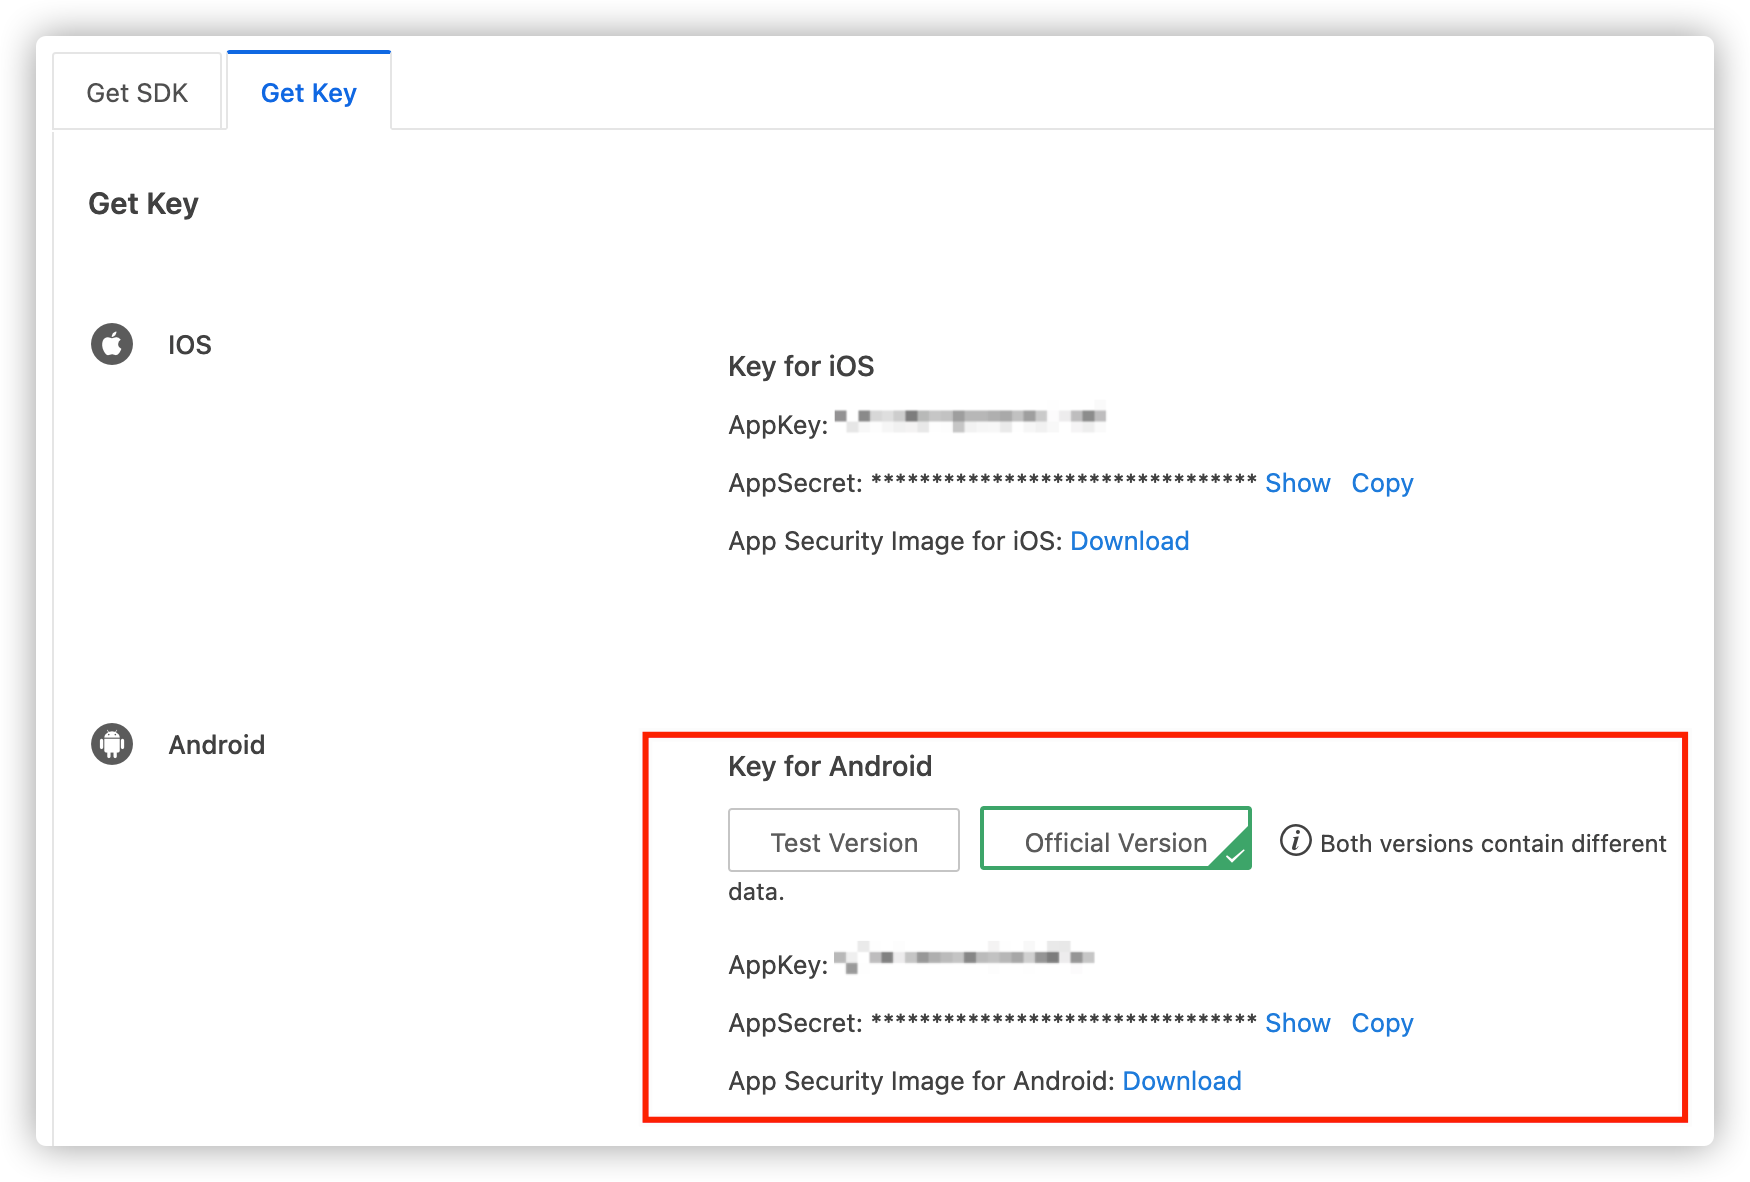
Build an app on the Tuya IoT Platform, get the values of AppKey and AppSecret, and then download the security image of the App SDK.
- Log in to the Tuya IoT Platform.
- Click App in the left-side navigation bar.
- Choose App > App SDK > SDK Development and click Create App.
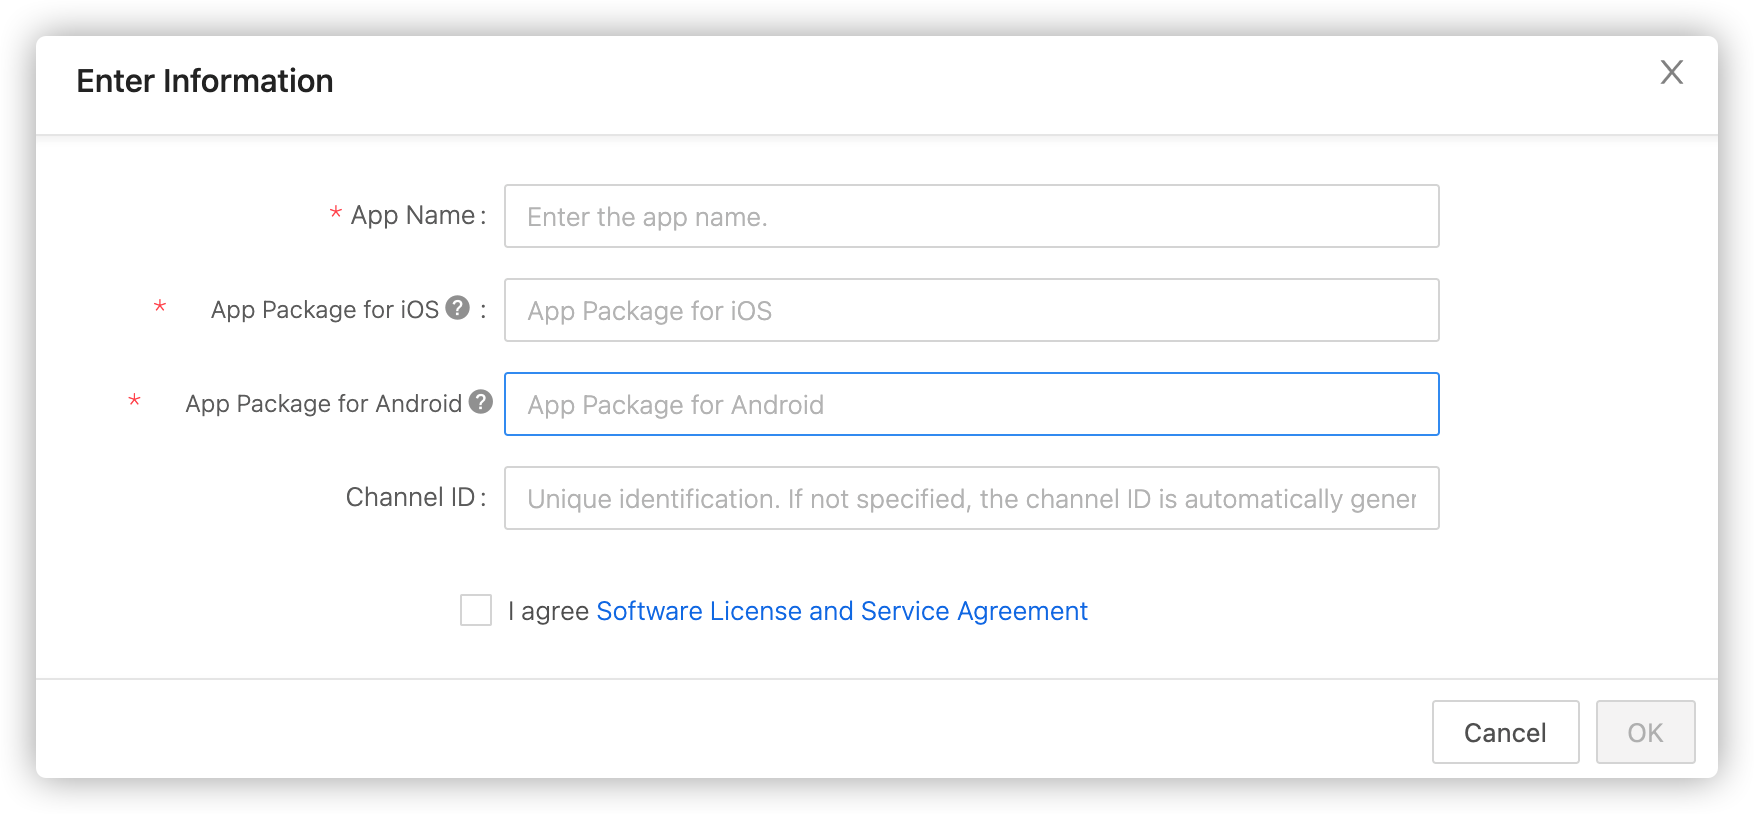
- Enter information about the app.
-
App Name: Enter a name for the app.
-
App Package for iOS: Enter a name for the app package for iOS, such as
com.testapp.smartiot. -
App Package for Android: Enter a name for the app package for Android, such as
com.testapp.smartiot. -
Channel ID: Optional. If you do not set the value, the system automatically generates a channel ID according to the package name.
-
- Click Confirm.
- Click the created app to enter the detail page. Click Get Key to check the values of AppKey AppSecret, and App Security Image for Android.
- Enter information about the app.
Step 2: Configure and run the sample file
Configure the sample file with the key information.
-
Download the Github sample file tuya-android-fingerbot-demo-master for Android.
-
Import the tuya_android_fingerbot folder from the sample file via Android Studio.
-
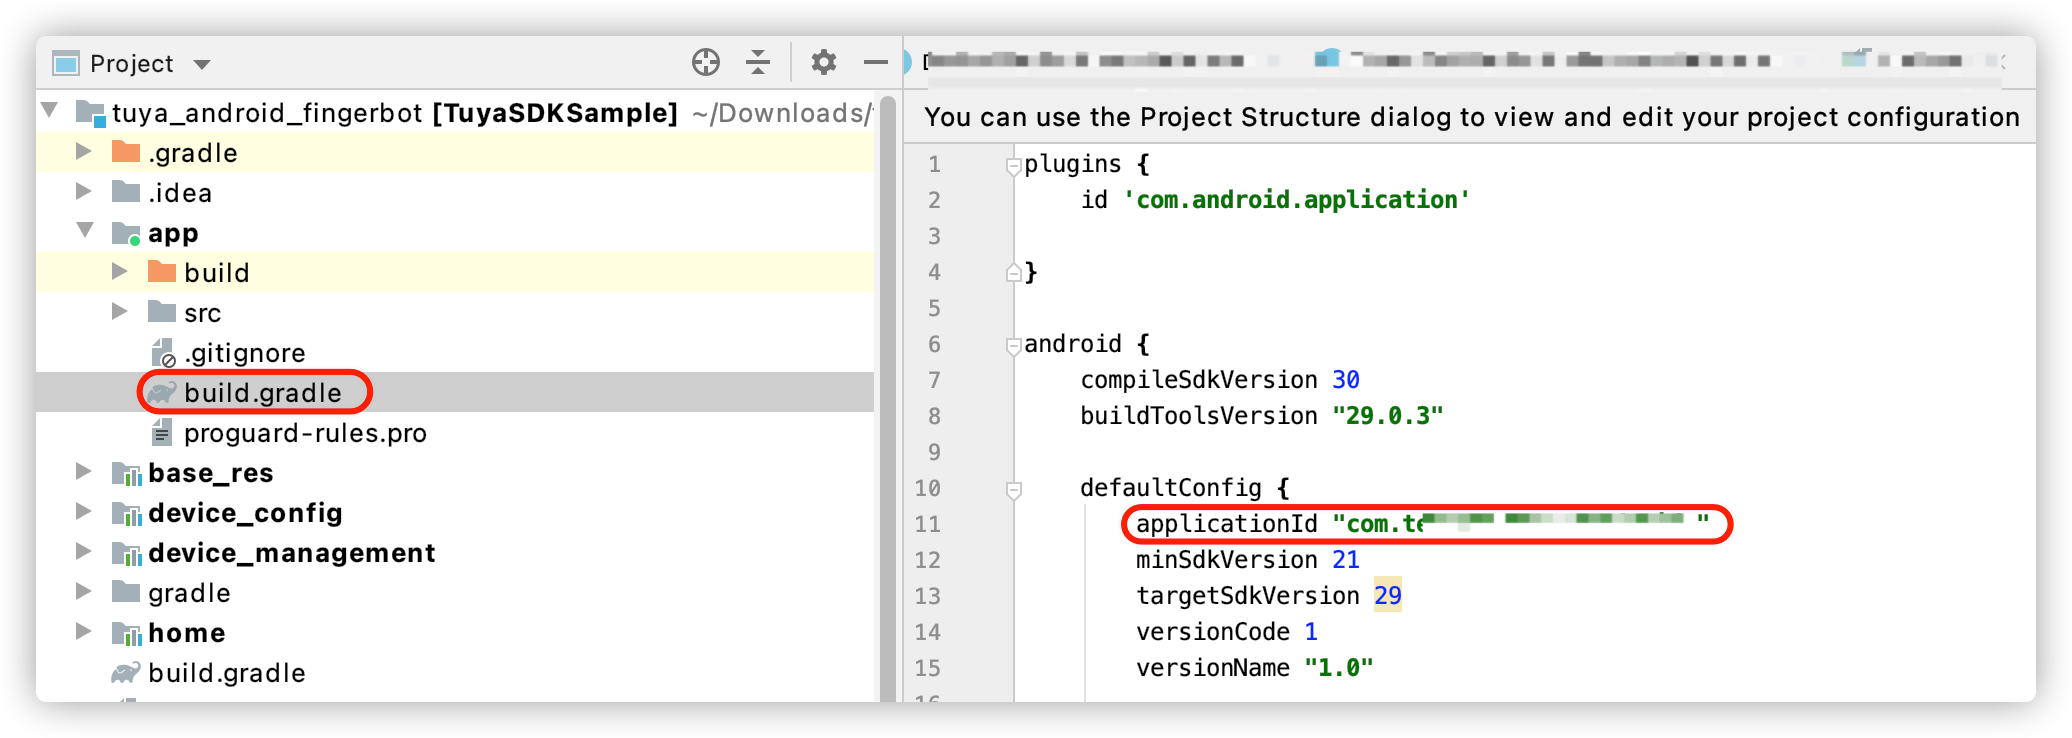
Choose tuya_android_fingerbot > app > build.gradle, and replace the value of applicationId with your app package name for Android.
-
Name the Android security image in the App SDK key information as
t_s.bmpand save it in the tuya_android_fingerbot > app > src > main >assets directory.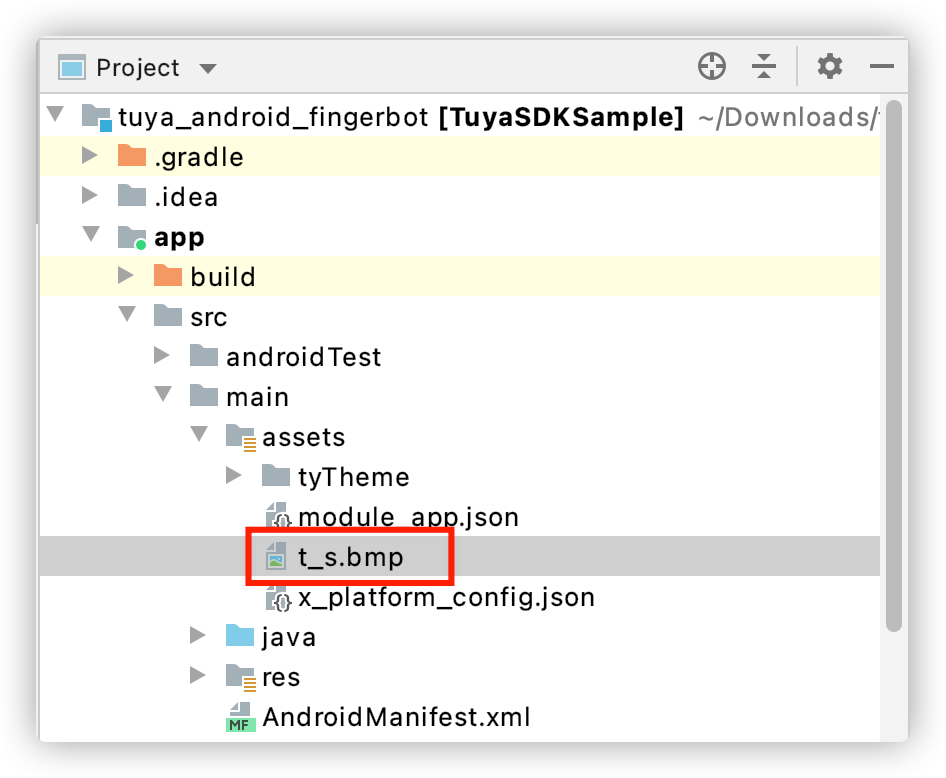
-
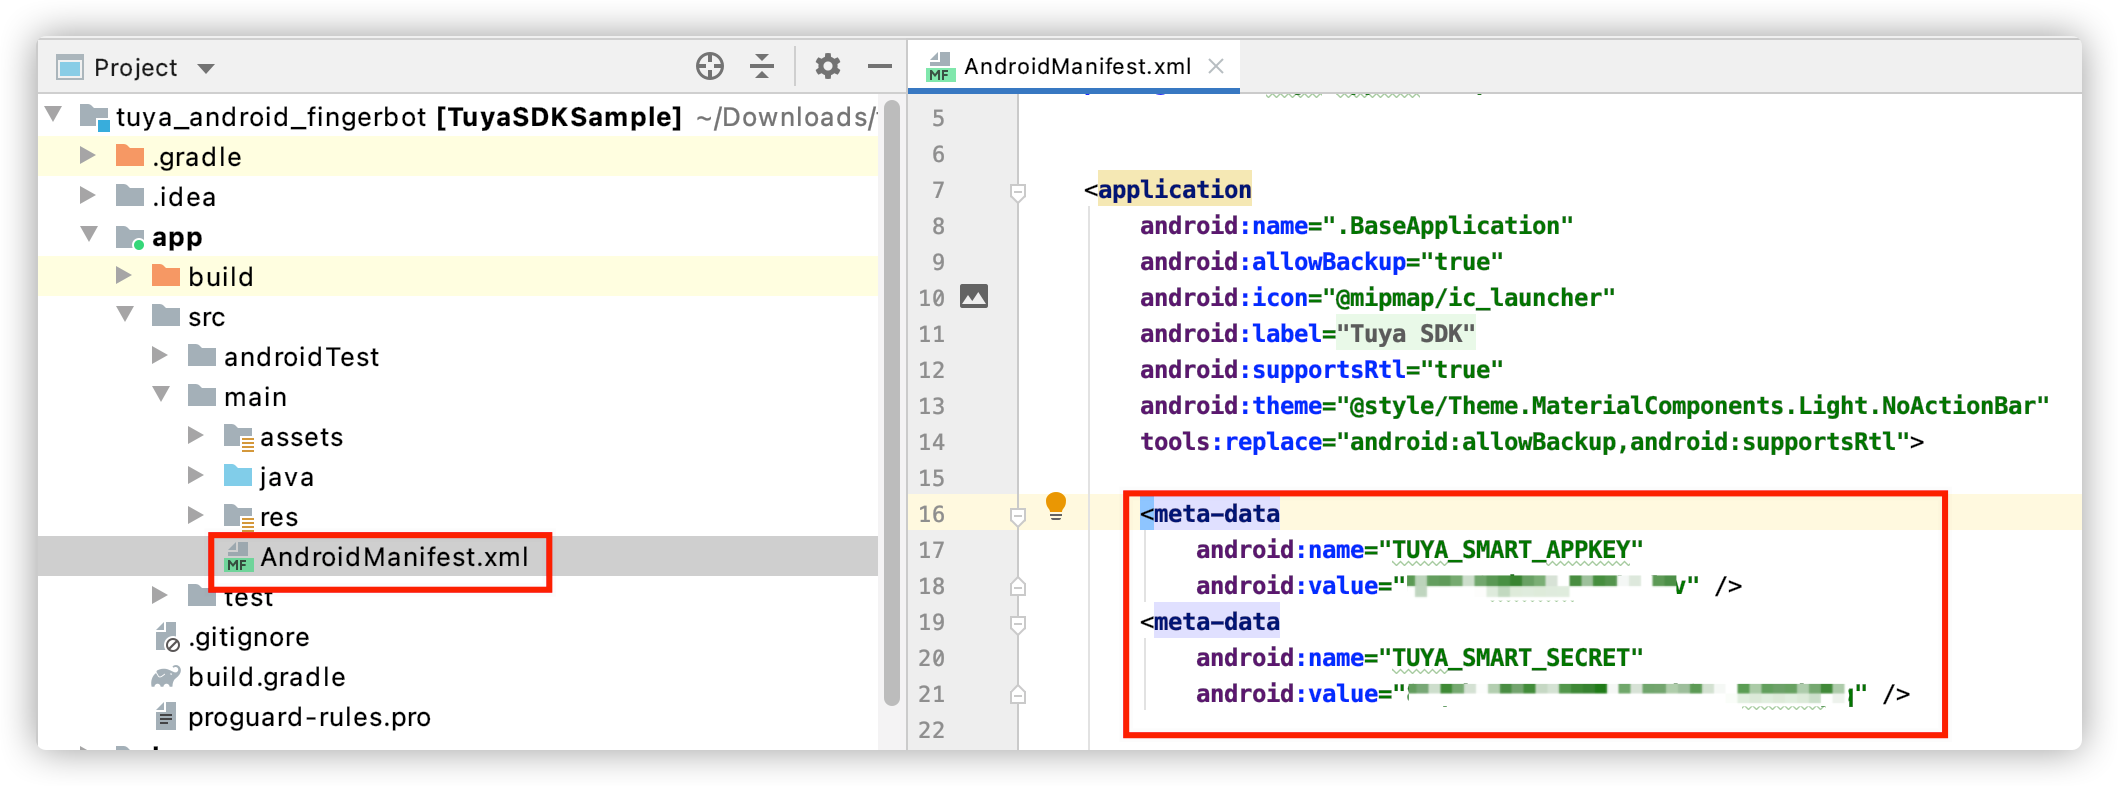
Choose tuya_android_fingerbot > app > src > main > res > AndroidManifest, configure the TUYA_SMART_APPKEY and TUYA_SMART_ SECRET fields of the App SDK with the values of AppKey and AppSecret.
Step 3: Remotely control the Fingerbot that is connected through a gateway
After you add the Fingerbot to your app by using a gateway, you can remotely control the Fingerbot on the app.
-
On the menu bar at the top of Android Studio, click Run to run the sample file.
-
Register and log in to Fingerbot Sample app.
-
Select your home.
- Tap New Home to create a home.
- Tap Current Home to select the newly created home.
-
Select the Bluetooth Low Energy mode to connect the Fingerbot and the gateway to the Fingerbot Sample app.
-
The following video tutorial shows how to add the Fingerbot to your app.
Operation result
Now, you can remotely control the Fingerbot on the app.
-
When the switch mode is disabled, you can tap the switch. Then, the Fingerbot runs in clicking mode and performs a clicking task.
-
When the switch mode is enabled, you can tap the switch. Then, the Fingerbot runs in switching mode and goes up or down.
-
Up and Down: the range in which the Fingerbot can go up or down.
-
Duration: the duration in which the Fingerbot clicks and holds a button in clicking mode.

Device control implementation procedure
-
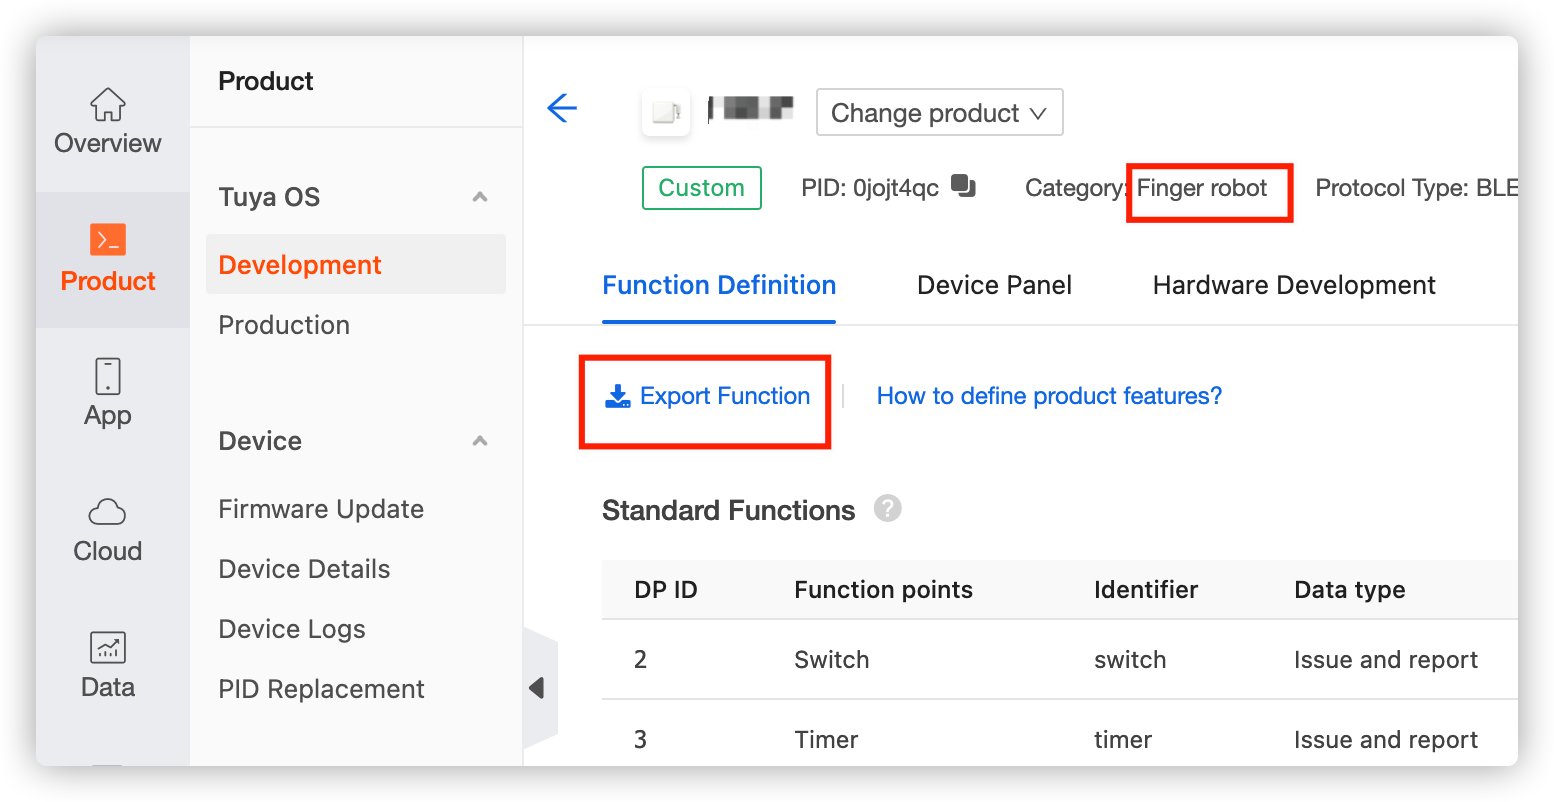
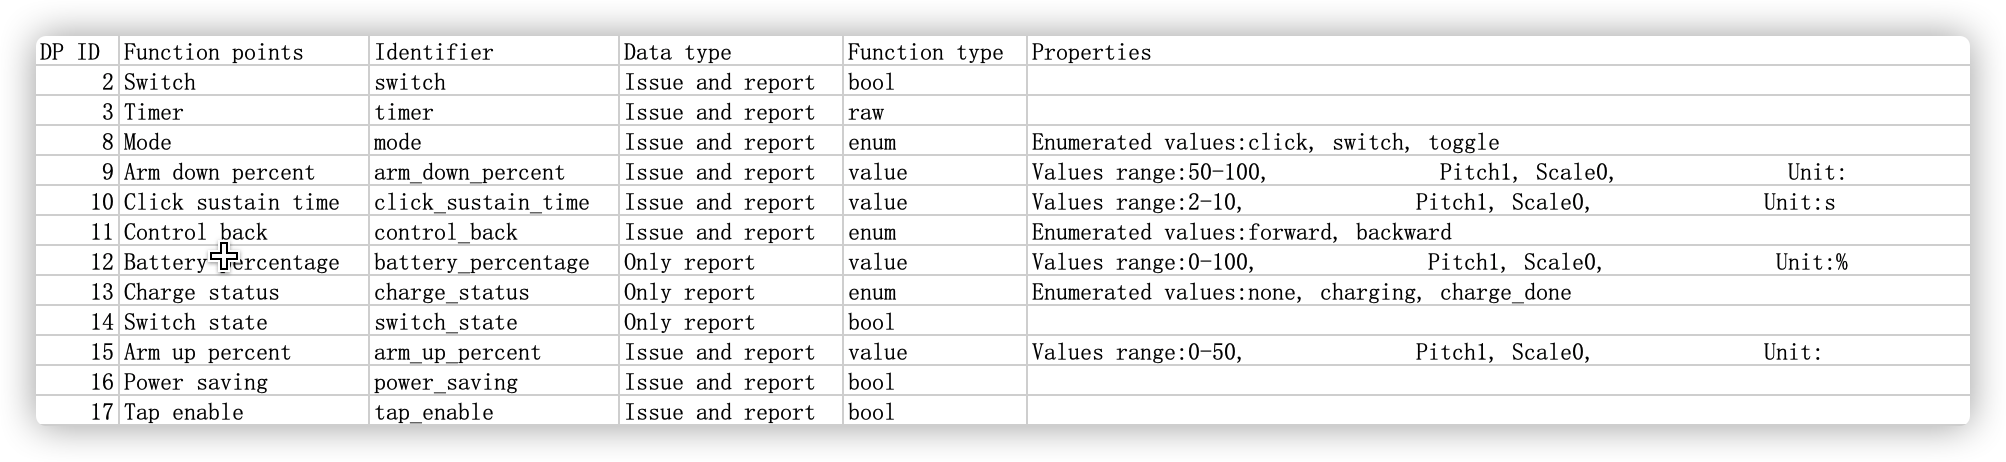
Log in to the Tuya IoT Platform, create a Fingerbot product, and then click Export Function on the Function Definition page to get the DP information.
Note: For more information about product creation, see Create Products.
-
Get the values of
schemaBeananddeviceBeanbydeviceID.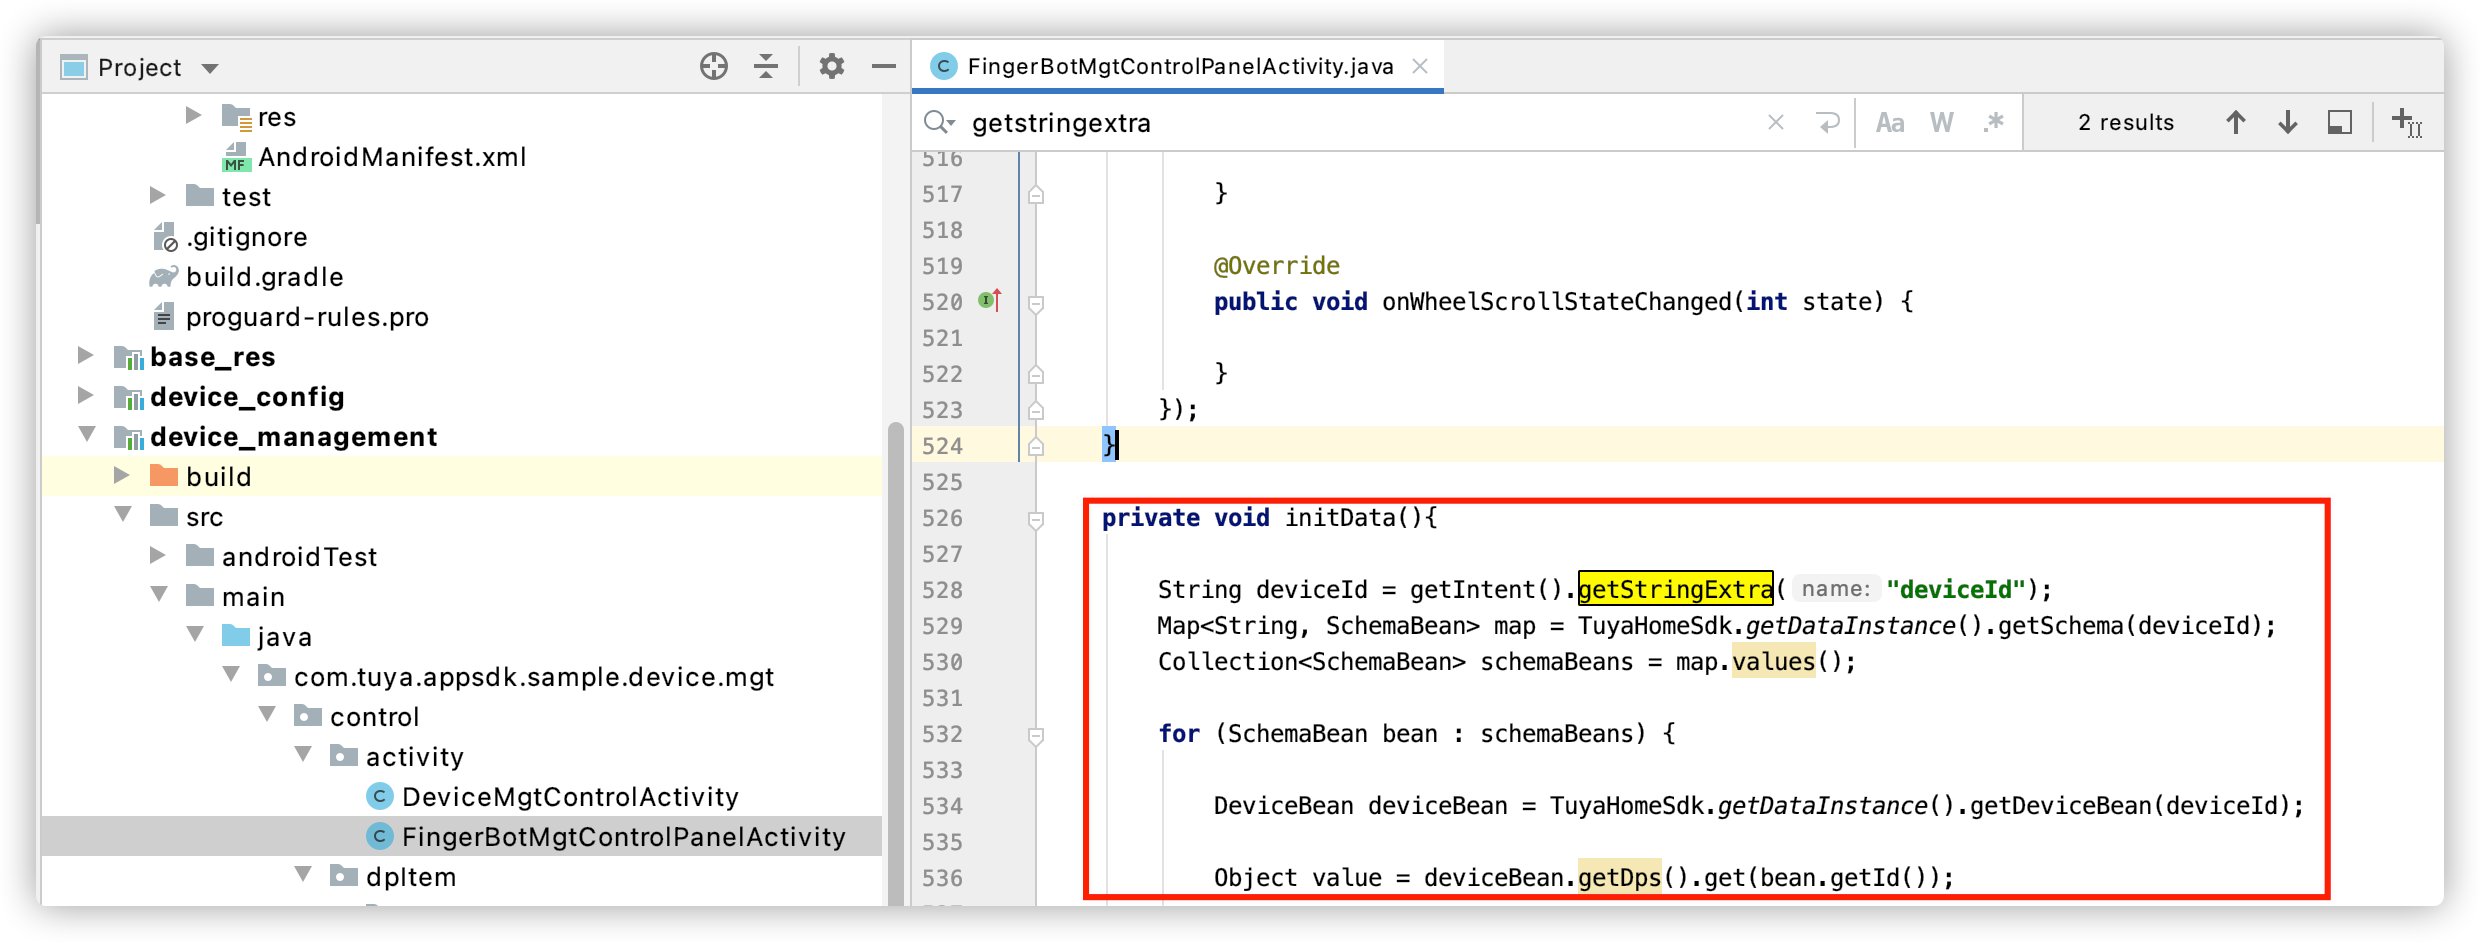
-
The control panel receives DP updates and sends the updates to the device.
-
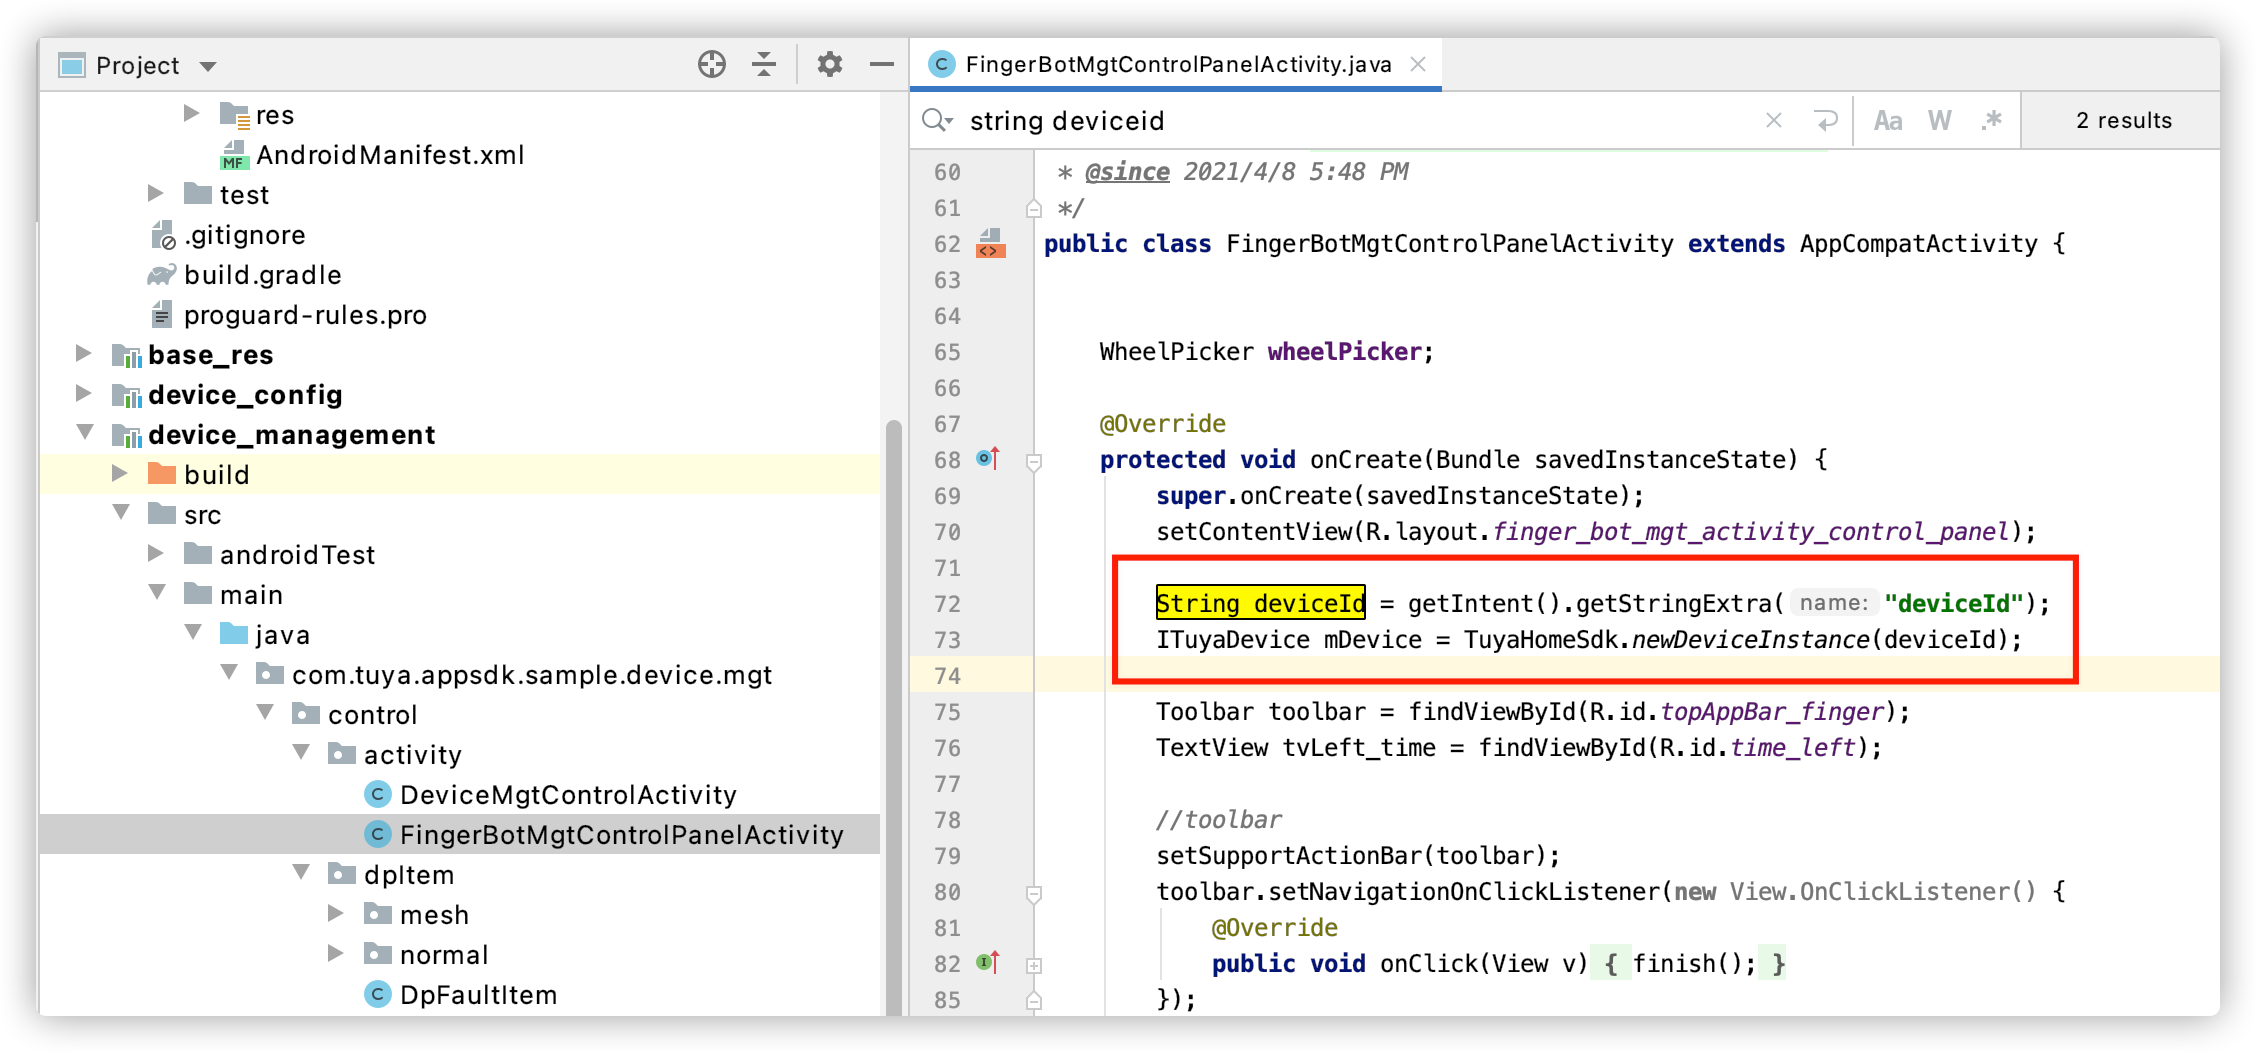
Register the device.
-
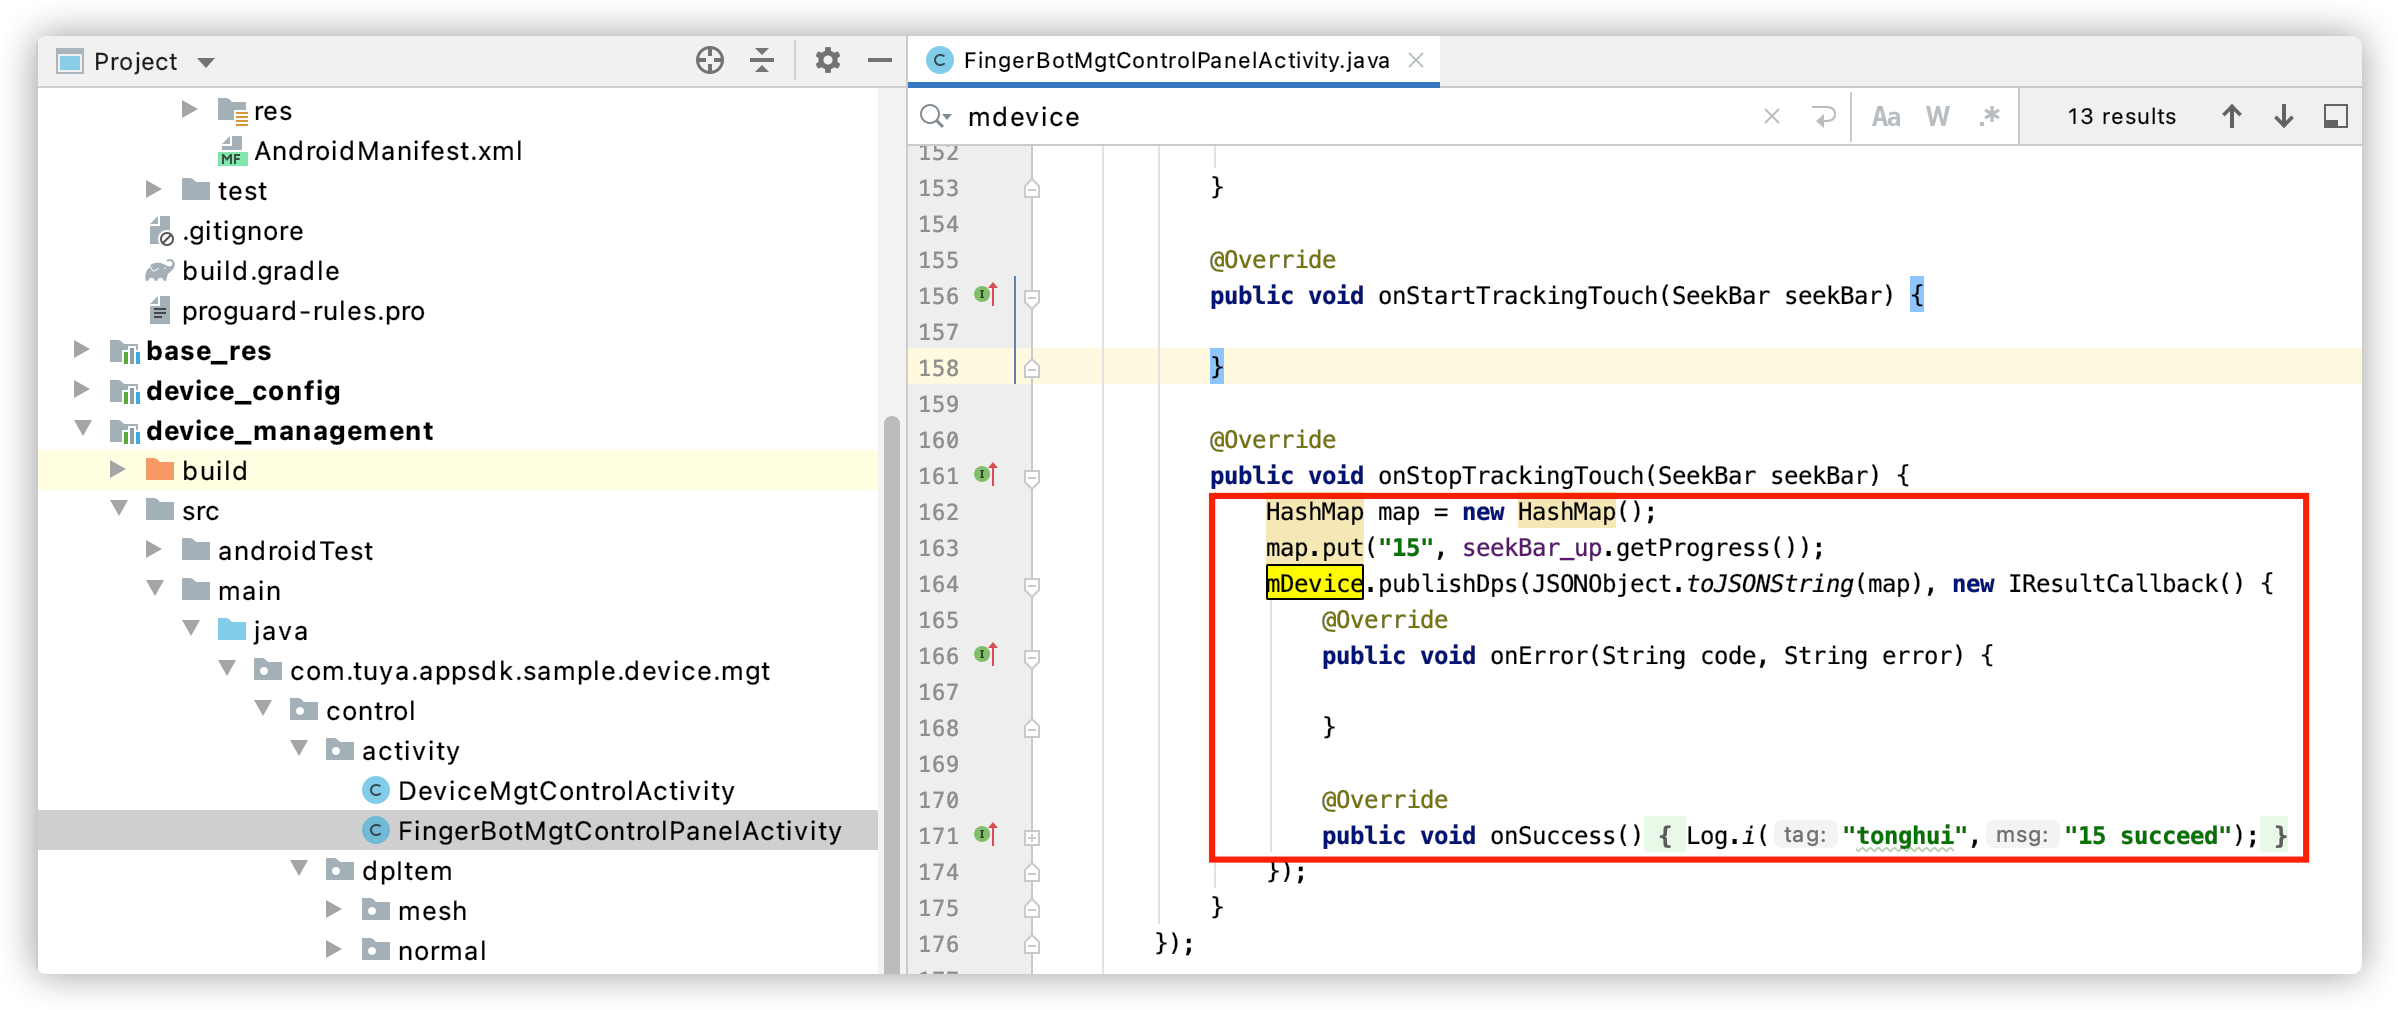
Call the Map method to convert the DP updates to the JSON format and send the updates to the device.
-
-
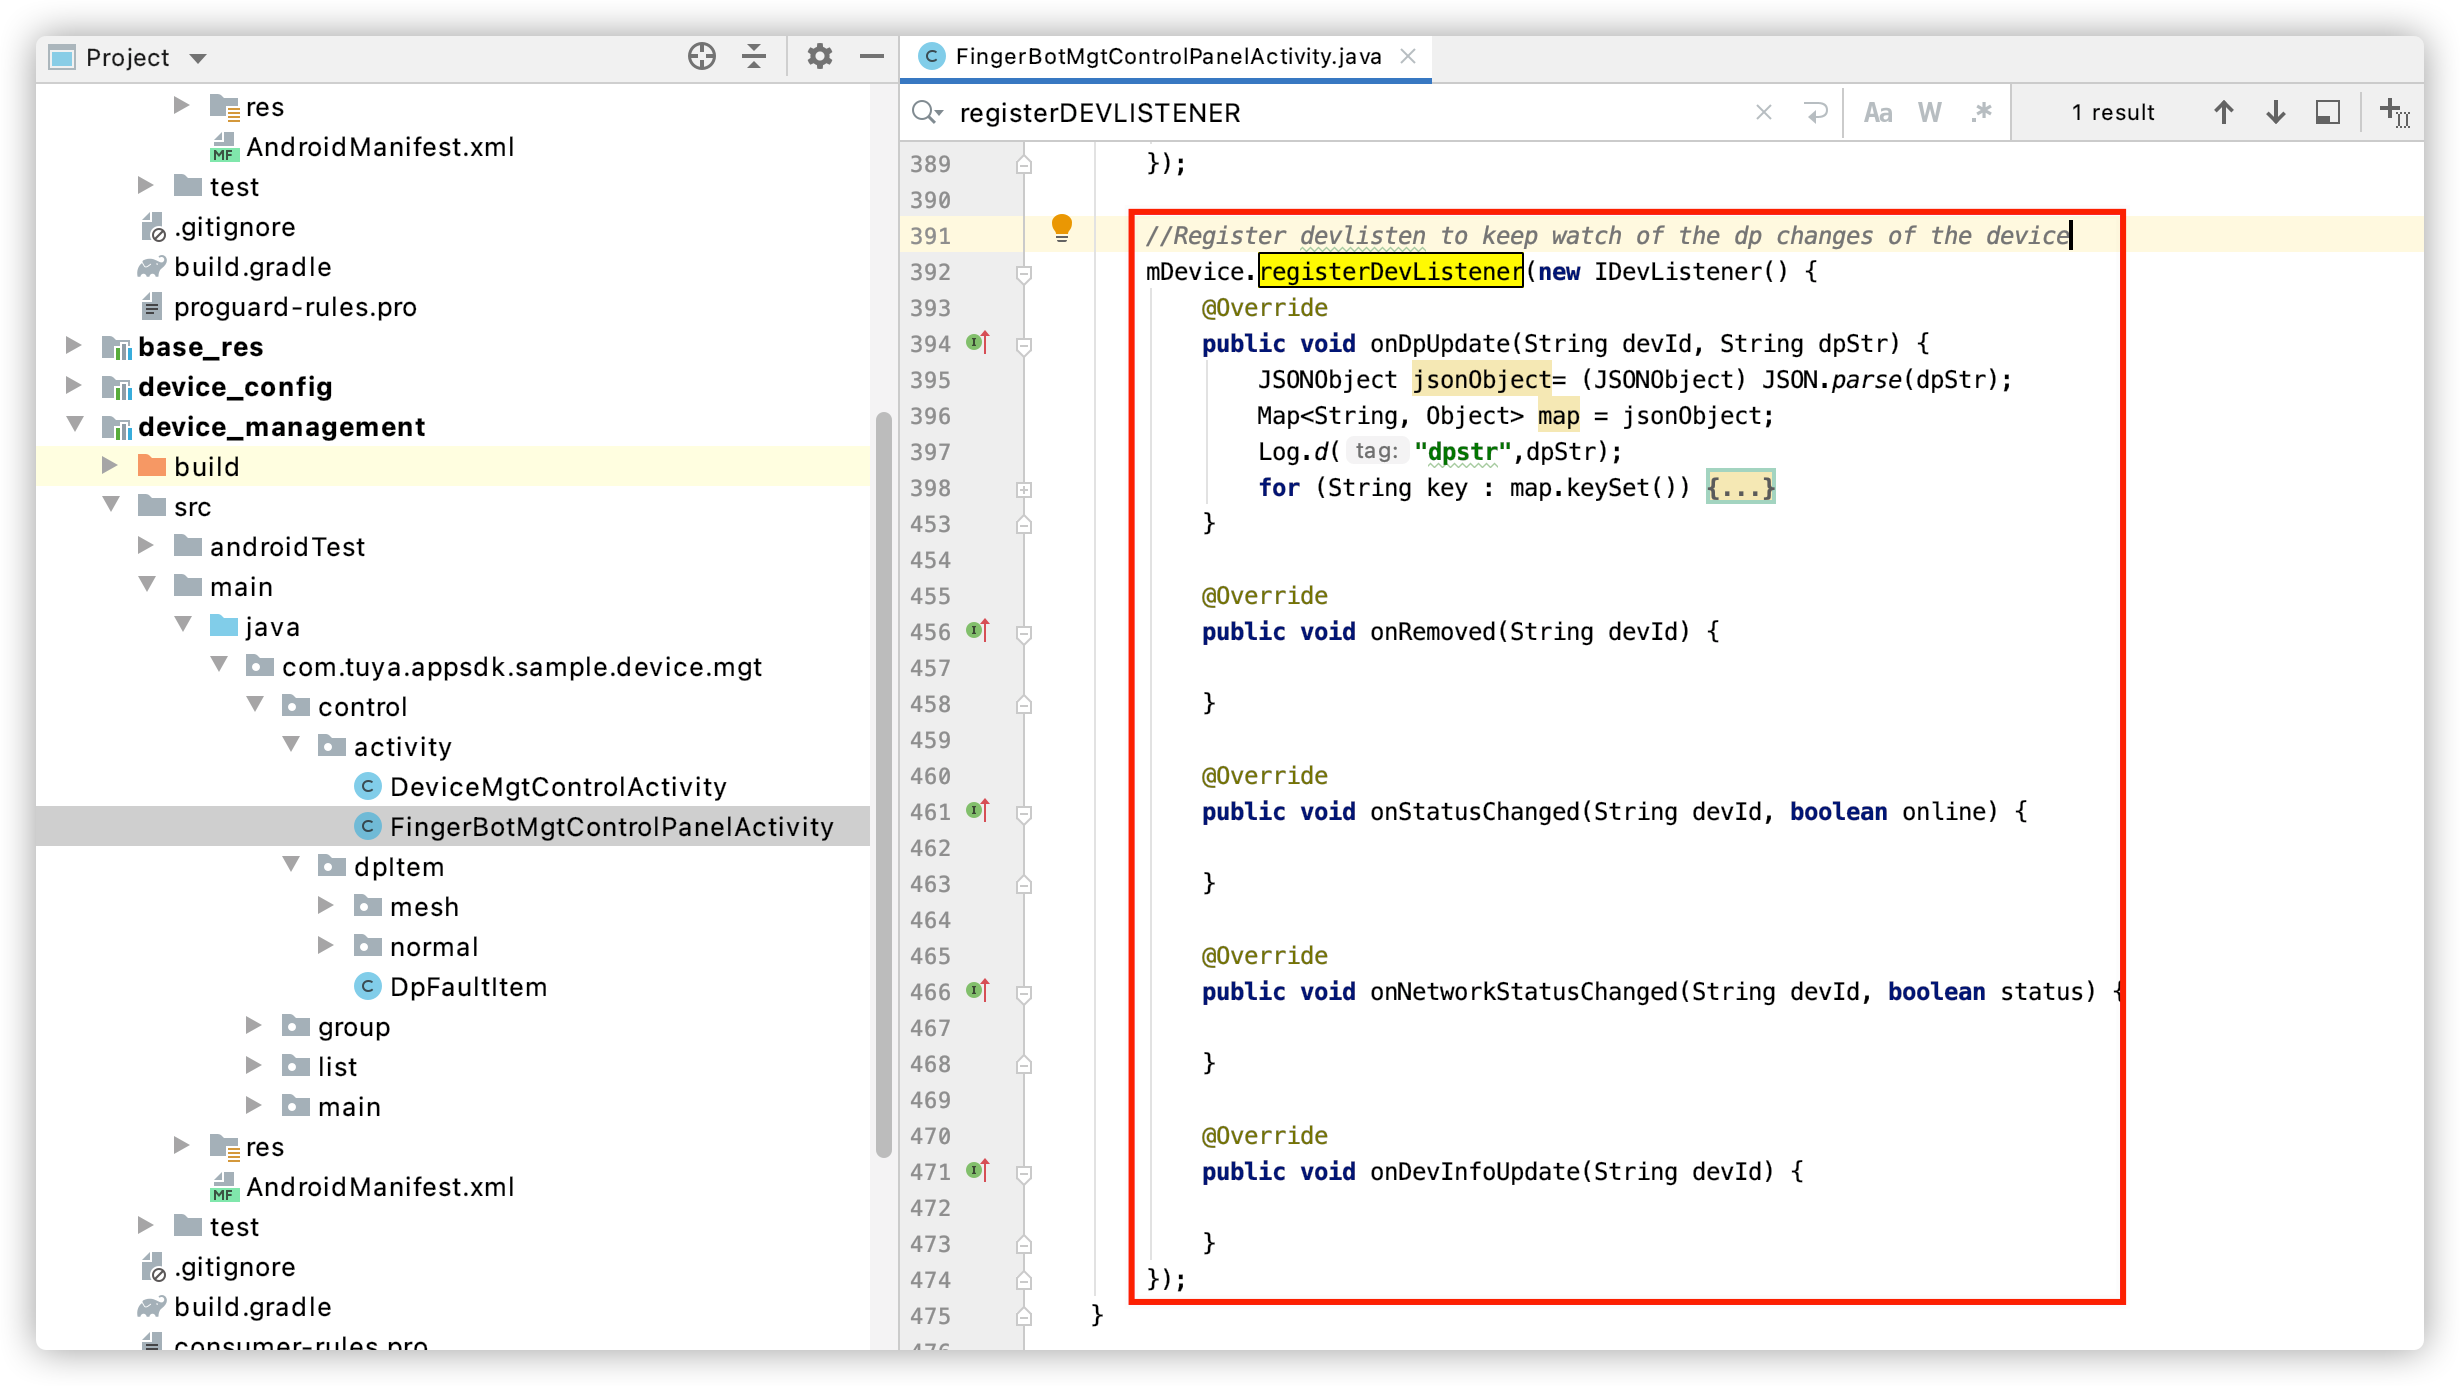
Register a device listener to synchronize DP updates of the device to the control panel. For example, the data is synchronized when the device is manually controlled or DP linkage is triggered.
Is this page helpful?
YesSuggestions


