Connect a Raspberry Pi to the Cloud Using Link SDK
Overview
The open-source Raspberry Pi is very popular with global developers. This project describes how to quickly connect the Raspberry Pi to the Tuya cloud service by using the Tuya IoTOS Link SDK for Python and TuyaOS Link SDK for C. Therefore, Raspberry Pi-powered devices and ‘Powered by Tuya’ devices can be linked.
Materials
Raspberry Pi 4 Model B
Count:1Raspberry Pi 4 Model B
Steps
Step 1: Create a product
You can create a product on the Tuya IoT Platform and get a unique product ID (PID).
-
Log in to the Tuya IoT Platform.
-
Click Create.
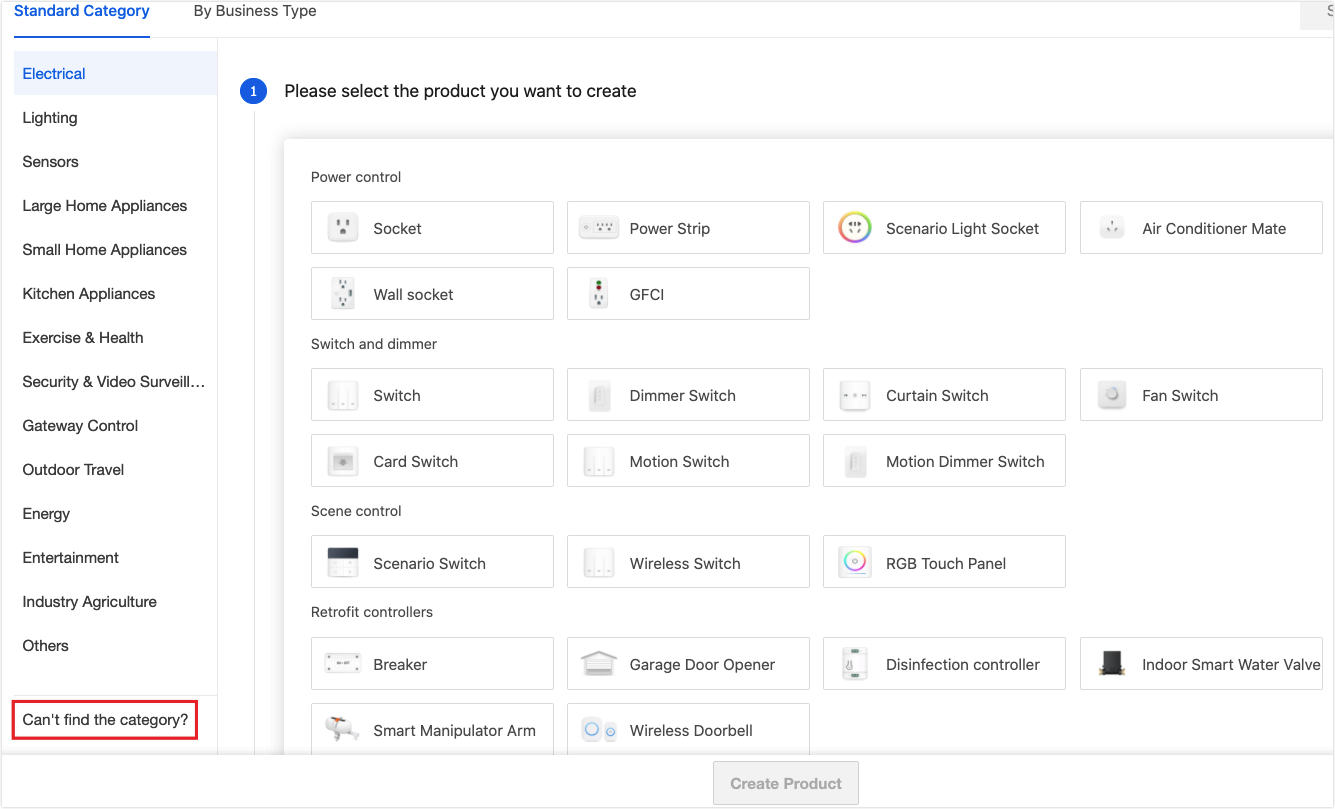
-
Find Standard Category, scroll down to the bottom of the page, and click Can’t find the category?.
Note: Because the Raspberry Pi is a non-standard category, you need to select Can’t find the category? when you create a product.
-
Enter the product information and select Wi-Fi as the protocol type, choose Standard Power Consumption, and click Create Product.

-
Get the PID information.

-
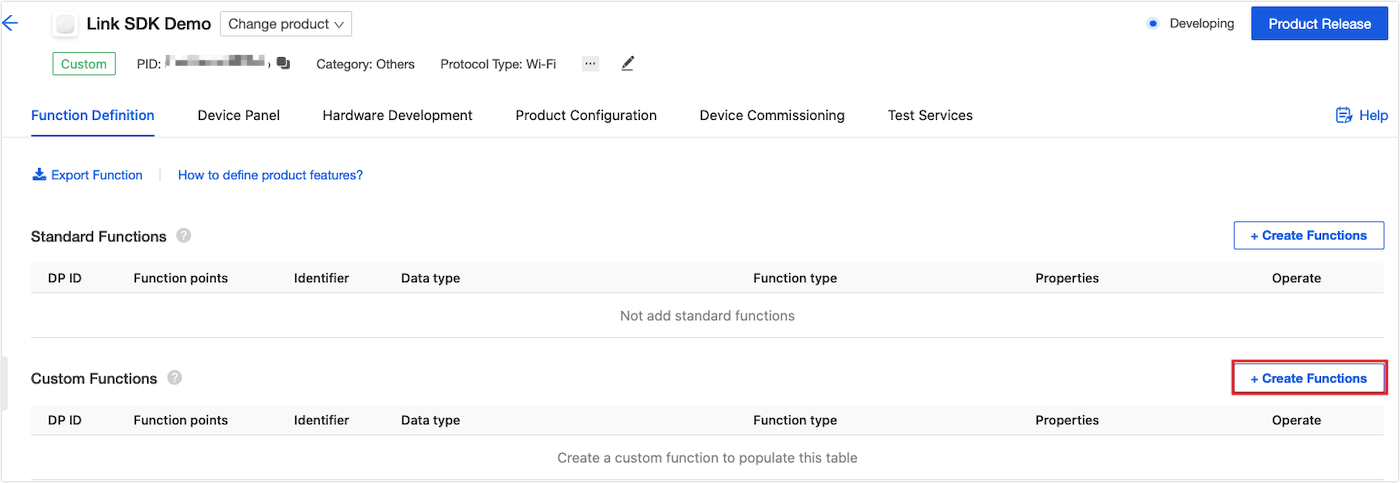
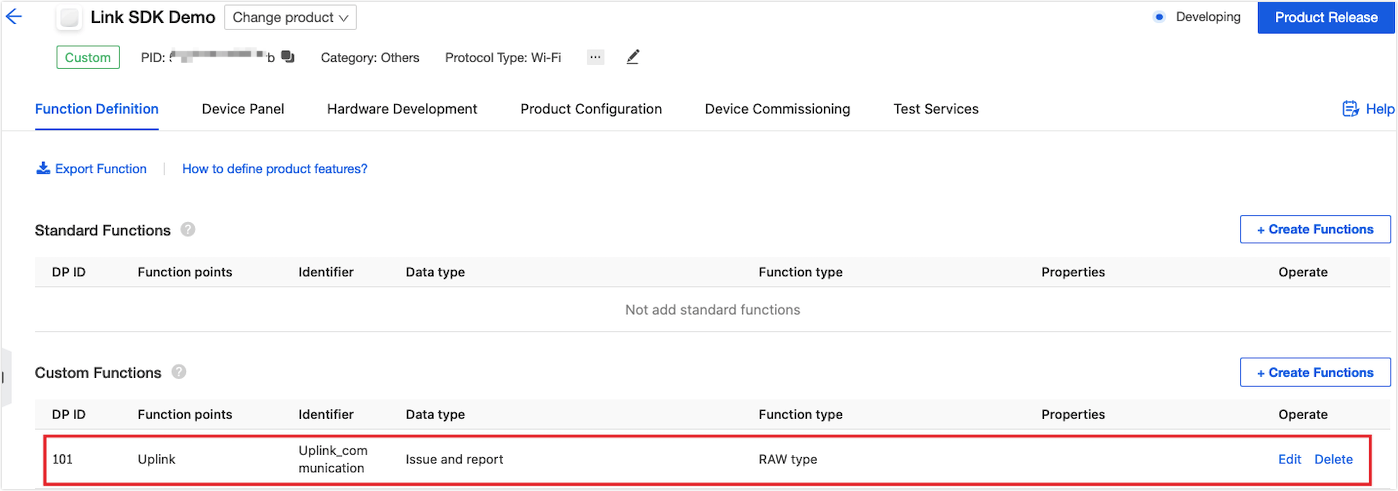
Step 2: Define functions
Tuya devices communicate with the cloud through data points (DPs). We need to add the DP ID according to product functions, and then configure related information.
Note:
- The Tuya IoT Platform supports six data types, including Boolean, value, enum, fault, string, and raw. For more information, see Custom Functions.
- Because the Raspberry Pi is a non-standard category, only custom functions can be added in this step.
- In the Function Definition > Custom Functions section, click Create Functions.
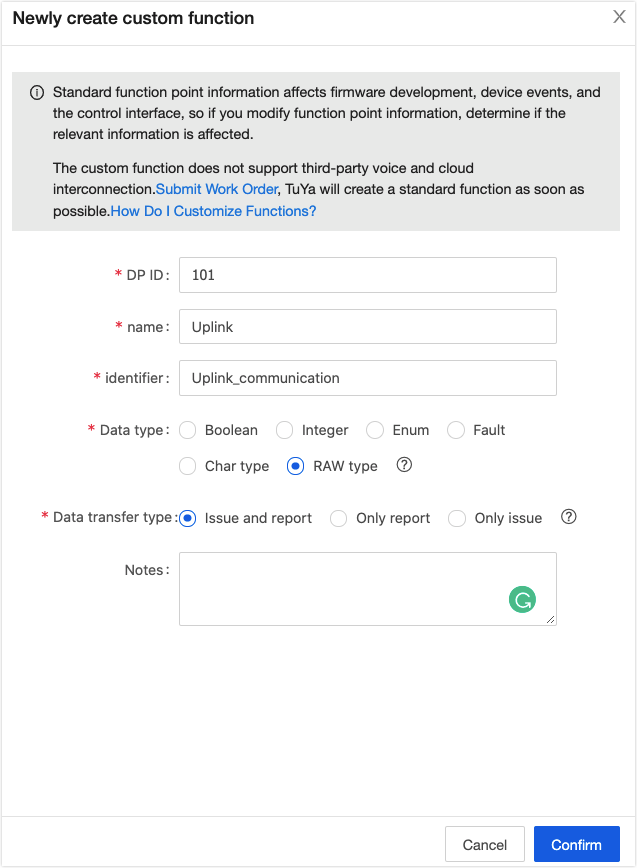
- In the Newly create custom function pop-up window, enter the relevant information of the DP and click Confirm.
The created function will be displayed in the Custom Functions section.
Step 3: Select a panel
You can view the data that is transmitted between the device and the cloud on the app. Select the DIY Style Panel for better debugging experiences.
Step 4: Get licenses
-
In the Hardware Development tab, select the Self-Developed Module SDK, and set the required fields.
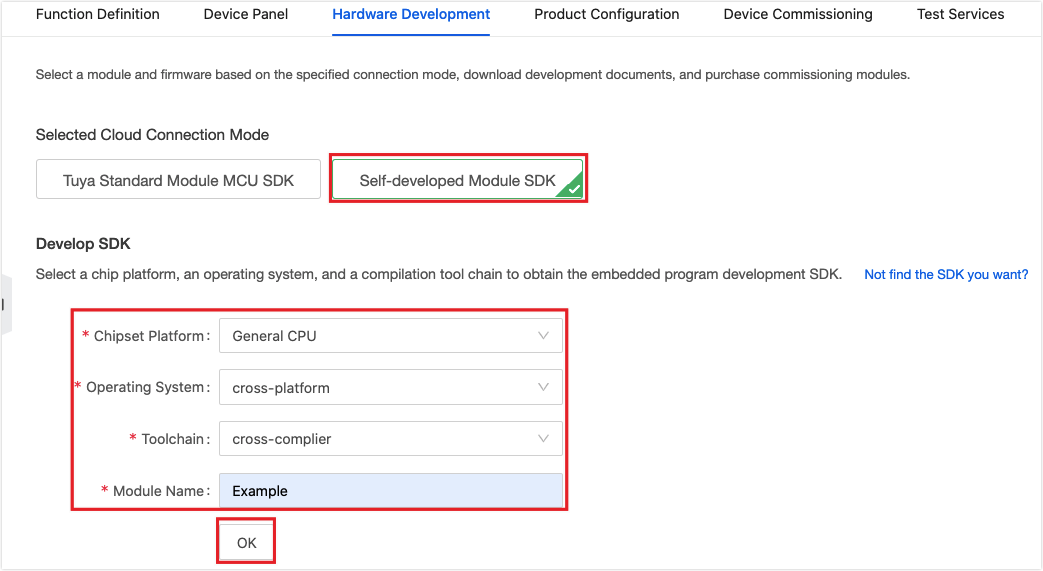
-
In the Develop SDK section, keep the default settings for Chipset Platform, Operating System, and Toolchain, enter a module name, and then click OK.
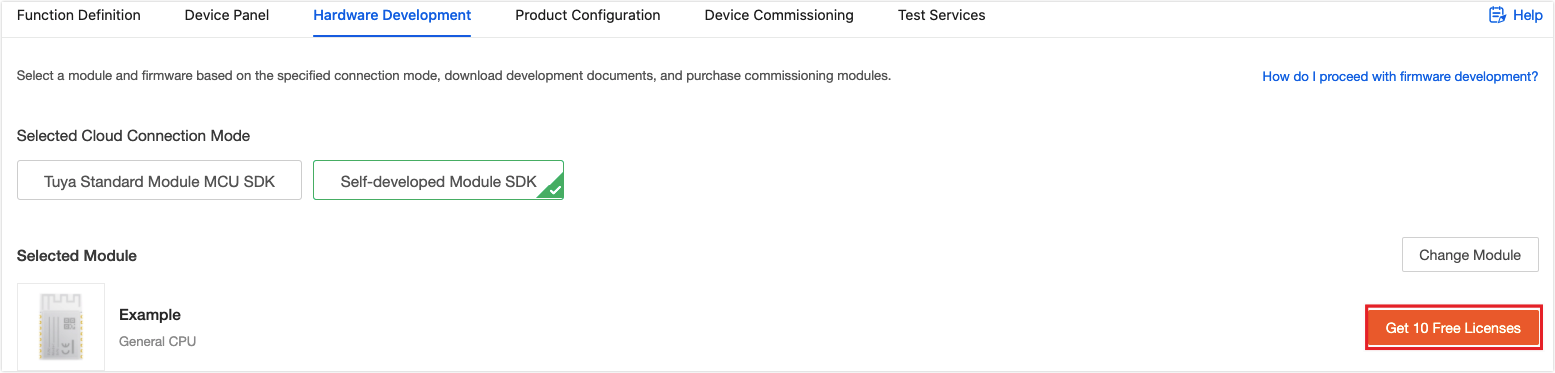
Wait a minute. The page will refresh and the free licenses will be displayed. -
On the right side of the Selected Module section, get free licenses.
-
Step 5: Run the demo
The SDK provides a demo that runs in Ubuntu. The following shows how to run the demo.
SDK for C
-
Install make and other related dependencies.
sudo apt-get install make cmake libqrencode-dev -
Clone the code from the repository.
git clone https://github.com/tuya/tuya-iot-link-sdk-embedded-c.git --recurse-submodules -
Navigate into
tuya-iot-sdk-embedded-c/examples/switch_demoto edittuya_config.h.-
Change the parameter of
TUYA_PRODUCT_KEYto the PID of your product created on the Tuya IoT Platform. -
Change the parameter of
TUYA_DEVICE_UUIDto the UUID provided in the license list. -
Change the parameter of
TUYA_DEVICE_AUTHKEYto the key provided in the license list.Note: To ensure the correct parameters are input, you can perform the following step to complete the parameter editing.
- If you use a Linux desktop GUI, you can copy the license list to the SD card in Linux and then copy the required parameters to the configuration file.
- If you use a Linux shell, make sure you input the correct parameters. Otherwise, the pairing will fail.
-
-
Navigate to
tuya-iot-sdk-embedded-cand create a directory namedbuildfor compilation and build.cd tuya-iot-sdk-embedded-c mkdir build && cd build cmake .. make -
Run the demo. Let’s take the switch demo in the SDK as an example.
./bin/switch_demo -
Search for Tuya Smart or Smart Lift in the Apple Store and major application markets and install it on your mobile phone.
-
Bind a device with an app.
You can use the app to scan the QR code generated by the program on Linux to bind a device.
For more information, see TuyaOS Link SDK Overview.
Python SDK
-
(Optional) Have Python 3.6 or later installed.
Note:
TuyaOS-link-sdk-pythonsupports Python 3.6 or later. -
Clone the SDK for Python.
git clone https://github.com/tuya/tuyaos-link-sdk-python.git -
Install the SDK for Python.
python3 -m pip install ./tuyaos-link-sdk-python -
Navigate to
/home/pi/tuyaos-link-sdk-python/examplesand modifyoutlet.py.-
Change the parameter of
productidto the PID of your product created on the Tuya IoT Platform. -
Change the parameter of
uuidto the UUID provided in the license list. -
Change the parameter of
authkeyto the key provided in the license list.Note: To ensure the correct parameters are input, you can perform the following step to complete the parameter editing.
- If you use a Linux desktop GUI, you can copy the license list to the SD card in Linux and then copy the required parameters to the configuration file.
- If you use a Linux shell, make sure you input the correct parameters. Otherwise, the pairing will fail.
-
-
Run the demo. Let’s take the
outley.pyin the SDK as an example.python3 ./outlet.py -
Search for Tuya Smart or Smart Lift in the Apple Store and major application markets and install it on your mobile phone.
-
Bind a device with an app.
You can use the app to scan the QR code generated by the program on Linux to bind a device.
For more information, see TuyaOS Link SDK Overview.
-
Summary
So far, the Raspberry Pi is connected to the Tuya Cloud and can be linked with ‘Powered by Tuya’ devices. Next, create some cool products and awesome scenarios with your wonderful imaginations.
Is this page helpful?
YesSuggestionsNext Step


