Build a Smart Light App for iOS with Tuya App SDK

Overview
With a smart light app, users can take full control and change the brightness and colors of lights and create personalized lighting atmospheres.
Materials
(Optional) One smart light
Count:1Any 'Powered by Tuya' devices are applicable. Find more in our TuyaGo.more
Steps
Step 1: What is a smart light?
Tuya provides five types of smart lights in terms of color temperature and colors.
White light ( C) White light (CW) Multi-color light (RGB) Multi-color light (RGBC) Multi-color light (RGBCW) Cool white light with adjustable brightness Cool and warm white light with adjustable brightness Multi-color light with adjustable brightness Cool white and multi-color light with adjustable brightness Cool and warm white and multi-color light with adjustable brightness The multi-color light (RGBCW) can switch between white and multi-color mode. Note that both modes cannot be enabled simultaneously.
RGB and HSV are the most widely used color models.
-
RGB color model
The RGB (red, green, blue) color model is an additive color model in which red, green, and blue light are added together in various ways to reproduce a broad array of colors. The main purpose of the RGB color model is for the sensing, representation, and display of images in electronic systems. The color is expressed as an RGB triplet, each component of which can vary from zero to a defined maximum value. If all the components are at zero, the result is black; if all are at maximum, the result is the brightest representable white.
A color’s RGB value is not directly related to color-making attributes: hue, saturation, and lightness. -
HSV color model
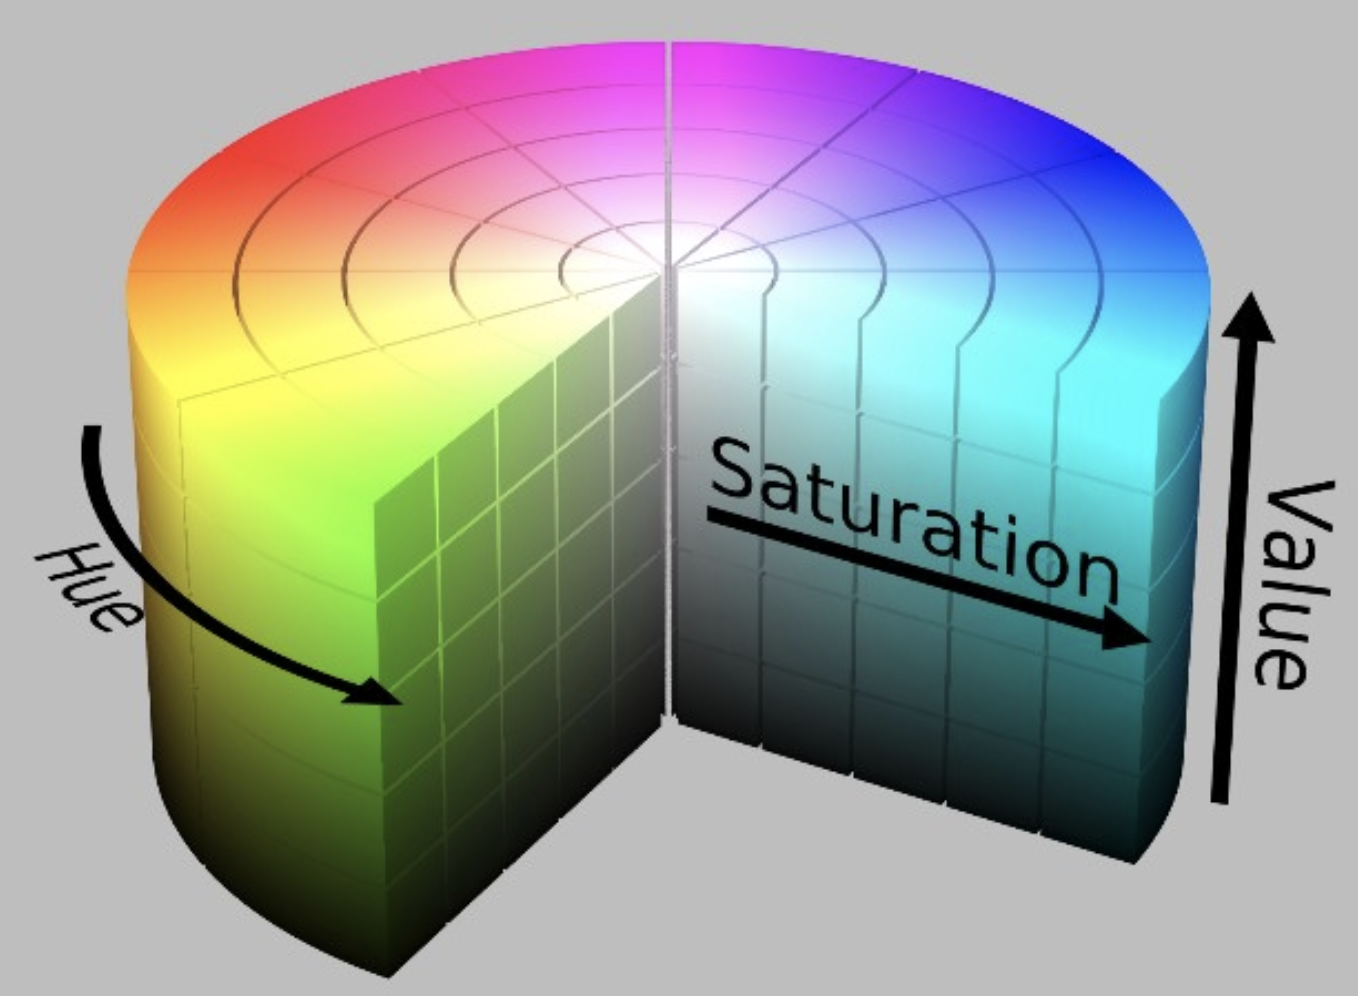
HSV (hue, saturation, value) is a color model that specifies colors based on the dimensions of color most intuitive to human cognition. It is an alternative representation of the RGB color model and more closely aligns with the way human vision perceives color-making attributes. Therefore, the HSV color model can be used for color contrast enhancement.
-
Hue is the angle counterclockwise around the color cone, representing the actual color itself. Its value ranges from 0° to 360°, typically 0° is red, 60° yellow, 120° green, 180° cyan, 240° blue, and 300° magenta.
-
Saturation is the distance from the center of a circular cross-section of the cone, representing the vibrancy of the color. Its value ranges from 0.0 to 1.0, where 0.0 is a shade of grey and 1.0 is the full color.
-
Value is the height of the cone, representing the brightness of the color. Its value ranges from 0.0 to 1.0, with 0.0 being black and 1.0 white.

-
-
Step 2: Preparation
You need to get the following steps ready before you get into developing a smart light app.
- Create App SDK
- Integrate App SDK
- Register and log in to the app
- Create a home on the app
- Complete pairing logic
- Complete device control logic
For more information about the specific operations, see Quick Development of an iOS IoT App Based on Tuya App SDK.
Step 3: What is a data point?
The data point (DP) is the abstraction of a smart device function, describing product functions and parameters.
-
DP ID: the identification of a data point. The DP ID is used for DP data transmission between the device and the cloud.
-
DP name: the name of a custom function.
-
Identifier: the code value of a data point. It is used for displaying the DP name in multi-language on the app. Support letters, numbers, and underlines, starting with a letter.
-
Data type:
Type Parameter Description Example Boolean bool Represent binary variable value that is either true or false. On/off control. Turn a device on or off. Numeric value Apply to the data that can be linearly adjusted. Adjust the temperature, ranging from 20 °C to 40 °C. Enum enum A custom finite set of values. Change the working level in terms of high, medium, and low level. Fault fault Used to report DP failure. The device can only report the data when multiple faults occur. Faults occur in the temperature sensor, motor, and more. String string Transmit the data as a string. Set multi-color mode for lights. RAW raw Transmit the data in a raw binary format. - -
Data transfer type:
- Send and report: two-way data transmission between the device and the cloud.
- Report only: one-way data transmission. Data can only be reported from the device.
- Send only: one-way data transmission. Data can only be sent from the cloud.
For example, suppose the PID of a product is
ylr9R01cMWnMR***, and its DPs are as follows:DP ID DP code DP name Description Mode Type Type details 1 led_switch Switch On/off control rw bool {“type”:“bool”} 2 work_mode Mode Music mode rw enum {“range”:[“white”, “colour”, “scene”, “scene_1”, “scene_2”, “scene_3”, “scene_4”, “music”],“type”:“enum”} 3 bright_value Brightness Brightness adjustment rw value {“min”:25,“unit”:"", “scale”:0,“max”:255,“type”:“value”, “step”:1} 4 temp_value Color temperature Color temperature adjustment rw value {“min”:0,“unit”:"", “scale”:0,“max”:255,“type”:“value”, “step”:1} 5 colour_data The number of multi-color modes RGB/HSV rw string {“type”:“string”, “maxlen”:14} 6 scene_data The number of scene modes RGB/HSV rw string {“type”:“string”, “maxlen”:14} 7 flash_scene_1 Soft mode Marquee soft mode rw string {“type”:“string”, “maxlen”:14} 8 flash_scene_2 Colorful mode Marquee colorful mode rw string {“type”:“string”, “maxlen”:44} 9 flash_scene_3 Dazzling mode Marquee dazzling mode rw string {“type”:“string”, “maxlen”:14} 10 flash_scene_4 Gorgeous mode Marquee gorgeous mode rw string {“type”:“string”, “maxlen”:44} 101 music Music light Music light wr string {“type”:“string”, “maxlen”:255} -
Step 4: Download demo
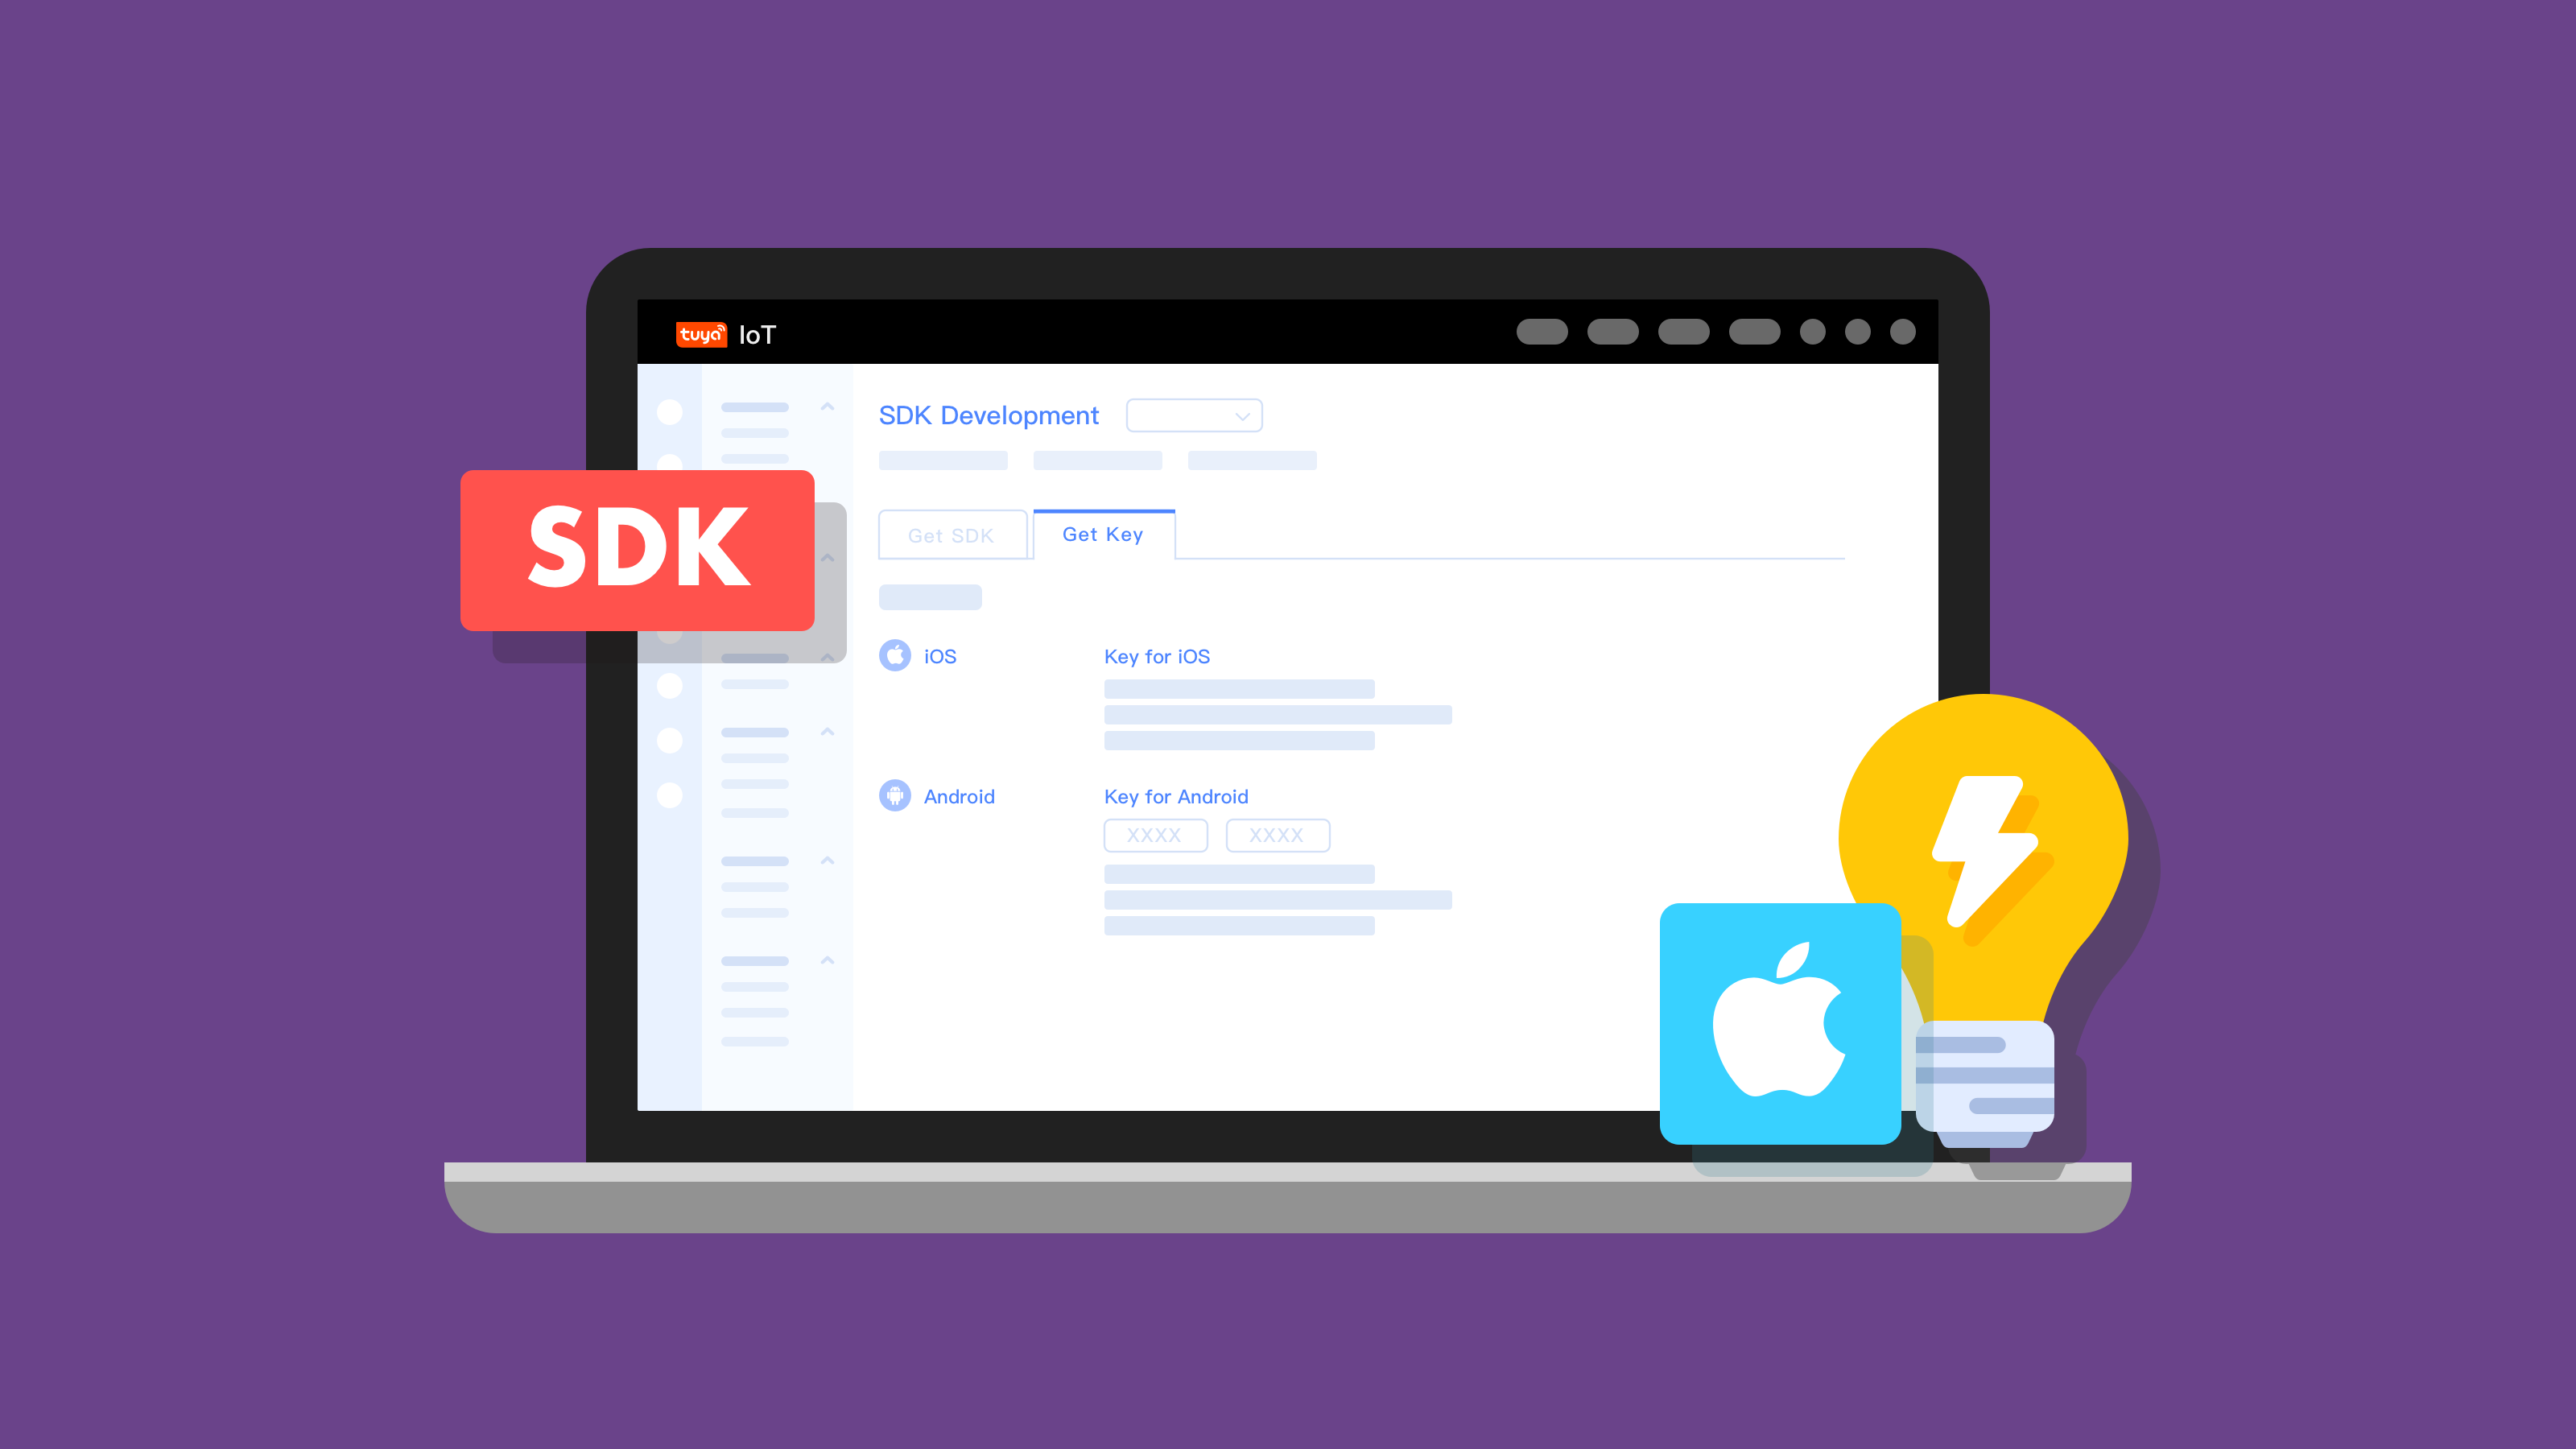
- Demo download URL, where the function branch is
main. - SDK documentation
This demo completes the program logic of DP-based device control in terms of on/off, brightness, color temperature, and colors. You can modify the demo code as needed. The following steps describe how to download the demo and configure the system environment accordingly:
-
To download the demo, enter the following command in the terminal.
git clone https://github.com/tuya/tuya-home-ios-sdk.git -
Open the project settings, click Target > General, and modify
Bundle Identifierto the iOS Bundle ID set on the Tuya IoT Platform. -
Import the security image to the root directory of the project, rename it as
t_s.bmp. Go to Project Settings > Target > Build Phases, and add this image to Copy Bundle Resources. -
Add the following to the
PrefixHeader.pchfile.#import <TuyaSmartHomeKit/TuyaSmartKit.h> -
Open the
AppDelegate.mfile and initialize the SDK inAppDelegate application:didFinishLaunchingWithOptions:.[[TuyaSmartSDK sharedInstance] startWithAppKey:<#your_app_key#> secretKey:<#your_secret_key#>]; -
Enable the debug mode and print logs for problem analysis.
#ifdef DEBUG
    [[TuyaSmartSDK sharedInstance] setDebugMode:YES];
#else
#endif
- Demo download URL, where the function branch is
Step 5: Set DPs
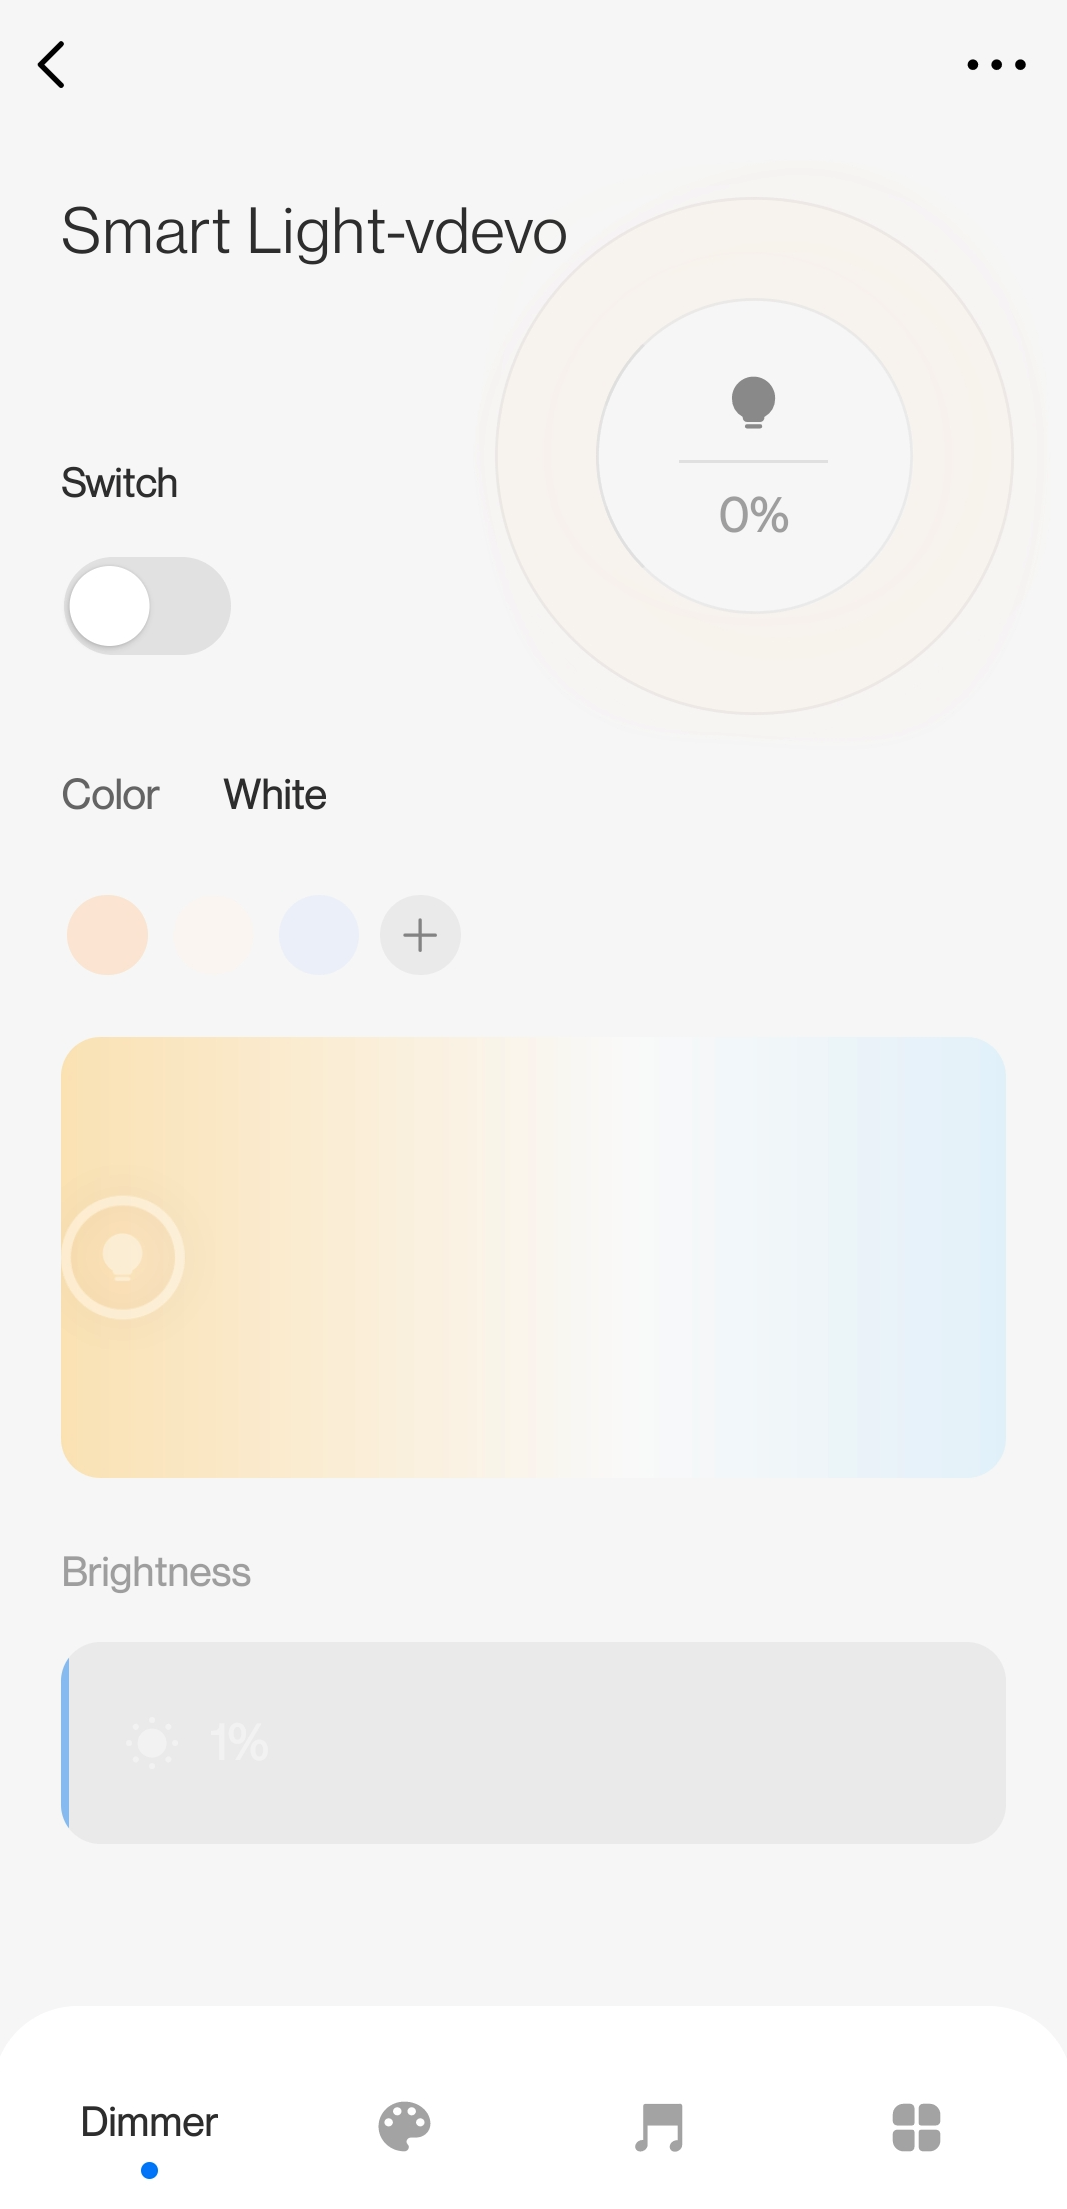
The control panel of the smart light is as follows:

Set DPs:
NSString * const kLightSwtichDpId = @"1";/* DP to control on/off */
NSString * const kLightColorTypeDpId = @"2";/* DP to control the light type */

NSString * const kLightColorBrightDpId = @"3";/* DP to control brightness */
NSString * const kLightColorTempDpId = @"4";/* DP to control color temperature */

NSString * const kLightColorDpId = @"5";/* DP to control color */
Set on/off control:
- (void)switchAction:(UISwitch *)sender {
    // Control on/off
    WEAKSELF_AT
    [TPDemoProgressUtils showMessag:TYSDKDemoLocalizedString(@"loading", @"") toView:self.view];

    [self.device publishDps:@{kLightSwtichDpId:@(sender.isOn)} success:^{
        [TPDemoProgressUtils hideHUDForView:weakSelf_AT.view animated:NO];
    } failure:^(NSError *error) {
        [TPDemoProgressUtils hideHUDForView:weakSelf_AT.view animated:NO];
        [TPDemoProgressUtils showError:error.localizedDescription];
    }];
}
Step 6: Control light
You can adjust the brightness in the white or multi-color mode. Set brightness adjustment:
// Bright
NSDictionary *dps = self.device.deviceModel.dps;
if ([[dps objectForKey:kLightColorTypeDpId] isEqualToString:@"colour"]) {
    int ir,ig,ib;

    _hsvValue.v = value;

    HSVToRGB(_hsvValue.h, _hsvValue.s, _hsvValue.v, &ir, &ig, &ib);

    UIColor *resColor = RGBCOLOR(ir, ig, ib);

    NSString *dpsString = [NSString stringWithFormat:@"%@%@",
                           [[[resColor hexStringFromColor] lowercaseString] substringFromIndex:1],
                           [self getHexStringFromHSV:_hsvValue]];

    publishDps = @{
                     kLightSwtichDpId:@(YES),
                     kLightColorDpId:dpsString,
                     kLightColorTypeDpId:@"colour"
                     };

} else {
    CGFloat tempV = (value * 100 - 1)/(100.0-1.0) * (self.maxValue - self.minValue) + self.minValue;
    int val = [self round:tempV];
    publishDps = @{
                  kLightSwtichDpId:@(YES),
                  kLightColorBrightDpId:@(val),
                  kLightColorTypeDpId:@"white",
                  };
}

[self.device publishDps:publishDps success:^{

} failure:^(NSError *error) {

}];
The color temperature can only be adjusted in the white mode:
// Temperature
int dpsInt = (int)(value * (self.tempMaxValue - self.tempMinValue) + self.tempMinValue);
publishDps = @{
    kLightColorTypeDpId:@"white",
    kLightColorTempDpId:@(dpsInt)
};

[self.device publishDps:publishDps success:^{

} failure:^(NSError *error) {

}];
The color can only be adjusted in the multi-color mode:
#pragma mark - RSColorPickerViewDelegate
- (void)colorPickerDidChangeSelection:(RSColorPickerView *)colorPicker {

    NSDictionary *dps = self.device.deviceModel.dps;

    BOOL isSwitch = [[dps objectForKey:kLightSwtichDpId] tysdk_toBool];

    if (!isSwitch) {
        return;
    }

    HSVType hsv = [self.class getHSVFromUIColor:colorPicker.selectionColor];

    _hsvValue.h = hsv.h;
    _hsvValue.s = hsv.s;
    _currentH = hsv.h;

    if (_hsvValue.v == 0) {
        _hsvValue.v = 1;
    }

    int r, g, b;

    HSVToRGB(_hsvValue.h, _hsvValue.s, _hsvValue.v, &r, &g, &b);

    NSString *dpsString = [NSString stringWithFormat:@"%02x%02x%02x%@",
                           (unsigned int)r,
                           (unsigned int)g,
                           (unsigned int)b,
                           [self getHexStringFromHSV:_hsvValue]];

    NSDictionary *publishDps = @{
                                 kLightColorDpId:dpsString,
                                 kLightColorTypeDpId:@"colour",
                                 };

    [self.device publishDps:publishDps success:^{

    } failure:^(NSError *error) {

    }];
}
The saturation can only be adjusted in the multi-color mode:
// Saturation
_hsvValue.s = value;

if (_hsvValue.v == 0) {
    _hsvValue.v = 1;
}
int r, g, b;
HSVToRGB(_hsvValue.h, _hsvValue.s, _hsvValue.v, &r, &g, &b);

NSString *dpsString = [NSString stringWithFormat:@"%02x%02x%02x%@",
                       (unsigned int)r,
                       (unsigned int)g,
                       (unsigned int)b,
                       [self getHexStringFromHSV:_hsvValue]];

publishDps = @{
                 kLightColorDpId:dpsString,
                 kLightColorTypeDpId:@"colour",
             };
[self.device publishDps:publishDps success:^{

} failure:^(NSError *error) {

}];
Callback of refreshing light status:
#pragma mark - TuyaSmartDeviceDelegate

/// Update DP data
- (void)device:(TuyaSmartDevice *)device dpsUpdate:(NSDictionary *)dps {
    [self reloadData];
}

- (void)reloadData {

    _hsvValue = [self getHSVFromDpId:kLightColorDpId];

    NSDictionary *dps = self.device.deviceModel.dps;
    BOOL isSwitch = [[dps objectForKey:kLightSwtichDpId] boolValue];
    [self.switchButton setOn:isSwitch];

    double brightnessValue = [self getBrightness:dps];
    [self.brightSliderView setSliderValue:brightnessValue];

    double tempValue = [self getTempValue:[[dps objectForKey:kLightColorTempDpId] doubleValue]];
    [self.tempSliderView setSliderValue:tempValue];

    HSVType hsv = [self getHSVFromDpId:kLightColorDpId];
    UIColor *color = [self getColorFromDpId:kLightColorDpId];

    NSLog(@" h : %f, s : %f, v : %f, color : %@", hsv.h, hsv.s, hsv.v, color);
    if (fabs(roundf(hsv.h) - roundf(_currentH)) > 1) {

        _currentH = hsv.h;

        self.colorPicker.selectionColor = color;
        self.colorPicker.brightness = 1;
        self.colorPicker.opaque = YES;
    }

    [self.saturationSliderView setSliderValue:hsv.s];
}
Is this page helpful?
YesSuggestions


