tuya-geeknock-android-sdk
1. Integration SDK
1.1. Create project
Create a new project in Android Studio.
1.2. Configuration build.gradle
Download the sdk aar file locally, add it to the project under the libs file, and configure build.gradle. Add the following to the build.gradle file
repositories {
     flatDir {
        dirs 'libs'
    }
}
Add the following to the build.gradle file dependencies
android {
    defaultConfig {
        ndk {
            abiFilters "armeabi-v7a", "arm64-v8a"
        }
    }
    packagingOptions {
        pickFirst 'lib/*/libc++_shared.so' // Multiple aar exist for this so, you need to select the first one
    }
}
dependencies {
    implementation 'com.alibaba:fastjson:1.1.67.android'
    implementation 'com.squareup.okhttp3:okhttp-urlconnection:3.14.9'

    // Geeknock SDK Latest stable version:
    implementation(name:'geeknock-sdk-1.0.0', ext:'aar')
    implementation 'com.tuya.smart:tuyasmart:3.24.0'
}
1.3. Integrated Security Picture
Click on "Download Security Images" – "Security Image Download" to download security images.
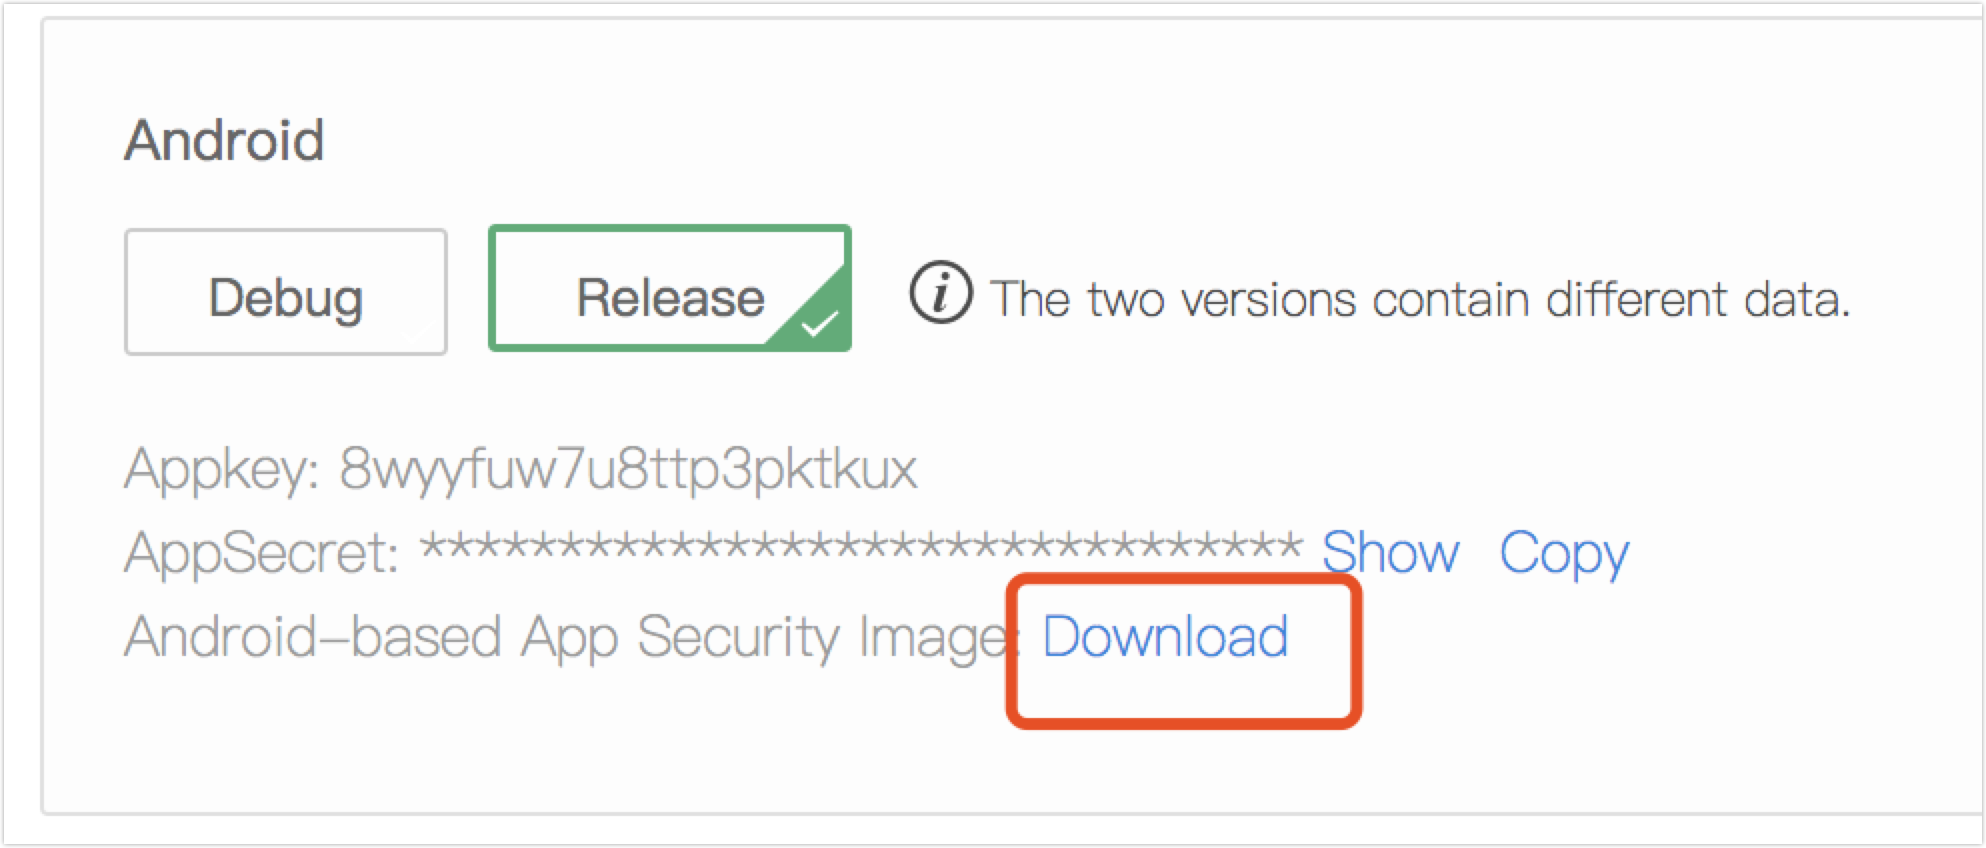
Click on "Download Security Image" in the integration preparation. Name the downloaded security image as "t_s.bmp" and place it in the assets folder of the project directory.

1.4. Set Appkey and AppSecret
Configure the appkey and appSecret in the AndroidManifest.xml file, and configure the corresponding permissions, etc.
<meta-data
android:name="TUYA_SMART_APPKEY"
android:value="Appkey" />
<meta-data
android:name="TUYA_SMART_SECRET"
android:value="AppSecret" />
1.5. Obfuscation configuration
Configure the appropriate obfuscation configuration in the proguard-rules.pro file
#fastJson
-keep class com.alibaba.fastjson.**{*;}
-dontwarn com.alibaba.fastjson.**

#mqtt
-keep class com.tuya.smart.mqttclient.mqttv3.** { *; }
-dontwarn com.tuya.smart.mqttclient.mqttv3.**

#OkHttp3
-keep class okhttp3.** { *; }
-keep interface okhttp3.** { *; }
-dontwarn okhttp3.**

-keep class okio.** { *; }
-dontwarn okio.**

-keep class com.tuya.**{*;}
-dontwarn com.tuya.**
1.6. Initialization SDK
Description
For initializing the SDK, please initialize the SDK in the Application and make sure that all processes are initialized
Sample Code
public class TuyaSmartApp extends Application {
    @Override
    public void onCreate() {
        super.onCreate();
        TuyaSmartGeeknockKit.init(this);
    }
}
The appId and appSecret need to be configured in the AndroidManifest.xml file, or they can be initialized in the initialization code.
TuyaSmartGeeknockKit.init(Application application, String appkey, String appSerect)
1.7. Cancel Tuya Smart Cloud Connection
Call the following interface to log out of the application when exiting.
TuyaSmartGeeknockKit.onDestroy();
1.8. Debugging switches
In debug mode you can turn on the SDK’s logging switch to see more logging information and help locate problems quickly. In release mode it is recommended to turn off the logging switch.
TuyaSmartGeeknockKit.setDebugMode(true);
Is this page helpful?
YesFeedbackIs this page helpful?
YesFeedback


