Build AI Chatbot on Top of T5AI-Core
Overview
This topic describes how to quickly build an AI chatbot using the T5AI-Core. For more information about T5AI-Core, see T5AI-Core Development Kit.
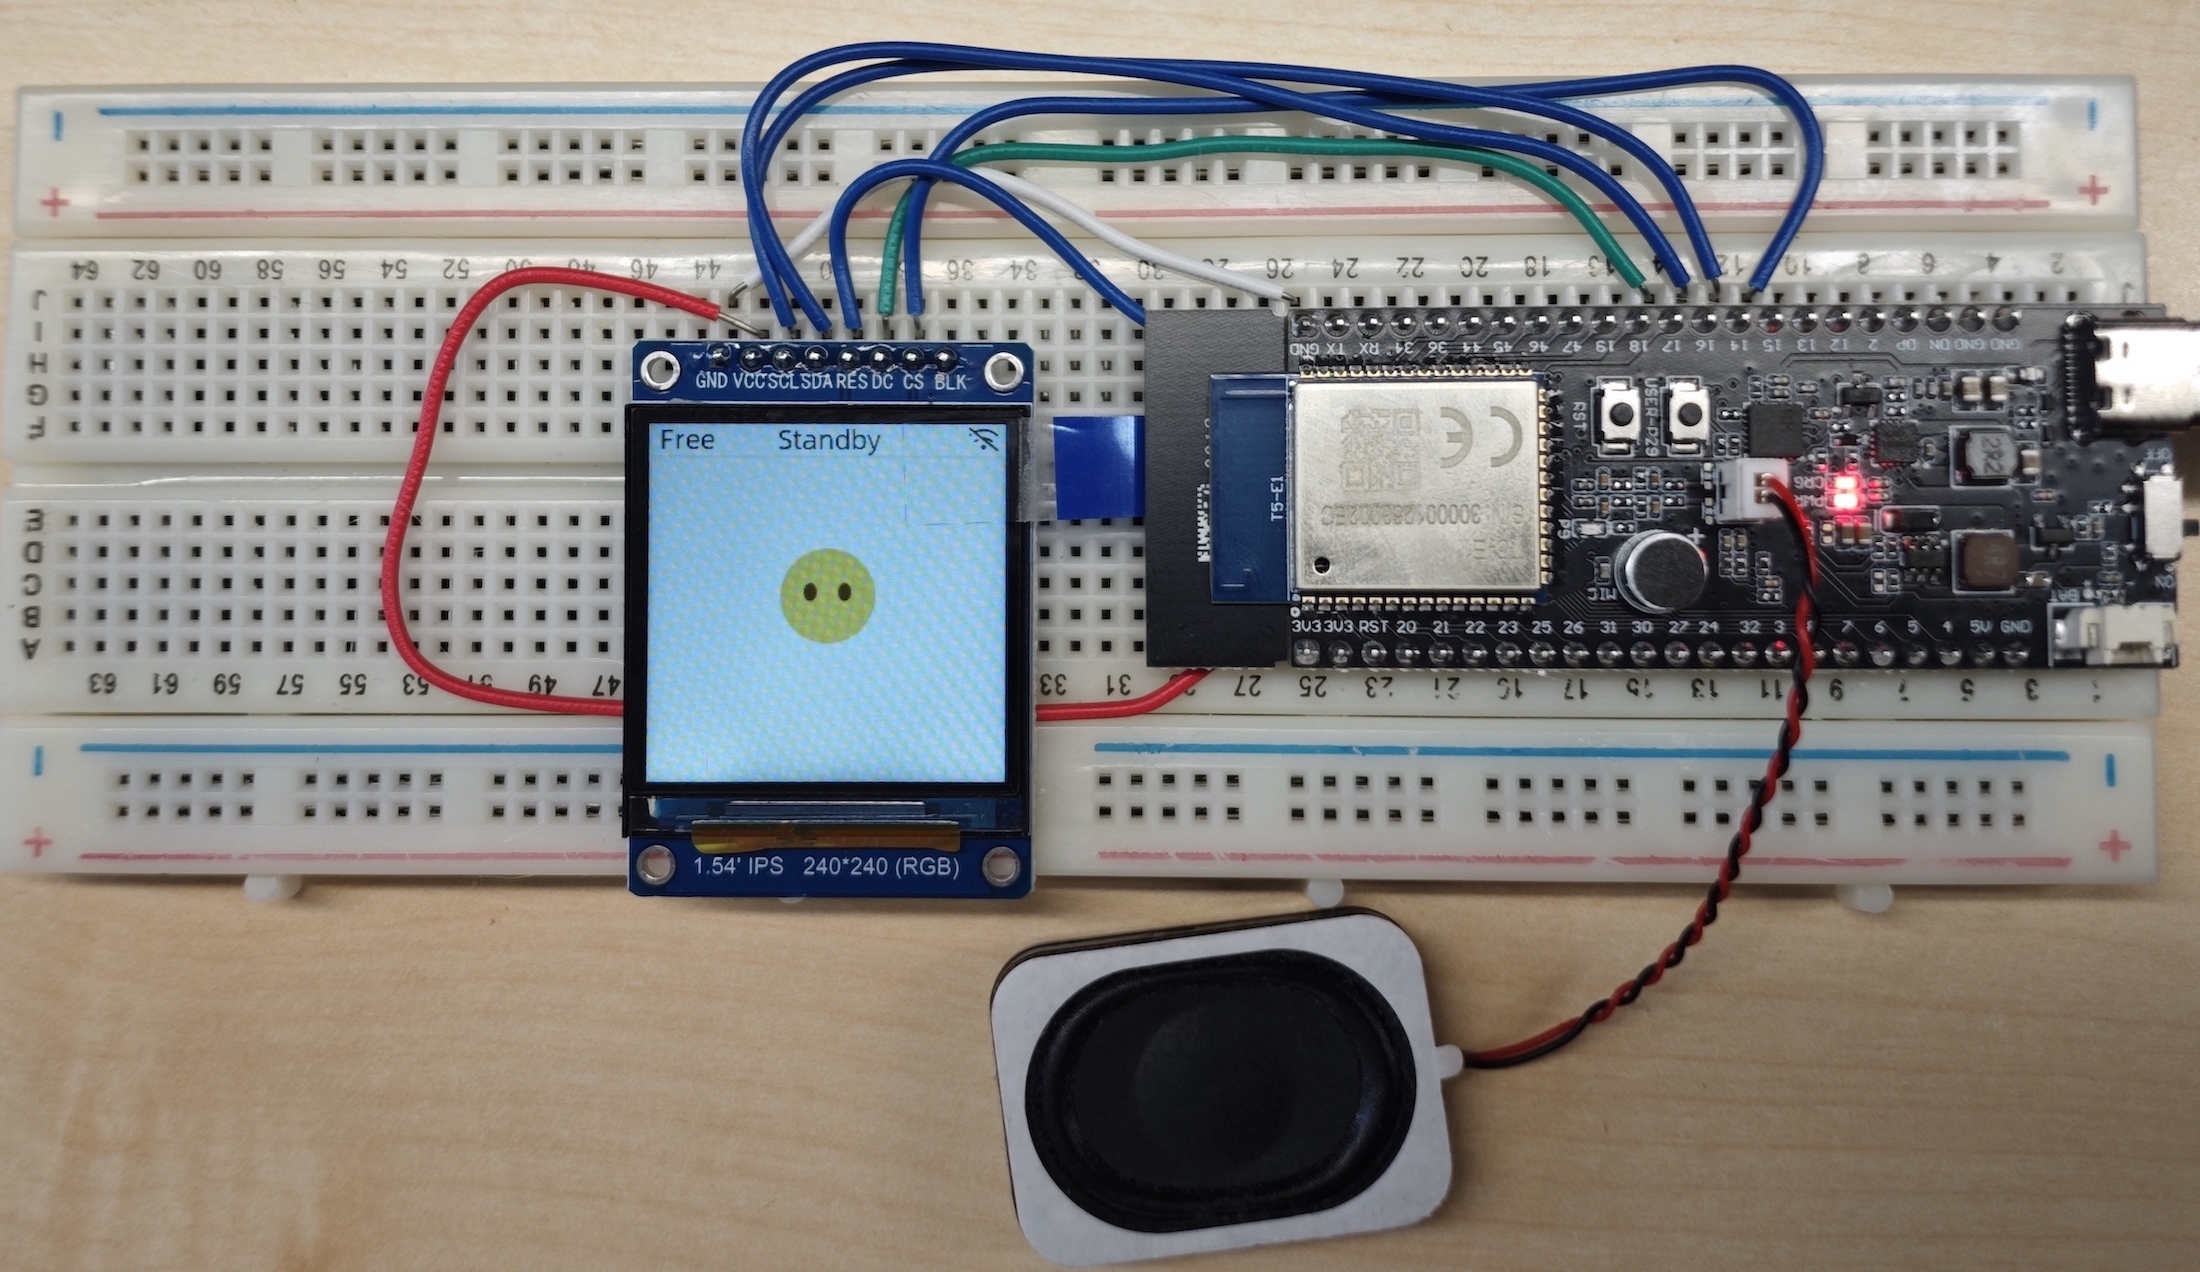
The pin connections between the T5AI-Core and the ST7789 screen are defined as follows (same as the EVB):
| T5AI-Core | ST7789 screen |
|---|---|
| P14 | SPI0_SCK |
| P16 | SPI0_MOSI |
| P6 | LCD_RES |
| P17 | LCD_DC |
| P15 | LCD_CSN |
| P5 | LCD_BL_ON |
| P7 | LCD_PWR_ON |
How it works:
Configure menu
-
Refer to Download and activate TuyaOpen to activate
tos.py. -
Enter and run
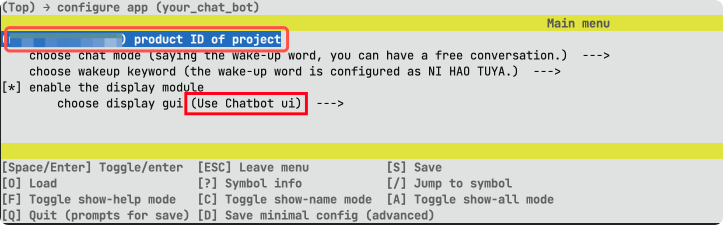
cd apps/tuya.ai/your_chat_bot && tos.py config menuin the terminal and modify the configuration information in the code as needed.- Modify the product ID (PID) and select chat UI.
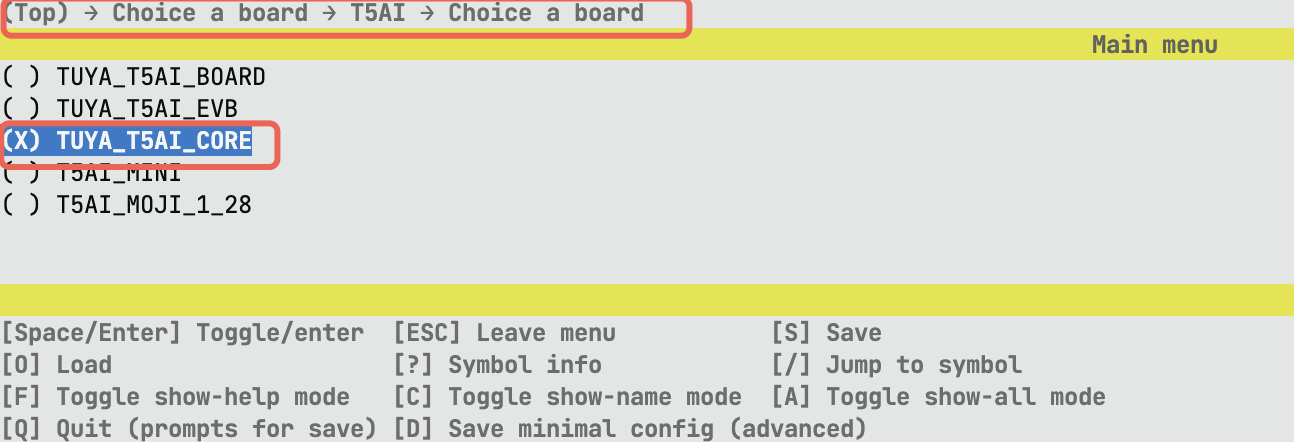
- Select a development board.
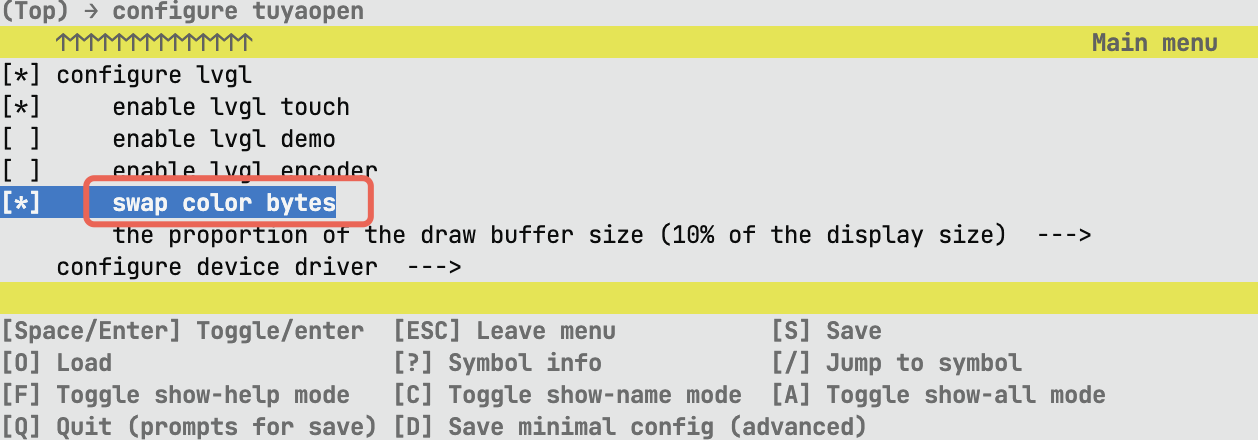
- Enable color inversion.
- Modify the product ID (PID) and select chat UI.
Modify code
Add T5AI-Core definition
-
Locate the
get_ui_fontinterface in the fileapps/tuya.ai/your_chat_bot/src/display/app_display.c. -
Add the code
|| defined(BOARD_CHOICE_TUYA_T5AI_CORE)at the position shown in the figure below.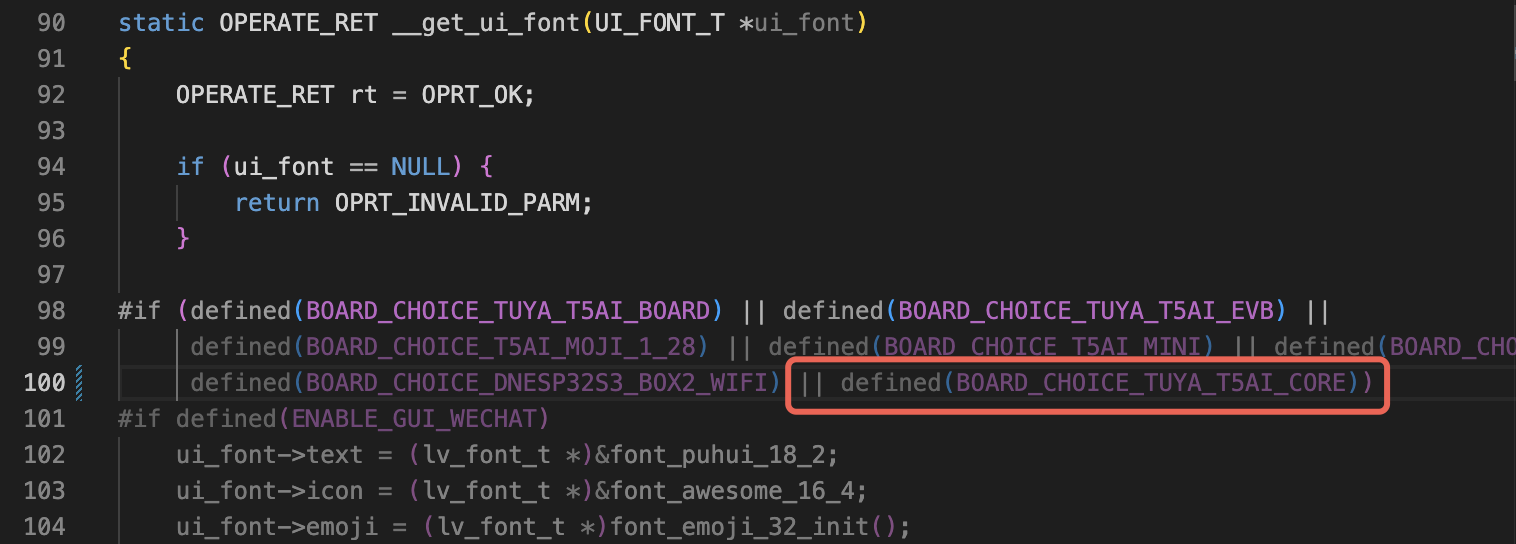
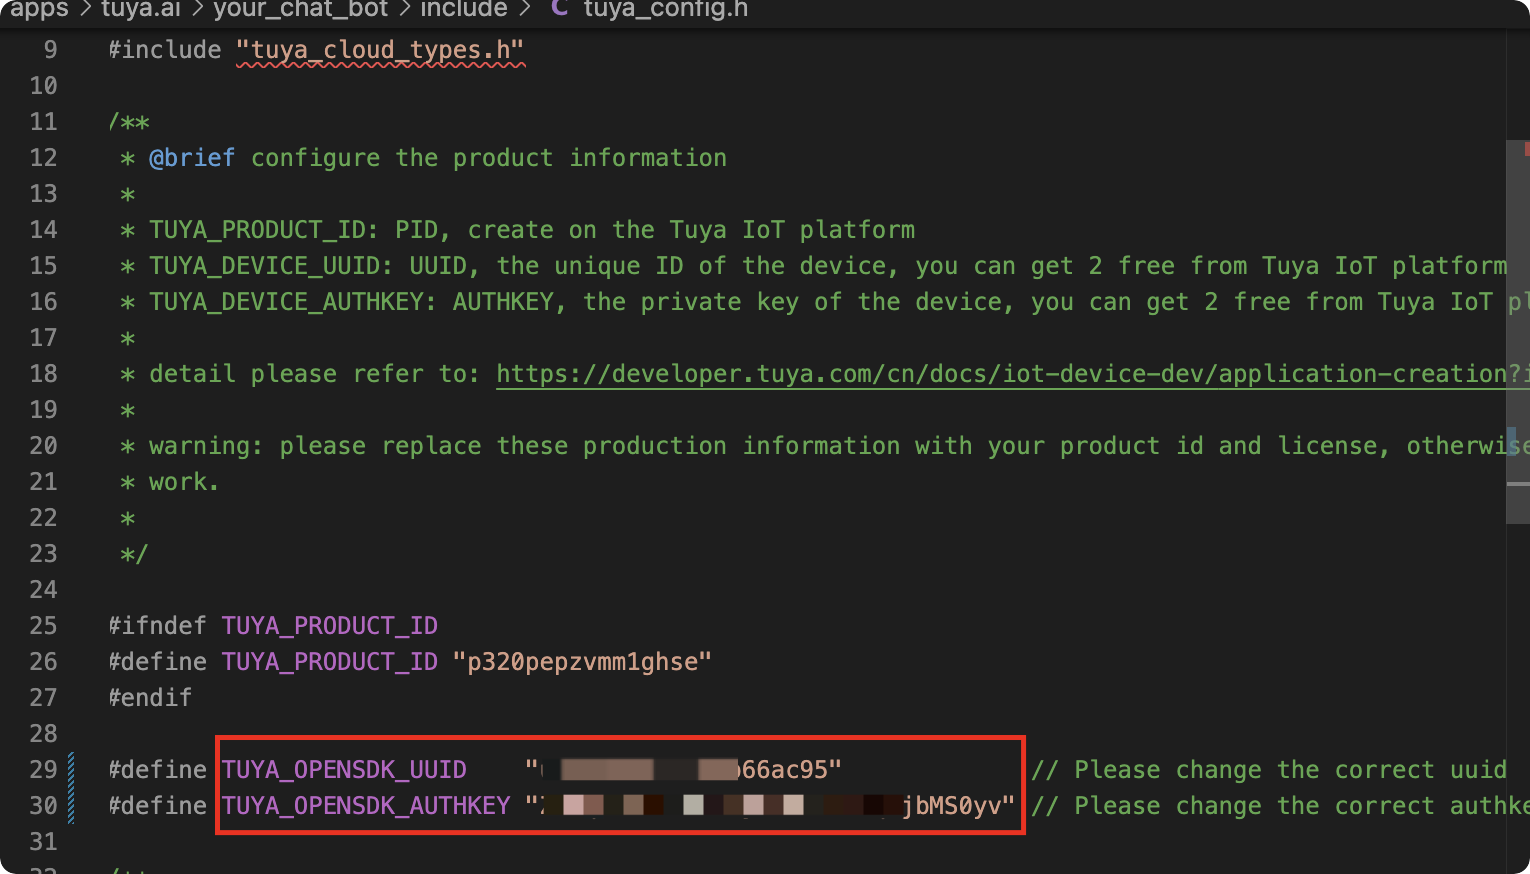
Fill in the license
Locate the file apps/tuya.ai/your_chat_bot/include/tuya_config.h. Fill in the license (UUID and Authkey) into the macro definitions TUYA_OPENSDK_UUID and TUYA_OPENSDK_AUTHKEY, respectively.
Add display driver
In the file TuyaOpen/boards/T5AI/TUYA_T5AI_CORE/tuya_t5ai_core.c, add the display driver code. You can copy the code below and completely replace your original code.
/**
 * @file tuya_t5ai_core.c
 * @brief tuya_t5ai_core module is used to
 * @version 0.1
 * @copyright Copyright (c) 2021-2025 Tuya Inc. All Rights Reserved.
 */

#include "tuya_cloud_types.h"

#include "tal_api.h"

#include "tdd_audio.h"
#include "tdd_led_gpio.h"
#include "tdd_button_gpio.h"
#include "tdd_disp_st7789.h"
/***********************************************************
************************macro define************************
***********************************************************/
#define BOARD_SPEAKER_EN_PIN TUYA_GPIO_NUM_39

#define BOARD_BUTTON_PIN       TUYA_GPIO_NUM_29
#define BOARD_BUTTON_ACTIVE_LV TUYA_GPIO_LEVEL_LOW

#define BOARD_LED_PIN       TUYA_GPIO_NUM_9
#define BOARD_LED_ACTIVE_LV TUYA_GPIO_LEVEL_HIGH

#define BOARD_LCD_BL_TYPE            TUYA_DISP_BL_TP_GPIO
#define BOARD_LCD_BL_PIN             TUYA_GPIO_NUM_5
#define BOARD_LCD_BL_ACTIVE_LV       TUYA_GPIO_LEVEL_HIGH

#define BOARD_LCD_WIDTH              240
#define BOARD_LCD_HEIGHT             240
#define BOARD_LCD_PIXELS_FMT         TUYA_PIXEL_FMT_RGB565
#define BOARD_LCD_ROTATION           TUYA_DISPLAY_ROTATION_0

#define BOARD_LCD_SPI_PORT           TUYA_SPI_NUM_0
#define BOARD_LCD_SPI_CLK            48000000
#define BOARD_LCD_SPI_CS_PIN         TUYA_GPIO_NUM_15
#define BOARD_LCD_SPI_DC_PIN         TUYA_GPIO_NUM_17
#define BOARD_LCD_SPI_RST_PIN        TUYA_GPIO_NUM_6

#define BOARD_LCD_PIXELS_FMT         TUYA_PIXEL_FMT_RGB565

#define BOARD_LCD_POWER_PIN          TUYA_GPIO_NUM_7
#define BOARD_LCD_POWER_ACTIVE_LV    TUYA_GPIO_LEVEL_HIGH

/***********************************************************
***********************typedef define***********************
***********************************************************/

/***********************************************************
********************function declaration********************
***********************************************************/

/***********************************************************
***********************variable define**********************
***********************************************************/

/***********************************************************
***********************function define**********************
***********************************************************/
OPERATE_RET __board_register_audio(void)
{
    OPERATE_RET rt = OPRT_OK;

#if defined(AUDIO_CODEC_NAME)
    TDD_AUDIO_T5AI_T cfg = {0};
    memset(&cfg, 0, sizeof(TDD_AUDIO_T5AI_T));

    cfg.aec_enable = 1;

    cfg.ai_chn = TKL_AI_0;
    cfg.sample_rate = TKL_AUDIO_SAMPLE_16K;
    cfg.data_bits = TKL_AUDIO_DATABITS_16;
    cfg.channel = TKL_AUDIO_CHANNEL_MONO;

    cfg.spk_sample_rate = TKL_AUDIO_SAMPLE_16K;
    cfg.spk_pin = BOARD_SPEAKER_EN_PIN;
    cfg.spk_pin_polarity = TUYA_GPIO_LEVEL_LOW;

    TUYA_CALL_ERR_RETURN(tdd_audio_register(AUDIO_CODEC_NAME, cfg));
#endif
    return rt;
}

static OPERATE_RET __board_register_button(void)
{
    OPERATE_RET rt = OPRT_OK;

#if defined(BUTTON_NAME)
    BUTTON_GPIO_CFG_T button_hw_cfg = {
        .pin = BOARD_BUTTON_PIN,
        .level = BOARD_BUTTON_ACTIVE_LV,
        .mode = BUTTON_TIMER_SCAN_MODE,
        .pin_type.gpio_pull = TUYA_GPIO_PULLUP,
    };

    TUYA_CALL_ERR_RETURN(tdd_gpio_button_register(BUTTON_NAME, &button_hw_cfg));
#endif

    return rt;
}

static OPERATE_RET __board_register_led(void)
{
    OPERATE_RET rt = OPRT_OK;

#if defined(LED_NAME)
    TDD_LED_GPIO_CFG_T led_gpio;

    led_gpio.pin = BOARD_LED_PIN;
    led_gpio.level = BOARD_LED_ACTIVE_LV;
    led_gpio.mode = TUYA_GPIO_PUSH_PULL;

    TUYA_CALL_ERR_RETURN(tdd_led_gpio_register(LED_NAME, &led_gpio));
#endif

    return rt;
}

static OPERATE_RET __board_register_display(void)
{
    OPERATE_RET rt = OPRT_OK;

#if defined(DISPLAY_NAME)
    DISP_SPI_DEVICE_CFG_T display_cfg;

    memset(&display_cfg, 0, sizeof(DISP_RGB_DEVICE_CFG_T));

    display_cfg.bl.type              = BOARD_LCD_BL_TYPE;
    display_cfg.bl.gpio.pin          = BOARD_LCD_BL_PIN;
    display_cfg.bl.gpio.active_level = BOARD_LCD_BL_ACTIVE_LV;

    display_cfg.width     = BOARD_LCD_WIDTH;
    display_cfg.height    = BOARD_LCD_HEIGHT;
    display_cfg.pixel_fmt = BOARD_LCD_PIXELS_FMT;
    display_cfg.rotation  = BOARD_LCD_ROTATION;

    display_cfg.port      = BOARD_LCD_SPI_PORT;
    display_cfg.spi_clk   = BOARD_LCD_SPI_CLK;
    display_cfg.cs_pin    = BOARD_LCD_SPI_CS_PIN;
    display_cfg.dc_pin    = BOARD_LCD_SPI_DC_PIN;
    display_cfg.rst_pin   = BOARD_LCD_SPI_RST_PIN;

    display_cfg.power.pin          = BOARD_LCD_POWER_PIN;
    display_cfg.power.active_level = BOARD_LCD_POWER_ACTIVE_LV;

    TUYA_CALL_ERR_RETURN(tdd_disp_spi_st7789_register(DISPLAY_NAME, &display_cfg));
#endif

    return rt;
}

/**
 * @brief Registers all the hardware peripherals (audio, button, LED) on the board.
 *
 * @return Returns OPERATE_RET_OK on success, or an appropriate error code on failure.
 */
OPERATE_RET board_register_hardware(void)
{
    OPERATE_RET rt = OPRT_OK;

    TUYA_CALL_ERR_LOG(__board_register_audio());

    TUYA_CALL_ERR_LOG(__board_register_button());

    TUYA_CALL_ERR_LOG(__board_register_led());
    TUYA_CALL_ERR_LOG(__board_register_display());

    return rt;
}
Build and flash
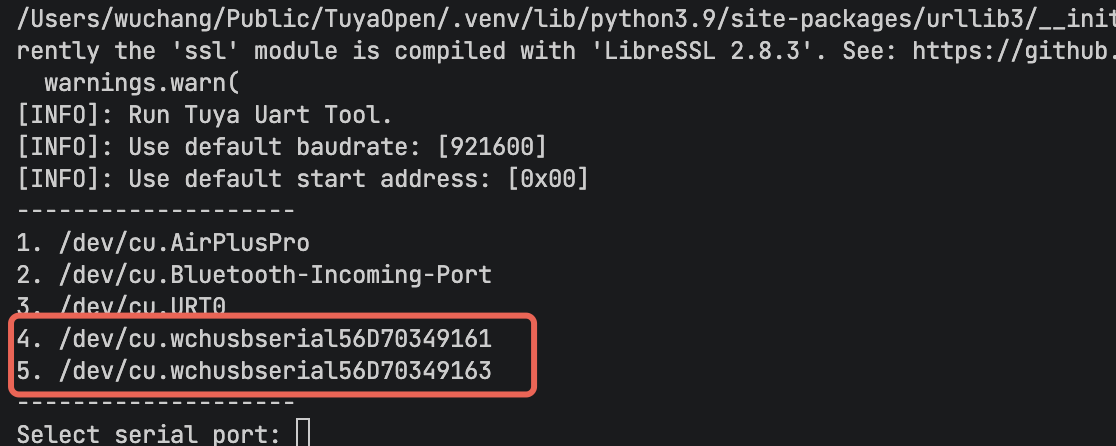
Enter and run tos.py build && tos.py flash in the terminal.
The development board is configured with two serial ports: one for flashing and the other for log output. Try and select as needed.
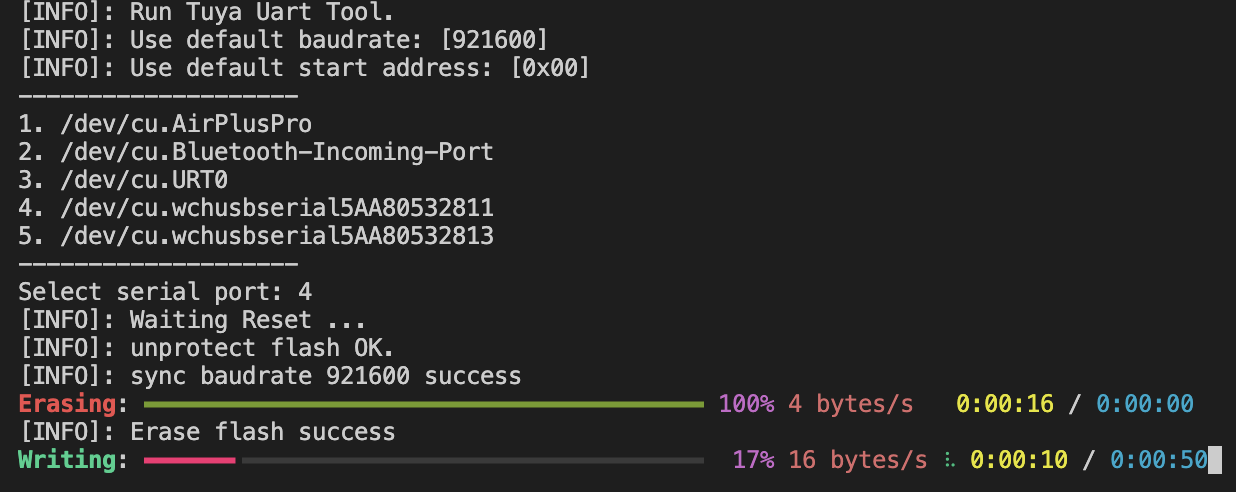
Flash the firmware and run. The expected operation result is shown in the figure below:
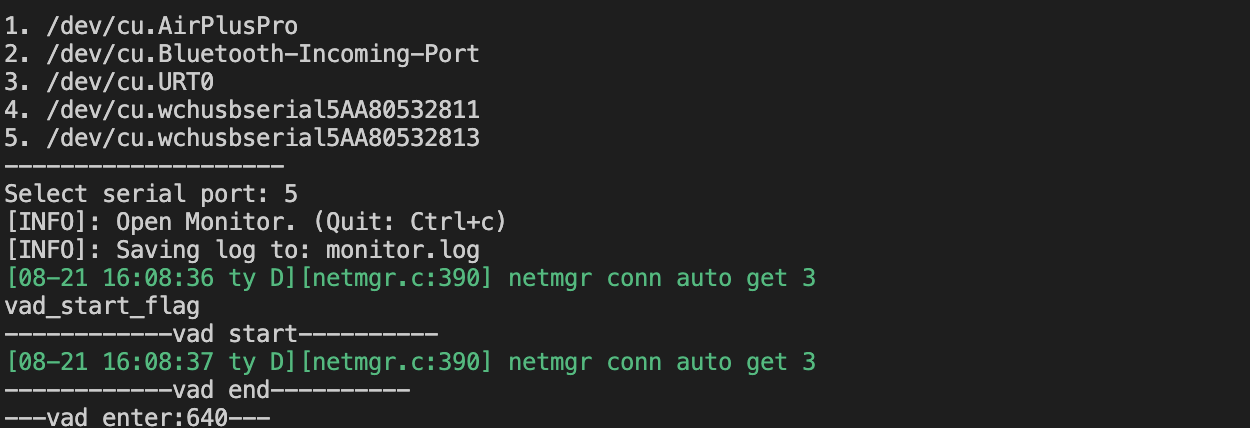
Monitor logs
Enter and run tos.py monitor in the terminal.
Is this page helpful?
YesFeedbackIs this page helpful?
YesFeedback


