TuyaOpen SDK Quick Start
Set up environment and download SDK
First, set up a development environment and download the TuyaOpen SDK. For more information, visit the TuyaOpen documentation center.
Create product
Log in to the Tuya Developer Platform and navigate to the AI Product > Development page. Click Create, select the appropriate category based on your product type, and then refer to the Create Product guide to complete product creation.
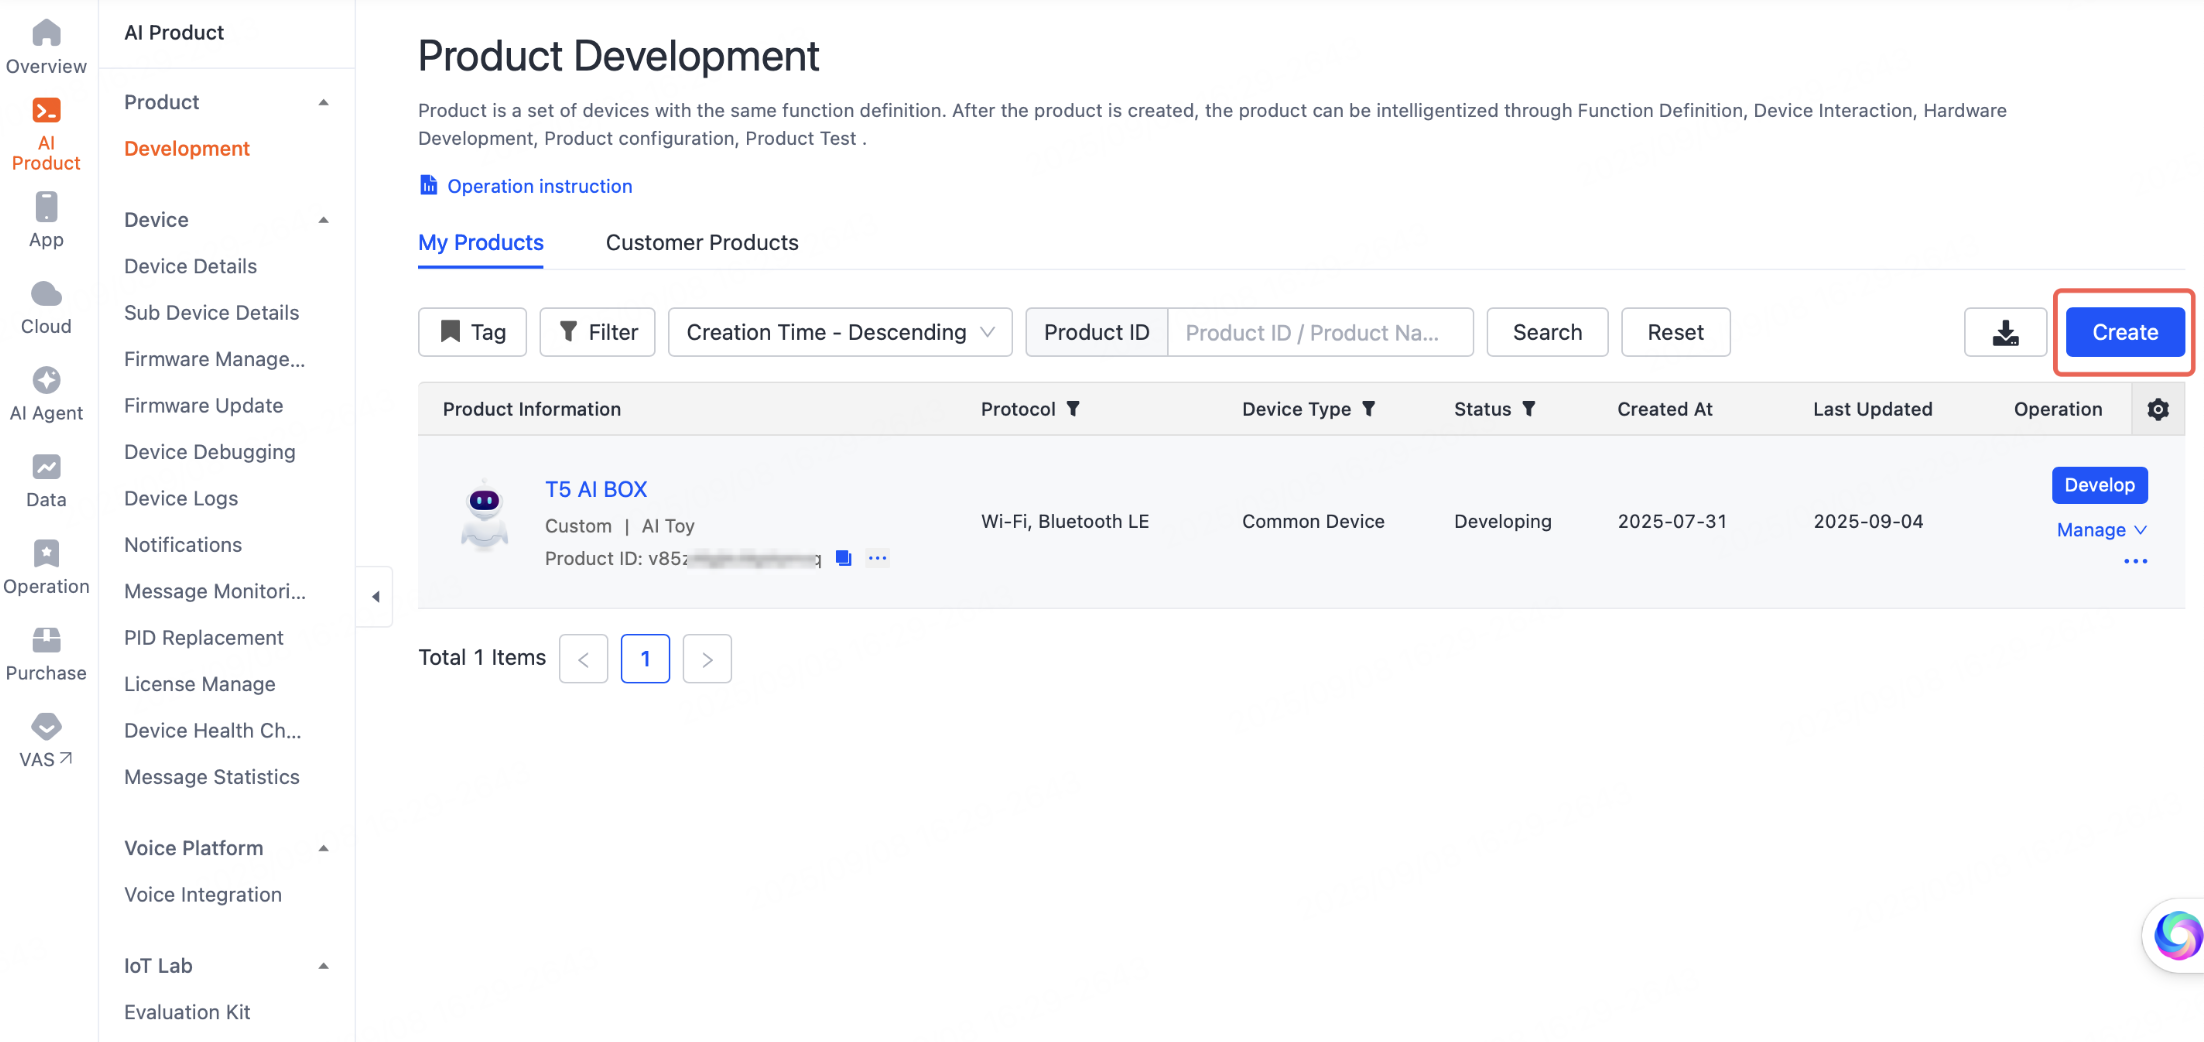
During the product development process, focus on how to add product functions, add AI capabilities, and configure new firmware as described below.
Add product functions
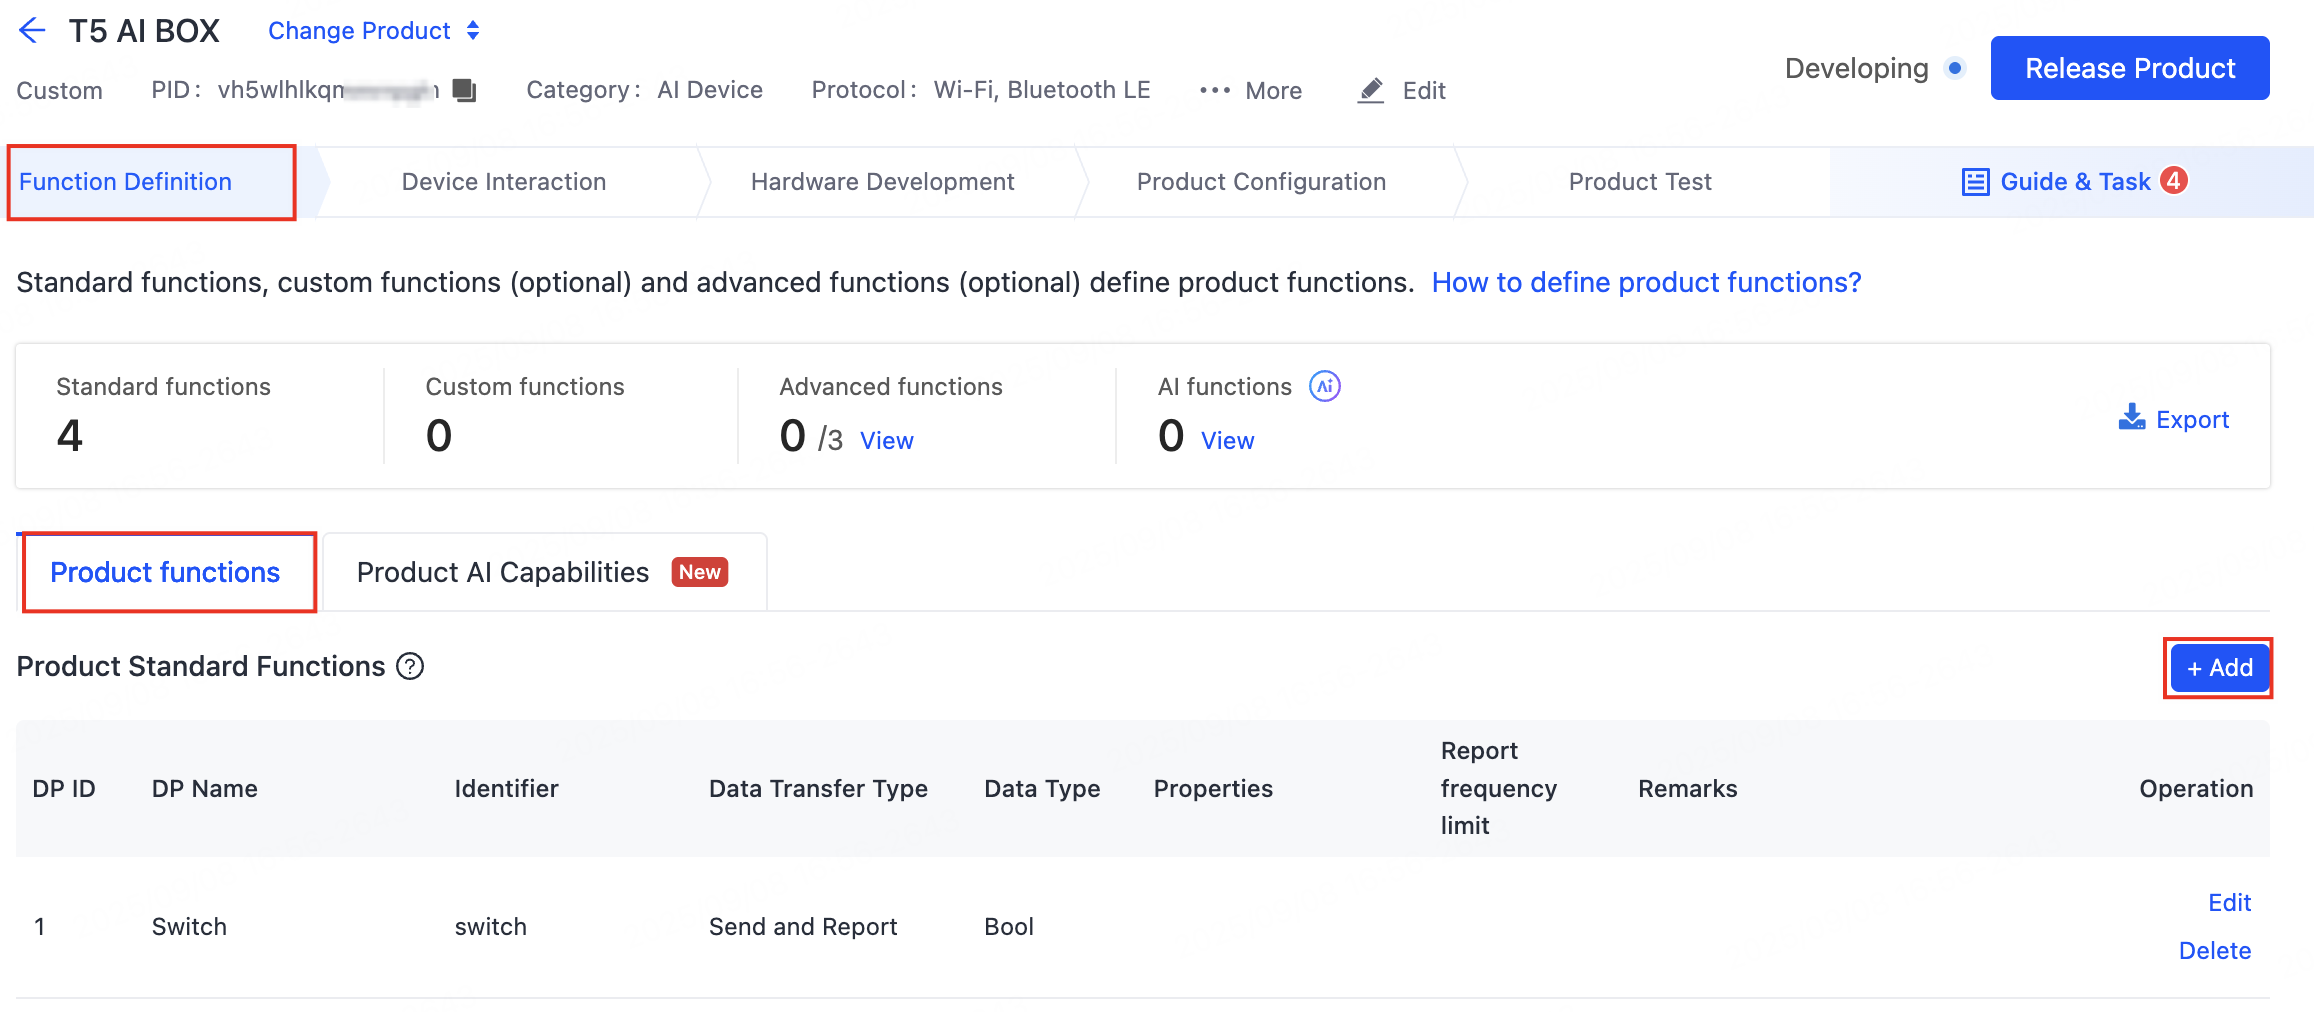
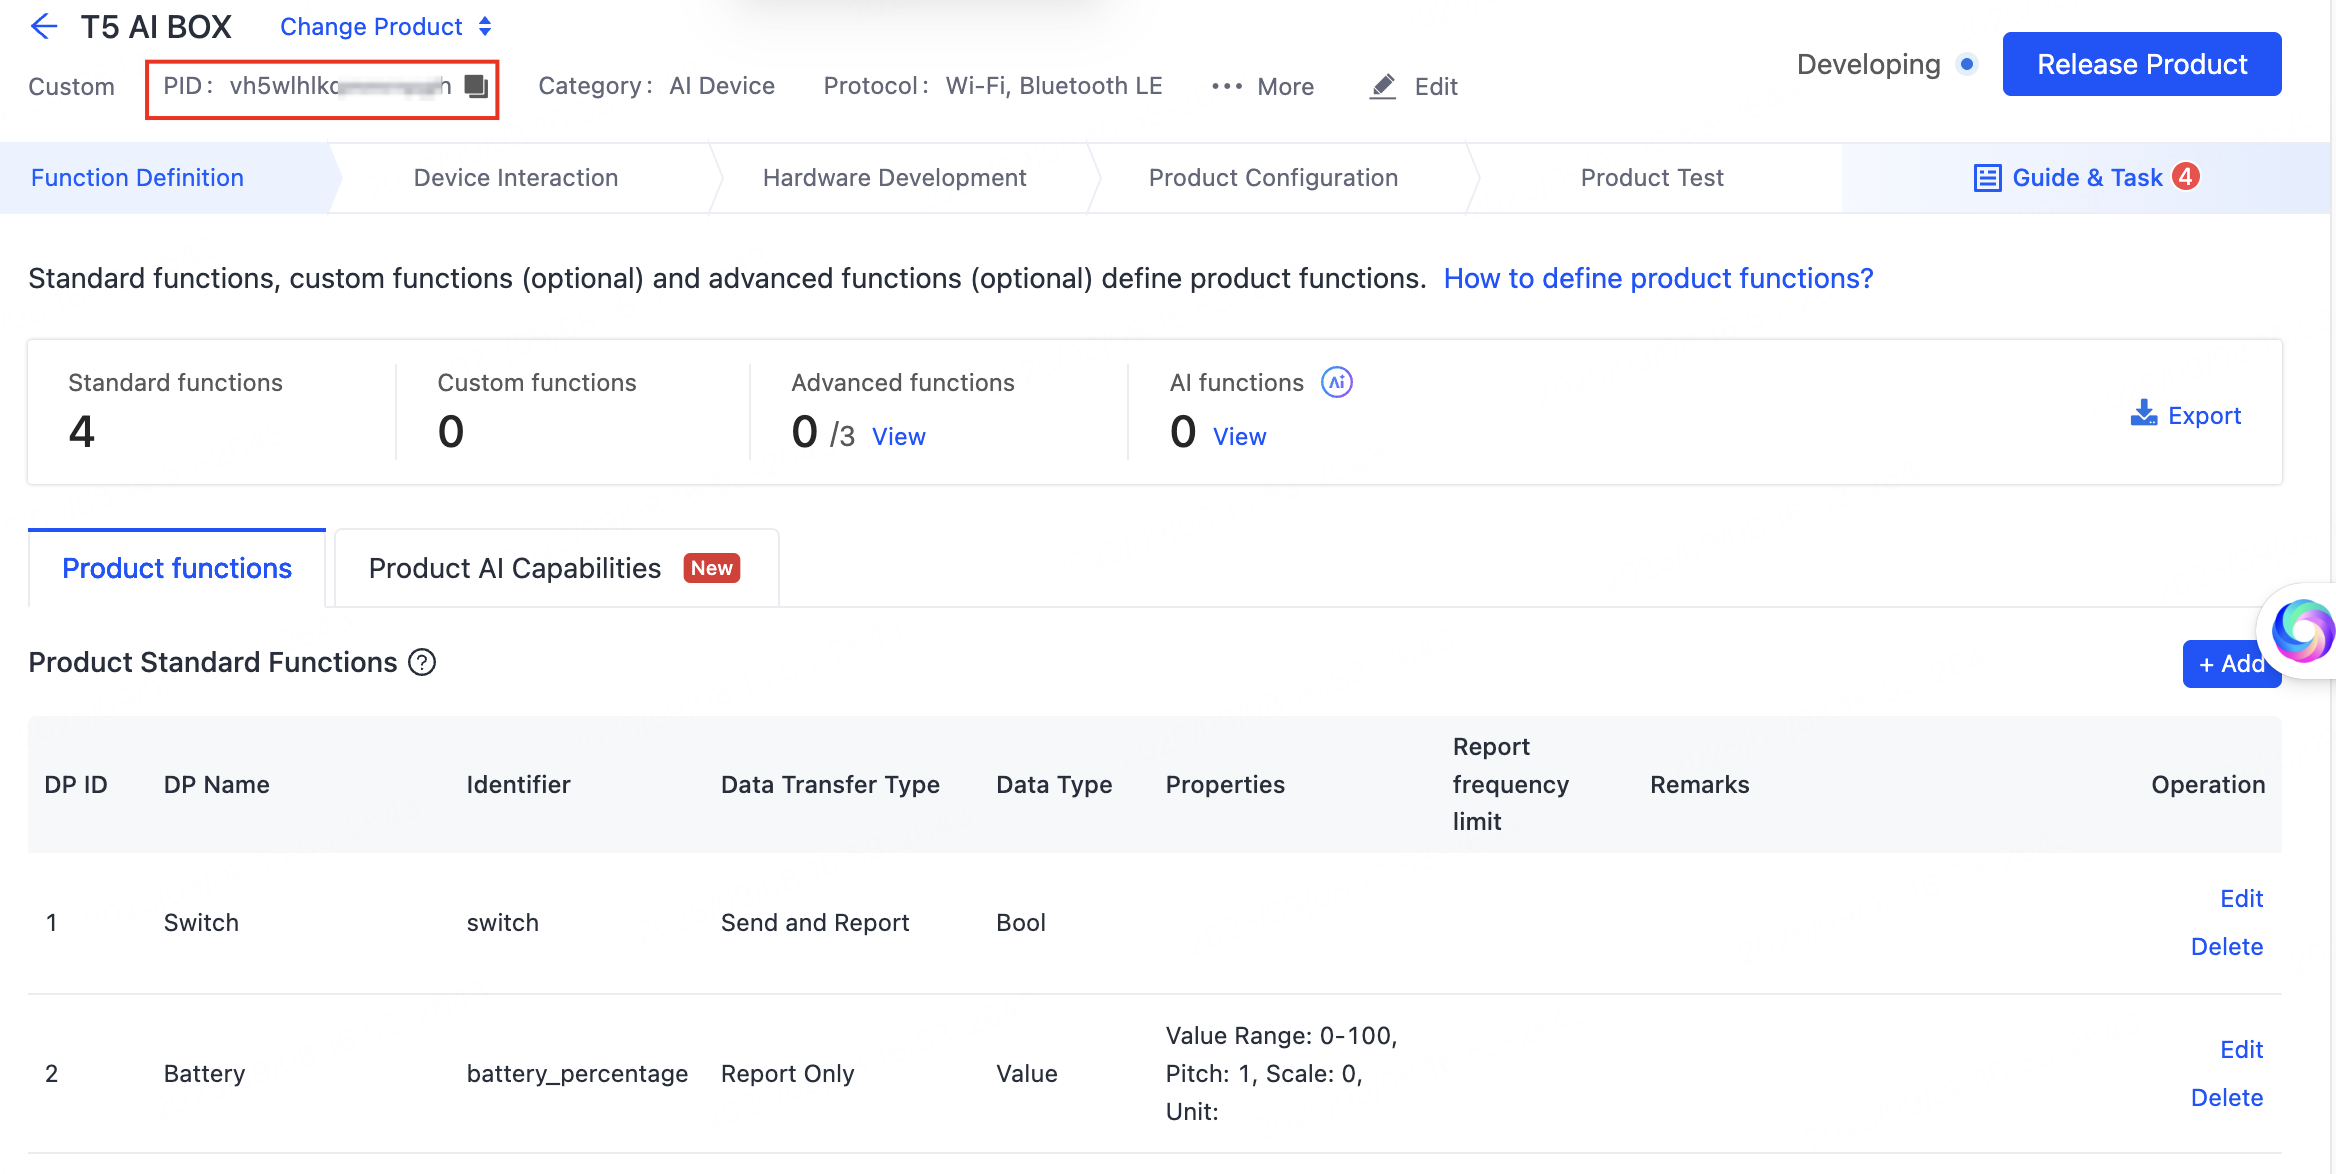
In the Function Definition tab, find Product Functions, click Add to add standard and custom functions to the product, or enable advanced functions.
For more information, see Product Functions.
Add AI capabilities
In the Function Definition tab, find Product AI Capabilities and click Add Agent to add AI capabilities.
For more information about how to develop an agent, see AI Capabilities Development. Among them, focus on the following configurations:

Add a plugin
-
In 01 Model Configuration > Skill Configuration, select Plugin and click the + button on the right to enter the Add Tool page.
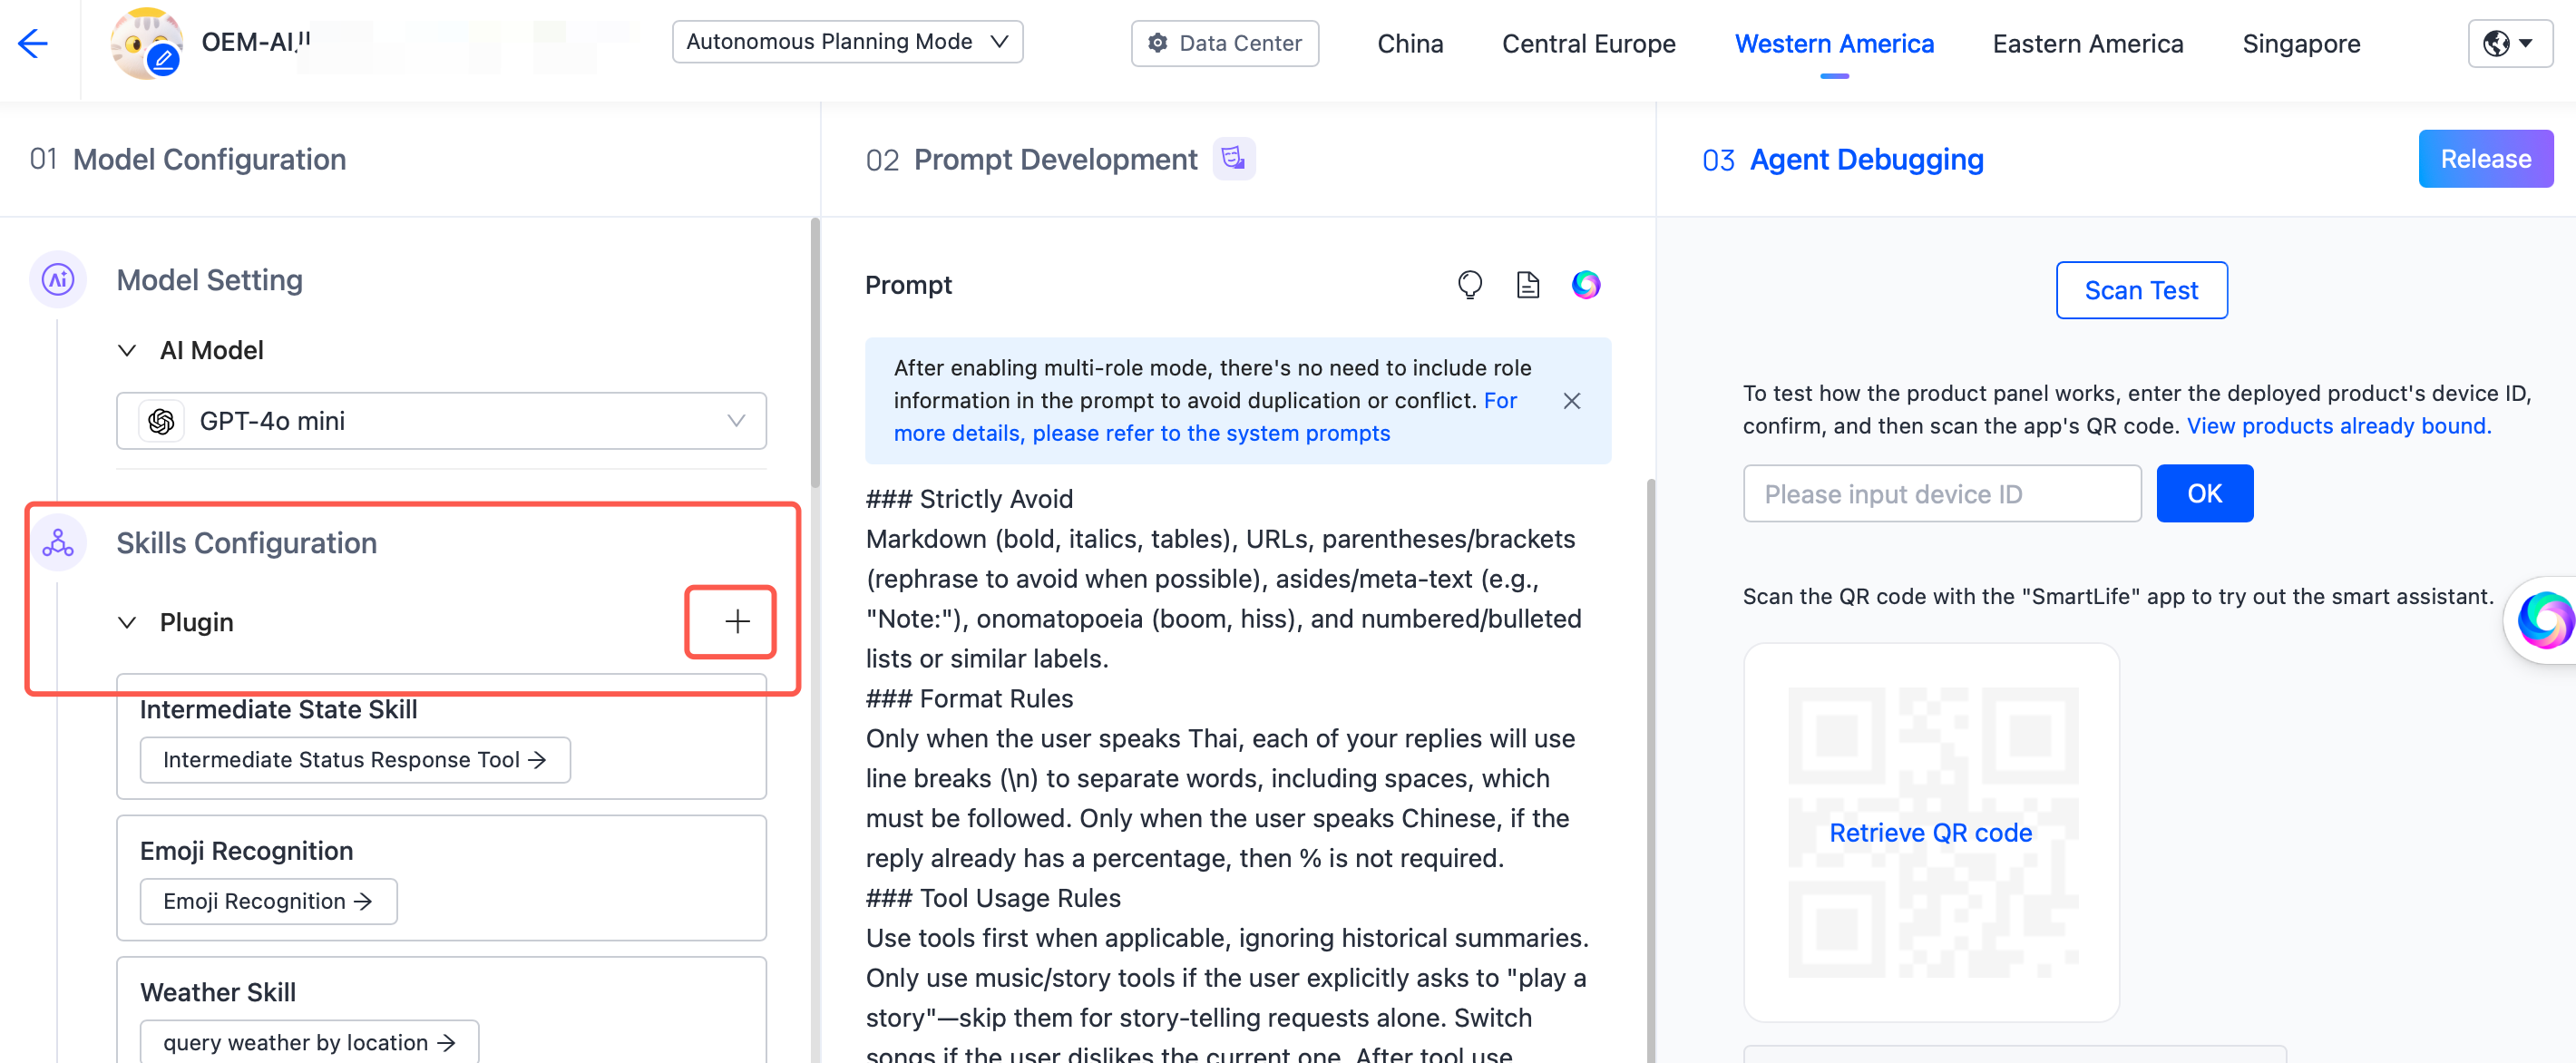
-
In the Device control tab, click Device Control · Bound Only, find Control the device itself, and then click Add.

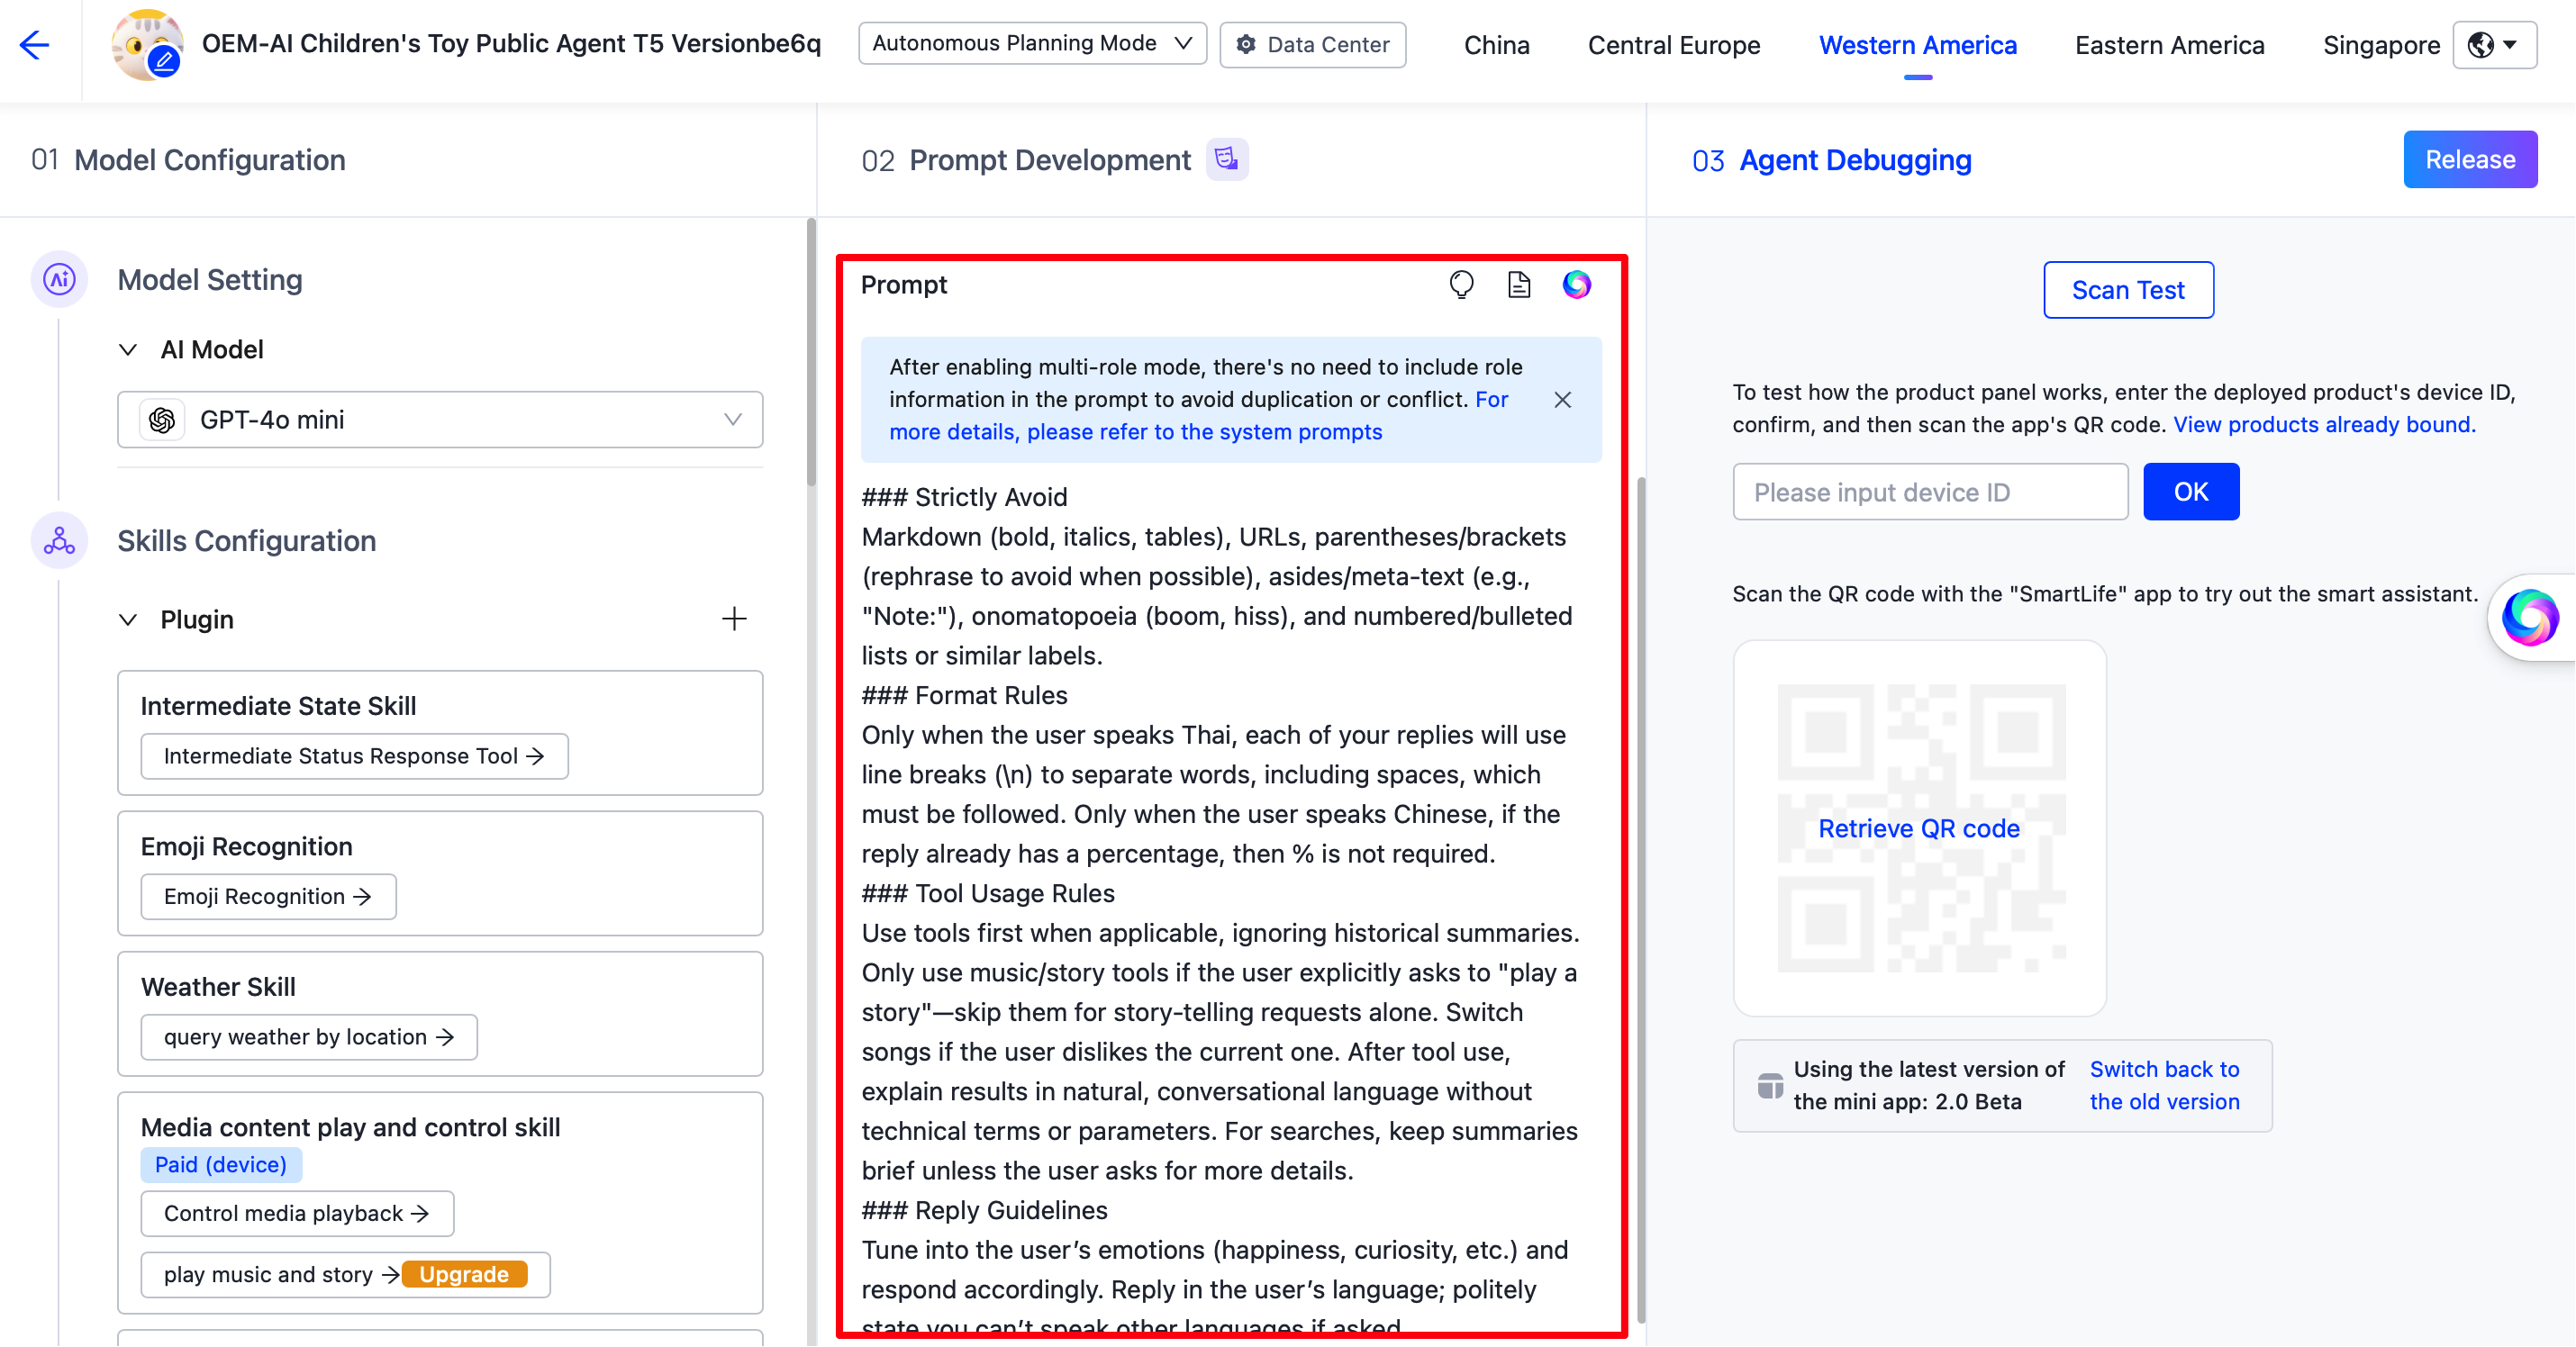
Develop a prompt
In the tab 02 Prompt Development, develop your prompt based on the Prompt Guide.
Add custom firmware
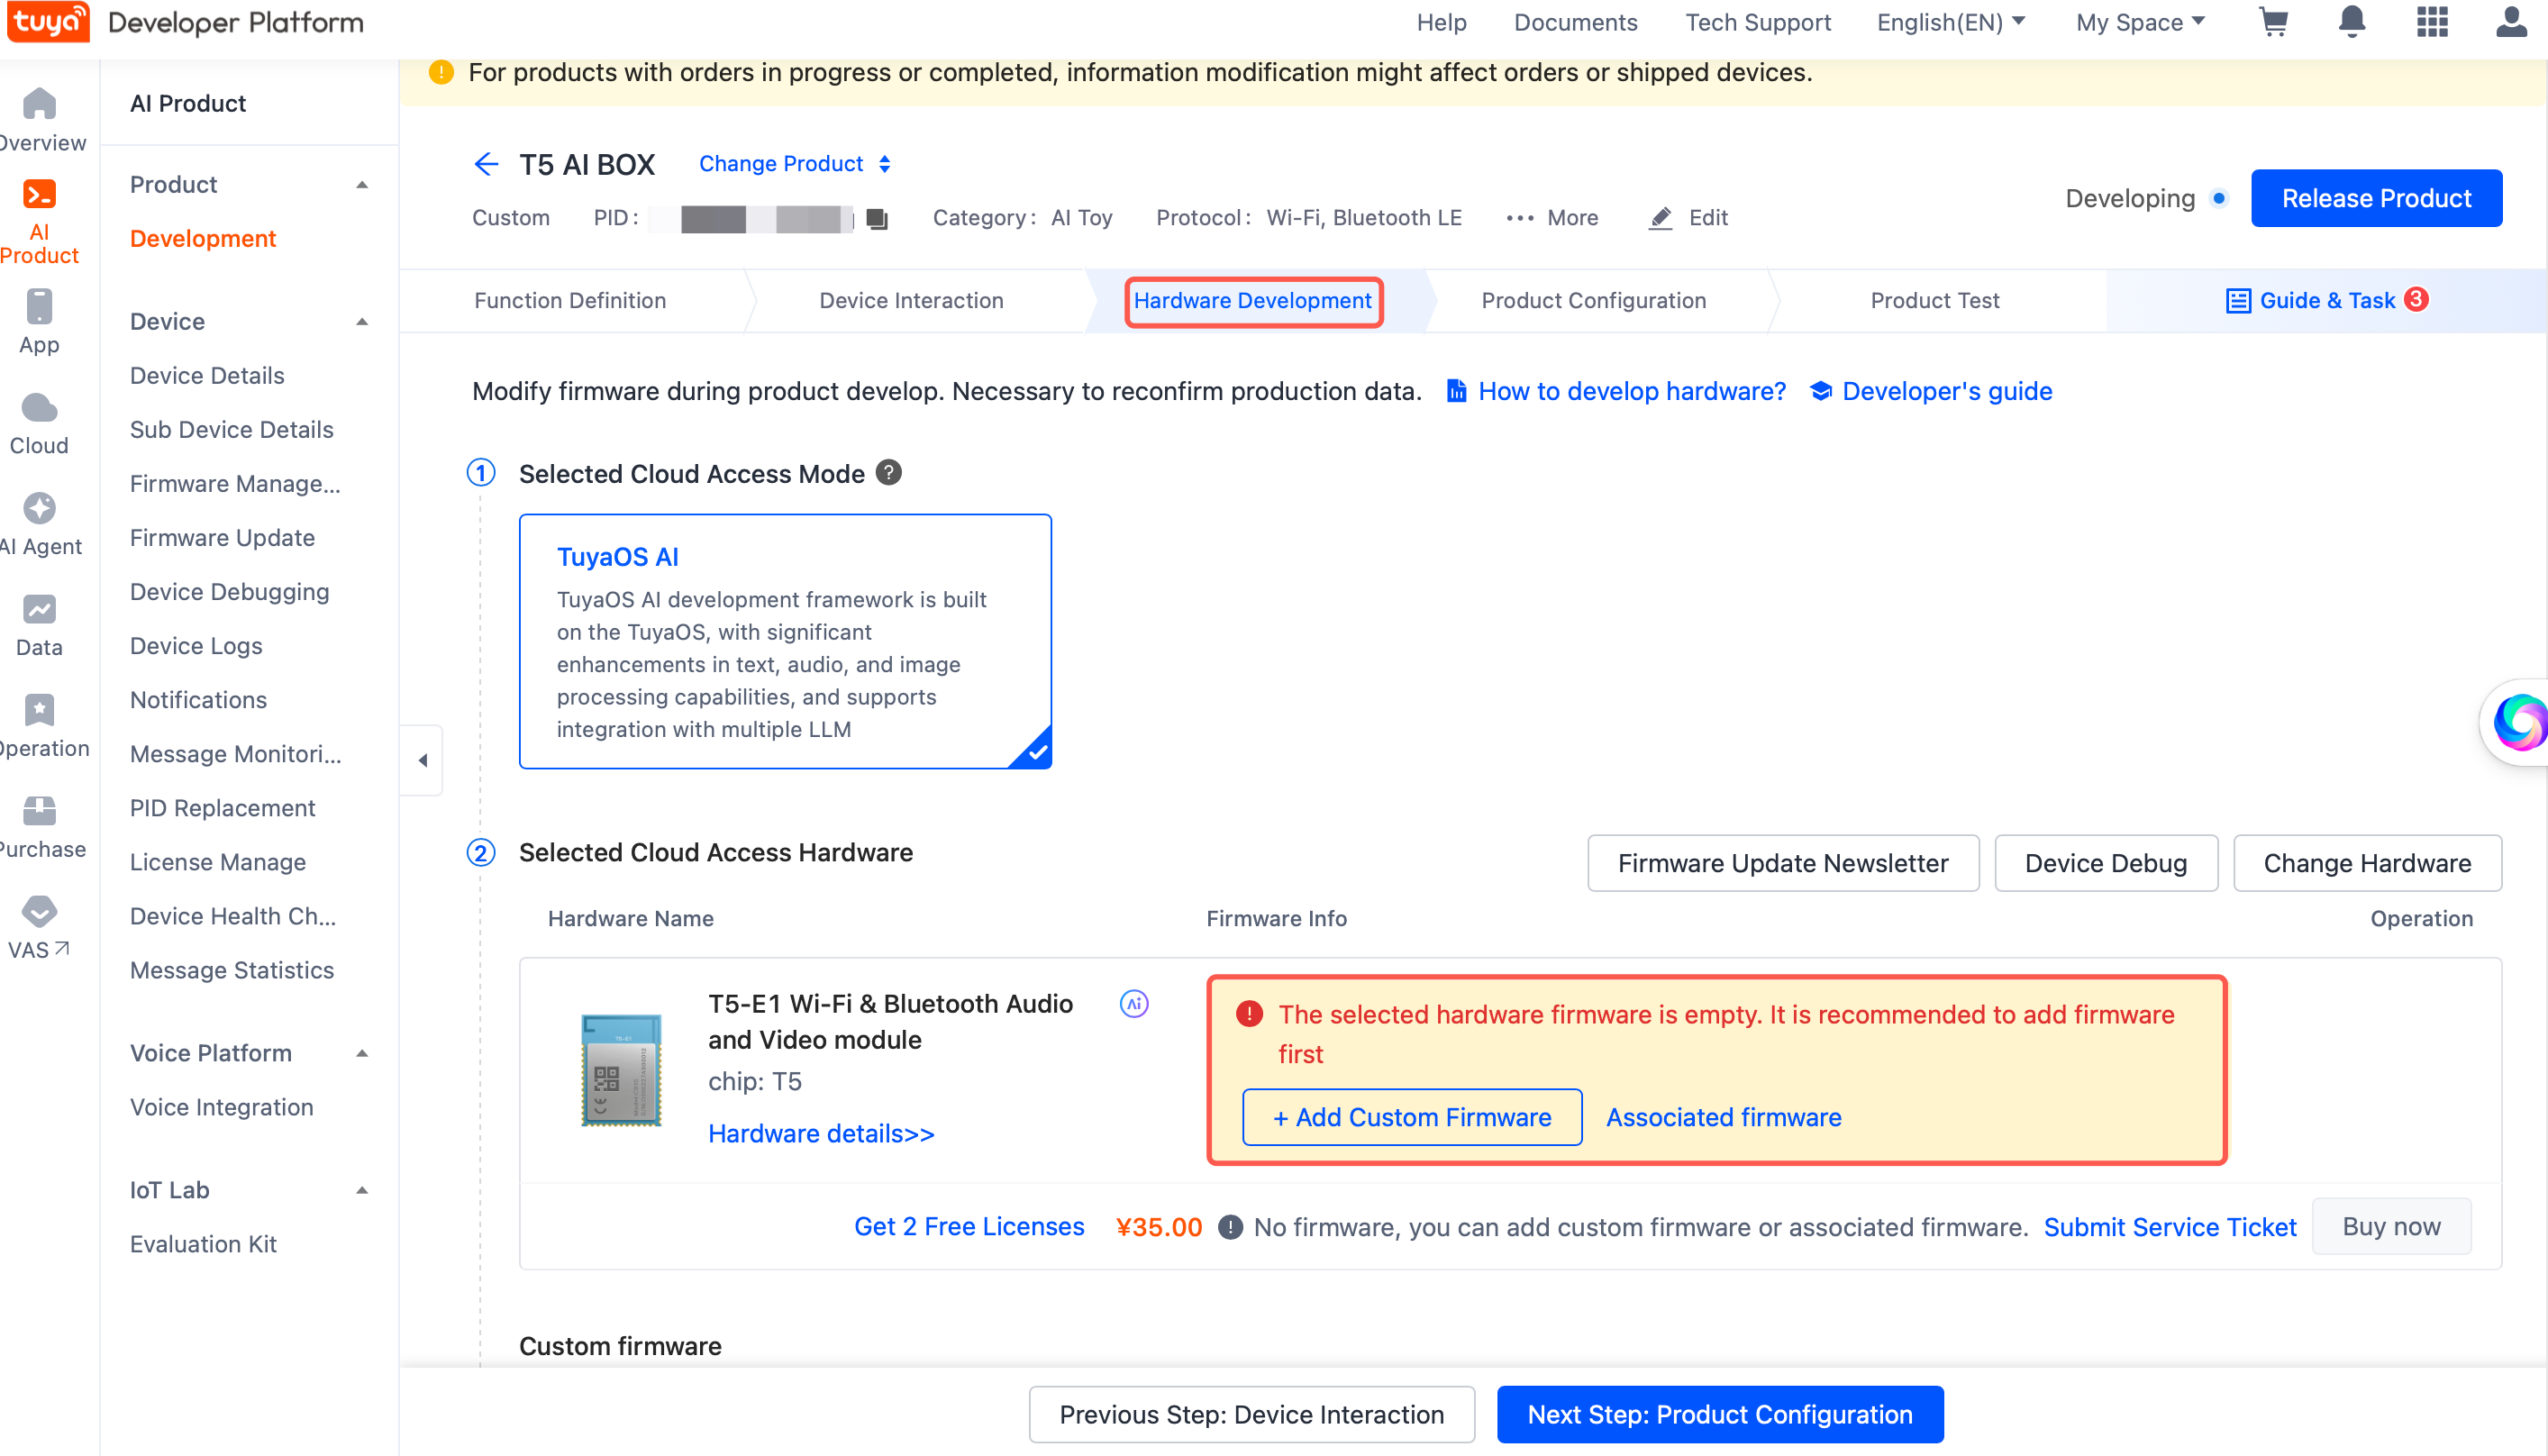
To support subsequent OTA updates and bulk module ordering, you need to create a custom firmware.
In the step of Hardware Development, set the Cloud Access Mode to TuyaOS AI, select a T5 module as the Cloud Access Hardware, click Add Custom Firmware, and then complete the relevant configurations.
Configure AI control commands
Product functions added during the product development process are also known as data points (DPs), and standard functions refer to DPs with IDs less than 100. If all functions added are standard functions, the self-control commands are configured by default, and this step can be skipped.
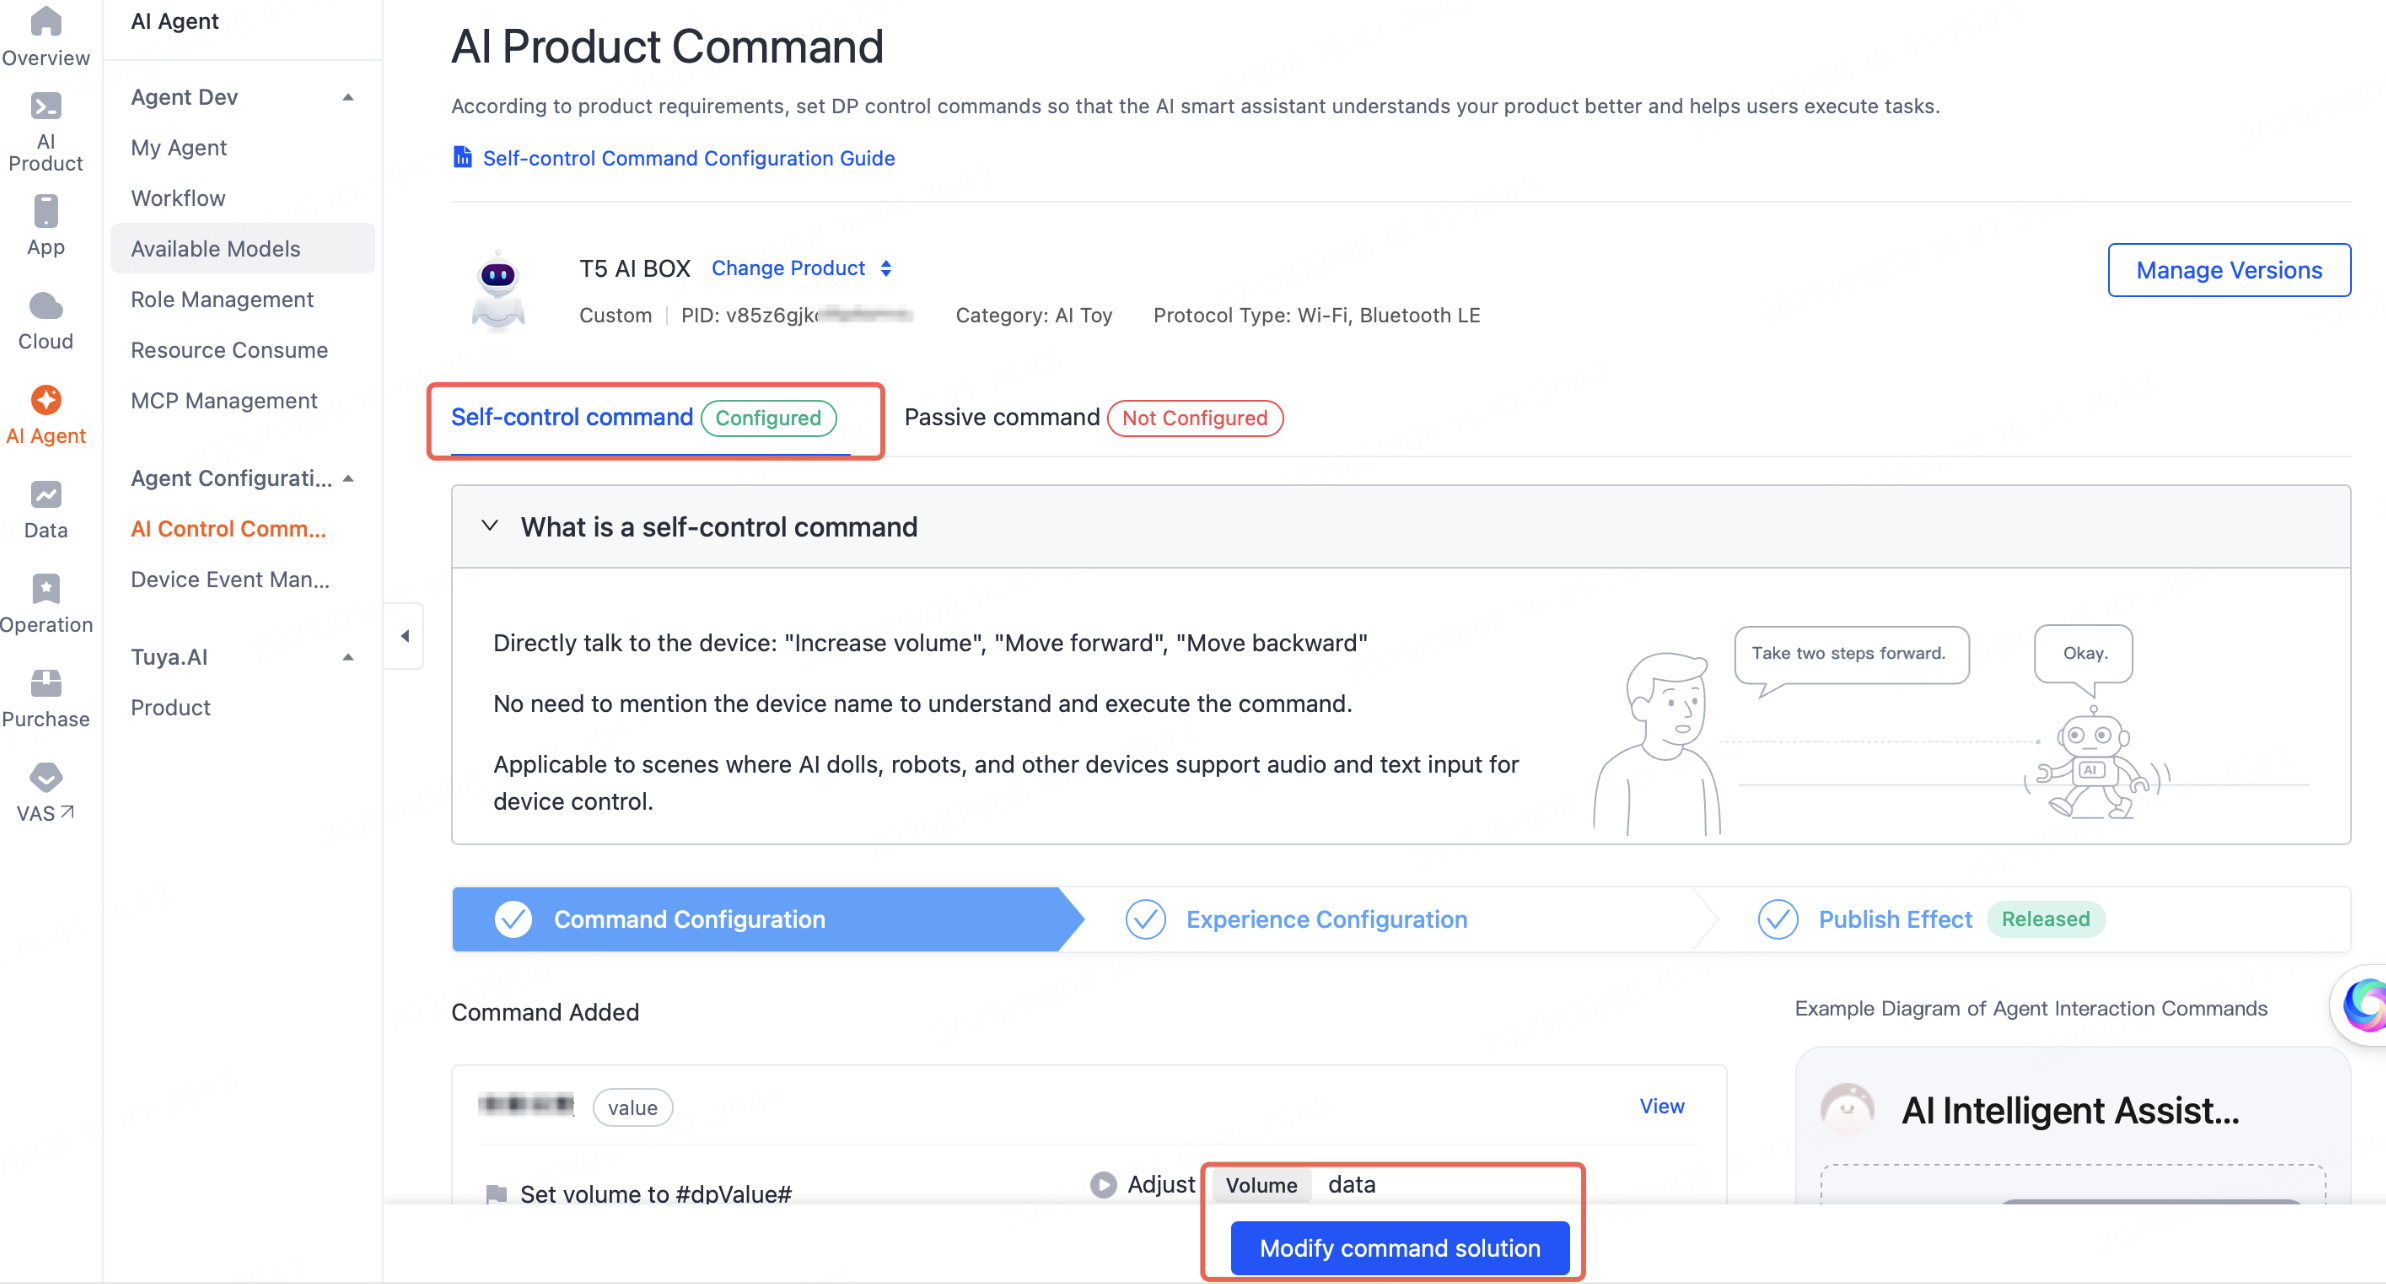
However, if you have added custom functions, you need to complete this step to modify the command solution.
Go to the AI Product Command page, find Self-control command, and then click Modify command solution. Complete the configurations by referring to Self-control Commands.
Implement product functions
A data point (DP) is a data model defined by Tuya to describe the functions of a product. To enable scalable and digital management of massive and diverse devices, an abstract language is required to describe these devices. For more information, see DP Model and Control Protocol.
Taking the your_chat_bot demo in TuyaOpen as an example, when the app or AI agent sends a control command, the user_event_handler_on interface is triggered. Among these, object types (including boolean, value, enum, bitmap, and string) enter the TUYA_EVENT_DP_RECEIVE_OBJ branch, while raw types enter the TUYA_EVENT_DP_RECEIVE_RAW branch.
void user_event_handler_on(tuya_iot_client_t *client, tuya_event_msg_t *event)
{
    PR_DEBUG("Tuya Event ID:%d(%s)", event->id, EVENT_ID2STR(event->id));
    PR_INFO("Device Free heap %d", tal_system_get_free_heap_size());

    switch (event->id) {
    /*
    ******Omit the intermediate process here******
    */
        /* RECV OBJ DP */
    case TUYA_EVENT_DP_RECEIVE_OBJ: {
        dp_obj_recv_t *dpobj = event->value.dpobj;
        PR_DEBUG("SOC Rev DP Cmd t1:%d t2:%d CNT:%u", dpobj->cmd_tp, dpobj->dtt_tp, dpobj->dpscnt);
        if (dpobj->devid != NULL) {
            PR_DEBUG("devid.%s", dpobj->devid);
        }

        audio_dp_obj_proc(dpobj);

        tuya_iot_dp_obj_report(client, dpobj->devid, dpobj->dps, dpobj->dpscnt, 0);

    } break;

    /* RECV RAW DP */
    case TUYA_EVENT_DP_RECEIVE_RAW: {
        dp_raw_recv_t *dpraw = event->value.dpraw;
        PR_DEBUG("SOC Rev DP Cmd t1:%d t2:%d", dpraw->cmd_tp, dpraw->dtt_tp);
        if (dpraw->devid != NULL) {
            PR_DEBUG("devid.%s", dpraw->devid);
        }

        uint32_t index = 0;
        dp_raw_t *dp = &dpraw->dp;
        PR_DEBUG("dpid:%d type:RAW len:%d data:", dp->id, dp->len);
        for (index = 0; index < dp->len; index++) {
            PR_DEBUG_RAW("%02x", dp->data[index]);
        }

        tuya_iot_dp_raw_report(client, dpraw->devid, &dpraw->dp, 3);

    } break;

    default:
        break;
    }
}
Authorize the development board
Method 1: Authorize by code
Modify the header file. For detailed steps, refer to Authorize Devices.
For example, open the your_chat_bot project, locate the tuya_config.h file at the following path: apps/tuya.ai/your_chat_bot/include/tuya_config.h, and modify the following three parameters:
TUYA_PRODUCT_ID: The product ID (PID) generated during product creation.TUYA_OPENSDK_UUID: The UUID can be obtained free of charge. Please contact Tuya support to receive it.TUYA_OPENSDK_AUTHKEY: The AuthKey can be obtained free of charge. Please contact Tuya support to receive it.
Example:
#ifndef TUYA_PRODUCT_ID
#define TUYA_PRODUCT_ID "p320pepzvmm1g***"//PID
#endif

#define TUYA_OPENSDK_UUID    "uuidxxxxxxxxxxxxxxxx"             // Change to the correct UUID.
#define TUYA_OPENSDK_AUTHKEY "keyxxxxxxxxxxxxxxxxxxxxxxxxxxxxx" // Change to the correct AuthKey.
Method 2: Authorize by tool
In Tuya Uart Tool, select the serial port and BaudRate for flashing, click Start to enable the serial port, and then click Authorize.

Compile and flash
Enter the following command in the terminal.
tos.py build && tos.py flash
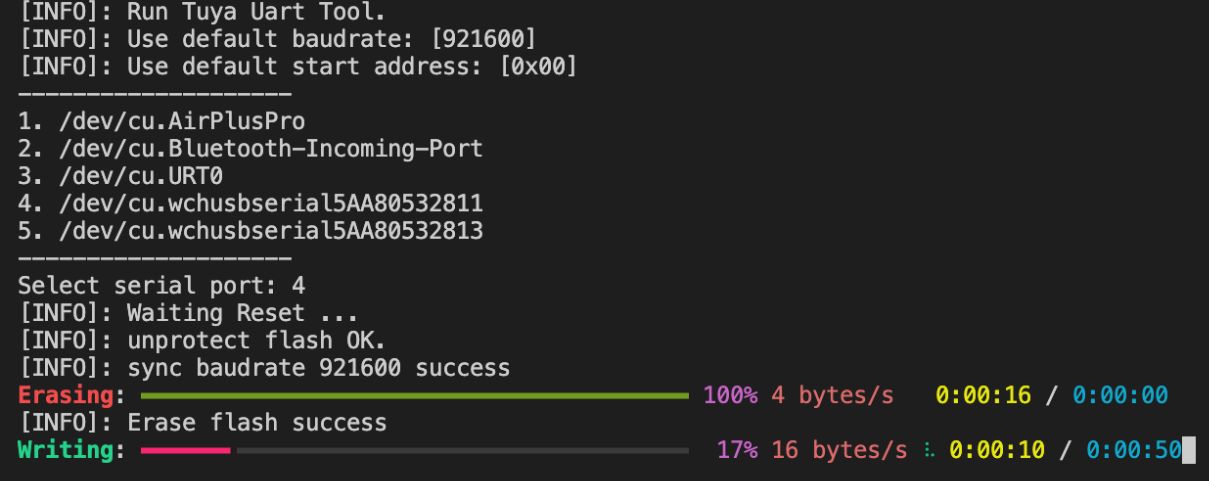
The T5AI-Board development board is configured with two serial ports: one for flashing and the other for log output. If flashing failed, switch to another port number and try again.
FAQs
Flashing always failed during the write phase. How can I resolve this?
Install the driver to try to resolve this issue.
Is this page helpful?
YesFeedbackIs this page helpful?
YesFeedback


