Quick Start
This topic describes how to create and set up a cloud development project, and how to integrate with Tuya’s cloud development.
This documentation is no longer updated. For more information, see Best Practice.
Step 1: Create a project
A project is a collection of resources on the Tuya IoT Development Platform. Resources assigned to each cloud project are isolated from those for other cloud projects. You can create Custom and Smart Home projects on the platform.
For more information about the differences between both types of projects, see Development Method. For more information about project creation steps, see Manage Projects.

Step 2: Configuration wizard
After you configure the basic information of the project, you are navigated to the page of the configuration wizard.
-
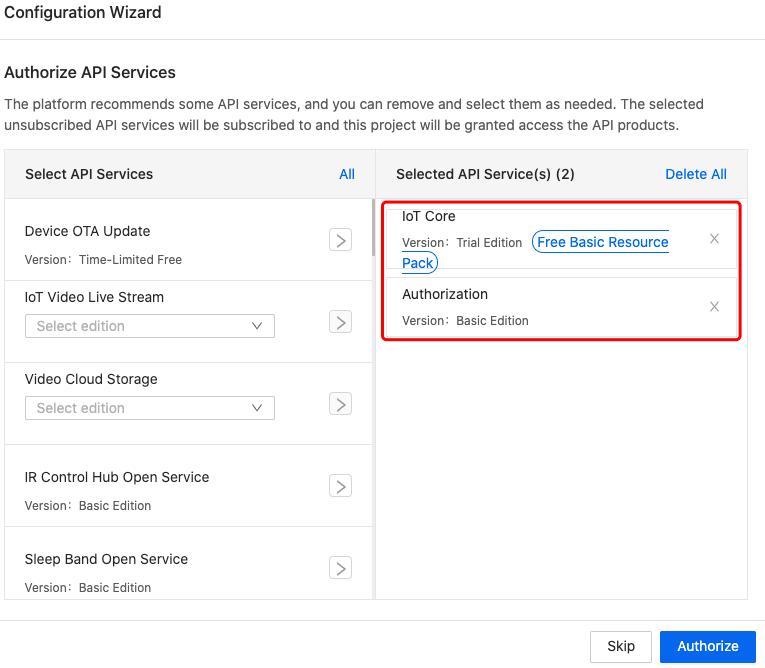
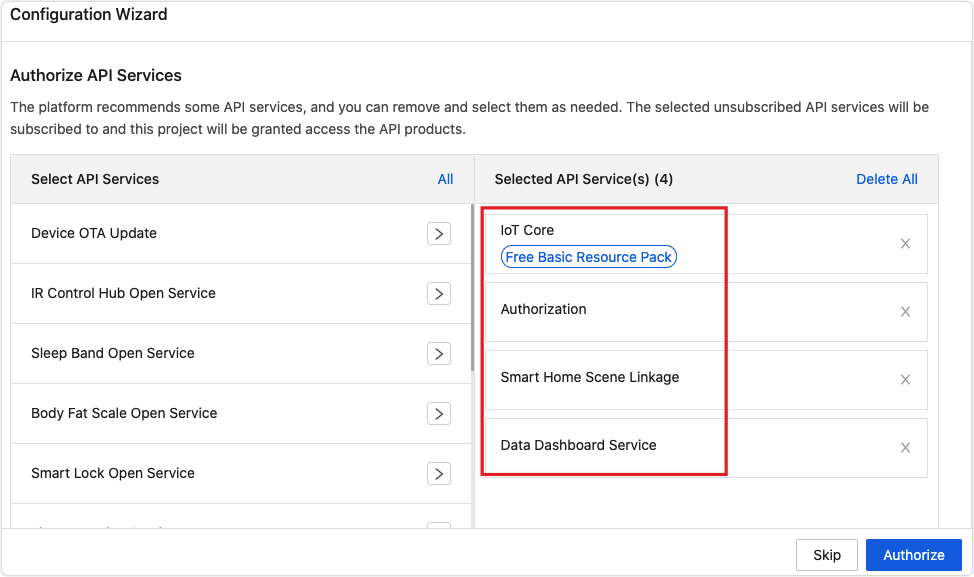
Authorize the project to access multiple API services.
By default, the APIs that support the specified development method are selected for the project on the platform. You can add or delete the default APIs, or select other APIs. The following list shows the default APIs for each development method.If you have not subscribed to the selected APIs, the platform will automatically subscribe to them for your account and authorize this project to access them.
-
Custom development:
- IoT Core
- Authorization
-
Smart home:
- IoT Core
- Authorization
- Smart Home Scene Linkage
- Data Dashboard Service
-
-
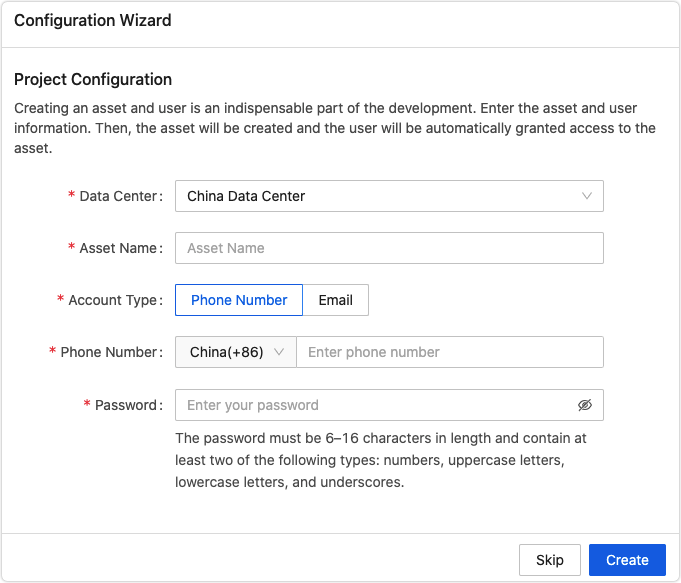
Quickly create an asset and grant a specific user access to the asset.
This step is only required for the Custom development method. You can skip this step if you select the Smart Home development method. If you skip this step, you can create users and assets in the specified tabs of the cloud development project.
Step 3: Link devices
The process to link devices is different between the Custom and Smart Home projects.
Custom development
The following steps describe the overall process to link devices for the custom development project. For more information about specific steps, see the related documentation.
-
Create users.
After a user is added to a project, you can authorize the user to manage the specified assets.
-
Create assets.
Cloud development allows you to manage the devices and assign the device permissions by asset IDs.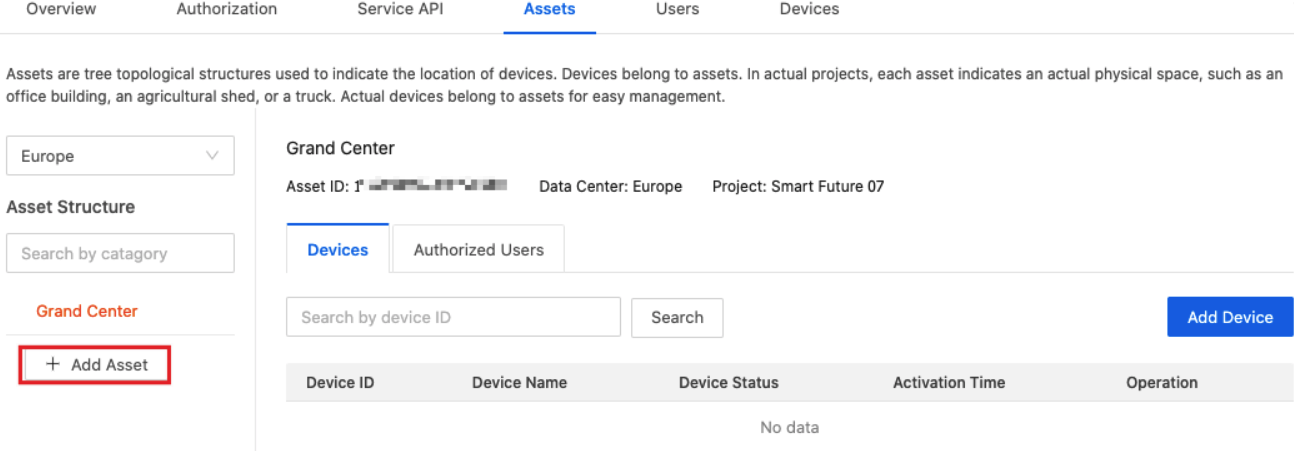
-
Authorize users.
You can authorize users to add, delete, and transfer devices under an asset. -
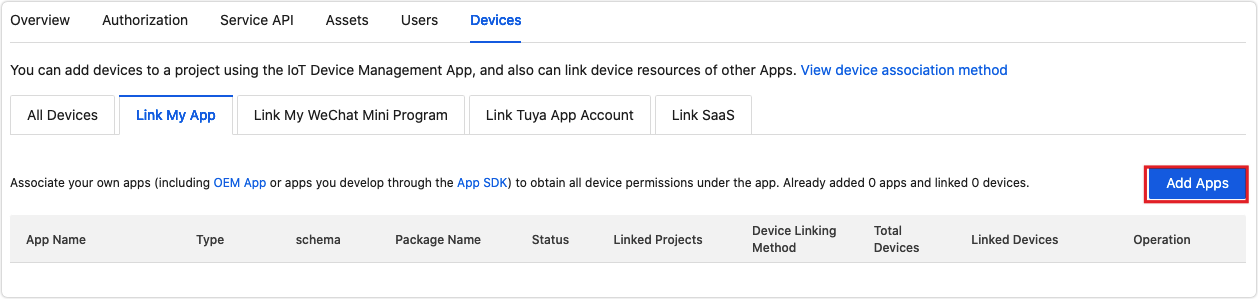
Add devices.
After you create an asset, you can add devices to the asset in multiple ways. The Smart Industry app is recommended for device pairing.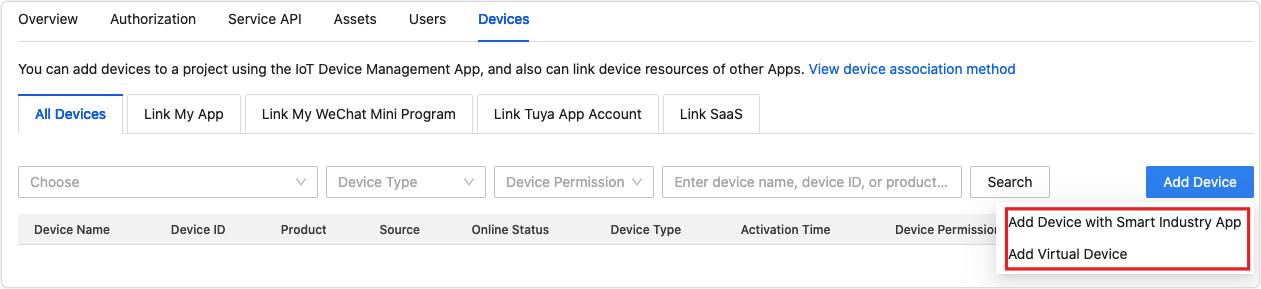
Smart home
After you create a project, you can link the project with devices that have been paired with smart home applications.
Several linking methods are available. For more information, see Link Devices.
Step 4: Configure functions
You can request access to cloud APIs and enable the message service on the Tuya IoT Development Platform.
-
Subscribe to cloud services
For more information, see Manage API Services.
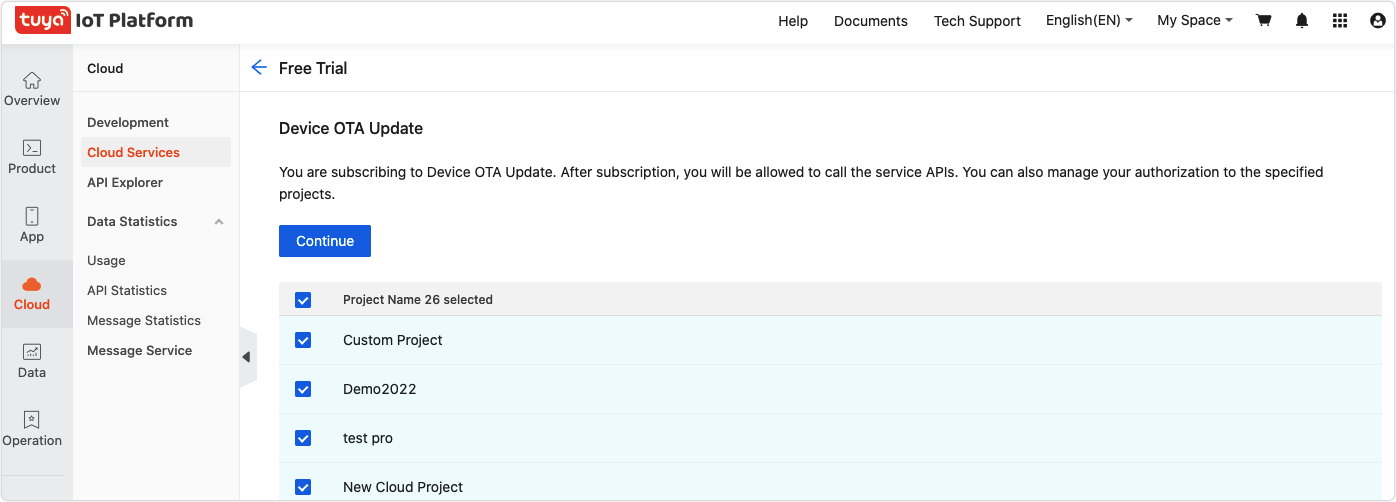
On the page of Cloud Services, select your desired cloud service and click Free Trial. Also, you can click View Details to enter the details page and subscribe to the service.
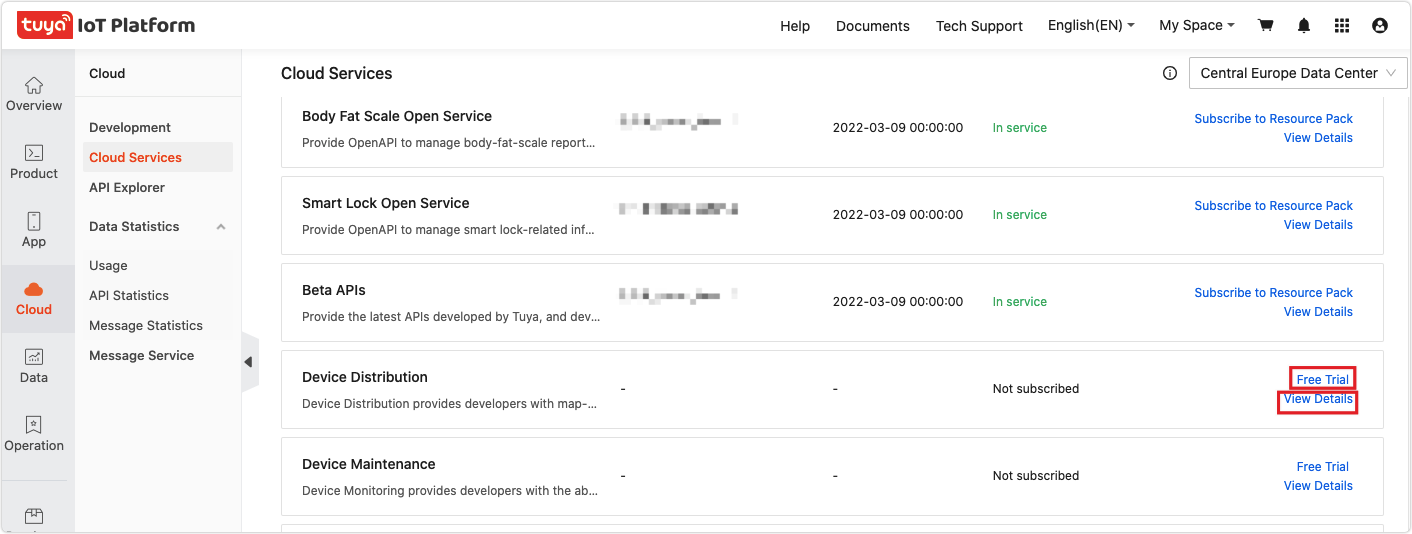
On the subscription page, select and authorize cloud projects to access this service. After authorization, the project can call this API.
-
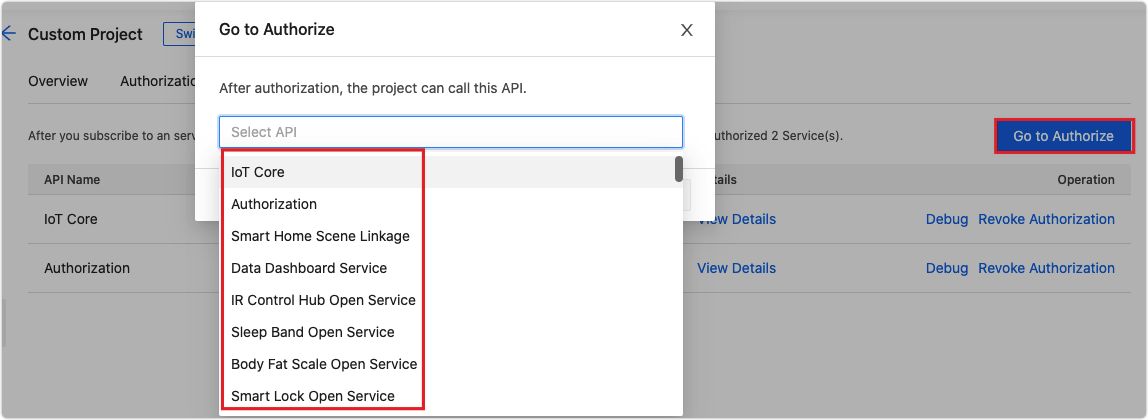
Authorize the project to call multiple APIs
If a subscribed API is not authorized to a project, choose Cloud > Development > Cloud Management, and click the created project to enter the details page. Click the Service API tab > Go to Authorize, find the subscribed API, and authorize the project. And then, the project can call this API with the authorization key.
-
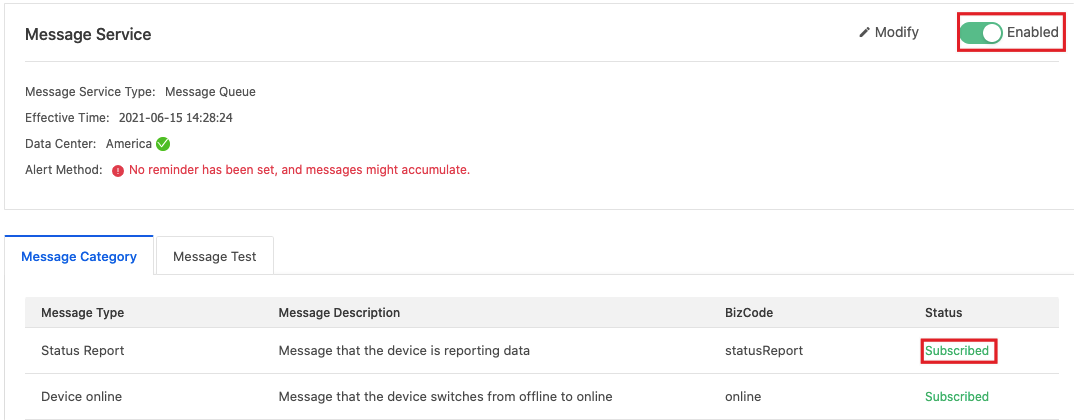
Enable message service
On the page of Message Service, you can enable this service and configure parameters to get alerts of excessive messages.
For more information, see Message Service.
Step 5: Develop and call APIs
After you subscribe to an API service and authorize the specified project to use it, you can debug API calls with the API Explorer on the platform. For more information, see API Explorer.
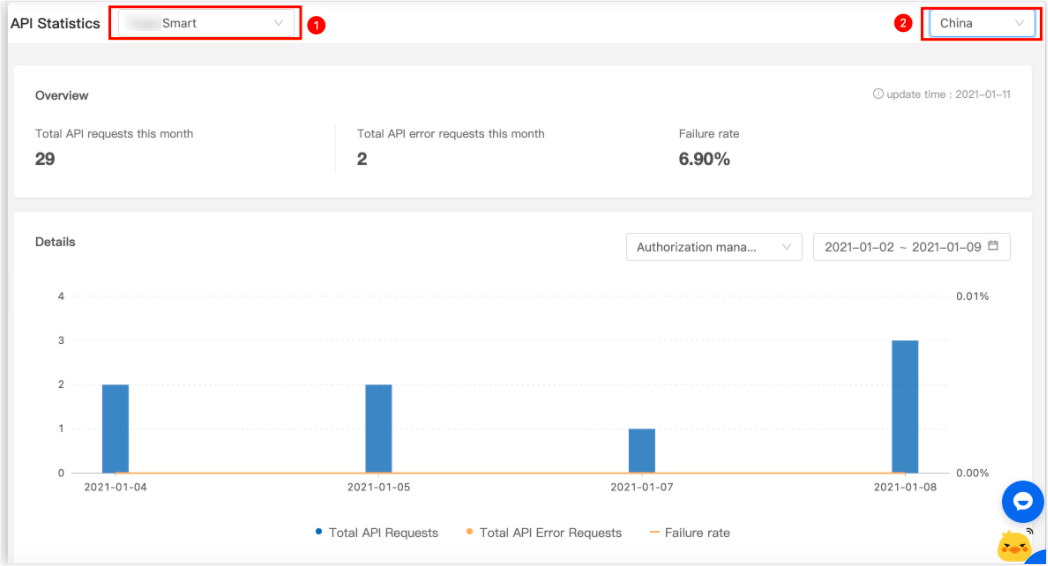
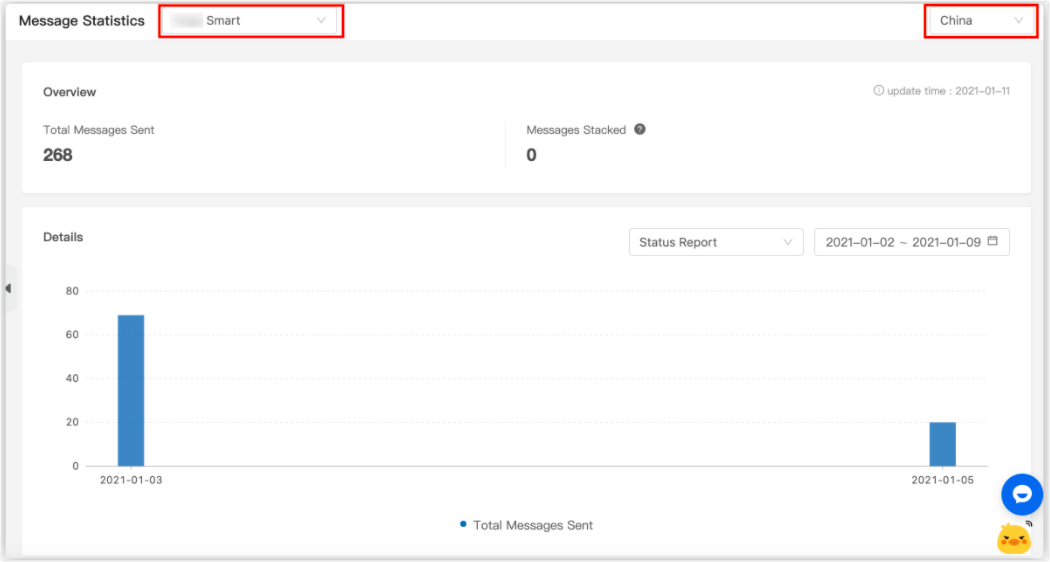
Step 6: View data statistics
You can view your data statistics at Tuya IoT Development Platform > Cloud > Data Statistics. For more information, see Data Statistics. Tuya provides two types of data statistics.
-
API statistics
-
Message statistics
A wealth of paid cloud services are provided for you. You can subscribe to the cloud services on a pay-as-you-go basis. View pricing details>>
Is this page helpful?
YesFeedbackIs this page helpful?
YesFeedback


