Manage Assets
Tuya Developer Platform enables centralized management of devices and authorization by asset ID.
This feature has been unavailable starting from June 20, 2023. We recommend that you build project SaaS to manage users under the project. If you still want to use this feature, go to the Cloud Project Asset Management.
Create an asset
An asset is a multi-layer tree structure. You can grant administrator permissions to users and add devices to each node.
-
Go to My Cloud Projects.
-
Click the target project.
-
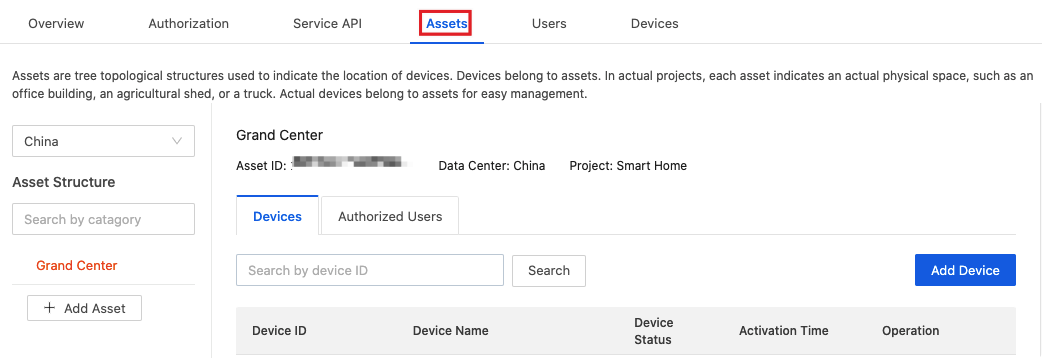
Click Assets in the top navigation bar.
-
Click + Add Asset.
-
In the Add Asset dialog box, select the parent catalog, enter the asset name, and then click OK.
Note: If no parent catalog exists or you do not select the parent catalog, a new asset structure will be added.
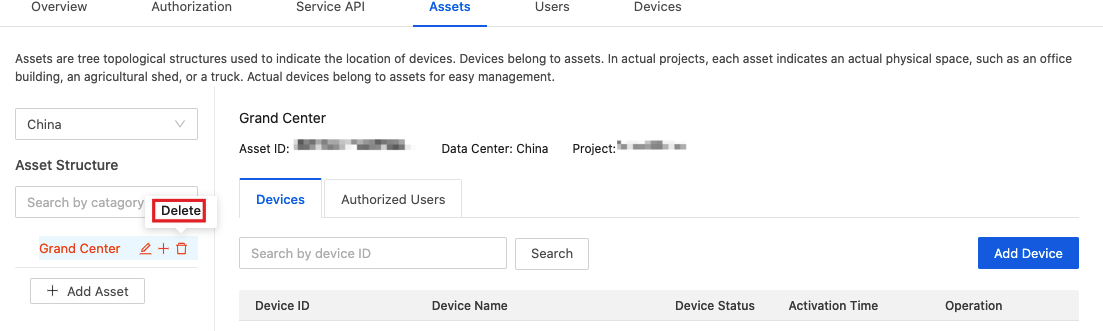
Delete assets
You can delete unwanted assets. Before you delete an asset, remove the devices from the asset.
Note: This action will delete the asset and its sub-assets and cannot be undone. Proceed with caution.
-
Go to My Cloud Projects.
-
Click the target project.
-
Click Assets in the top navigation bar.
-
Hover over the destination asset and click Delete.
-
Click OK.
Manage asset structure
-
Go to My Cloud Projects.
-
Click the target project.
-
Click Assets in the top navigation bar.
-
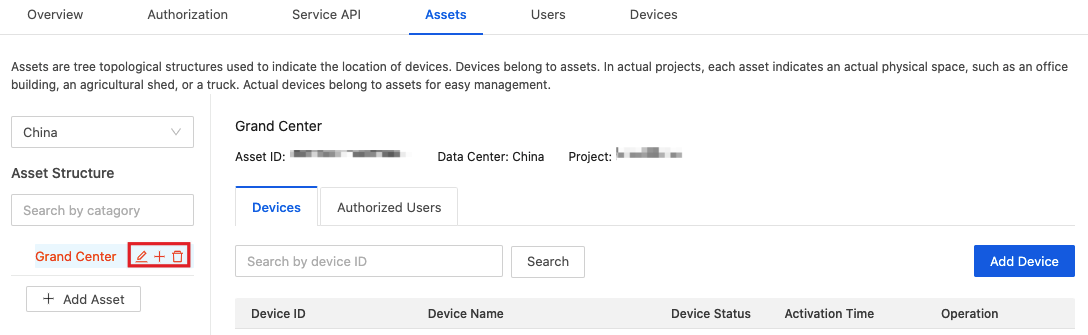
In the Asset Structure area, you can manage your assets. The following operations are supported:
- Edit asset information
- Add subordinate asset catalogs
- Delete assets
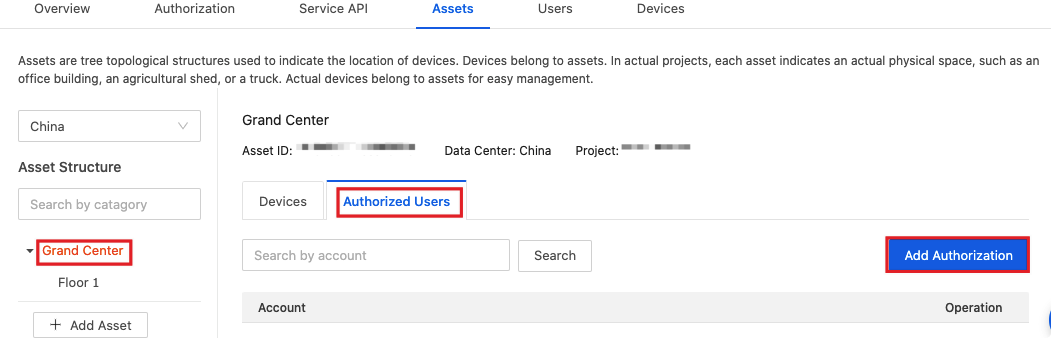
Authorize users
You can authorize users to add, delete, and transfer devices under an asset.
-
Go to My Cloud Projects.
-
Click the target project.
-
Click Assets in the top navigation bar.
-
On the Authorized Users tab, select an asset catalog, and click Add Authorization.
-
In the Add Authorization dialog box, enter the user account and click Add.
-
(Optional) You can click Cancel Authorization to cancel the user’s administrator permissions for the devices under the asset.
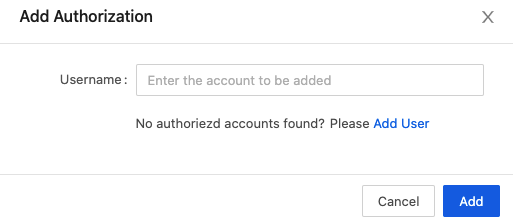
Note: The user account must be linked with a project before the authorization of the specified asset can be granted. For more information about how to link a user account with a project, see Add user.
Manage devices under assets
After you create an asset, you can add devices. Also, you can unlink devices from the asset or transfer them to another asset.
Add a device
You can add devices with the Smart Industry app and add virtual devices for debugging. Take the latter one for example.
-
Go to My Cloud Projects.
-
Click the target project.
-
Click Assets in the top navigation bar.
-
Click the Devices tab and click Add Device. The following operations are supported:
- Add devices with the Smart Industry app
- Add virtual devices for debugging
-
Add devices:
-
Add Devices with Smart Industry App: Provides examples of basic features such as device pairing, registration, login, and asset management. You can create apps and add devices on the app. For more information, see Pair Devices.
-
Add Virtual Devices for Debugging: Select the target asset and product category and click Add Virtual Devices.
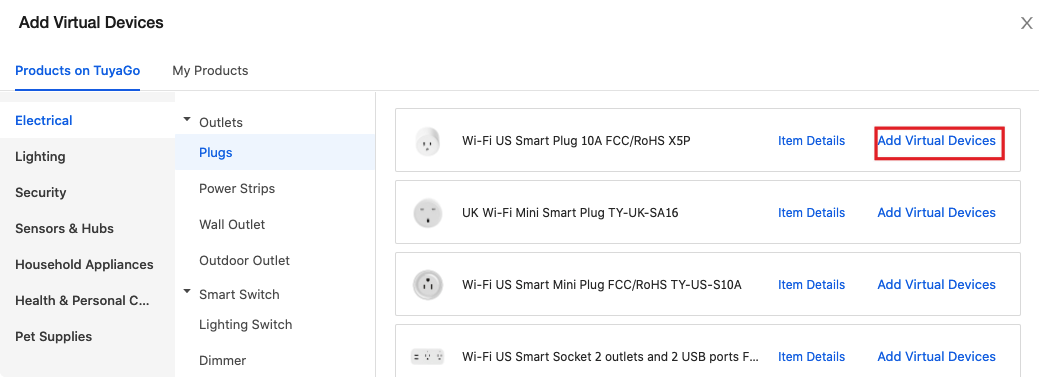
After the operations are completed, the added devices will be automatically synchronized to the assets.
-
-
(Optional) You can click Unlink to unlink the device from the asset.
Transfer devices
You can transfer the devices from the current asset to other asset catalogs. Take the following steps:
-
Go to My Cloud Projects.
-
Click the target project.
-
Click Assets in the top navigation bar.
-
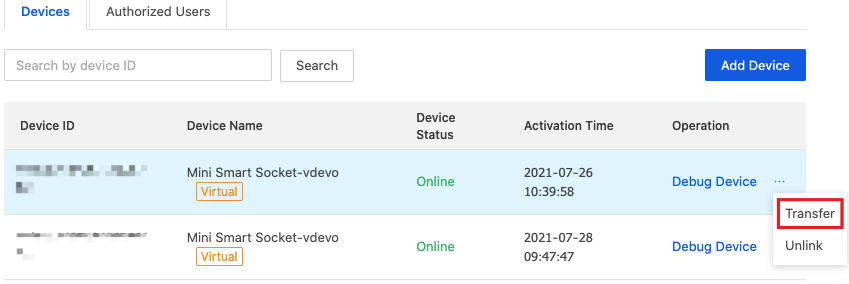
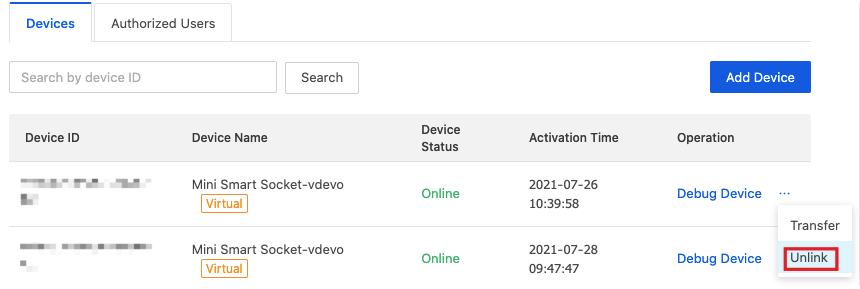
On the Devices tab, find the device to be managed, and click … > Transfer in the Operation column.
-
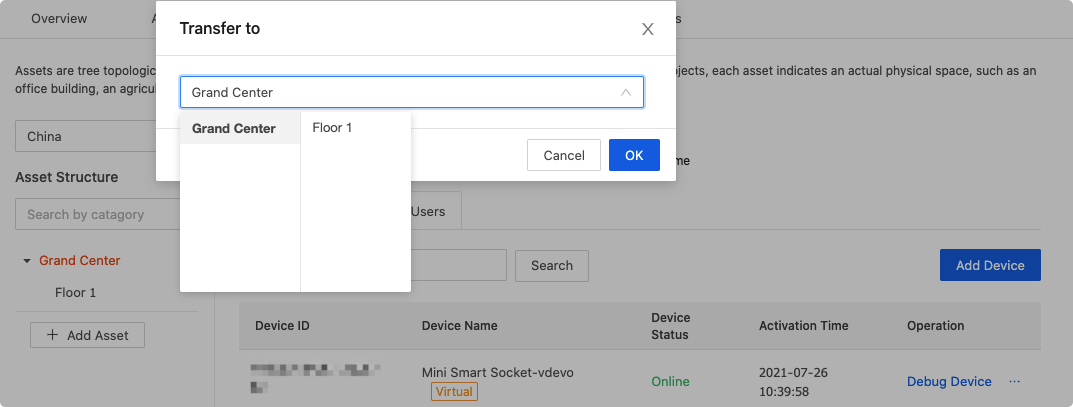
Select the destination asset catalog and click OK.
Unlink devices
You can unlink the devices from the current asset. Take the following steps:
-
Go to My Cloud Projects.
-
Click the target project.
-
Click Assets in the top navigation bar.
-
On the Devices tab, find the device to be managed, and click … > Unlink in the Operation column.
-
Click OK.
Note: The unlinking action cannot be undone. Proceed with caution.
Is this page helpful?
YesFeedbackIs this page helpful?
YesFeedback


