Develop Projects on Assets, Users and App
With custom development solutions in the cloud development section of Tuya Developer Platform, you can build projects for most industry scenarios in which assets and users can be managed. You can create multiple applications for a custom development project to share the assets and users. This topic describes how to create a cloud development project with custom development methods. In the following example, a smart office project is created.
Operation purpose
In the cloud development section of Tuya Developer Platform, simulate the remote management of smart lights on the first floor of Building A of East Lake Square. For example, turn on and off the smart lights and switch the working modes.
Procedure
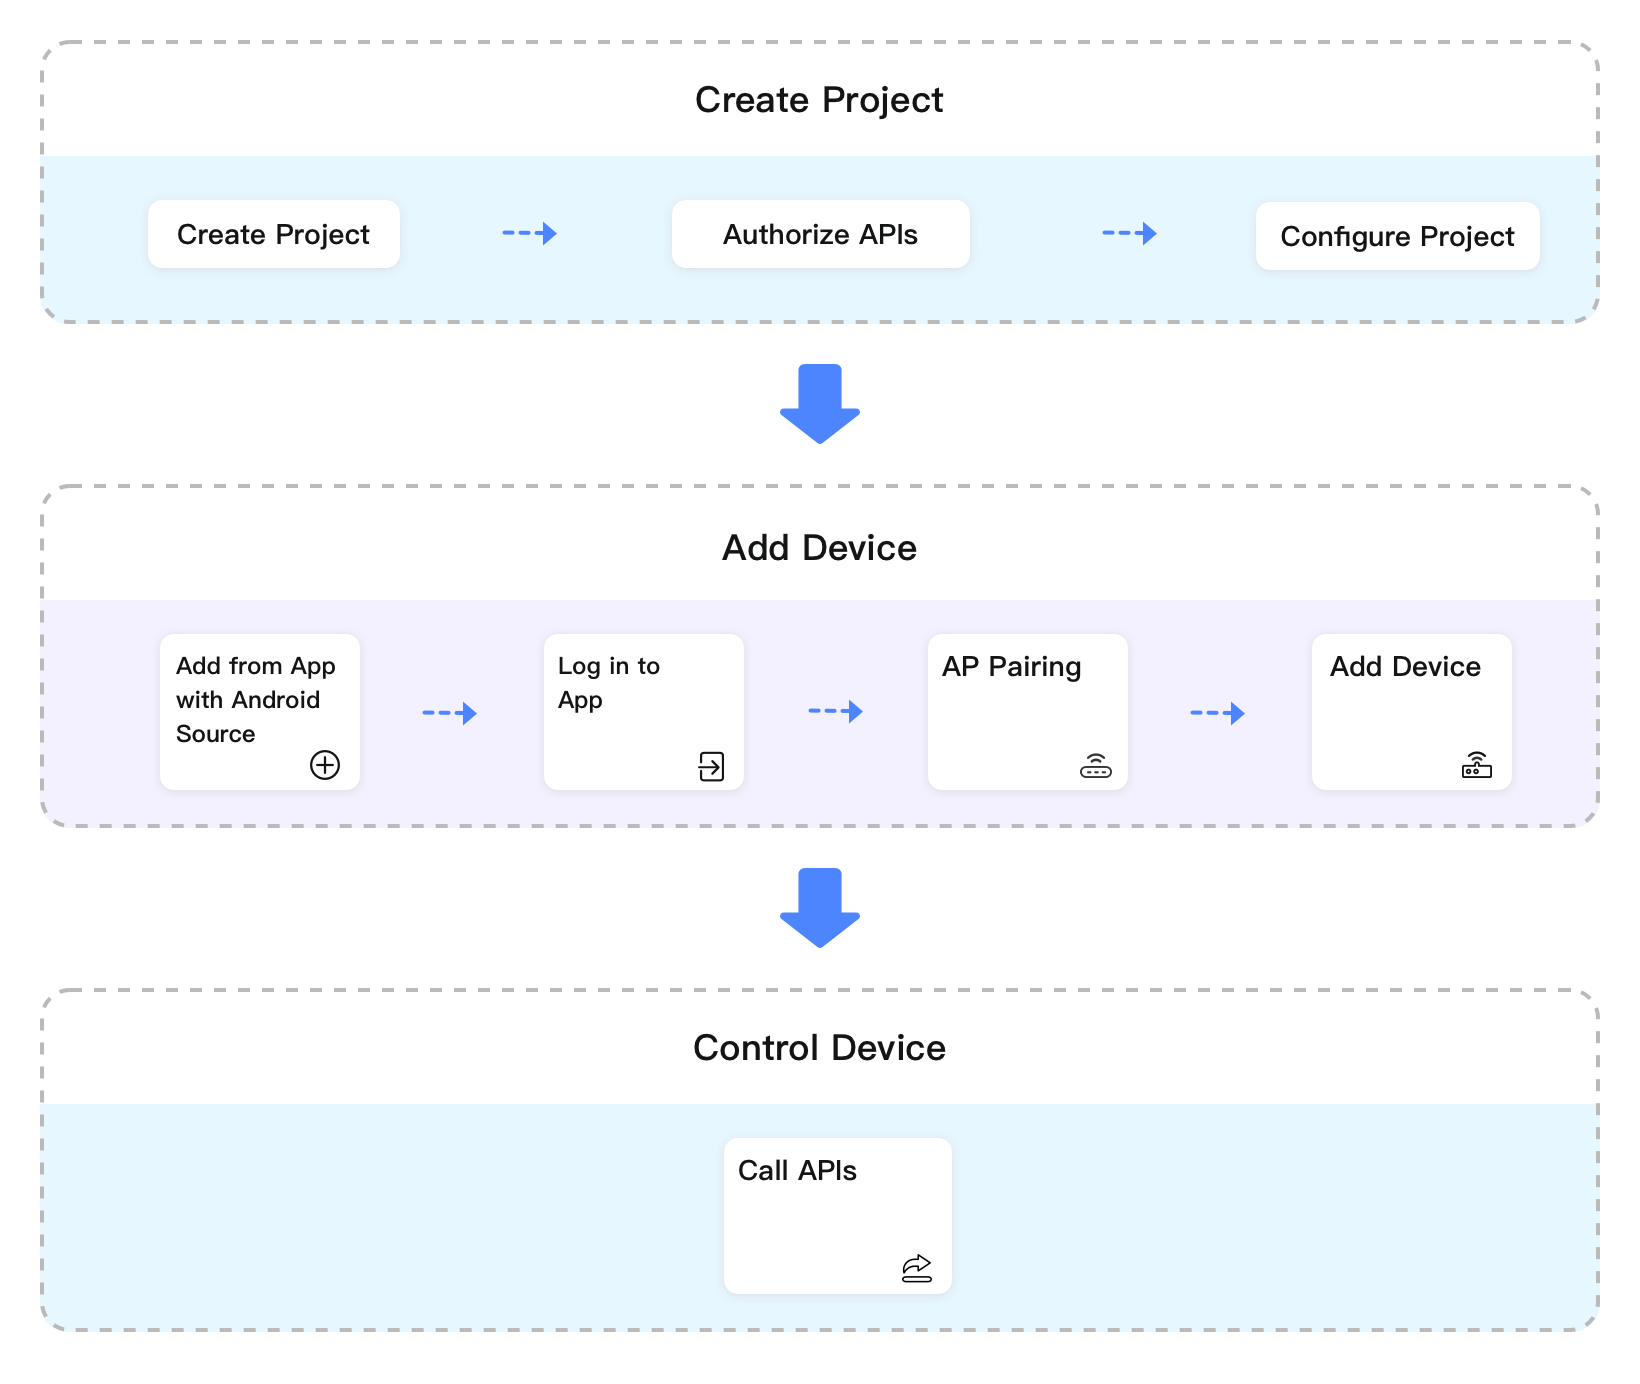
Cloud development projects support a variety of ways to link devices. This topic describes the whole process of project creation, taking Link Devices by Android App for example. The following figure shows the procedure.
Create a project
-
Log in to the platform.
-
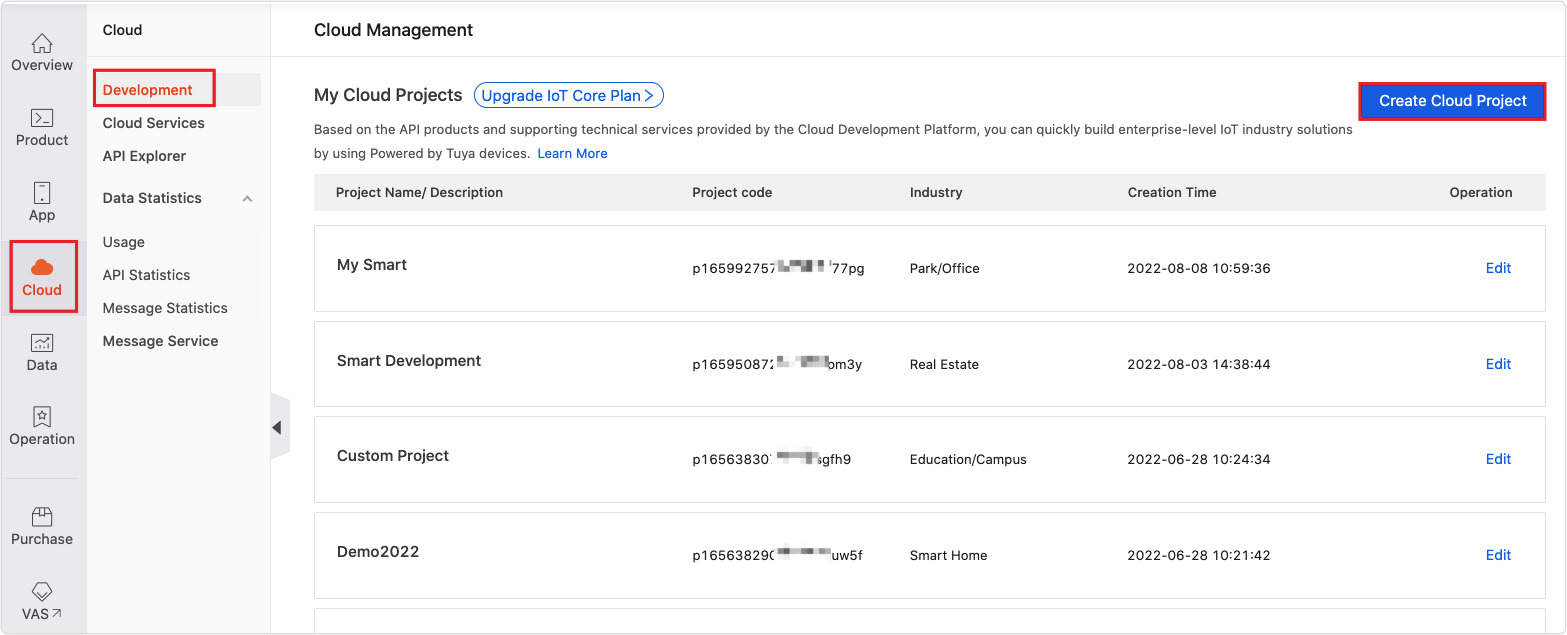
In the left-side navigation bar, choose Cloud > Development.
-
On the Cloud Management page, click Create Cloud Project.
-
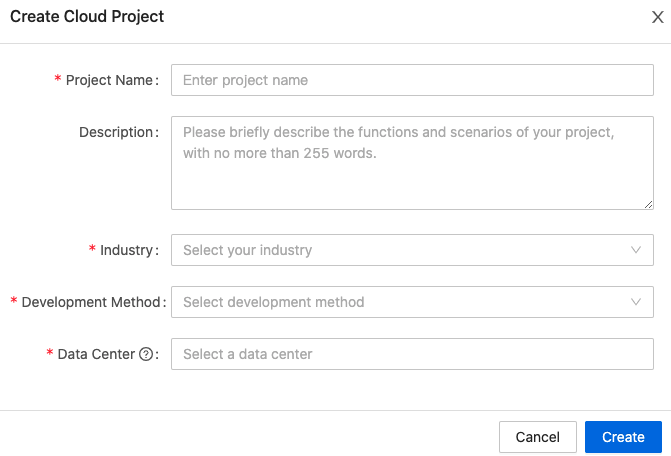
On the Create Cloud Project window, configure Project Name, Description, Industry, Development Method, and Data Center. From the Development Method drop-down list, select Custom.
Tuya has deployed six data centers around the world to provide more stable cloud services. You can select one or more desired zones, which can be modified later in your project management.
-
Click Create to continue with project configuration.
-
On the page of Authorize API Services, add Device OTA Update and Industry Project Client Service, and click Authorize.
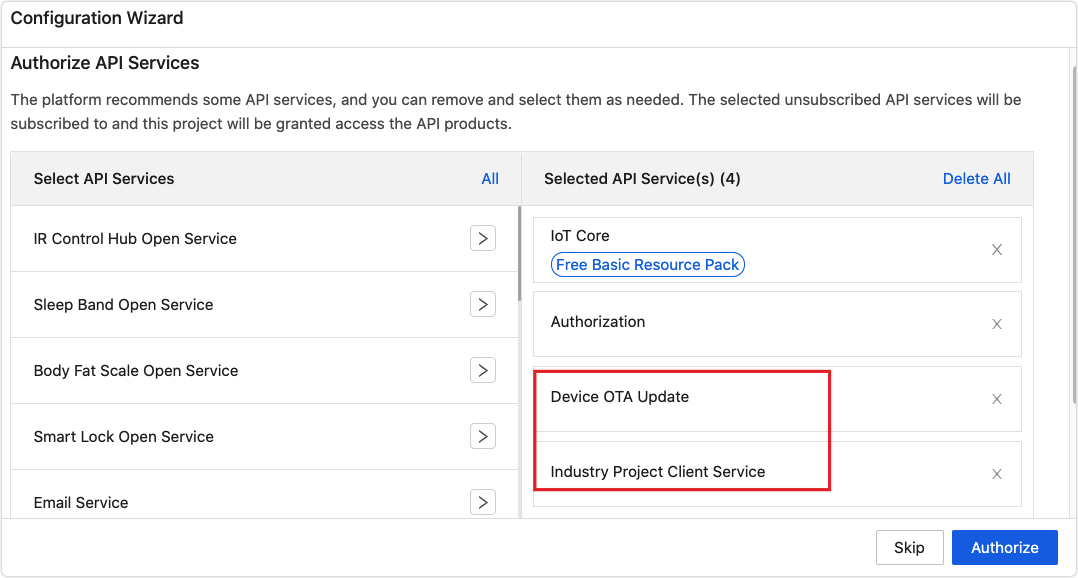
The IoT Core and Authorization API services have been selected by default.
-
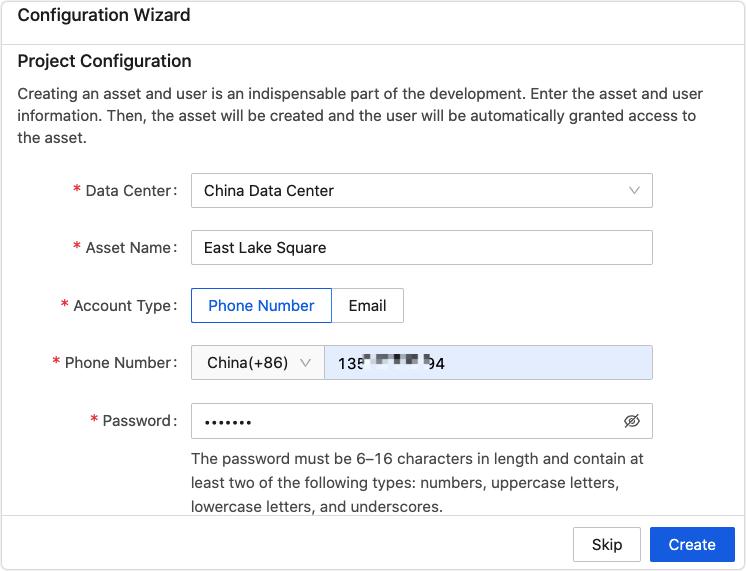
Enter the asset and account information. Then, the asset will be automatically created and the account will be granted access to the asset. In this example, East Lake Square is set as the asset name.
For more information about assets, see Manage Assets.
-
Click Create.
Create an Android app
-
Download the Sample project to a local directory.
-
Generate your own
keyStorefile for Sample and note down the file password. Take the following steps:Currently, the extension of the generated file is
.jks, instead of the previous.keyStore.- Import the Sample file through Android Studio.
- Click Build.
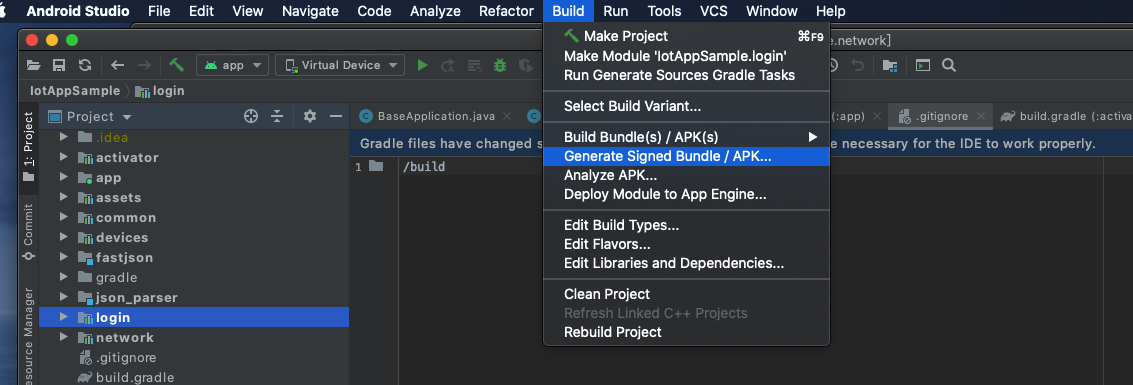
- Select Generate Signed Bundle / APK from the drop-down list.
- Select APK and follow the prompts to create a
keyStorefile. - According to the
keyStorefile, configure signingConfigs in the build.gradle of the project. InstoreFile, set the storage location of.jks.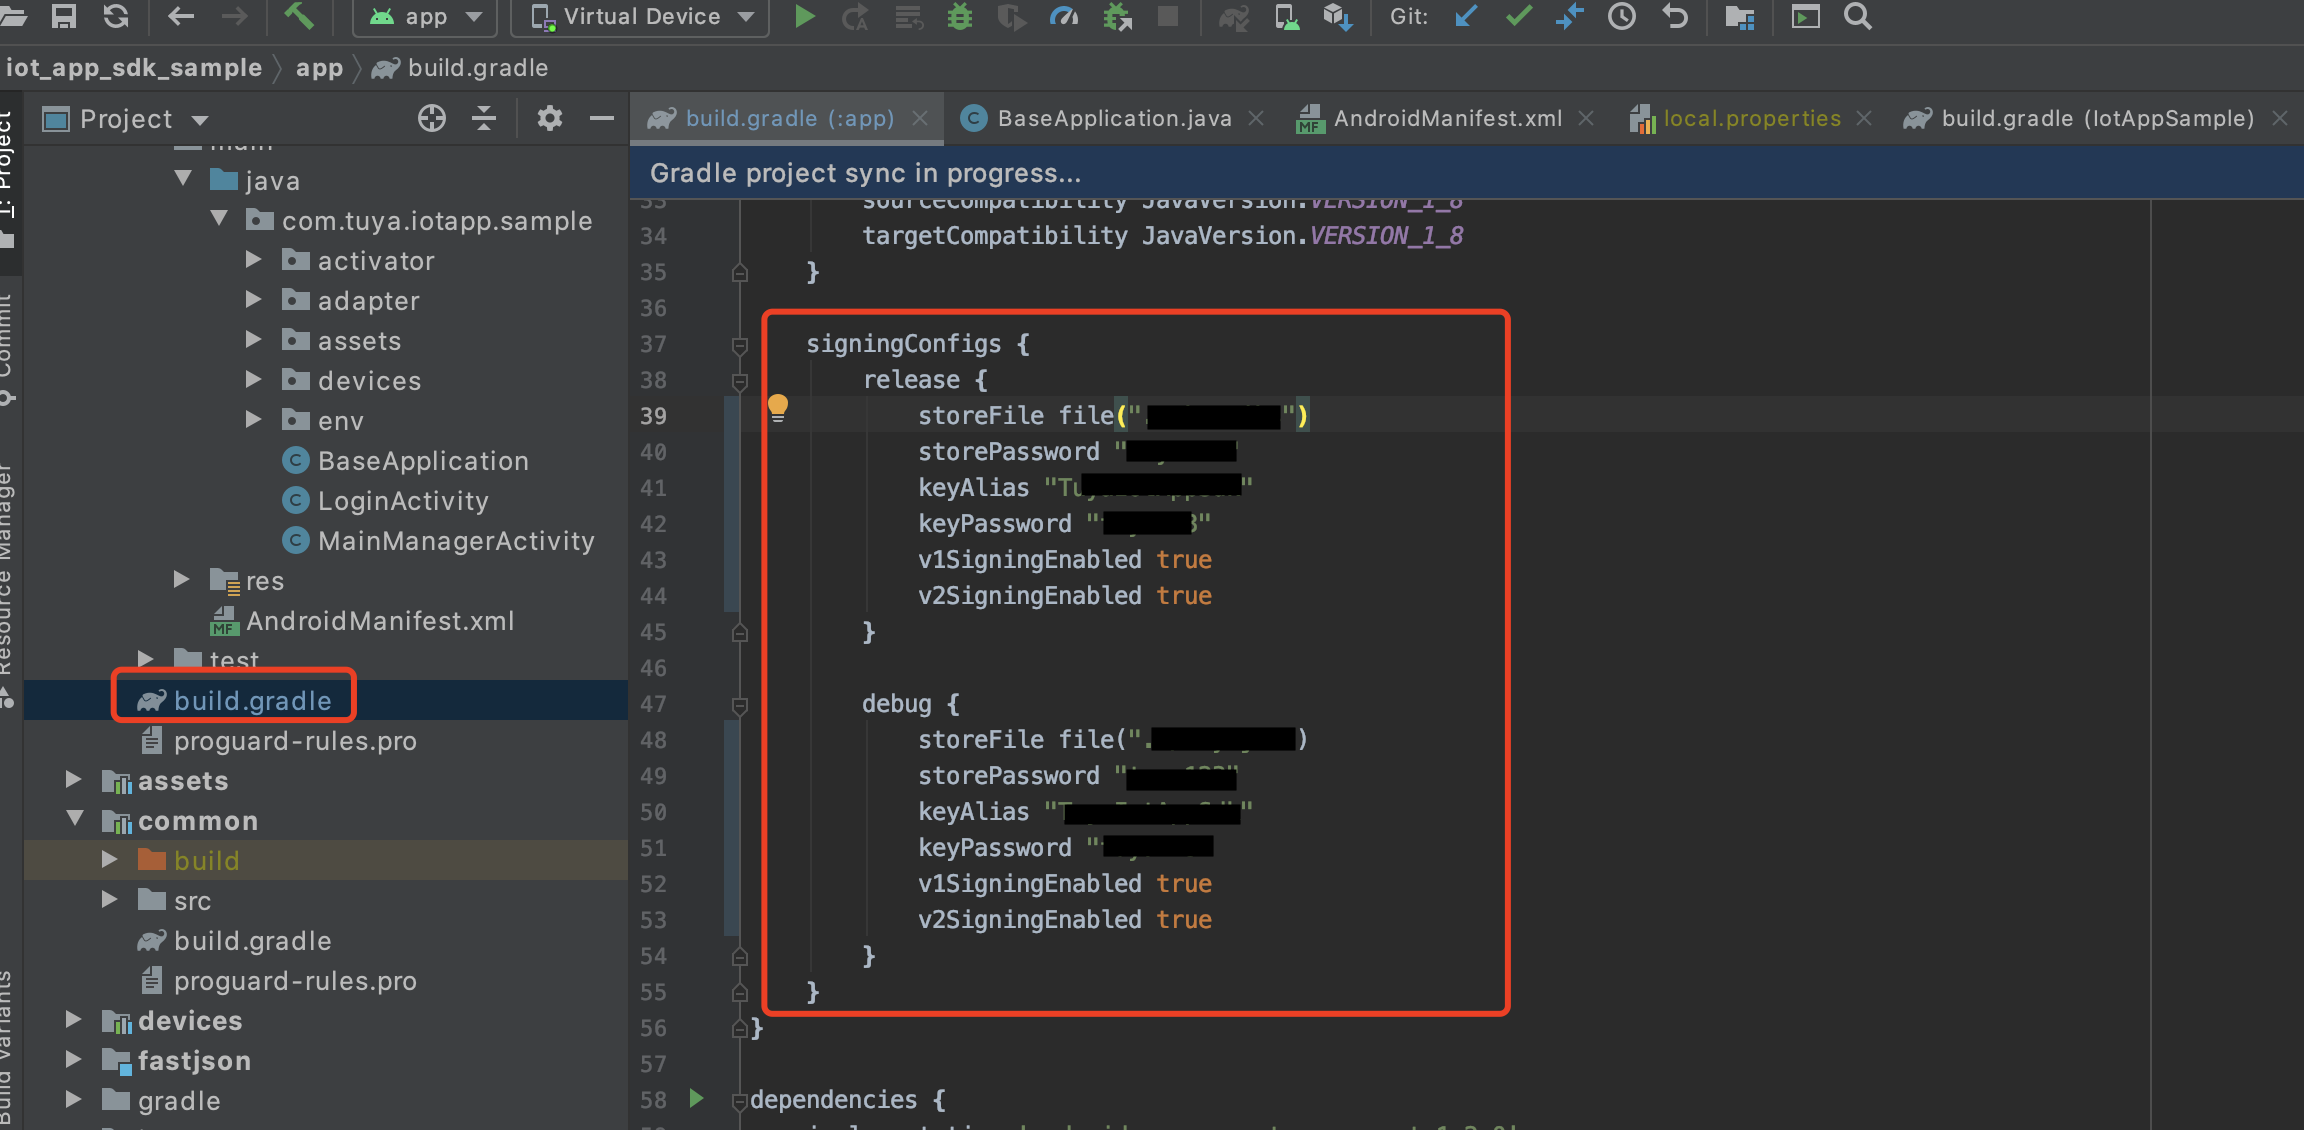
-
Run the following command in the
.jksstorage path to filter the generated.jksfiles.keytool -list -v -keystore xx.jks {Enter a password} -
Get the value of SHA1 key in the file.
Valid from Tue Mar 16 10:22:14 CST 2021 to Sun Mar 06 10:22:14 CST 2061 Certificate fingerprint: MD5: 6B:8C:94:15:35:7C:2E:E8:6E:76:7F:8C:F9:4B:05:BC SHA1: 8F:AC:5D:50:65:22:C2:2A:E4:96:3D:8F:9E:DC:5B:43:11:49:55:B1 SHA256: 0B:98:89:D8:D5:FC:B1:23:9A:76:B1:2B:8F:4C:5E:24:BF:E7:60:E8:FF:EF:E9:40: 48:14:60:D3:62:00:5C:5F Signature algorithm name: SHA256withRSA Subject public key algorithm: 2048-bit RSA key Version: 3 -
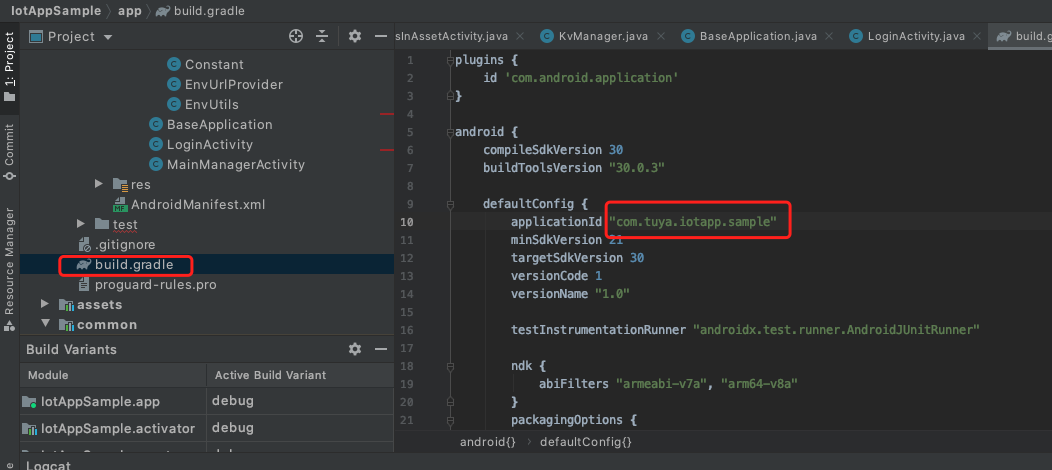
Get the package name. You can customize the package name.
-
Create an application.
-
In the left-side navigation pane of the platform, choose Cloud > Development > My Cloud Projects, and click a project.
-
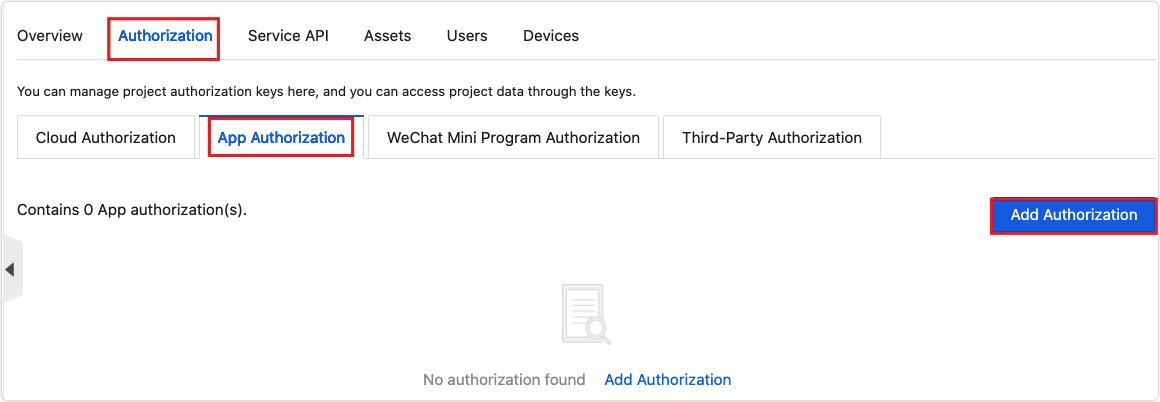
In the top navigation bar, choose Authorization > App Authorization and click Add Authorization.
-
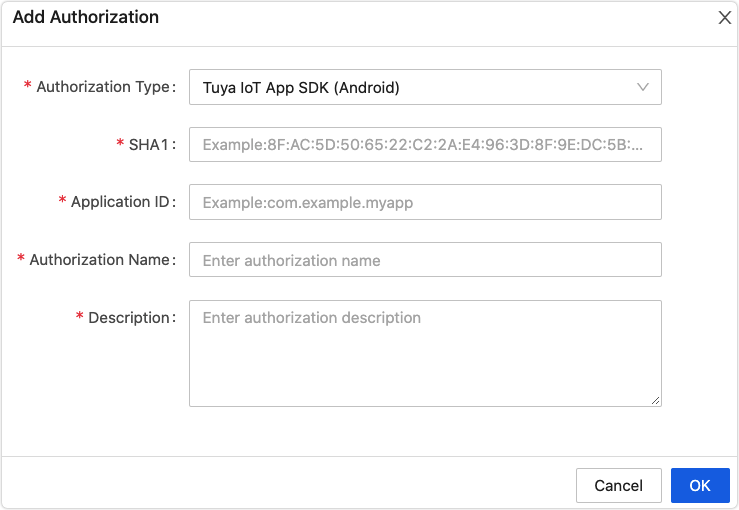
In the Add Authorization window, complete the required information.
- Authorization Type: Tuya app SDK (Android).
- SHA1: See the SHA1 key in the
.jksfile. - Application ID: the package name, for example,
com.tuya.iotapp.sample. - Authorization Name: custom.
- Description: custom.
-
-
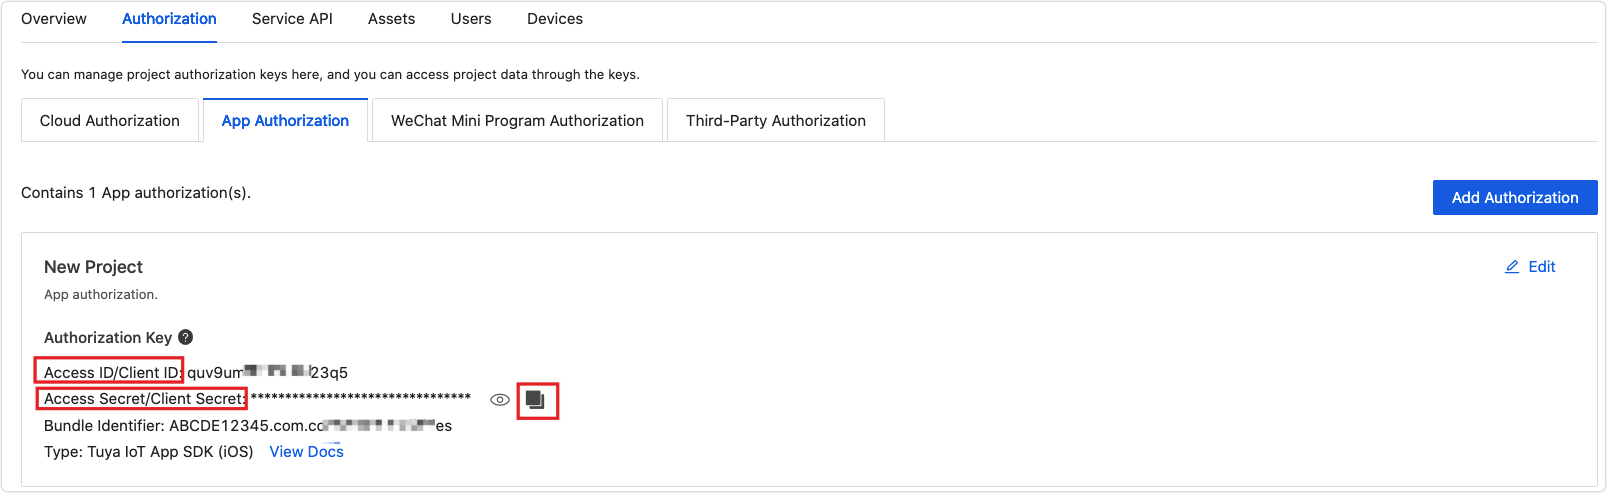
Choose Authorization > App Authorization, and on the page that appears, get the values of Client ID and Client Secret of the created Andriod application.
-
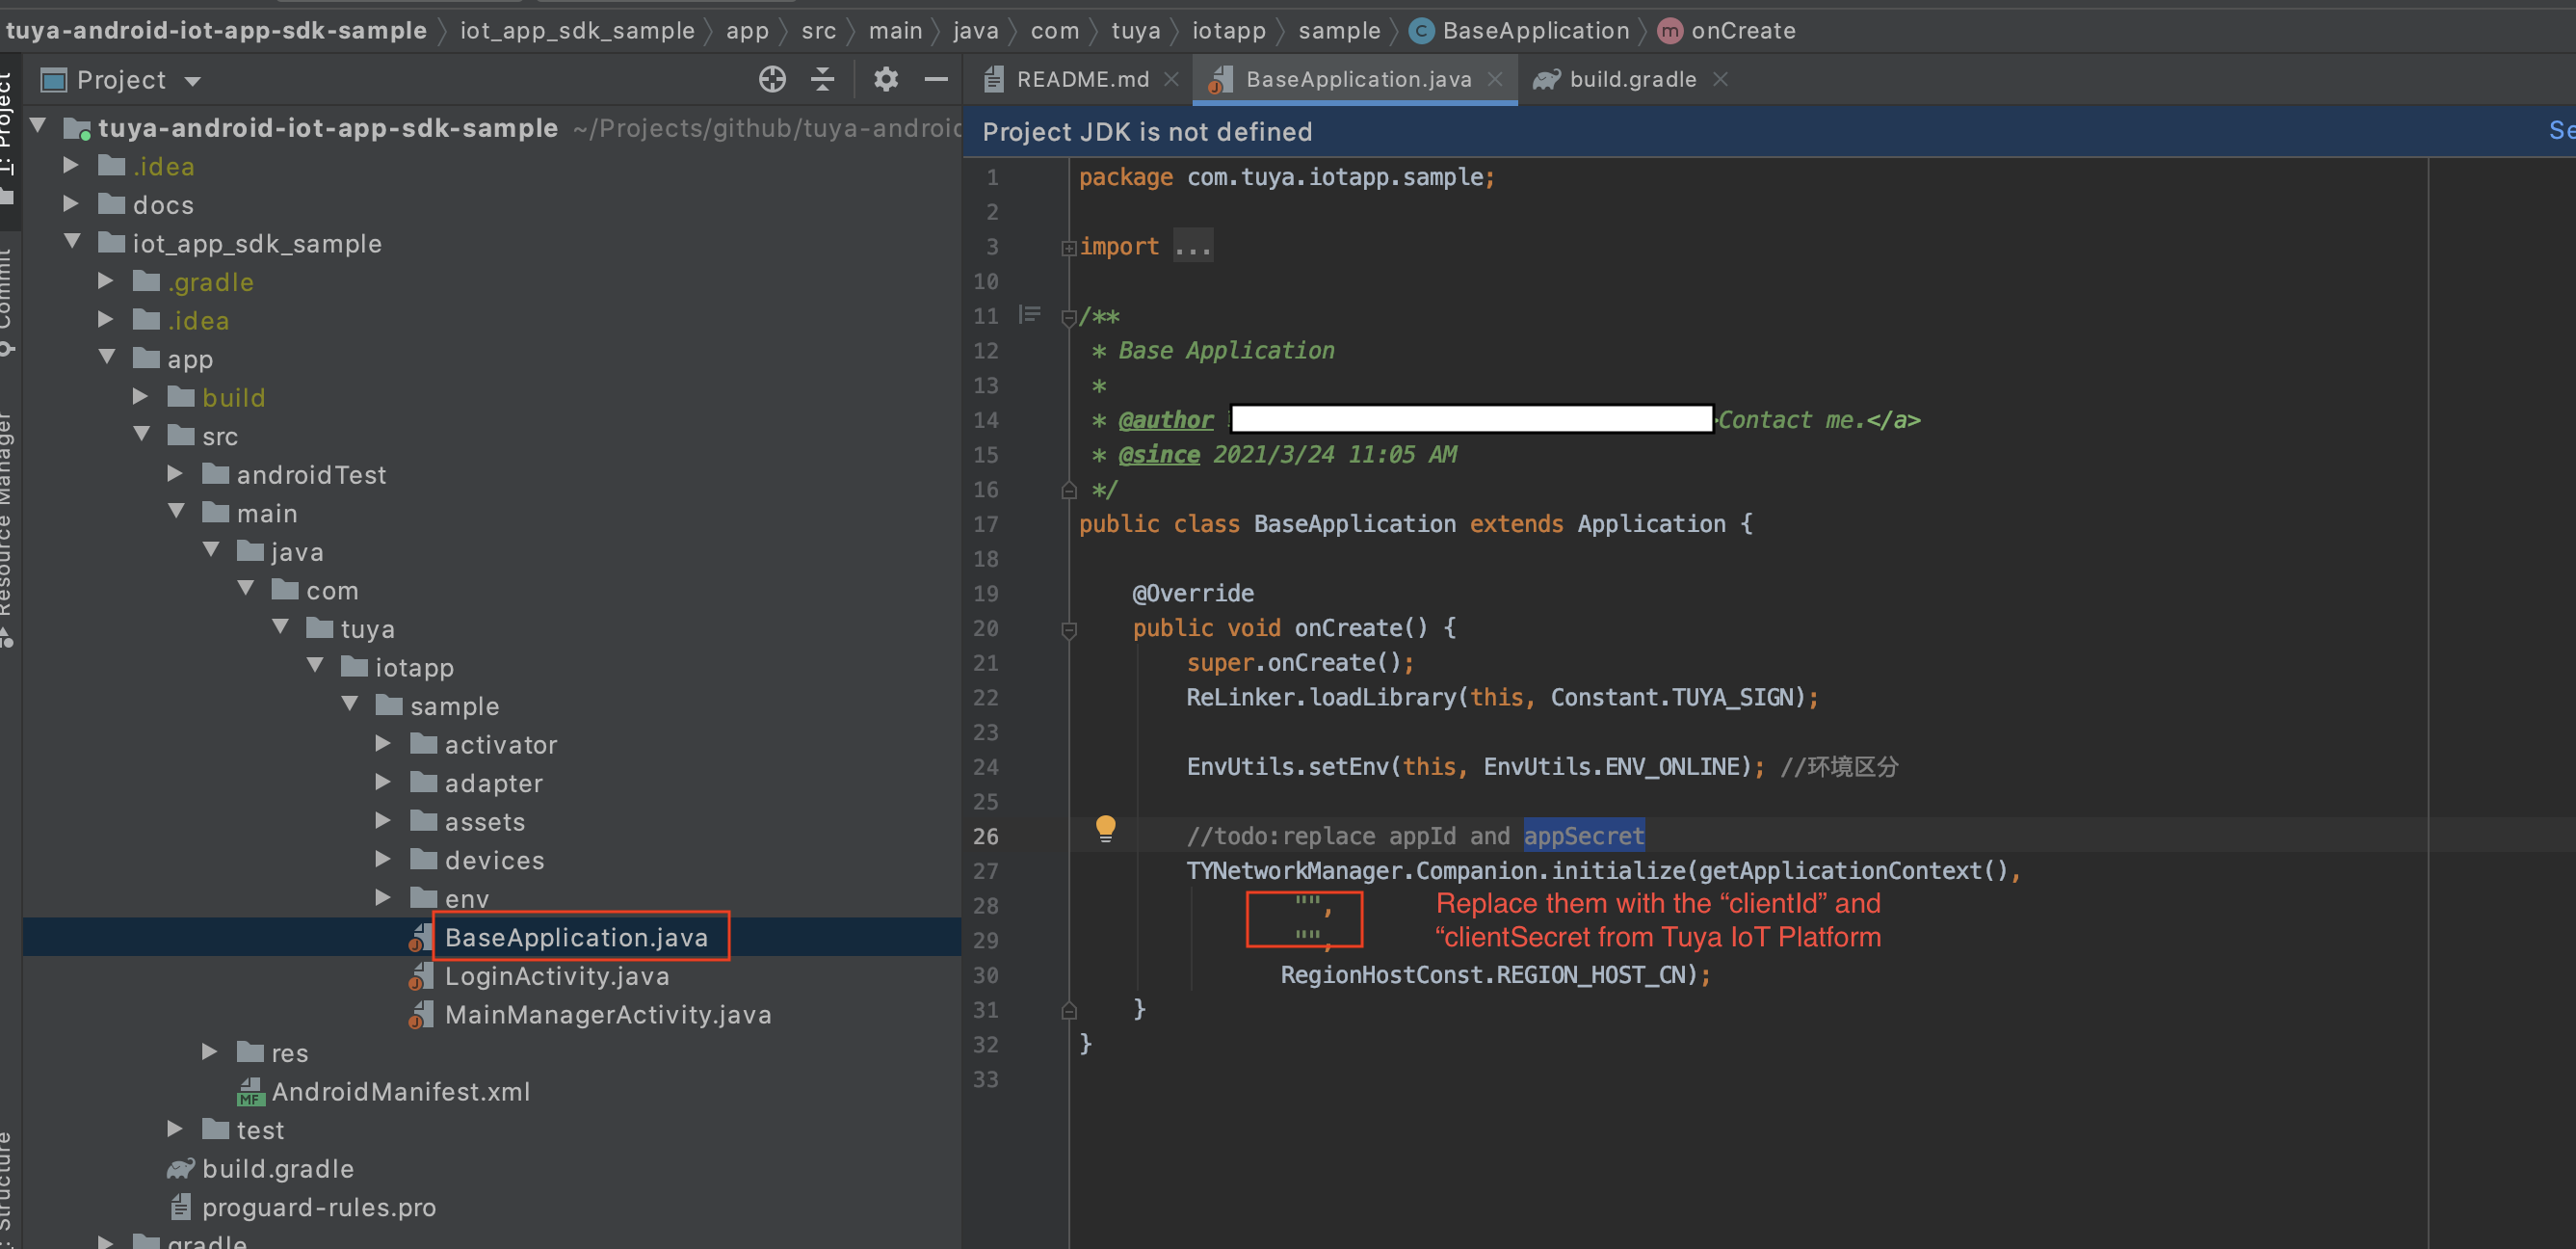
Copy them to the location of the
BaseApplication.javafile in the Sample code, as shown in the figure below.
Add a device
For example, add a smart strip light.
Prerequisites
- The device runs in the access point (AP) pairing status. Turn on and off the light three times, and the light will flicker quickly. Turn on and off the light another three times, and the light will flicker slowly and enter the AP pairing mode.
- Your mobile phone and the light are connected to the same Wi-Fi network.
-
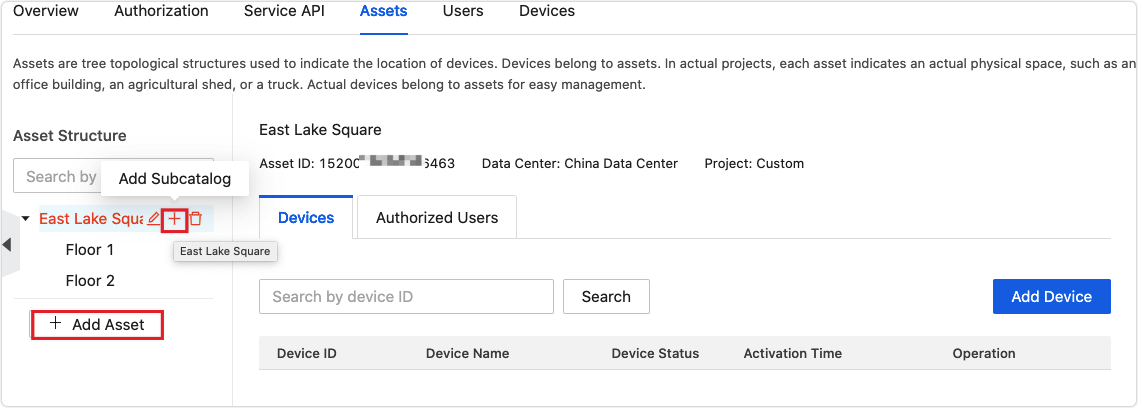
Create assets.
Building A of East Lake Square where the smart device is located has two floors. The process of building the asset structure is as follows.-
Click Assets in the top navigation bar.
-
In the Asset Structure section, click + Add Asset to add East Lake Square and build the specific asset structure.
-
-
Run the Sample file through Android Studio.
-
Select the time zone, enter the username and password of the app account, and log in to the app.
-
On the Devices page of the East Lake Square/Building A/Floor 1 node, click AP Pairing and follow the prompts to add the device.
-
After the device is added refresh the page to view it.
-
On the Devices page of the East Lake Square/Building A/Floor 1 node, view the synced device and note down the device ID.
The device ID is required for subsequent API requests.

Control devices
After you add the device to the platform, you can call API operations to remotely turn on and off the light, and switch the working mode. On the API Explorer page, you can make an API request to control the devices.
-
Choose Cloud > API Explorer.
-
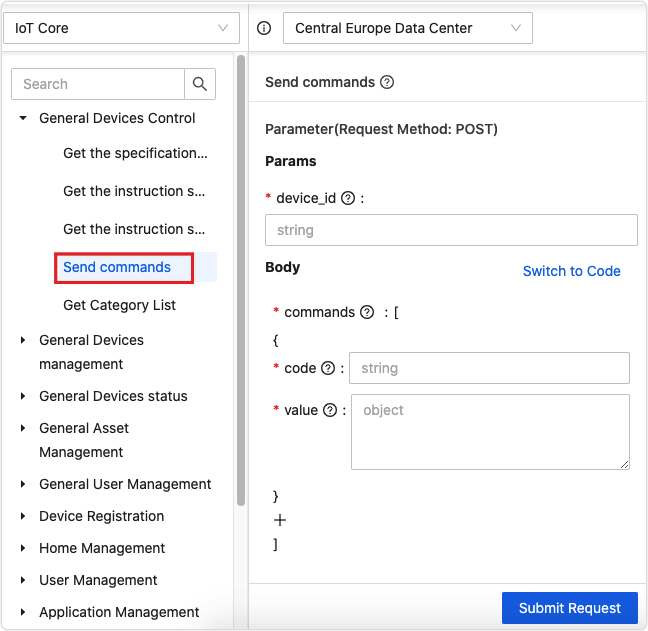
In the left-side navigation pane, choose General Devices Control > Send Commands.
-
Enter
device_idandcommandsto implement different operations.For more information about control instructions of lights, see Standard Instruction Set.
-
Turn on the light
{ "code": "switch_led", "value": true } -
Enable colored working mode
{ "code":"work_mode", "value":"colour" } -
Enable gradient mode
{ "code":"flash_scene_1", "value":{ "bright":100, "frequency":76, "hsv":[ { "h":210.0, "s":169.0, "v":146.0 } ], "temperature":84 } } -
Turn off the light
{
  "code": "switch_led",
  "value": false
}
-
Is this page helpful?
YesFeedbackIs this page helpful?
YesFeedback


