IAM Practice
This topic takes the virtual smart campus project as an example and describes how to grant permissions and manage permissions by using Identity and Access Management (IAM). This IAM practice applies to the development environments IntelliJ IDEA and API Explorer.
Overview
This practice is intended to build a smart campus and requires a facility manager role. The facility manager is authorized to manage spaces over a teaching building and install and debug devices in the spaces. A space can be a classroom, meeting room, or activity room.
In this practice, use the developer token and user token in different ways:
-
Use the developer token to manage operation permissions.
Currently, permissions can be managed with the developer token only.
-
To authorize users to manage resources, use the user token instead.
Before you start, learn more about Identity and Access Management to get fully prepared for and speed up the practice. For more information about the APIs mentioned in this topic, see Cloud Services API Reference.
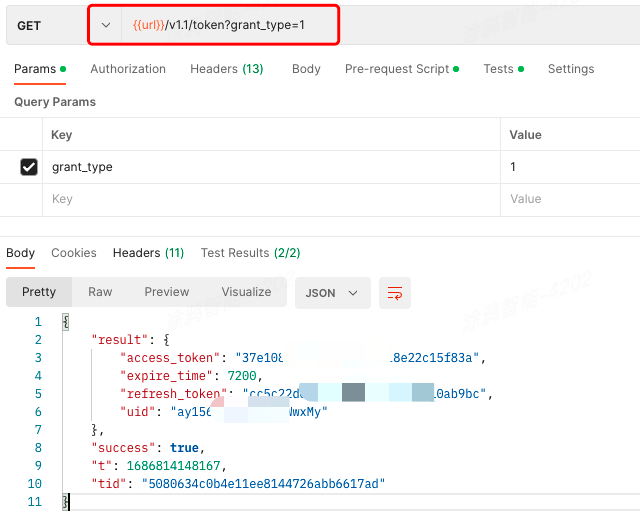
Step 1: Get developer token
API description
GET: /v1.0/token
Parameters
-
To get the developer token, do not use the parameter
targetUidin the request. -
To get the user token, use the parameter
targetUidin the request. The value oftargetUidmust be the same as the user unique ID that you assign to the user.Currently, permission management is available to developers only. To manage permissions, switch to the developer role. In the request to get the authorization token, do not use the parameter
targetUid.
Operation result
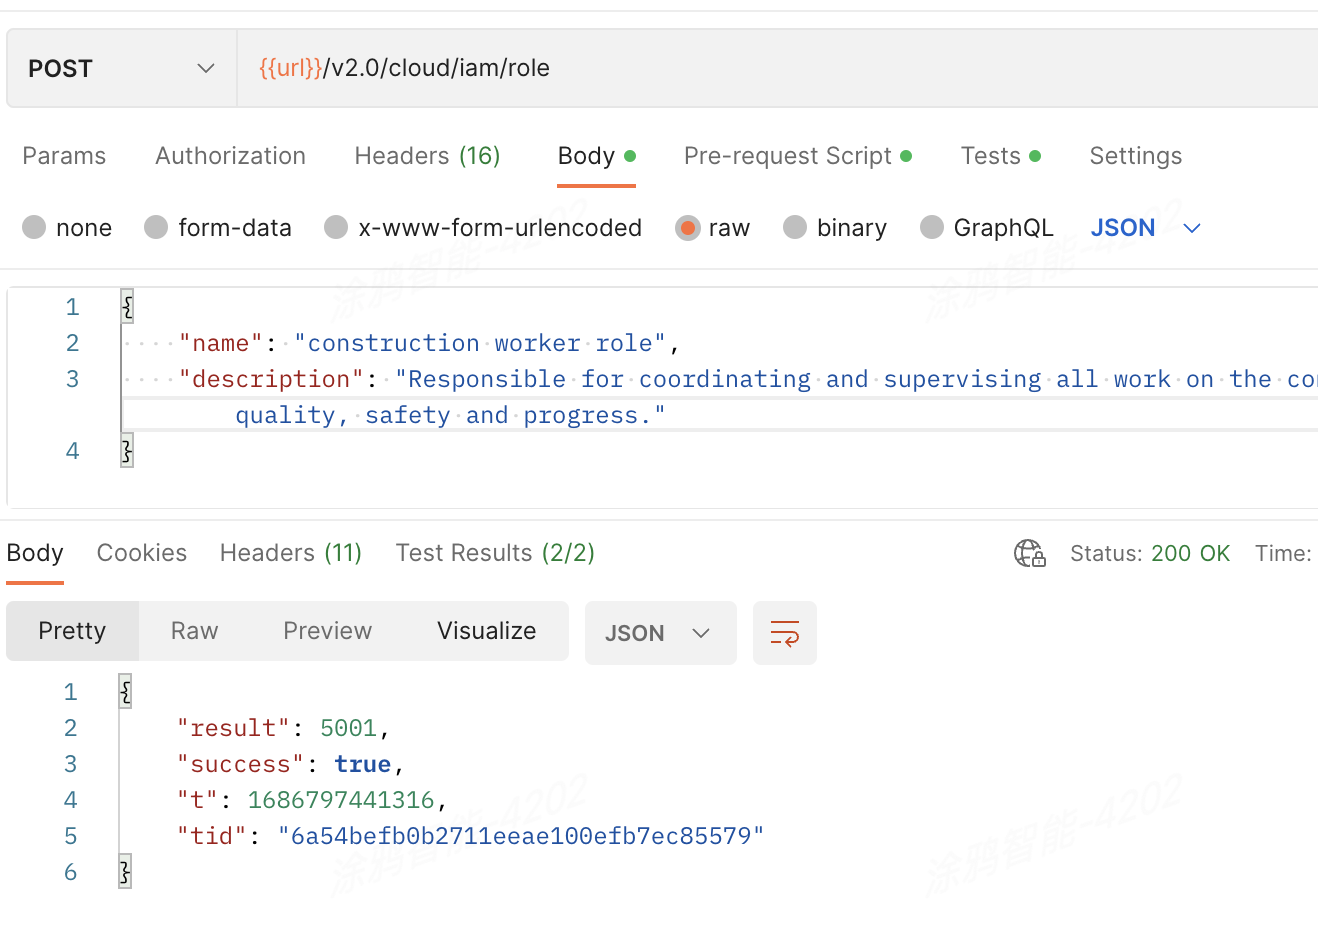
Step 2: Create a facility manager role
API description
POST /v2.0/cloud/iam/role
Operation result
The created role is numbered 5001.
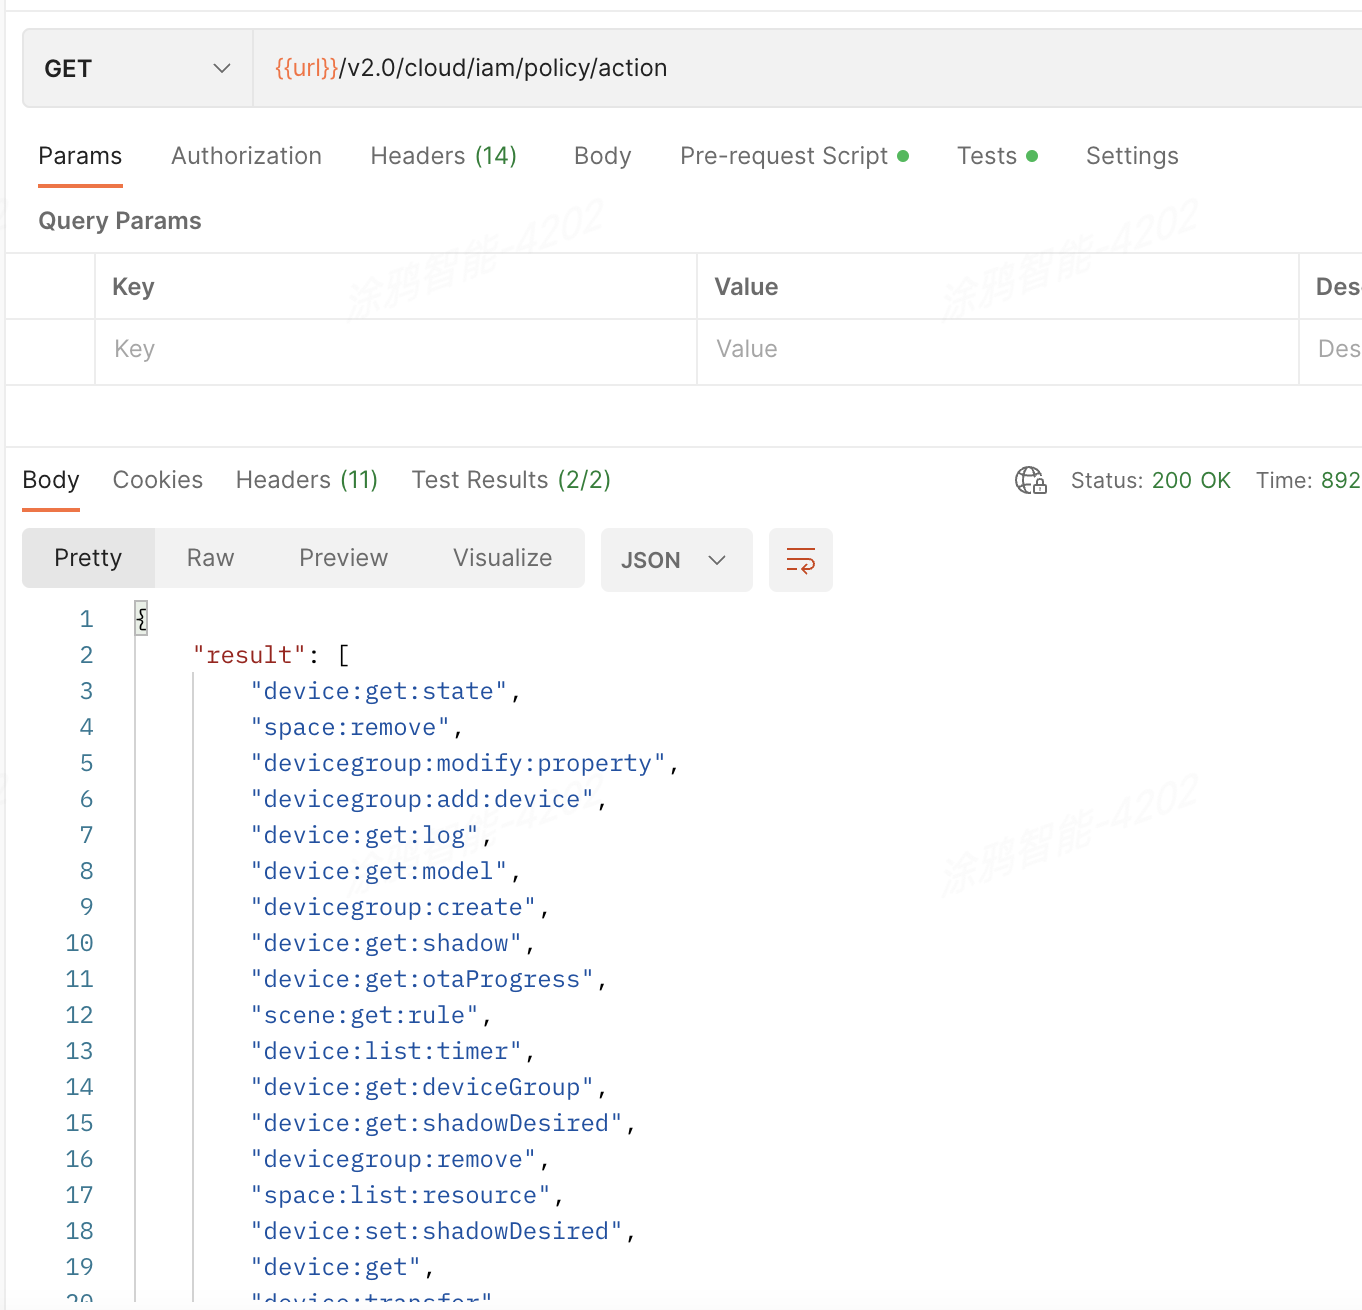
Step 3: Check available actions
API description
GET /v2.0/cloud/iam/policy/action
Operation result
Step 4: Create policies
To enable the actions available to the facility manager role, create the following policies: space management and device management:
-
Space management policy:
- Create a space:
space:create - Delete a space:
space:remove - View a space:
space:get - Modify a space:
space:modify - Query a list of child nodes of a space:
space:listChild - Query a list of devices in a space:
space:listResource
- Create a space:
-
Device management policy:
- Get properties of a things data model:
device:get:shadow - Send properties of a things data model:
device:issue:shadow - Add a device group:
devicegroup:create - Query a list of devices in a group:
devicegroup:list:device - Query details of a device:
device:get - Remove a device:
device:remove - Transfer a device:
device:transfer
- Get properties of a things data model:
API description
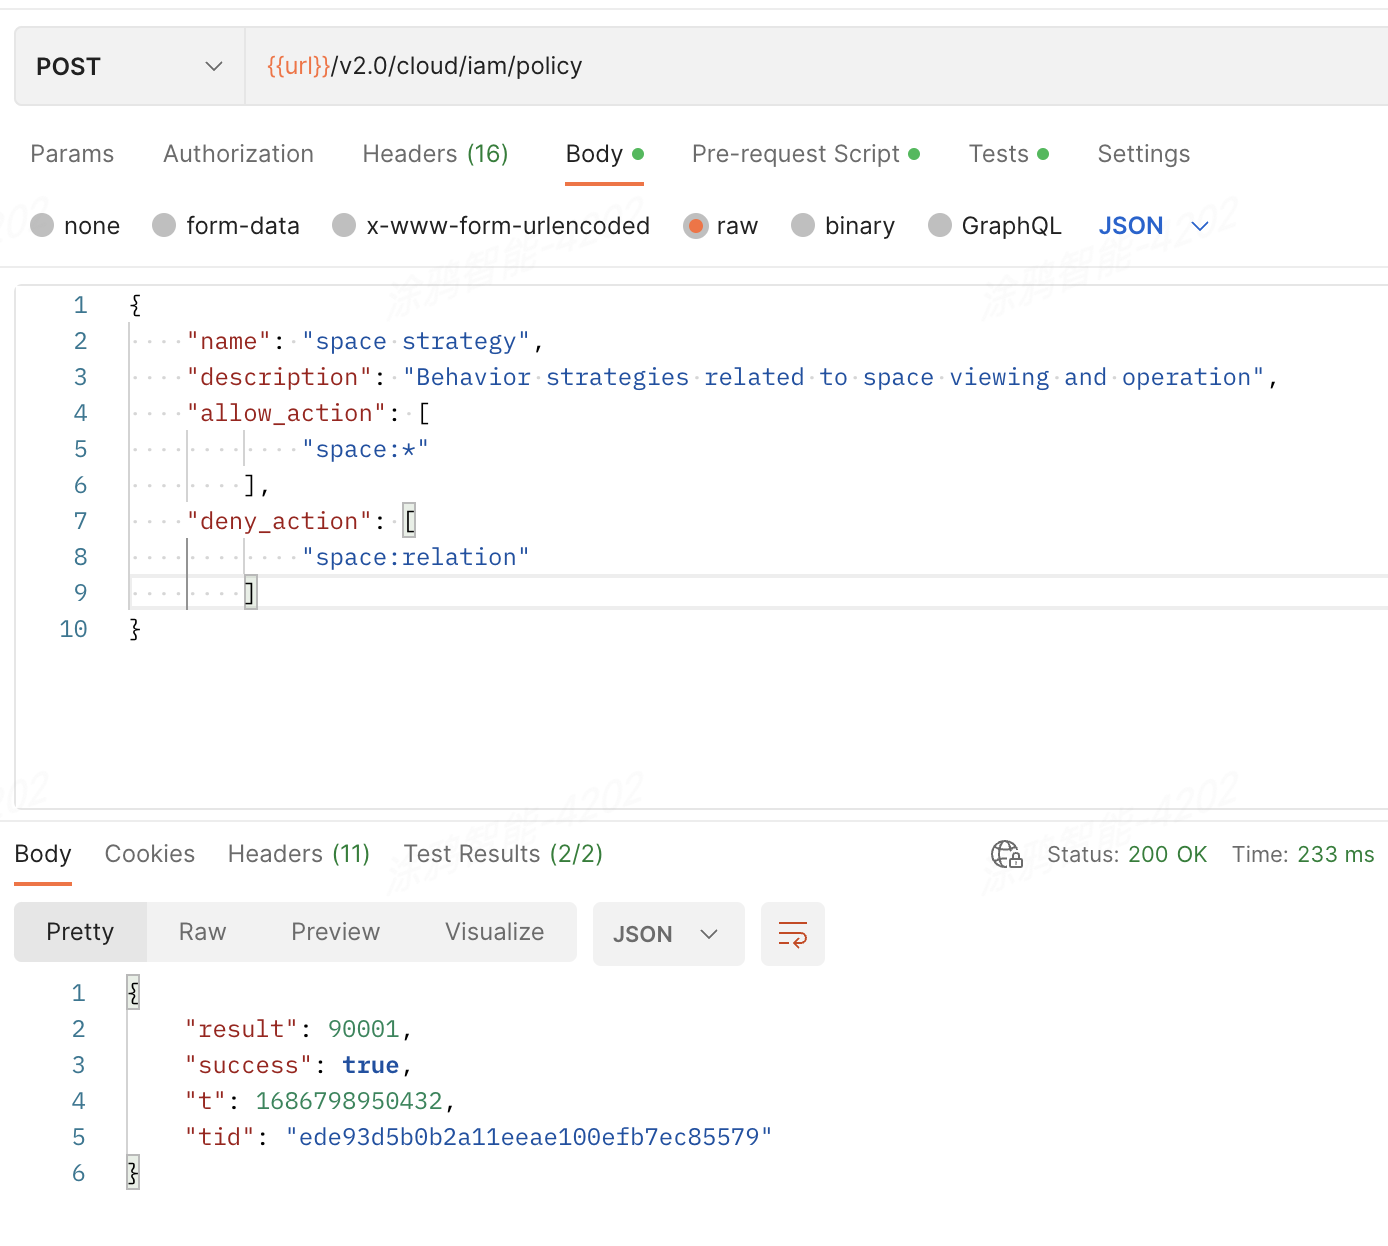
-
Create a space management policy:
POST /v2.0/cloud/iam/policyThe space management policy involves most space management actions. When you create a space, you can contain all space actions. Then, exclude the action
space:relationthat determines the relationship between two spaces.Request parameters
{
"name": "space strategy",
"description": "Behavior strategies related to space viewing and operation",
"allow_action": [
"space:*"
],
"deny_action": [
"space:relation"
]
}
Operation result
The space management policy is numbered 90001.
-
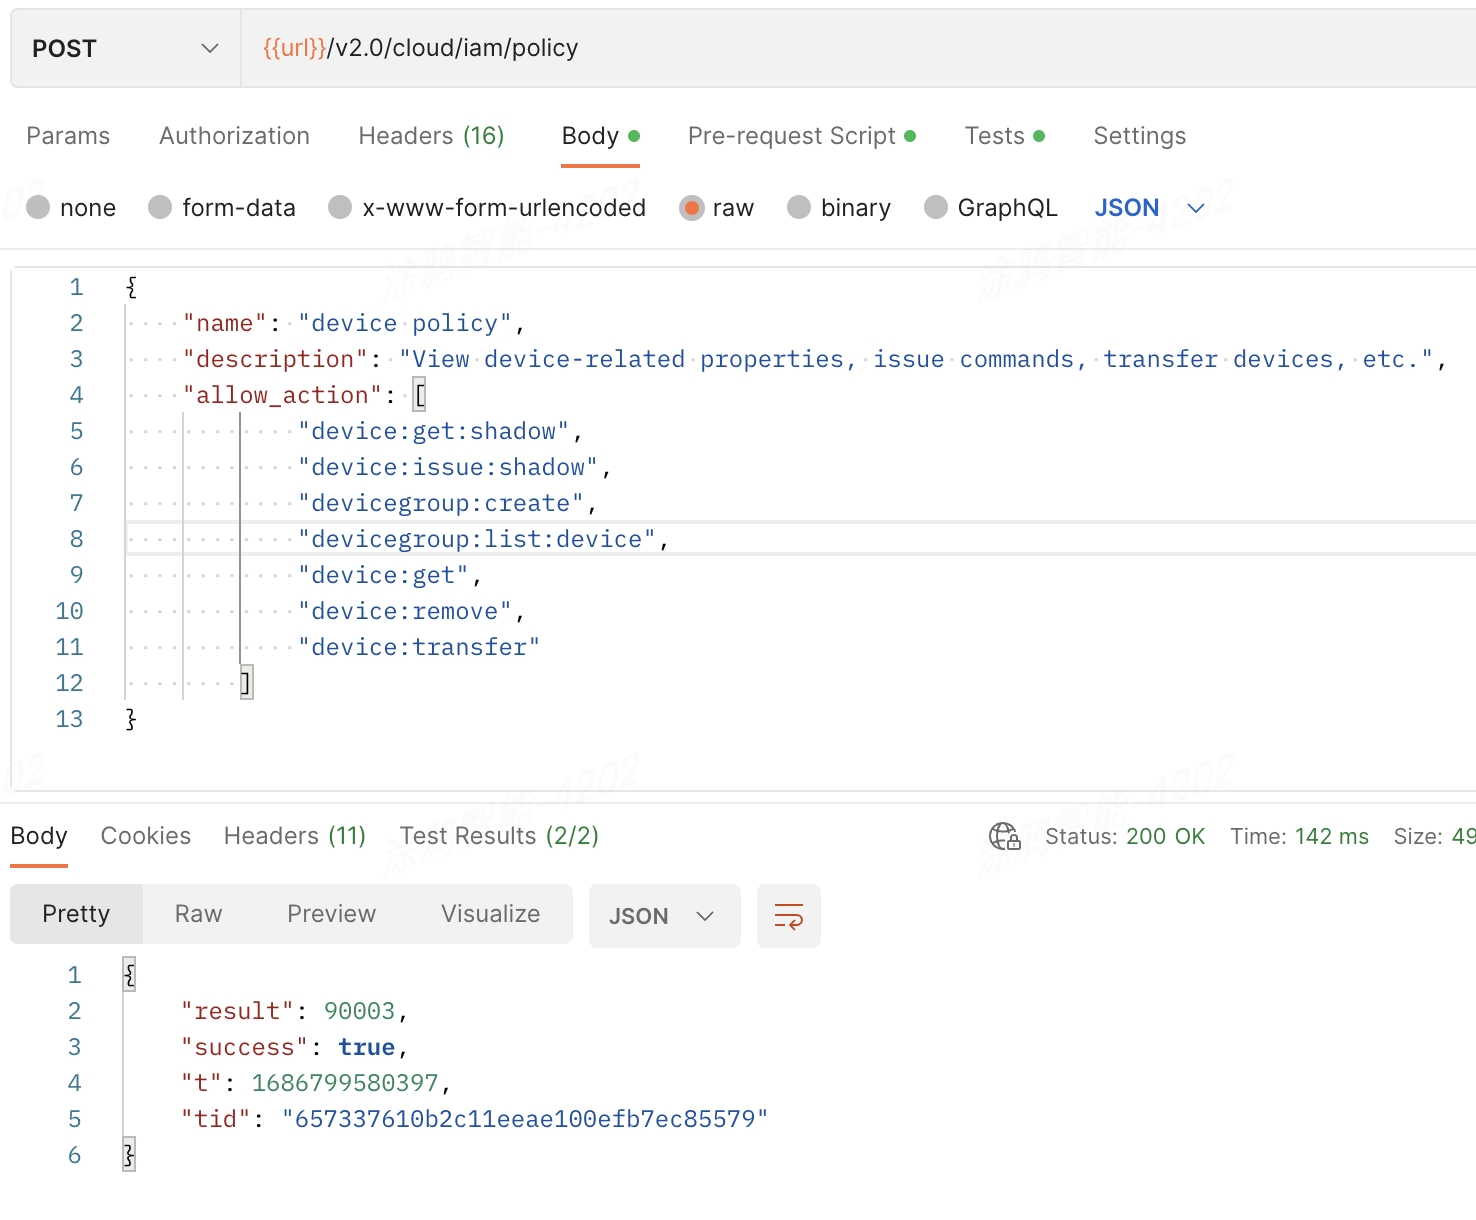
Create a device management policy:
Request parameters
{
"name": "device policy",
"description": "View device-related properties, issue commands, transfer devices, etc.",
"allow_action": [
"device:get:shadow",
"device:issue:shadow",
"devicegroup:create",
"devicegroup:list:device",
"device:get",
"device:remove",
"device:transfer"
]
}
Operation result
The device management policy is numbered 90003.
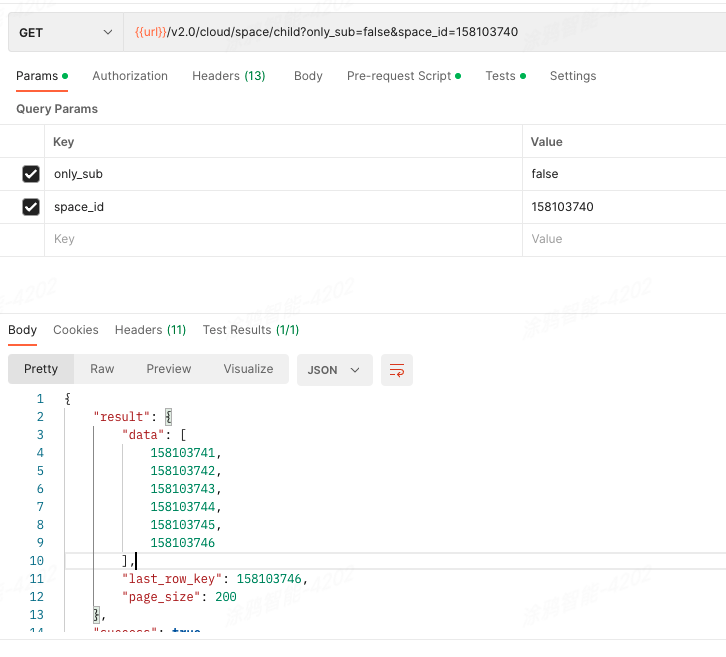
Step 5: Query space resources
In this practice, the following space resources are managed:
- Teaching building: 158103740
- 1st floor: 158103741
- Classroom 1: 158103744
- Classroom 2: 158103745
- Activity room: 158103746
- 2nd floor: 158103742
- 3rd floor: 158103743
- 1st floor: 158103741
API description
GET /v2.0/cloud/space/child
Operation result
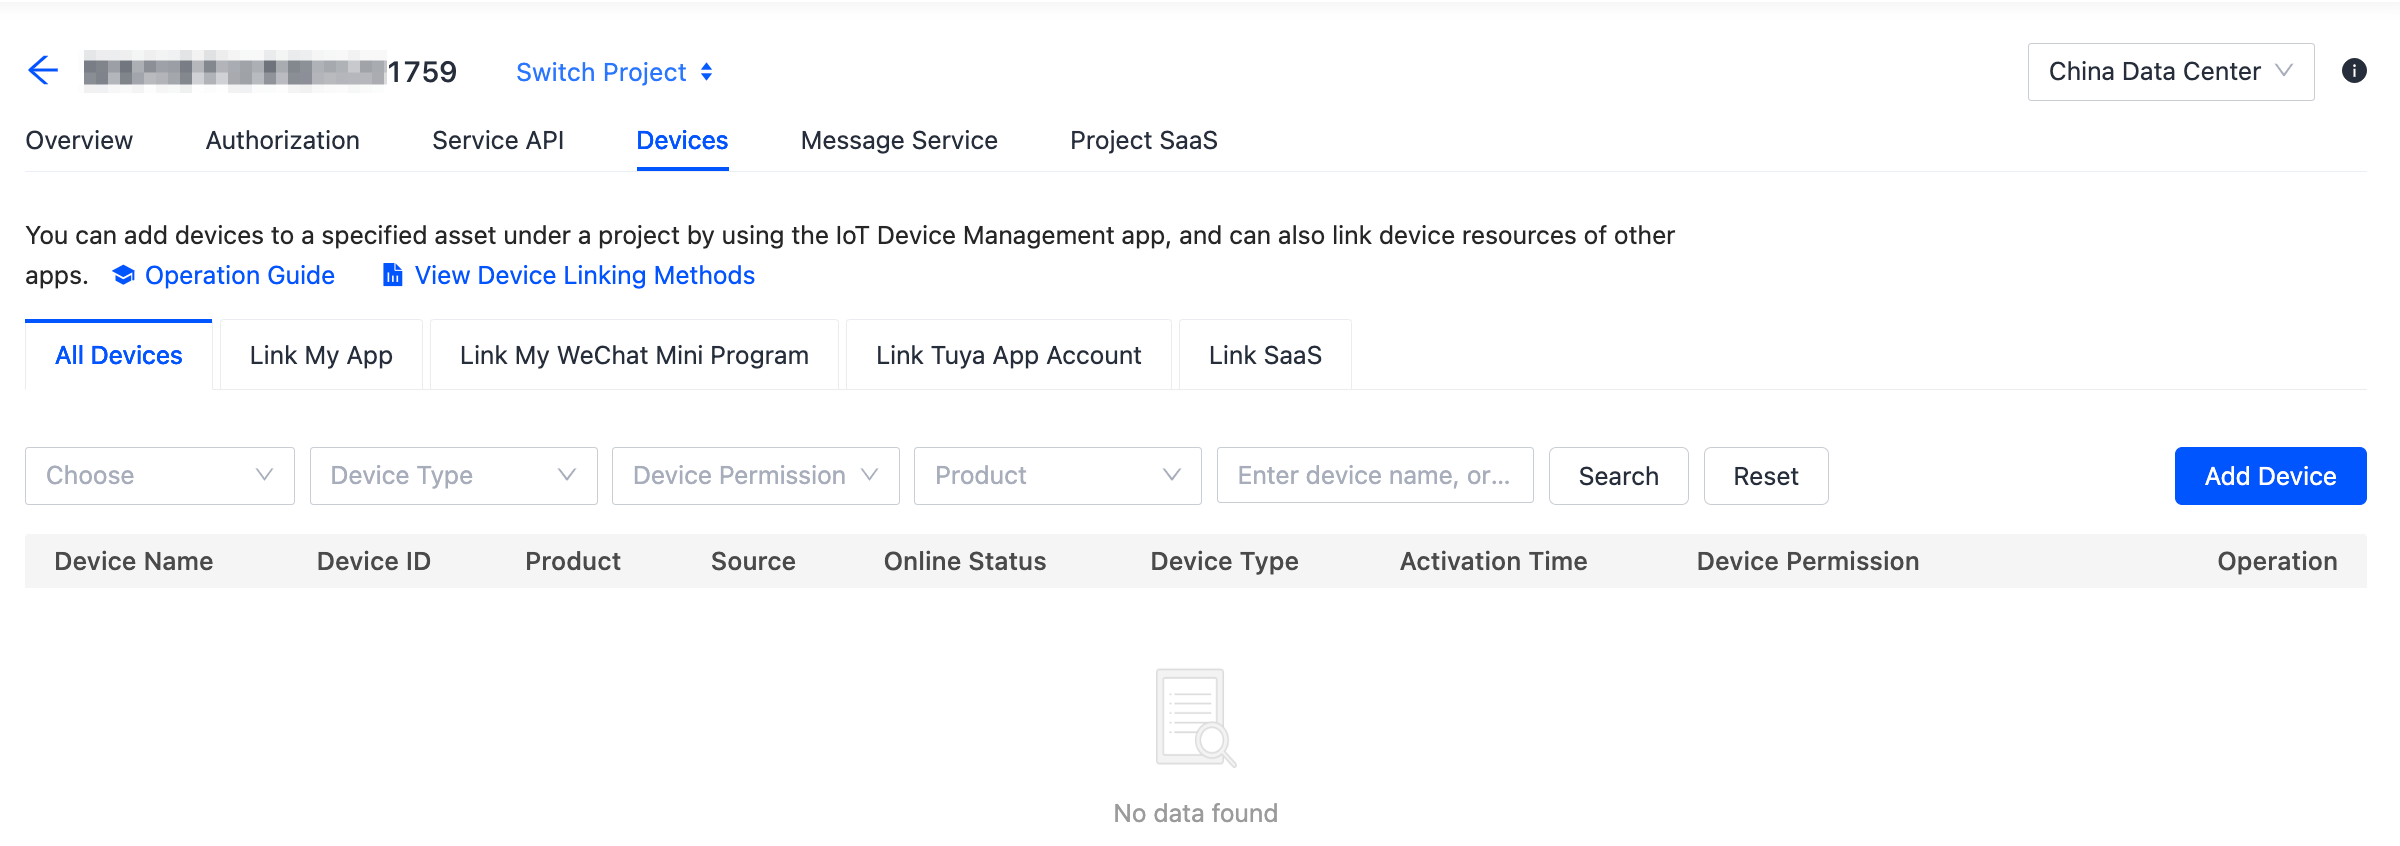
Device resources
Go to Cloud > Development > My Cloud Projects, open the target project, and then choose Devices > All Devices to view all devices that are bound with the project. If no testing device is available, click Add Device and add a virtual device for testing. For more information, see Link Devices.
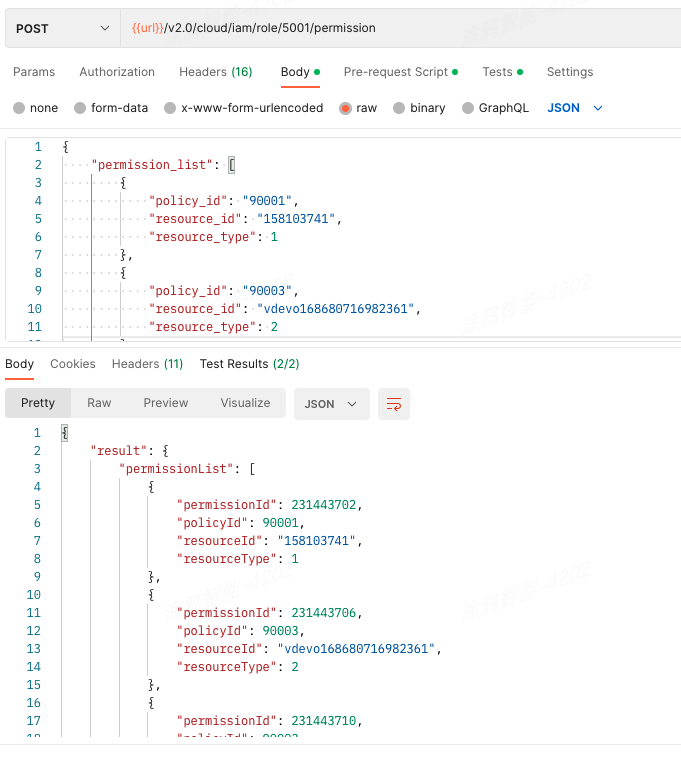
Step 6: Generate permissions and authorize role
API description
POST /v2.0/cloud/iam/role/{role_id}/permission
Parameters
{
"permission_list": [
{
"policy_id": "90001",
"resource_id": "158103741",
"resource_type": 1
},
{
"policy_id": "90003",
"resource_id": "vdevo168680716982361",
"resource_type": 2
},
{
"policy_id": "90003",
"resource_id": "vdevo168680716412726",
"resource_type": 2
},
{
"policy_id": "90003",
"resource_id": "vdevo168680715245356",
"resource_type": 2
},
{
"policy_id": "90003",
"resource_id": "vdevo168680714375003",
"resource_type": 2
}
]
}
Operation result
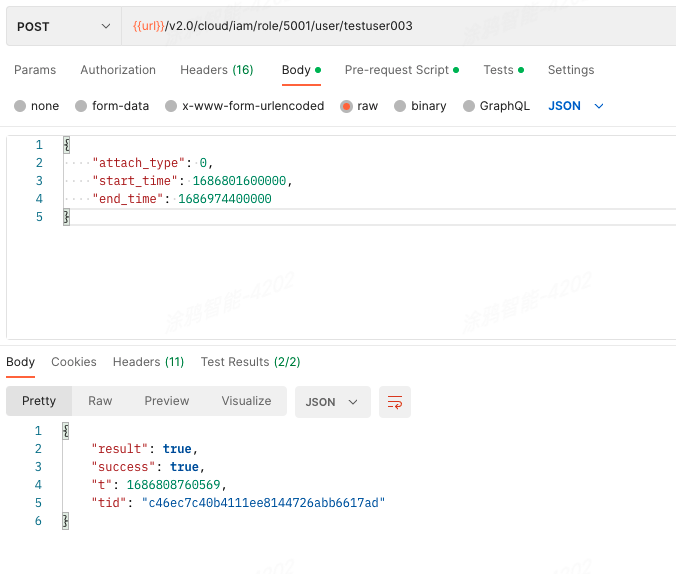
Step 7: Assign role to user
In the following example of your proprietary system, a user is assigned the unique ID testuser003. Then, assign a role to the user, so the user is authorized to manage specified spaces and devices within a specified period.
The user unique ID can be a unique identifier assigned by your proprietary system or a user unique identifier assigned by Tuya. However, this identifier must be unique to each user in the same cloud project.
- Specified period:
- Start time: 12:00:00 on June 15, 2023
- End time: 12:00:00 on June 17, 2023
- 1st floor: 158103741
- Classroom 1: 158103744
- Classroom 2: 158103745
- Activity room: 158103746
- Assigned role: facility manager (
5001)
The following example shows how to assign the role to the user:
API description
POST /v2.0/cloud/iam/role/{role_id}/user/{user_id}
Request parameters
{
"attach_type": 0,
"start_time": 1686801600000,
"end_time": 1686974400000
}
Description of attach_type:
Role 5001 is associated with the first floor (158103741). To let the role have access to Classroom 1 (158103744), Classroom 2 (158103745, and Activity room (158103746), select raw for attach_type. This setting represents that the role owns the current space and has access to all direct and indirect permissions associated with this space. To make the role valid within a period for the user, set attach_type to 0. For more information about the settings of attach_type, see the API description of POST:/v2.0/cloud/iam/role/{role_id}/user/{user_id} that assigns a role to a user.
Operation result
Step 8: Authorized user manages accessible resources
Get the user token by using the authorized user ID.
API description
GET: /v1.0/token
To get the user token, use the parameter targetUid in the request. This parameter specifies the unique identifier of the user to be authorized. This identifier must be the same as that used in the API that assigns a role to a user in the previous step. Otherwise, the system cannot proceed to match permissions.
Operation result
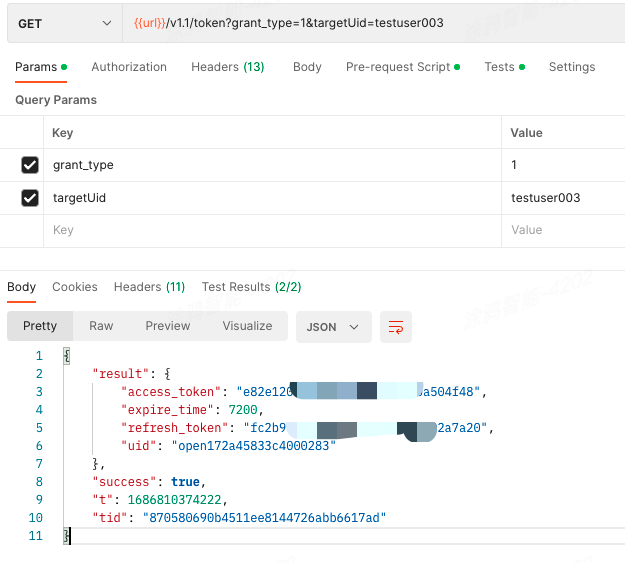
This token is used to grant User testuser003 access to operations. The permissions on the target resources and actions are automatically verified.
-
Example of granted permission: Get the properties of the things data model of the accessible device (
vdevo168680716982361) by callingGET:/v2.0/cloud/thing/{device_id}/shadow/properties|device:get:shadow.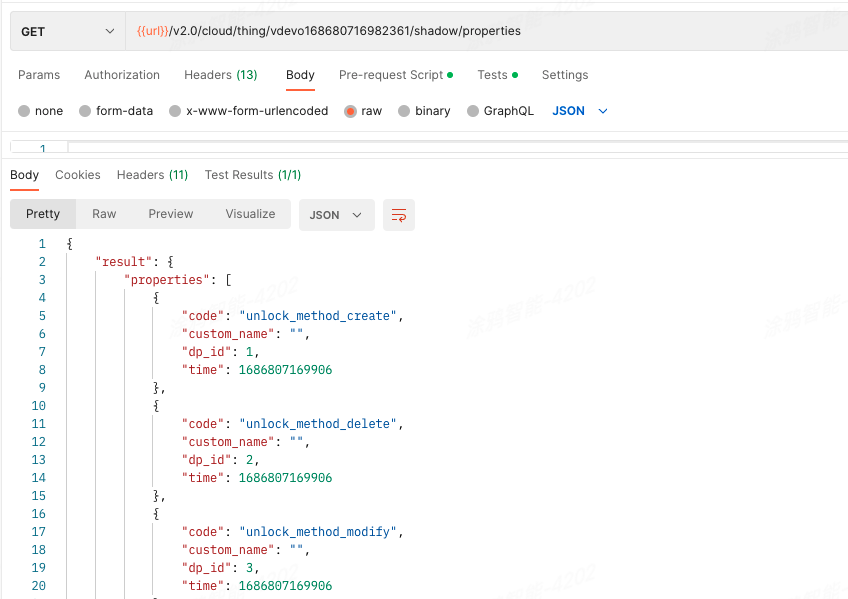
-
Example of permission not granted: If an API request is made to get the properties of the things data model of the inaccessible device (
vdevo168671847475582), the following error message is returned to indicate insufficient permissions.
Is this page helpful?
YesFeedbackIs this page helpful?
YesFeedback


