OAuth 2.0 Authorization Flow
This topic describes how to configure OAuth 2.0 authorization for a cloud project. This enables end users to open a link with the client_id and callback URL, log in to the specified app, and authorize your cloud project to access their data.
After authorization, the cloud project will exchange the OAuth 2.0 authorization code for an access token for user data.
Configure OAuth 2.0 authorization
-
Log in to the Tuya Developer Platform.
-
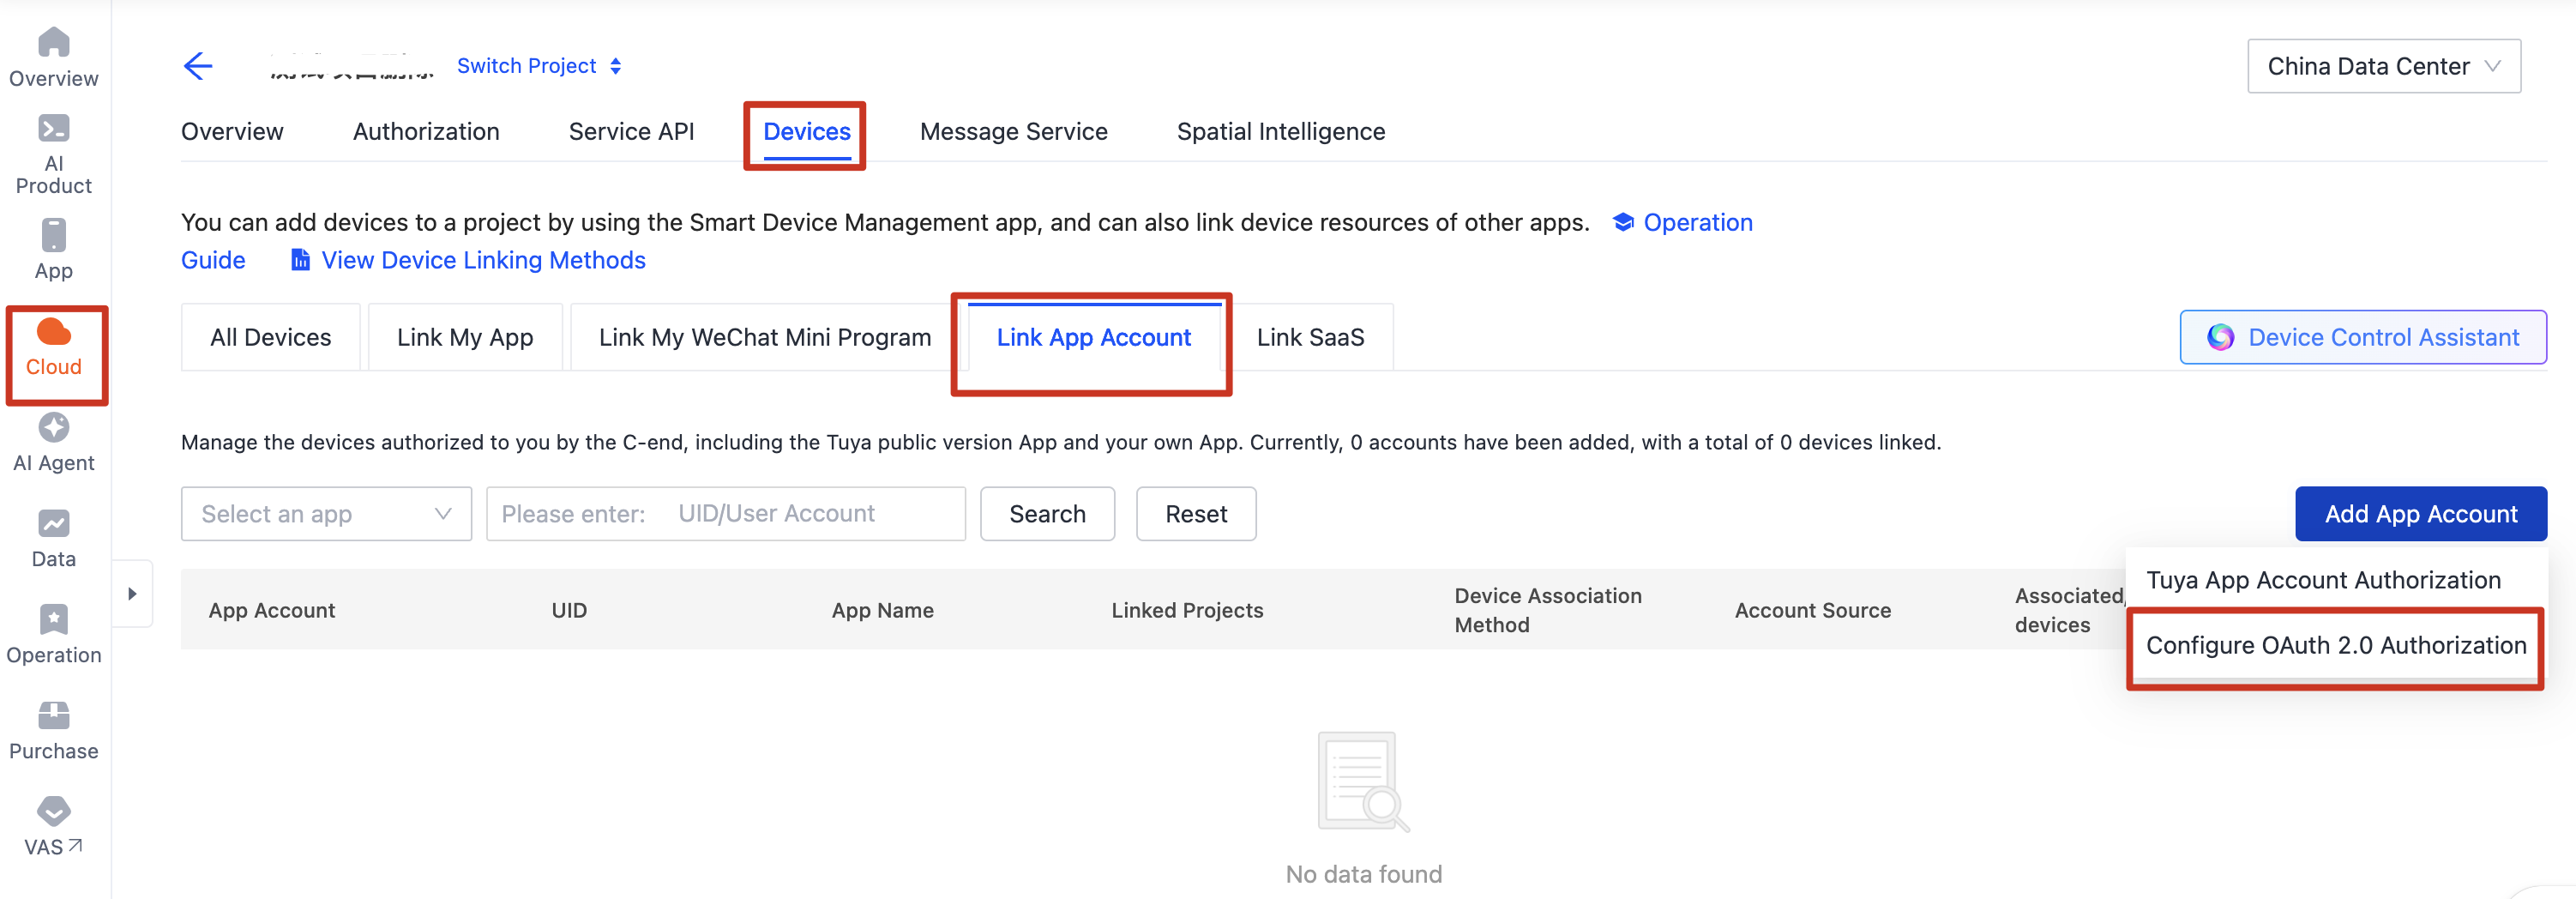
In the left navigation bar, choose Cloud.
-
On the My Cloud Projects page, click Open Project in the Operation column for your target project.
-
Click the Devices tab.
-
Click the Link App Account tab.
-
Click Configure OAuth 2.0 Authorization. Enable the login authorization feature for the desired app and configure the data center and callback URL.
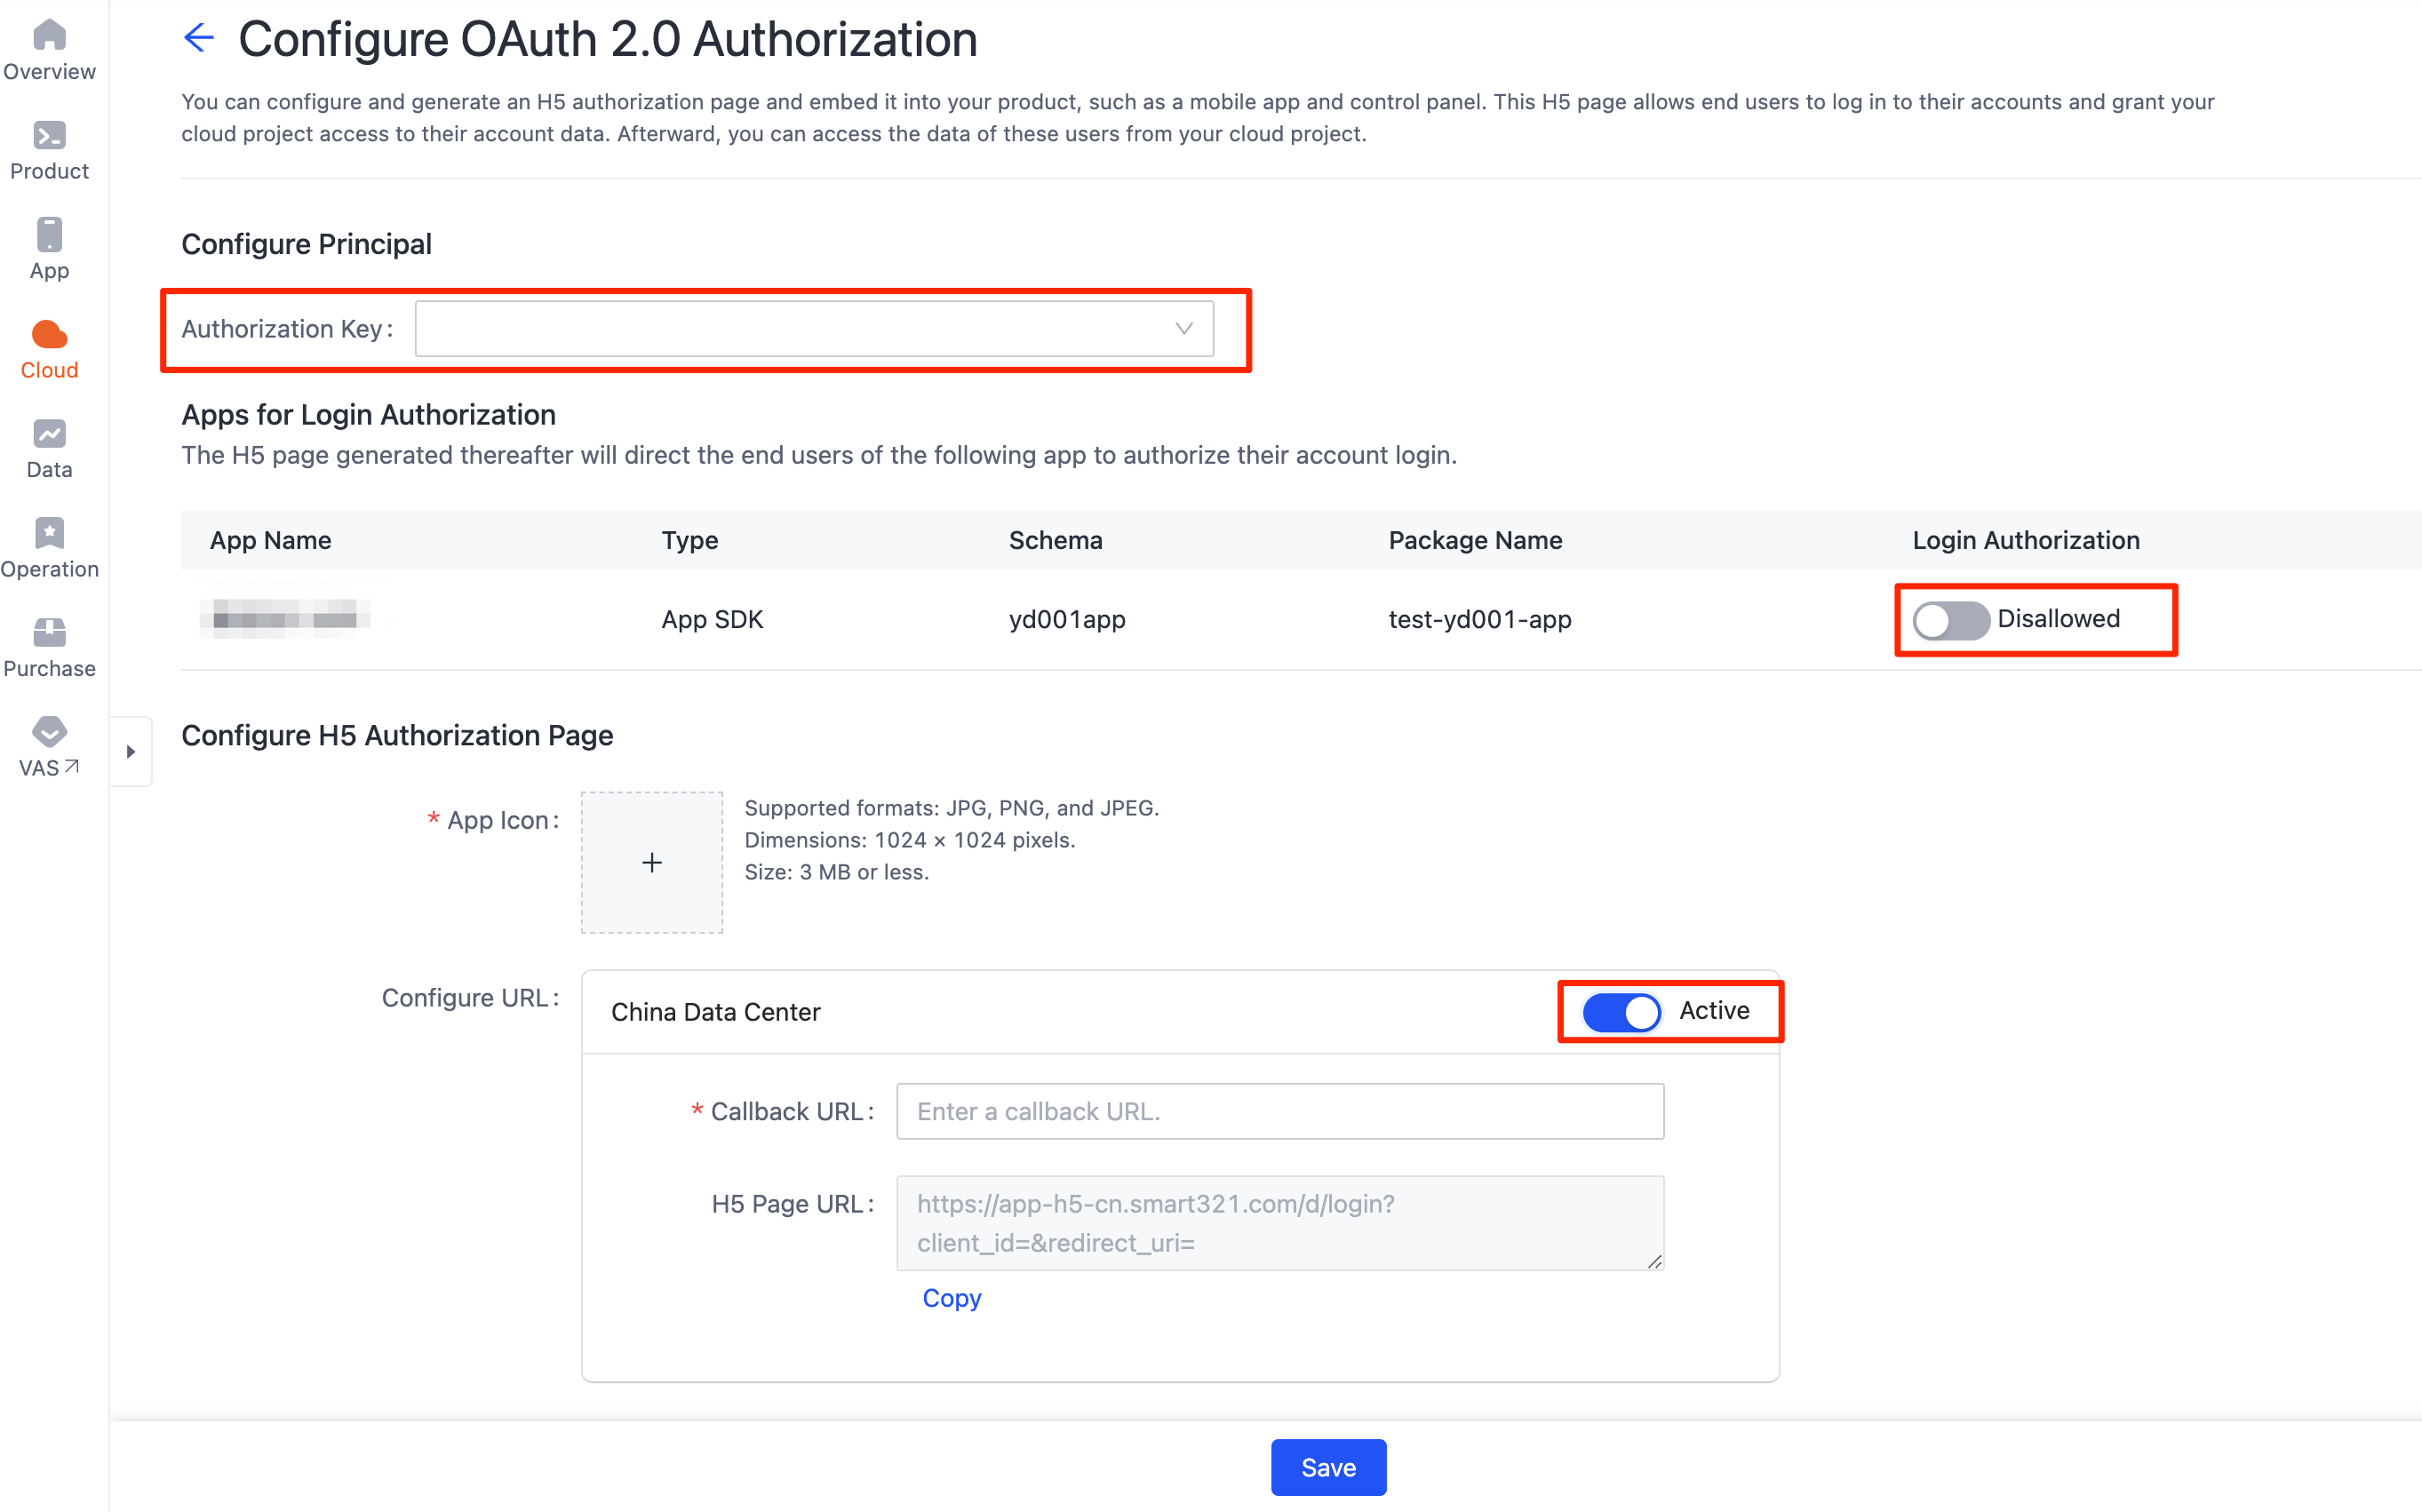
- The authorization key must be the one specific to app authorization. See App Authorization for details.
- The callback URL should vary for different data centers. Provide one along with the corresponding processing logic. Once the user gives consent, the OAuth 2.0 authorization code will be sent through this URL and can only be used in the user’s data center.
OAuth 2.0 authorization flow
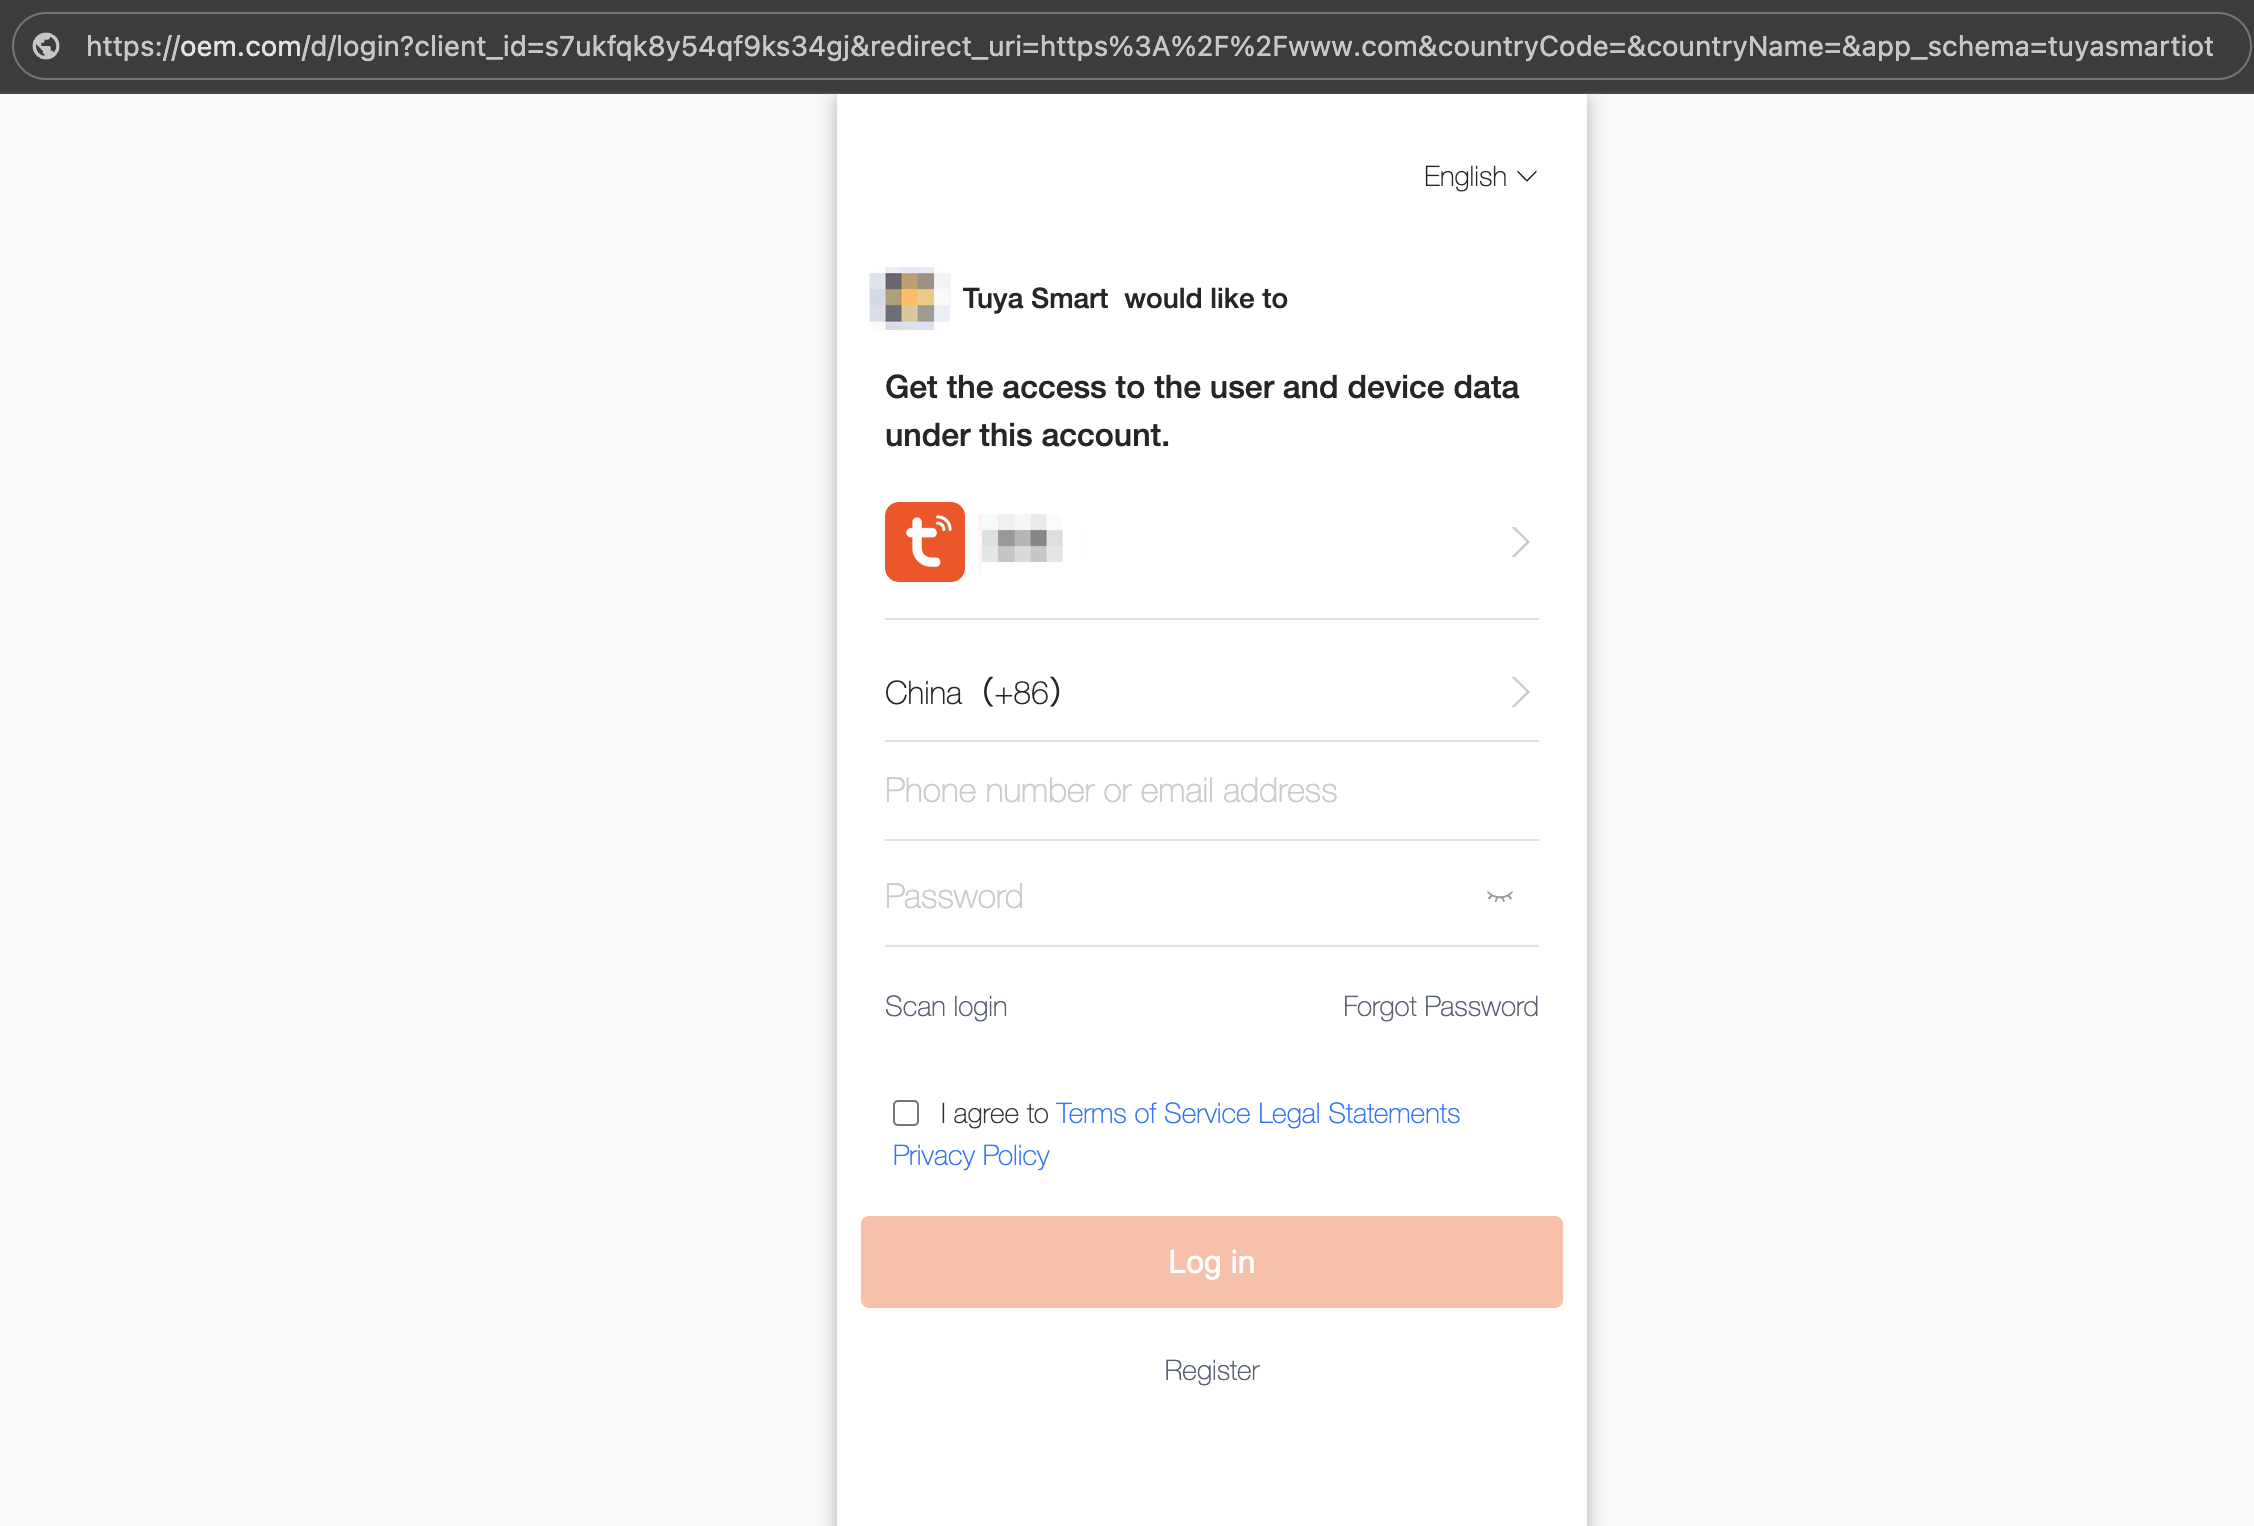
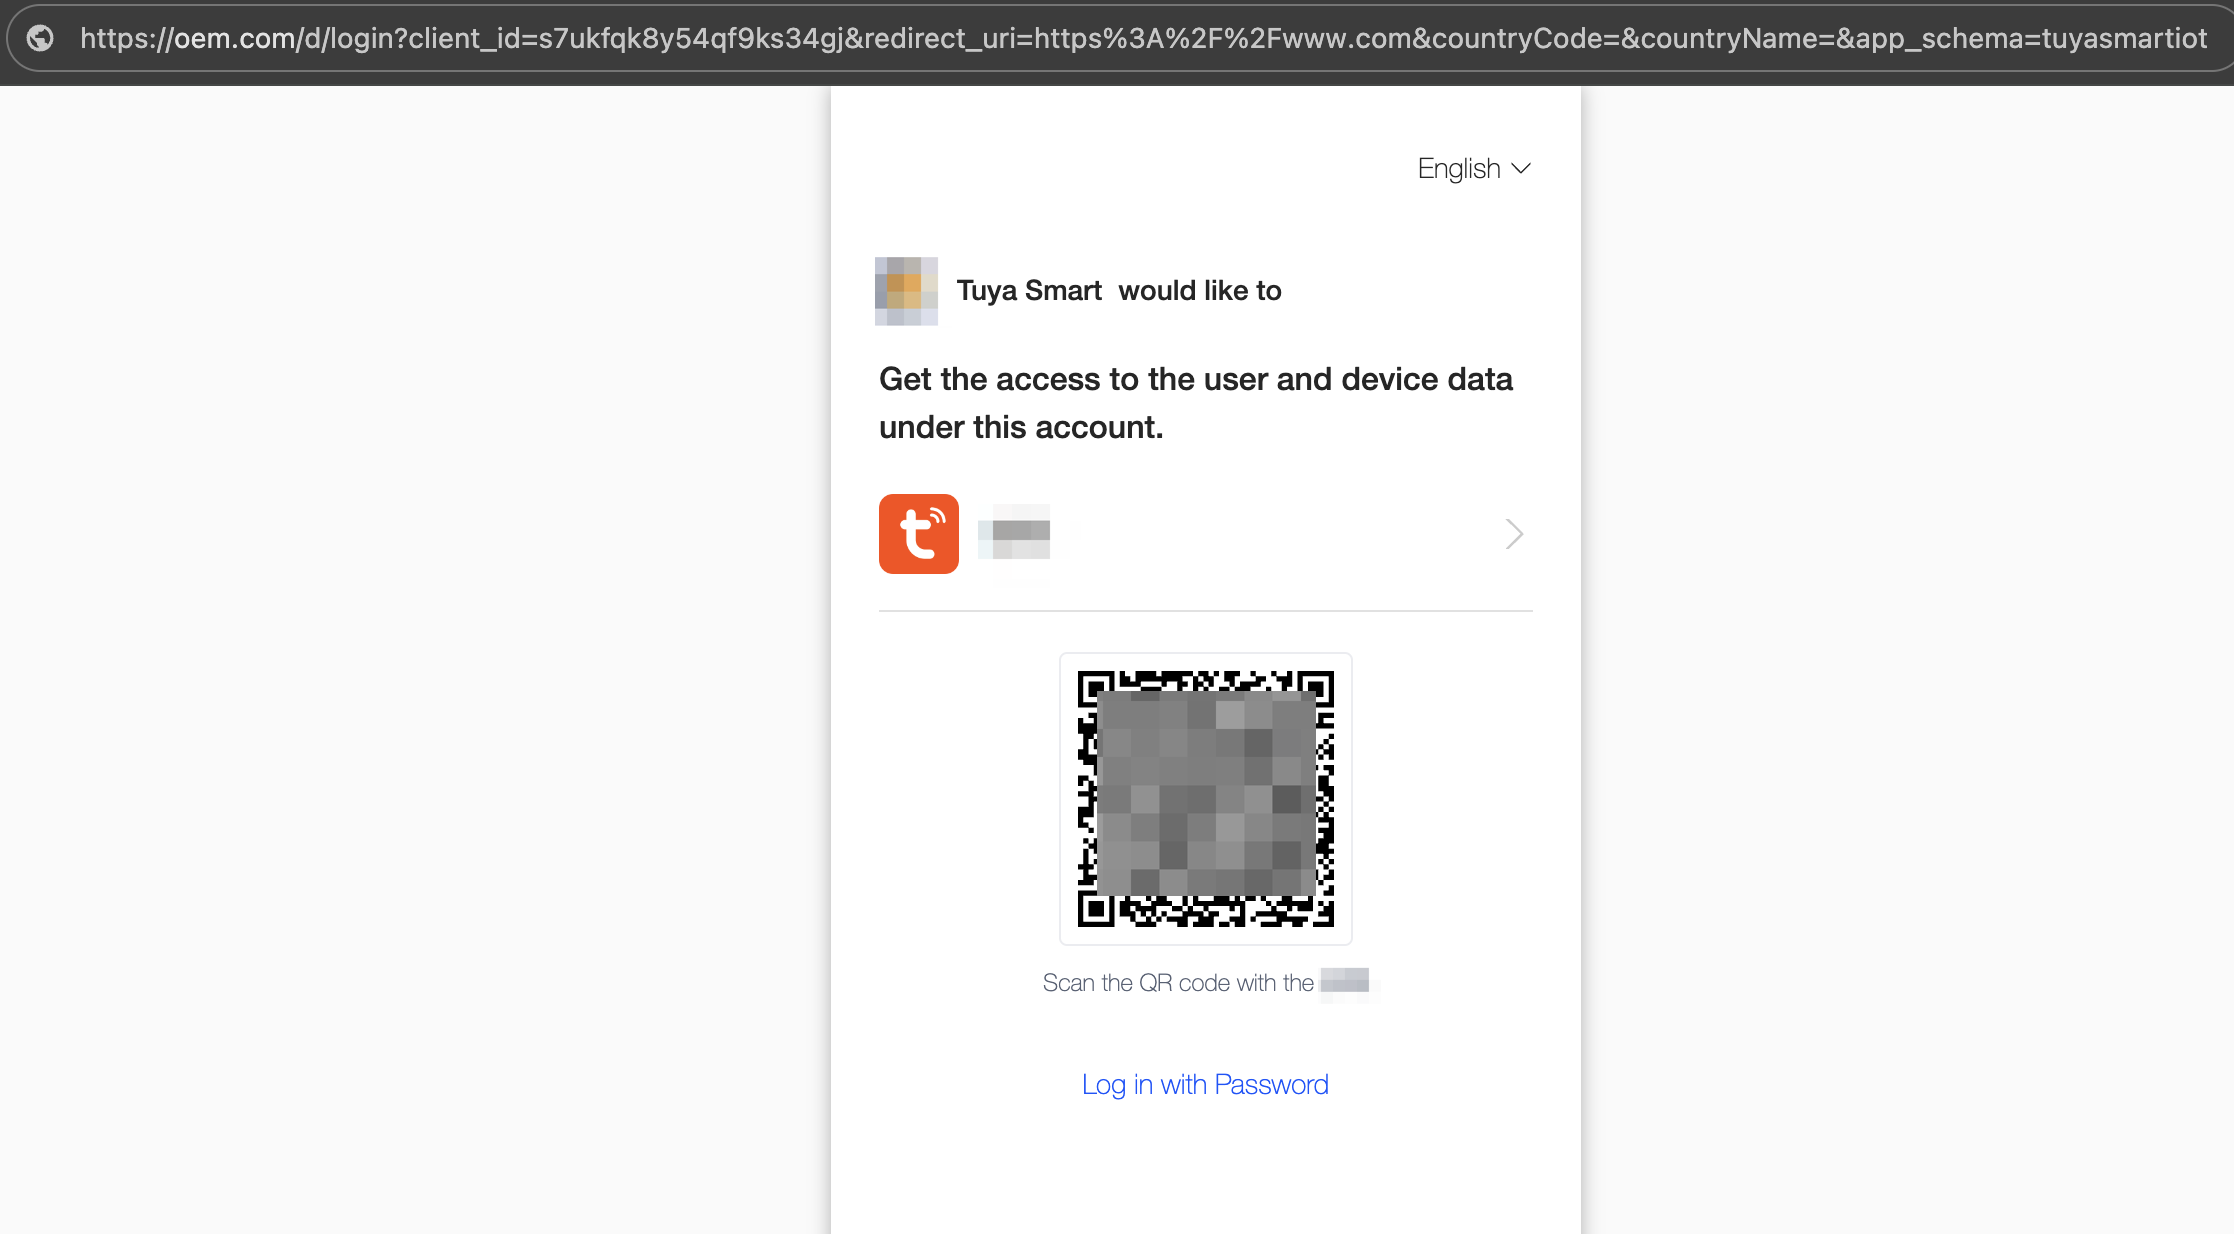
Users are redirected to the authorization page when opening the configured H5 page.
Diagram
Authorization flow
-
The user opens the H5 page for OAuth 2.0 authorization.
-
They log in to the specified app by scanning a QR code or entering a password.
-
The user taps Confirm Authorization.
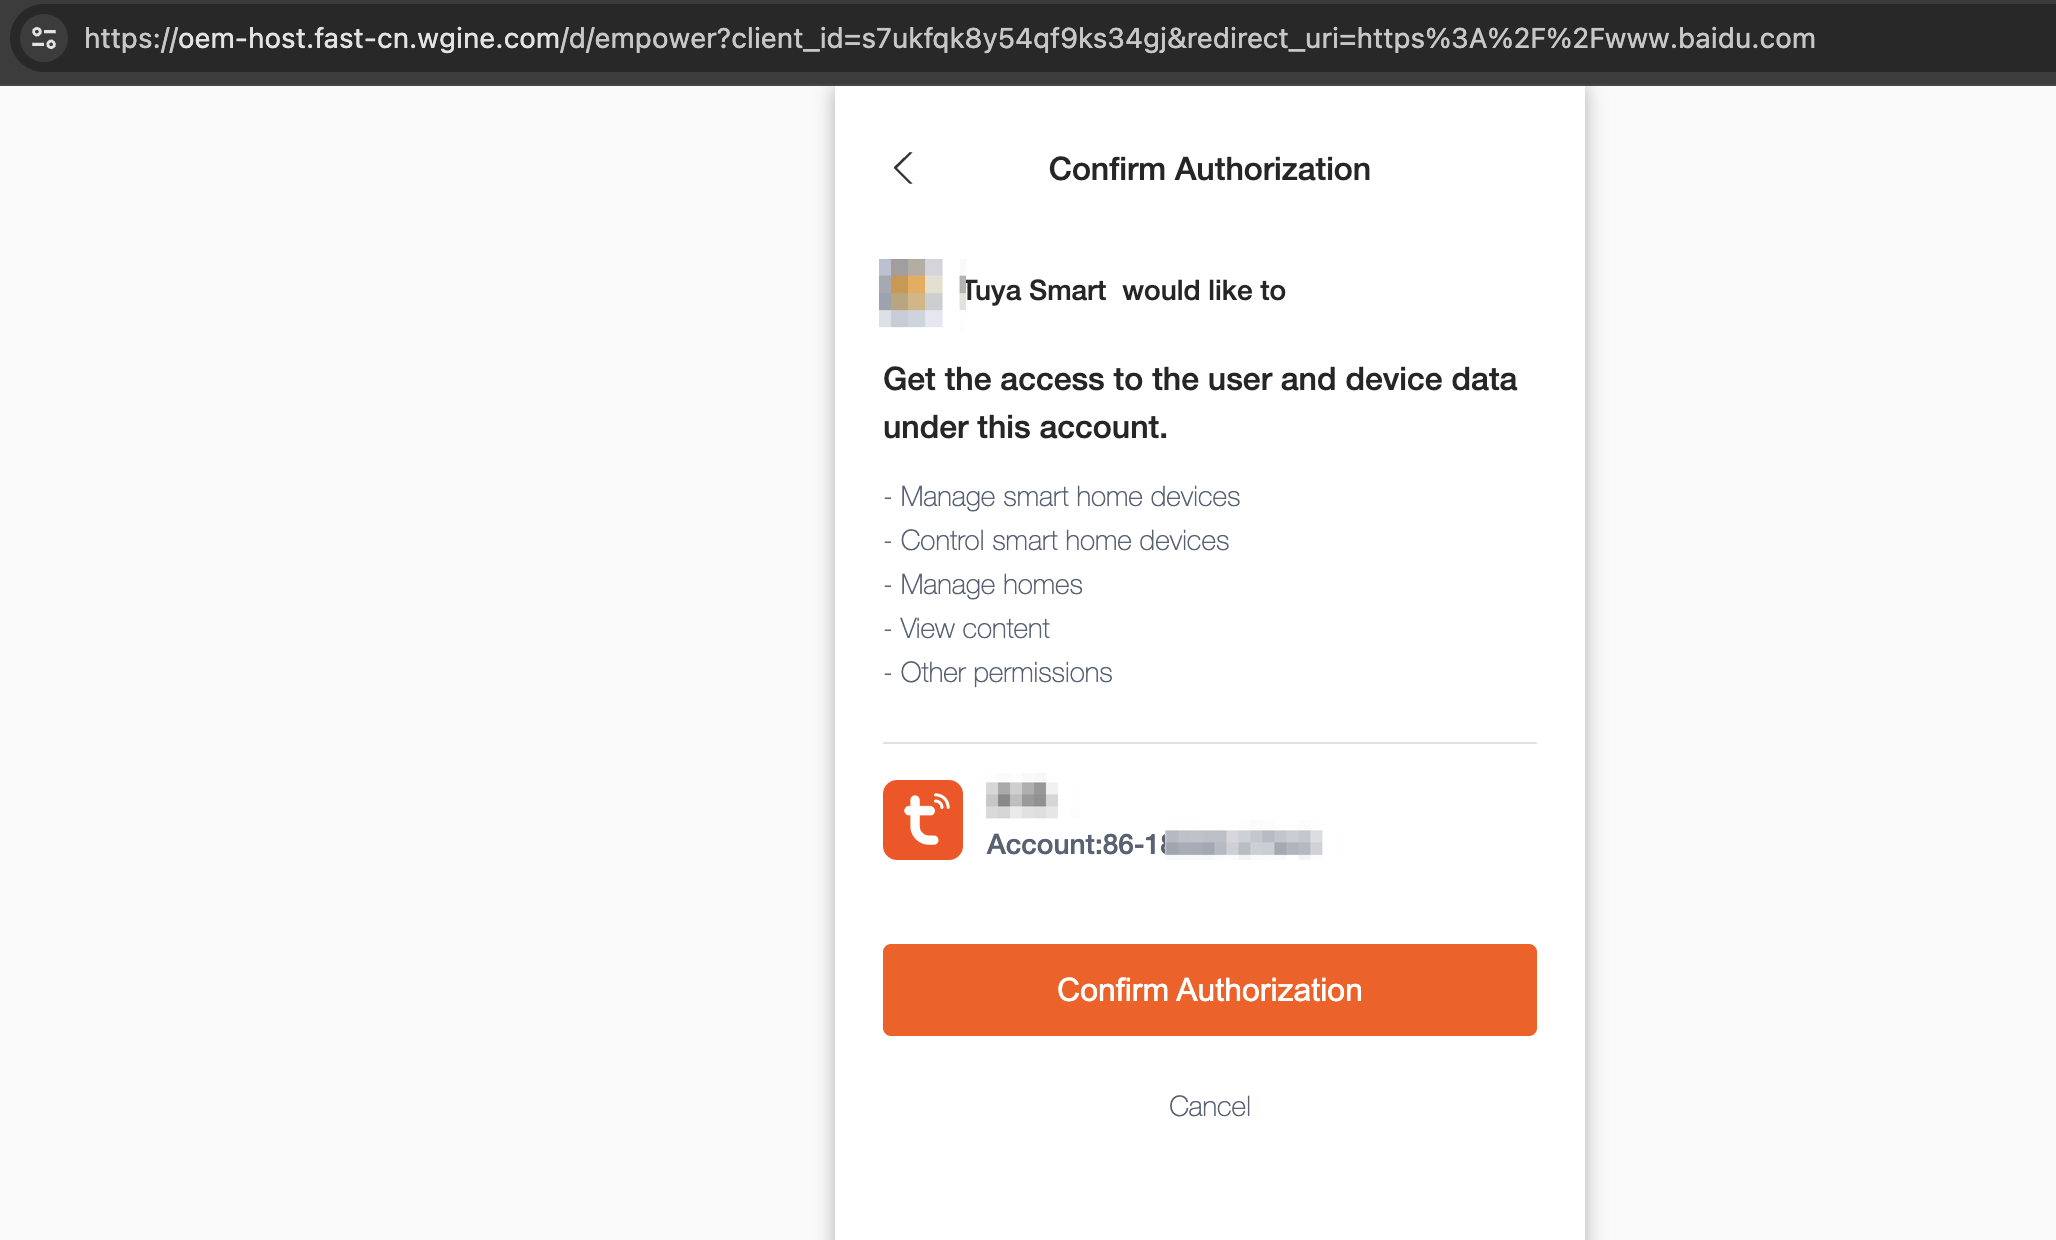
-
Upon successful authorization, the Tuya cloud sends the OAuth 2.0 authorization code to the third-party cloud through the callback URL.

Exchange OAuth 2.0 authorization code for access token
For more information, see Authentication Method.
Is this page helpful?
YesFeedbackIs this page helpful?
YesFeedback


