Smart Office Practice
Last Updated on : 2024-06-19 03:15:55download
Purpose
With custom development solutions in the cloud development section of Tuya Developer Platform, you can build IoT projects for most industry scenarios in which assets and users can be managed. This topic describes how to create a cloud development project with custom development methods. In the following example, a smart office project is created.
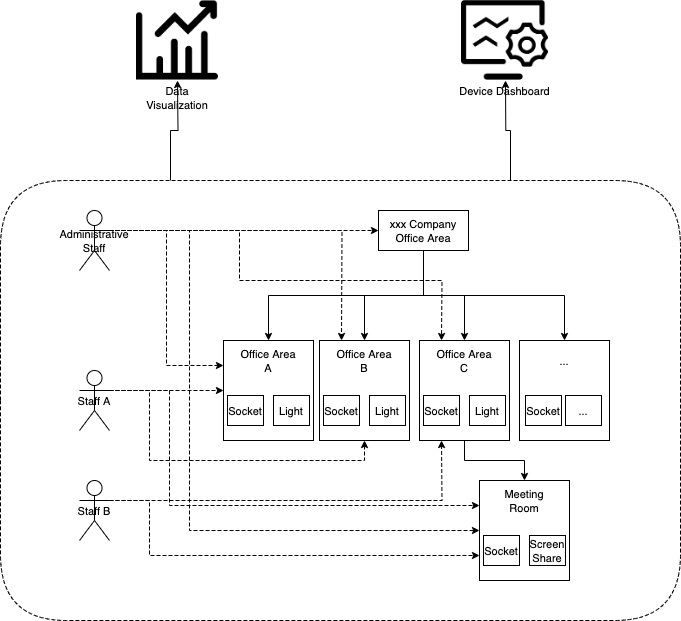
For example, a company needs to control devices such as lights and sockets in the office area. The staff of different departments can control devices in the specified office areas. Administrative staff can control all devices in the office area, whereas other staff can only control the devices in the office area where they are located. Based on these devices and staff data, the company can develop its own services, such as data visualization screens and device dashboards.
Procedure
A cloud project can be linked with devices in multiple ways. This section takes the Smart Industry app as an example and describes how to add devices to an asset. Perform the following steps:
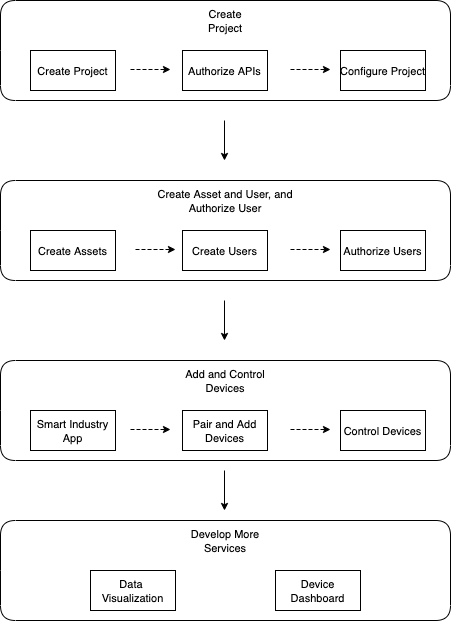
Create a project
Create a cloud project named Smart Office of xxx Company.
For more information about how to create a project, see Quick Start.
Create assets and users, and authorize users
Create assets
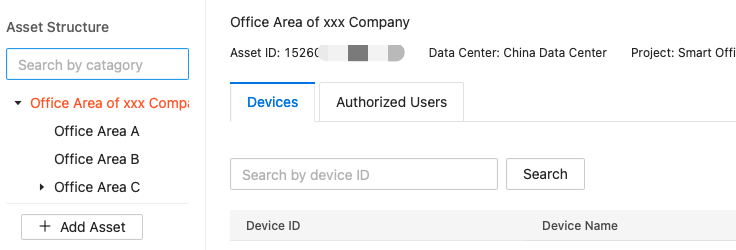
After the cloud project is created, you can create assets and users, and authorize users to access the assets. In this example, create a root asset Office Area of xxx Company. Create three assets under the root asset, namely Office Area A, Office Area B, and Office Area C. Moreover, there is a meeting room in Office Area C.
-
Log in to the Cloud Development of Tuya Developer Platform.
-
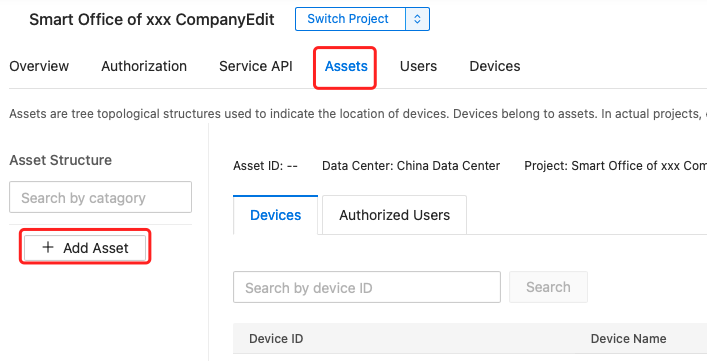
In the left-side navigation bar, choose Cloud > Development. Create a project or click an existing project to enter the details page, and choose Assets > Add Asset.
-
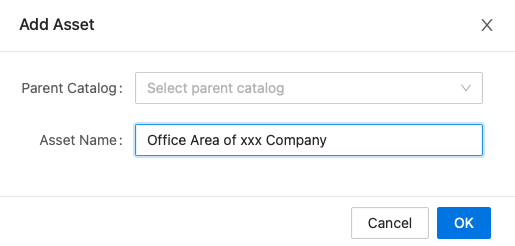
Enter the required information as prompted and click OK. Regarding a root asset, the parent catalog is not required.
-
Repeat this step until the final asset structure looks like this:
Create users
After the assets are created, assign a user account to each staff. In this example, create three user accounts: administrative staff, staff A, and staff B.
-
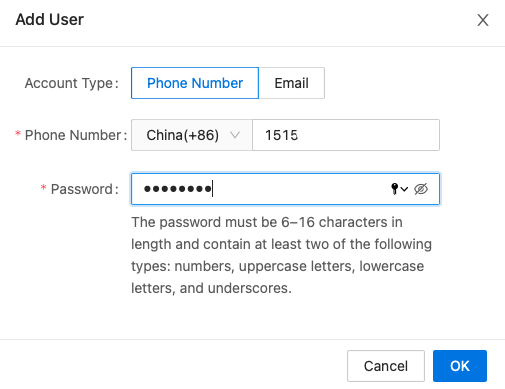
On the details page of the project, click Users > Add User.

-
Enter the required information as prompted and click OK.
-
Repeat this step until the three user accounts look like this:

Among which:
- The administrative staff’s account: 151***
- Staff A’s account: 177***
- Staff B’s account: 132***
Authorize users
After the assets and users are created, you can authorize users to access the specified assets. In this example, authorize the administrative staff the access to all the root assets (office area of xxx company), office areas A, B, and C, and the meeting room, authorize staff A the access to office areas A and B, and authorize staff B the access to office area C.
-
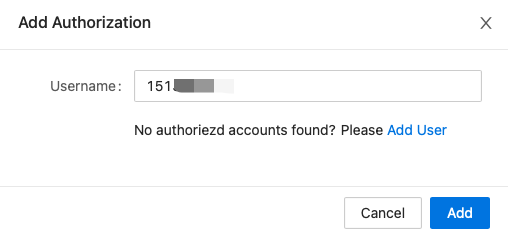
On the details page of the project, click Assets, find the target asset, and then click Authorized Users > Add Authorization.

-
Enter the username to be authorized and click Add.
-
After authorization, you can view the authorization result in Assets > Authorized Users.

-
Repeat this step until all the users are authorized.
When an asset is authorized to a user, its sub-asset is not authorized to the user.
Add and control devices
After the assets and users are created and authorized, the users can add or control devices under the specified assets. For example, the administrative staff can add devices in office area A by using the Smart Industry app.
-
Click the Assets tab, select office area A, click Devices > Add Device, and then select Add Devices with Smart Industry App.

-
Use the Smart Industry app to scan the QR code and log in to the app. Find office area A in the Asset List, and click Add to perform device pairing and adding.
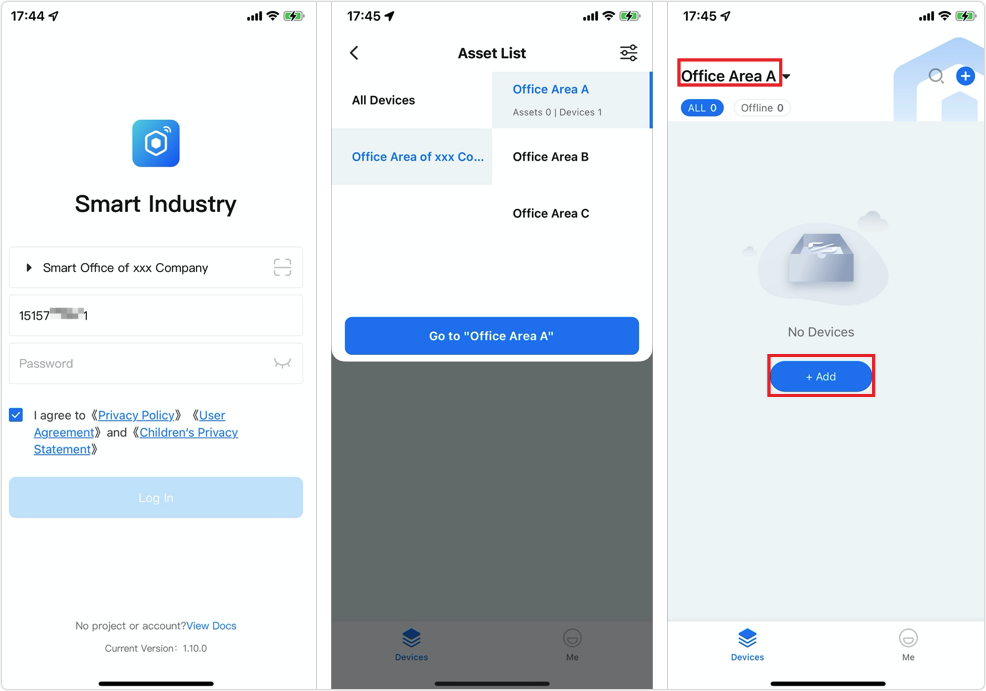
You will see the added device on the Devices page.

Now, both the administrative staff and staff A can control this device by using the Smart Industry app.
Develop more services
You can develop more services based on the above scenarios. For example, statistical services such as data visualization screens, and management platform services such as device dashboards. You can also use such services provided by Tuya without further development.
Data visualization
A data visualization screen is used to provide an overview of users and devices.
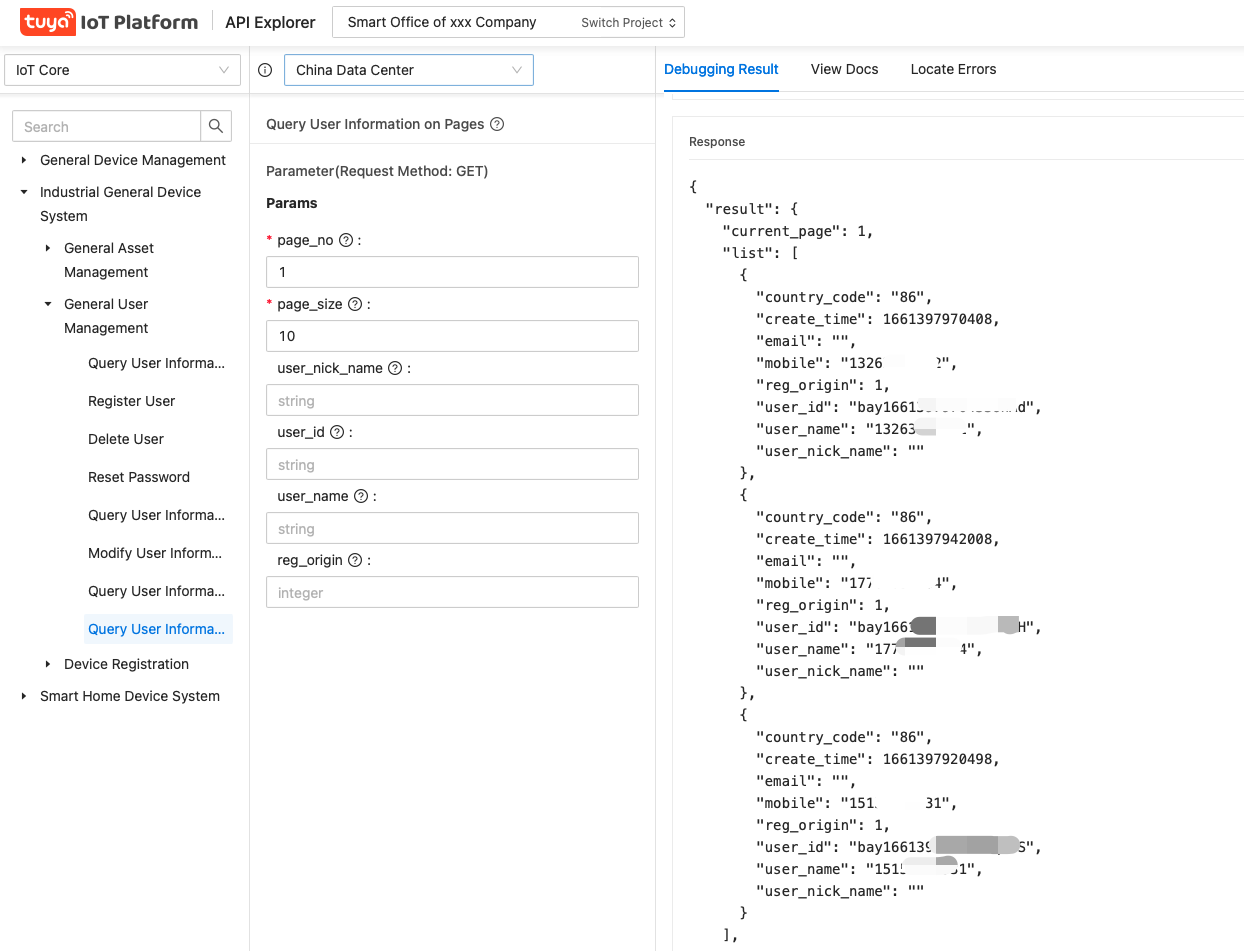
Request the Query User Information on Pages OpenAPI to query the company’s staff information.
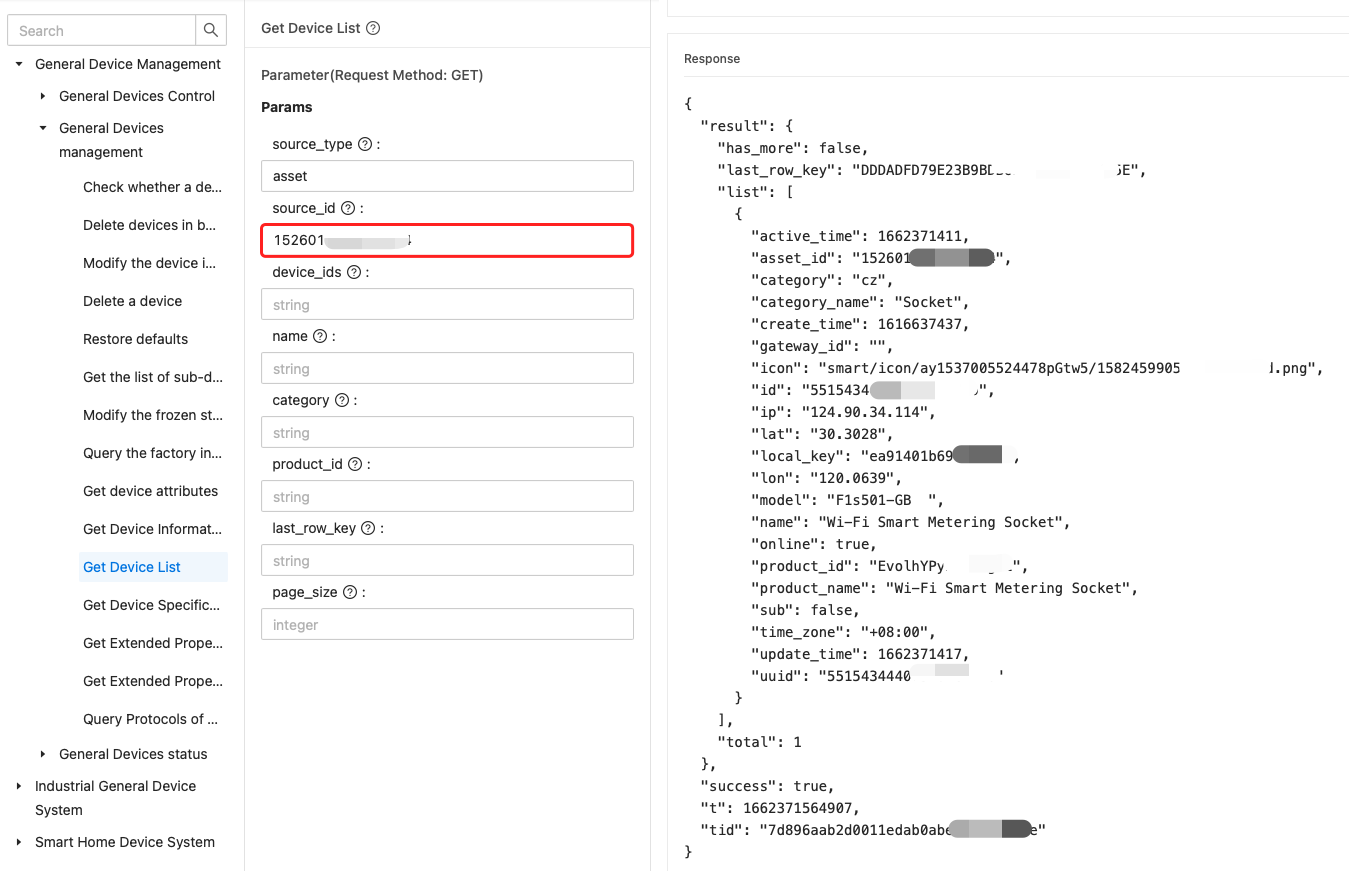
Query a list of devices under the device asset. For example, to query a list of devices in office area A, you can request the Get Device List OpenAPI. source_id is the asset ID of office area A.
The list of returned devices.
Device dashboard
-
Firstly, request the Get Device List OpenAPI to get a list of devices that belong to the target asset.
-
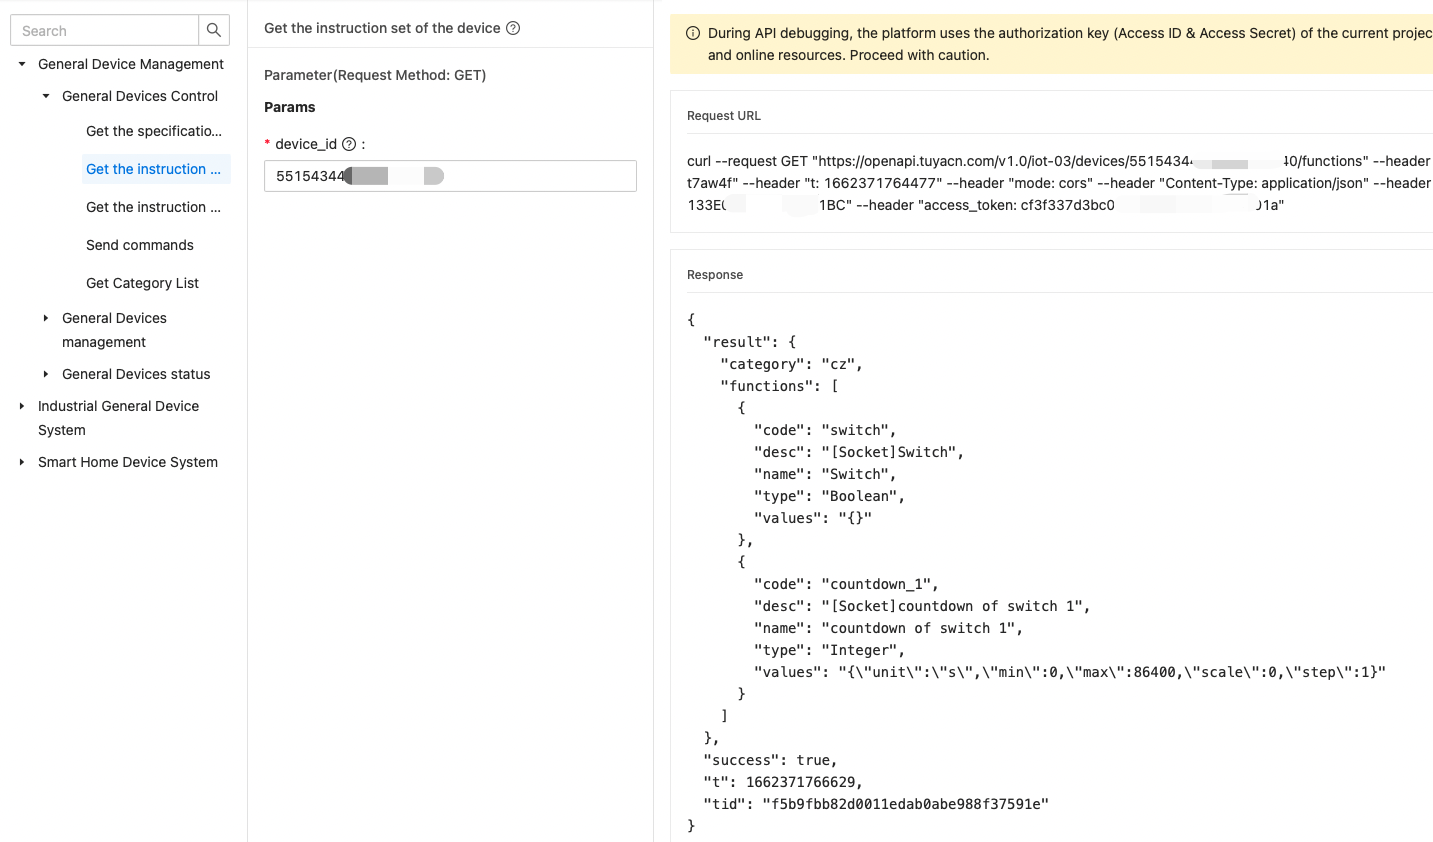
After you get the target devices, you can get the instruction set of the device based on the device ID.
-
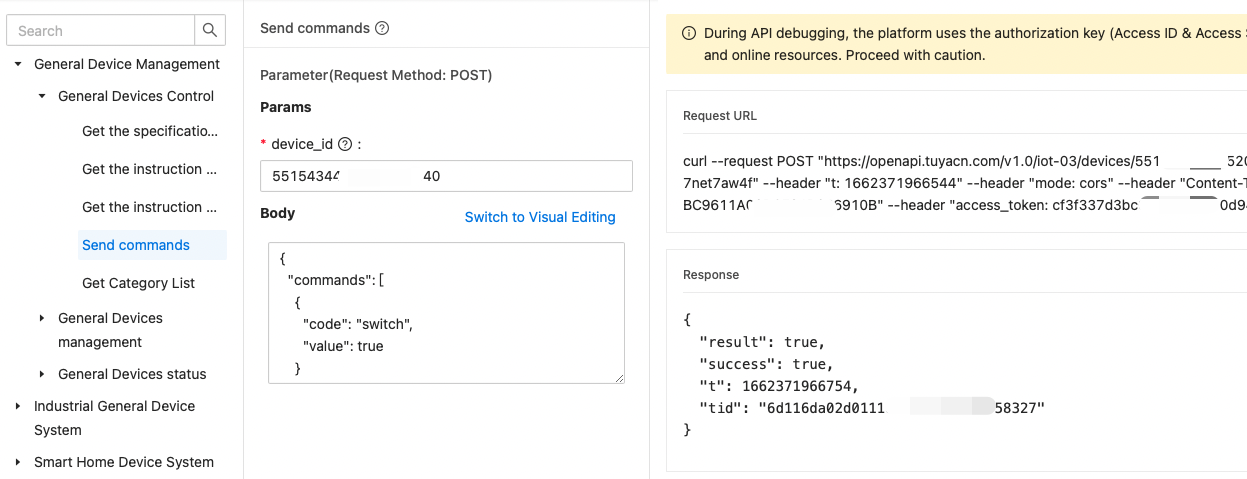
After you get the instruction set of the device, you can request the Send commands OpenAPI to send commands to the device and control it accordingly.
You can use the above OpenAPI calls in your own services by programming. For more information, see API Reference.
Is this page helpful?
YesFeedbackIs this page helpful?
YesFeedback


