IoT Core Device Management
This topic takes a virtual smart campus project as an example and describes how to perform device control and device management by calling the new IoT Core OpenAPI. By calling the essential APIs of Tuya IoT Core, you can implement a wide array of operations. For example, classify devices by space, manage bulk devices in groups, set device properties and scheduled tasks, and trigger scene linkages. This practice applies to the development environments IntelliJ IDEA and API Explorer.
Scenario analytics
This topic simulates the remote management of various smart devices in a virtual smart campus, and describes how to manage and operate devices. In the following example, five types of open APIs provided by IoT Core are supported: space, device, group, linkage, and timer.
Sample scenario
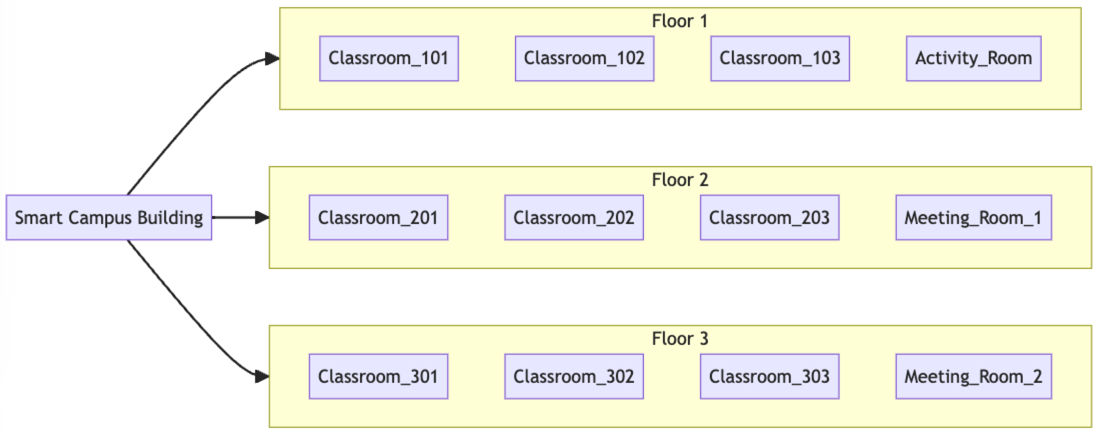
The figure below shows the spatial structure of a smart campus building. The entire building has three floors, and each floor has three classrooms and an activity room or a meeting room.
Device list
The following table lists the devices managed in this example. You can add devices as you want.
| Space | Device | Quantity | Space | Device | Quantity | Space | Device | Quantity |
|---|---|---|---|---|---|---|---|---|
| Meeting room | Smart light | 4 | Classroom | Smart switch | 1 | Activity room | Smart switch | 1 |
| Smart lock | 1 | Smart light | 4 | Large light | 2 | |||
| Central air conditioner | 1 | Smart lock | 1 | Smart lock | 2 | |||
| Smart projector | 1 | Central air conditioner | 1 | Ambient light | 10 | |||
| Smart curtain | 4 | Smart projector | 1 | Smart speaker | 1 | |||
| Human presence sensor | 1 | Smart camera | 1 | Central air conditioner | 1 | |||
| Sound sensor | 1 | Smart curtain | 4 | Smart LCD | 1 | |||
| Temperature & humidity sensor | 1 | Human presence sensor | 4 | Smart camera | 1 | |||
| Common device | Zigbee gateway | 2 | Sound sensor | 1 | - | - | - | |
| Wireless router | 2 | Temperature & humidity sensor | 4 | - | - | - | ||
| - | - | - | Smart LCD | 4 | - | - | - |
Procedure
The following section takes a virtual case as an example and walks you through the whole procedure.
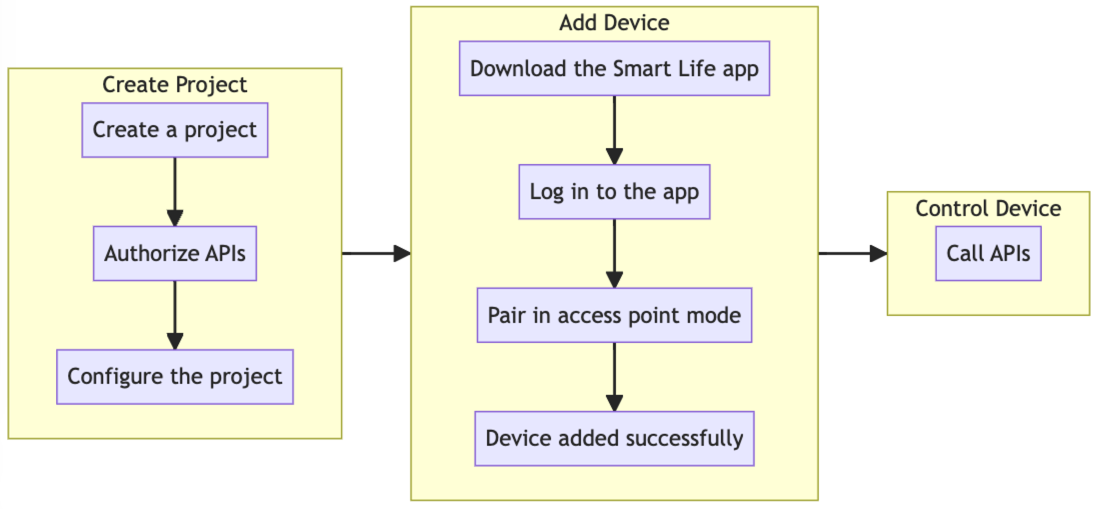
The procedure is divided into three steps. If you have created a cloud project and added devices to the project, you can proceed to Step 3: Control devices.
Step 1: Create a cloud project
- Log in to the Tuya Developer Platform.
- In the left-side navigation bar, choose Cloud > Development.
- On the page of My Cloud Projects, click Create Cloud Project.
- On the Create Cloud Project window, configure Project Name, Description, Industry, Development Method, and Data Center. From the Development Method drop-down list, select Custom. This sample project is named Smart Campus Building.
- On the Authorize API Services page, subscribe to the preferred API services and click Authorize.
For more information about cloud projects, see Manage Projects.
Step 2: Add devices
The cloud project supports multiple ways to add devices. You can choose the desired way to add devices in different scenarios.
This practice describes how to add a virtual device to show the features. For a real project, you can choose the development method that best suits your requirements.
-
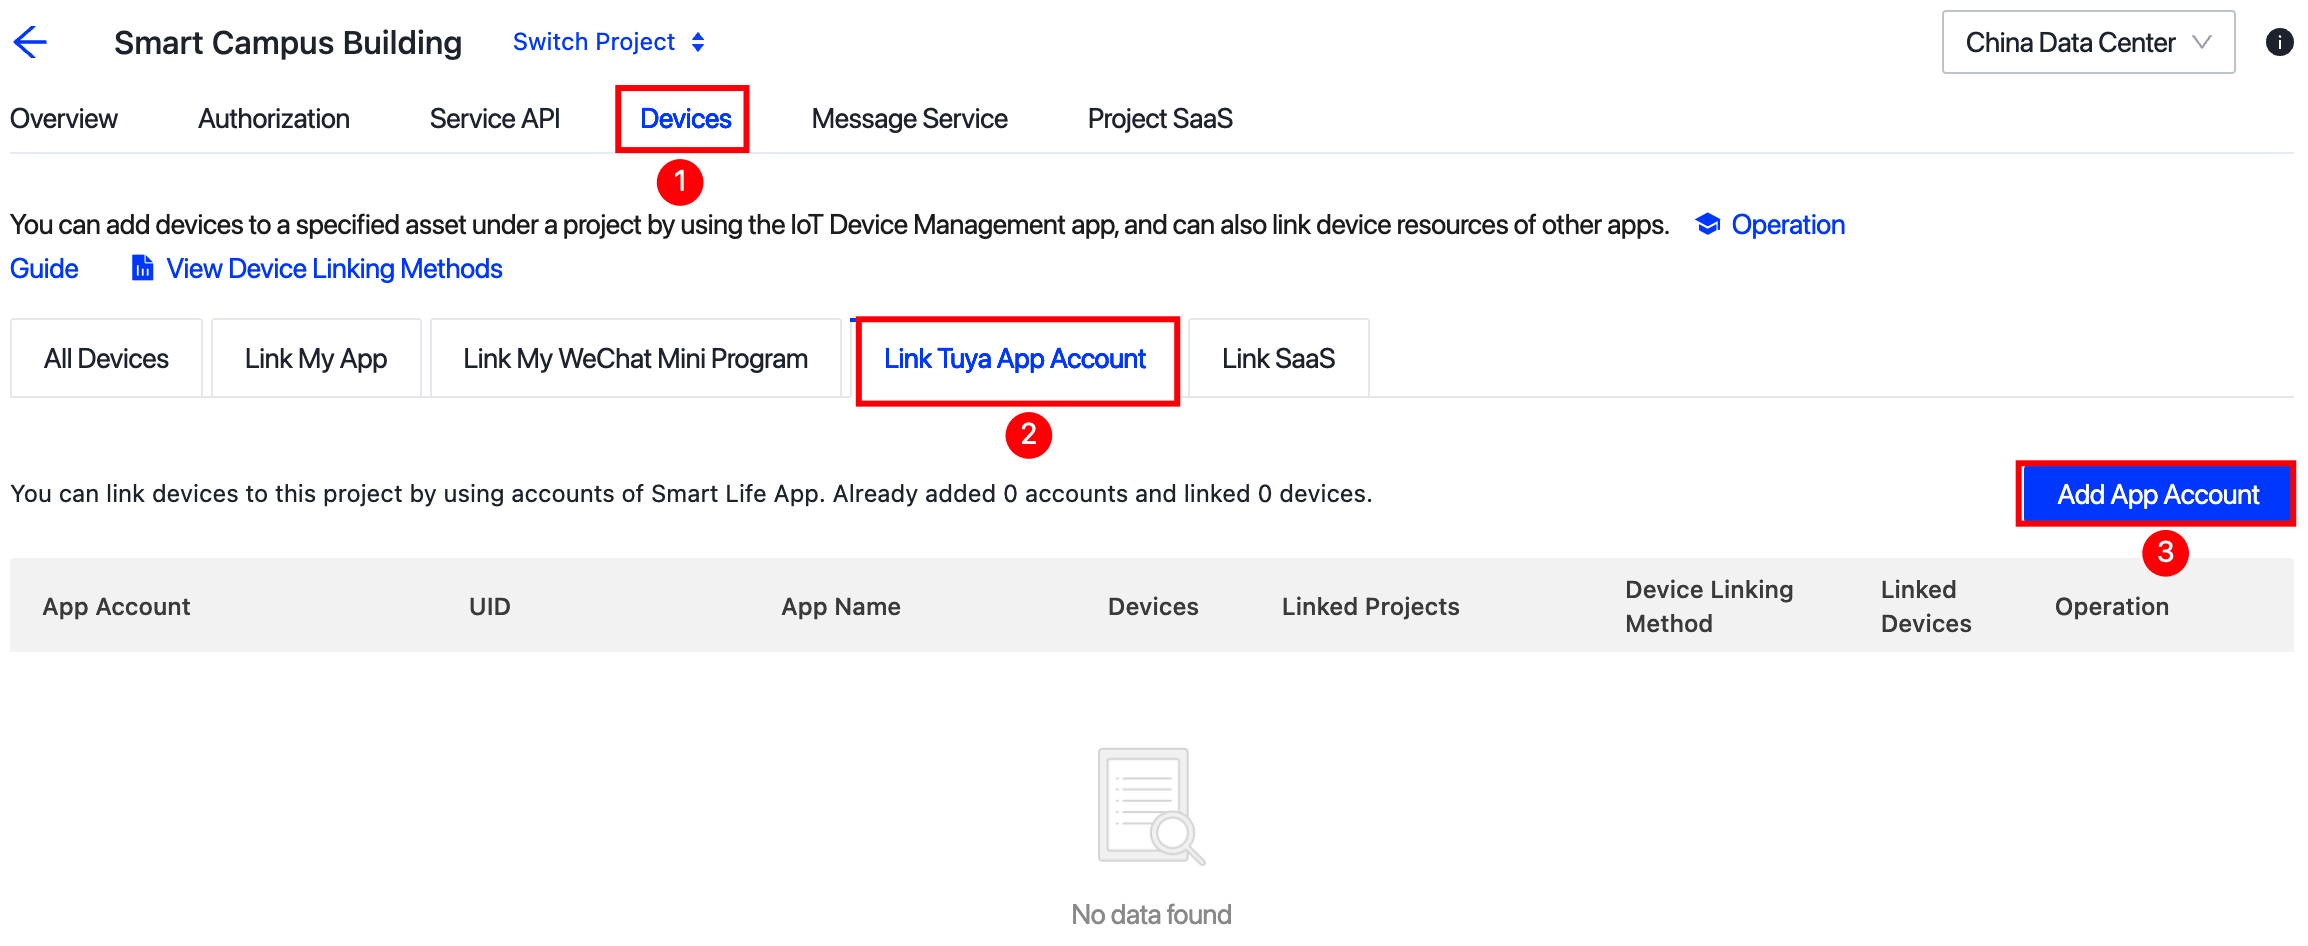
Link your project with a Tuya-enabled app account.
-
Choose Devices > Link Tuya App Account > Add App Account.
-
Scan the QR code with the SmartLife app that you have logged in. After authorization, you will see all devices under the authorized account in the All Devices tab.
-
-
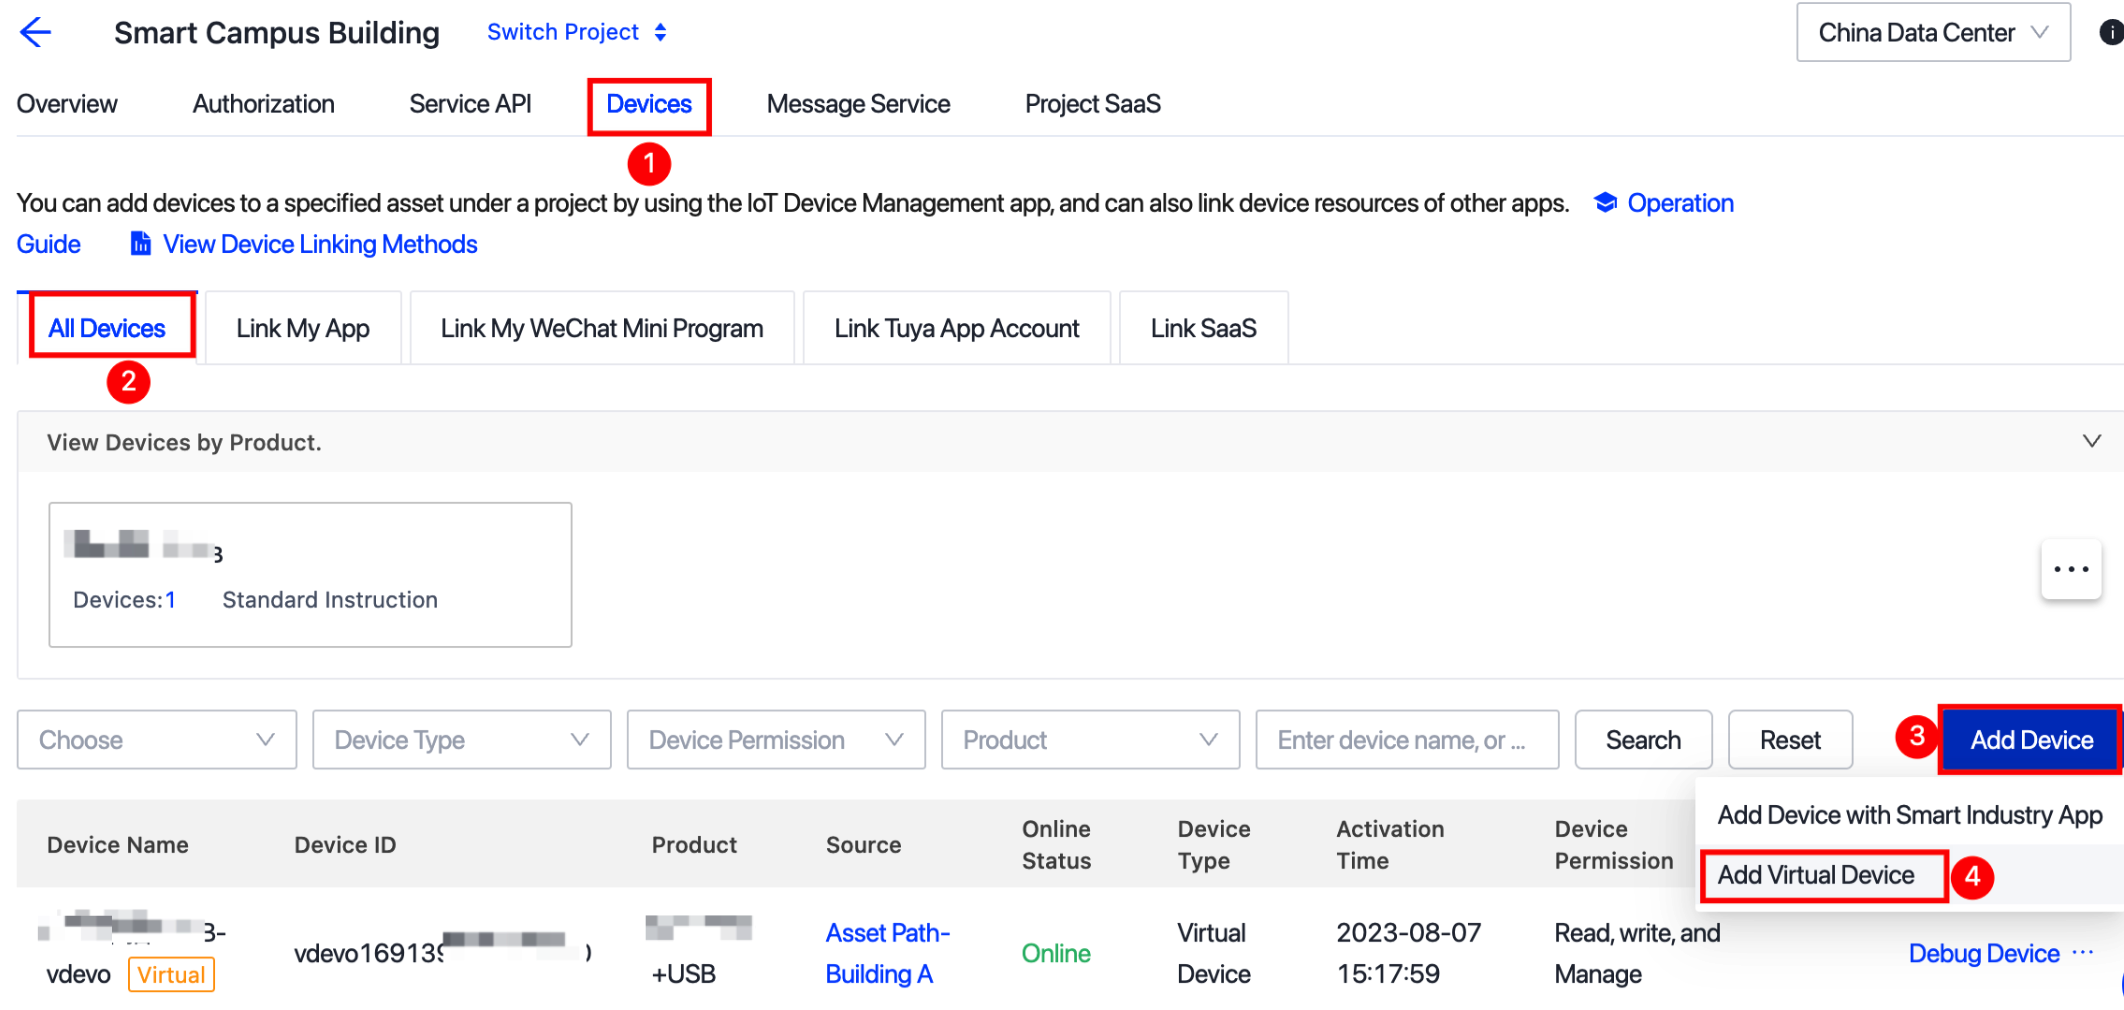
Add a virtual device to your Tuya-enabled app account.
-
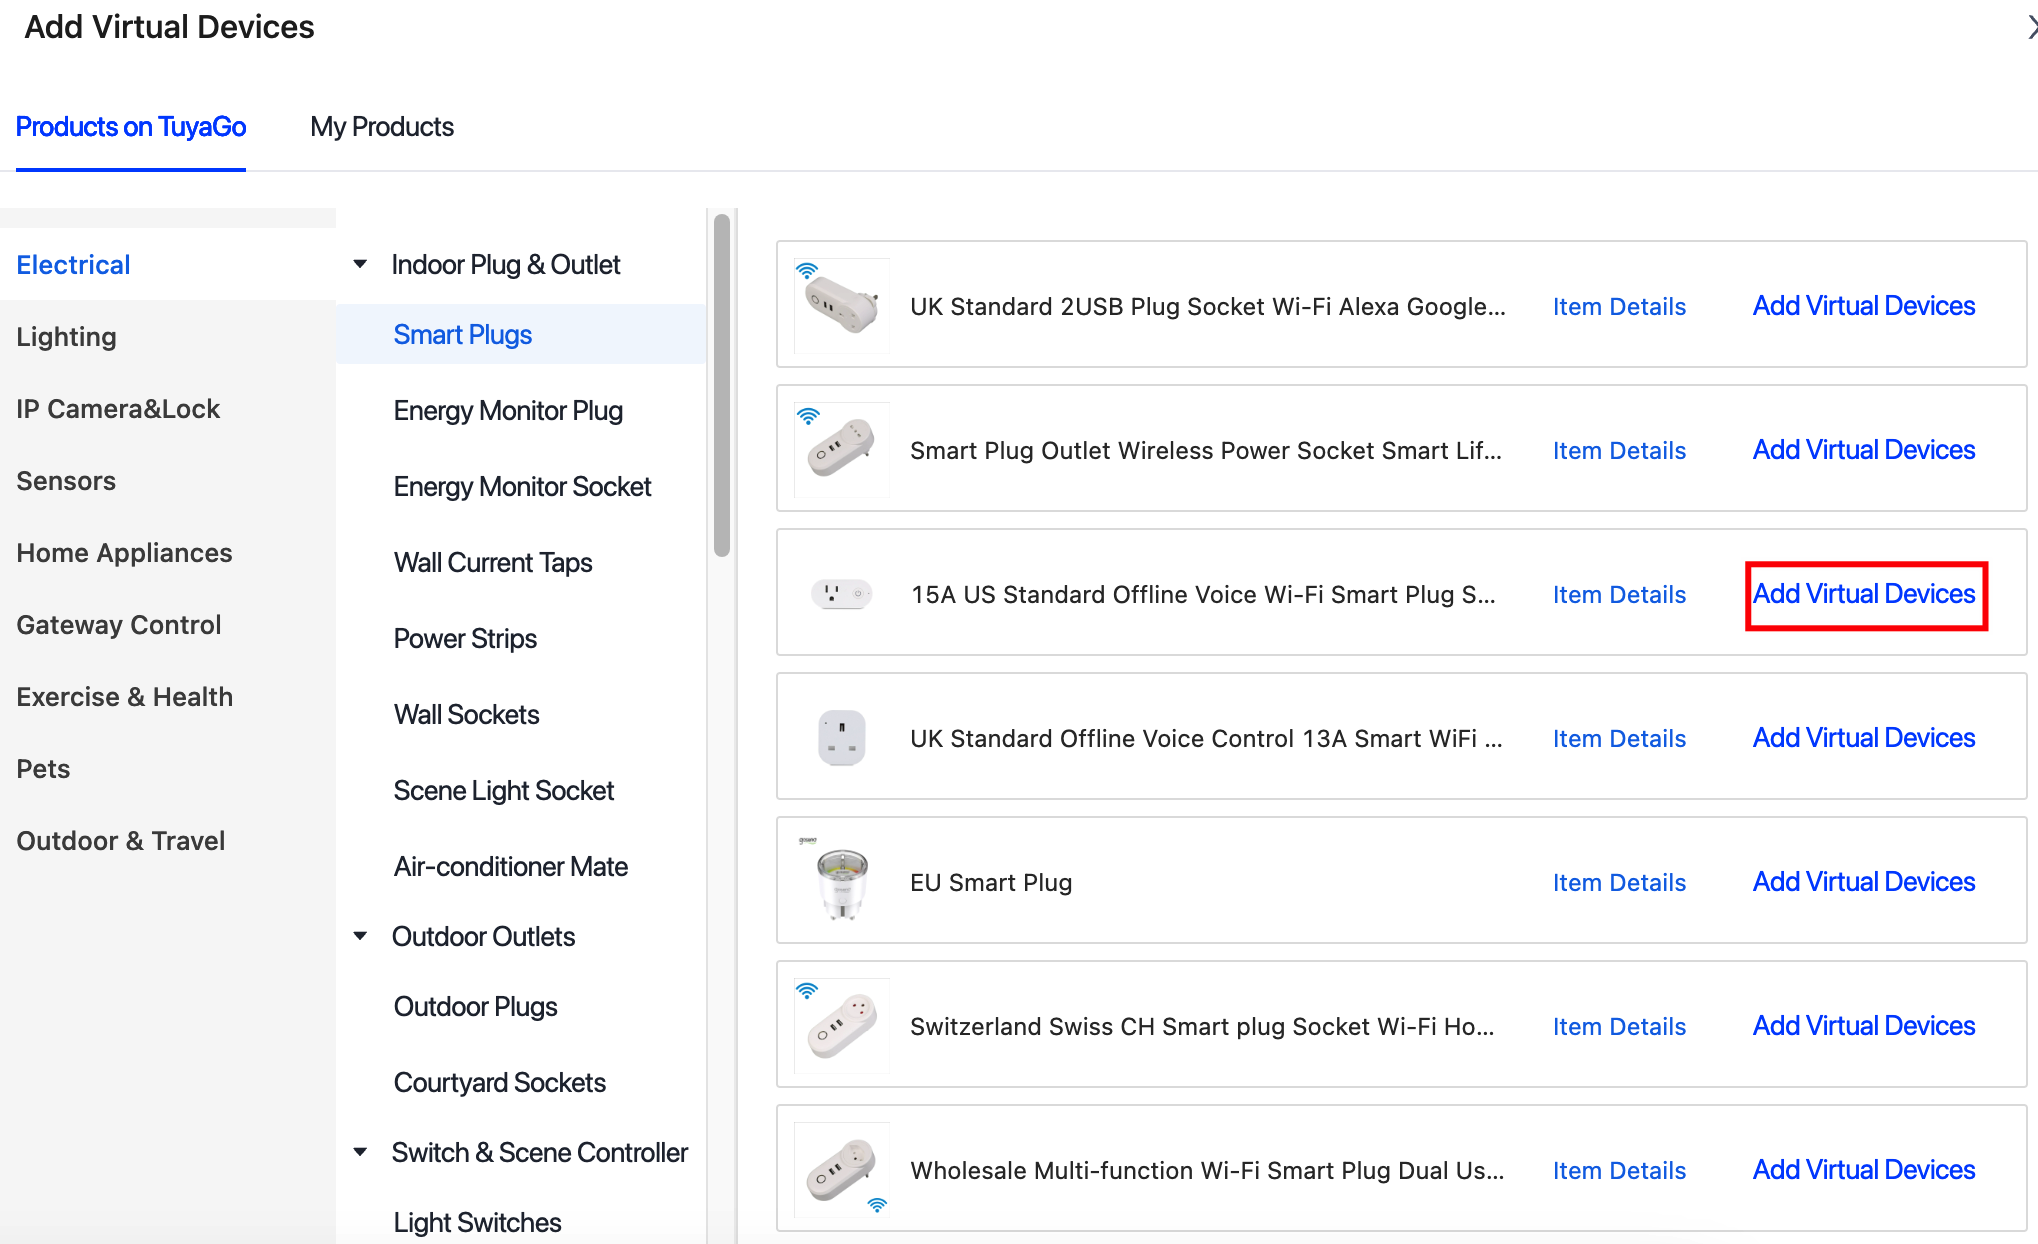
Choose Devices > All Devices > Add Device > Add Virtual Device.
-
On the page of Add Virtual Devices, select desired devices and click Add Virtual Devices.
-
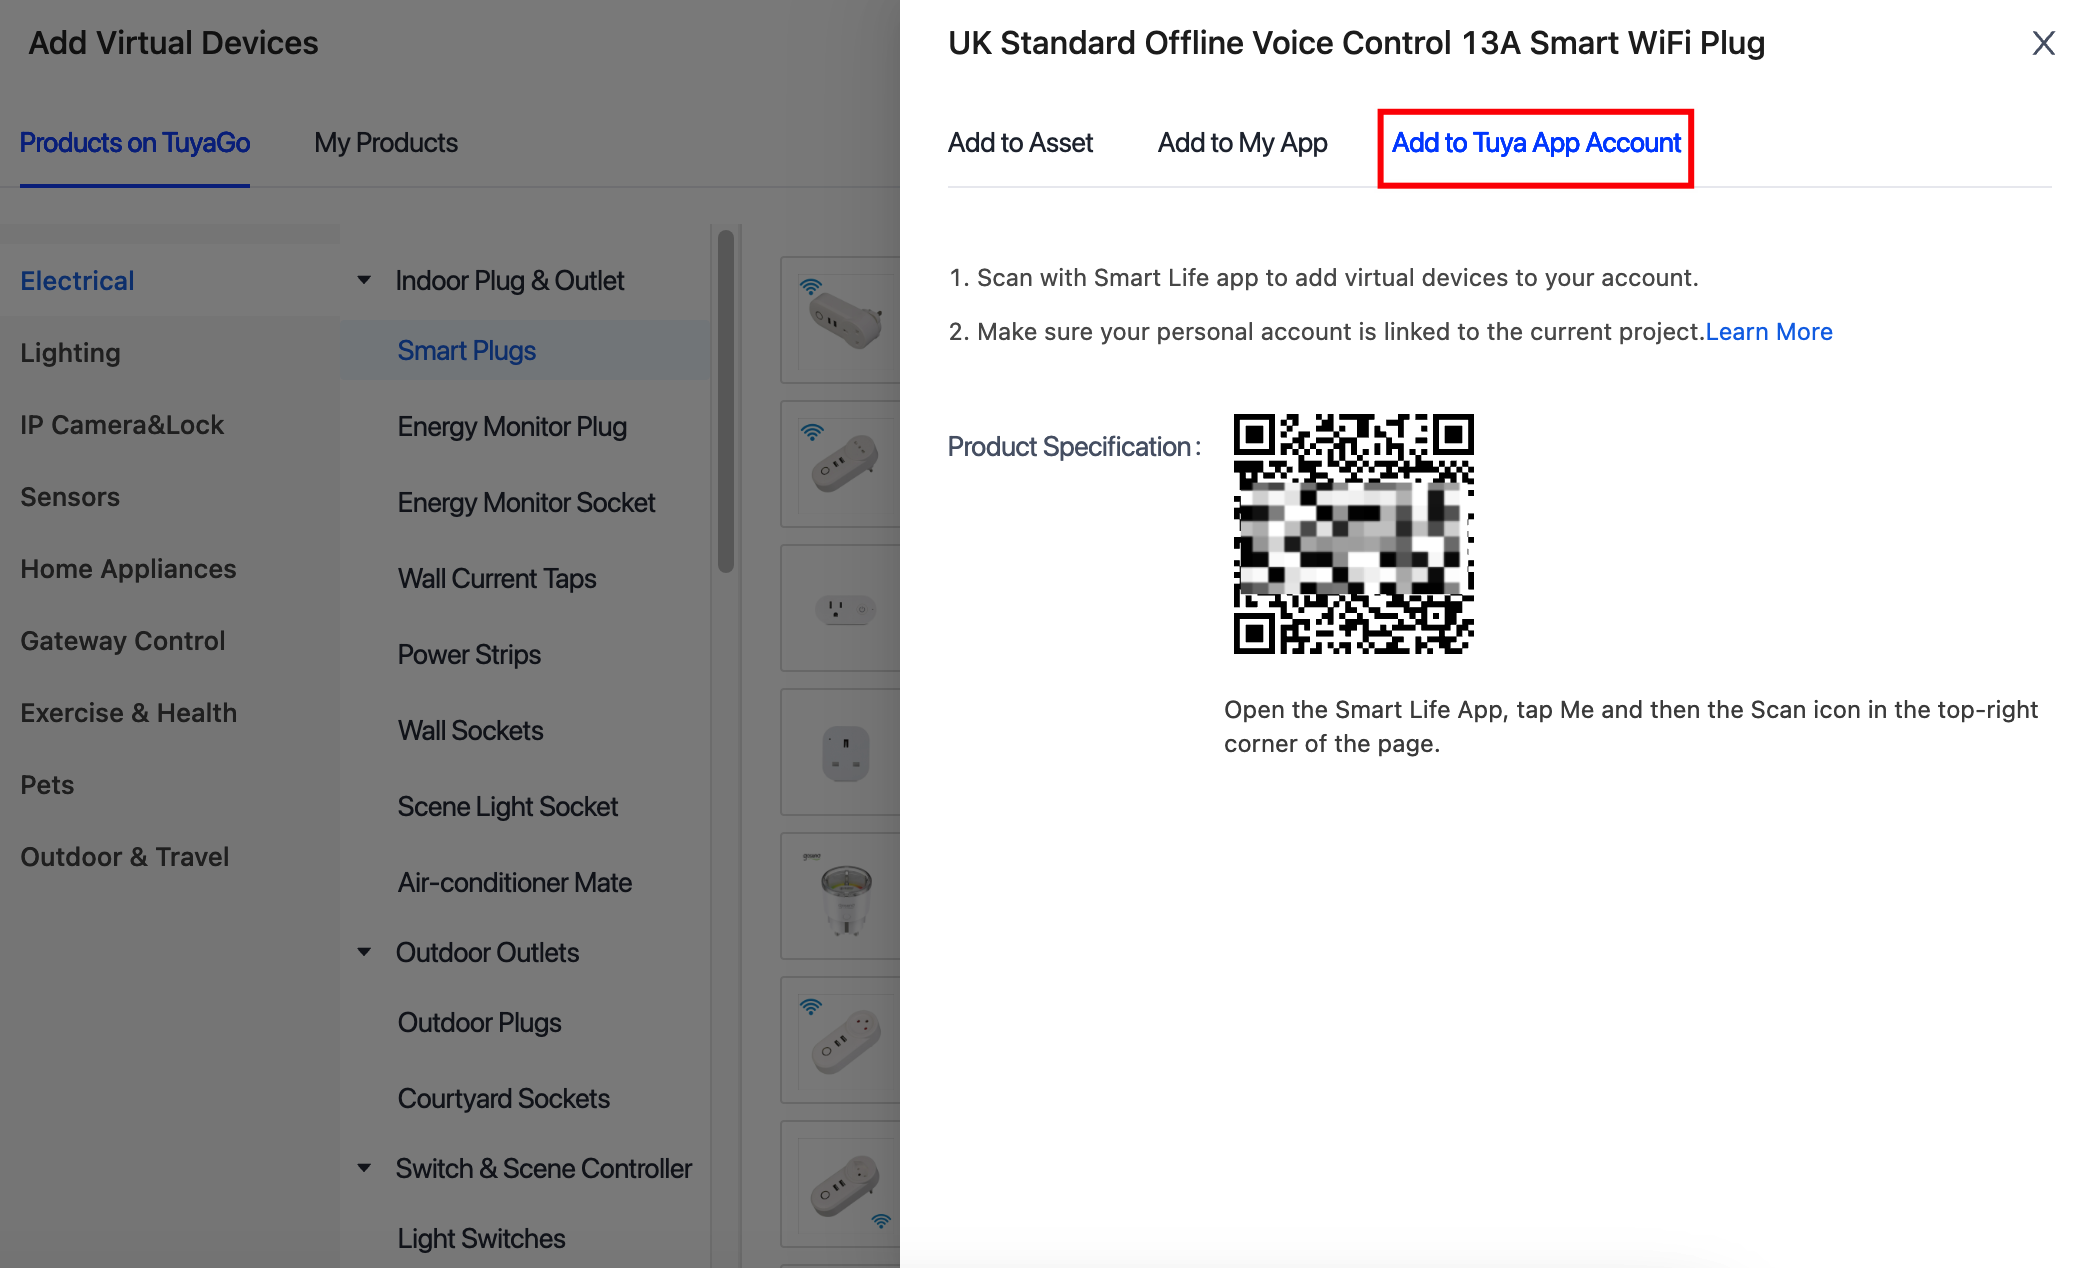
On the page that appears, click the tab Add to Tuya App Account, scan the QR code with the Tuya-enabled app that is authorized in the previous steps, and then add devices as prompted. You can find the added devices in the list of all devices of the current cloud development project.
-
Step 3: Control devices
Prerequisites
-
Development environment: IntelliJ IDEA
-
Development tool: Tuya-connector Java SDK.
Tuya-connector Java SDK helps you efficiently create cloud development projects regarding the OpenAPI or message subscription capabilities (cloud-to-cloud integration). You can put all the focus on business logic. For more information, see Develop with Java SDK.
-
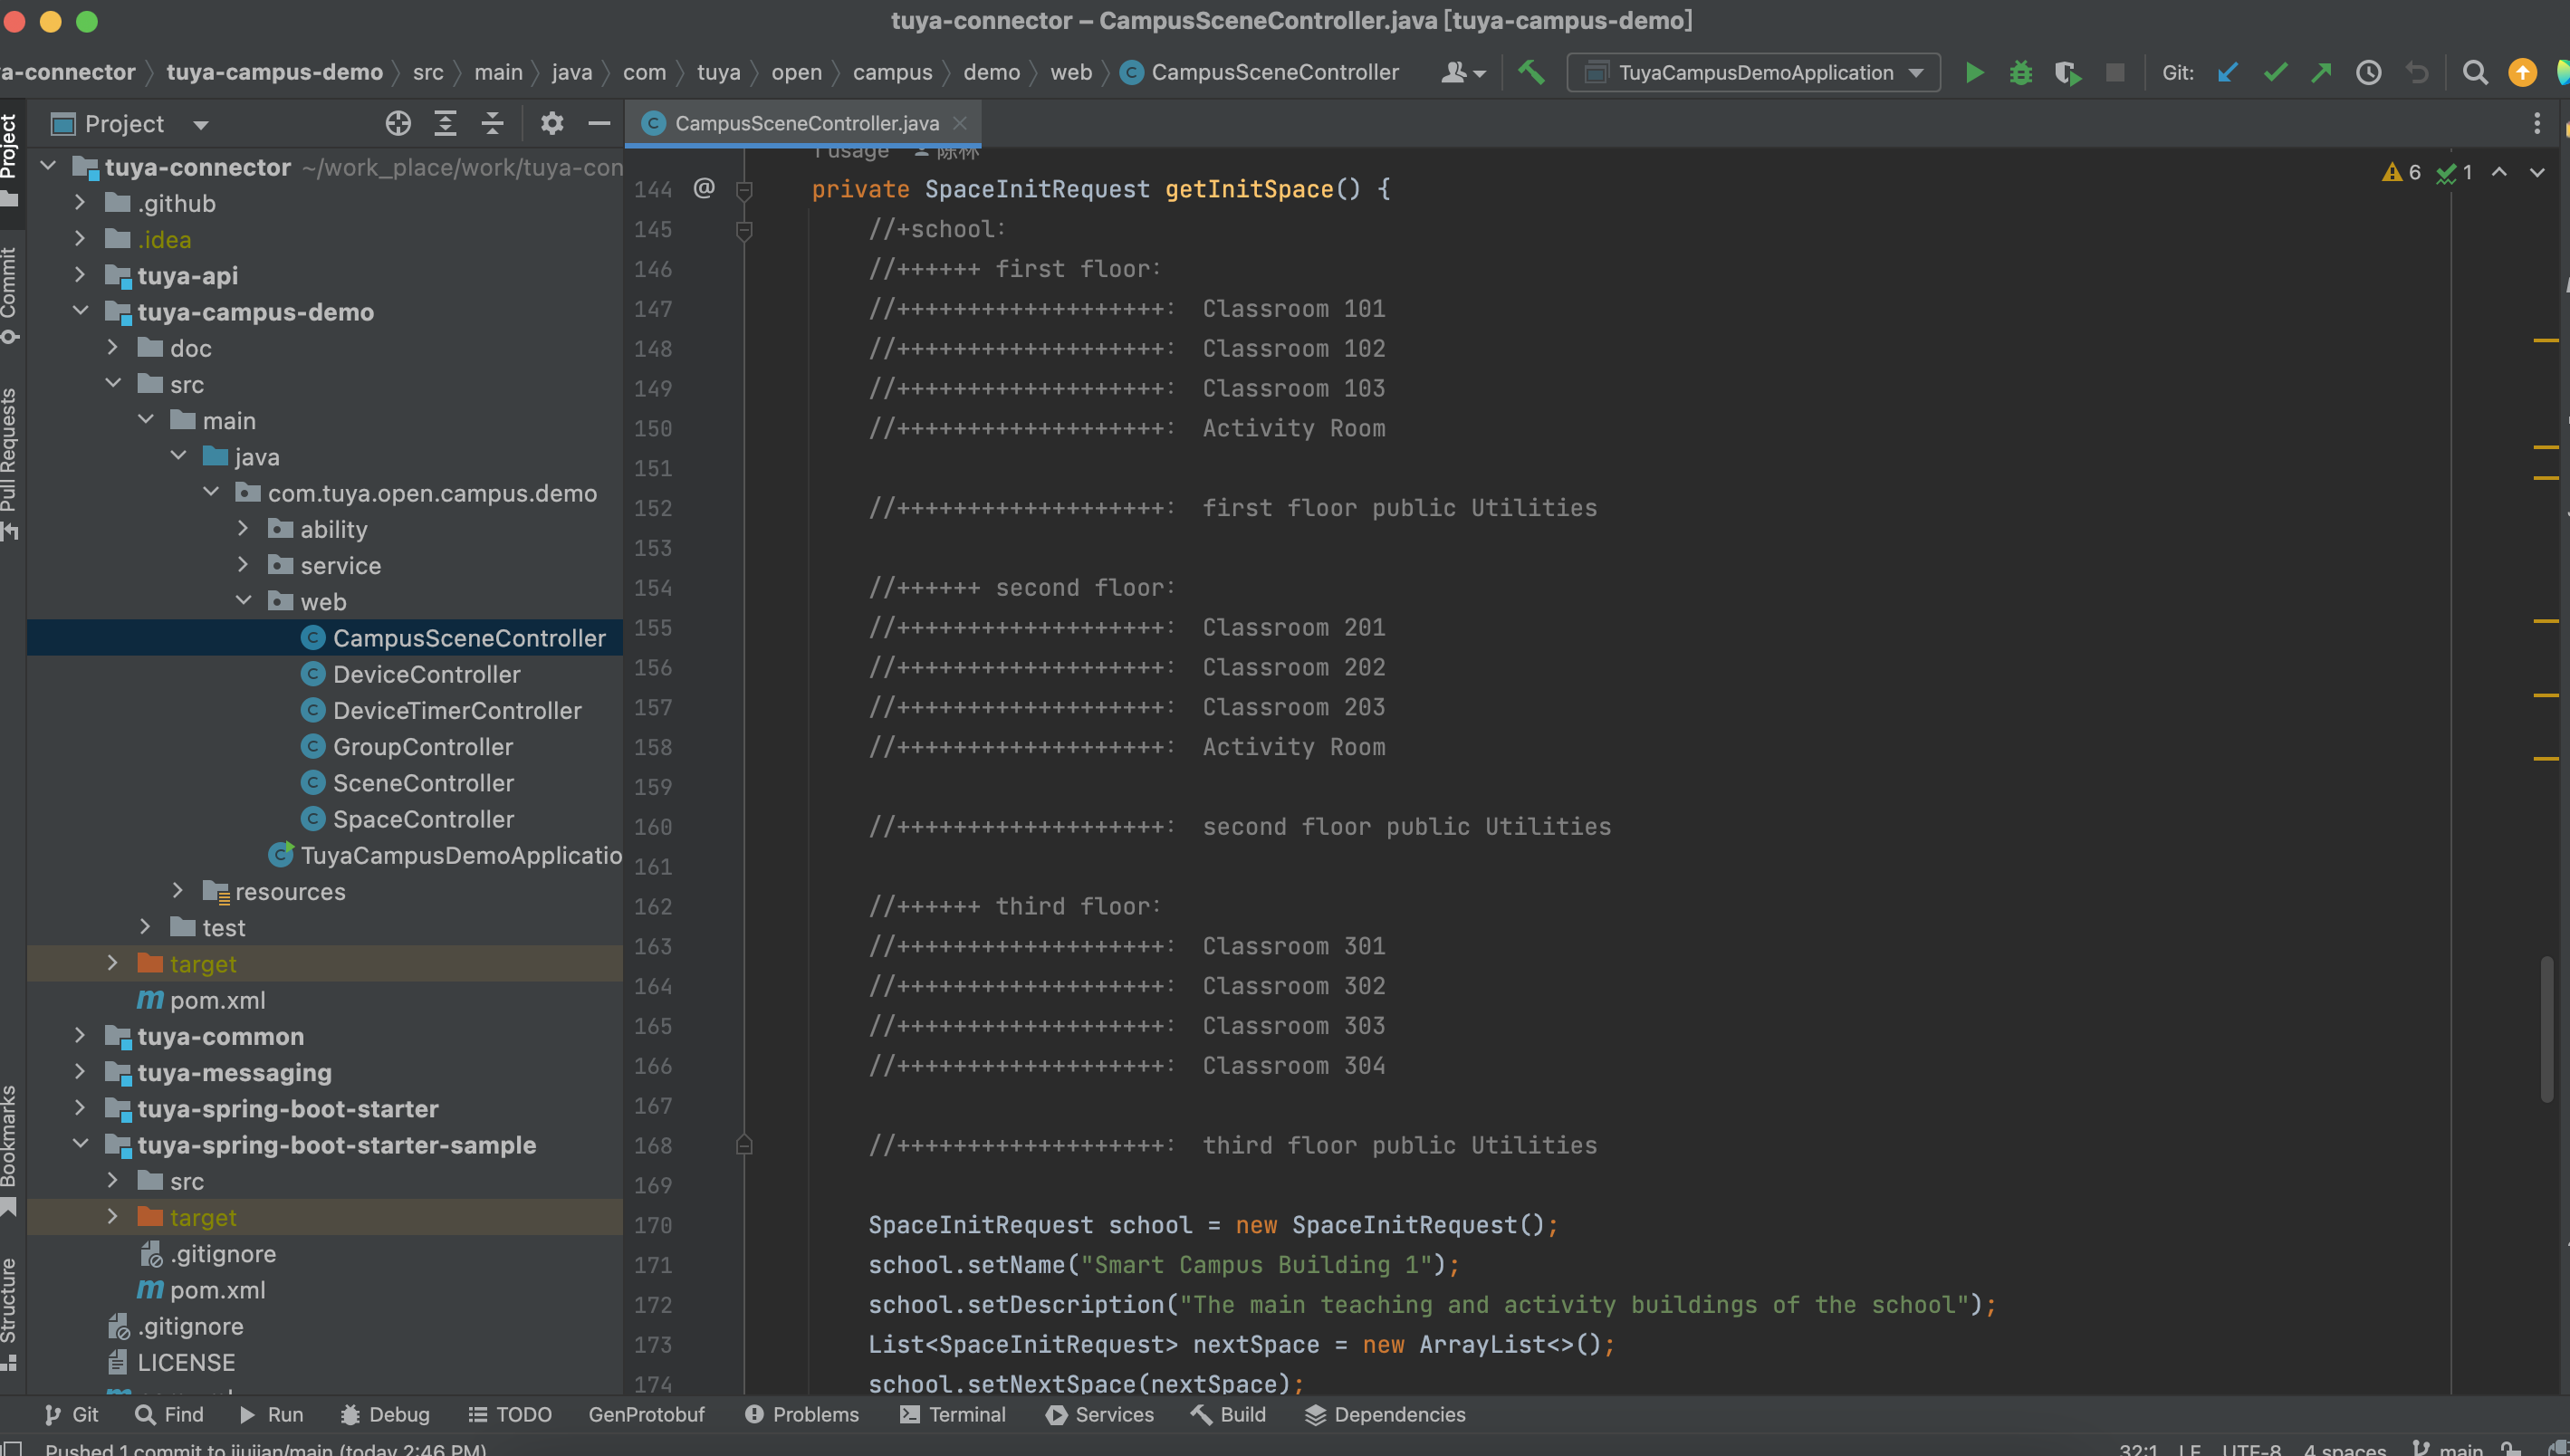
Demo project:
tuya-campus-demo. You can import this demo to try out the whole process. -
Debugging tool: Tuya’s API Explorer.
Create a space
Based on the Space structure diagram of smart campus building, you can:
-
Create a structure including the first to third floors of the teaching building.
-
Initialize three classrooms and an activity room on the first floor. During creation, you need to use APIs related to space.
-
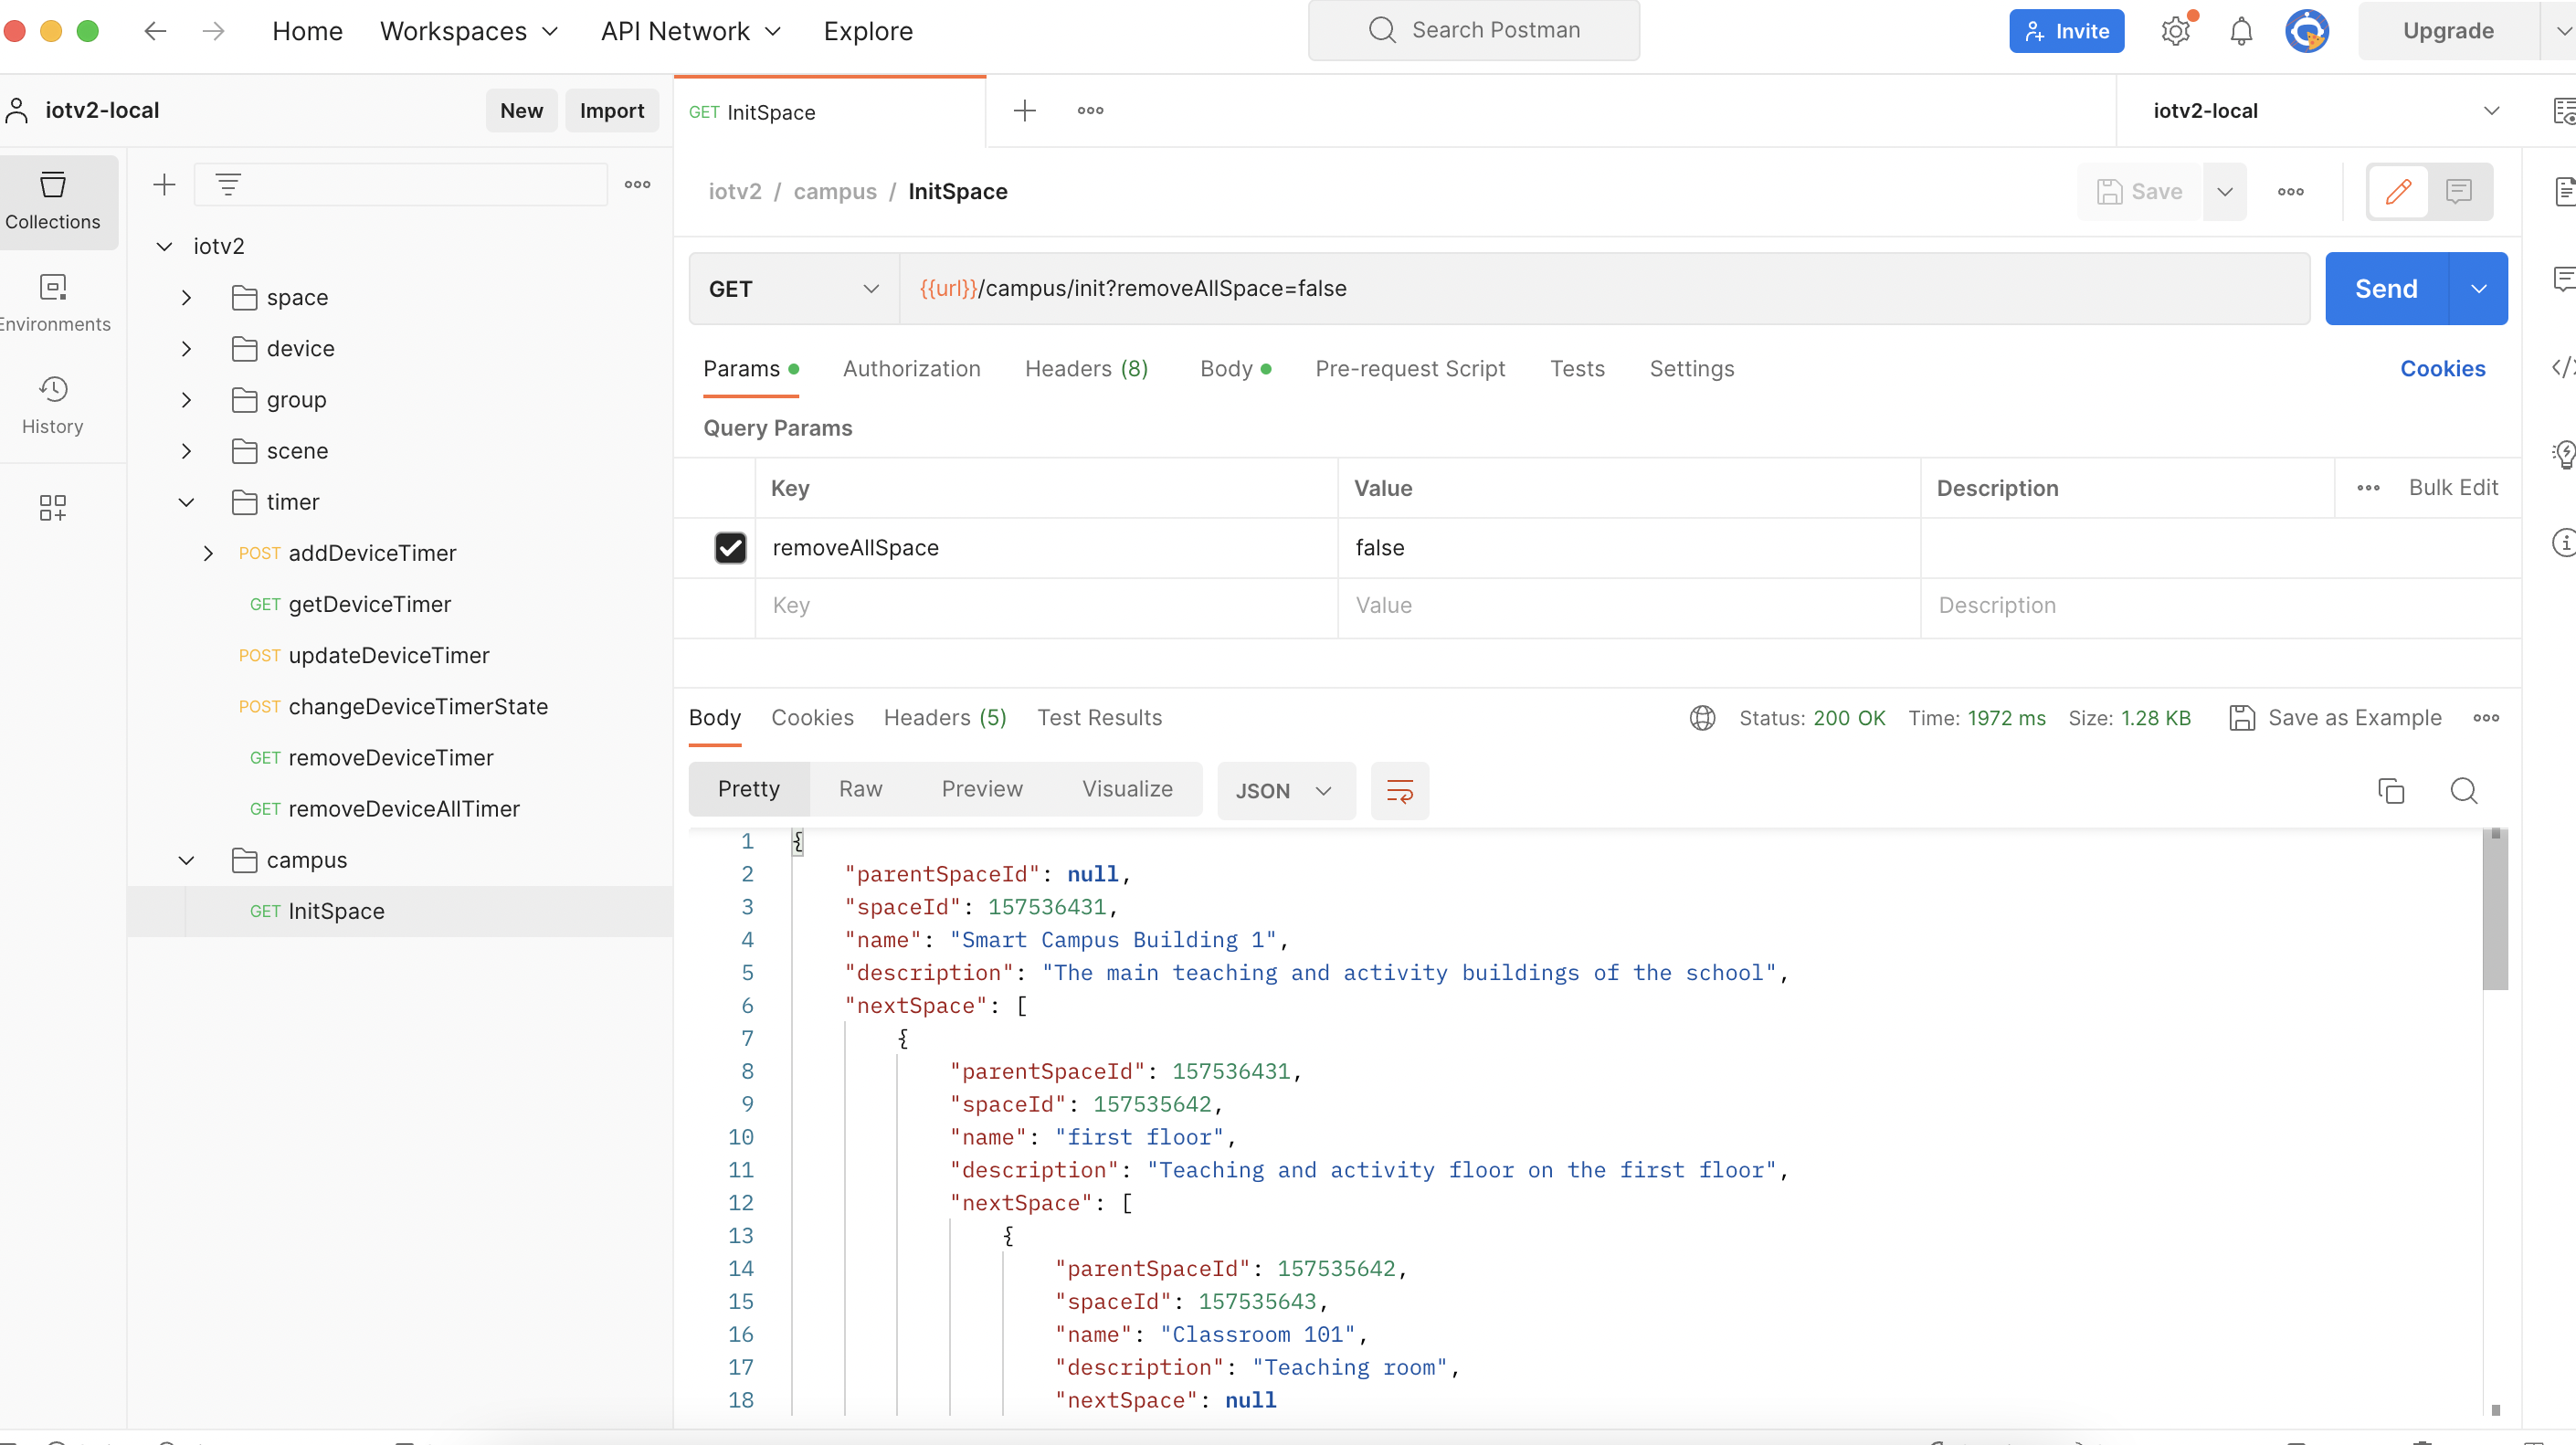
The initialization APIs are included in the
tuya-campus-demosample code. Thus, you can make API requests for initialization directly with your developer account.GET http://127.0.0.1:8080/campus/init?removeAllSpace=false -
APIs
Create a space.
POST:/v2.0/cloud/space/creation -
Demo snippet
-
Debugging example
-
-
Note down the generated space numbers, which will be used in the space-based device management process. This way, you do not need to query the space APIs again.
Building: 157536431
- Floor 1: 157535642
- Classroom 101: 157535643
- Classroom 102: 157536432
- Classroom 103: 157536433
- Activity room: 157536434
- Public utilities: 157536435
- Floor 2: 157536436
- Floor 3: 157535644
…
- Floor 1: 157535642
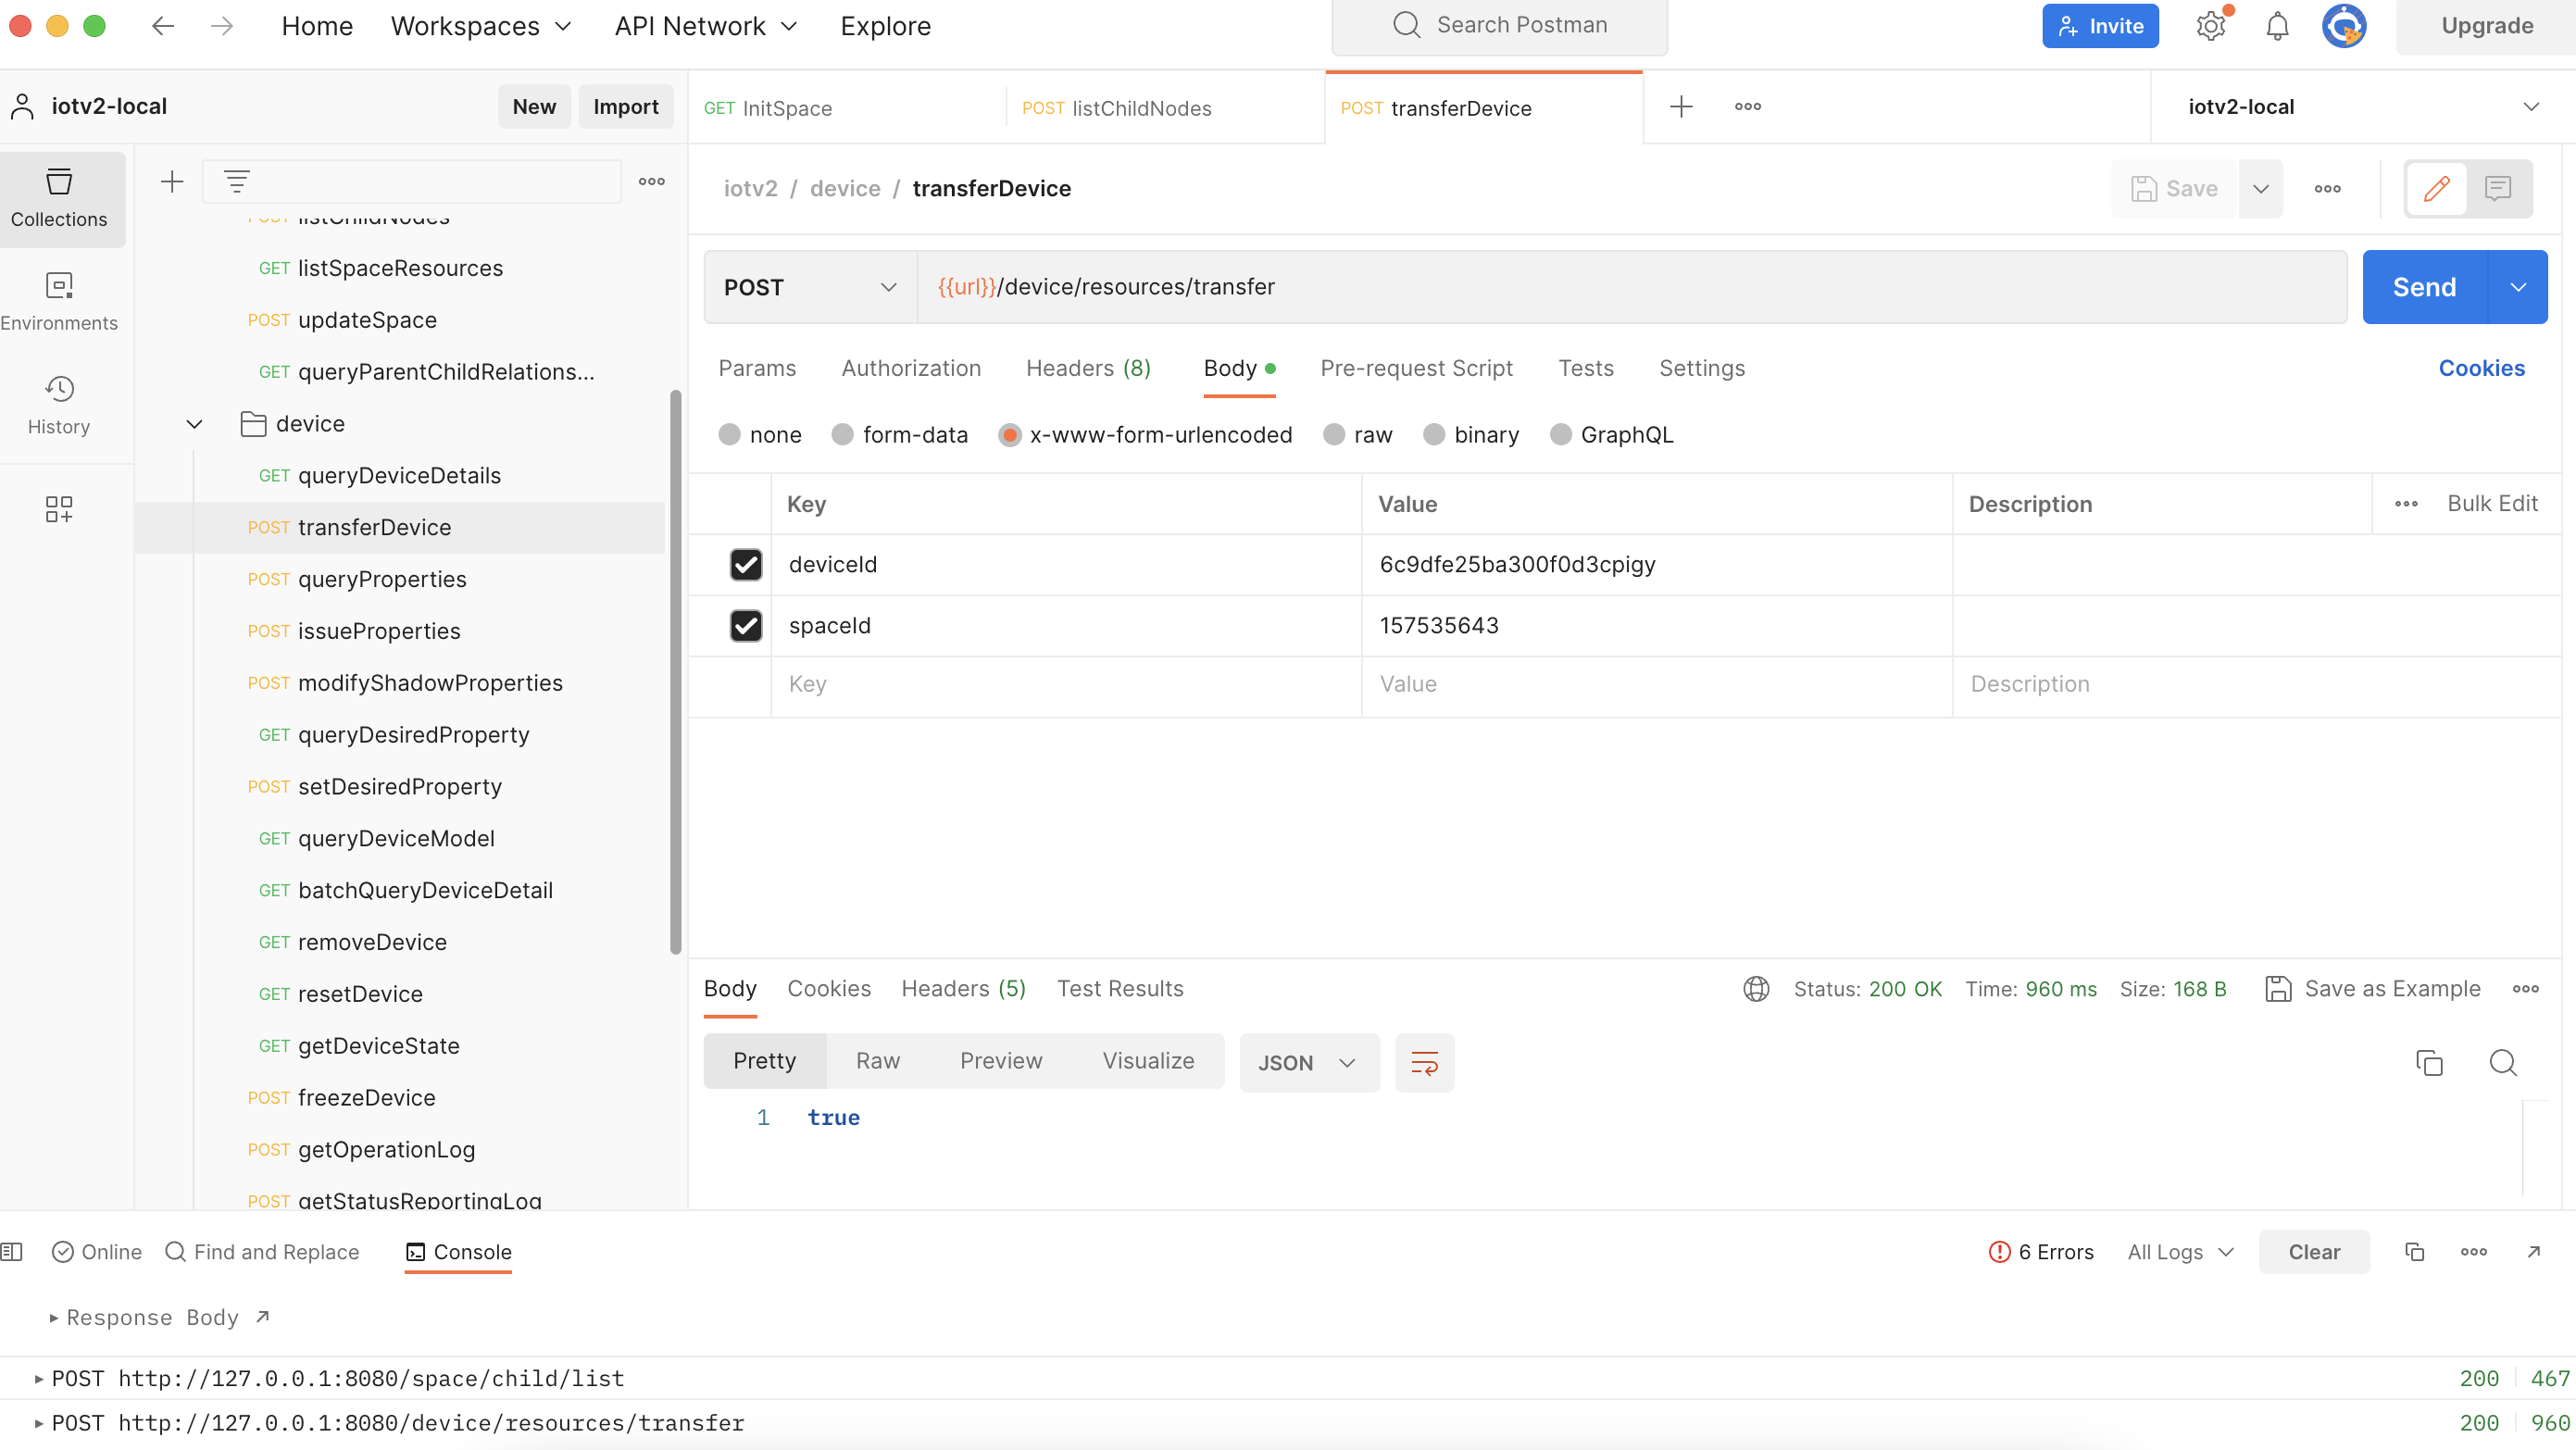
Transfer devices
According to the device list of each space, you can allocate the added devices to specific spaces as planned. For example, in Classroom 101, you need to allocate one smart switch, one door lock, four lights, two air conditioners, smart curtains, and other devices. You can allocate devices to spaces as follows:
-
APIs
Transfer devices.
POST:/v2.0/cloud/thing/{device_id}/transfer -
Demo snippet
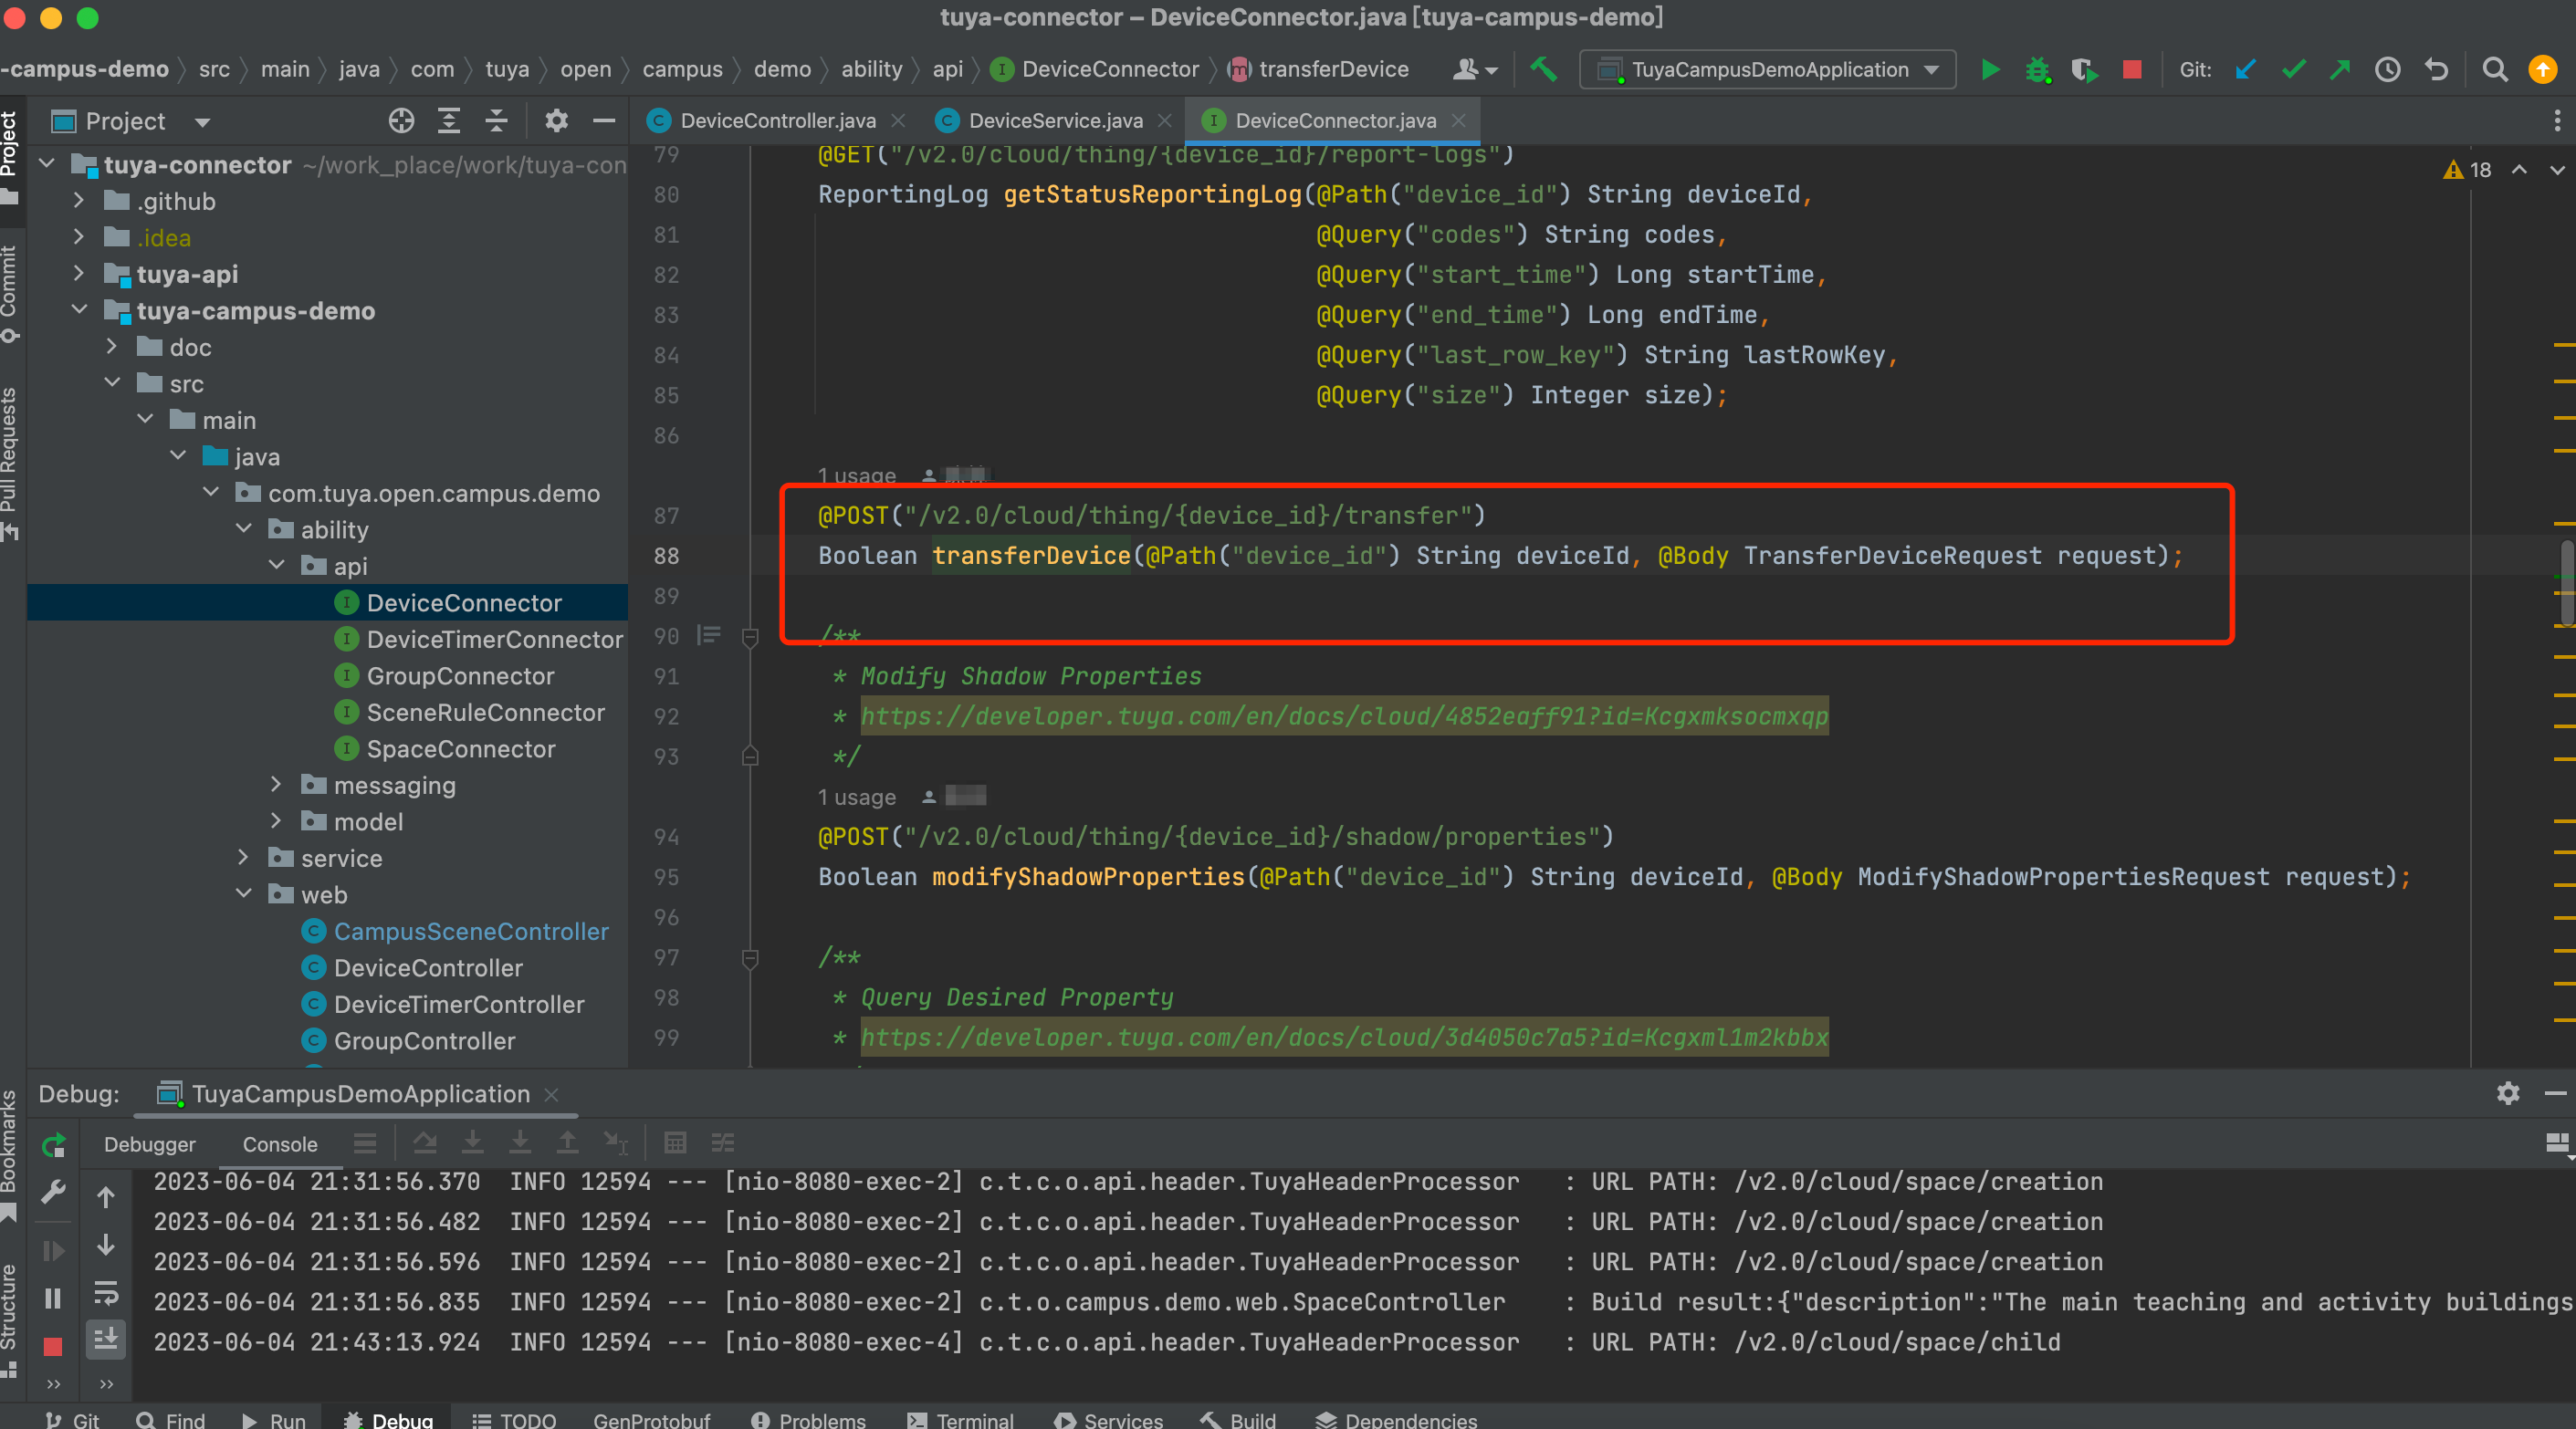

-
Debugging example
Query devices in a space
-
APIs
Query the list of resources in the specified space.
GET:/v2.0/cloud/space/{space_id}/resource -
Debugging example
You can request the listSpaceResources API to view all devices in the specified space.

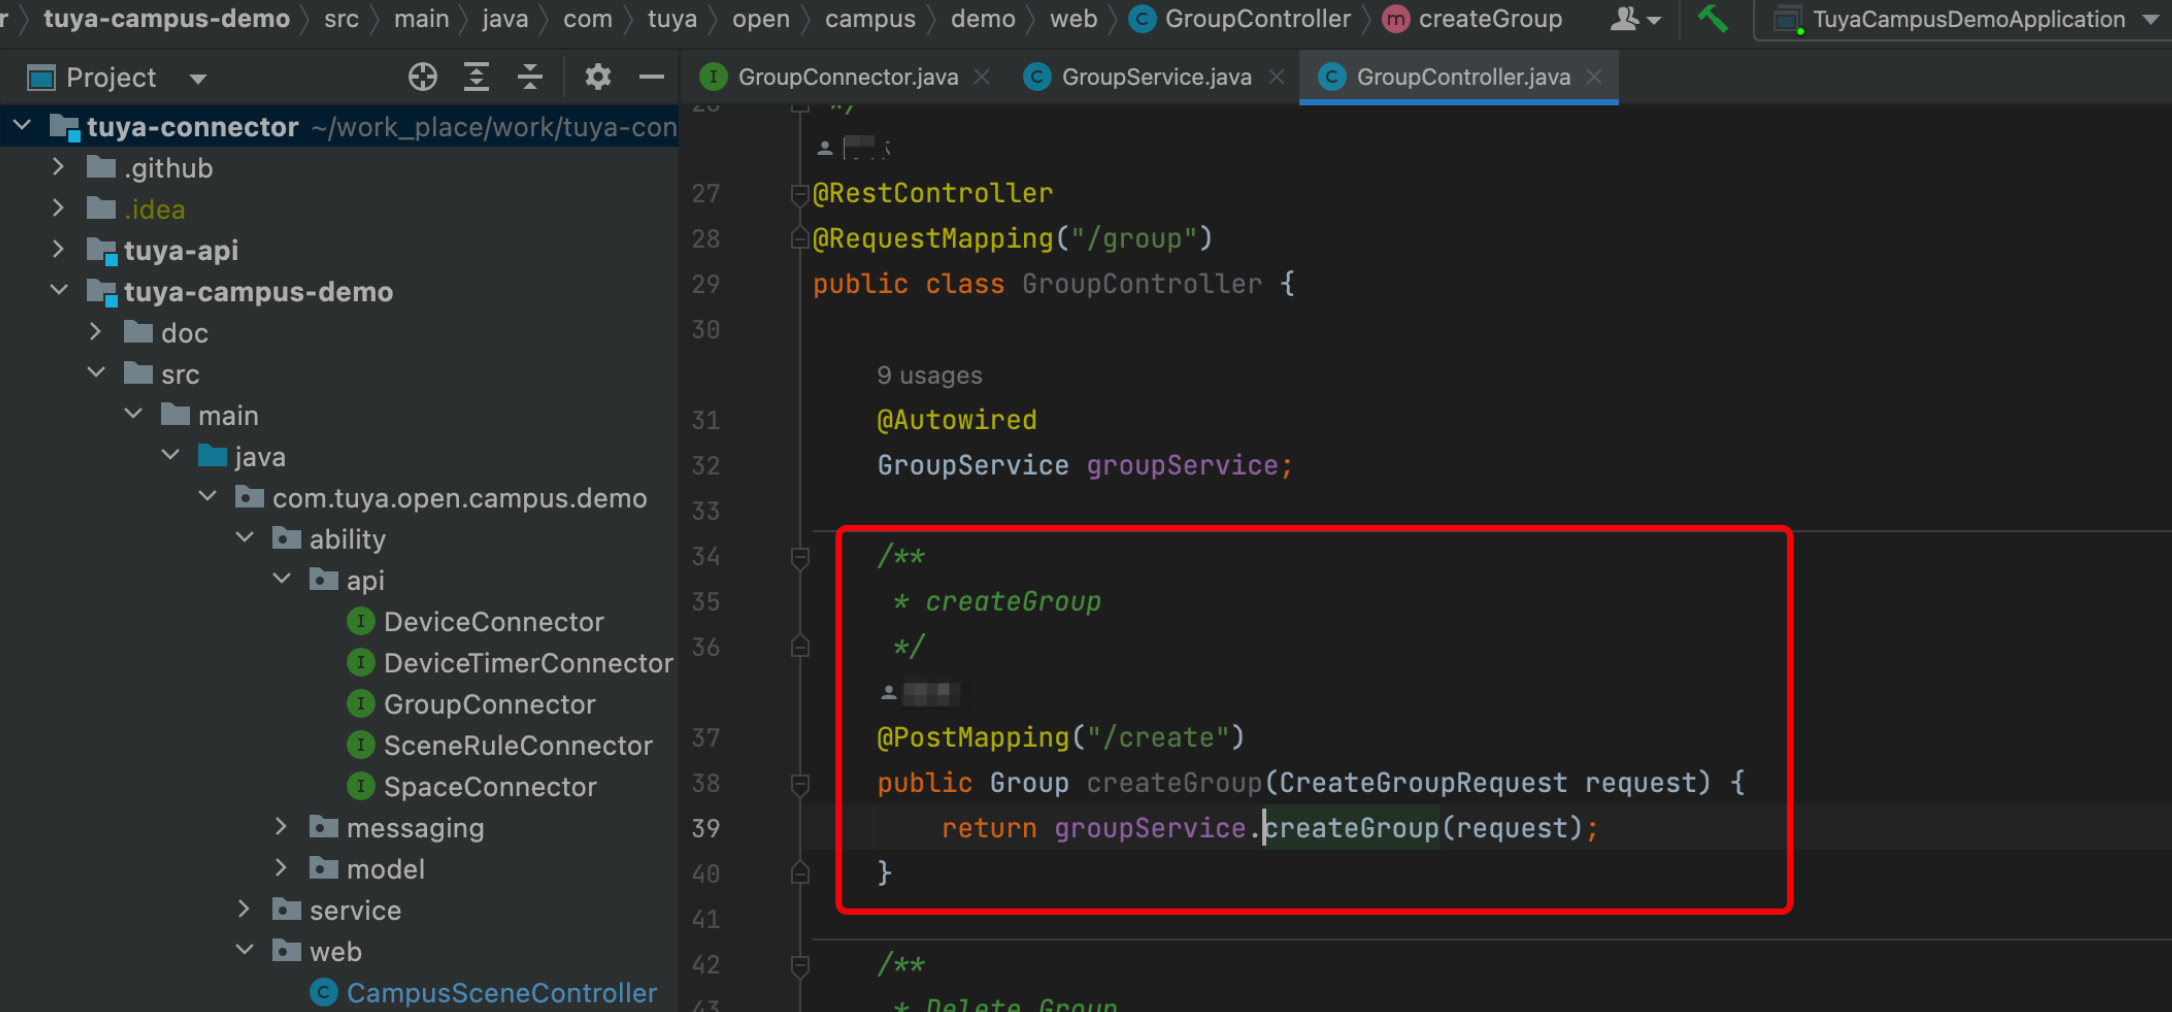
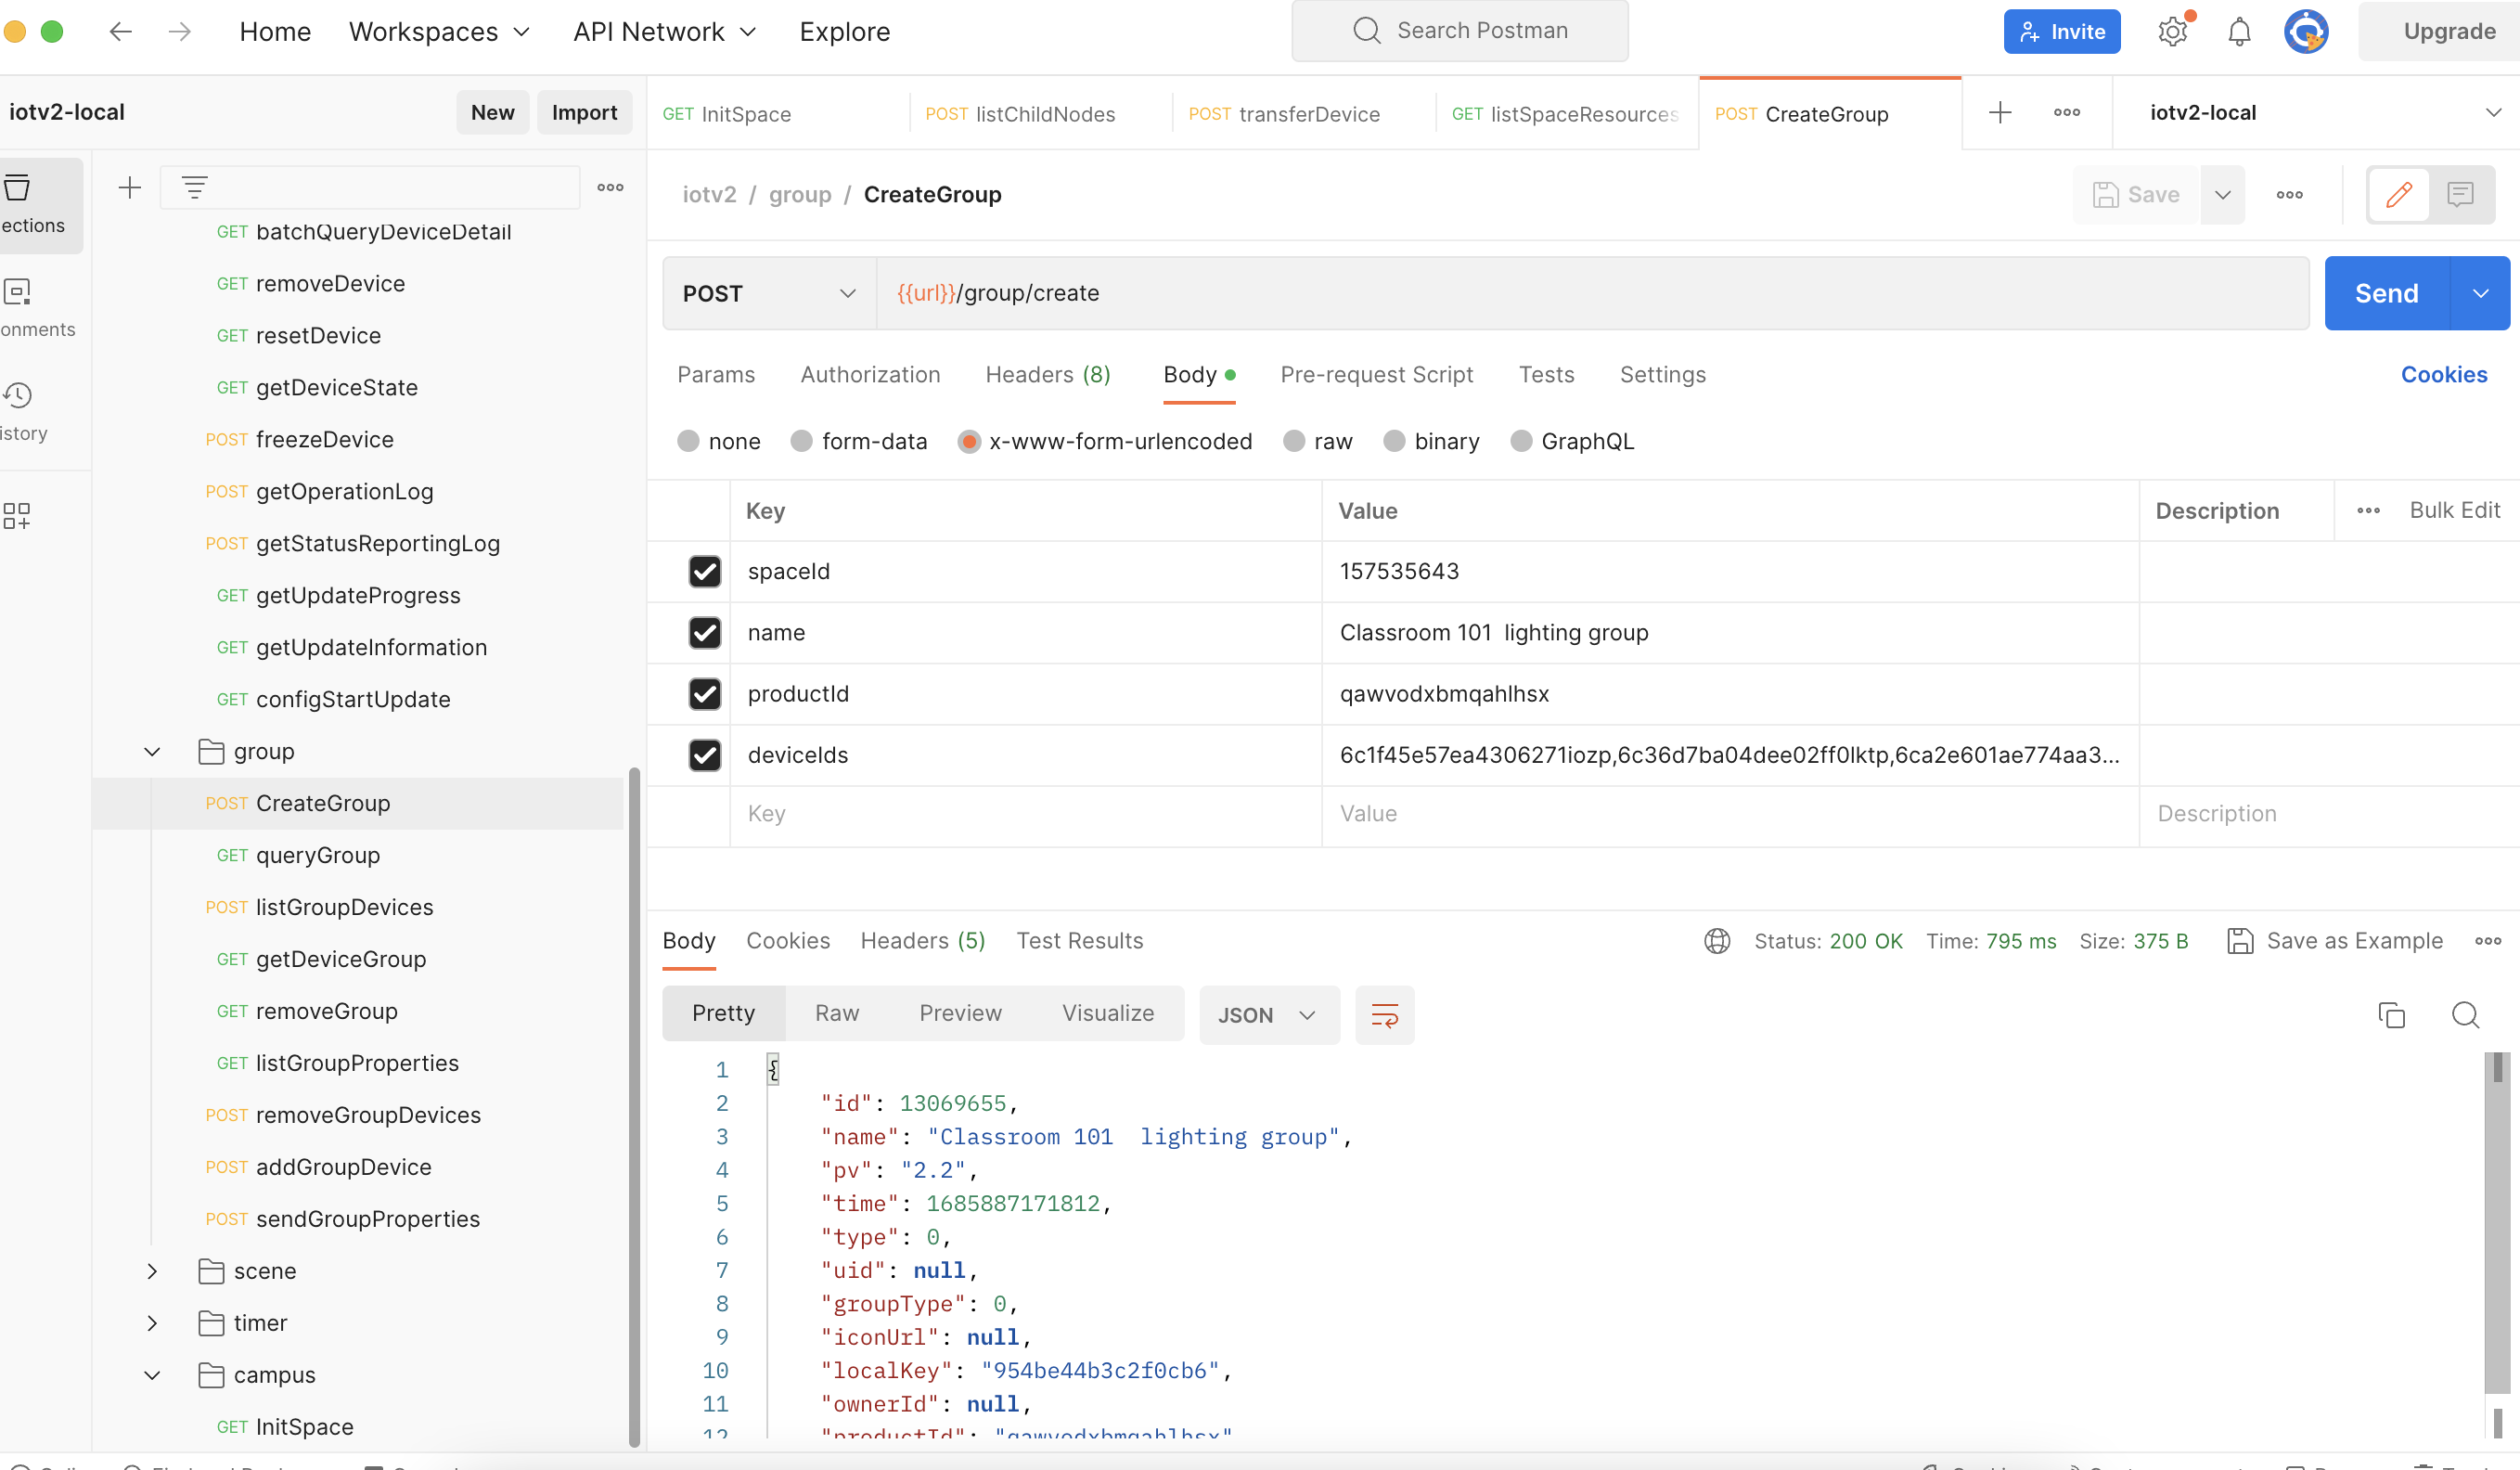
Create a group
-
APIs:
Create a group.
POST: /v2.0/cloud/thing/group -
Demo snippet
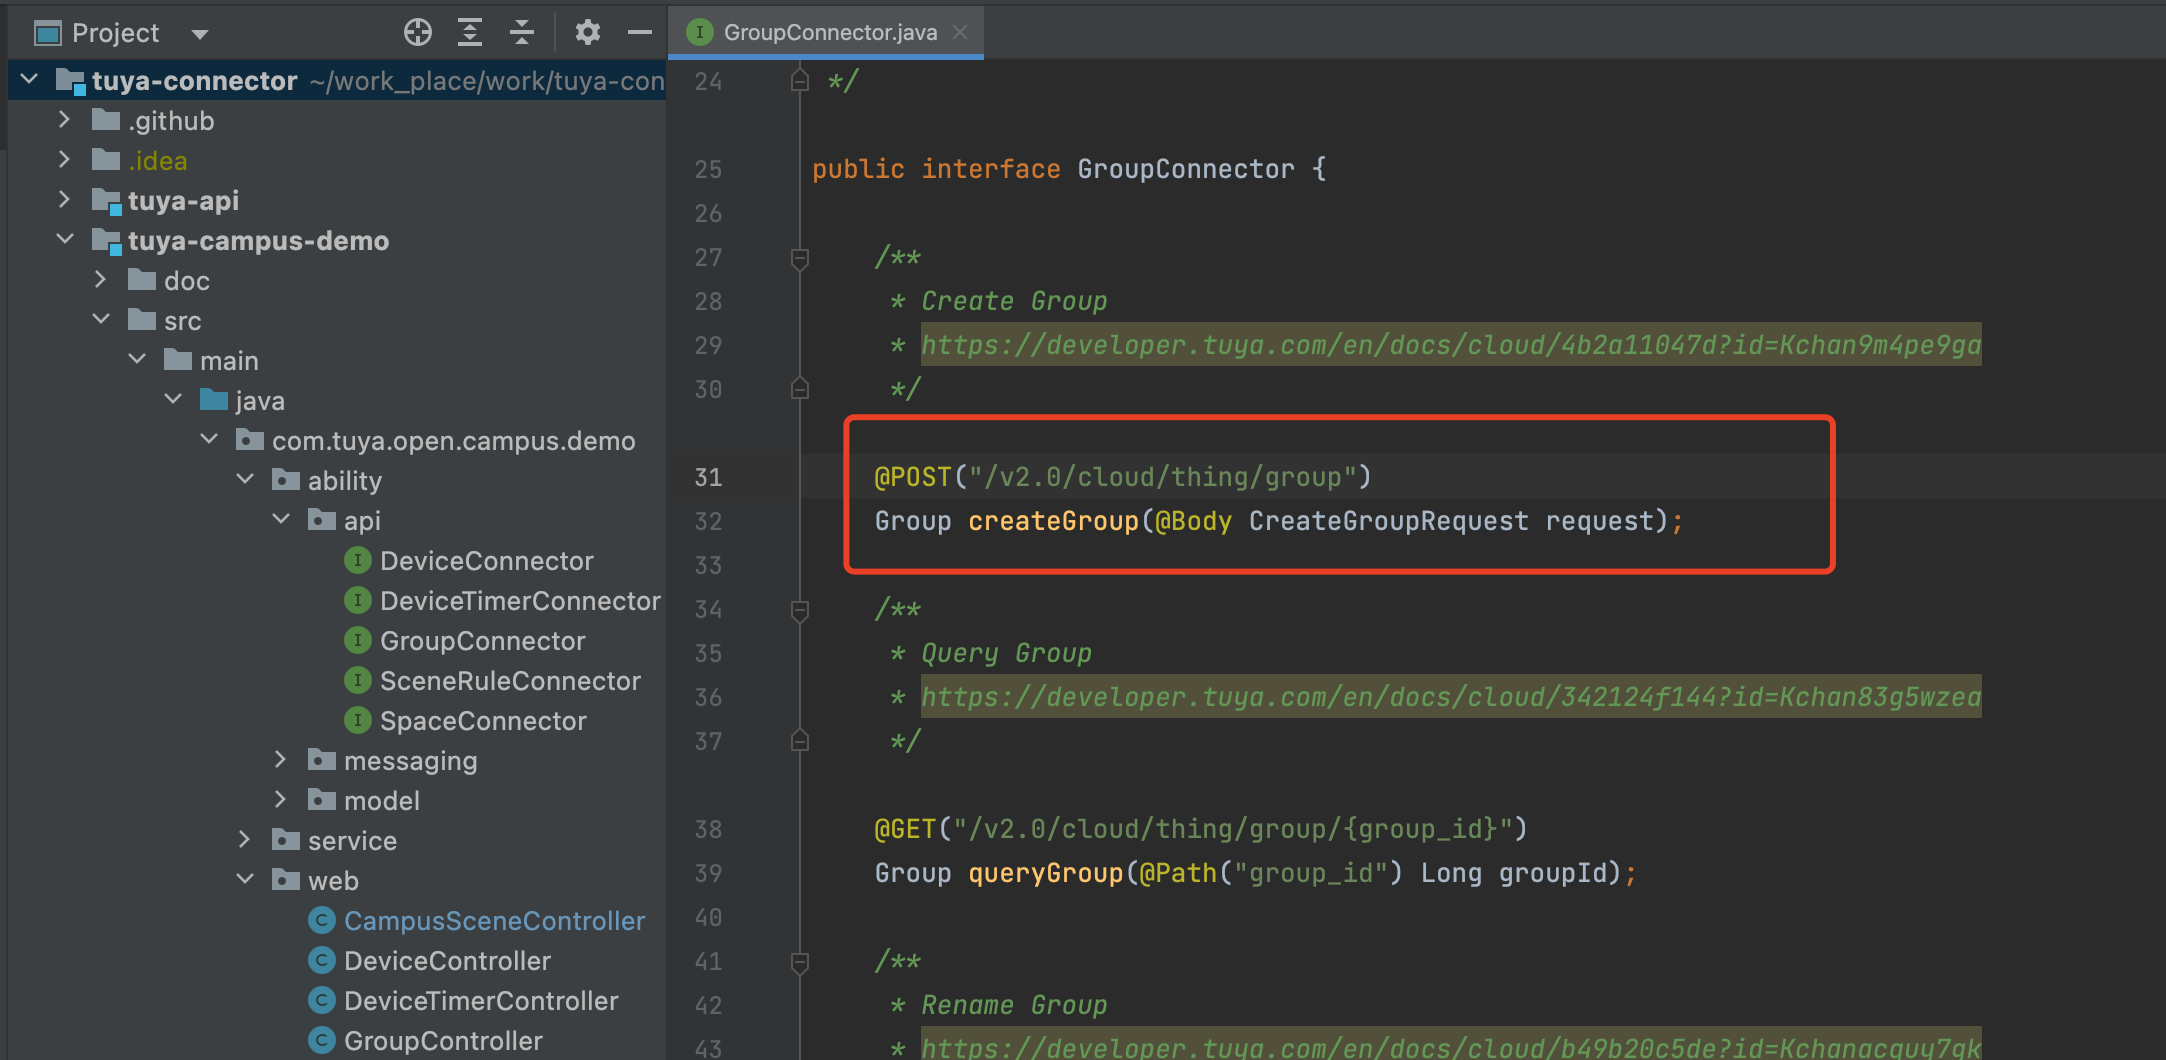
-
Debugging example
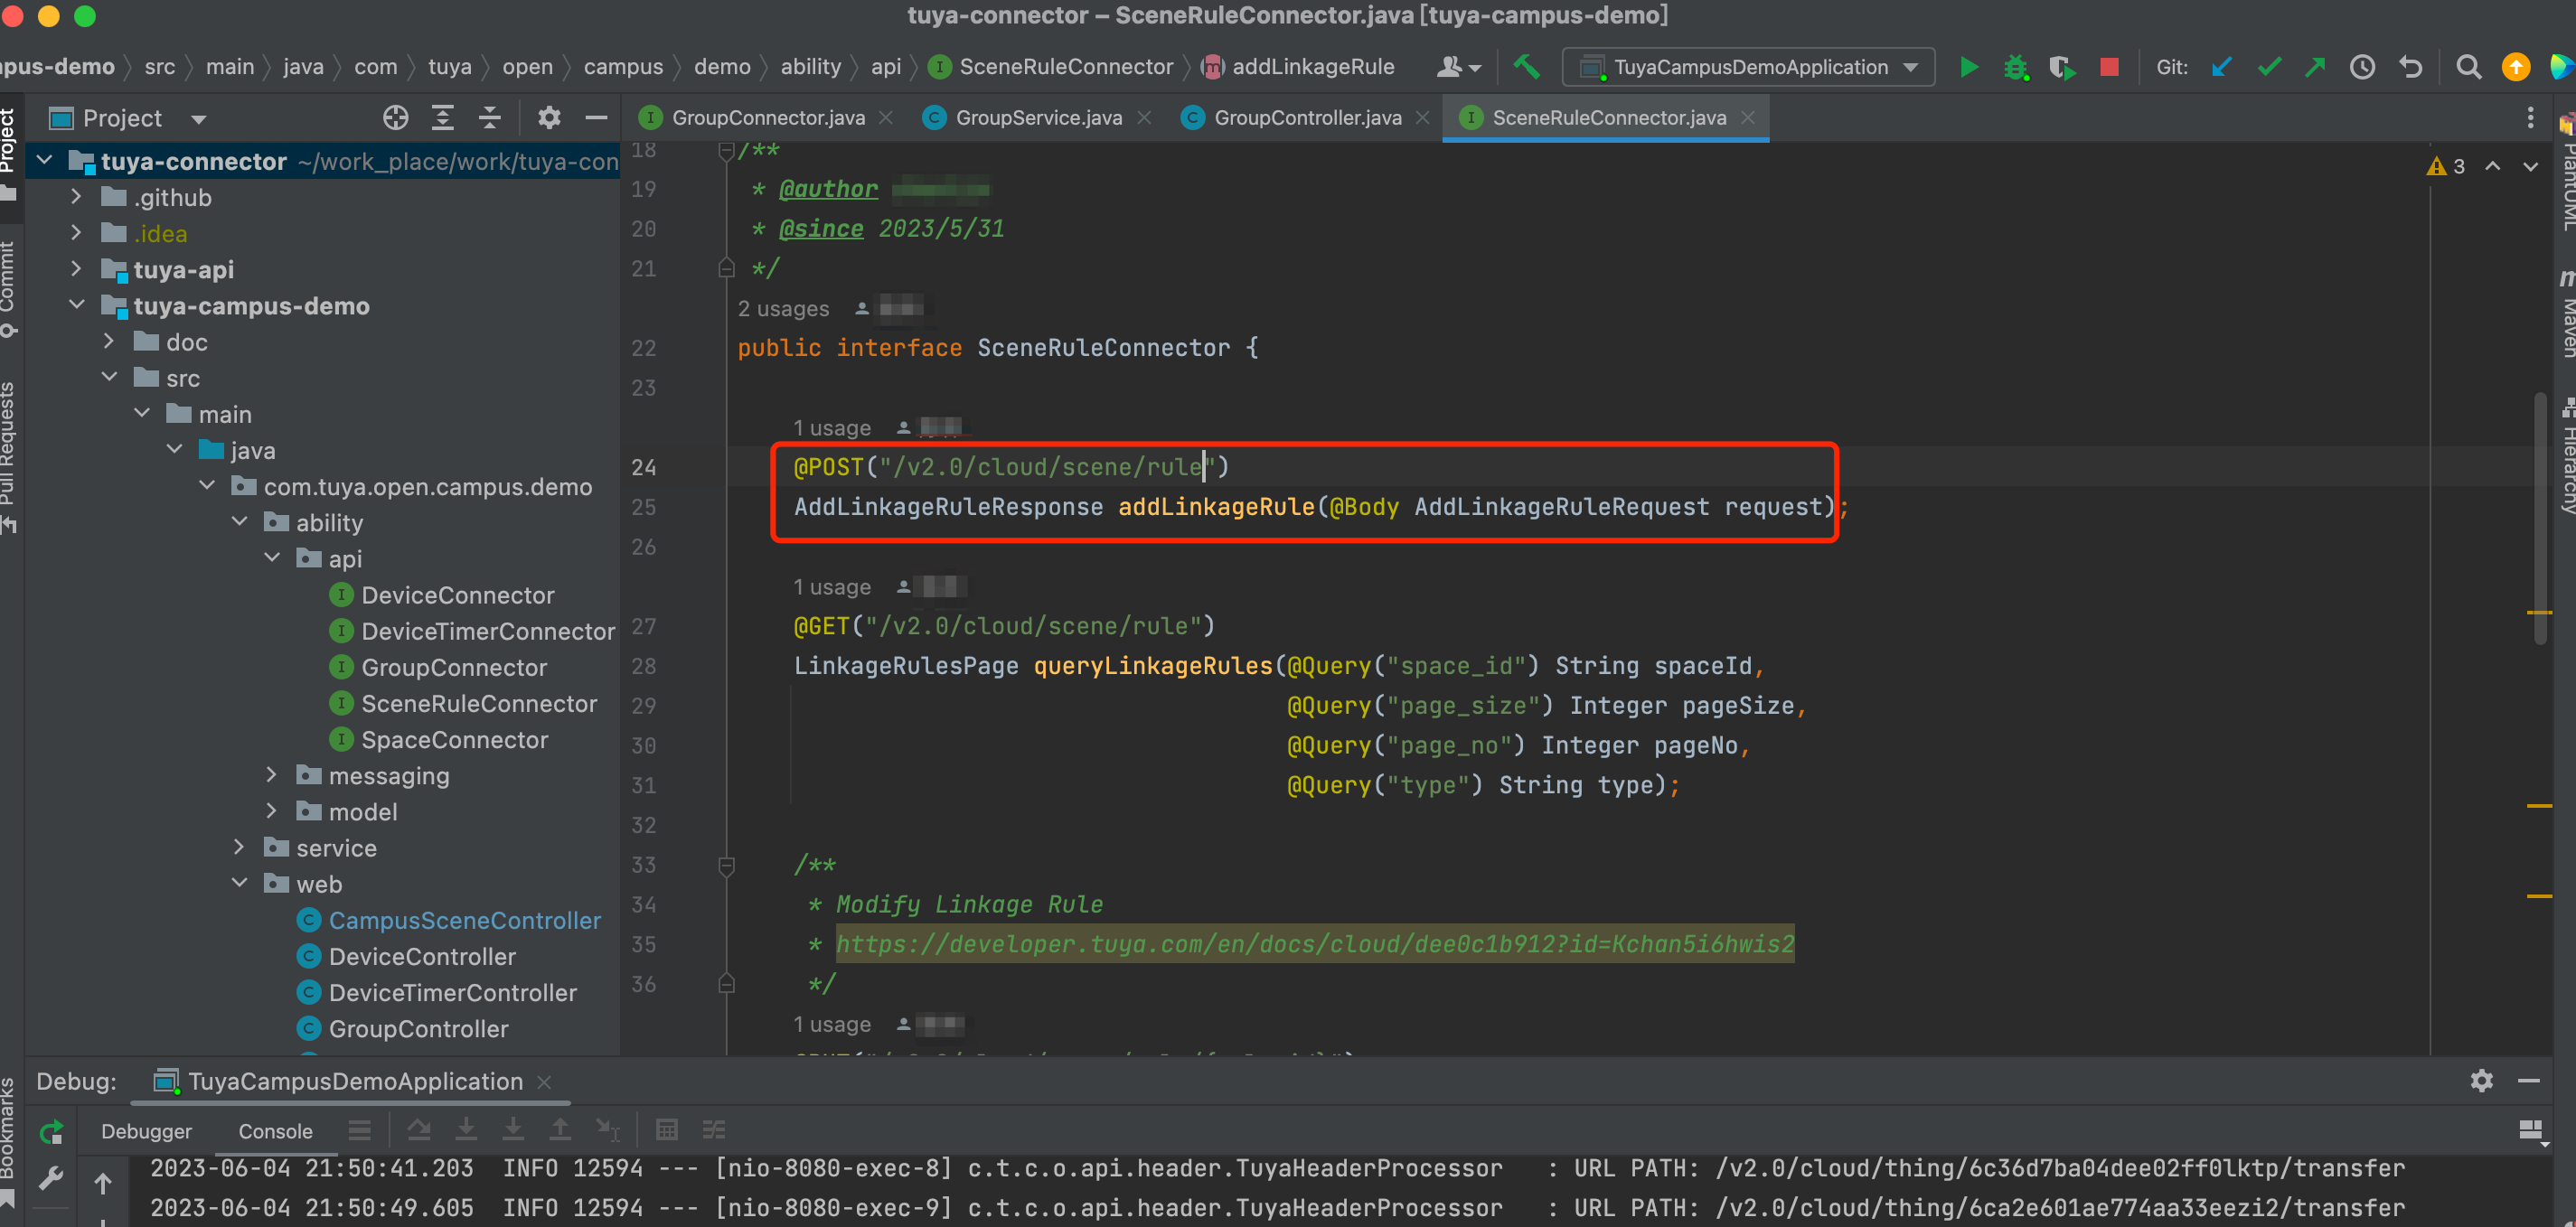
Create linkage rules
-
APIs
Create linkage rules.
POST: /v2.0/cloud/scene/rule -
Demo snippet
Based on the previously created group, create linkage rules. They will be automatically triggered when certain conditions are met.
-
Debugging example
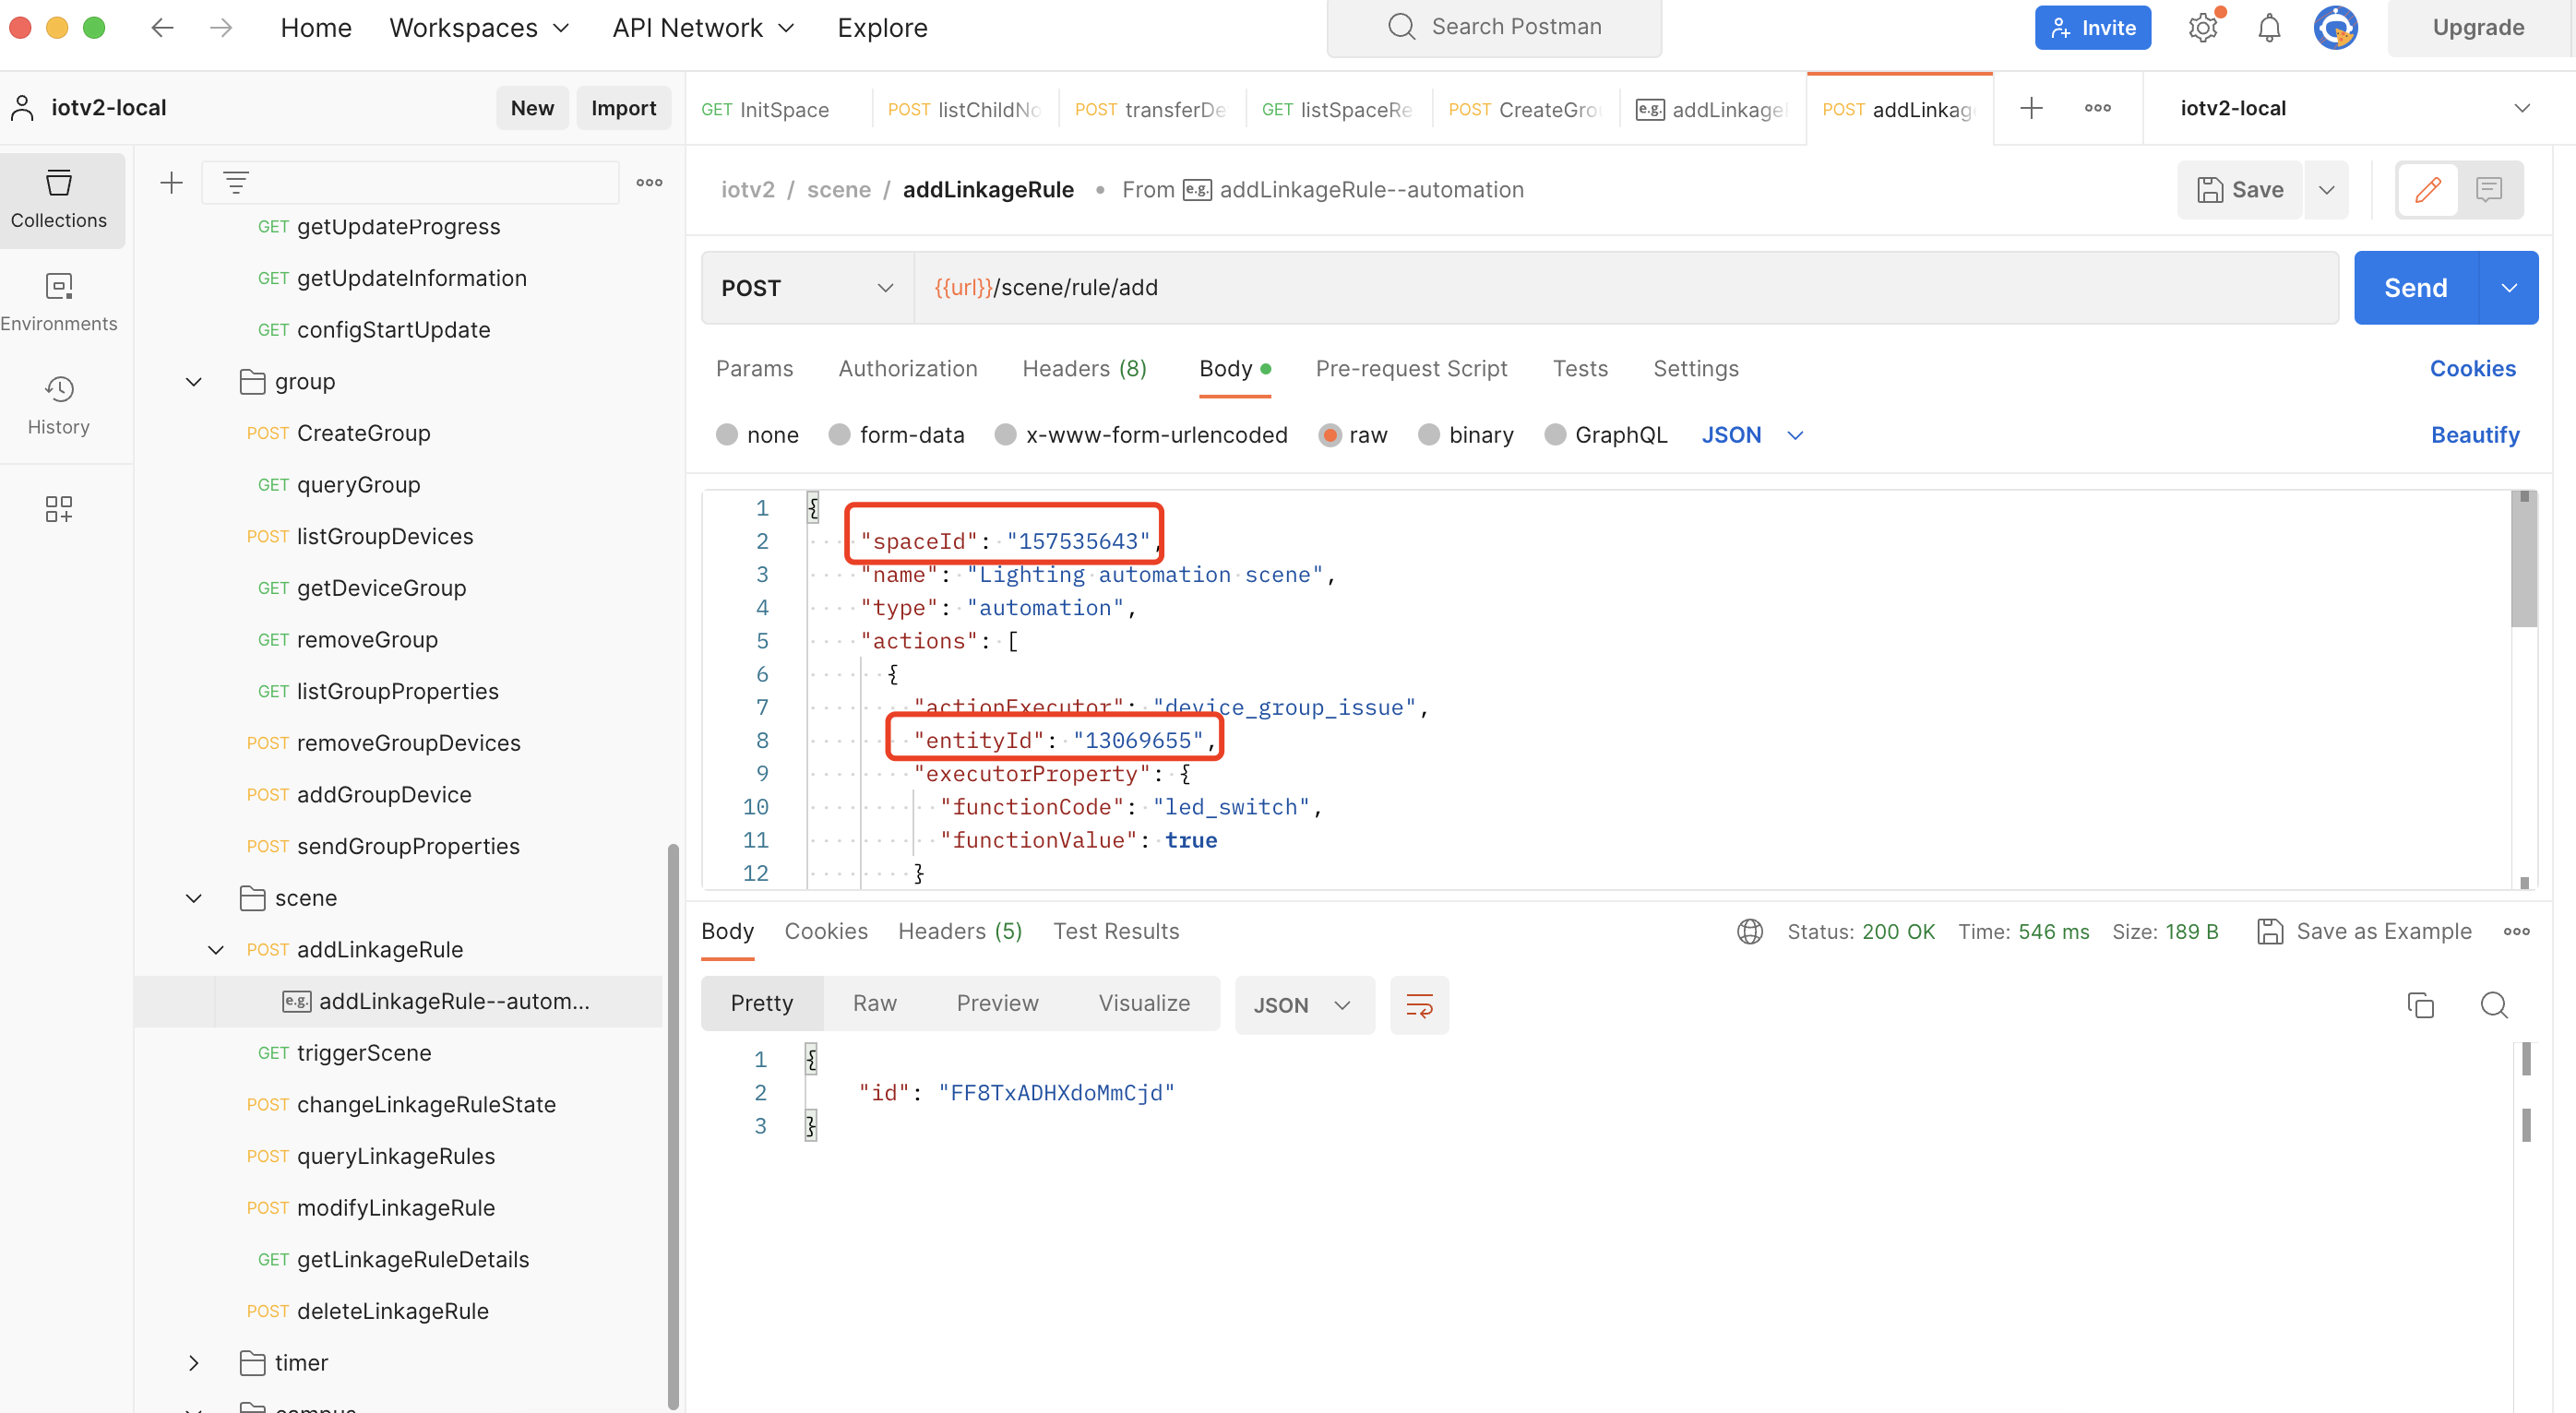
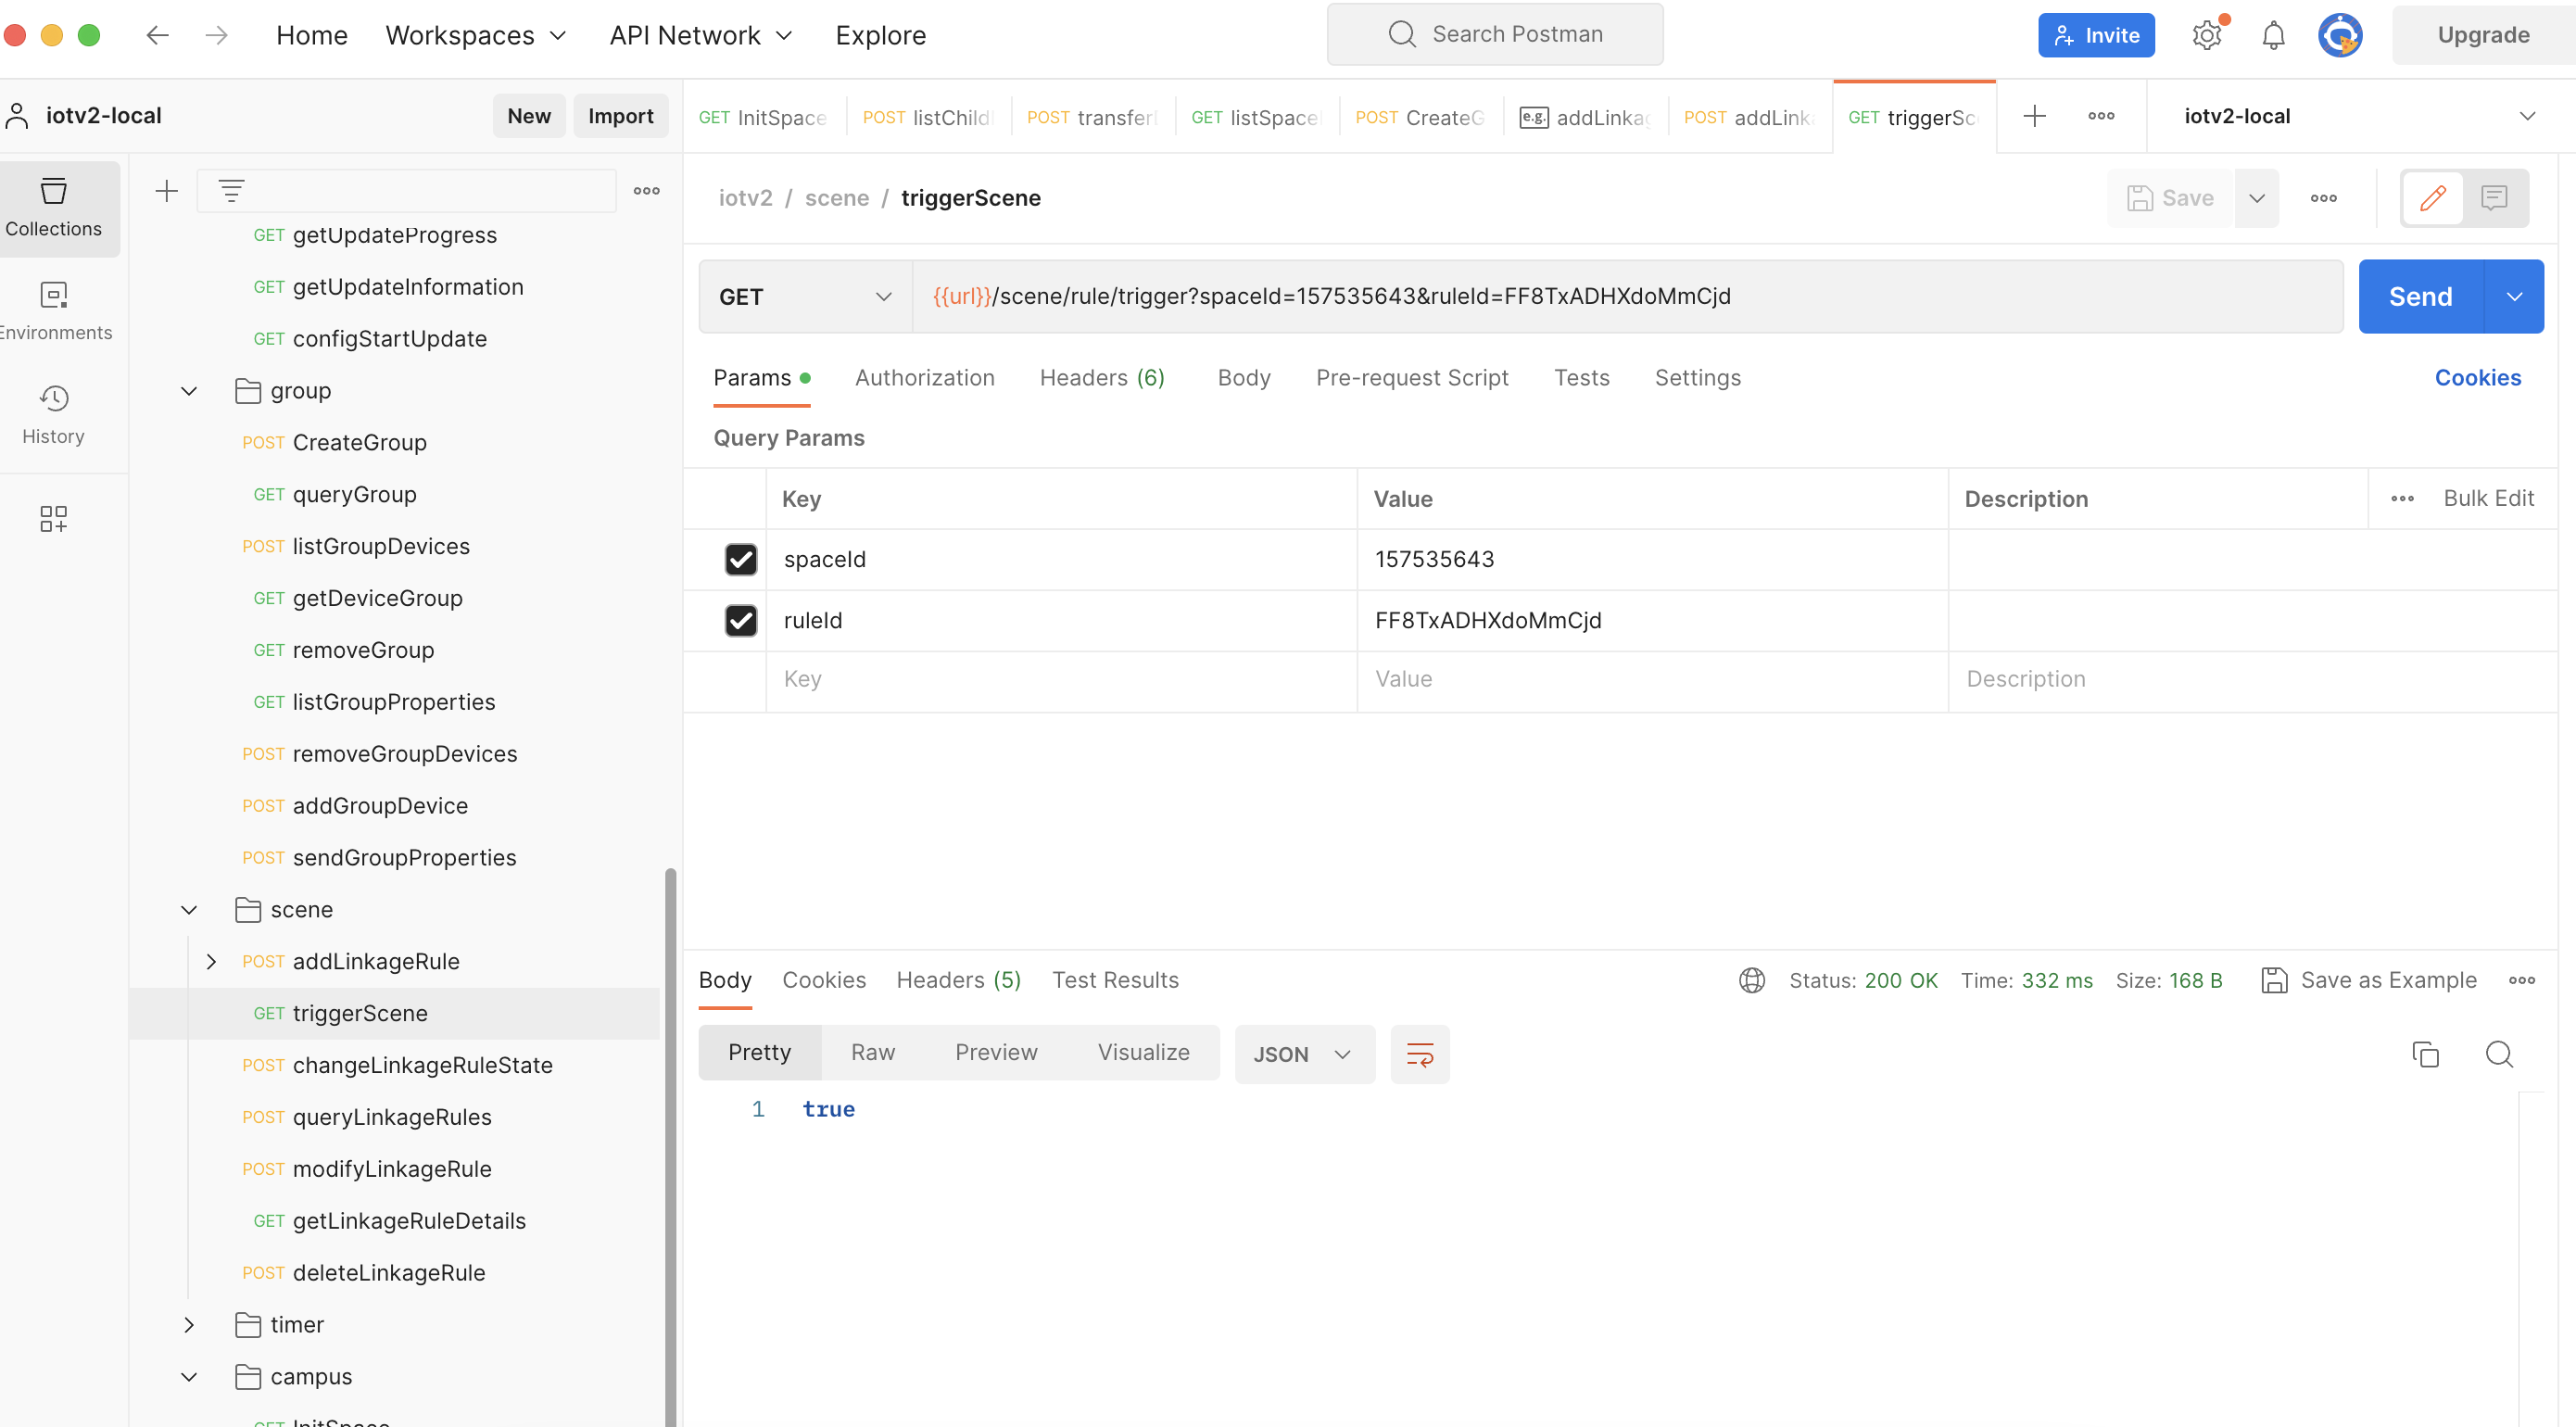
As shown in the above process, the lighting group 13069655 is created in the example, and the rule
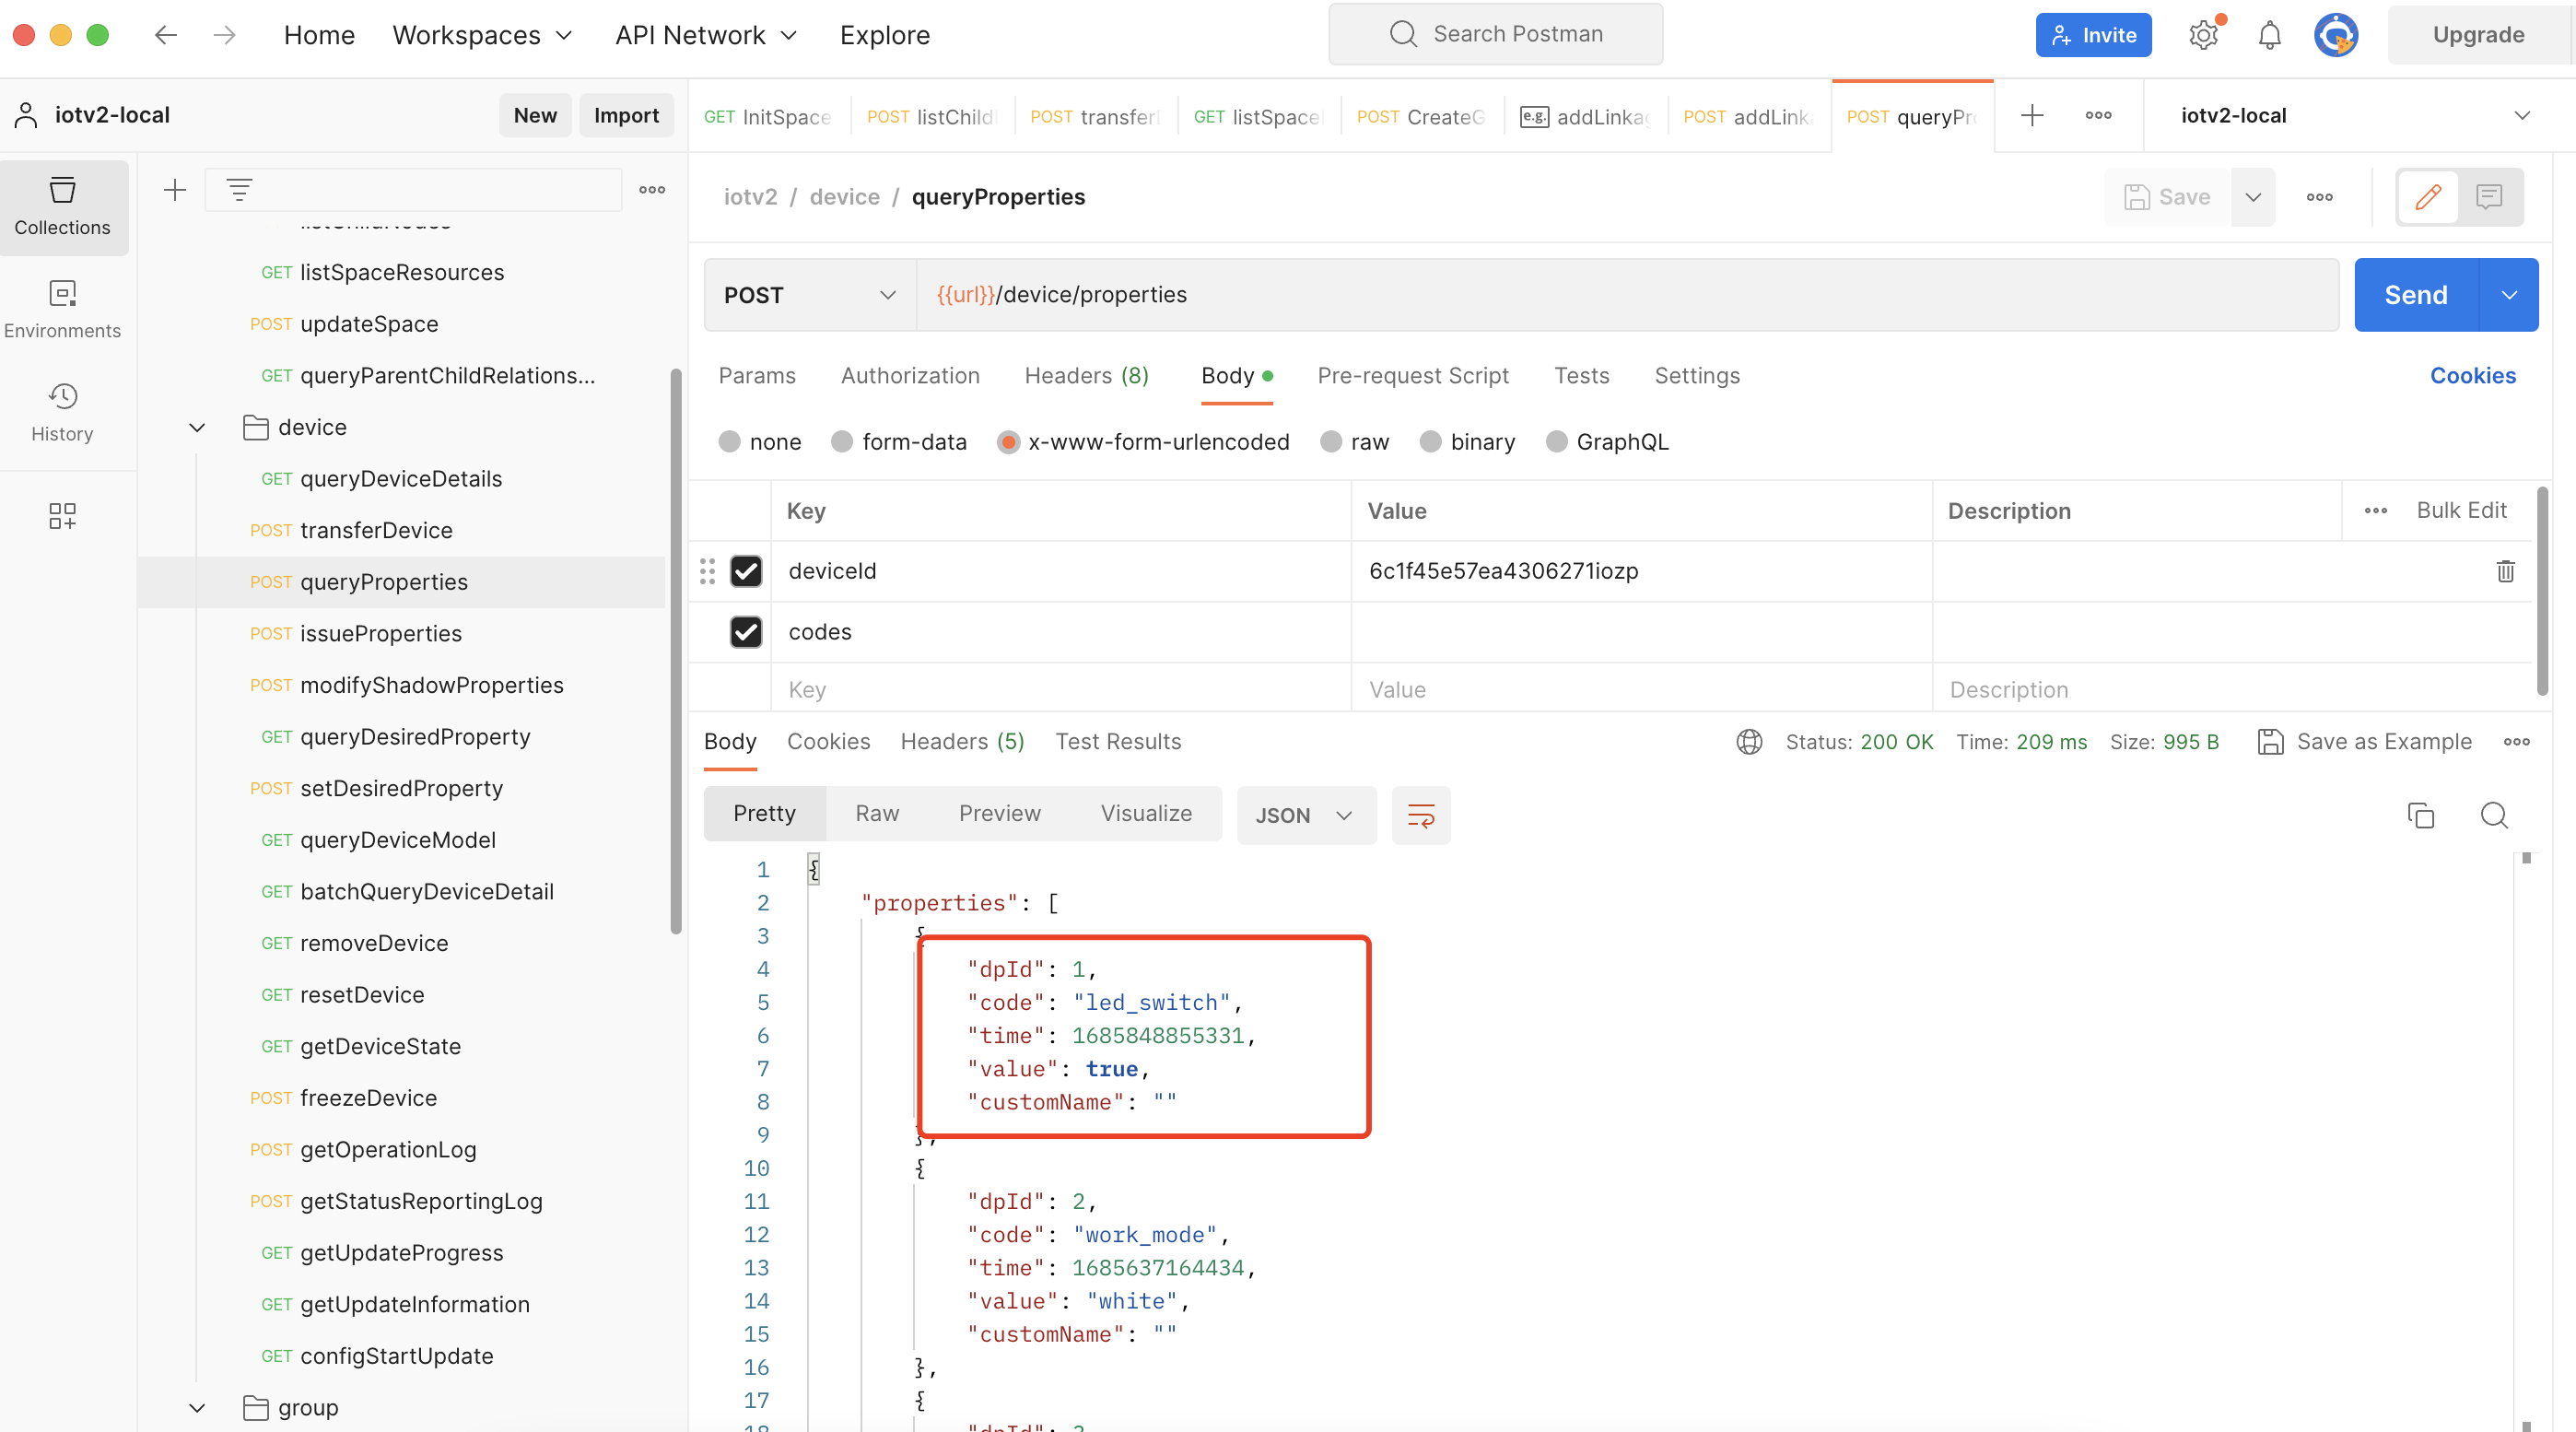
FF8TxADHXdoMmCjdis configured. The lights in this group are automatically turned on every afternoon from Monday to Friday. You can view the real-time execution of the devices in the group by data reporting logs or device properties.
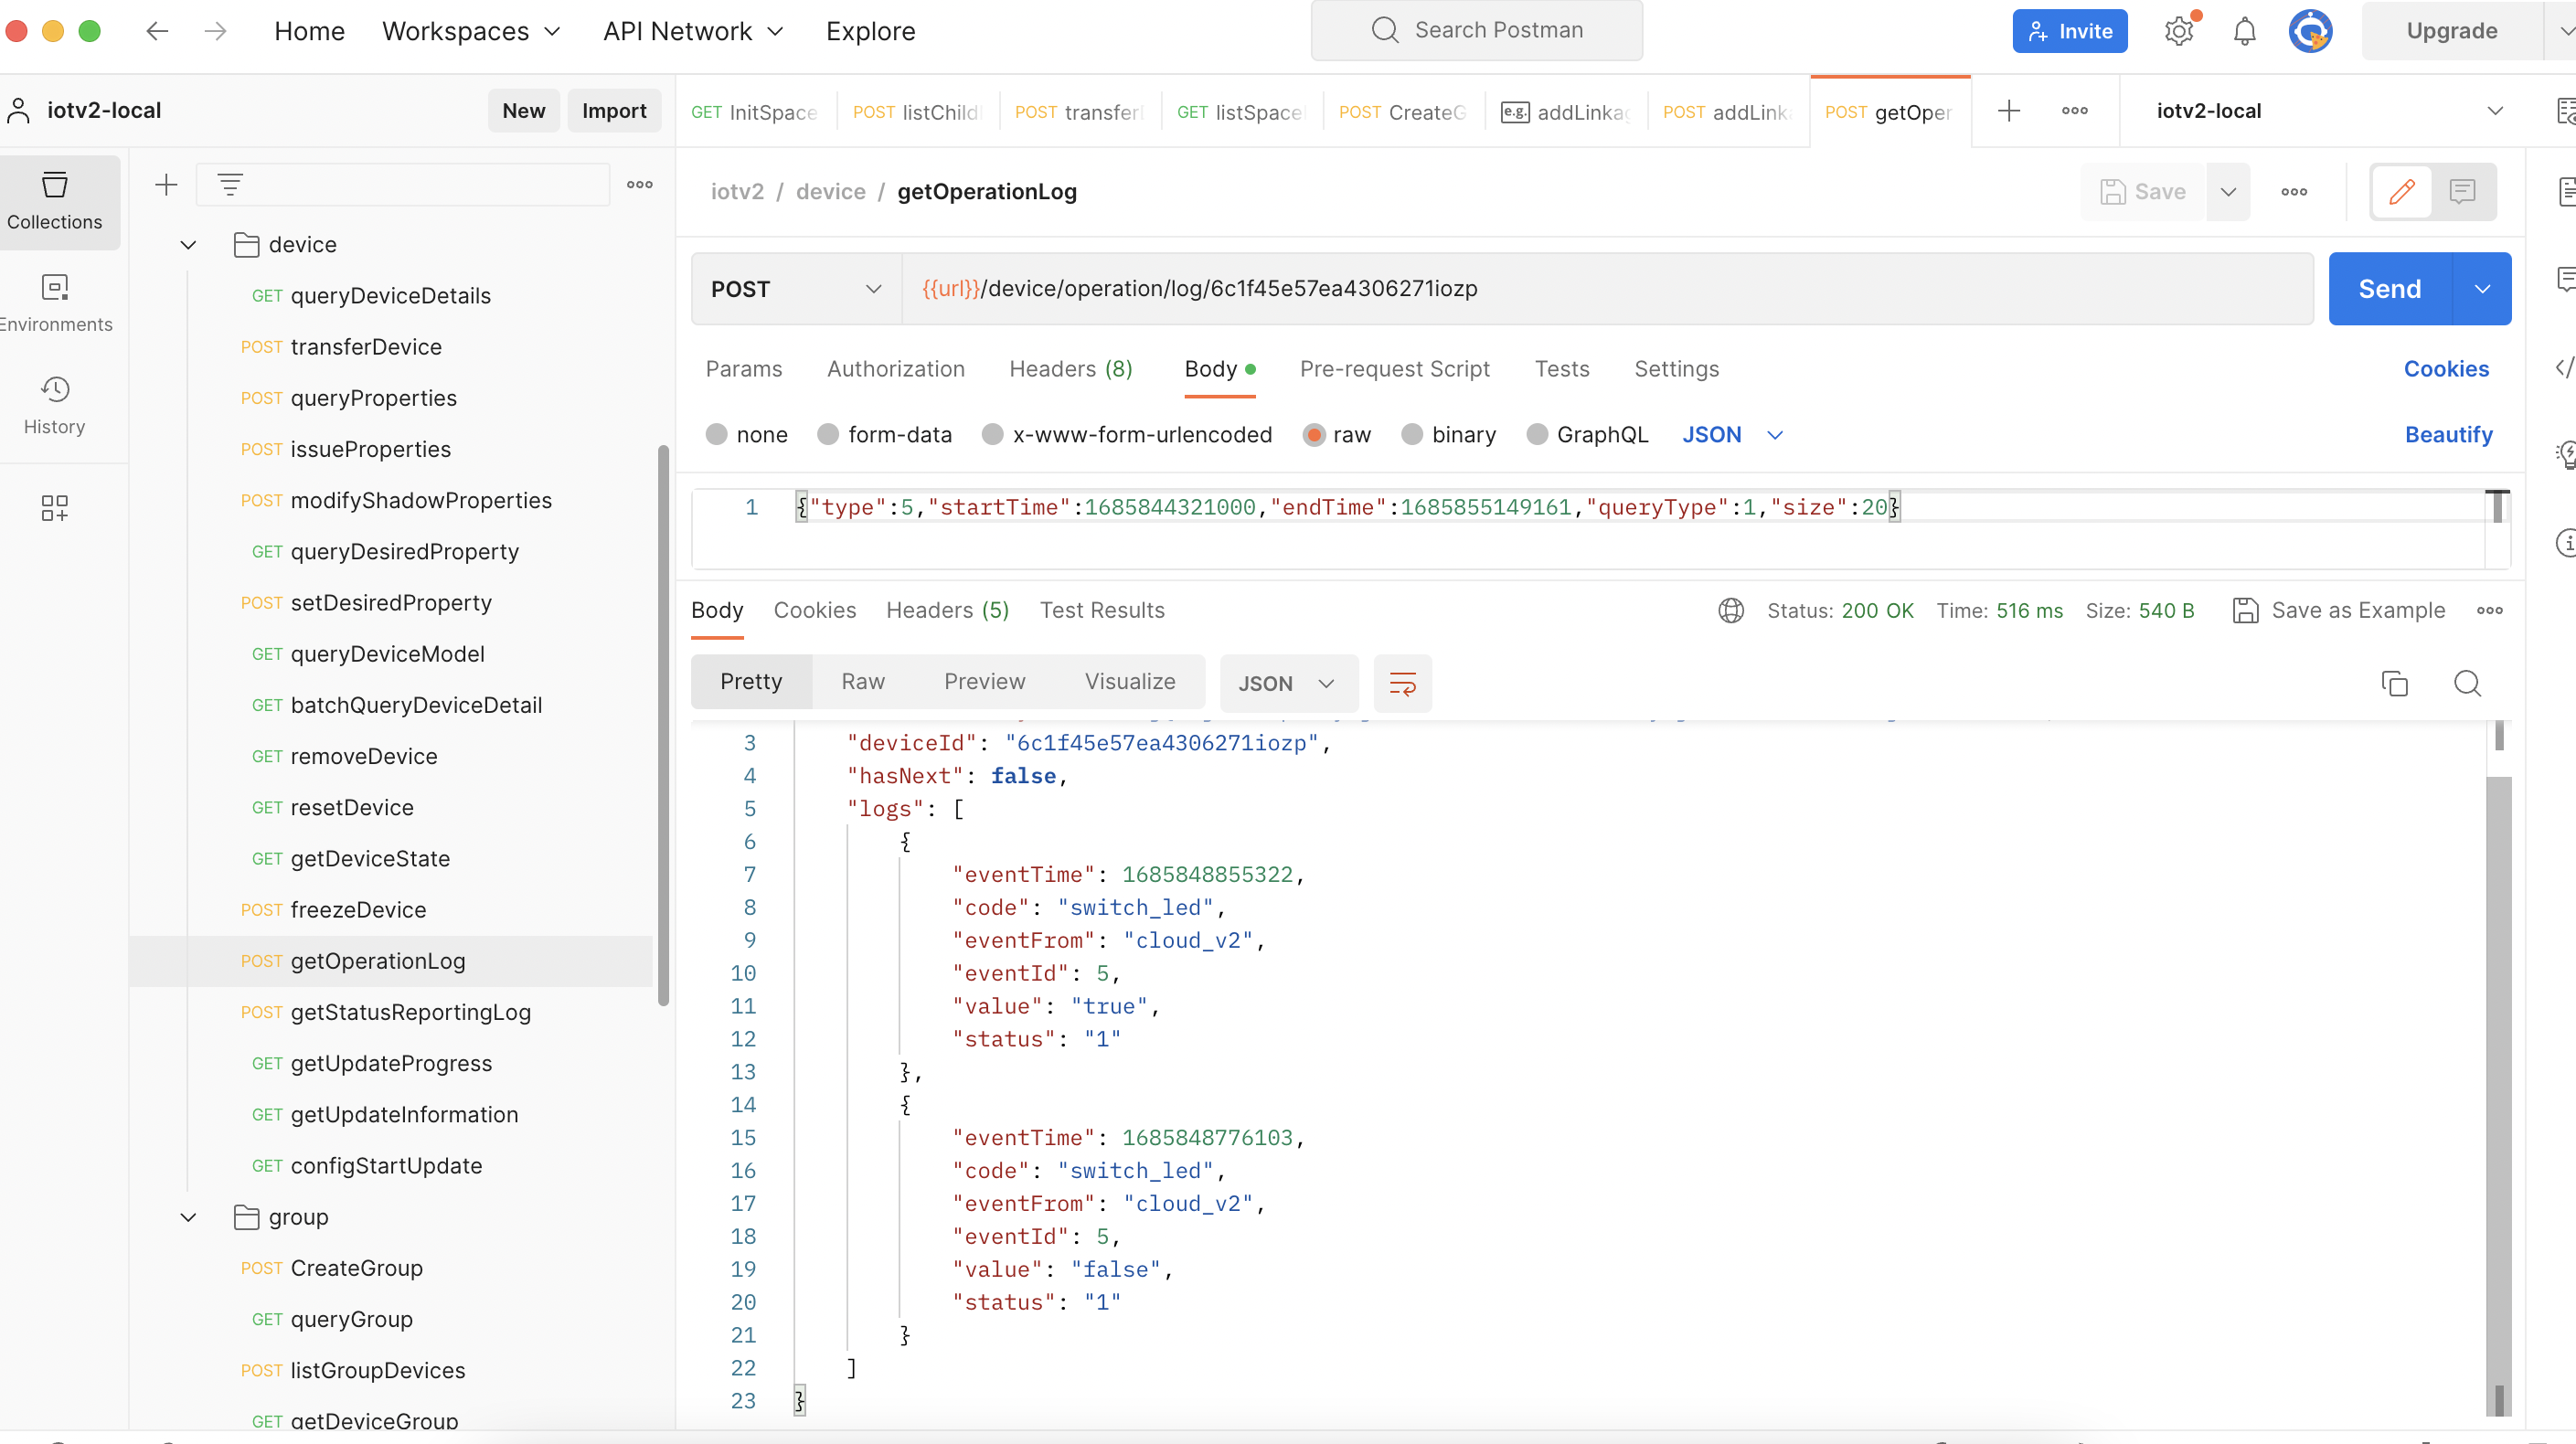
Query device logs
-
APIs
Get operation logs of the specified device.
GET: /v2.0/cloud/thing/{device_id}/logs -
Debugging example
Query device properties
-
APIs
Get the property values of the specified device.
GET: /v2.0/cloud/thing/{device_id}/shadow/properties -
Debugging example
Trigger a group rule
When creating a linkage rule, you can enable the manual trigger type. Then, you can make API requests to trigger a group rule.
-
APIs
Trigger the specified rule for a scene.
POST: /v2.0/cloud/scene/rule/{rule_id}/actions/trigger -
Demo snippet

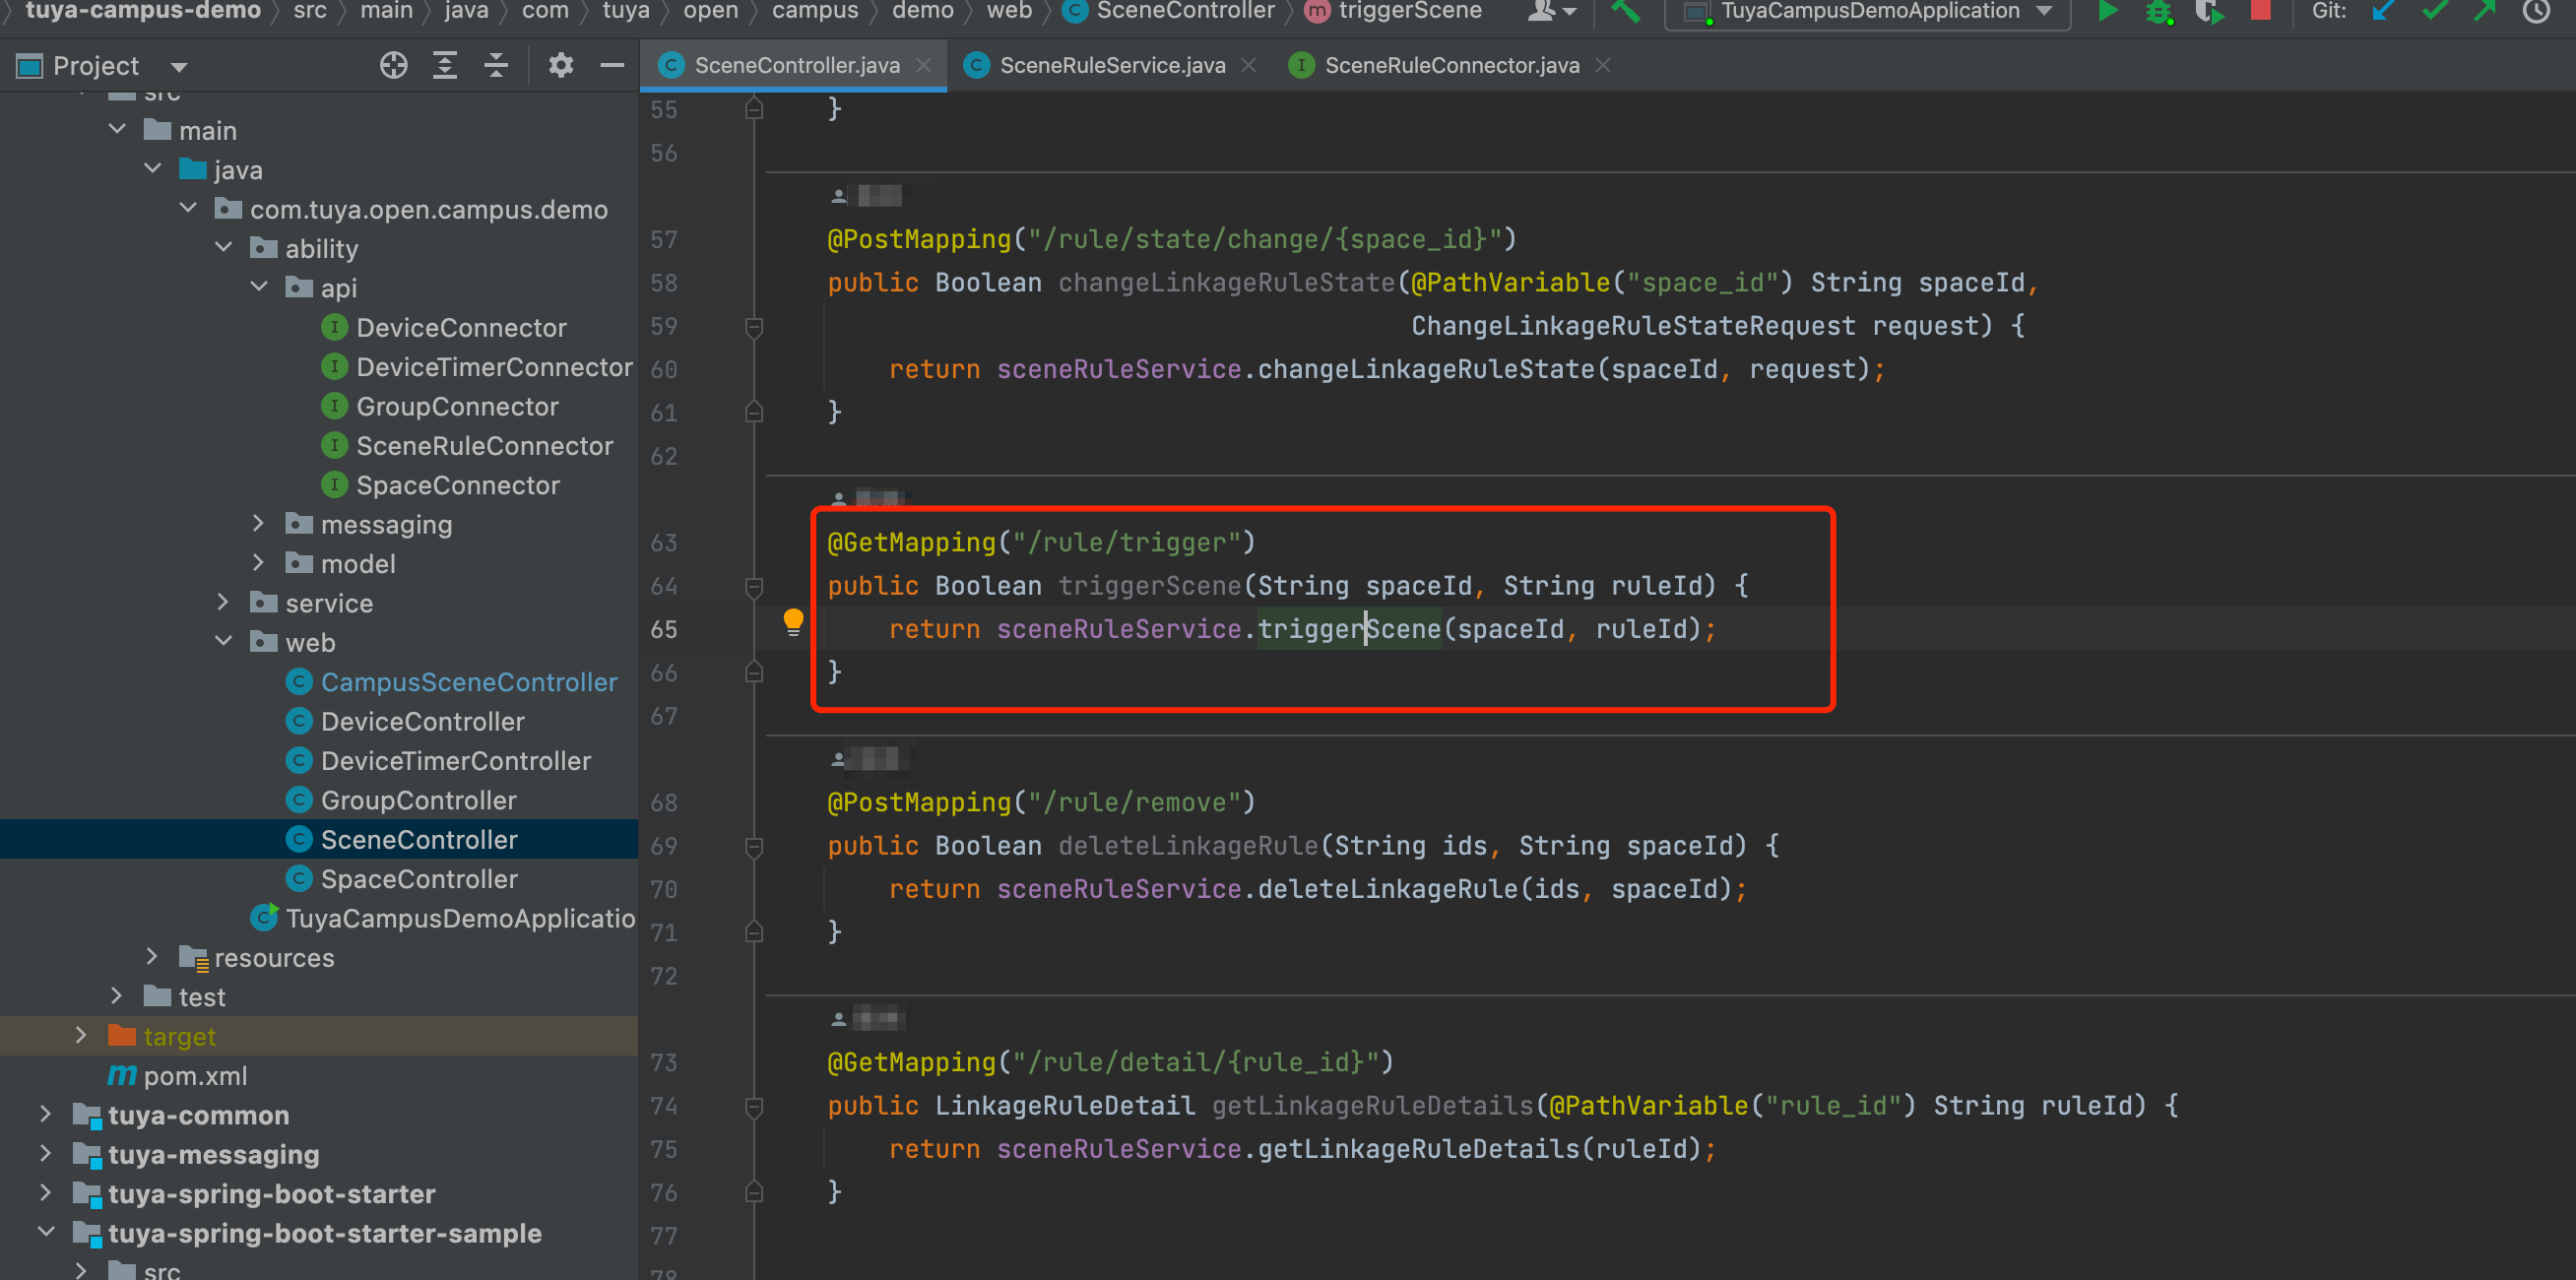
-
Debugging example:
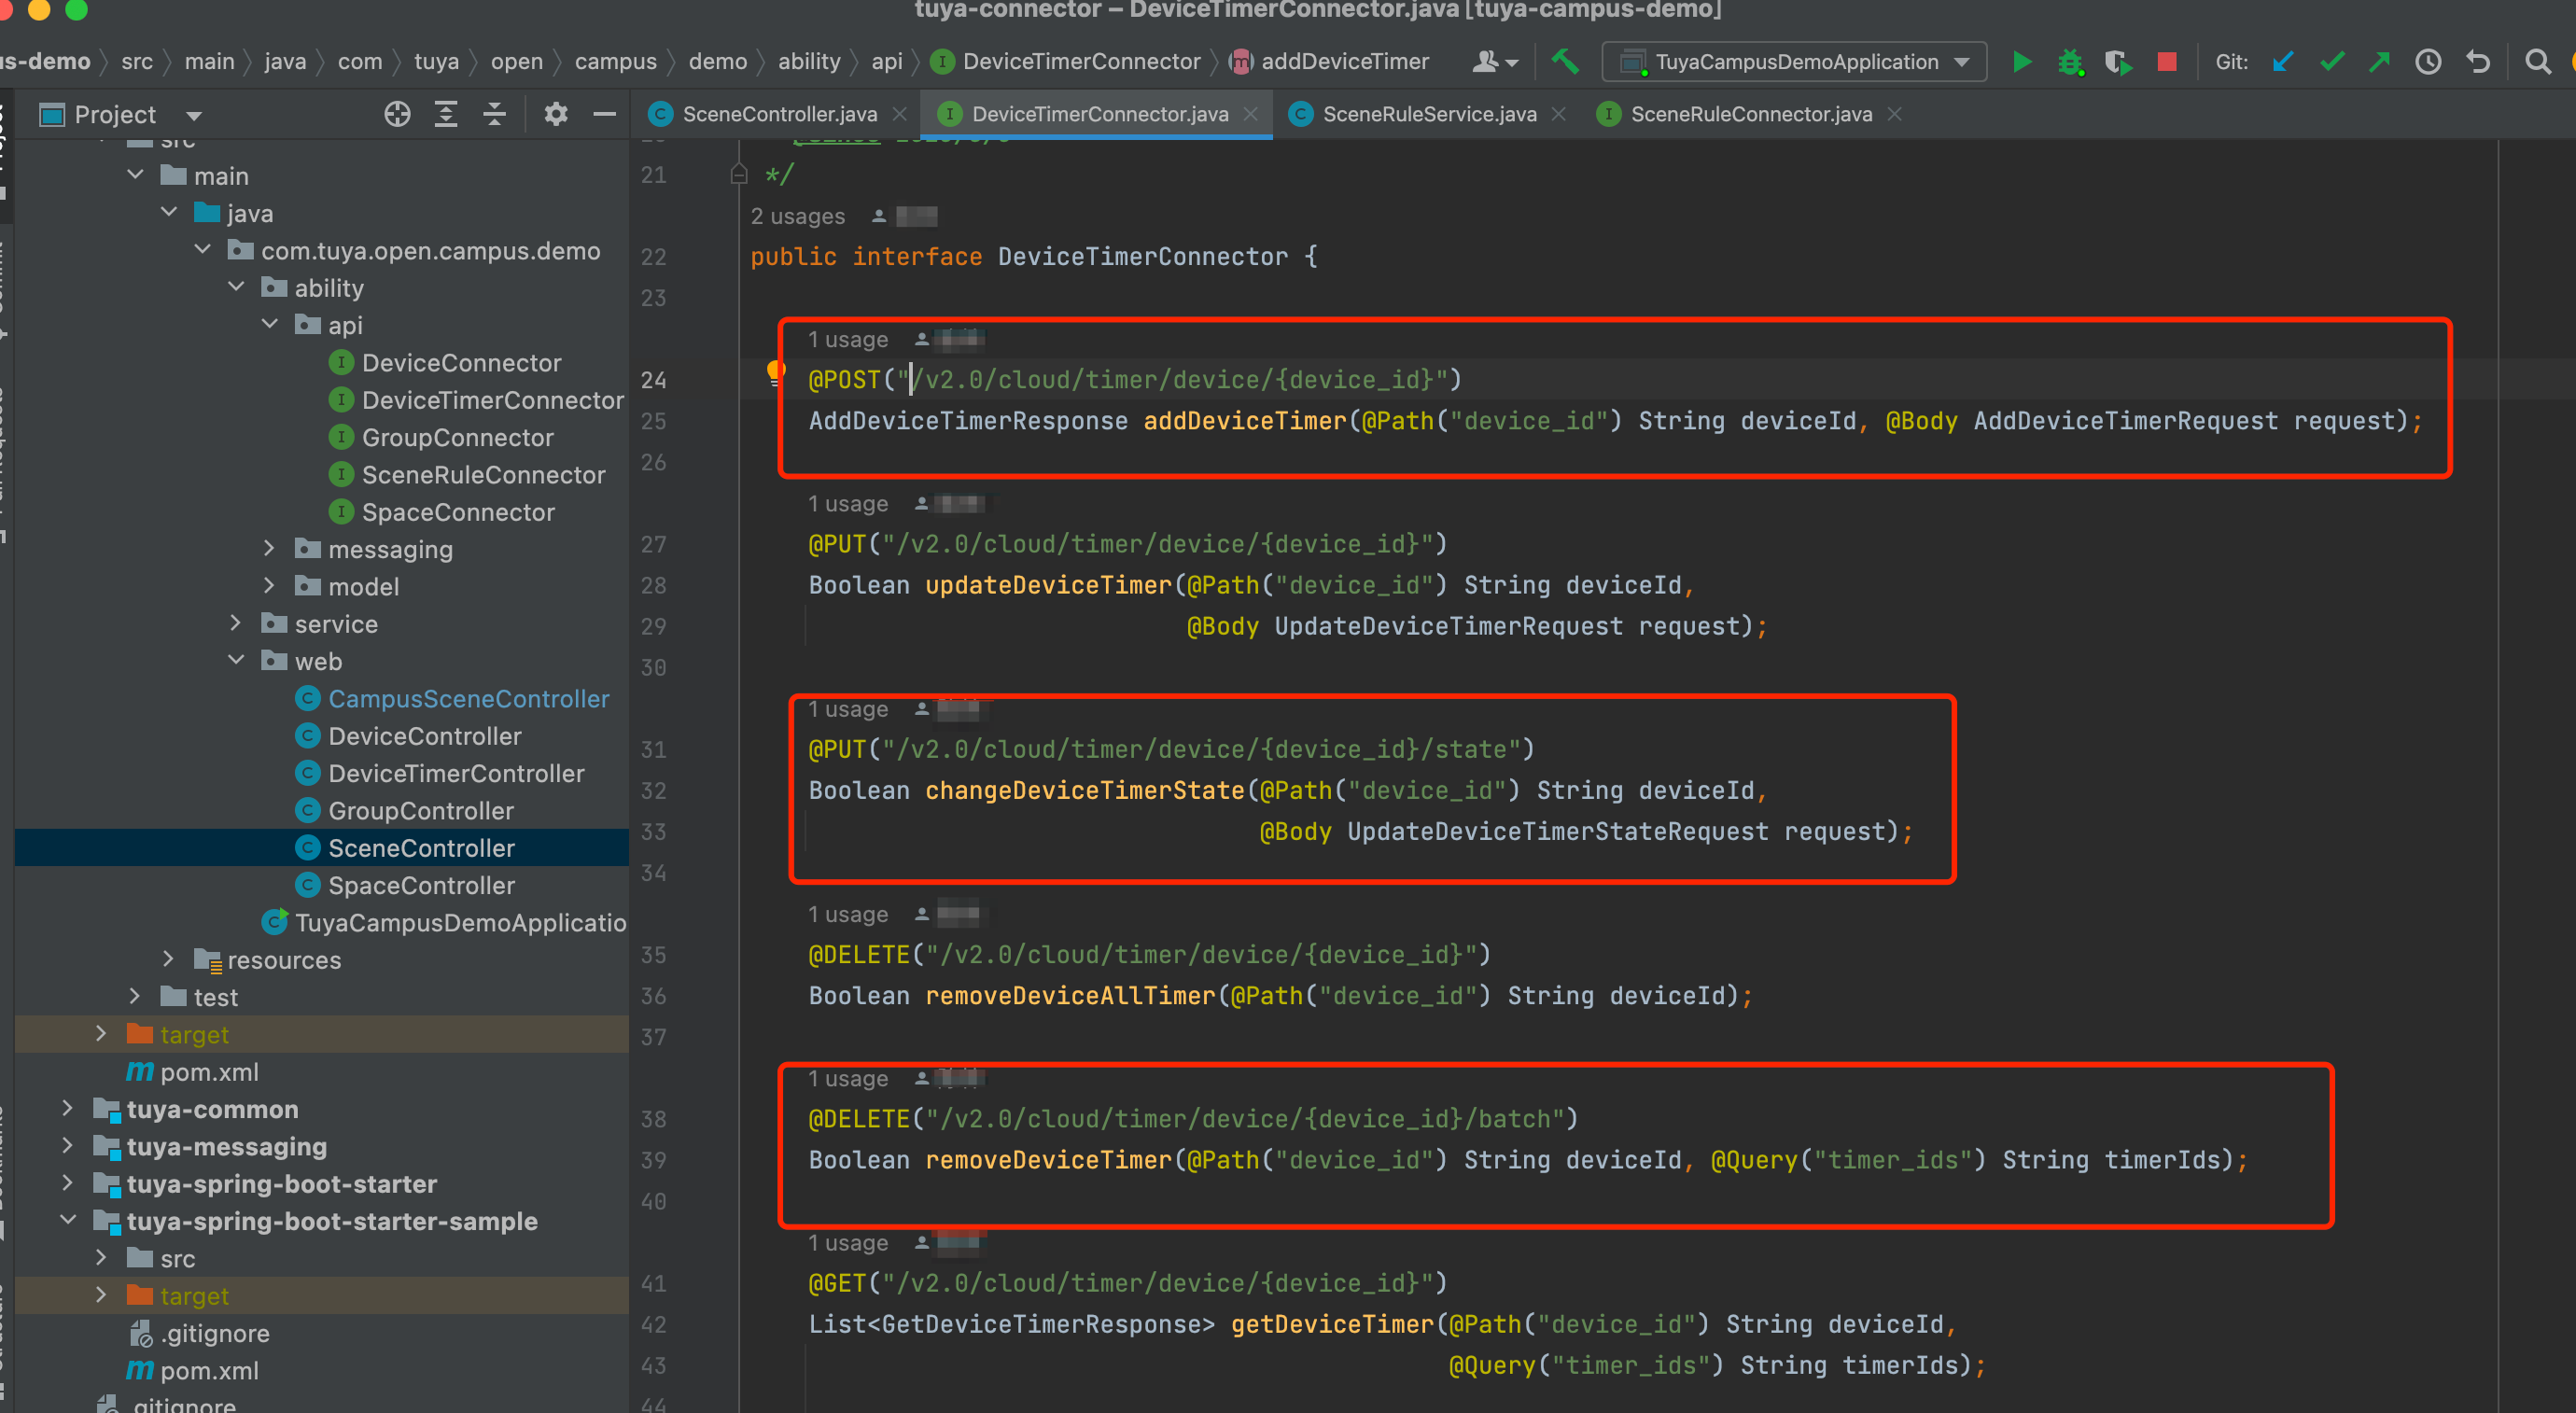
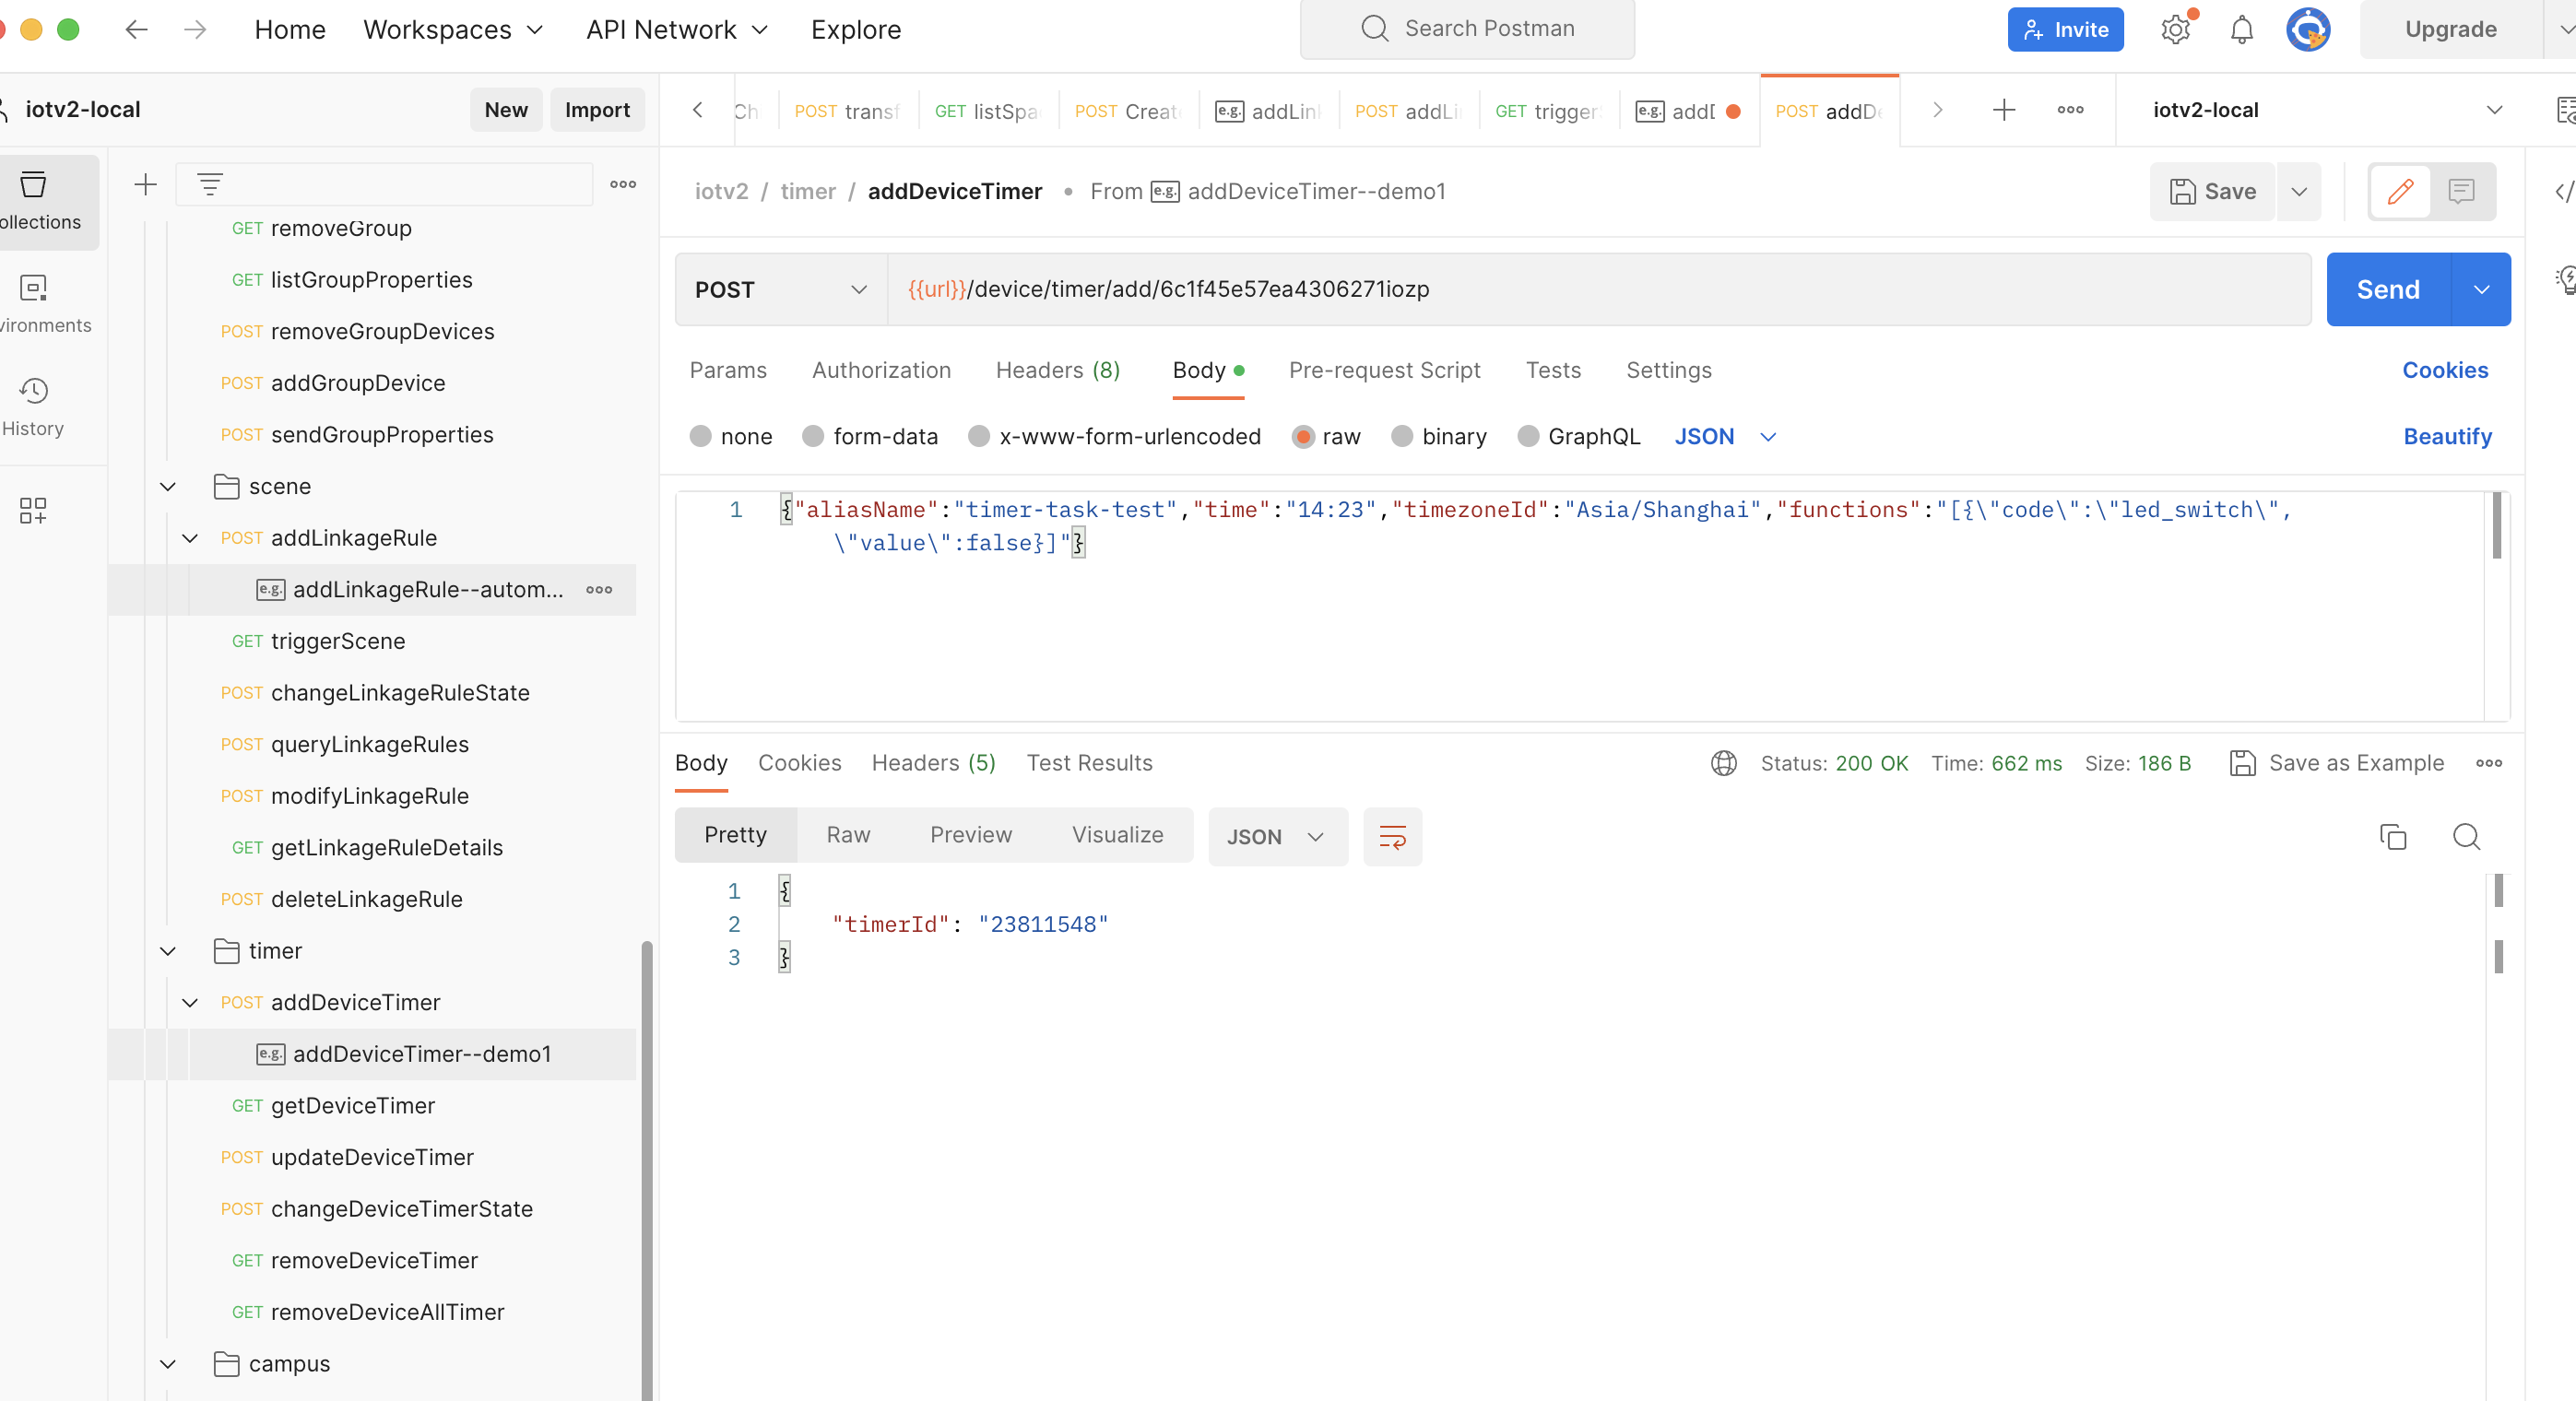
Create a scheduled task
-
APIs
Create a scheduled task for the specified device.
POST:/v2.0/cloud/timer/device/{device_id} -
Demo snippet
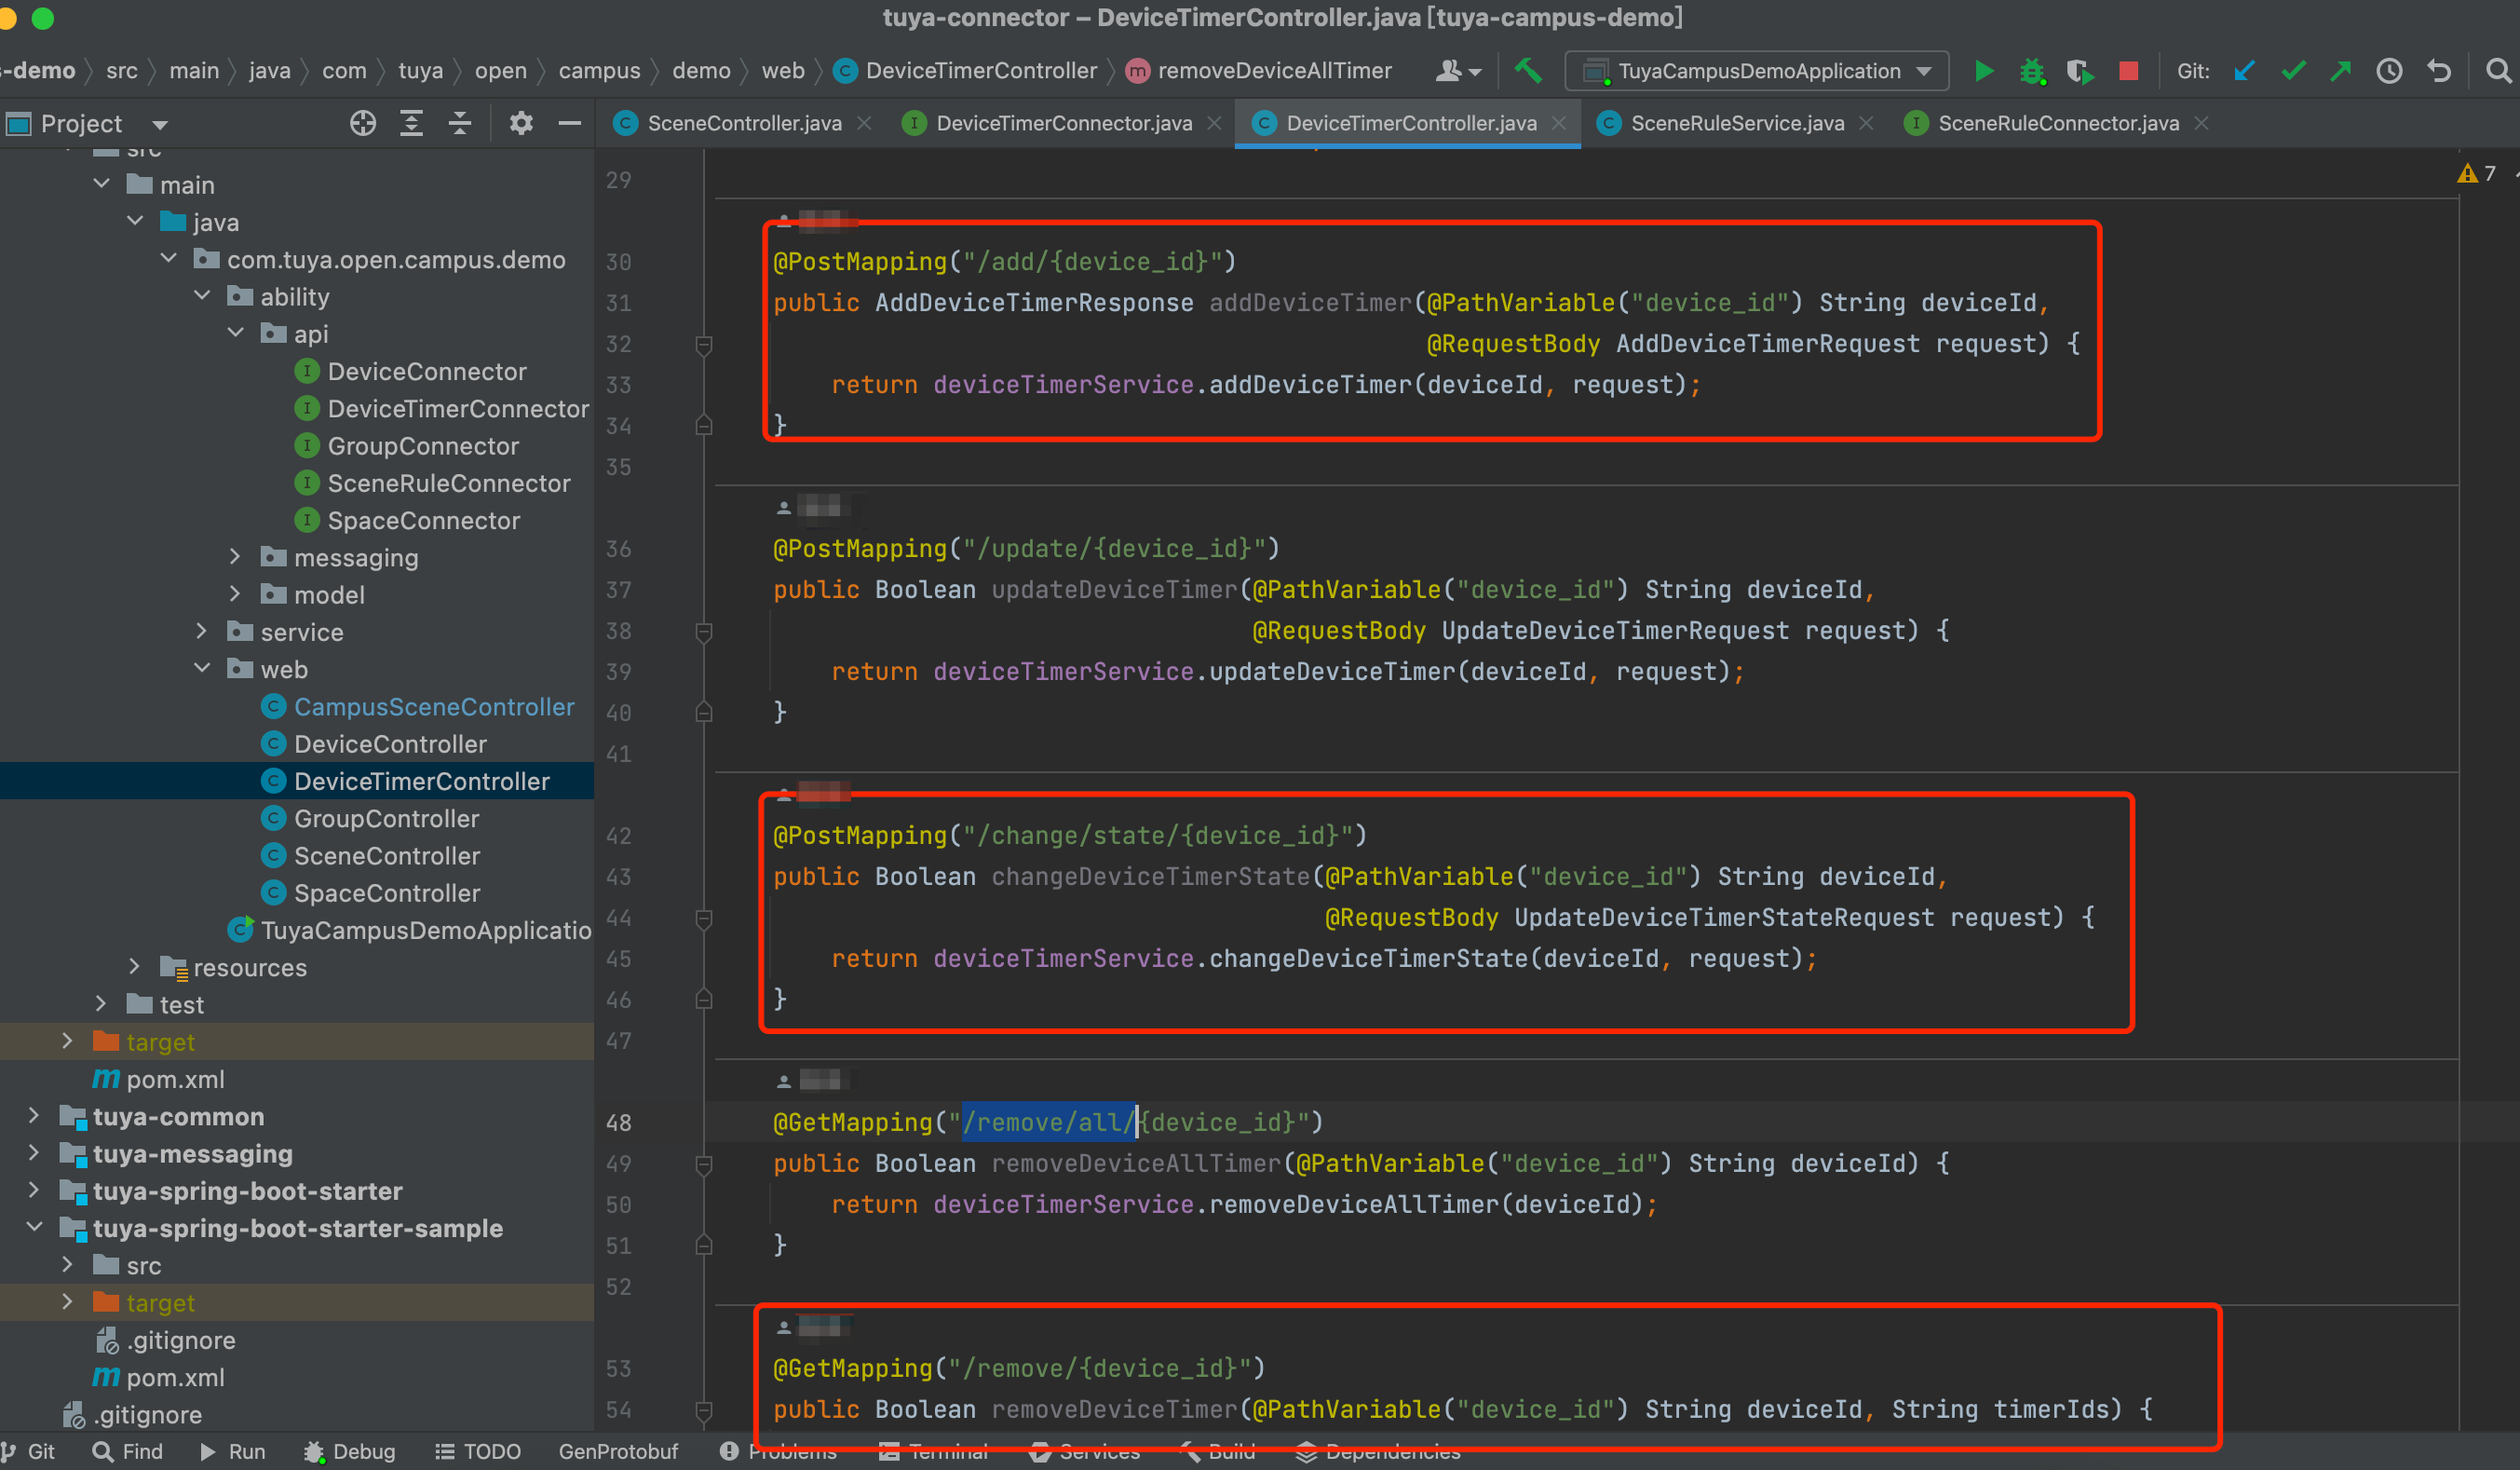
-
Debugging example
Modify a scheduled task
-
APIs
Modify the state of the specified scheduled task.
PUT:/v2.0/cloud/timer/{timer_id}/state -
Debugging example

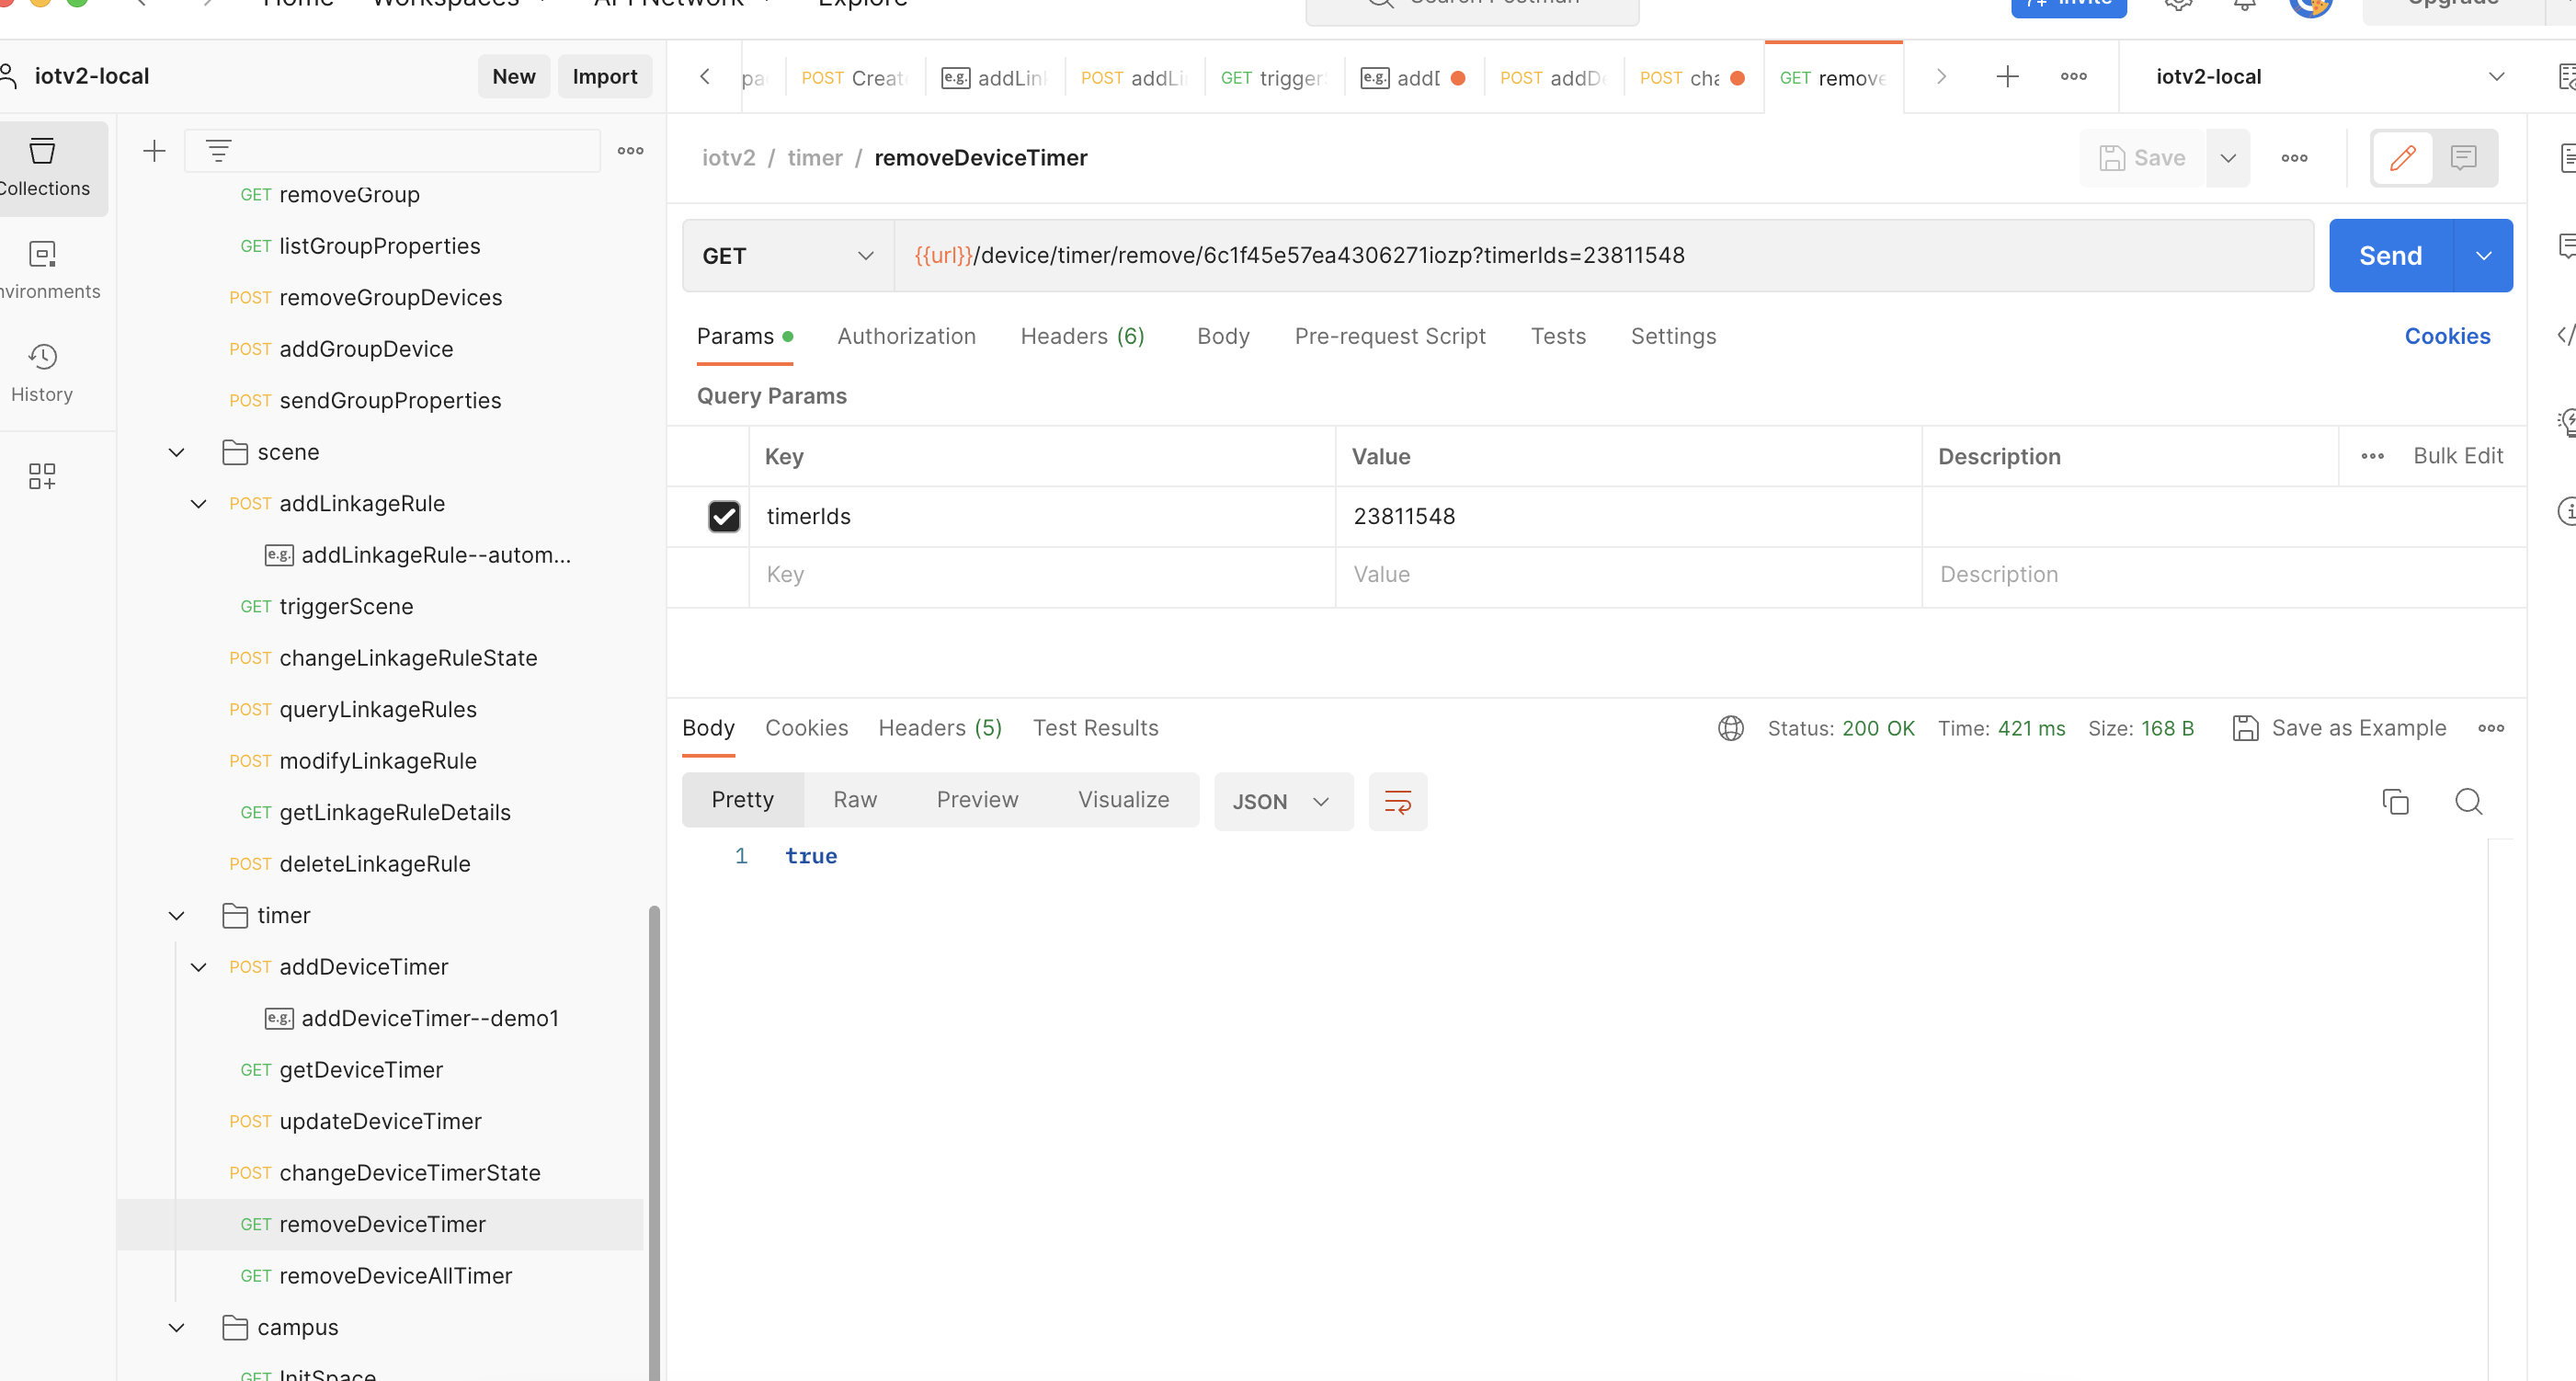
Delete a scheduled task
-
APIs
Delete a certain scheduled task for the specified device.
DELETE: /v2.0/cloud/timer/device/{device_id} -
Debugging example
Except for the APIs demonstrated above, other IoT Core v2.0 APIs have been implemented in tuya-campus-demo. You can download and import it into a local project for testing.
Reference
For more information, see IoT Core.
Is this page helpful?
YesFeedbackIs this page helpful?
YesFeedback


