Device Control Practice
Device control is a must-have service for IoT project development. This topic describes the procedure from configuring a cloud project to finally completing device control based on the IoT SDKs.
Procedure
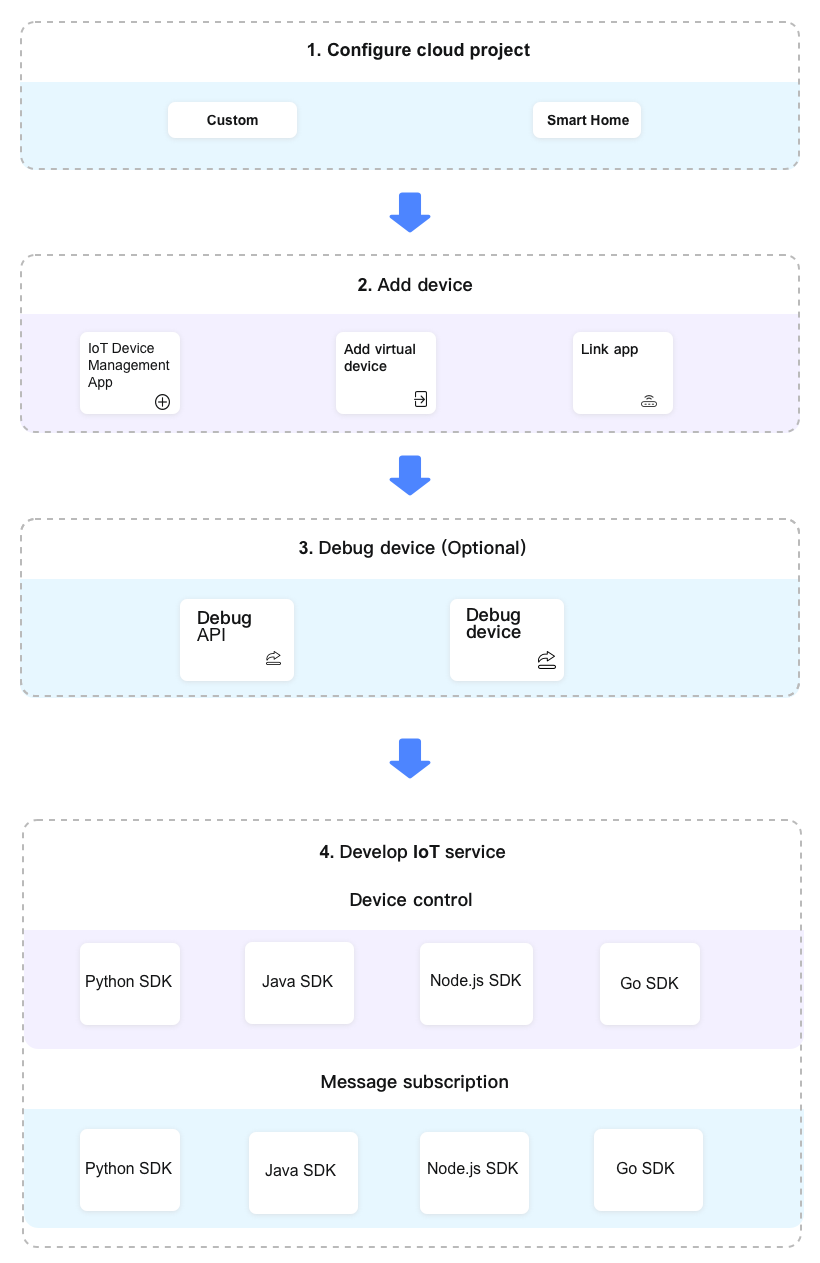
Step 1: Configure cloud project
Go through the following steps to create and configure a cloud project.
- Create a project: The cloud project is a collection of resources on the Tuya Developer Platform, including devices, APIs, and data. Resources distributed to different projects are isolated from each other.
- Subscribe to and authorize the required cloud services: You can choose the cloud services provided by Tuya based on the scenarios to speed up your development.
- Build the asset and user systems: The project owner has administrator permissions on the resources under the asset and user systems, including devices, users, API permissions, and data assets. This way, enterprises can easily manage and control project resources.
For more information, see Step 1: Configure Cloud Project.
Step 2: Add device
The cloud project supports multiple ways to add devices. You can choose the desired way to add devices in different scenarios. This topic focuses on the following frequently used ways.
- Smart Industry app: Link the cloud project with the Smart Industry app, and connect devices to the cloud project by using device pairing or edge gateway activation on the app.
- Virtual device: If you have not purchased a 'Powered by Tuya' device at the beginning of development, you can use the virtual device feature to try out and debug the IoT service you have built.
- Link external applications: You can link existing apps, WeChat mini programs, and Tuya app accounts, so the devices of external applications can be linked with the cloud project. Note that the devices of an external application belong to the owner of the external application. The cloud project owner is not authorized to control these linked devices, but only has permissions to view device status.
For more information, see Step 2: Add Device.
Step 3: (Optional) Debug device
- Debug the APIs: You can simulate your real business scenarios through the API debugging feature, call and debug the APIs to ensure stable operation.
- Debug the devices: You can simulate your real business scenarios through the device debugging feature, send commands to control the devices, and check the device availability to ensure stable operation.
For more information, see Step 3: Debug Device.
Step 4: Develop IoT services
Device control
Taking the device control service as an example, this topic describes how to implement the development of device control services through Tuya SDK for the following popular programming languages.
- Java
- Python
- Node.js
- Go
Message subscription
On the cloud development, Message Service is used to actively push the event data to external partners through Pulsar, which meets their demands for real-time and persistent messages. This topic describes the message queue SDK for the following popular programming languages.
- Java
- Python
- Node.js
- Go
For more information, see Step 4: Develop IoT Services.
Is this page helpful?
YesFeedbackIs this page helpful?
YesFeedback


