Step 1: Configure Cloud Project
Go through the following steps to create and configure a cloud project.
-
Create a project.
A cloud project is a collection of resources on the Tuya Developer Platform, including devices, API permissions, and data assets. And resources distributed to different projects are isolated from each other.
-
Subscribe to and authorize the required cloud services.
You can choose the cloud services provided by Tuya based on the scenarios to speed up your development.
-
Build the asset and user systems.
The project owner has administrator permissions on the resources under the asset and user systems, including devices, users, API permissions, and data assets. This way, enterprises can easily manage and control project resources.
Procedure
A cloud project is a collection of resources on the Tuya Developer Platform. Resources and permissions distributed to different projects are isolated from each other. To get started, you need to create a cloud project first.
-
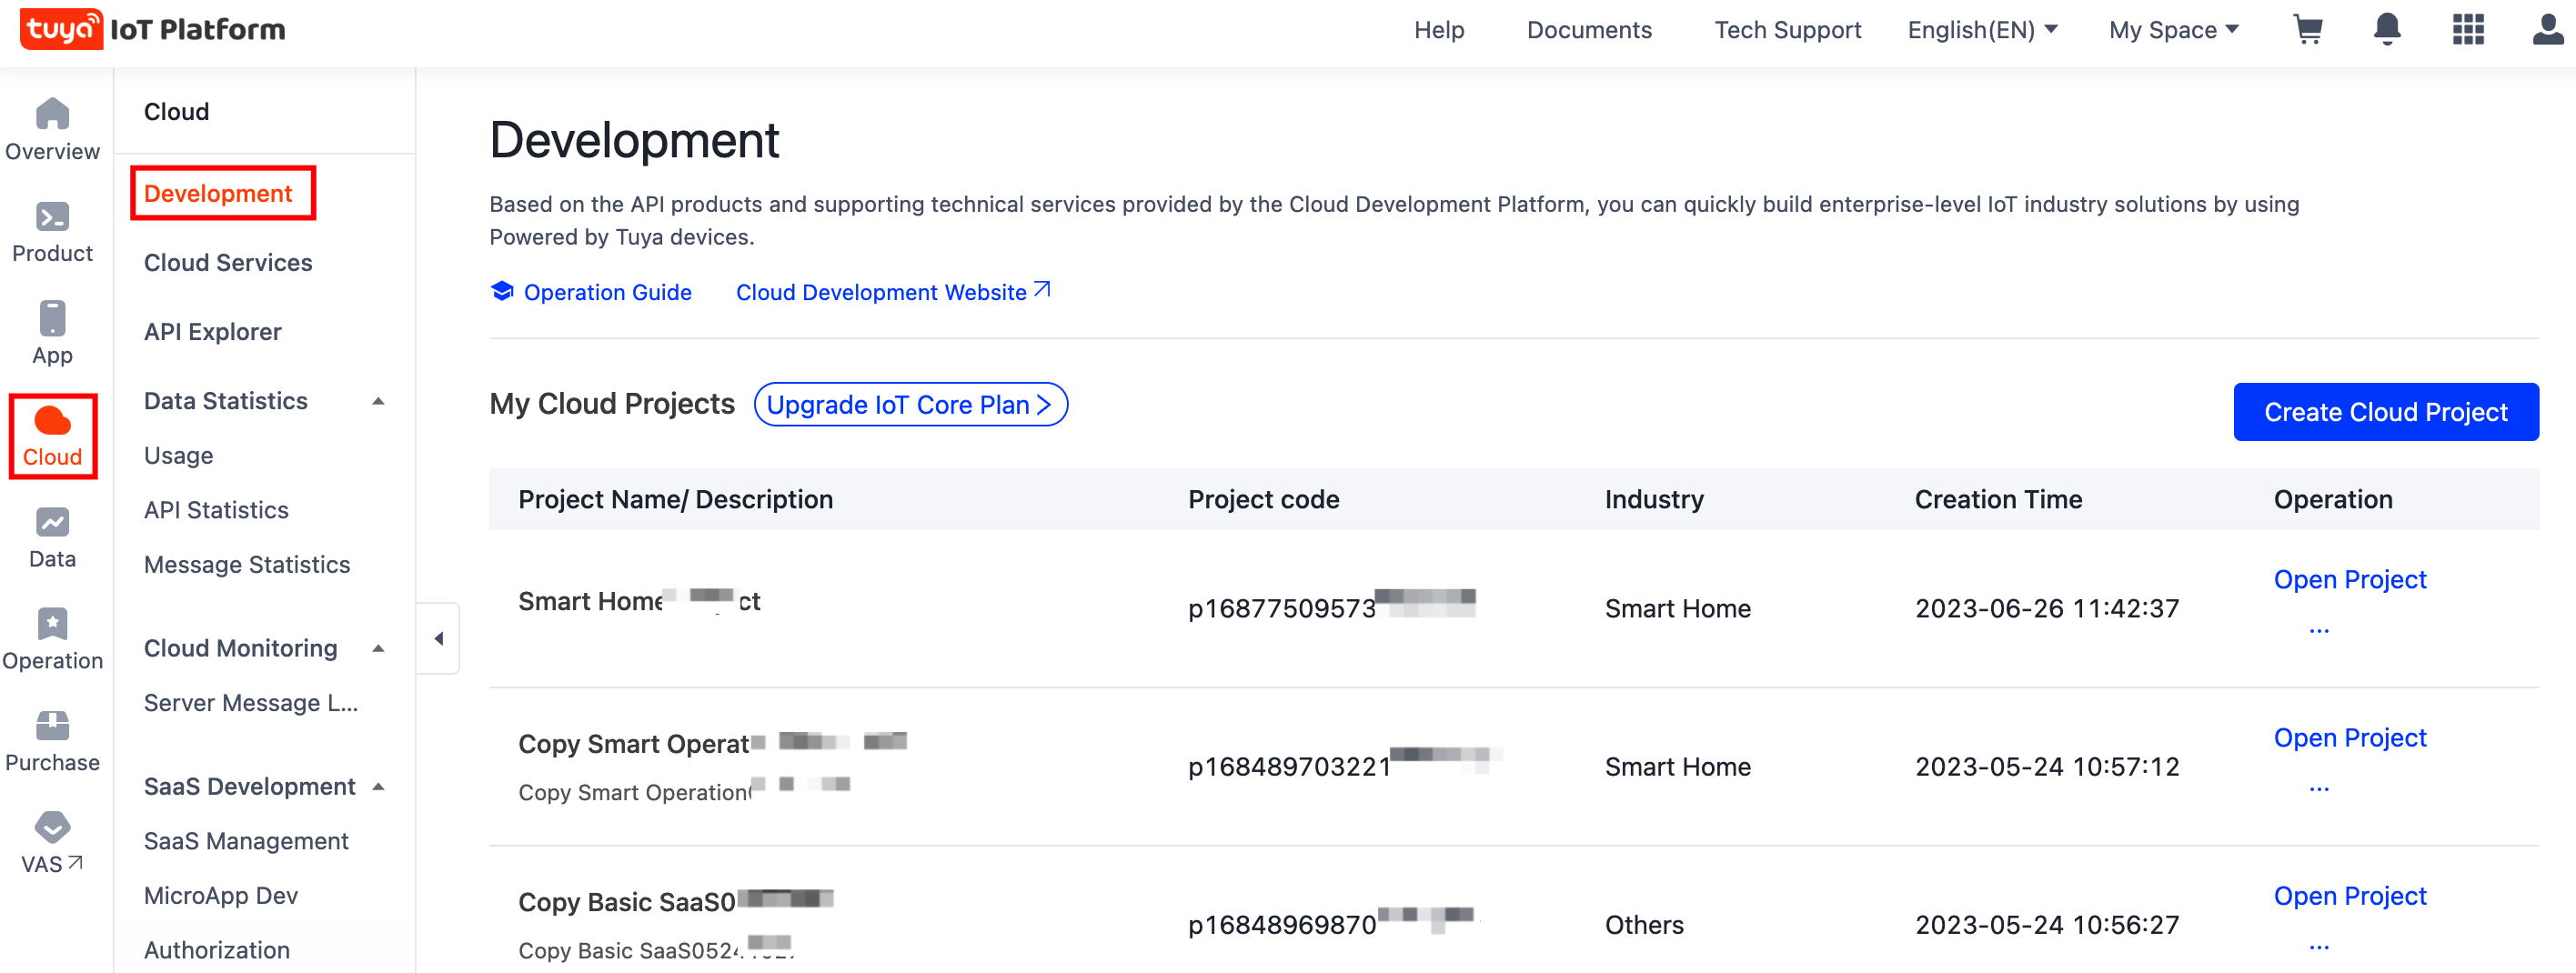
Log in to the Tuya Developer Platform.
-
In the left-side navigation bar, hover over Cloud and choose Development.
-
On the page of My Cloud Projects, click Create Cloud Project.
-
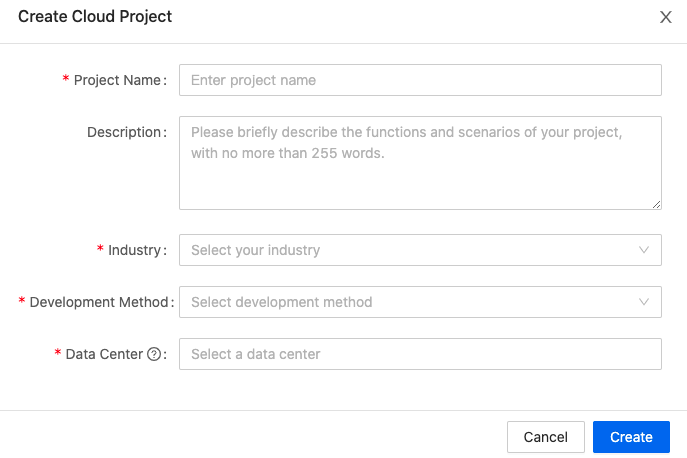
On the Create Cloud Project dialog box, set the required parameters and click Create.
-
Project Name: the custom name of your project.
-
Description: the custom description of your project.
-
Industry: Select the industry type of your project, facilitating follow-up statistical analytics.
-
Development Method: In this example, select Custom from the drop-down list. For more information about the differences between development methods, see Development Method.
-
Data Center: Select the name of the data center to which your location is mapped.
-
-
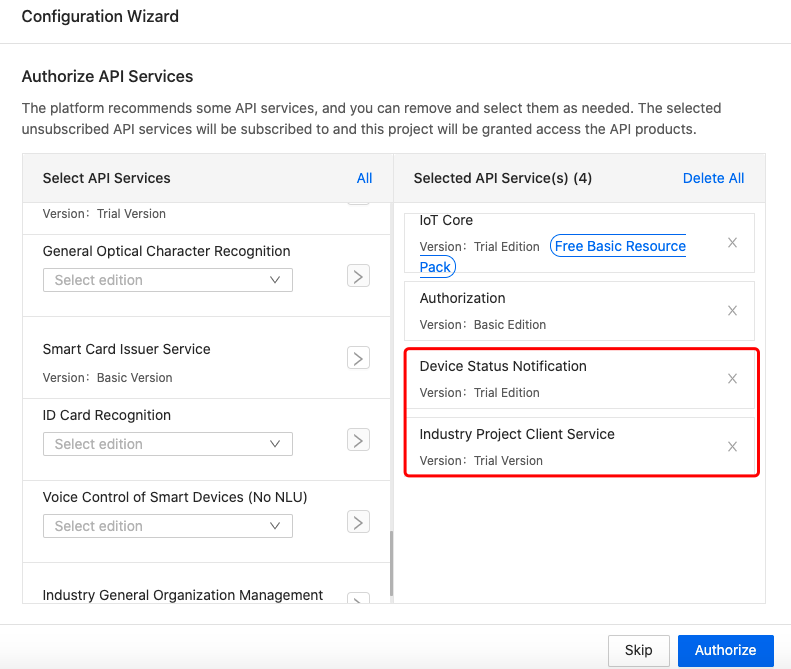
On the Authorize API Services page, besides the default selections, you need to subscribe to the API services such as Device Status Notification and Industry Project Client Service and click Authorize.
-
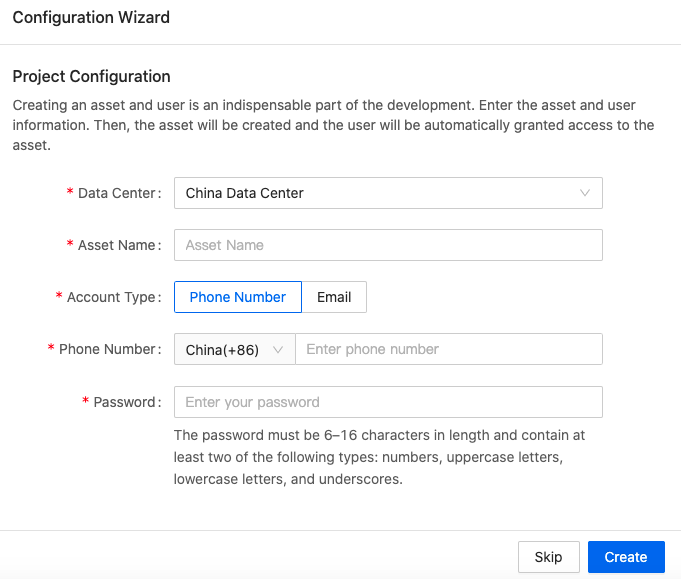
Create an original asset and original account. And then, the account will be granted access to the asset.
- Note down the specified account and password. You will use them when you add a device using the Smart Industry app or call the API operations to control the devices.
- You can also build your asset structure to adapt to actual scenarios. For more information, see Manage asset structure.
Next steps
After you create and configure a project, you can link devices with your project.
Is this page helpful?
YesFeedbackIs this page helpful?
YesFeedback


