Debug Device Linkage by Virtual Device
Last Updated on : 2024-06-20 06:56:44download
On the Tuya Developer Platform, you can add a virtual device to debug the device linkage feature. Taking the smart home project for example, this topic describes how to add a virtual device on the Tuya Developer Platform and run a simulated debugging task to test automatic control of smart home devices.
Procedure
Smart home projects support a variety of ways to link devices. This topic describes the whole process to develop smart home projects. In the following example, the steps to add virtual devices to the app and debug the virtual devices with the app are described. The following figure shows the procedure.
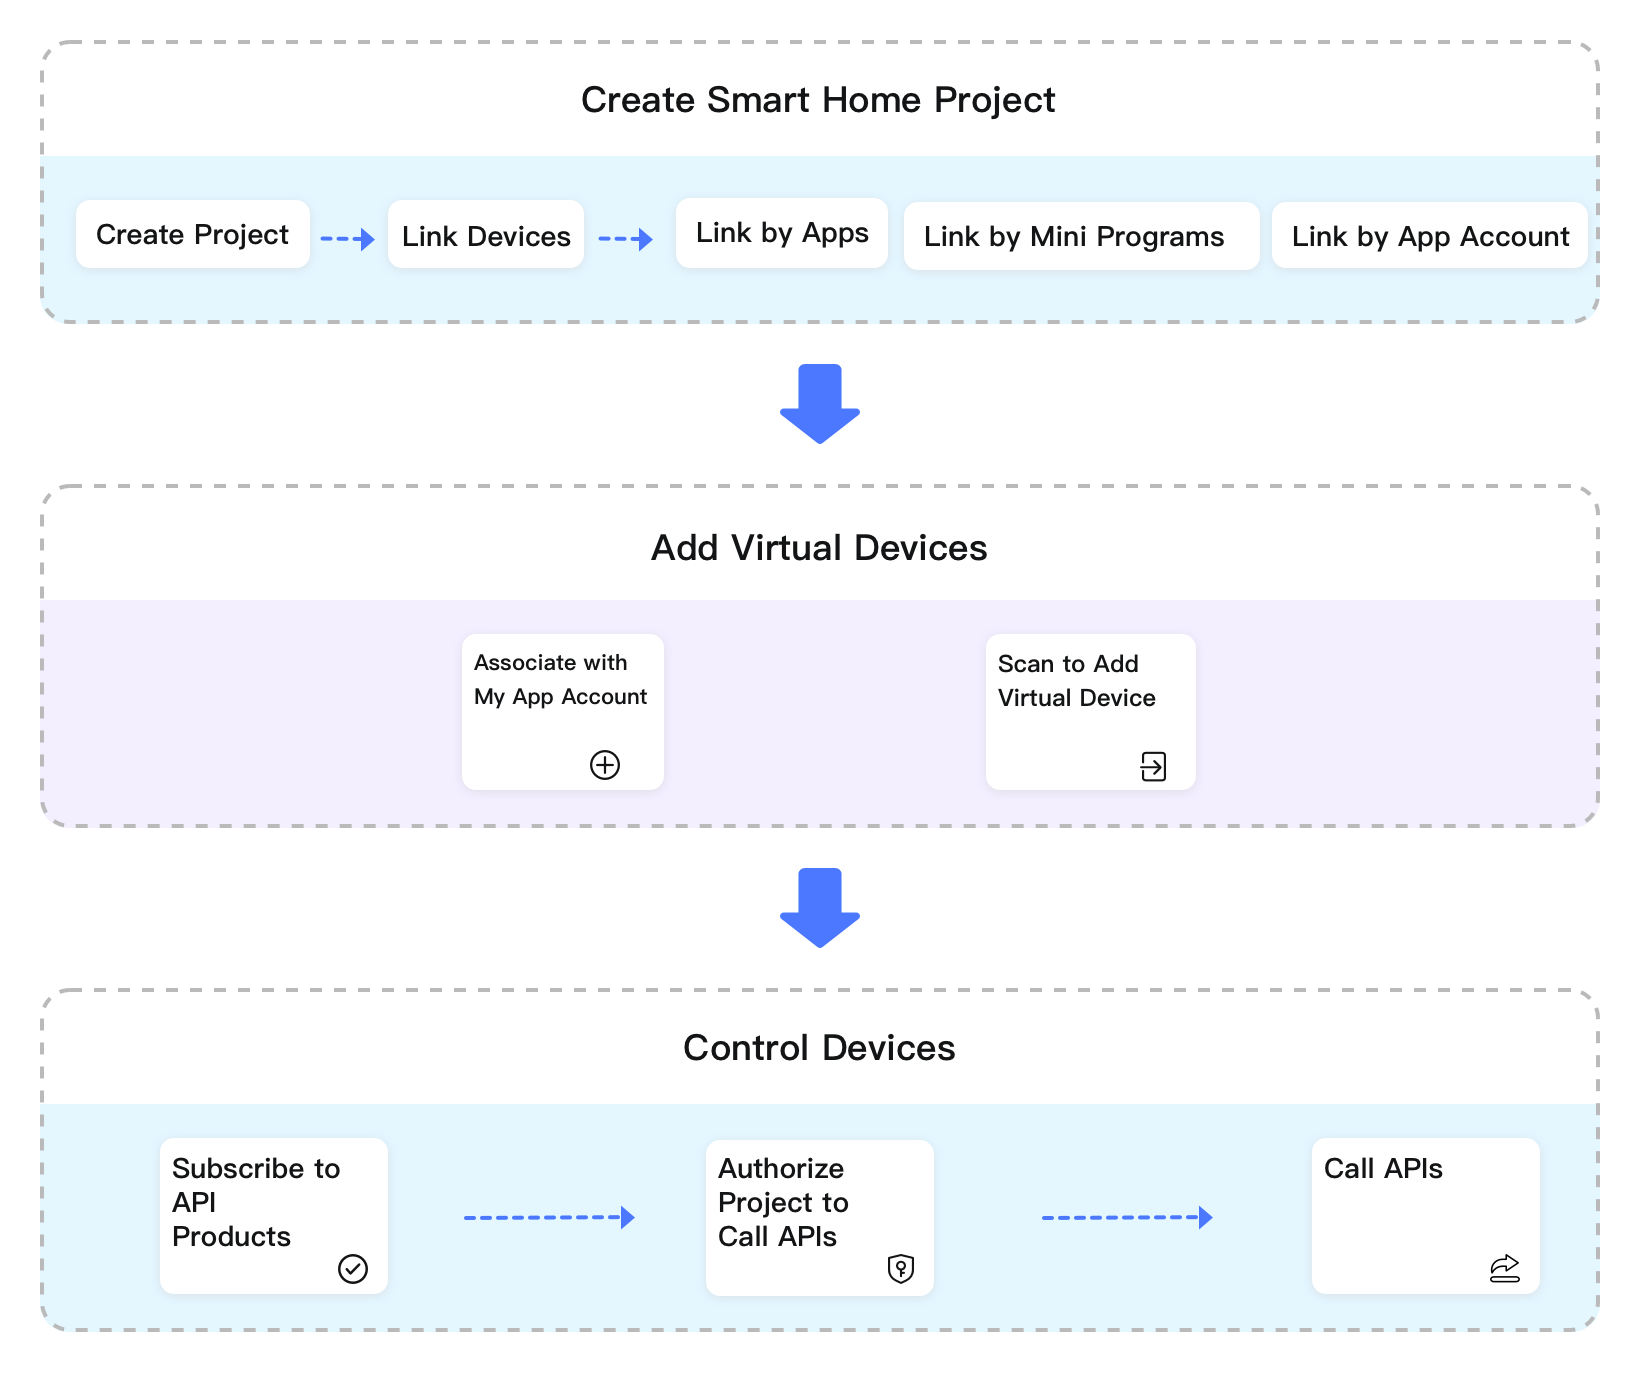
Create a smart home project
-
Log in to the Tuya Developer Platform.
-
In the left-side navigation bar, click Cloud > Development.
-
Create a smart home project.
- In the left-side navigation bar, click Cloud > Development.
- On the page of Cloud Development > My Cloud Projects, click Create Cloud Project.
- In the dialog box of Create Cloud Project, complete the information of the project.
- Click Create to select API services and then finish the project configuration.
For more information, see Configuration Wizard of Smart Home PaaS.
-
Link devices. Smart home projects support three ways to link devices.
- Link devices by apps
- Link devices by mini programs
- Link devices by Tuya app account
For more information, see Link Devices.
In this example, choose Link My App > Add Apps to link the device by the app account. Then, the project can manage and control the devices on the SmartLife app.
Add virtual devices
In this example, add bulb and lighting switch virtual devices to implement automation linkage of the smart home project.
-
In Cloud Management > My Cloud Projects, select your target project.
-
Click the Devices tab on the top.
-
Click the All Devices tab. Place the pointer over Add Device and then select Add Virtual Device.
-
Select the target device and click Add Virtual Devices. In the pop-out window, select one way.
Smart home projects support three ways to add virtual devices.-
Add to Asset
Select an asset path to add the product.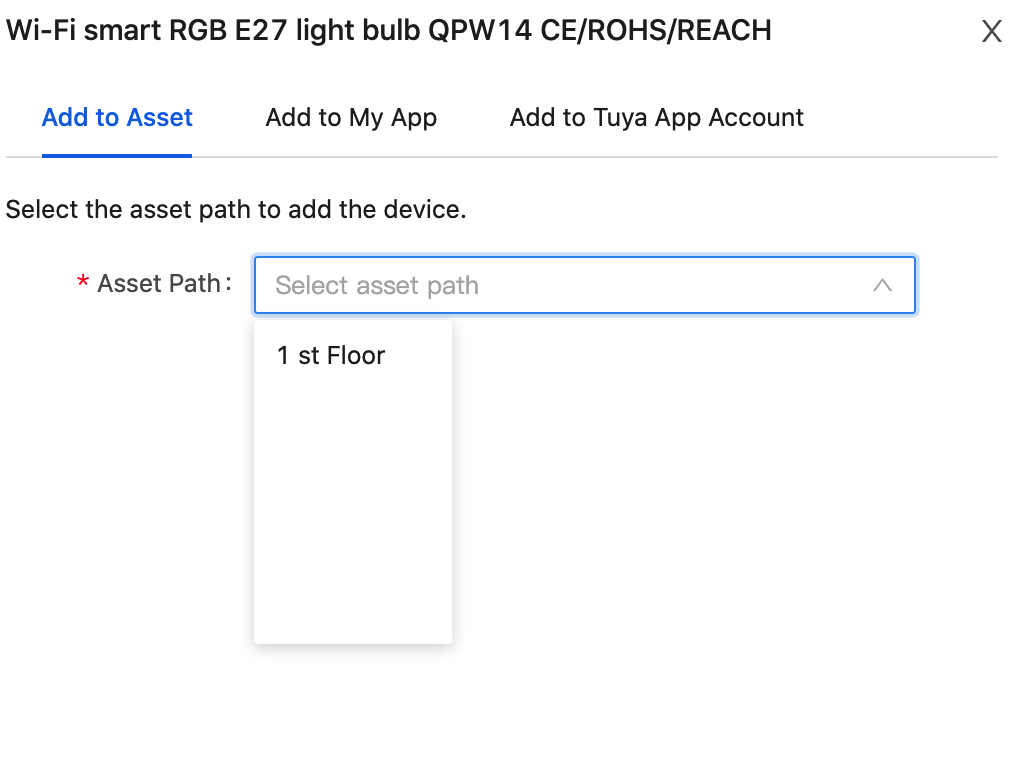
Note: If you have not created an asset, you need to create an asset first.
-
Add to My App
Select an app, add an account, and select a home to add your devices to the app.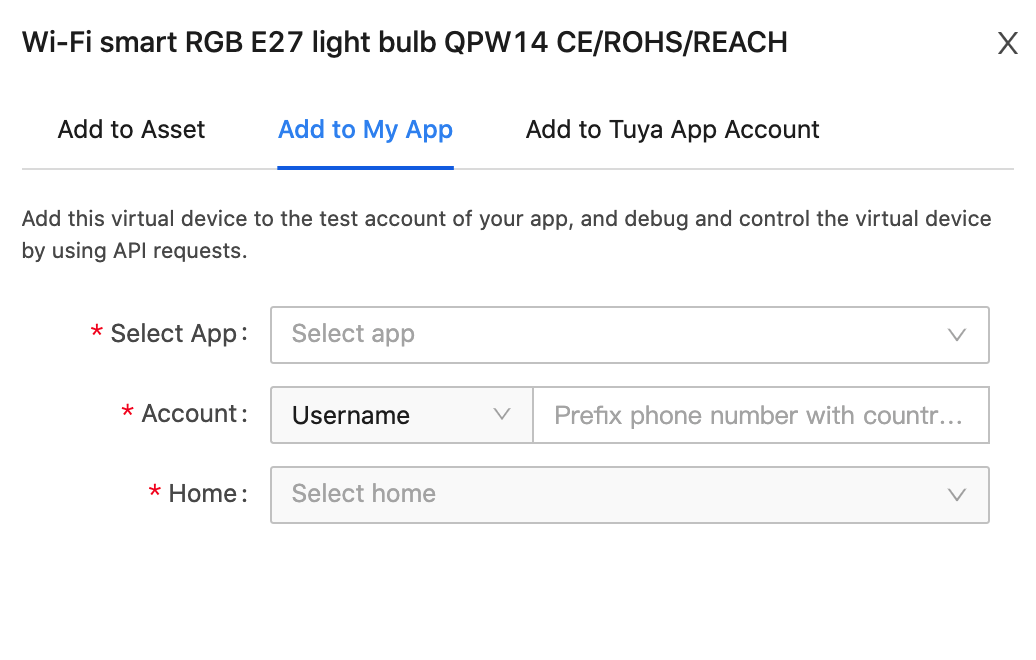
Note: You must create and link an OEM app before adding a device to it. For more information about how to create an OEM app, see Build an OEM app. The Trial edition of the app is available for test.
-
Add to Tuya App Account
Scan the QR code with the SmartLife app and add your devices to the app account.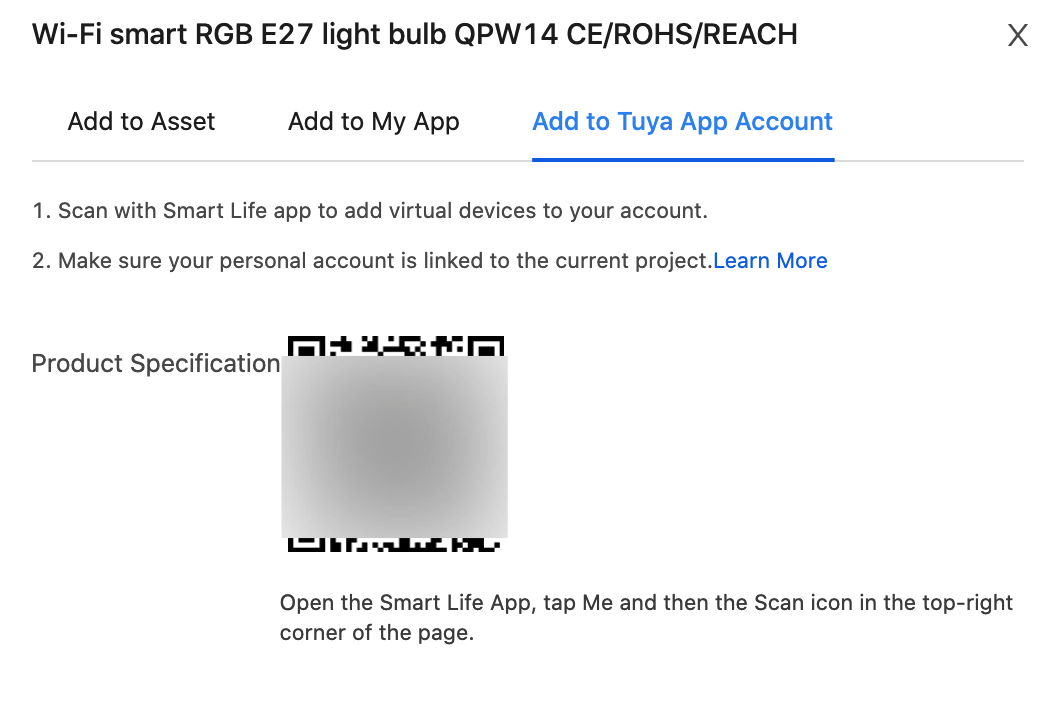
-
-
After adding, below the tab of All Devices, select an adding way, and you can see your devices added by this way.
Note: The device ID is required for subsequent API requests.

-
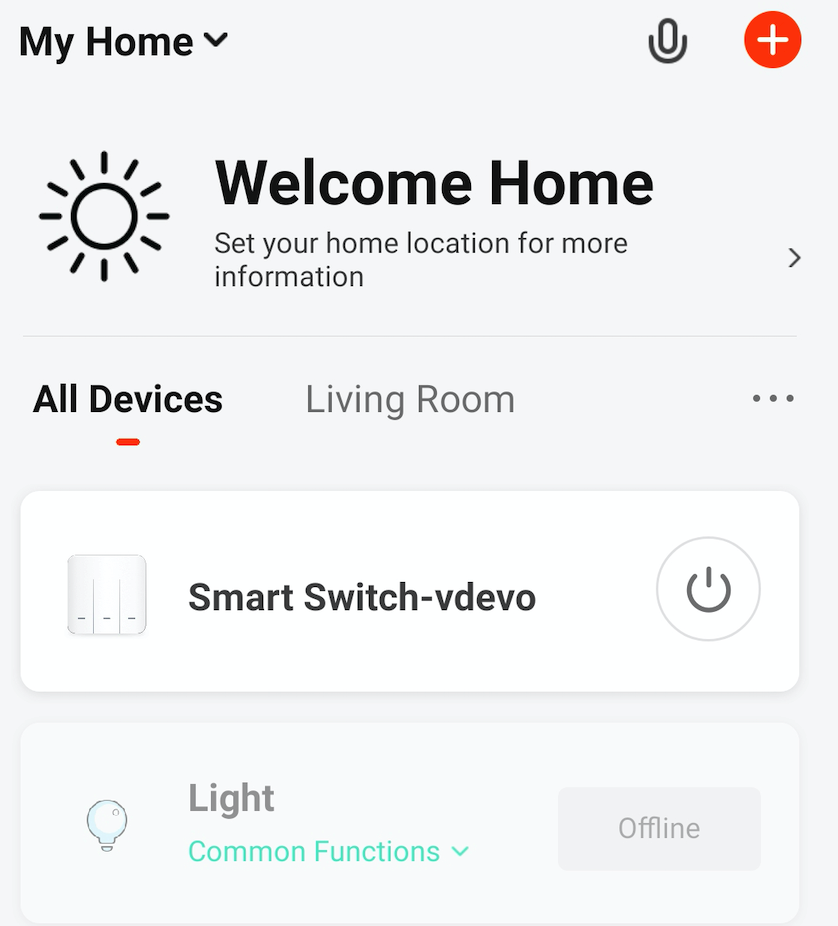
If you choose Add to My App or Add to Tuya App Account, you can view your added virtual devices on the OEM app or SmartLife app.
Control devices
After you add the device to the Tuya Developer Platform, you can call API operations to remotely turn on and off the bulb and lighting switch, and create smart scenes.
Note: If you skip the step of selecting and authorizing API services when creating cloud projects, or you want to call more APIs, you can subscribe to API services and authorize specified projects to call them with reference to Manage API services.
-
On the API Explorer page, you can make an API request to control the devices.
-
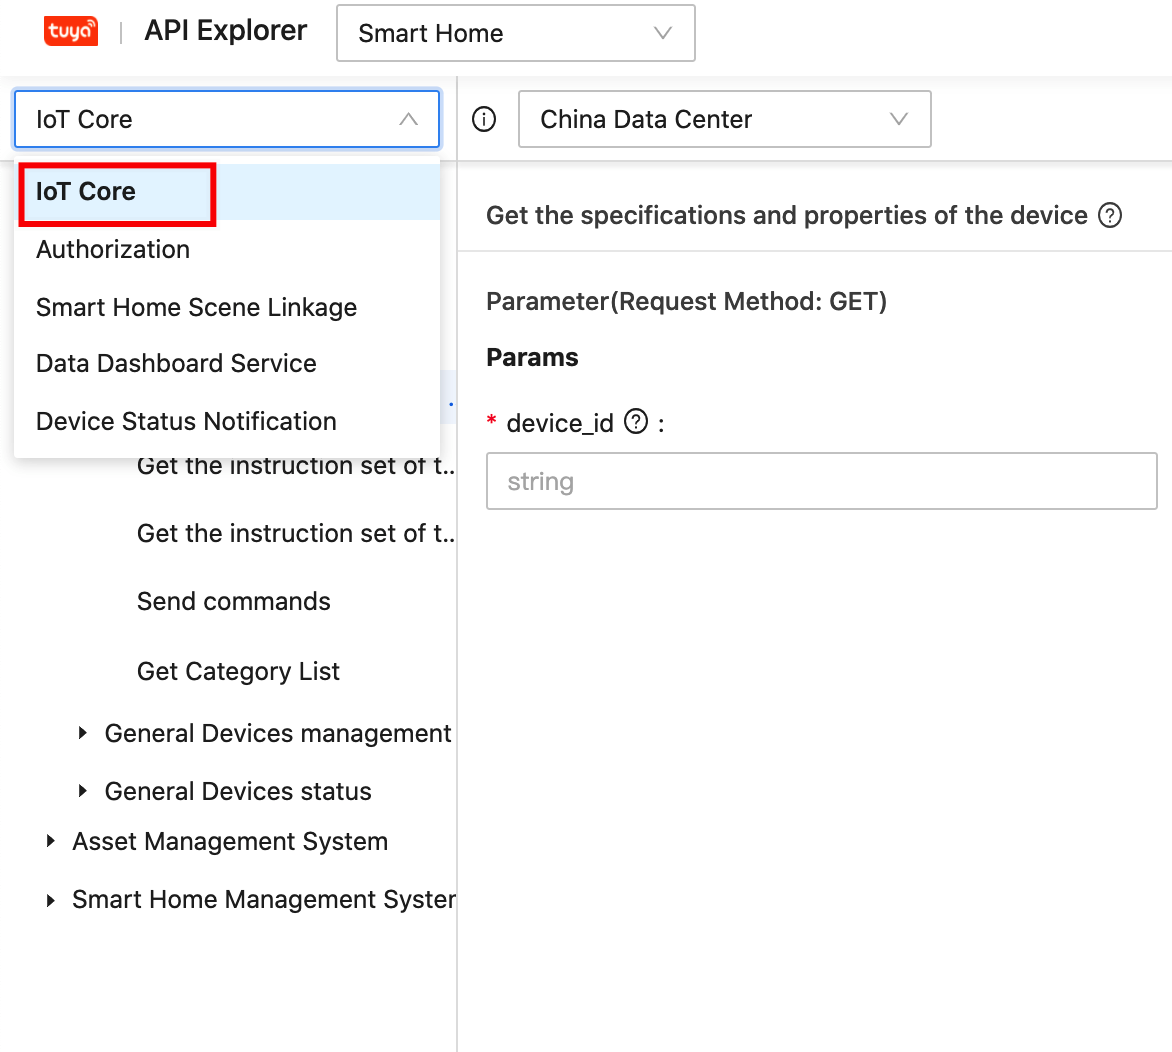
Choose Cloud > API Explorer.
-
From the drop-down list of subscribed APIs, select IoT Core.
-
On the API debugging page, call the Send commands API, enter
device_idandcommandsto implement different operations.Note: For more information about control instructions of lights, see Standard Instruction Set.
-
Turn on the light
{
   "code": "switch_led",
   "value": true
}
-
-
-
In smart home projects, you can also create smart home automation tasks and smart scene applications for virtual devices.
Note: You can use Postman to call more API operations. See Scene Automation. For more information about Postman, see Set Postman Environment and Call API Operations.
-
Call
GET /v1.0/homes/31979953/automation/devicesto query the list of devices that support automation scenes. You can know that the added virtual devices, including bulbs and switches, support automation functions. The following code block shows the response:{ "result": [ { "device_id": "vdevo162147870149***", "home_id": "31979***", "name": "YB_A70_RGBW_low-vdevo", "uuid": "vdevo162147870149***" }, { "device_id": "vdevo162147685639***", "home_id": "31979***", "name": "Two-gang switch-vdevo", "uuid": "vdevo162147685639***" } ], "success": true, "t": 1621478801943 } -
Call
GET /v1.0/homes/31979953/enable-linkage/codesto get the linkage conditions supported by the home. You can know that the linkage features are supported by the devices.{ "result": [ { "device_id": "vdevo162147870149***", "functions": [ { "code": "switch_led", "name": "Switch", "type": "Boolean", "values": {} }, { "code": "work_mode", "name": "Working mode", "type": "Enum", "values": { "range": [ "white", "colour" ] } } ], "status": [ { "code": "bright_value", "name": "Brightness value", "type": "Integer", "values": { "max": 255, "min": 25, "scale": 0, "step": 1, "unit": "" } }, { "code": "switch_led", "name": "Switch", "type": "Boolean", "values": {} }, { "code": "work_mode", "name": "Working mode", "type": "Enum", "values": { "range": [ "white", "colour" ] } } ] }, { "device_id": "vdevo162147685639***", "functions": [ { "code": "switch_1", "name": "Switch 1", "type": "Boolean", "values": {} }, { "code": "switch_2", "name": "Switch 2", "type": "Boolean", "values": {} } ], "status": [ { "code": "switch_1", "name": "Switch 1", "type": "Boolean", "values": {} }, { "code": "switch_2", "name": "Switch 2", "type": "Boolean", "values": {} } ] } ], "success": true, "t": 1621478728779 } -
Call
POST /v1.0/homes/31979953/automationsto Add an automation, and use multi-gang switches to control the bulb light and achieve linkage.-
Configure switch 1 to turn the light on or off.
{
   "conditions":[
        {
            "display":{
                "code":"switch_1",
                "operator":"==",
                "value":true
            },
            "entity_id":"vdevo162147685639***",
            "entity_type":1,
            "order_num":1
        }
    ],
    "actions":[
        {
            "action_executor":"dpIssue",
            "entity_id":"vdevo162147870149***",
            "executor_property":{
            "switch_led": true**
            }
        }
    ],
    "background":"https://images.tuyacn.com/smart/rule/cover/bedroom.png",
    "match_type":1,
    "name": "Switch to control the light–on"
}
{ "conditions":[ { "display":{ "code":"switch_1", "operator":"==", "value":false }, "entity_id":"vdevo162147685639***", "entity_type":1, "order_num":1 } ], "actions":[ { "action_executor":"dpIssue", "entity_id":"vdevo162147870149***", "executor_property":{ "switch_led": false } } ], "background":"https://images.tuyacn.com/smart/rule/cover/bedroom.png", "match_type":1, "name": "Switch to control the light–off" } -
Configure switch 2 to control the light to switch between colored light mode and white light mode.
{
   "conditions":[
        {
            "display":{
                "code":"switch_2",
                "operator":"==",
                "value":true
            },
            "entity_id":"vdevo162147685639***",
            "entity_type":1,
            "order_num":1
        }
    ],
    "actions":[
        {
            "action_executor":"dpIssue",
            "entity_id":"vdevo162147870149***",
            "executor_property":{
            "work_mode": "colour" /*Switch 2–on–enable the colored light mode*/
            }
        }
    ],
    "background":"https://images.tuyacn.com/smart/rule/cover/bedroom.png",
    "match_type":1,
    "name": "Switch 2 to control the light–colored light"
}
{ "conditions":[ { "display":{ "code":"switch_2", "operator":"==", "value":false }, "entity_id":"vdevo162147685639***", "entity_type":1, "order_num":1 } ], "actions":[ { "action_executor":"dpIssue", "entity_id":"vdevo162147870149***", "executor_property":{ "work_mode": "white" /*Switch 2–off–enable the white light mode*/ } } ], "background":"https://images.tuyacn.com/smart/rule/cover/bedroom.png", "match_type":1, "name": "Switch 2 to control the light–white light" }
-
-
Test the switch control.
-
Scene 1: Turn on Switch 1, and the light will automatically go on. Turn off Switch 1, and the light will also go off.
-
Scene 2: Turn on Switch 2, and the light will be in colored light mode. Turn off Switch 2, and the light will be in white light mode.
-
-
FAQs
Q: How can I get the account after I add a device with my own app account?
A: The app account is the same as the login account of the OEM app or mini program. You can view the account on the app or call an API operation to query it. For more information, see Get the user list.
Is this page helpful?
YesFeedbackIs this page helpful?
YesFeedback


