Manage Projects
A cloud project is a collection of resources, such as devices, API permissions, and data assets. These resources are isolated between different projects. On the Tuya Developer Platform, you can create custom development or smart home cloud projects, and manage, edit, or delete projects.
Create a project
Project creation is the first step of cloud development.
-
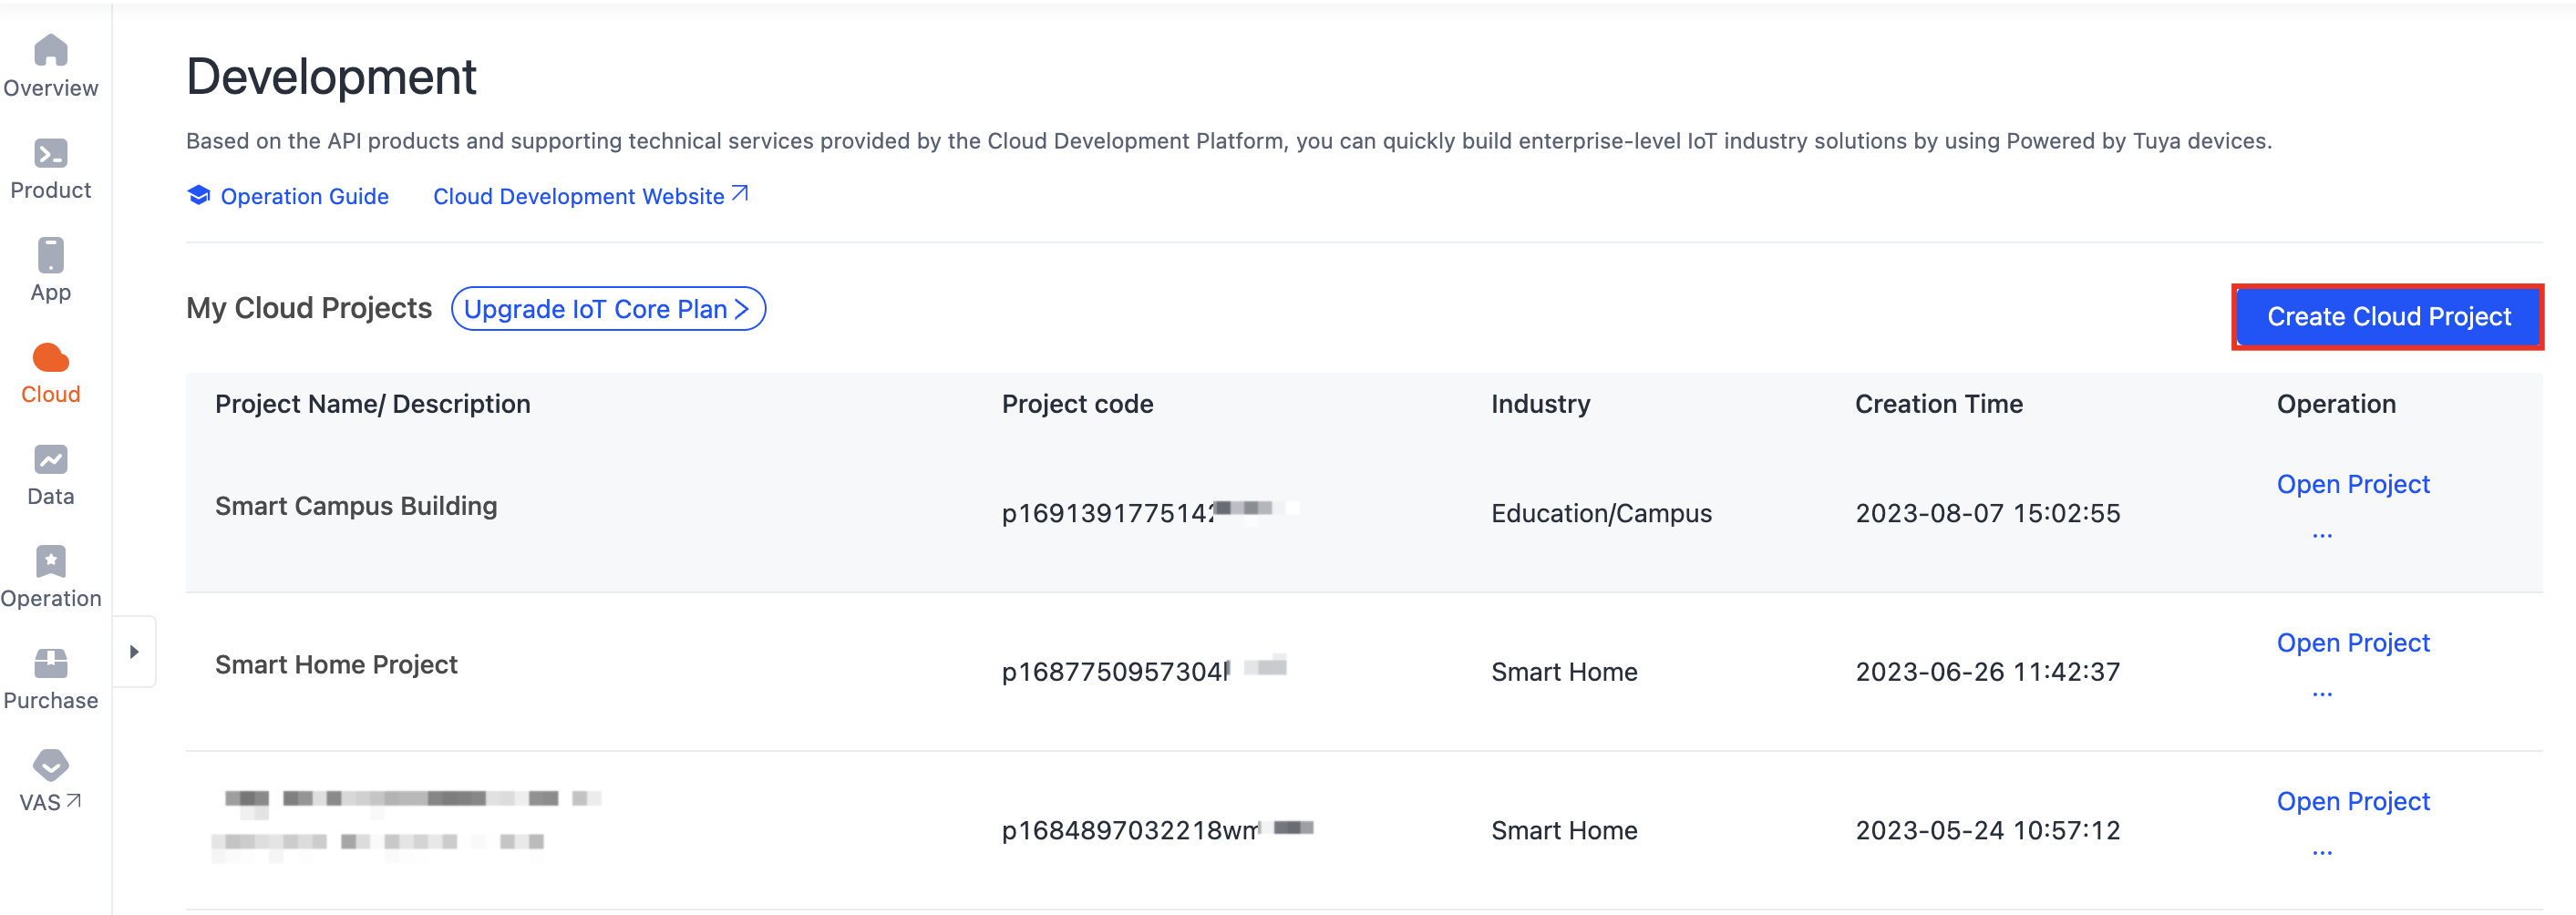
Log in to the Tuya Developer Platform.
-
In the left-side navigation bar, choose Cloud > Development.
-
On the Development page, click Create Cloud Project.
-
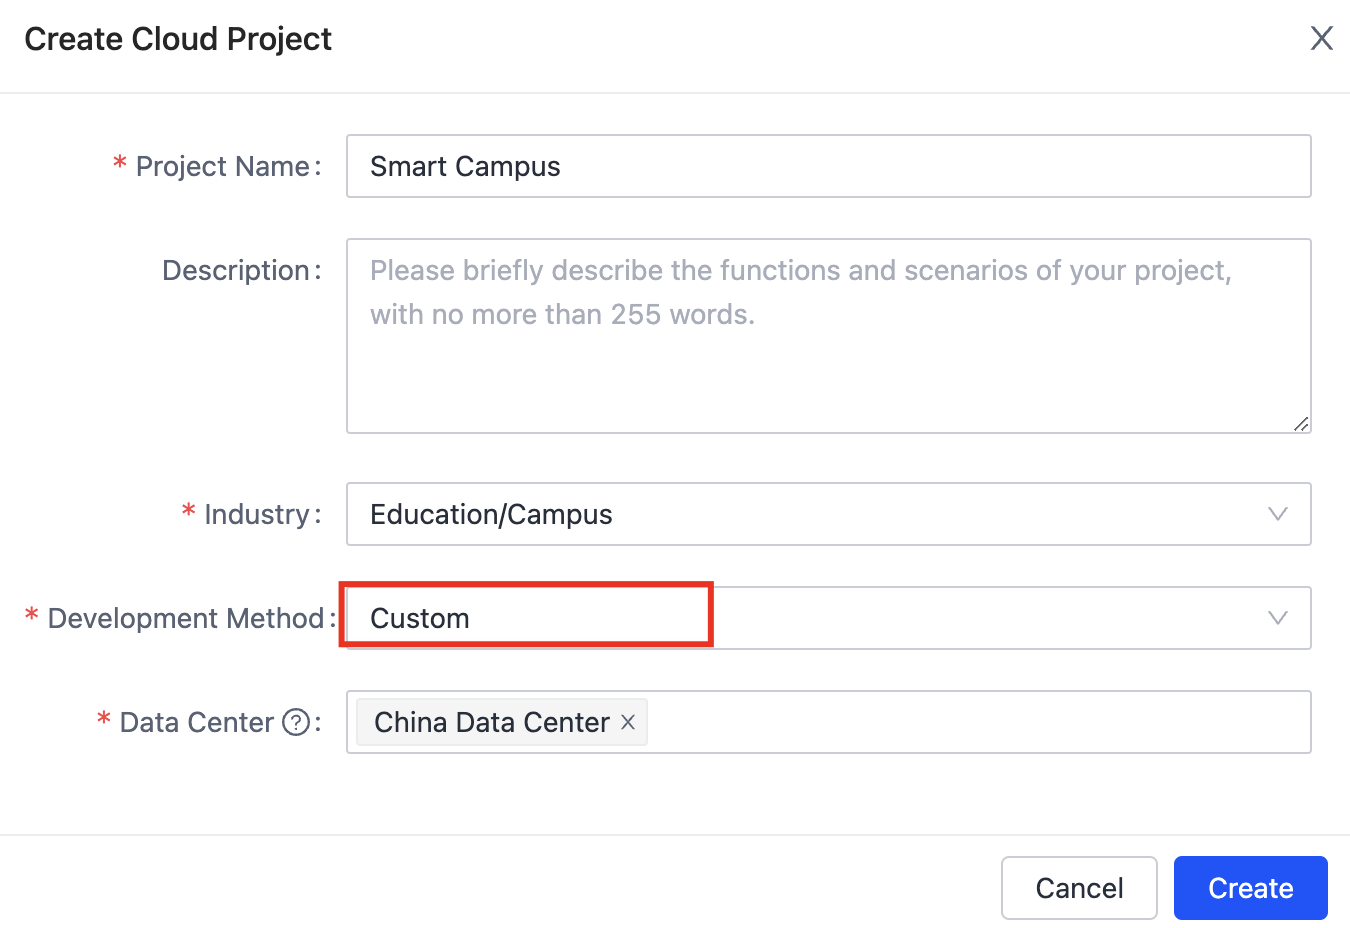
On the Create Cloud Project page, configure the Project Name, Description, Industry, Development Method, and Data Center, and click Create.
The following differences help you choose between the two development methods. For more information, see Development Method.
- Custom: Build your IoT SaaS projects for any industry scenario based on systems of assets and users. You can create multiple applications for an industry project to share assets and users among these applications.
- Smart Home: Link devices with your SmartLife app, such as Tuya-connected OEM apps or apps built on the Smart App SDK. You can call OpenAPI to access linked devices and user accounts.
-
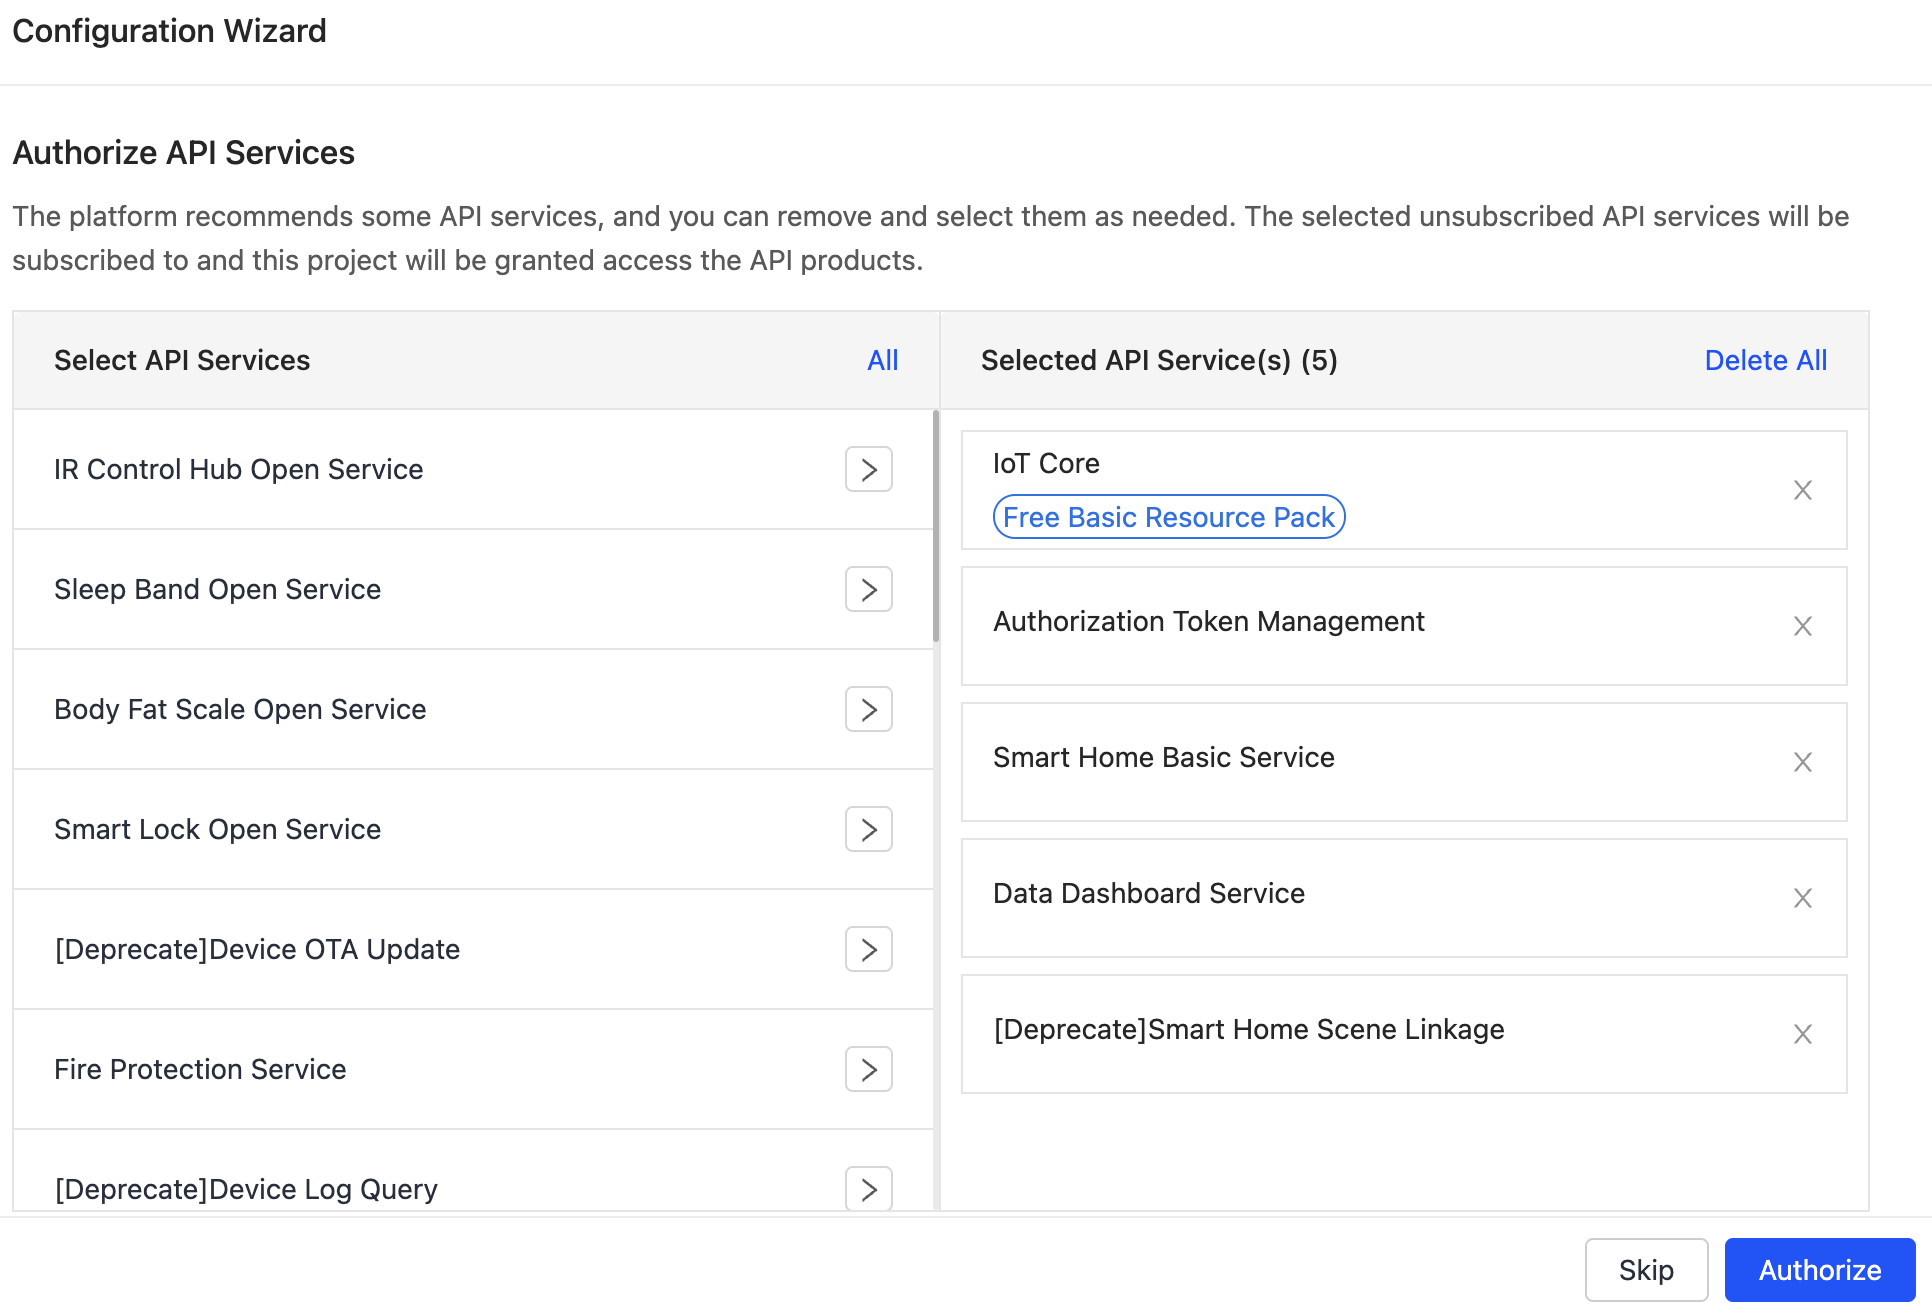
After you finish creating the project, you will be directed to the configuration wizard. Authorize the project to access multiple APIs.
By default, the APIs that support the specified development method are selected for the project. The platform will automatically subscribe to the selected APIs and authorize this project to access them. You can add or delete the default API services, or select other desired API services. The following list shows the default APIs for each development method.
Development method Default APIs Example Custom development - IoT Core
- Authorization Token Management
- Industry Basic Service
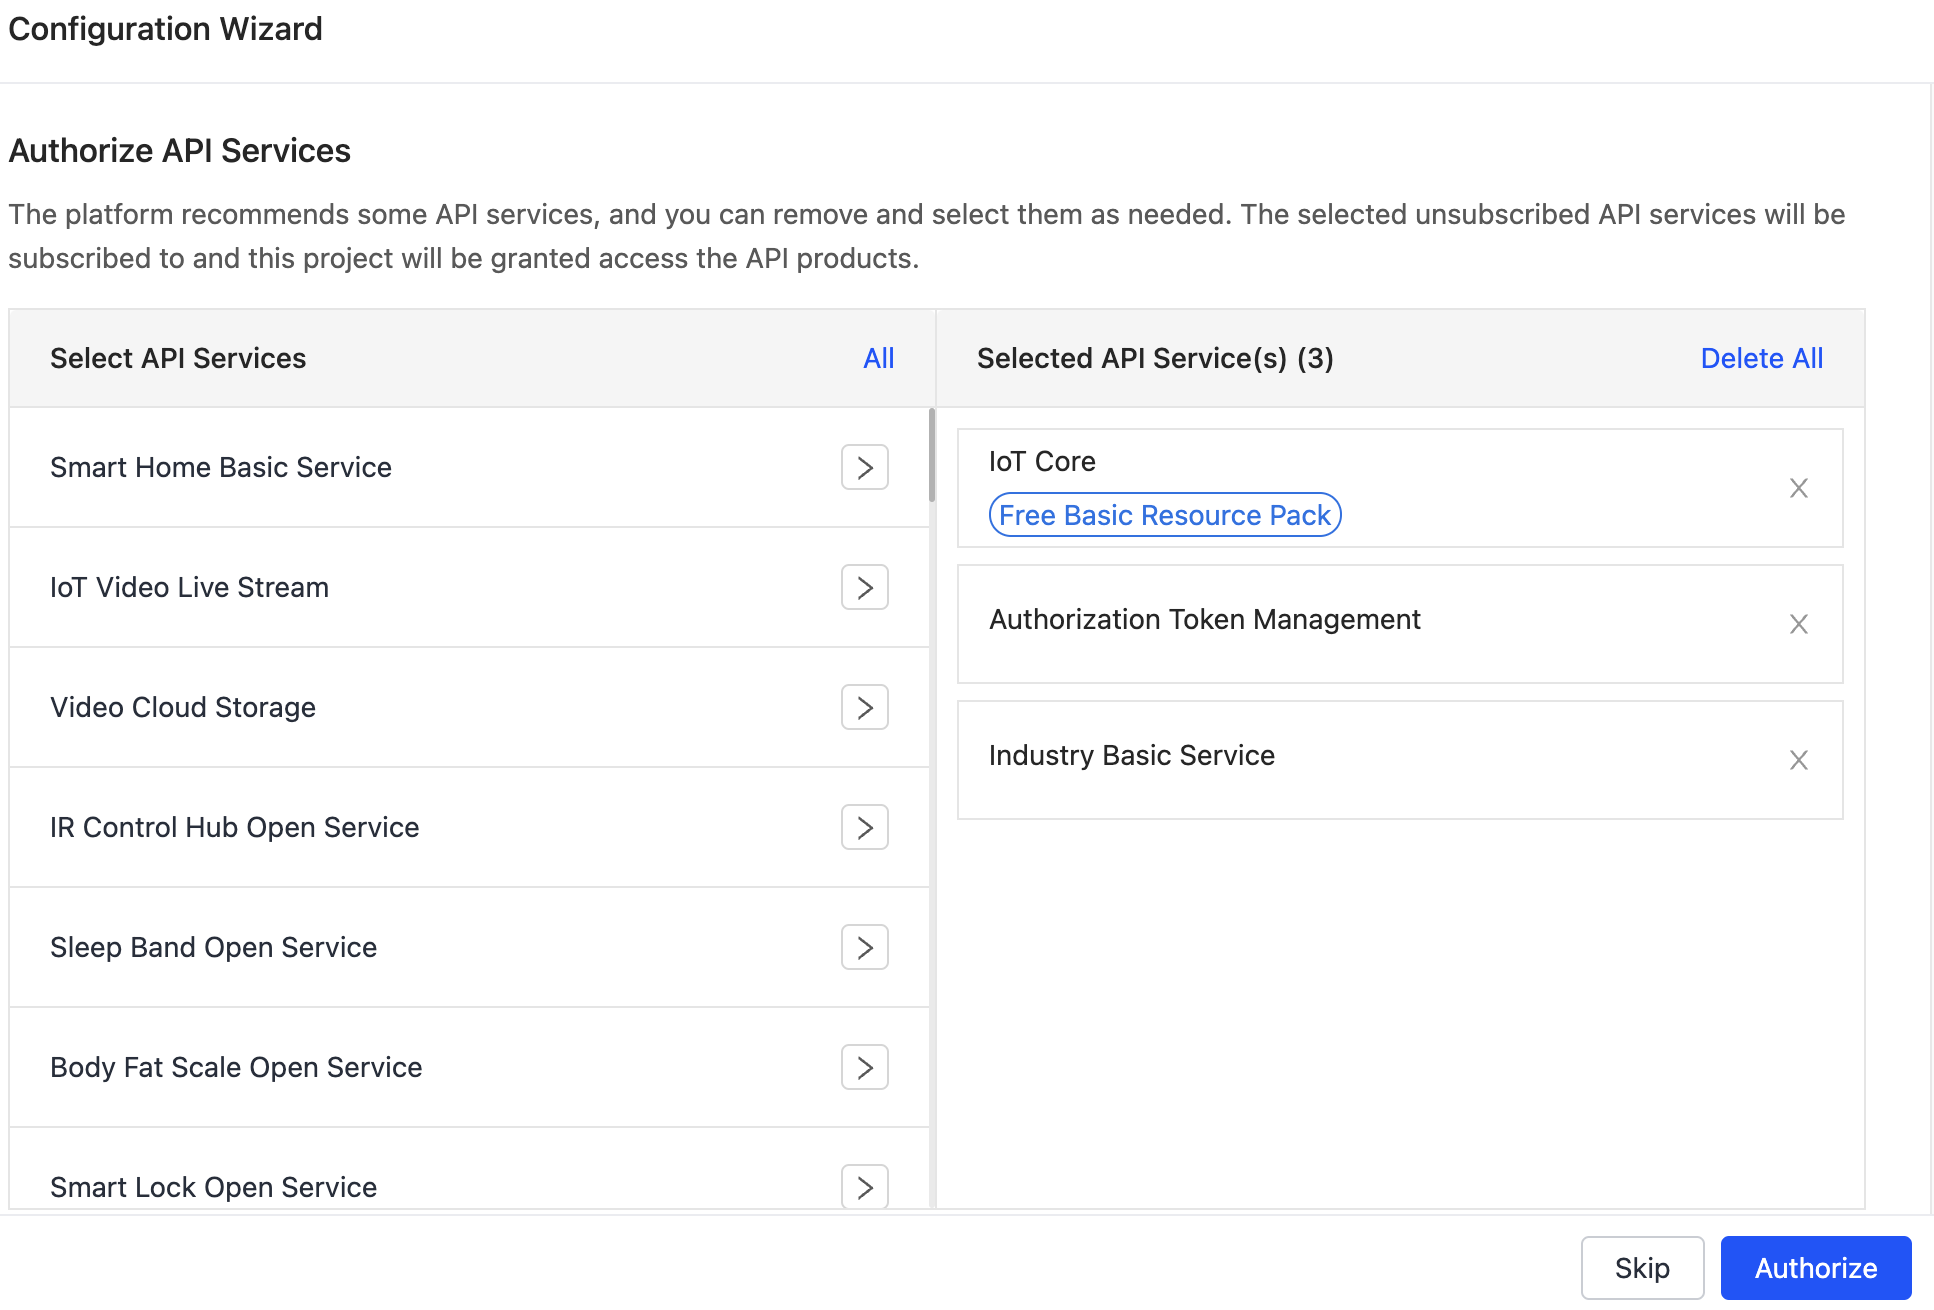
Smart home - IoT Core
- Authorization Token Management
- Smart Home Basic Service
- Data Dashboard Service
- [Deprecate] Smart Home Scene Linkage
View project details
- Log in to the Tuya Developer Platform.
- In the left-side navigation bar, choose Cloud > Development.
- On the page of My Cloud Projects, select one project and click Open Project in the Operation column.
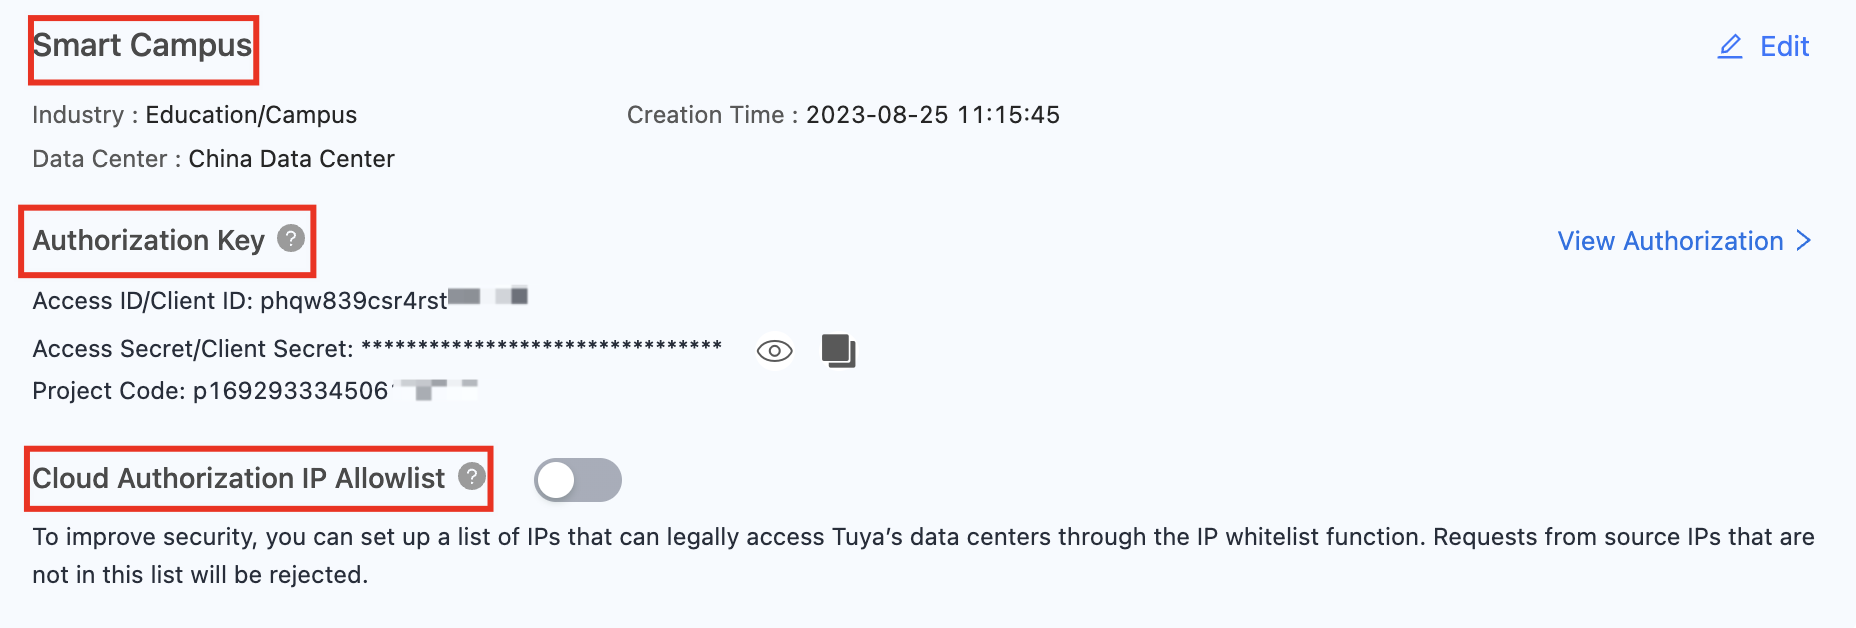
- On the Overview tab, you can find project details. The following project details are available:
- Basic information: including project name, project description, industry, data center, and creation time.
- Authorization key: including authentication information such as access ID/client ID, access secret/client secret, and project code.
Authorization key, including access ID and access secret, is the credential to authorize APIs. Keep it properly.
-
Cloud authorization IP allowlist: After enabling this feature, you can set up a list of IP addresses that can access Tuya’s data centers. Requests from source IP addresses that are not in this list will be rejected.
Edit project details
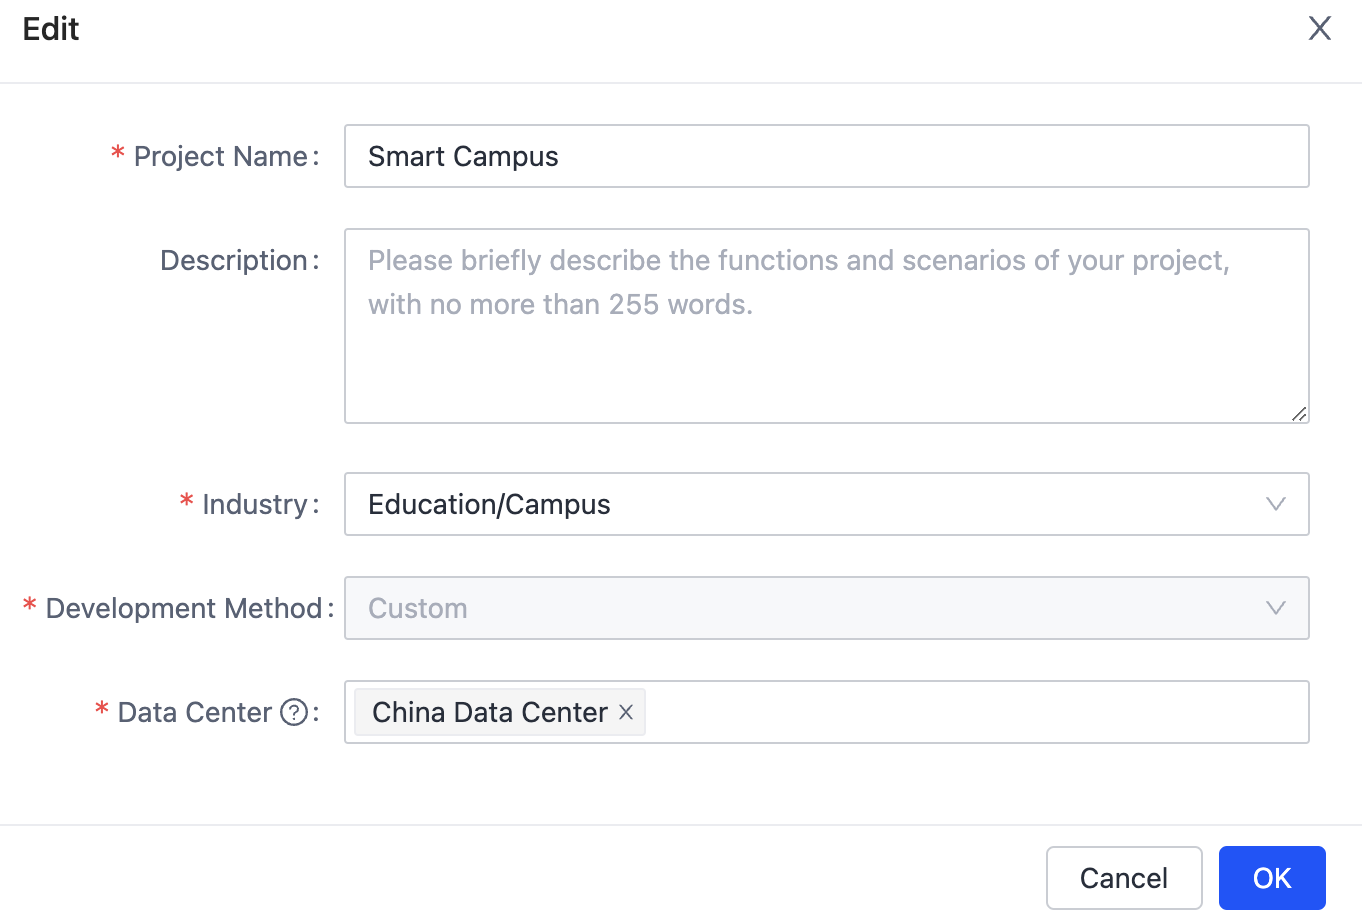
You can edit the details of a created project, including Project Name, Description, Industry, and Data Center.
-
Log in to the Tuya Developer Platform.
-
In the left-side navigation bar, choose Cloud > Development.
-
On the page of My Cloud Projects, select the target project.
- Method 1: Find the target project and click … > Edit in the Operation column.
- Method 2: Find the target project, click … > Open Project to enter the details page, and click Edit in the top right corner of the page.
-
On the Edit page, you can update the Project Name, Description, Industry, or Data Center.
-
Click OK.
Delete a project
For more information, see Delete Project.
Is this page helpful?
YesFeedbackIs this page helpful?
YesFeedback


