Manage Message Service
You can enable the message service to timely receive messages about device changes in your project, for example, device registration, data reporting, and status changes. This topic describes how to enable the message service and stay informed about device changes.
Overview
- Enable the message service and configure parameters.
- Set up messaging rules. You can customize the messaging rules.
- Perform message tests and verify the desired messaging rules in the test environment.
- Manage the message service and add channels to receive messages as you want.
- Monitor the message service and check the key indicators of the messages.
Step 1: Enable the message service
-
Log in to the Tuya Developer Platform.
-
In the project list, click Open Project to enter the details page and click the Message Service tab.
-
Select a project from the drop-down list at the top of the Message Service page. Click the toggle switch to enable the message service.

-
In the Configure Message Service dialog box, you can set parameters for push notifications.
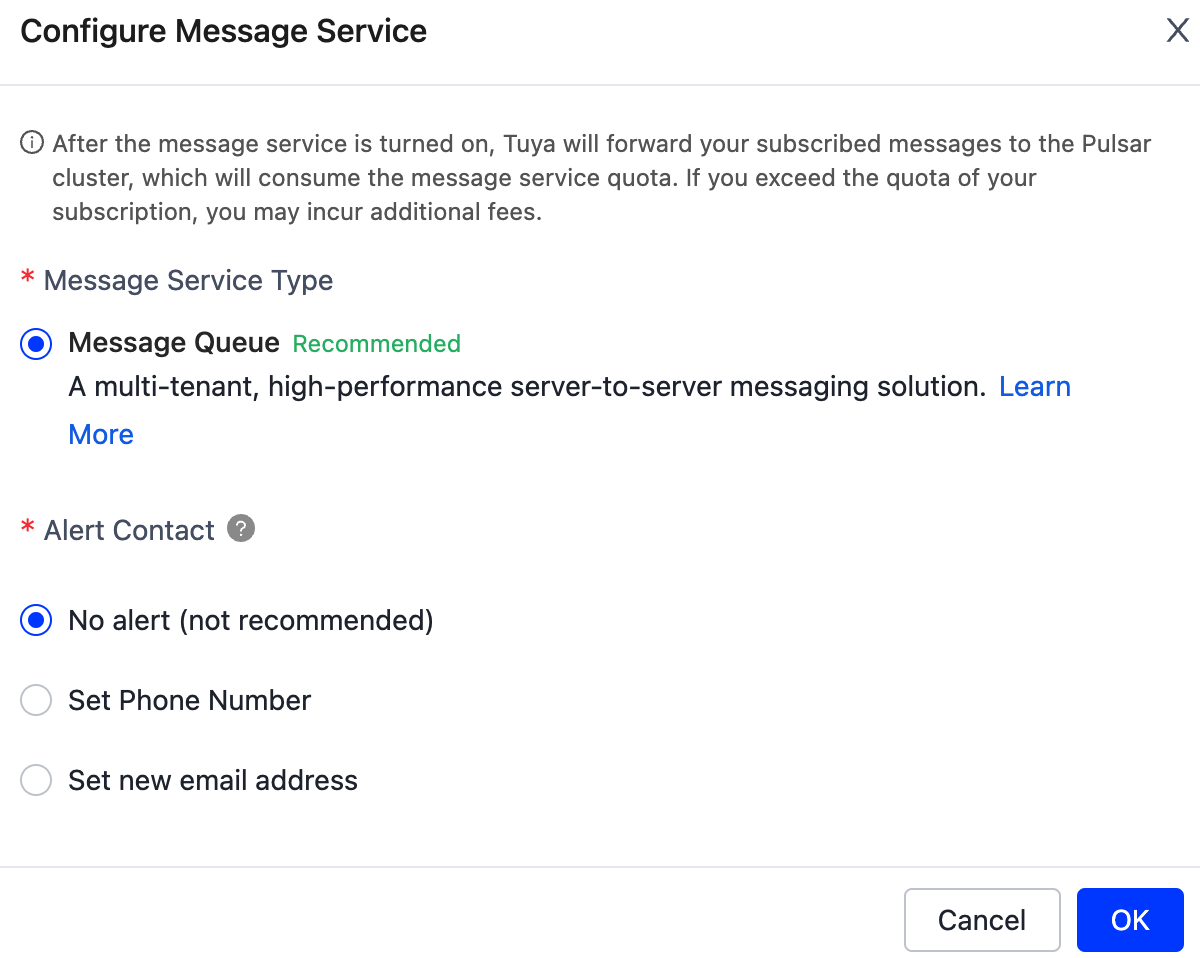
Parameter Description Message service type Only the message queue service is available currently. For more information, see Message Queue. Alert contact No alert (not recommend) When messages are accumulated, the platform will not send you notifications. Set new phone number or email address When the number of accumulated device messages exceeds the threshold, the platform will send you notifications via SMS or email. Alert threshold The threshold value to trigger an alert, ranging from 3 to 100. Alert interval The time interval to send push notifications. 1, 6, 12, and 24 hours are available.
Step 2: Set up messaging rules
This feature is only available for projects created after June 20, 2023. If the message service is enabled for a historical project, the default message bizCode is automatically enabled. If you want historical projects to support custom message rule configurations, submit a service ticket to contact Tuya.
After the message service is enabled, you can specify the message bizCode as needed, and customize message rules based on criteria such as device ID, product ID, and user ID. After the message configuration is completed, Tuya will push messages to your cloud server based on the custom rules. For more information about bizCode for all messages, see Message Types.
-
Select the environment where the rules are to be configured.
Messaging rules can be configured in the production environment and test environment. We recommend that you first configure and verify rules in the test environment and then modify the rules in the production environment.
-
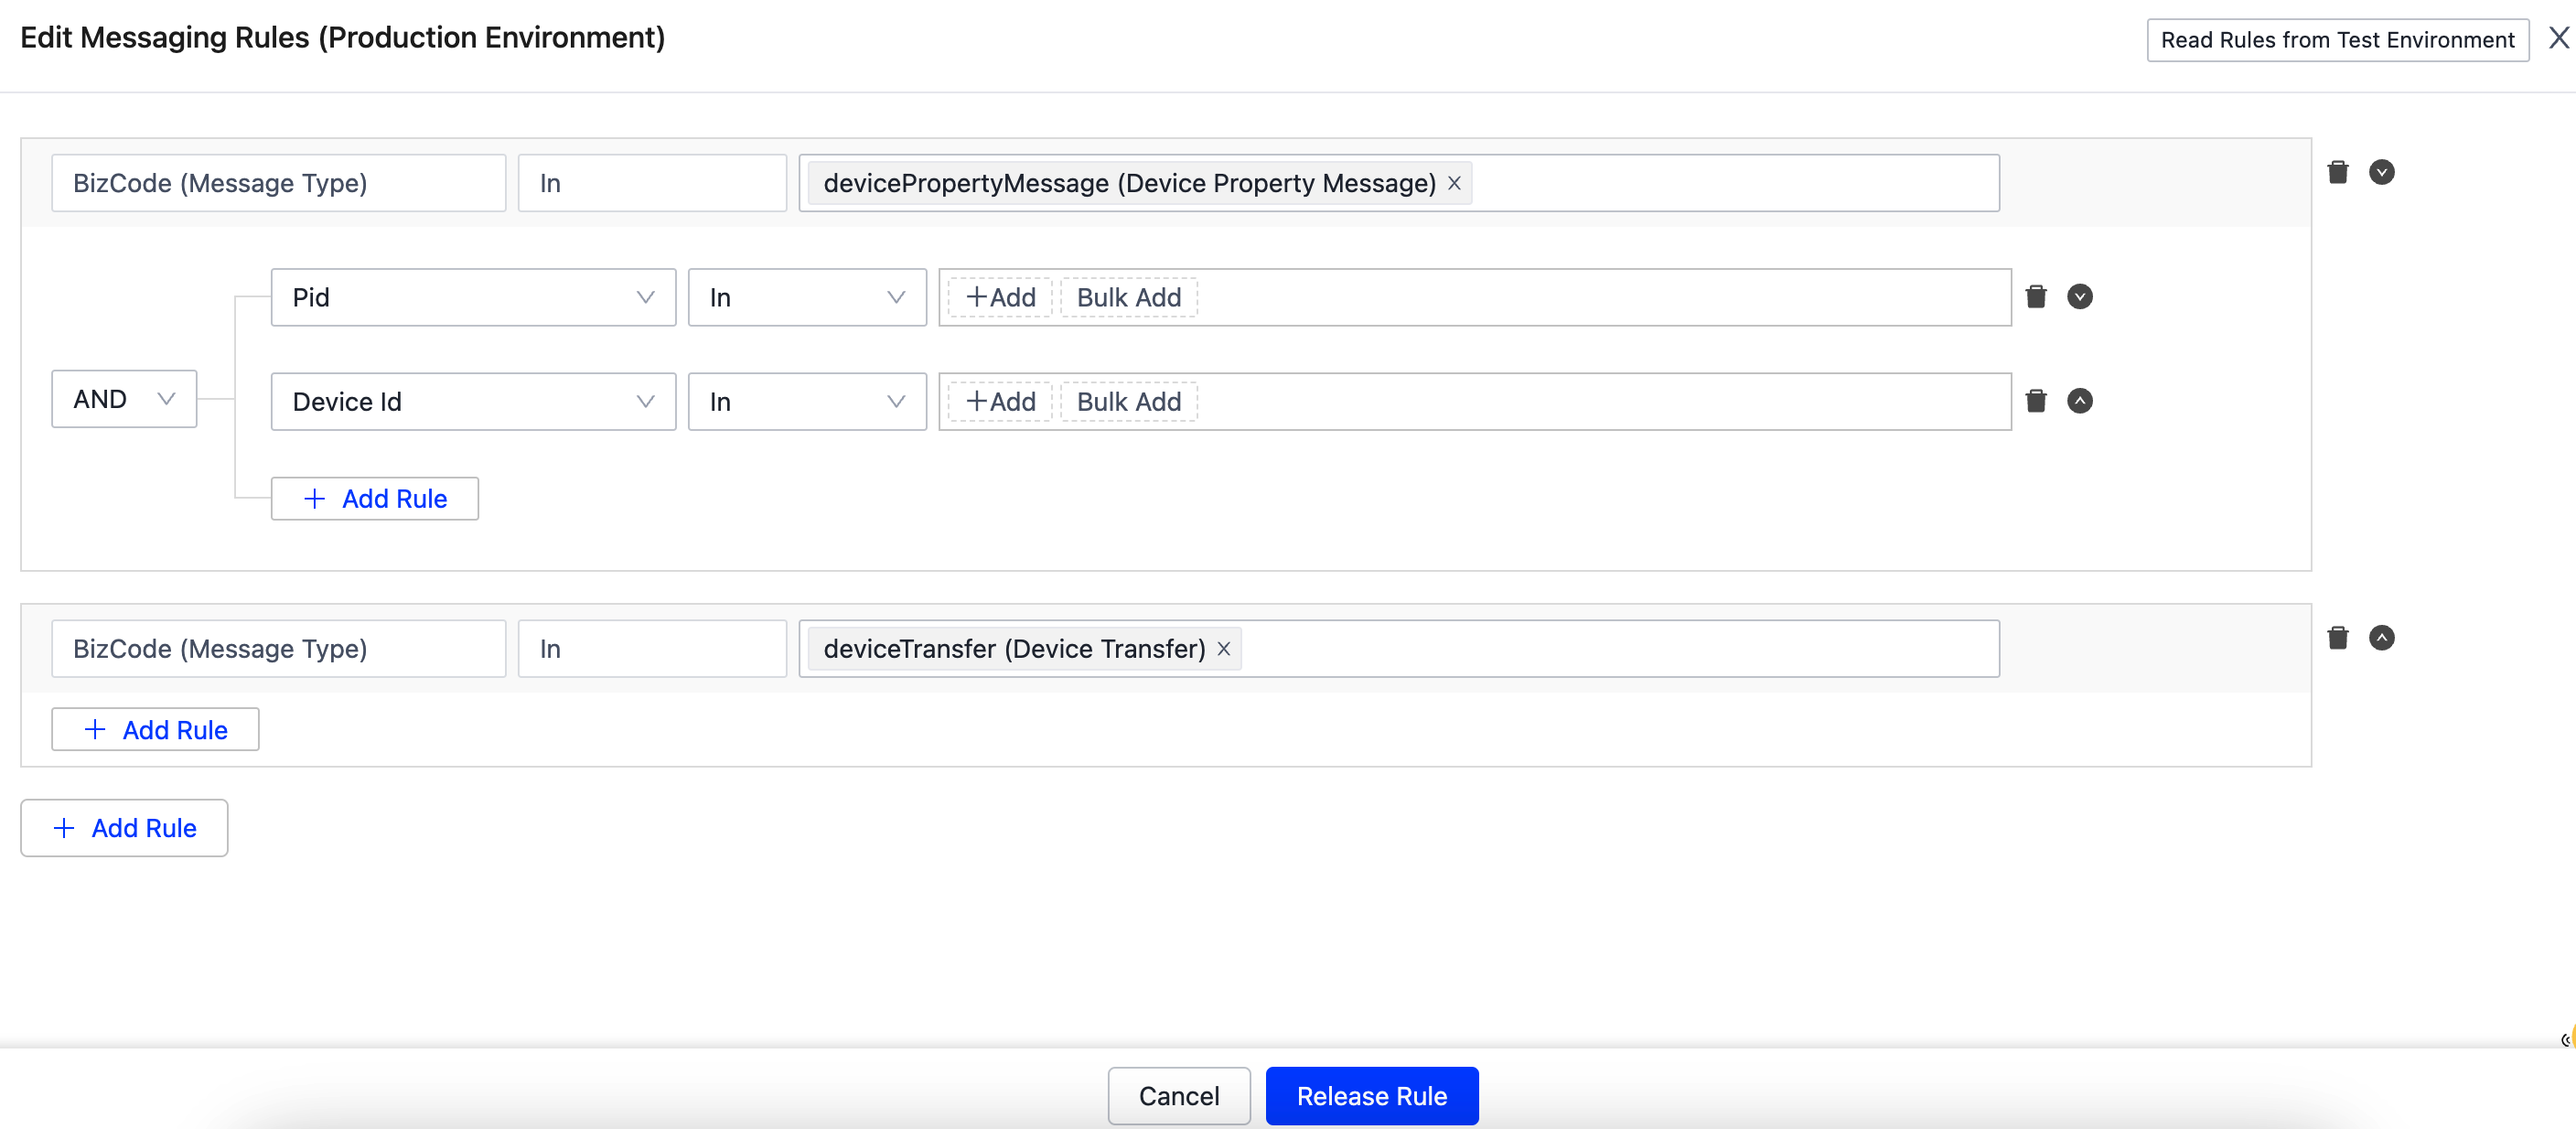
Click Create Messaging Rules. On the page that appears, configure the message BizCode and filter rules as required. After the configuration is completed, click Release Rule.
-
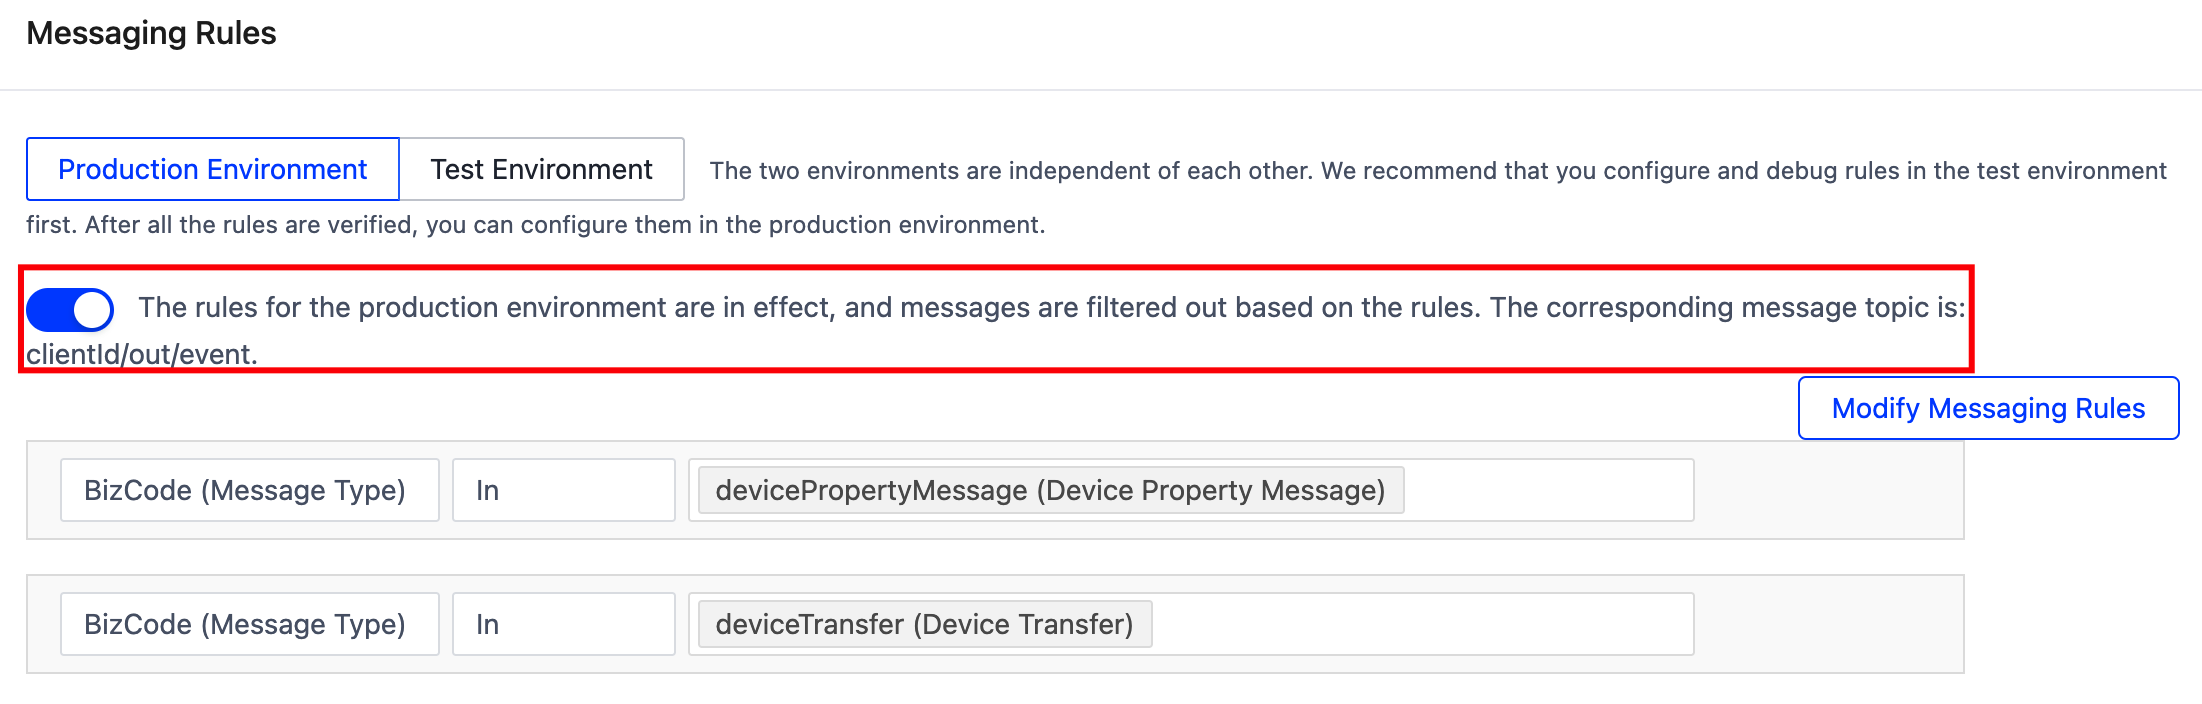
Enable messaging rules.
If the rules are not enabled, no messages will be pushed to your server.
Step 3: Perform a message test (optional)
-
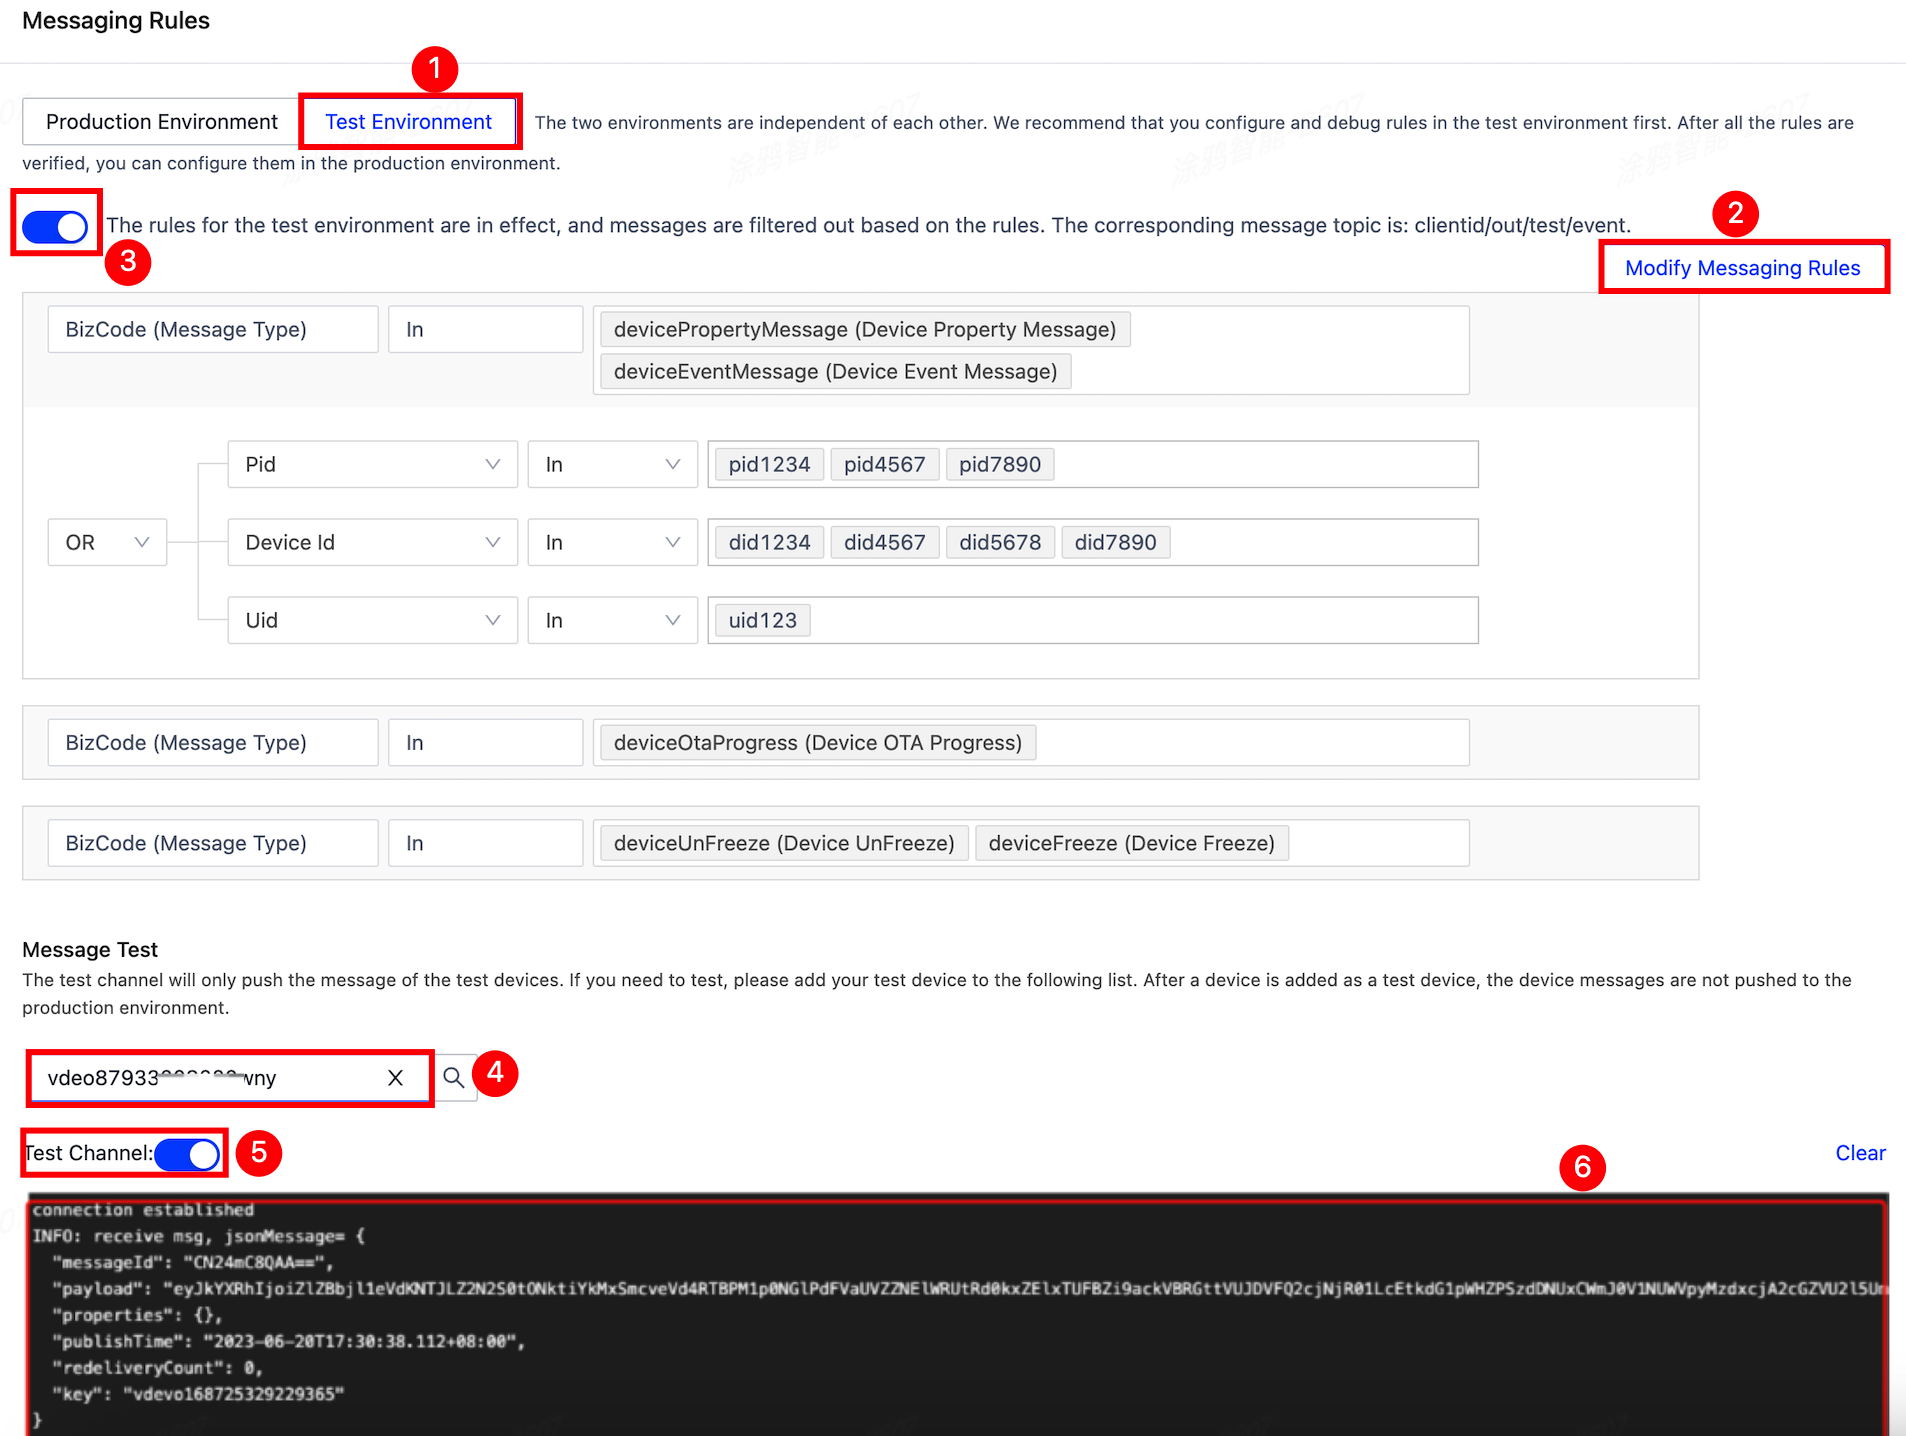
Click the Test Environment tab.
-
Click Modify Messaging Rules and configure the desired messaging rules in the test environment.
-
Enable messaging rules.
-
Add a test device.
Only the messages reported by the test device will be sent to the test channel.
-
Enable the test channel.
-
You can view real-time device messages in the command window below.
Step 4: Manage the message service
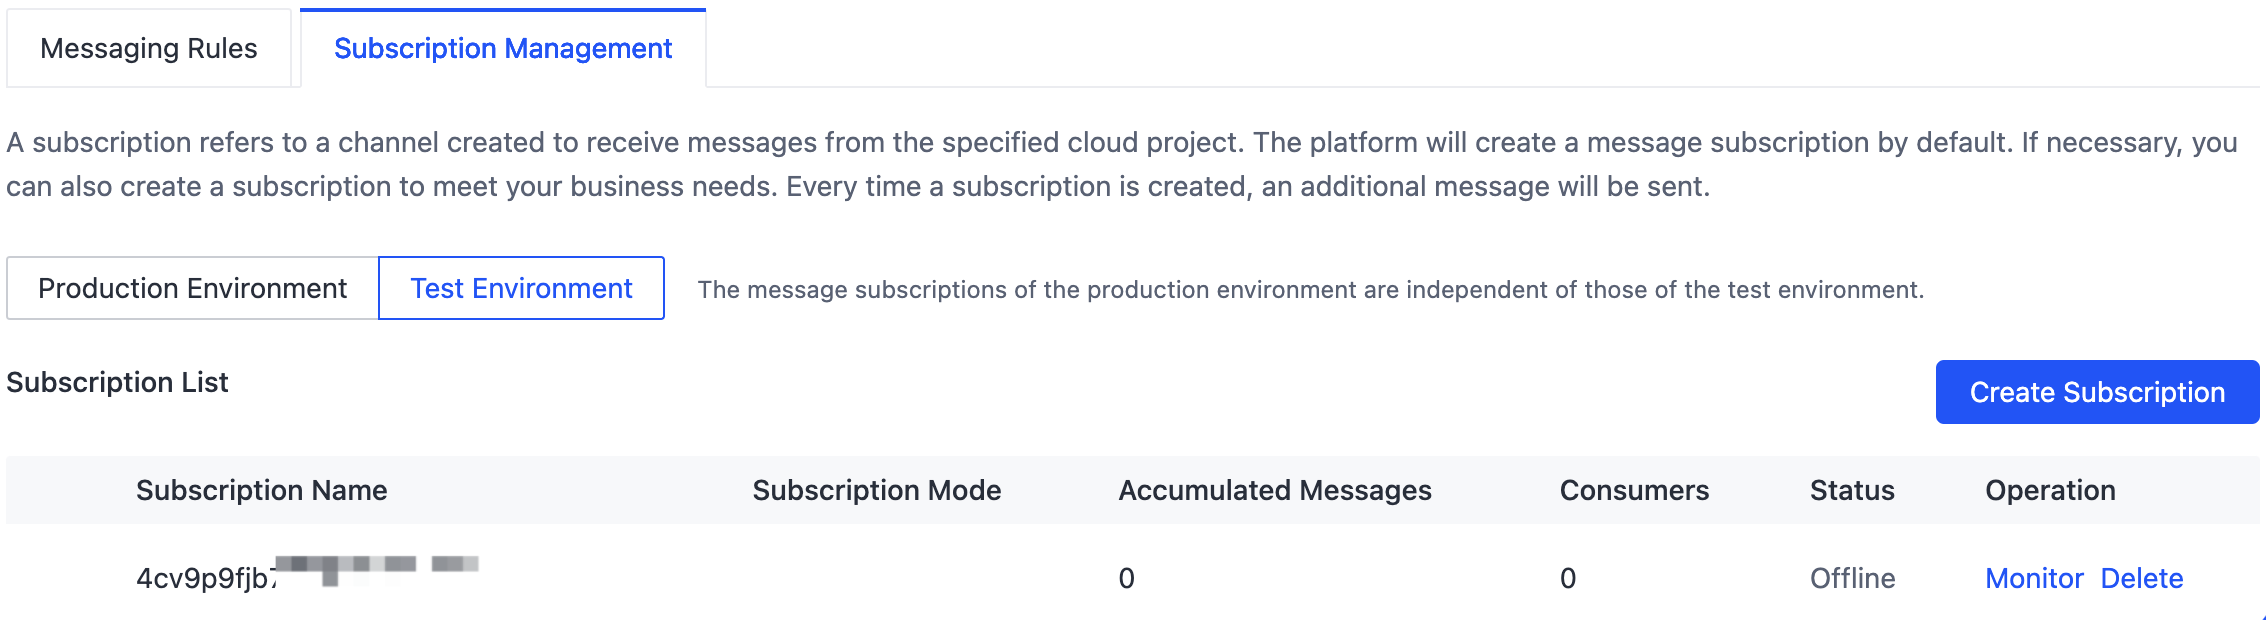
A subscription refers to a channel created to receive messages from the specified cloud project.
-
Default subscription: The platform will create a message subscription by default. You can use this subscription name, and integrate the client by referring to Integrate with Message Service via Pulsar SDK.
-
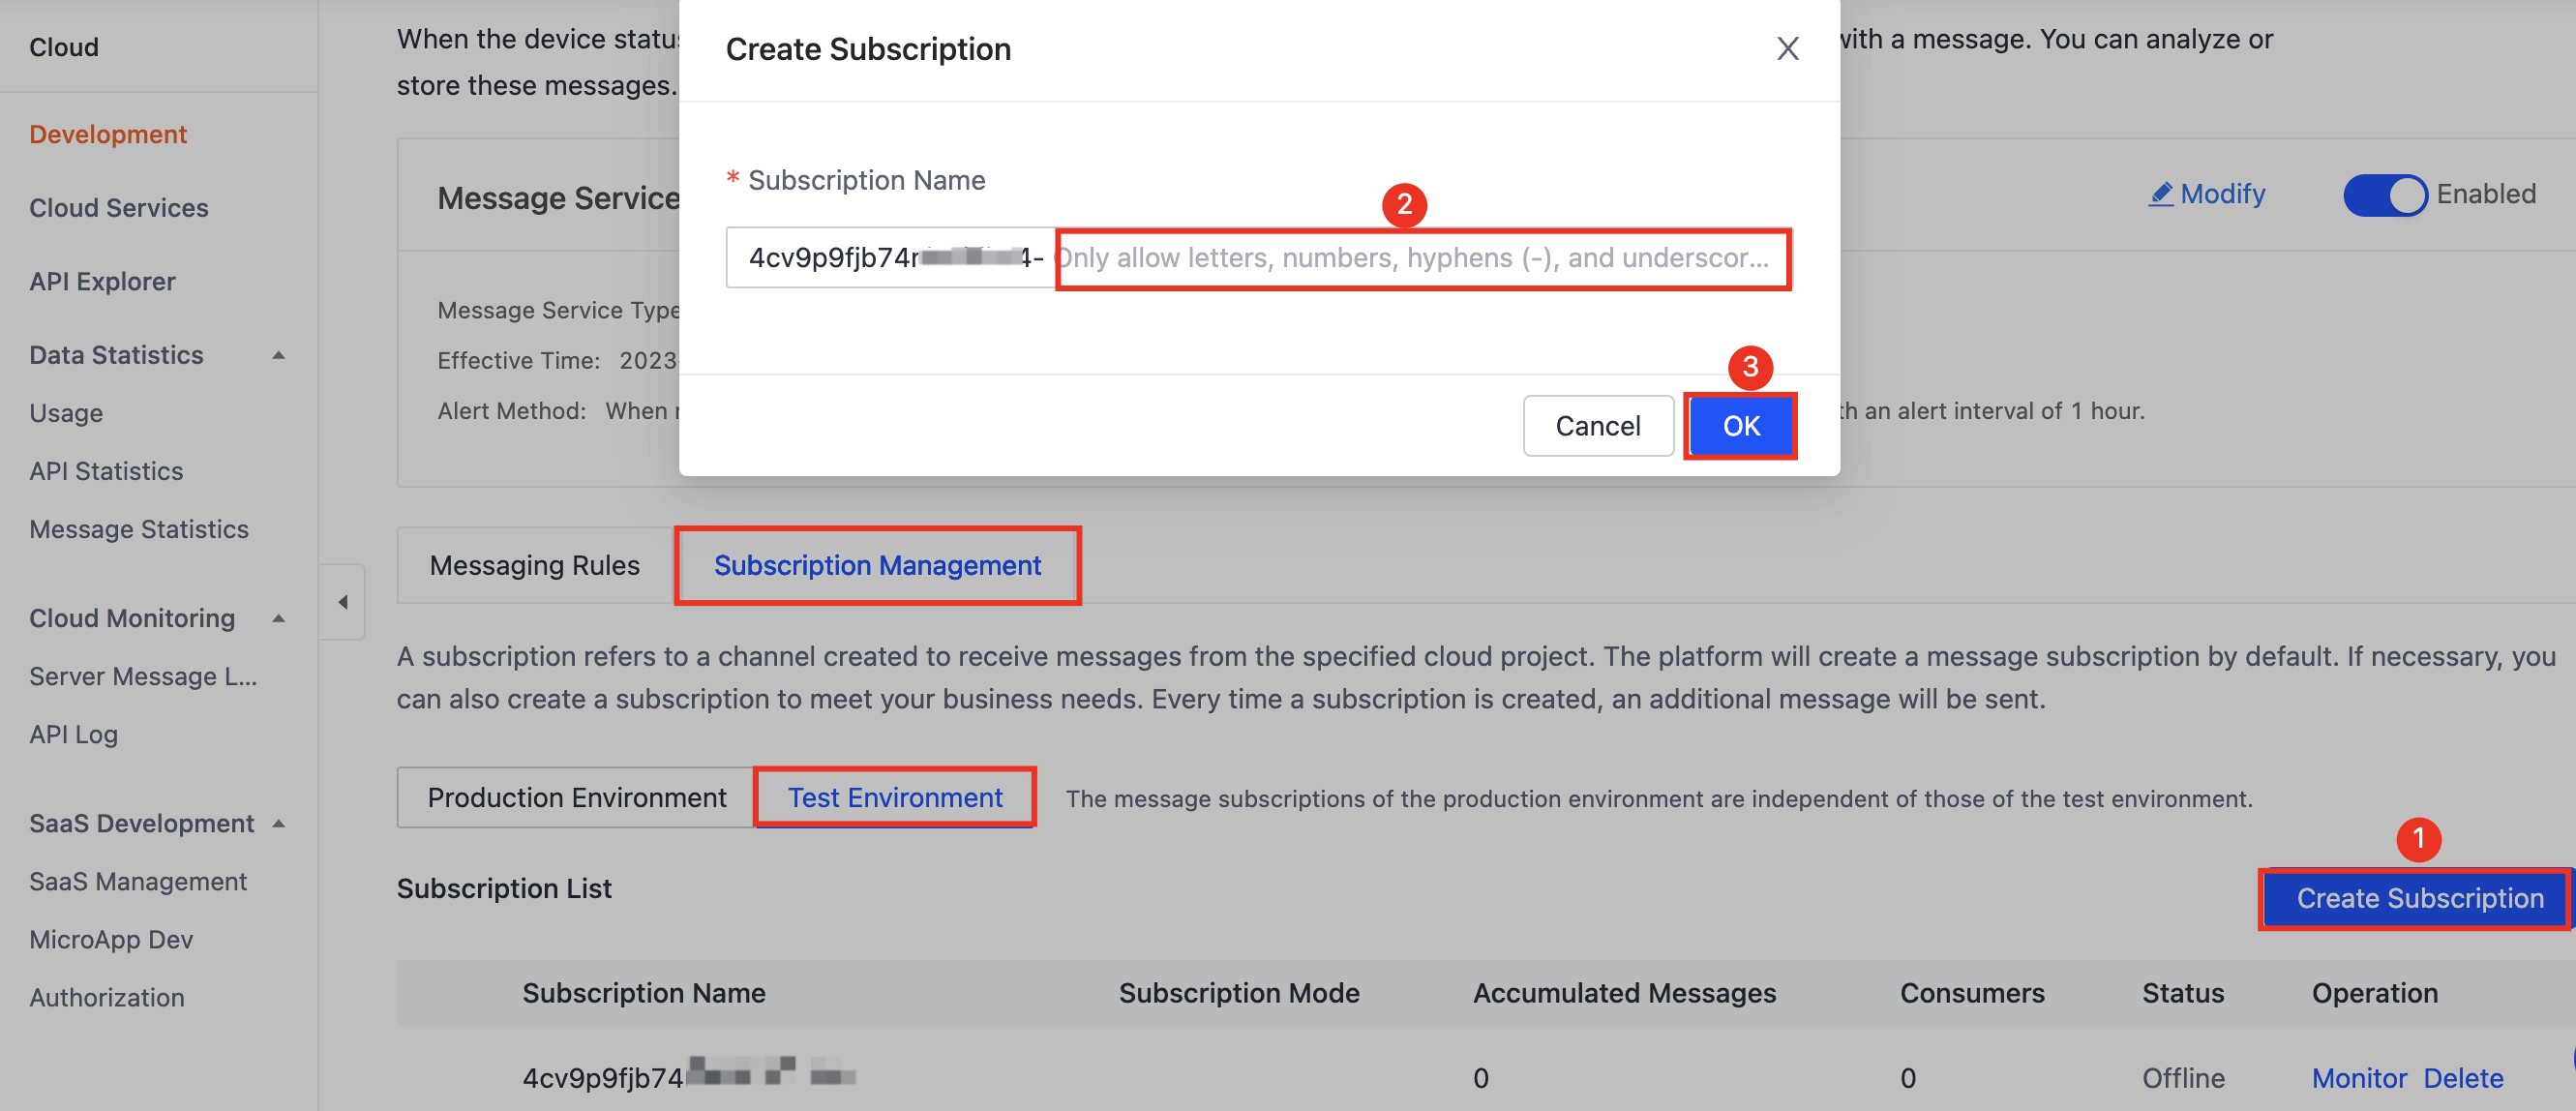
Create Subscription: If necessary, you can also create a subscription to meet your business needs. Every time a subscription is created, an additional message will be sent.
The message subscriptions of the production environment are independent of those of the test environment.
Step 5: Monitor the message service (optional)
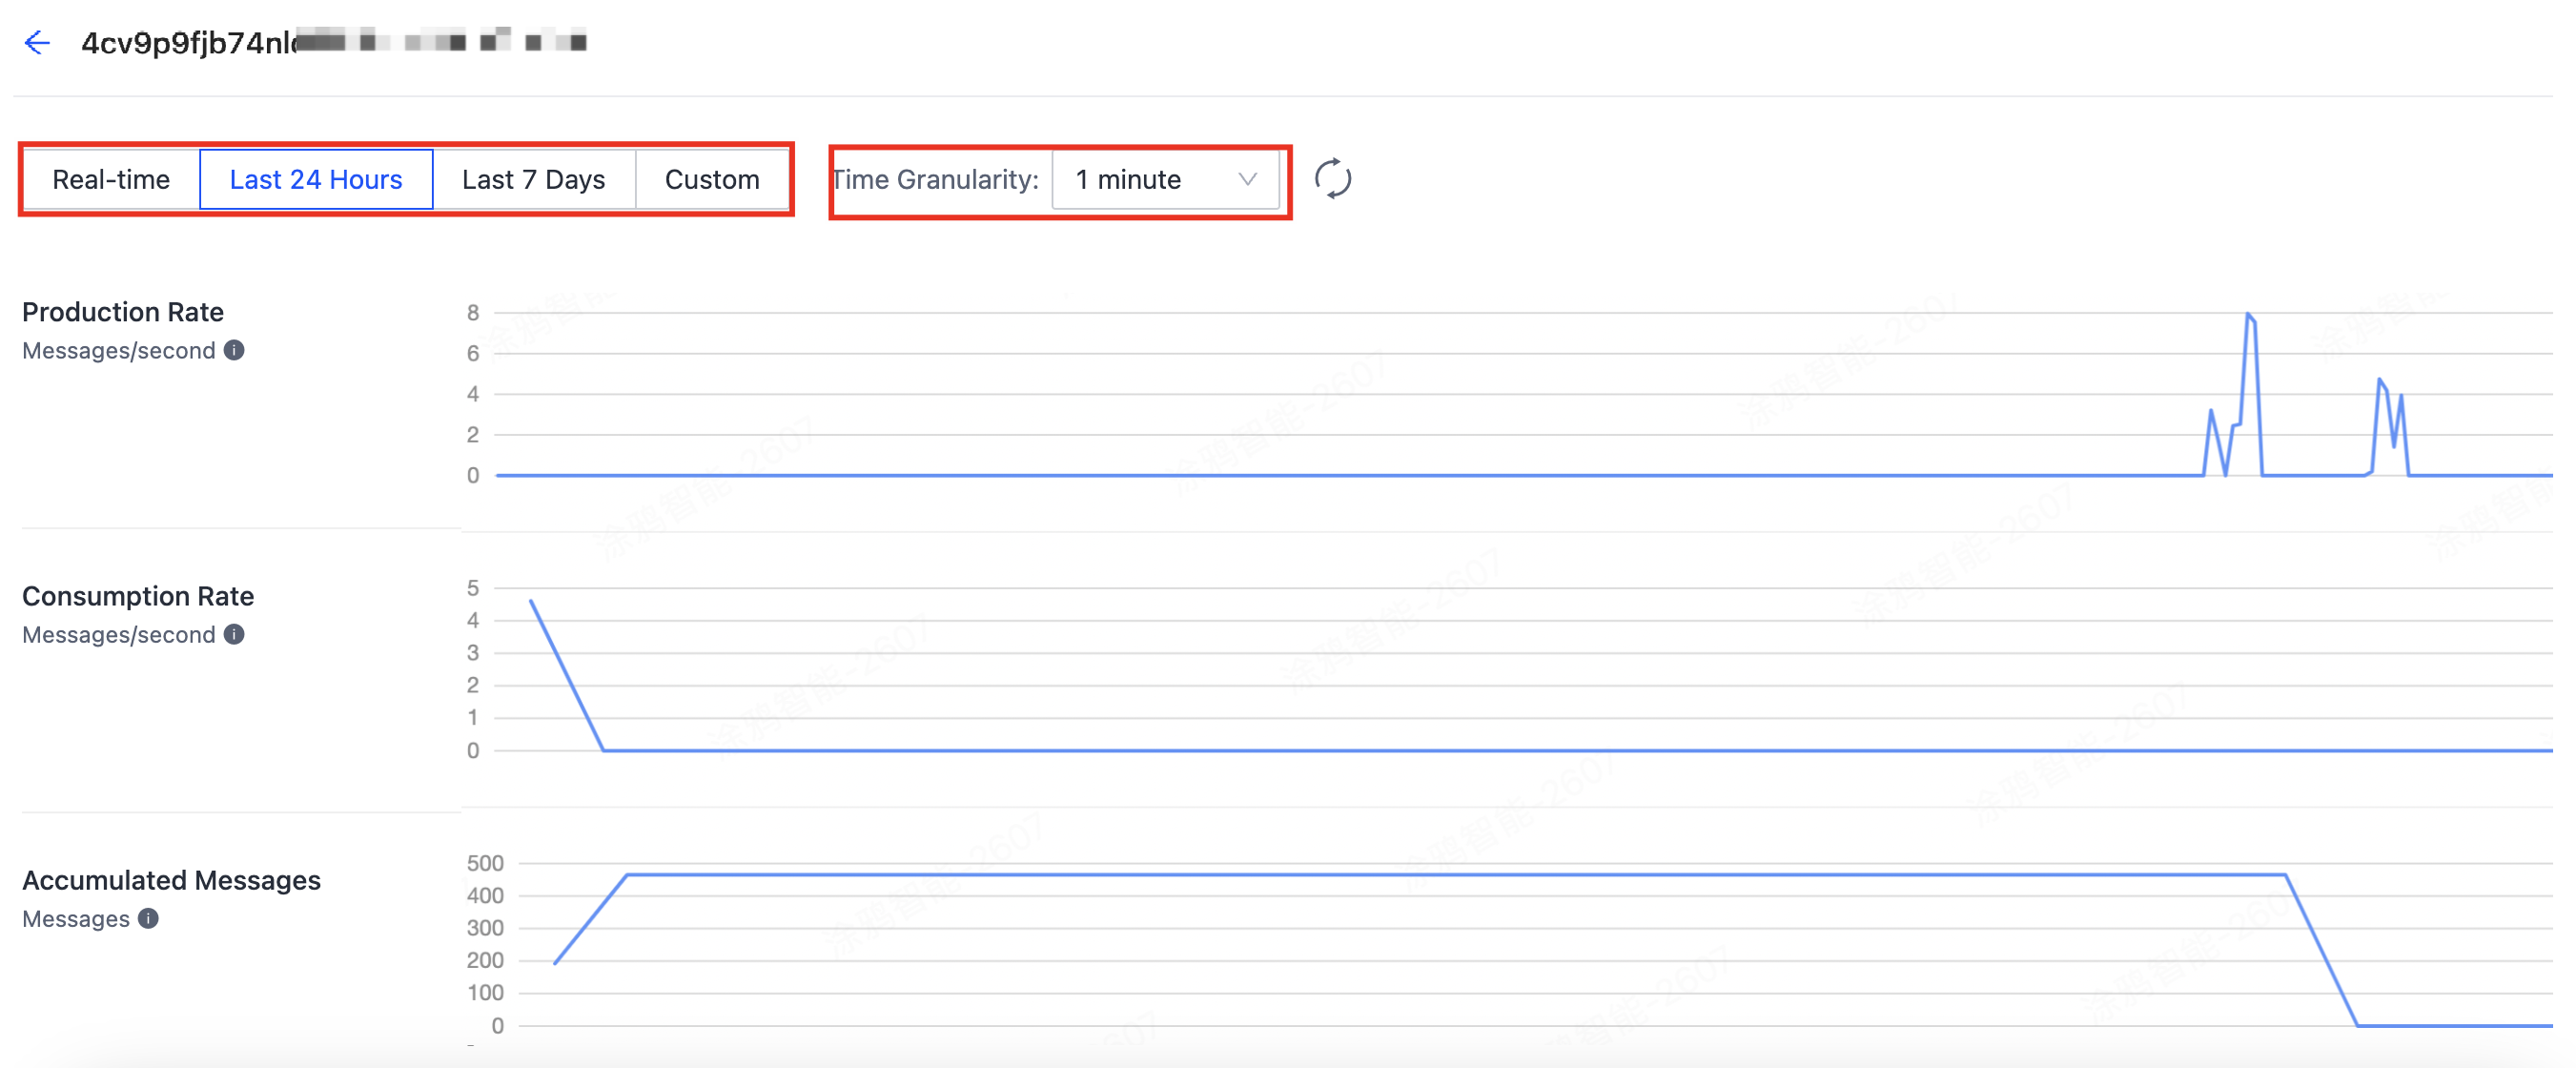
To gain insight into the data of each message subscription channel under this project, click Monitor to view key indicators such as message production rate, consumption rate, and accumulated messages.
-
Select the desired subscription and click Monitor.

-
Select the time period and granularity.
Is this page helpful?
YesFeedbackIs this page helpful?
YesFeedback


