Develop Homebridge Hardware Driver
Currently, only some 'Powered by Tuya' (PBT) product categories can be integrated with Homebridge. Based on Tuya’s standard instruction set documents, you can develop your desired product driver of the Tuya Homebridge plugin, so as to control more PTB devices through Homebridge.
Prerequisites
- You have completed configurations on the Tuya Developer Platform.
- You have run the Tuya Homebridge plugin.
Step 1: Get device information
Even if some PBT devices are not connected to Homebridge, we can still run the Tuya Homebridge plugin to get the device status information in the log. For example, the classification of the device in the Tuya product system, that is, the catagory.
-
Enable the debug mode and view the debug log.
Note: For more information about how to view logs in debug mode, see How to Get Logs.
-
You can get the log of device information by your device name.
Note: Start with
active_timeand end withuuid. For example, if you search forLiving room switchfrom the log, you will get the information of the device. The sample code is as follows.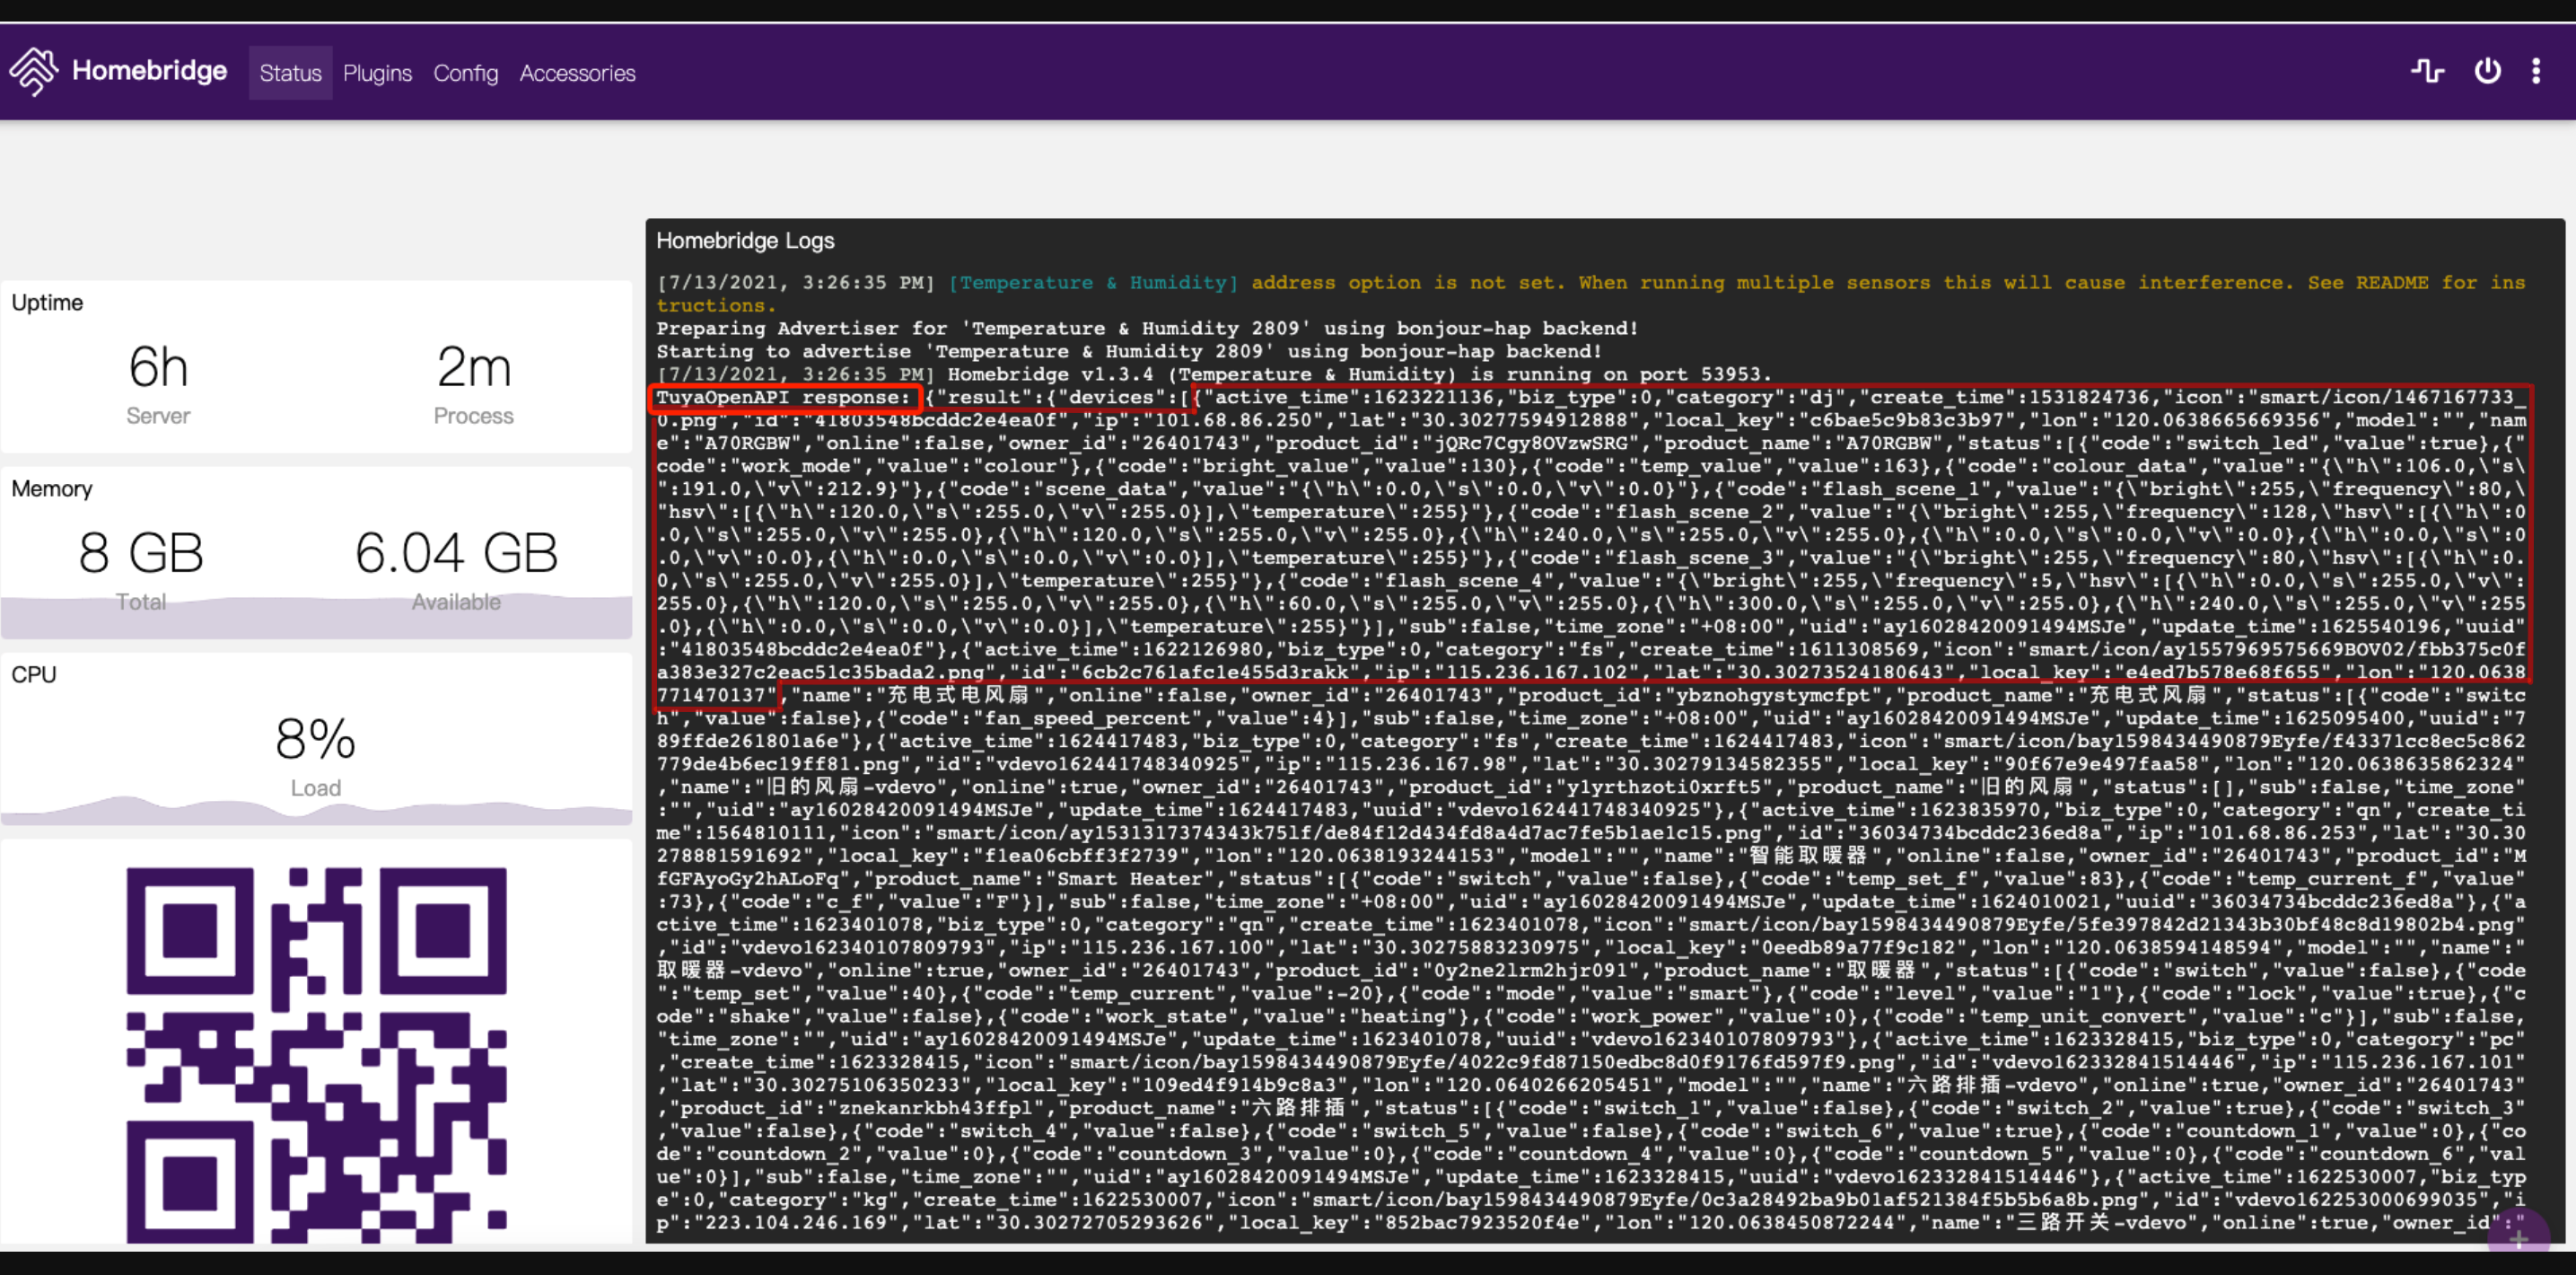
{
      "active_time": 1623229189,
      "biz_type": 18,
      "category": "cz",
      "create_time": 1560491945,
      "icon": "smart/product_icon/cz.png",
      "id": "xxxxxxxxxxxxxxx",
      "ip": "xxxxxxxxxxxxxxx",
      "lat": "30.30286857361191",
      "local_key": "xxxxxxxx",
      "lon": "120.0639743842656",
      "model": "",
      "name": "Living room switch",
      "online": false,
      "owner_id": "34794909",
      "product_id": "yfemiswbgjhddhcf",
      "product_name": "Switch Product",
      "status": [
        {
          "code": "switch",
          "value": false
        },
        {
          "code": "countdown_1",
          "value": 0
        },
        {
          "code": "cur_current",
          "value": 0
        },
        {
          "code": "cur_power",
          "value": 0
        },
        {
          "code": "cur_voltage",
          "value": 2343
        }
      ],
      "sub": false,
      "time_zone": "+08:00",
      "uid": "ay1622097934070h5Mpi",
      "update_time": 1625101929,
      "uuid": "65015854bcddc21a9073"
}
Step 2: Find the category
After you get the category information, you can proceed to get the parameter descriptions of the standard instruction set and standard status set based on the category (for example, cz) in the documentation center of the Tuya Developer Platform, so as to prepare for subsequent driver development.
-
Get the parameter descriptions of the standard instruction set and status set of the category.
-
According to the
"category": "cz"in the log, the category of the deviceLiving room switchin this example is defined asczby Tuya. -
In the search bar on the left side of the Tuya Developer Documentation Center, search for the cloud instruction set and status set for the specified category value, such as
cz.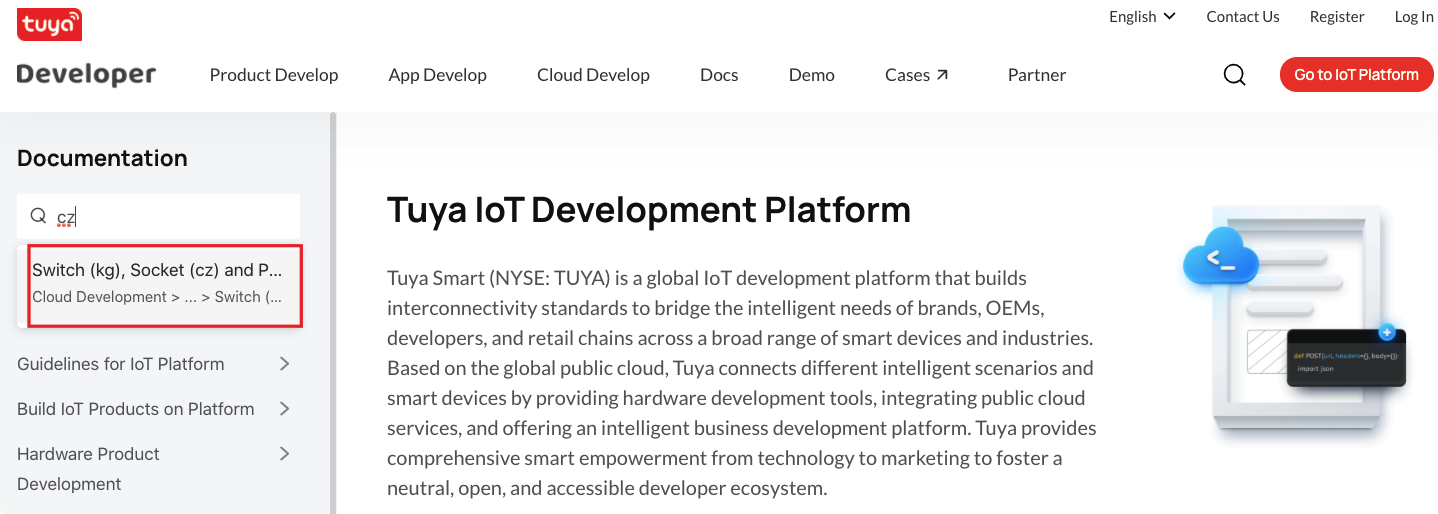
-
-
Get the Homebirdge service type of the category.
Find a similar service type in the Homebridge API to facilitate subsequent driver development. In this example, the product is similar to the outlet, so we choose Outlet.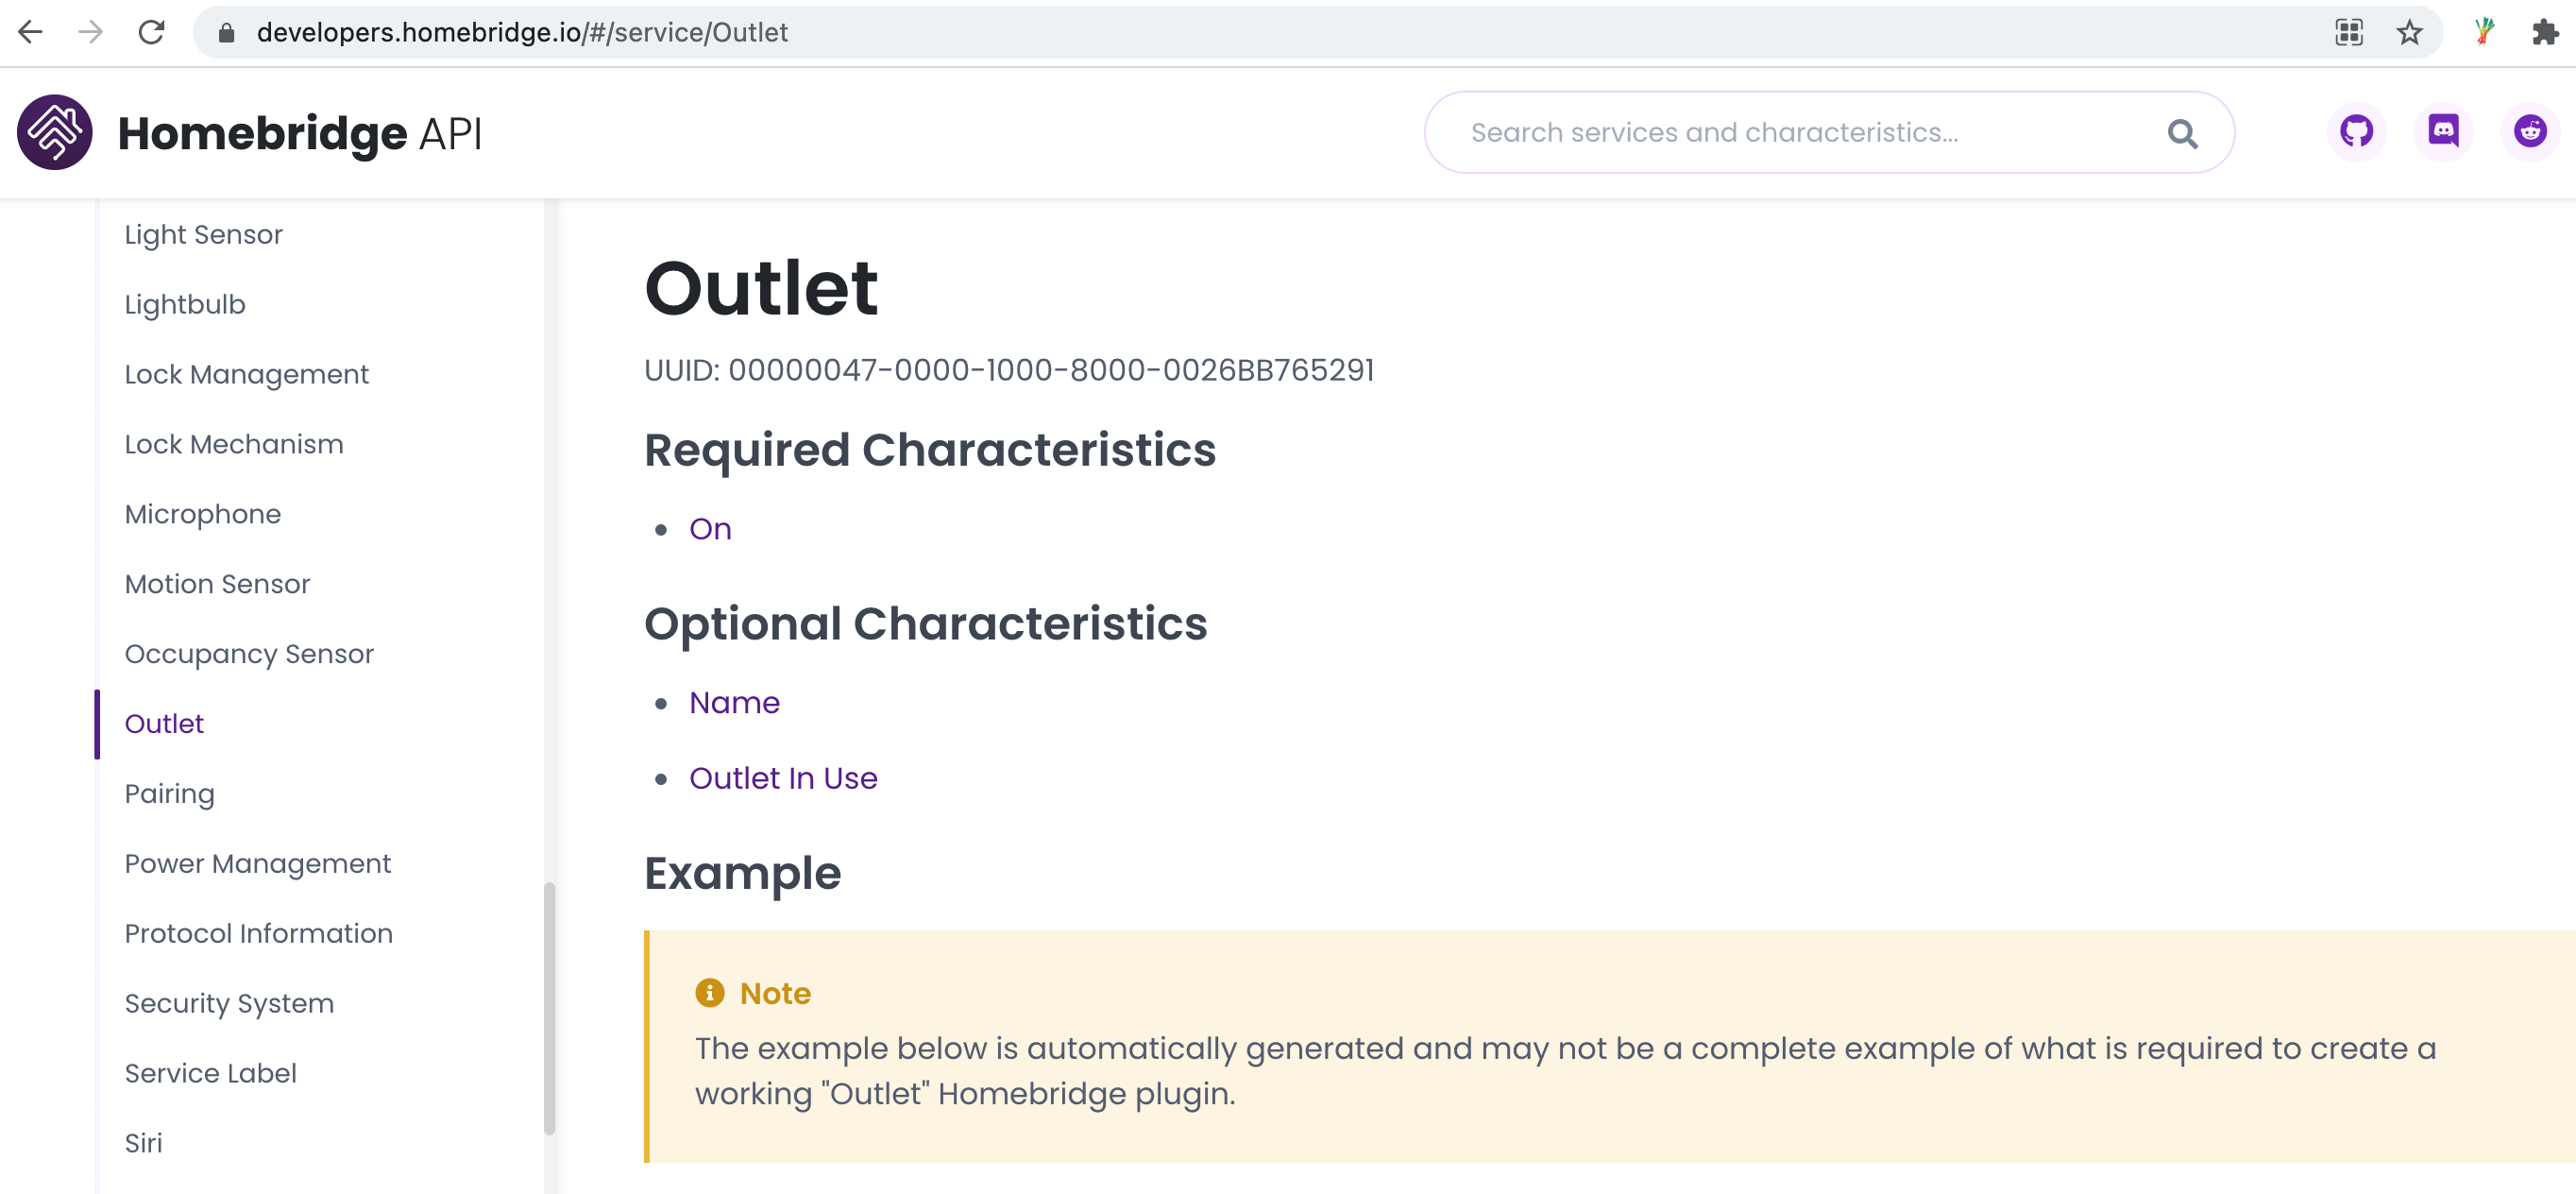
Step 3: Develop the driver
-
According to the selected
Outletservice type, create anoutlet_accessory.jsfile in thetuya-homebridgeproject.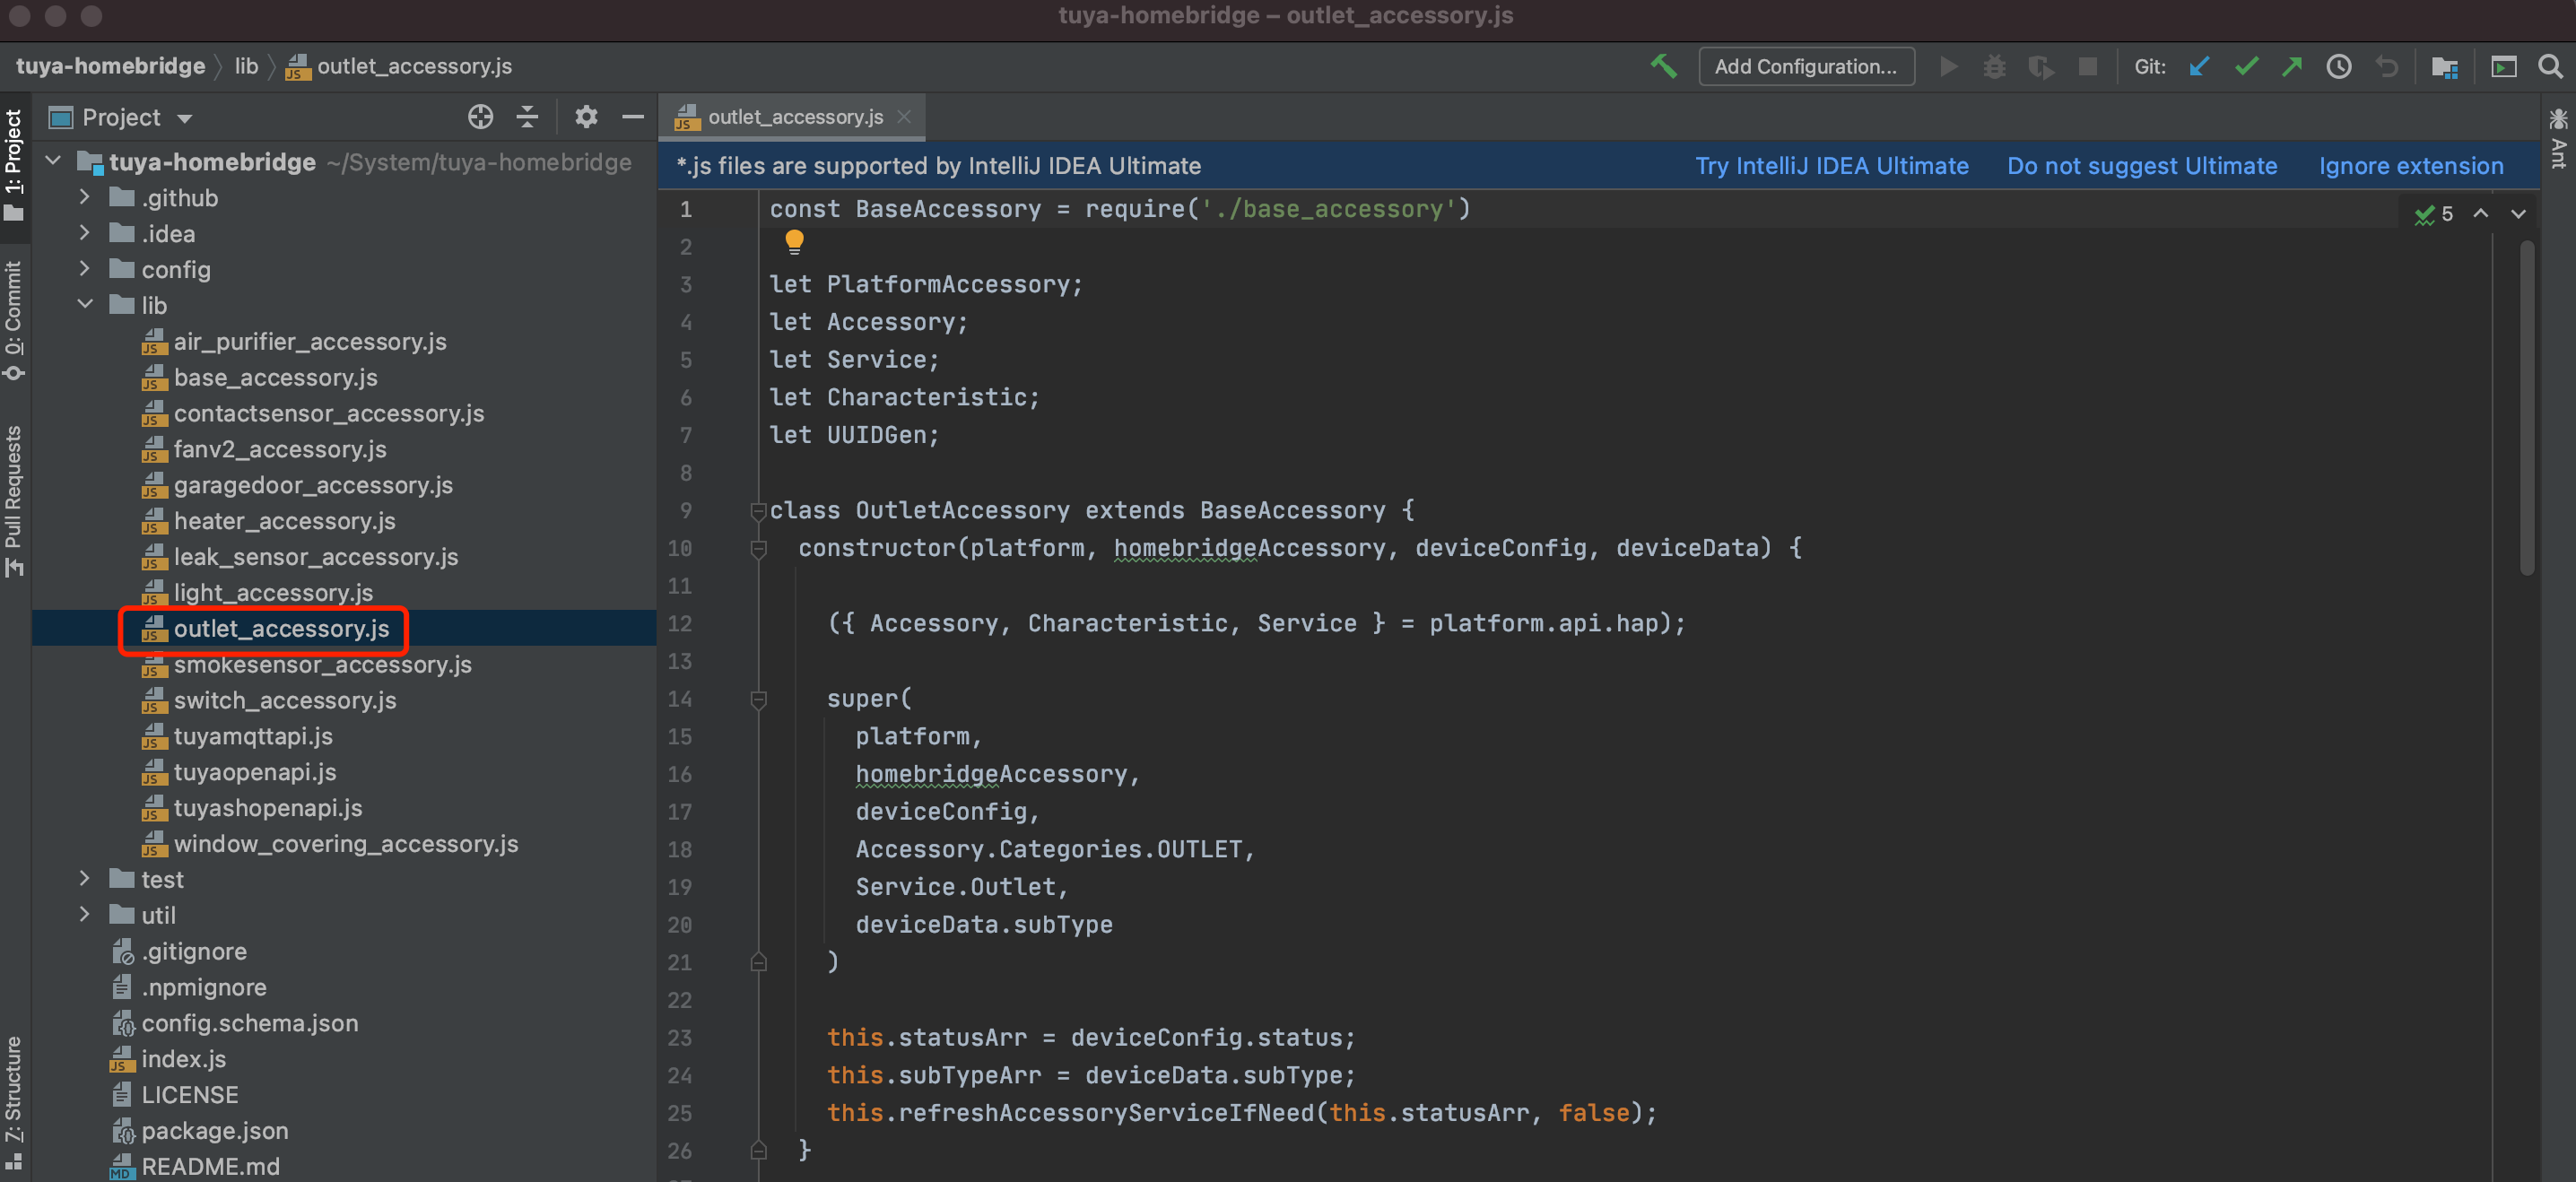
-
Add a category.
To supportczdevices, we must addczto theaddAccessory()method in theindex.jsfile. The code is as follows.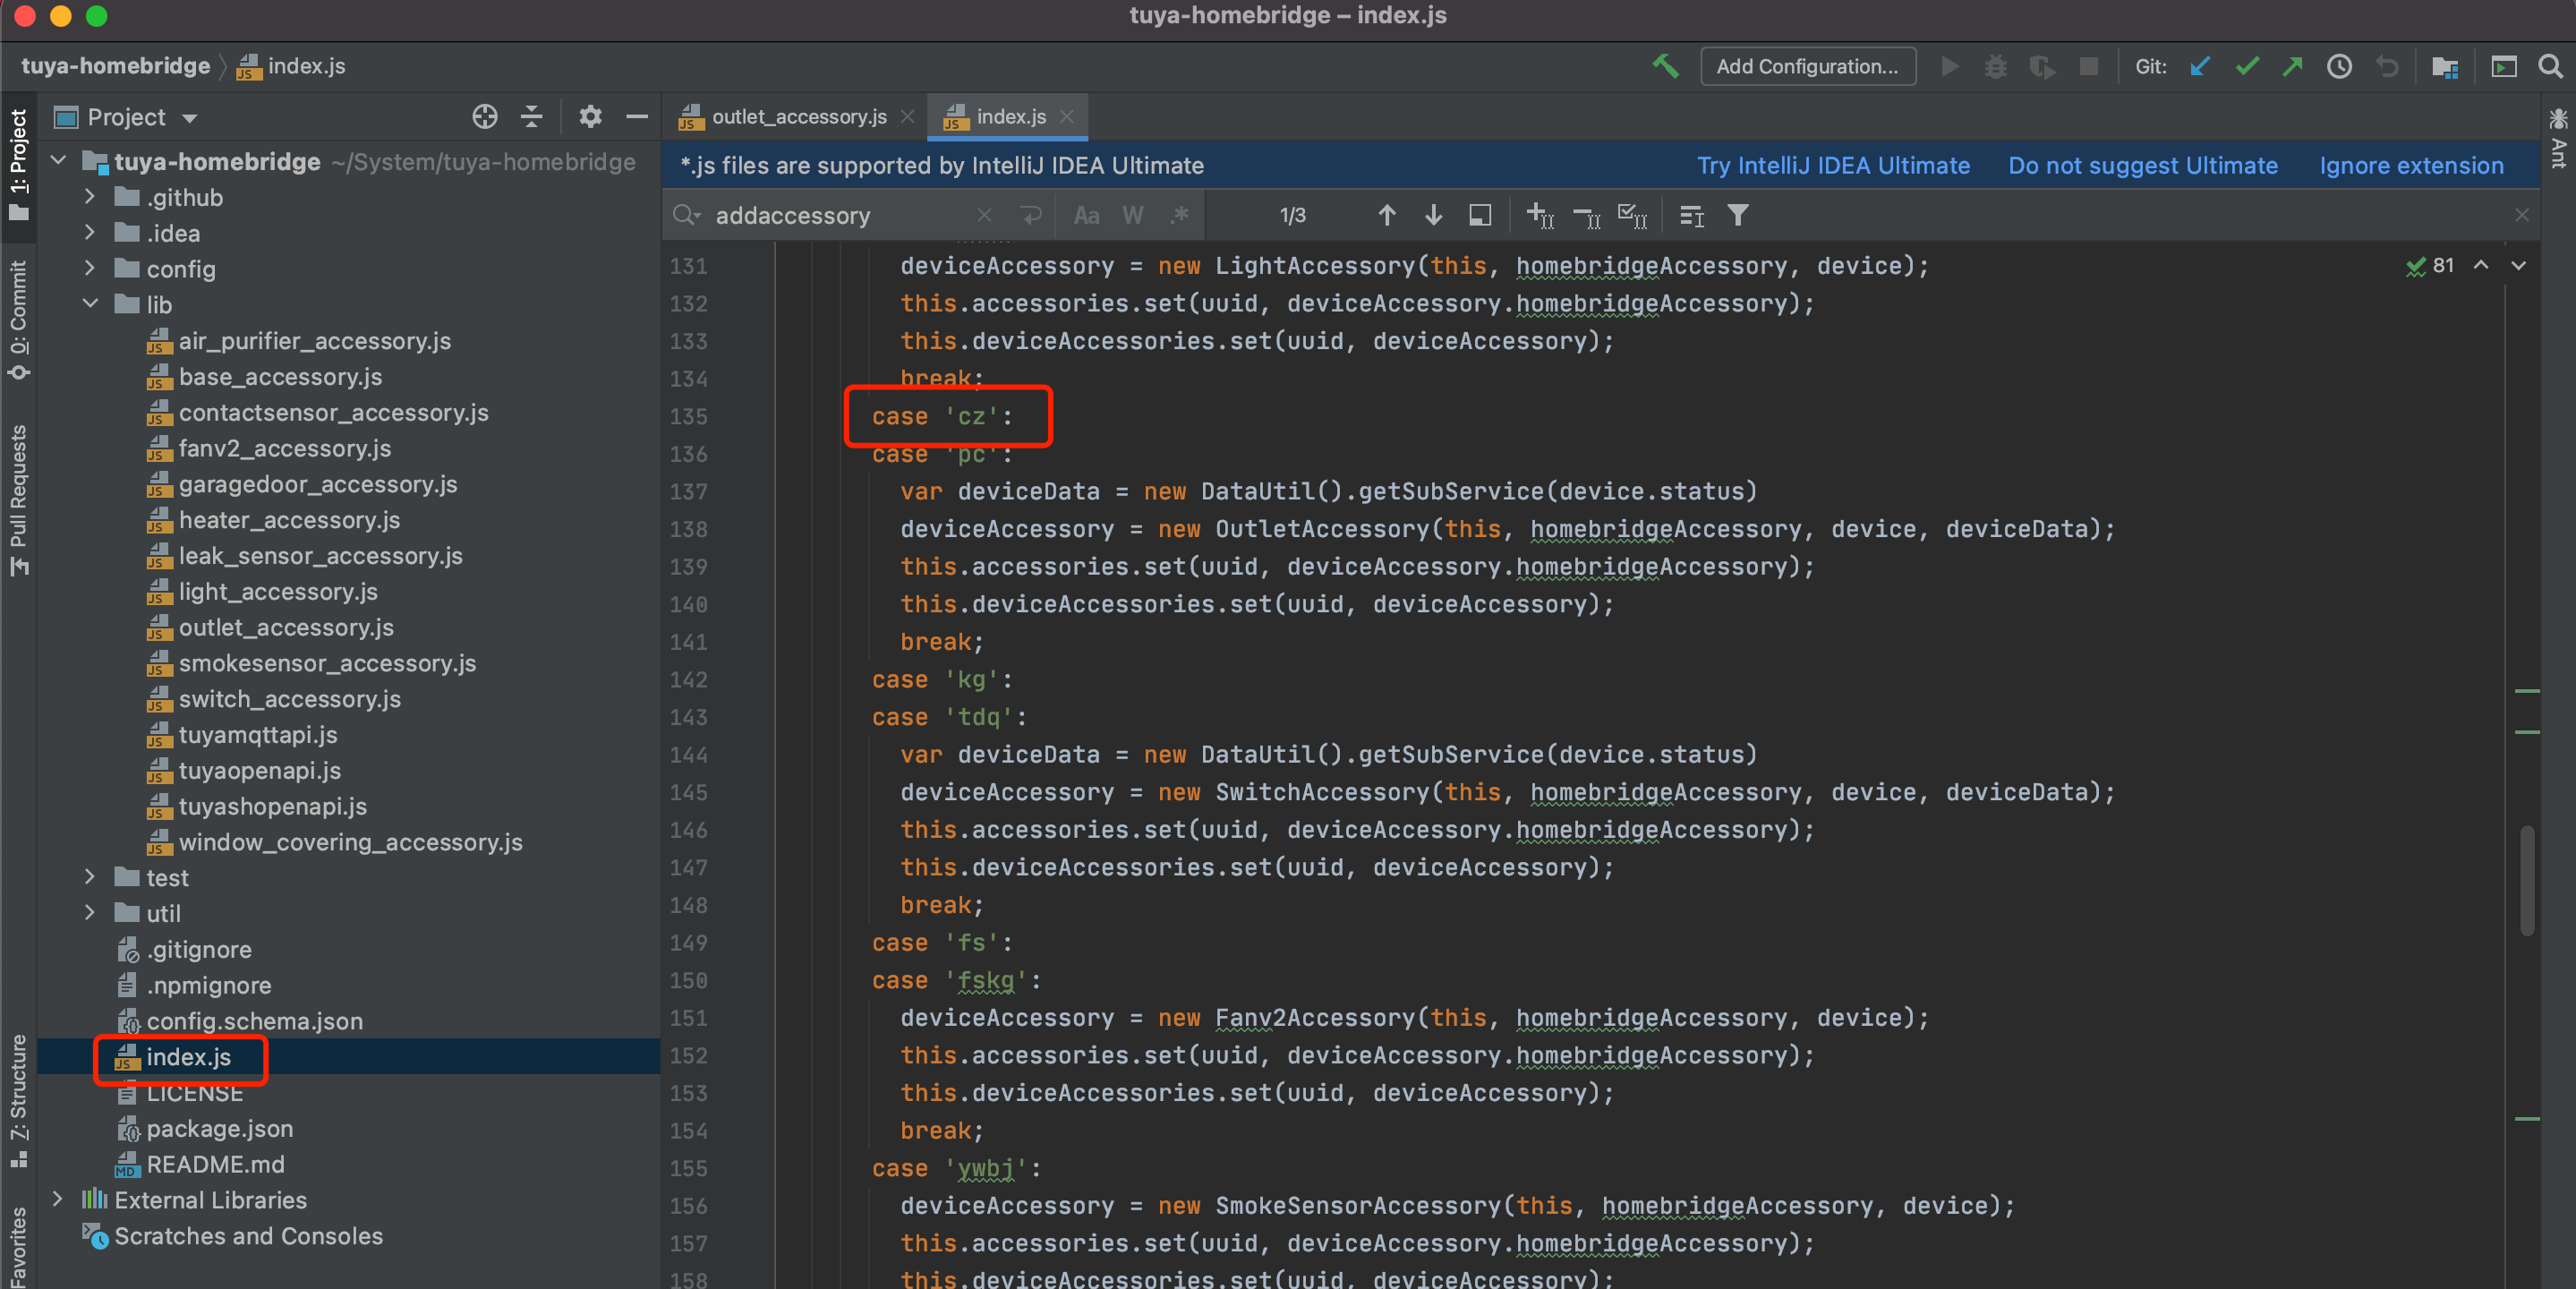
case 'cz': deviceAccessory = new OutletAccessory(this, homebridgeAccessory, device); this.accessories.set(uuid, deviceAccessory.homebridgeAccessory); this.deviceAccessories.set(uuid, deviceAccessory); break; -
Develop the plugin.
Develop the plugin in the
outlet_accessory.jsfile. See outlet_accessory.js for the sample code.-
Set
Characteristics, and set theGetandSetcallbacks of this attribute.Note: Characteristics is the service attribute corresponding to the Outlet type in the HomeBridge API. The Characteristics is
On.-
get: Return the device status to Homebridge, and display it on the Home app. -
set: When the on and off actions are triggered on the Home app, you can send the instructions to the device through this callback.if (this.isRefresh) { service .getCharacteristic(Characteristic.On) .updateValue(value); } else { this.getAccessoryCharacteristic(service, Characteristic.On); }getAccessoryCharacteristic(service, name) { //set Accessory service Characteristic service.getCharacteristic(name) .on('get', callback => { if (this.hasValidCache()) { callback(null, this.getCachedState(service.displayName)); } }) .on('set', (value, callback) => { var param = this.getSendParam(service.displayName, value) this.platform.tuyaOpenApi.sendCommand(this.deviceId, param).then(() => { this.setCachedState(service.displayName, value); callback(); }).catch((error) => { this.log.error('[SET][%s] Characteristic.Brightness Error: %s', this.homebridgeAccessory.displayName, error); this.invalidateCache(); callback(error); }); }); }
-
-
In the get callback, the value
falseof the DP codeswitchis called back to the Homebridge Service. In the set callback,switchis sent to the device as the DP code, together with the specified value."status": [ { "code": "switch", "value": false }, { "code": "countdown_1", "value": 0 }, ]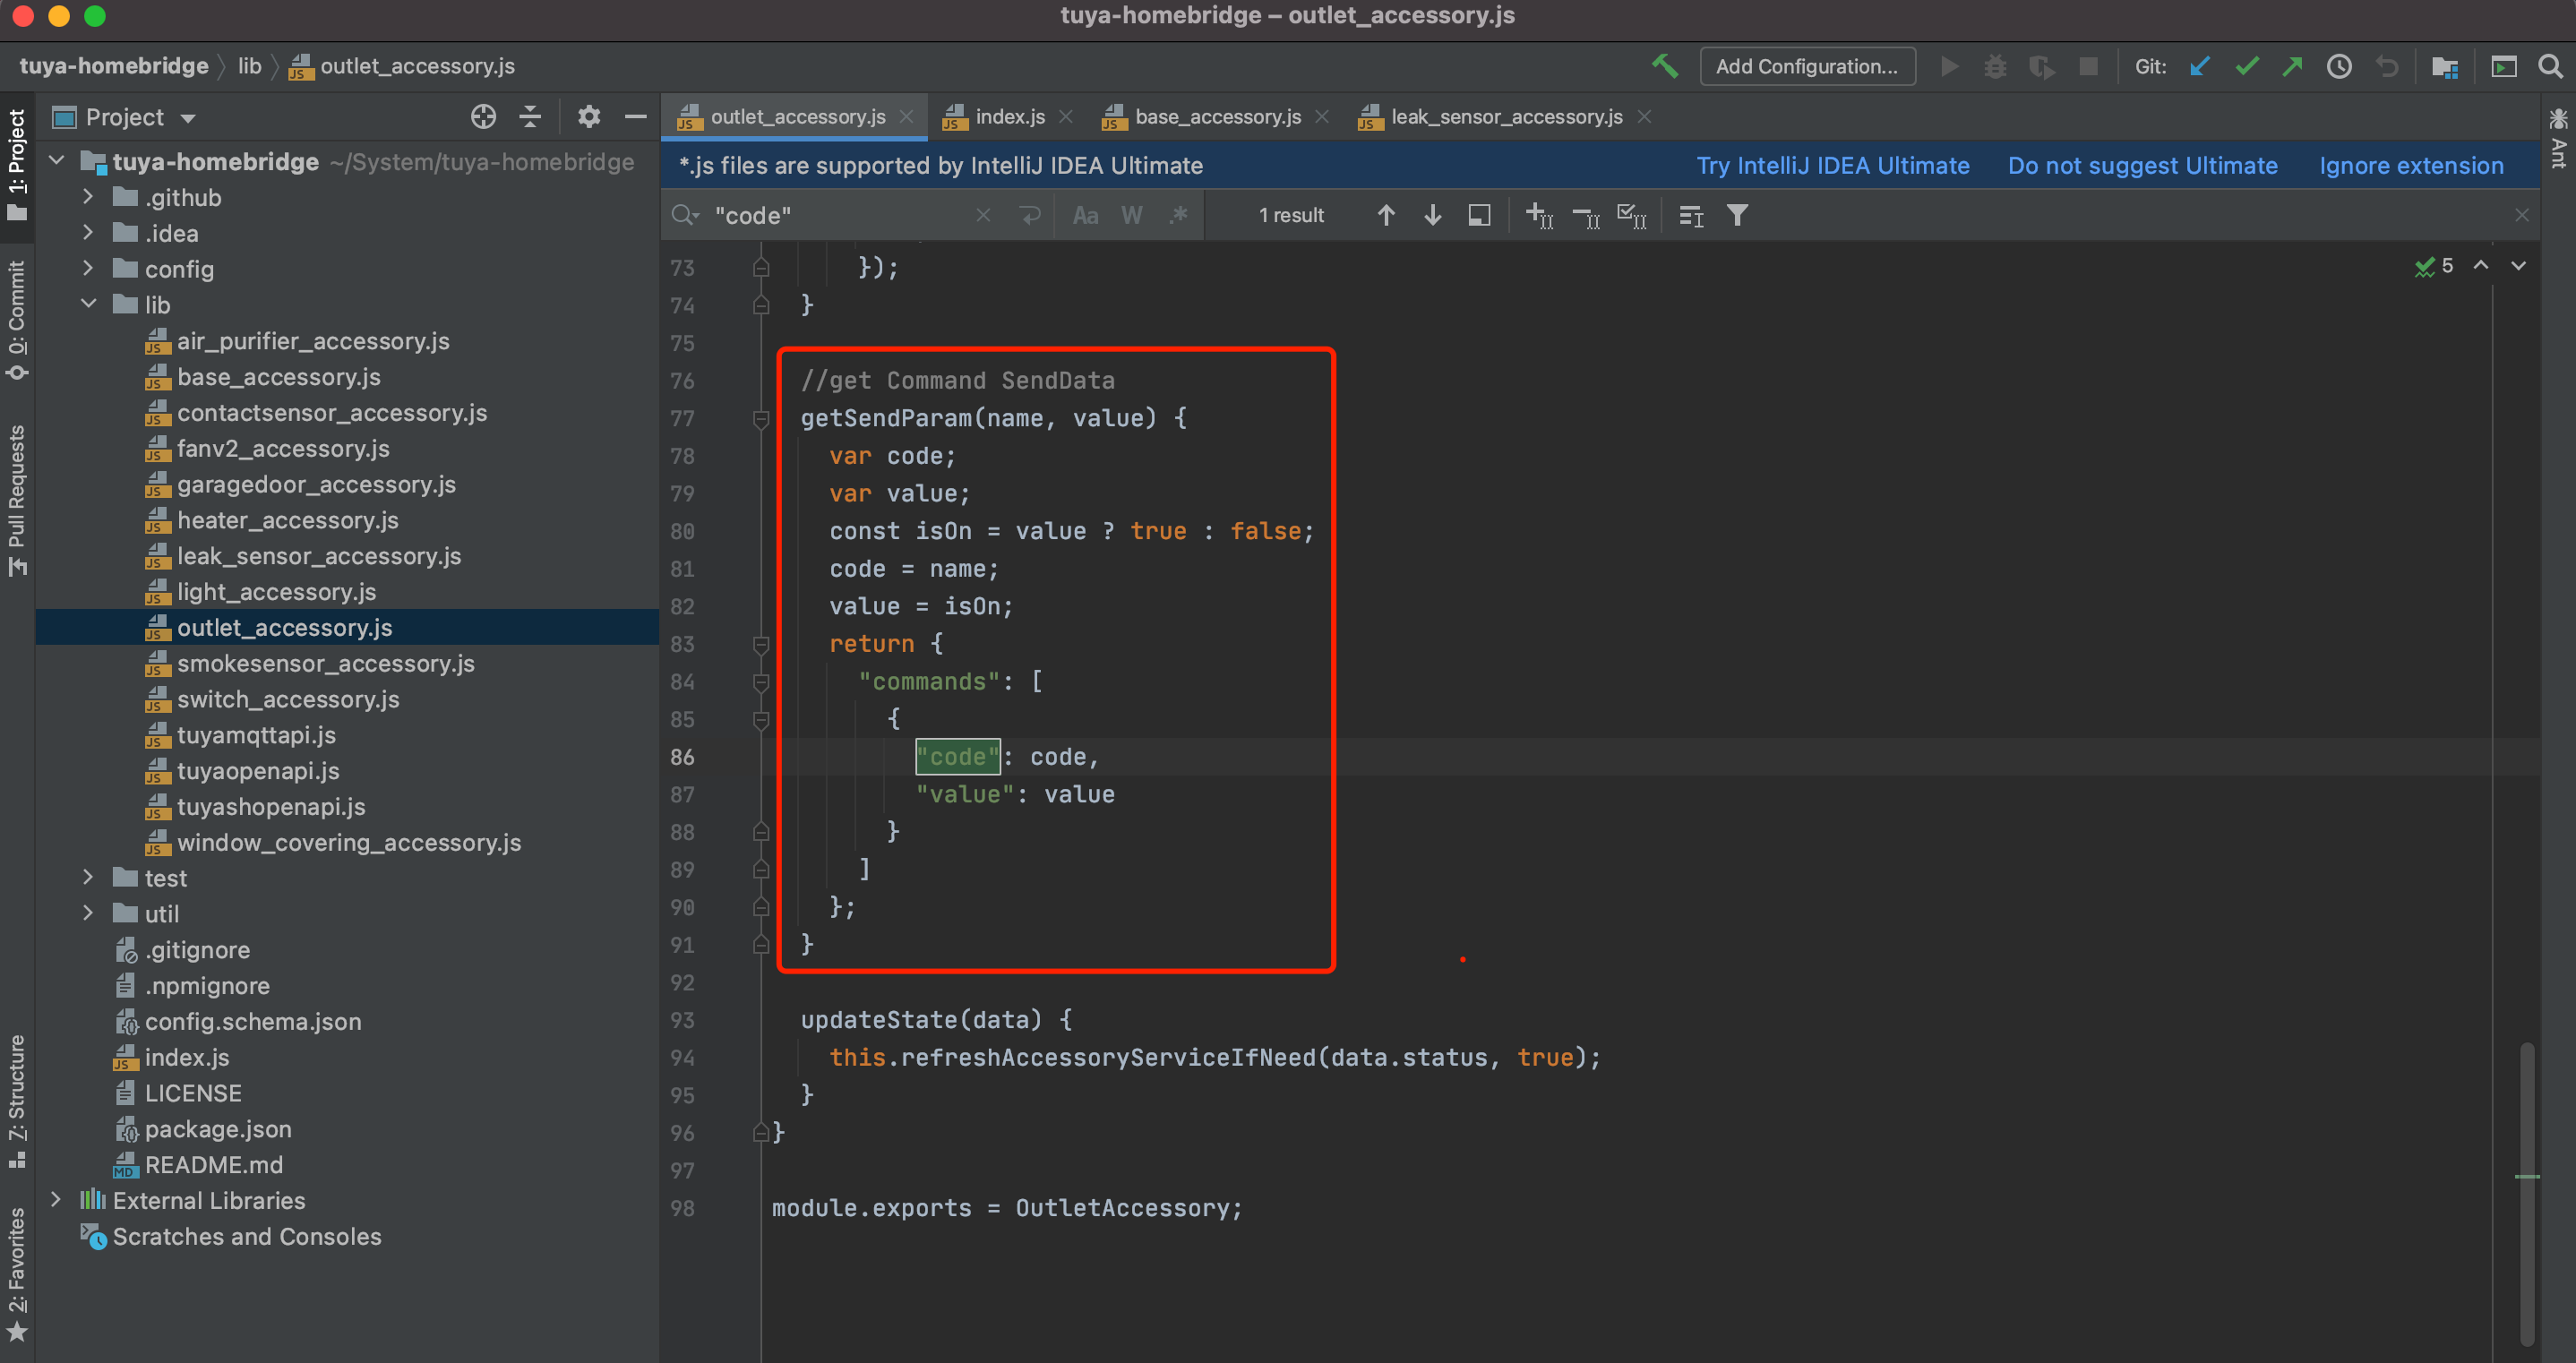
You can get the relationship between
codeandvaluefrom the standard instruction set and standard status set.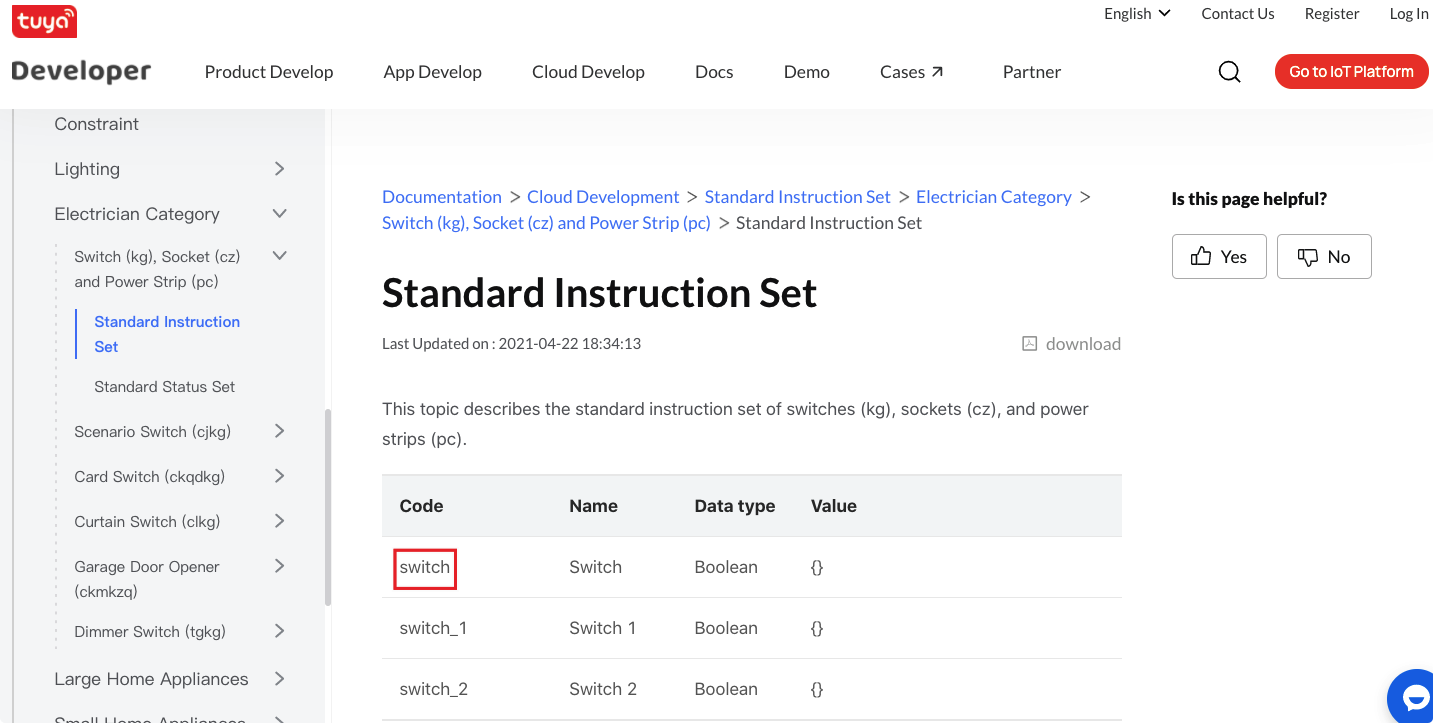
The following shows instructions to turn on the light.
{
   "code": "switch",
   "value": true
}
-
Step 4: Control devices
After you add a category, you can run the Tuya Homebridge plugin again. After you bridge to HomeKit, you can control the PBT devices on HomeKit.
Device registration logic
When you start the plugin, the entry file index.js will call TuyaSHOpenAPI().getDevices() to get the devices under the current associated app account. After getting the device, it will traverse and call this.addAccessory(device); to create an Accessory instance and then register it in PlatformAccessories.
The creation of Accessory and Service is implemented in base_accessory.js. You do not need to develop them separately.
// Accessory
    if (this.homebridgeAccessory) {
      this.homebridgeAccessory.controller = this;
      if (!this.homebridgeAccessory.context.deviceId) {
        this.homebridgeAccessory.context.deviceId = this.deviceConfig.id;
      }

      this.log.log(`Existing Accessory found ${homebridgeAccessory.displayName}  ${homebridgeAccessory.context.deviceId} ${homebridgeAccessory.UUID}`);
      this.homebridgeAccessory.displayName = this.deviceConfig.name;
    }
    else {
      // Create new Accessory
      this.log.log(`Creating New Accessory ${this.deviceConfig.id}`);
      this.homebridgeAccessory = new PlatformAccessory(
        this.deviceConfig.name,
        UUIDGen.generate(this.deviceConfig.id),
        categoryType);
      this.homebridgeAccessory.context.deviceId = this.deviceConfig.id;
      this.homebridgeAccessory.controller = this;
      this.platform.registerPlatformAccessory(this.homebridgeAccessory);
    }

    // Service
    if (this.subServices.length == 0) {
      // Service
      this.service = this.homebridgeAccessory.getService(this.serviceType);
      if (this.service) {
        this.service.setCharacteristic(Characteristic.Name, this.deviceConfig.name);
      }
      else {
        // add new service
        this.service = this.homebridgeAccessory.addService(this.serviceType, this.deviceConfig.name);
      }
    } else {
      // SubService
      for (const subService of this.subServices) {
        var service = this.homebridgeAccessory.getService(subService);
        if (service) {
          service.setCharacteristic(Characteristic.Name, subService);
        } else {
          // add new subService
          this.homebridgeAccessory.addService(this.serviceType, subService, subService);
        }
      }
    }
Is this page helpful?
YesFeedbackIs this page helpful?
YesFeedback


