Hardware Development
Last Updated on : 2021-06-02 11:01:45download
If you are familiar with hardware embedded development, you can select the module, add the firmware, and purchase the debugging module online. And Tuya will send the module burned with the firmware to you for testing your smart products. This topic describes how to select a module and configure the module firmware I/O port for a smart product.
Prerequisites
You have created a product. For more information, see Create Products.
Procedure
Configure custom product
The following steps describe how to configure hardware development based on a custom solution.
-
Go to the Smart Products page on the Tuya IoT Platform.
-
Find a product in Developing, and click Entering to Develop.
-
On the Hardware Development page, make sure the Selected Cloud Connection Mode is selected.
You can select from different custom solutions for product development. -
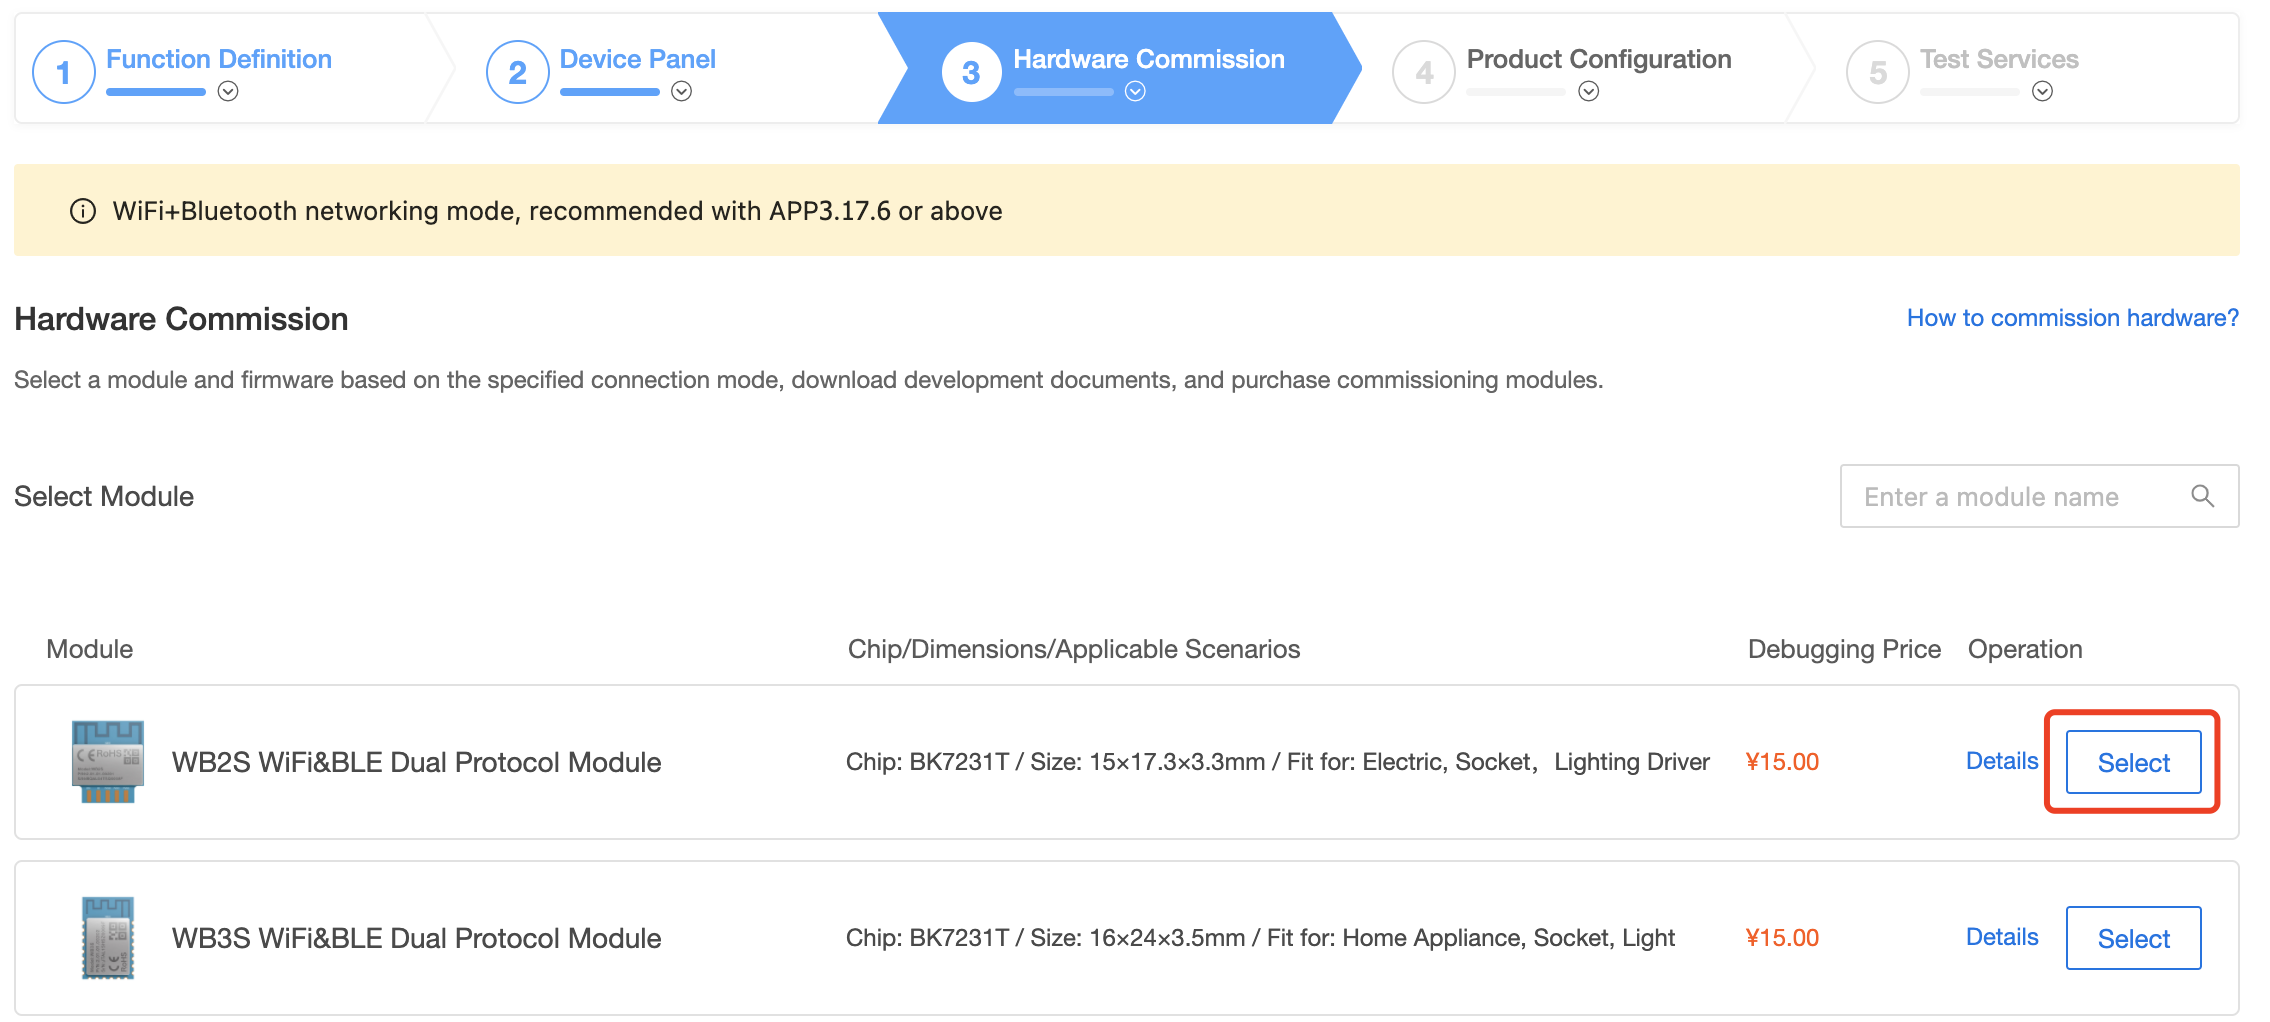
In the Select Module area, select a module according to the Chip/Dimensions/Applicable Scenarios in the module list.
It is recommended to select the recommended module as it is applicable to your defined functions.

-
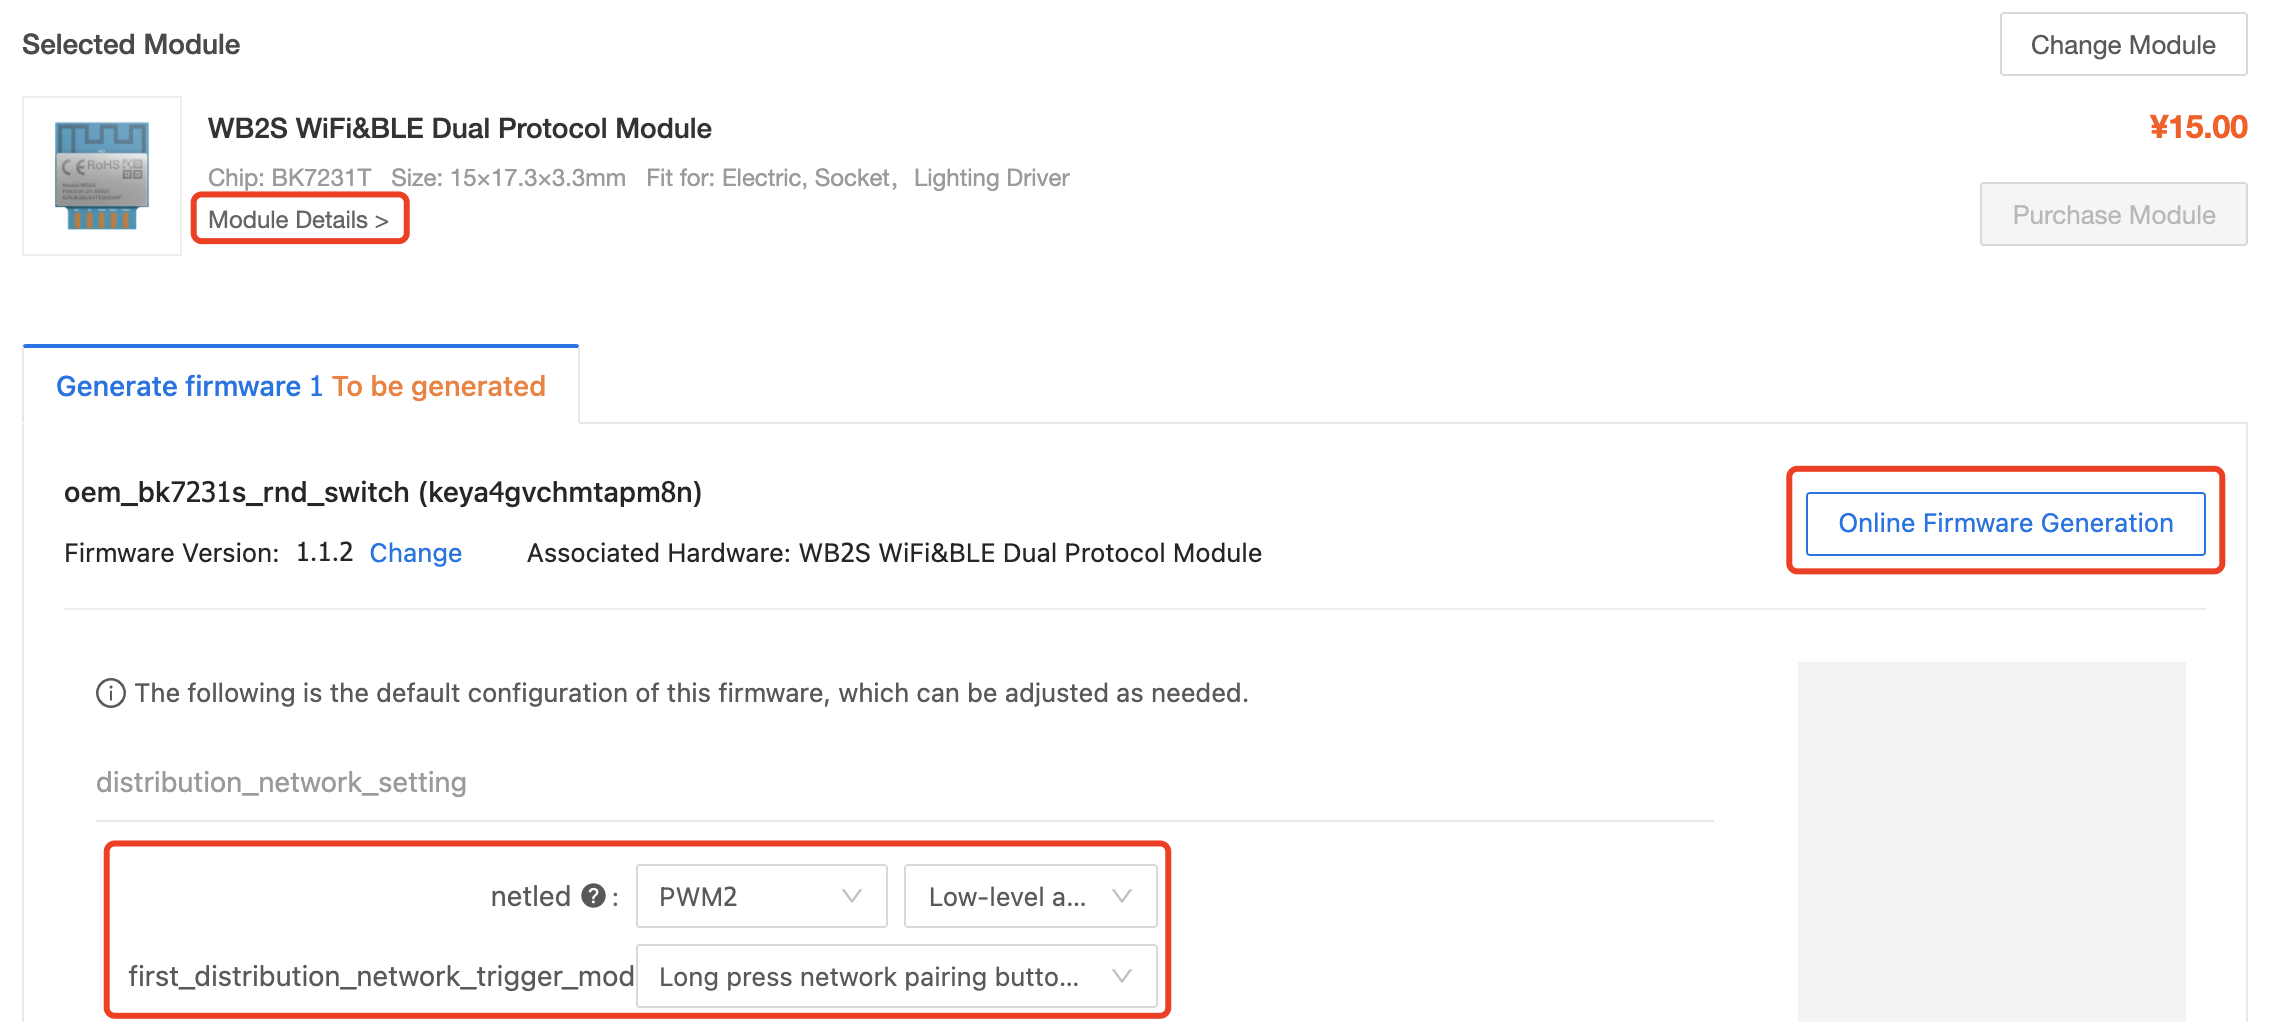
(Optional) After selecting a module, you can click Module Details to view the module information. You can change the module as needed.
-
In the Select Firmware area below Selected Module, click Select Firmware and select General firmware scheme in the pop-up box.

-
(Optional) If you need custom firmware, you can click Add custom firmware in the Generated Firmware area. For more information, see Update Firmware.

-
(Optional) On the right side of the selected module, click Purchase Module to purchase the module online for debugging.
The firmware configuration above is burned to the module. It can be directly used to debug the product after you place an order.
Configure the no-code development product
The following steps describe how to configure hardware development based on a no-code solution. For more information, see Create Electrical Products and Create Smart Light.
-
Go to the Smart Products page on the Tuya IoT Platform.
-
Find a product in Developing, and click Entering to Develop.
-
In the Select Module area of the Hardware Commission step, select a module according to the Chip/Dimensions/Applicable Scenarios of the module list.
It is recommended to select the recommended module as it is applicable to your defined functions.

-
(Optional) After selecting a module, you can click Module Details to view the module information. You can change the module as needed.
-
In the Generate firmware area, you can configure the firmware by clicking Online Firmware Generation. And the firmware of the selected module will be generated.

Note: During the Generate firmware process, you can see the I/O port table of the module. Read the firmware information carefully and modify the information as needed. Save the information after confirming. All modules will be burned according to the firmware configuration information, and the modules cannot be changed after being sent. If you change the firmware configuration information after the module is sent, the two versionss will be inconsistent. The previous product cannot be upgraded online. The I/O configuration information varies in products. Fill in the information according to different versions.
-
In the Development and debugging area below the module, complete Drawing PCBA, download the Tuya Cloud Test app, and test the device.
-
(Optional) On the right side of the selected module, click Purchase Module to purchase the module online for debugging.
The firmware configuration above is burned to the module. It can be directly used to debug the product after you place an order.
Next
After completing the hardware development, you can select and manage the firmware for the product. For more information, see Select and Change the Firmware Version.
Is this page helpful?
YesFeedbackIs this page helpful?
YesFeedback