Select and Manage Firmware Versions
This topic describes how to select the firmware and manage firmware versions for your product to ensure the product in development or end product can run as expected.
Prerequisites
You have created at least one product. For more information, see Create Products.
Background
After you create a product and select hardware (chip, module, or PCBA) on the Tuya Developer Platform, you will be provided with the firmware that matches your solution.
The firmware is updated over time as the market and solution evolve. Firmware versions might be retired based on the iteration of the original chips. In such cases, new versions or alternatives will be provided instead.
Step 1: Select firmware
This section describes how to select firmware when you create a product.
-
Open Product Development.
-
Find the target product in Developing and click Develop.
-
Click Hardware Development.

-
If your product is based on a Custom Solution, select an access mode.
-
Select the required hardware, such as the module or PCBA.
-
Add custom firmware and version. Firmware is provided for some hardware.
If there is firmware available for your selected hardware, the latest firmware version is selected by default. If you buy a sample module, the module will be flashed with the corresponding firmware for you to debug.

Step 2: Select firmware version
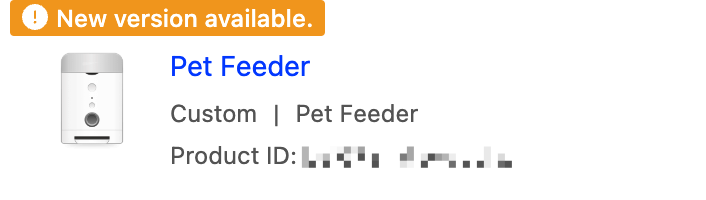
Case 1: New firmware version is available
When a new version is available for your selected firmware, you will receive a prompt on the Tuya Developer Platform.
-
Open Product Development.
-
Find the product with a firmware update prompt and click Develop.
-
Click Hardware Development.
-
Find the firmware version and click Replace Version.
Generally, new versions optimize the software. You can choose to switch to the latest version as necessary.
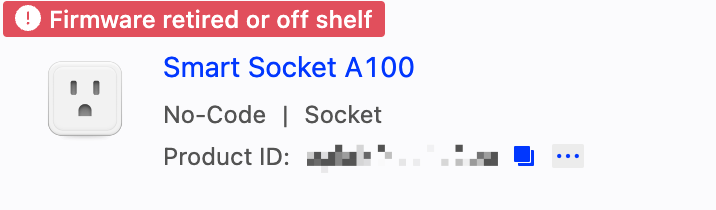
Case 2: Firmware version is retired
When a firmware version is retired due to inevitable reasons such as iteration of the original chips, you will receive a prompt on the Tuya Developer Platform. To avoid unexpected problems, make sure to replace the firmware version at your earliest convenience.
-
Open Product Development.
-
Find the product with a retirement prompt and click Develop.
-
Click Hardware Development.
-
Find the firmware version and click Replace Version.
Case 3: Replace firmware version as needed
-
Open Product Development.
-
Find the target product in Developing and click Develop.
-
Click Hardware Development.
-
Find the firmware version.

-
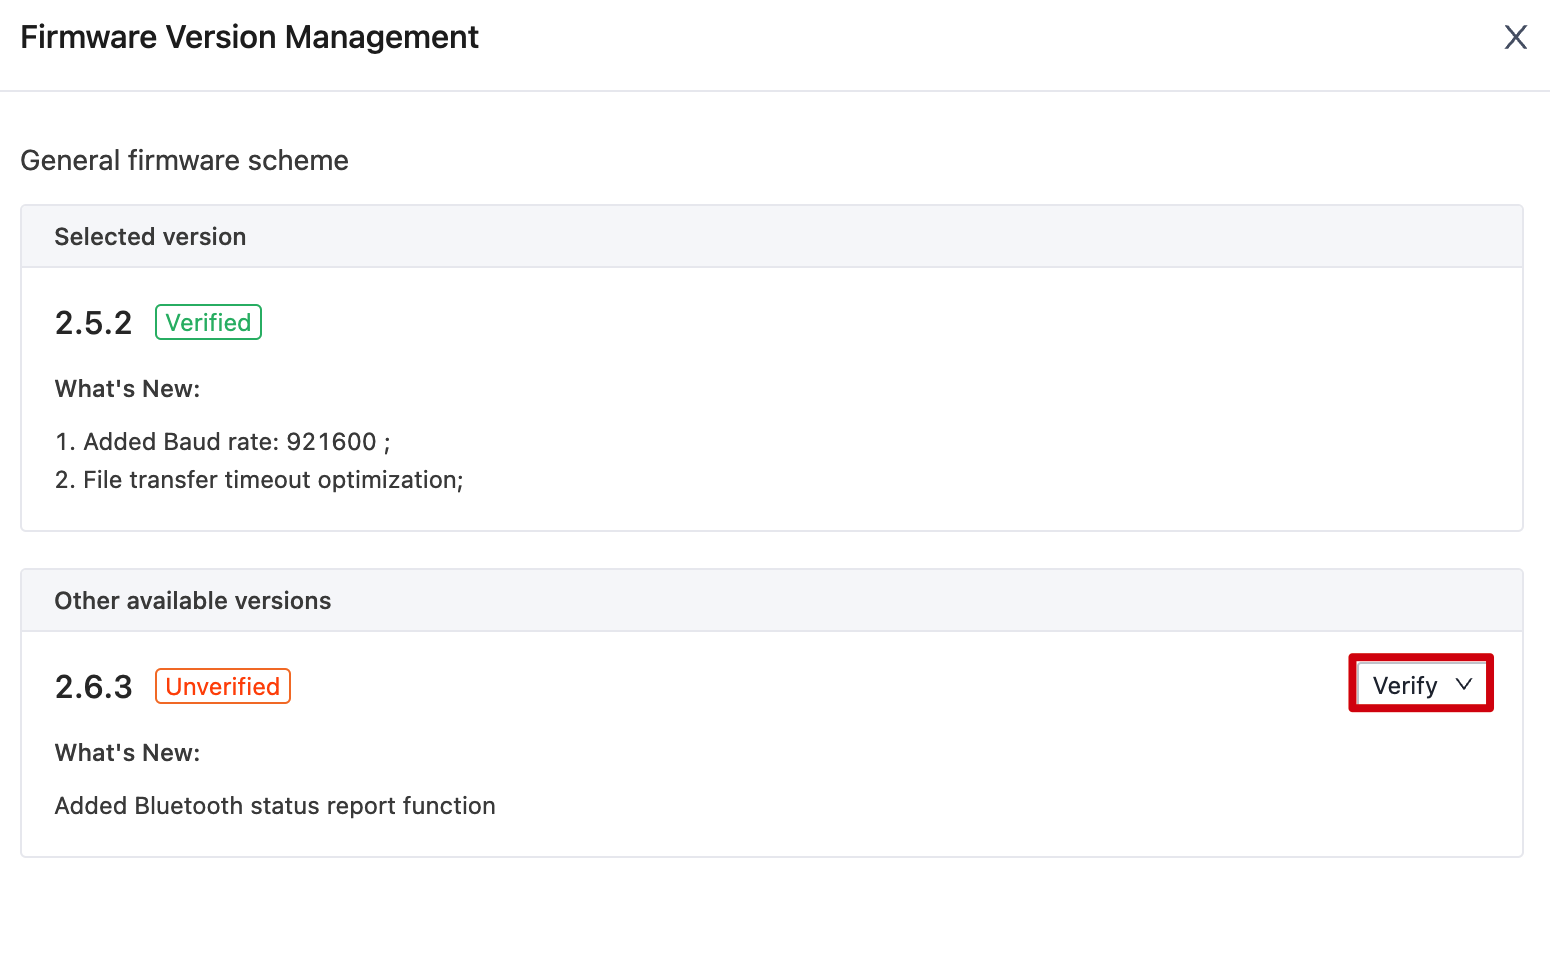
Click Replace Version to open the list of available firmware versions.
-
If your desired firmware version has not been verified, verify it first. If the verification is successful, mark that version as verified and select it.
Step 3: Verify firmware version
Two options are available to verify a firmware version by yourself.
- Option 1: Purchase the sample hardware (module, PCBA, or chip) that is flashed with the target firmware and verify the functionality.
- Option 2: If you have the hardware (module or PCBA) of the same model that runs the same firmware but an earlier version, you can update the firmware to the target version via OTA and verify the functionality.
Option 1: Purchase sample module
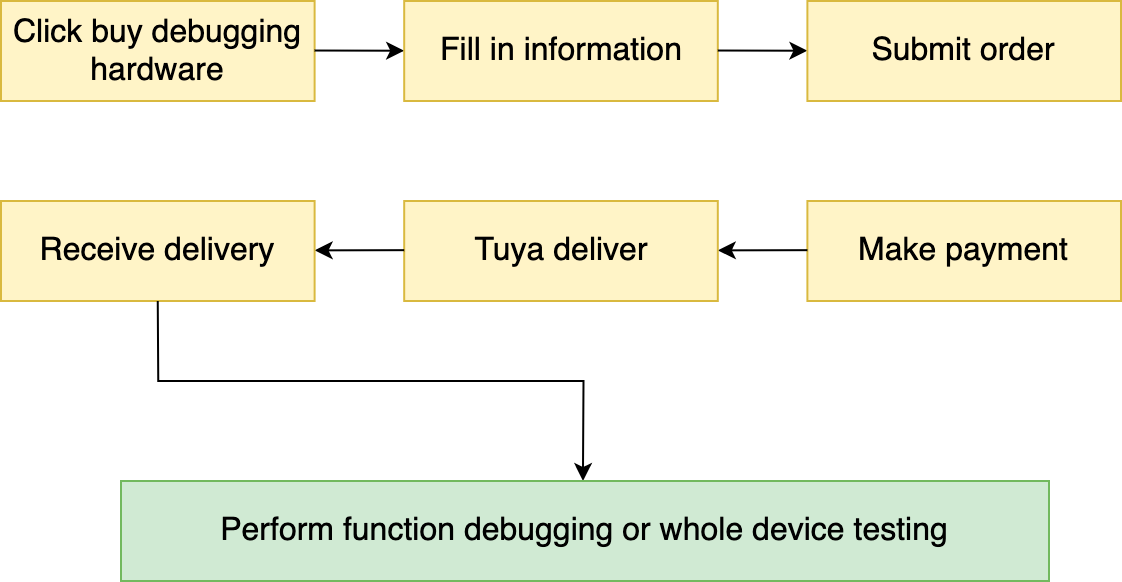
-
Open Product Development.
-
Find the target product in Developing and click Develop.
-
Click Hardware Development.
-
In the section Selected Cloud Access Hardware, find the target hardware and click Buy Now.
If your request is rejected, check the error message.

-
If the module has multiple types of firmware, you can edit the version number for them on the order confirmation page.
-
Complete the order information and make payment.
You will receive the hardware flashed with the target firmware version.
Option 2: Update existing hardware to target version via OTA
Before an OTA update, check the following:
- Hardware consistency: The model of your existing hardware (module, PCBA, or chip) must be the same as that selected for the product to be verified.
- Firmware consistency: The firmware on your existing hardware must be the same as that to be verified. You can confirm this by checking the firmware key on the order detail.
- The firmware version on your existing hardware is earlier than the firmware version to be verified. You can check the firmware version on the order detail or power on and pair the hardware and find the version number on the mobile app.
Perform the following steps to verify the firmware functionality.
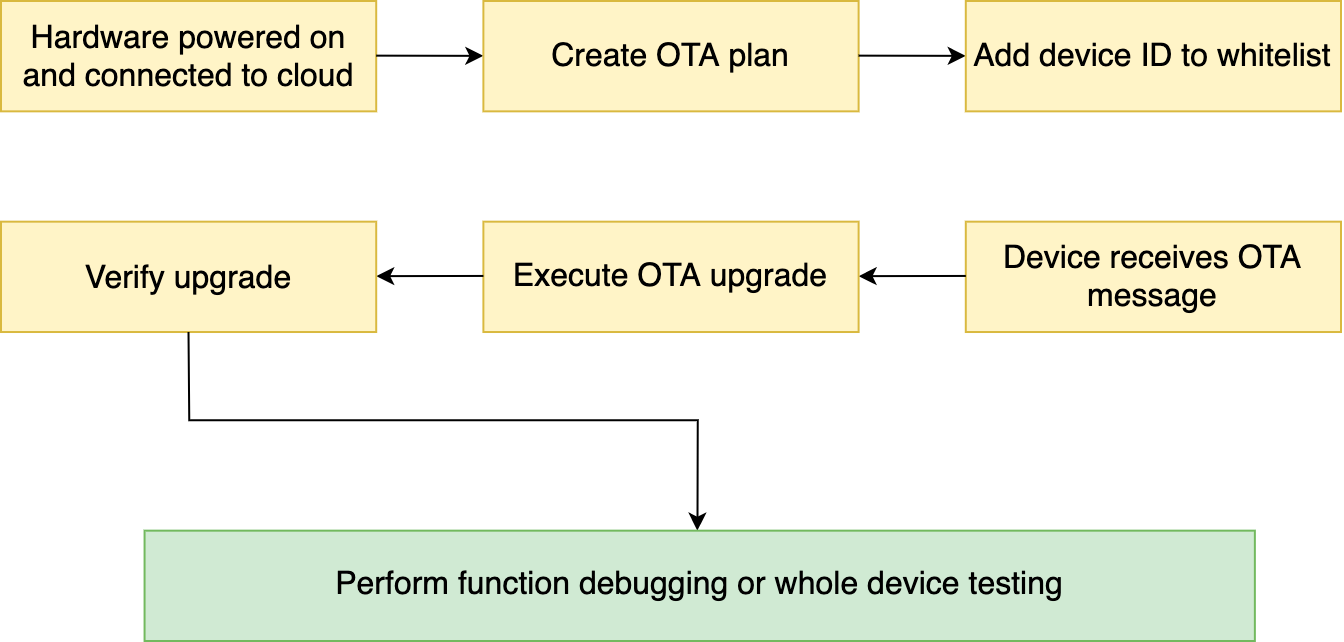
-
Connect your existing hardware to the cloud. Open the app panel and check the device ID and firmware version number.
-
Open Product Development.
-
Find the target product in Developing and click Develop.
-
Click Hardware Development.
-
Find the firmware version and click Replace Version. Choose Verify > OTA Firmware Updates for the target version.

-
Create an OTA update as instructed on the screen.
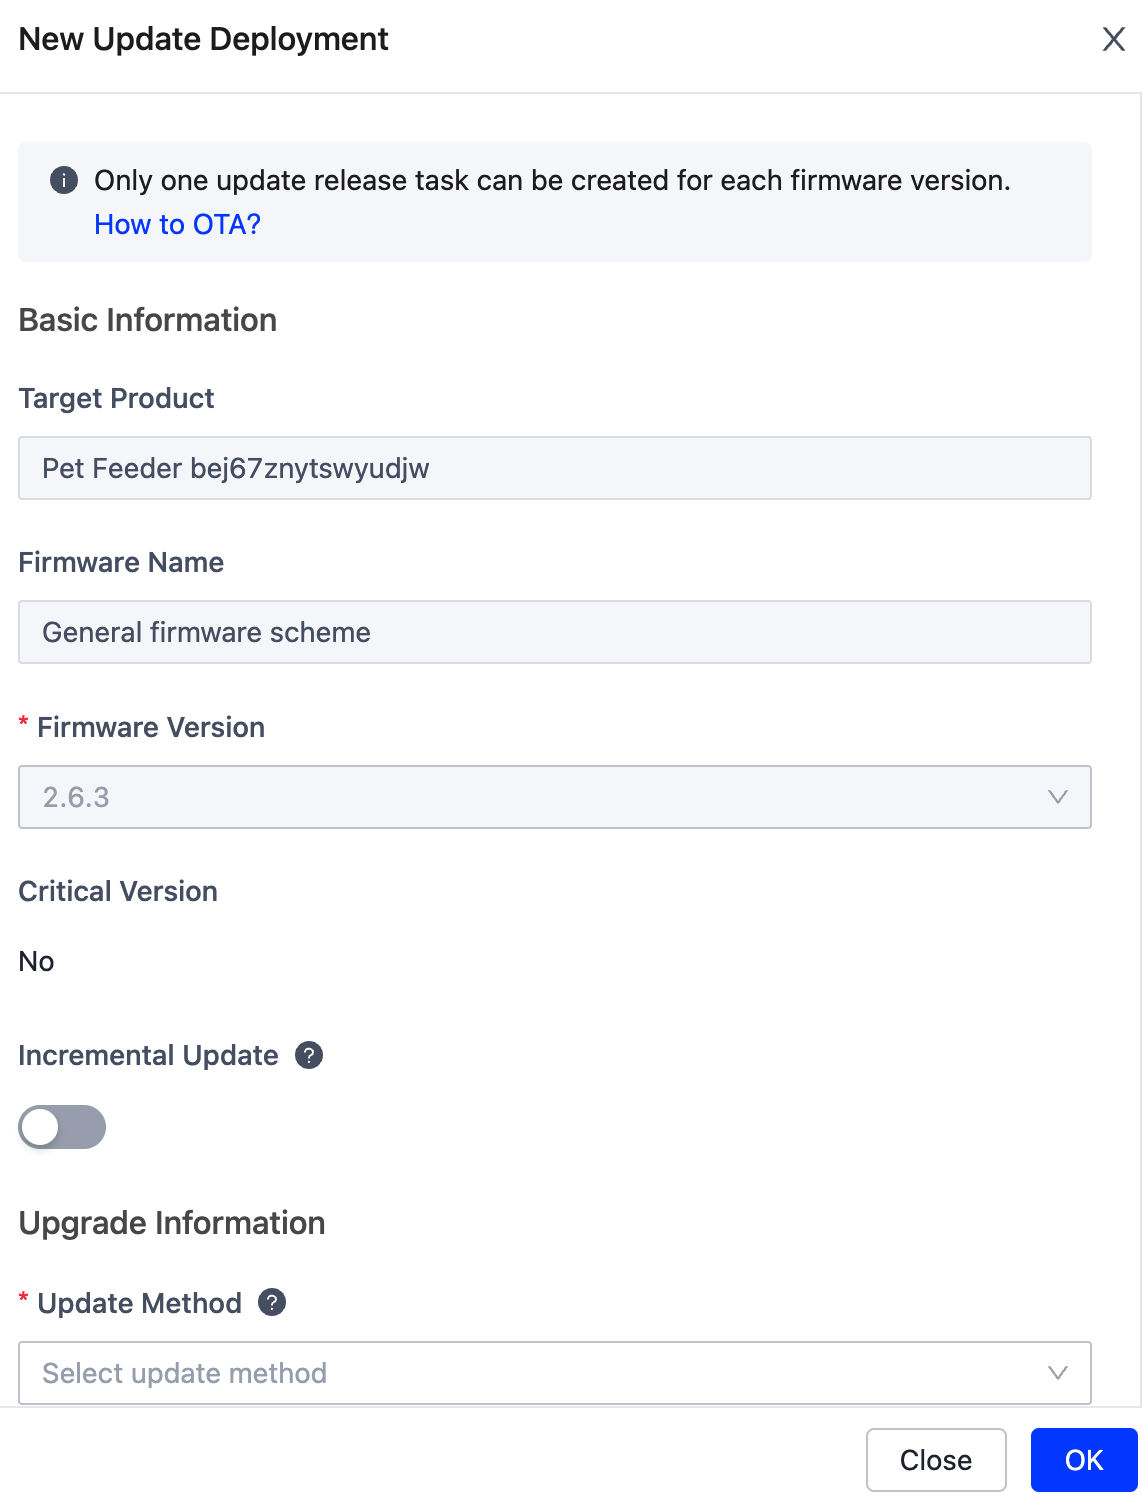
By default, a device only installs the latest update. If you have deployed a full update with a version later than that to be verified, suspend that deployment. And make sure the target device ID is only added to the test list of the OTA update you just created.
-
Click Verify and add the device ID that receives the update. After you release the OTA update, the device will receive a message. Tap Update on the mobile app to install.
-
To check the update result, you can either click Verify on the Firmware Update page or check the version number on the mobile app.
Now, your hardware has the target firmware installed. You can test the firmware functionality.
Step 4: Test firmware
Install your hardware on a PCB or bare metal and connect it to the cloud.
No-code solution
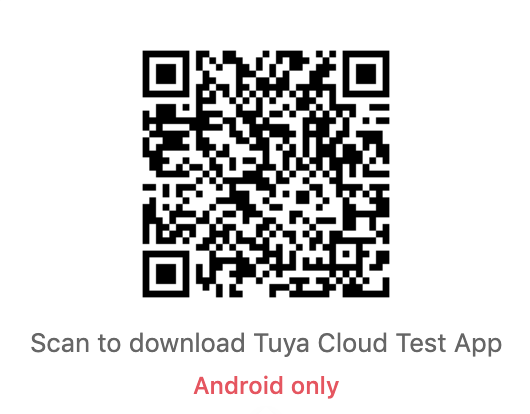
If your product is developed based on a no-code solution, you can use the Tuya Cloud Test app to perform an automated test. Scan the following QR code and download the Tuya Cloud Test app (for Android only). For more information about the test process, see Cloud Test App.
Custom solution
If your product is developed based on a custom solution, you can use the Module Debugging Assistant and the function debugging file to test the functionality. For more information, see Module Debugging Assistant.
To ensure the target firmware version is fully compatible with the MCU and the module, perform a test on the end product after the PCBA or bare mental assembly.
-
You can find the information about the testing process from Product Development > Hardware Development.
-
After all the tests are completed, go back to firmware version management and mark the target firmware version as Verified.
Is this page helpful?
YesFeedbackIs this page helpful?
YesFeedback


