Fast Integration
This topic describes how to quickly integrate the Tuya Spatial App SDK for Android into your development environment, such as Android Studio. It also sheds light on the initialization method and how to enable the debugging mode with a few simple steps. This allows you to run the demo app and get started with your Tuya Spatial app development.
Prerequisites
-
Before you start, make sure that you have performed the steps in Preparation.
-
If you have not installed Android Studio, visit the Android Studio official website to download Android Studio.
Integrate with the SDK
Step 1: Create an Android project
Create a project in Android Studio.
Step 2: Configure build.gradle
Add dependencies downloaded in the preparation steps to the file build.gradle of the Android project.
android {
   defaultConfig {
      ndk {
         abiFilters "armeabi-v7a", "arm64-v8a"
      }
   }
   packagingOptions {
      pickFirst 'lib/*/libc++_shared.so' // An Android Archive (AAR) file contains an Android library. If the .so file exists in multiple AAR files, select the first AAR file.
   }
}

dependencies {
   implementation fileTree(dir: 'libs', include: ['*.aar'])
    implementation 'com.alibaba:fastjson:1.2.32'
    // The latest stable version of Tuya Spatial App SDK for Android.
    implementation 'com.thingclips.smart:IndustryLinkSDK:2.3.1-indy'
    implementation 'com.squareup.moshi:moshi:1.15.1'
}
Add the Tuya Maven repository URL to the build.gradle file in the root directory.
repositories {
   google()
   mavenCentral()
   // Tuya Maven repository address.
   maven { url "https://maven-other.tuya.com/repository/maven-commercial-releases/" }
}
Step 3: Integrate with security component
-
Go to the Get SDK tab, select one or more required SDKs, and then download the App SDK for iOS or Android.

-
Extract the downloaded package, put
security-algorithm.aarin thelibsdirectory of the project, and then make suredependenciesinbuild.gradleof your project includeimplementation fileTree(include: ['*.aar'], dir: 'libs').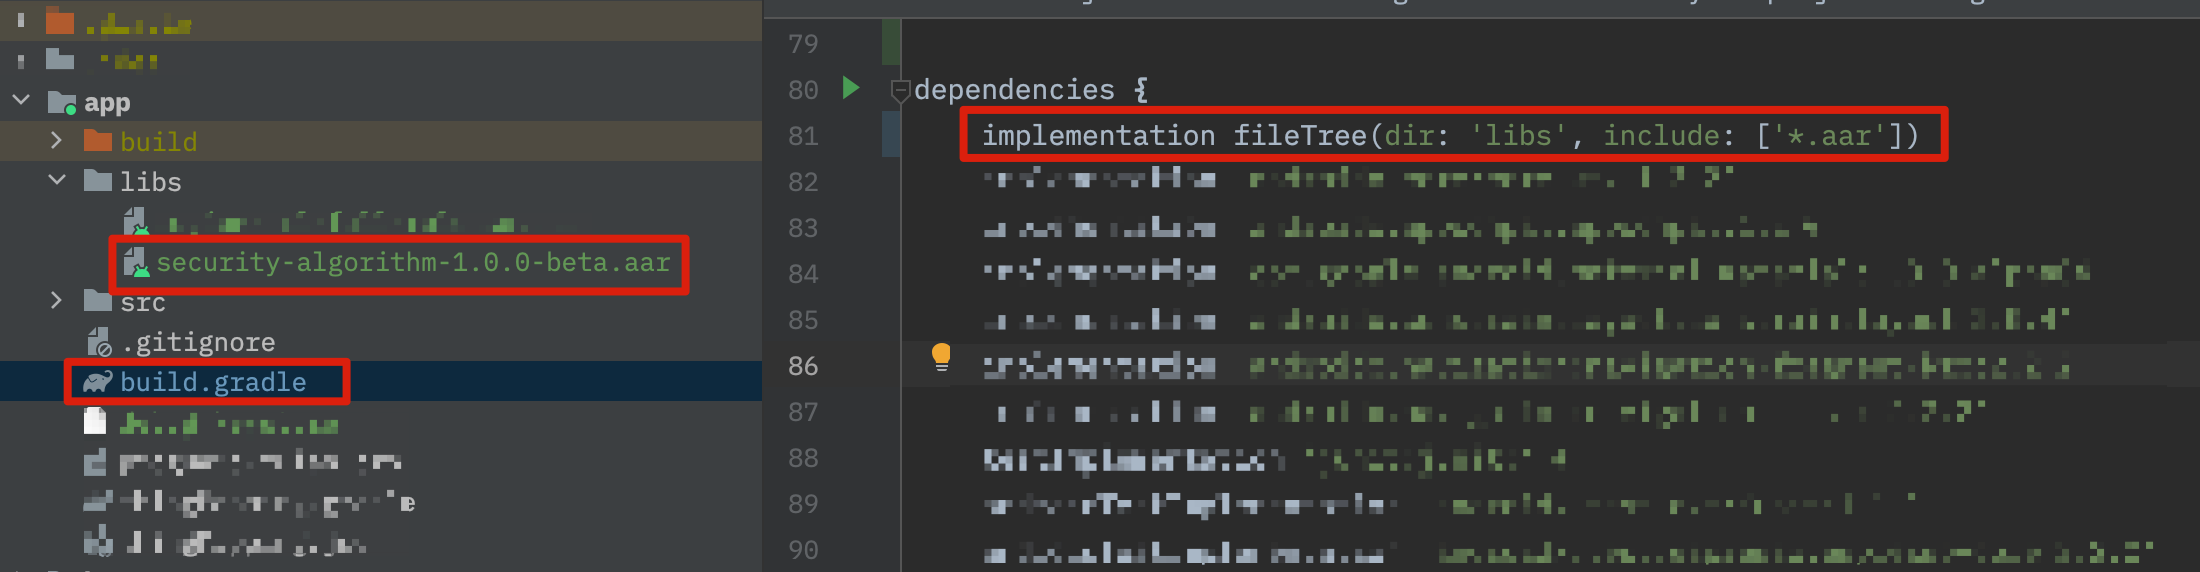
-
The
domain.txtfile extracted in step 2 will be used for initializing the SDK later.If you adopt or update the Custom Domain Name service later, you need to rebuild the SDK on the Get SDK page and repeat the steps mentioned above.
Step 4: Set cloud project certificate signature and get Client ID and Client Secret
-
In the Developer Platform, find the cloud project associated with the SDK you created.
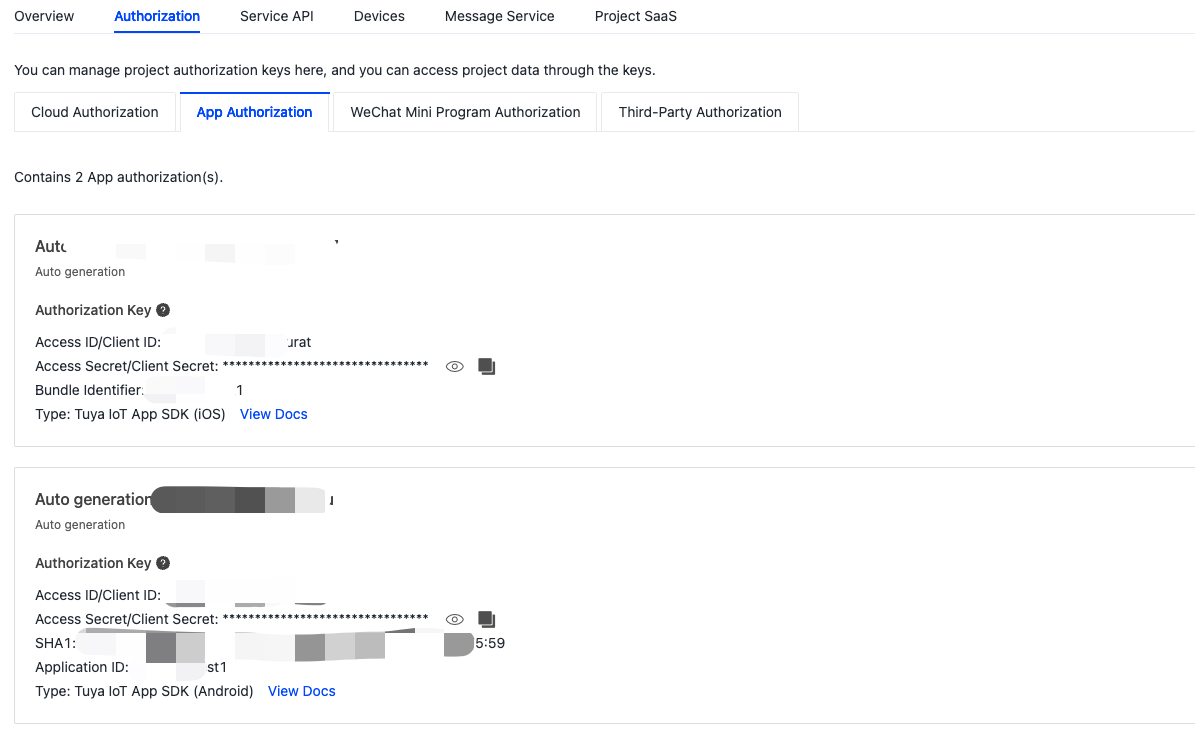
-
Edit the SHA-1 for Tuya app SDK (Android), as shown above.
- Generate an SHA-1 hash. For more information, see Android documentation and How to Get SHA-1 and SHA-256 Keys.
- Enter your SHA-1 hash in the SHA1 field.
-
Copy the
Client IDandClient Secretfor later use when initializing the SDK.
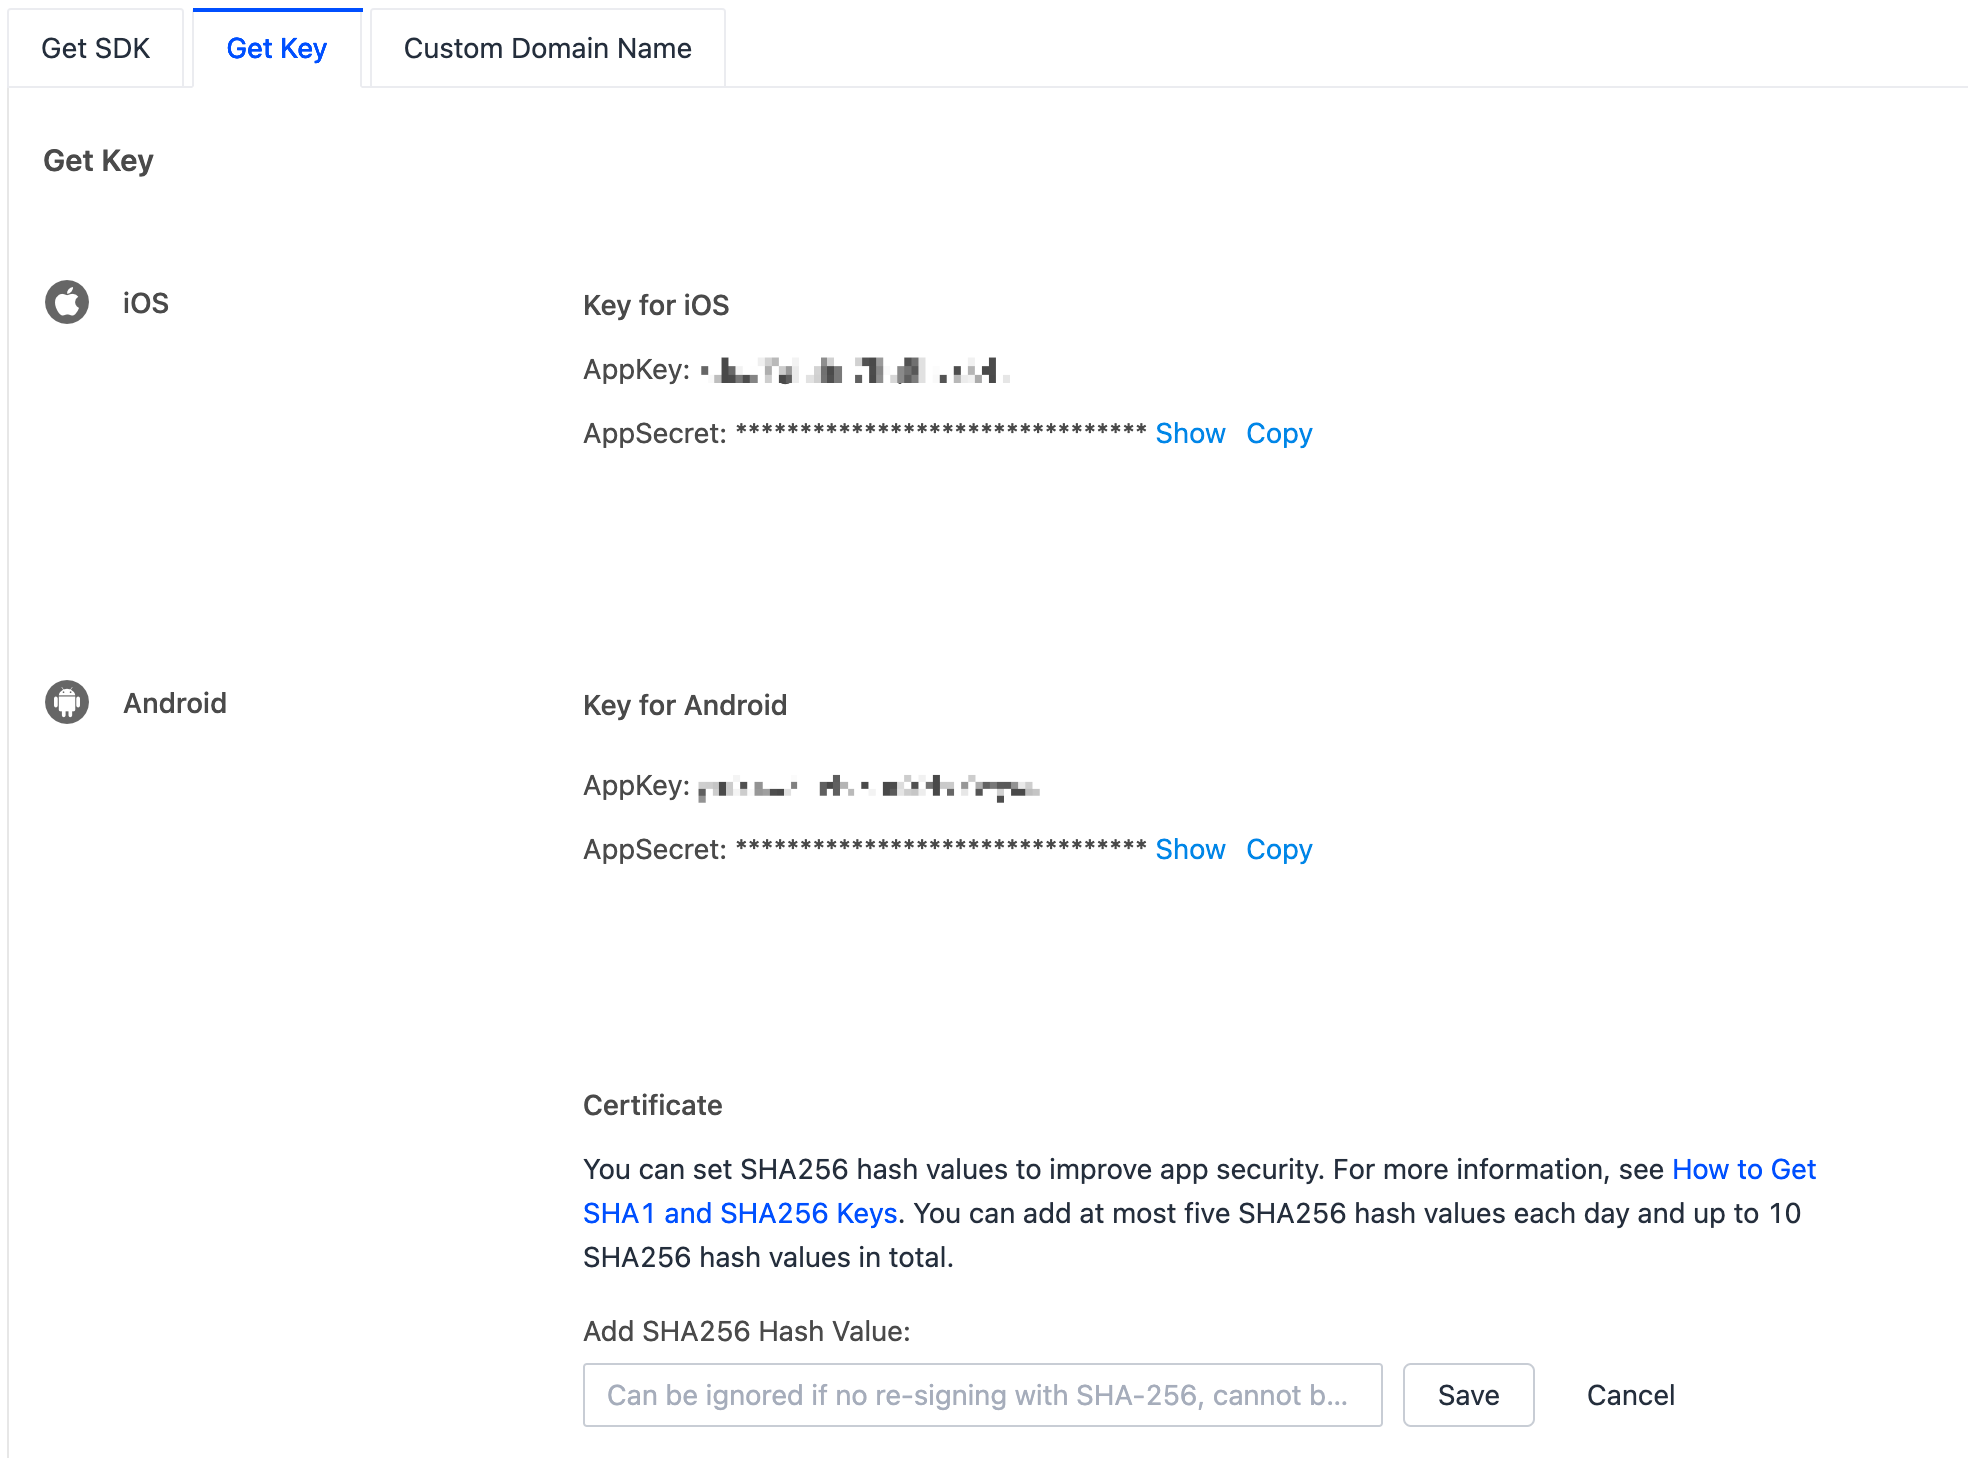
Step 5: Set certificate signature and get AppKey and AppSecret
-
In the Developer Platform, open the target SDK.
-
Configure the app certificate.
- Generate an SHA-256 hash value. For more information, see Android documentation and How to Get SHA-1 and SHA-256 Keys.
- Enter the SHA-256 key in the certificate.
-
Copy the
AppKeyandAppSecretfor later use when initializing the SDK.
Step 6: Obfuscate the code
Configure obfuscation in proguard-rules.pro.
#fastJson
-keep class com.alibaba.fastjson.**{*;}
-dontwarn com.alibaba.fastjson.**

#mqtt
-keep class com.thingclips.smart.mqttclient.mqttv3.** { *; }
-dontwarn com.thingclips.smart.mqttclient.mqttv3.**

#OkHttp3
-keep class okhttp3.** { *; }
-keep interface okhttp3.** { *; }
-dontwarn okhttp3.**

-keep class okio.** { *; }
-dontwarn okio.**

-keep class com.thingclips.**{*;}
-dontwarn com.thingclips.**

# Matter SDK
-keep class chip.** { *; }
-dontwarn chip.**
Step 7: Initialize the SDK
Initialize the SDK in the main thread of the Application. Make sure that all processes are initialized. Example:
public class BaseApplication extends Application {

    @Override
    public void onCreate() {
        super.onCreate();
        // Initialization.
        new IndustryLinkSDK.Builder(this)
                // The Client ID and Client Secret obtained in step 4.
                .initialize("clientId","clientSecret")
        // The domain obtained in step 3. Specify your domain.
                .setHost("domain")
                // The AppKey and AppSecret obtained in step 5.
                .setDeviceSDKKey("AppKey")
                .setDeviceSDKSecret("AppSecret")
                .setDebugMode(true)
                .build();
    }
}
- In
debugmode, you can enable SDK logging to facilitate troubleshooting. - We recommend that you disable logging in
releasemode.
Run the demo app
In the following example, a demo app is used to describe the process of app development with the Tuya Spatial App SDK. Before the development of your app, we recommend that you run the demo app.
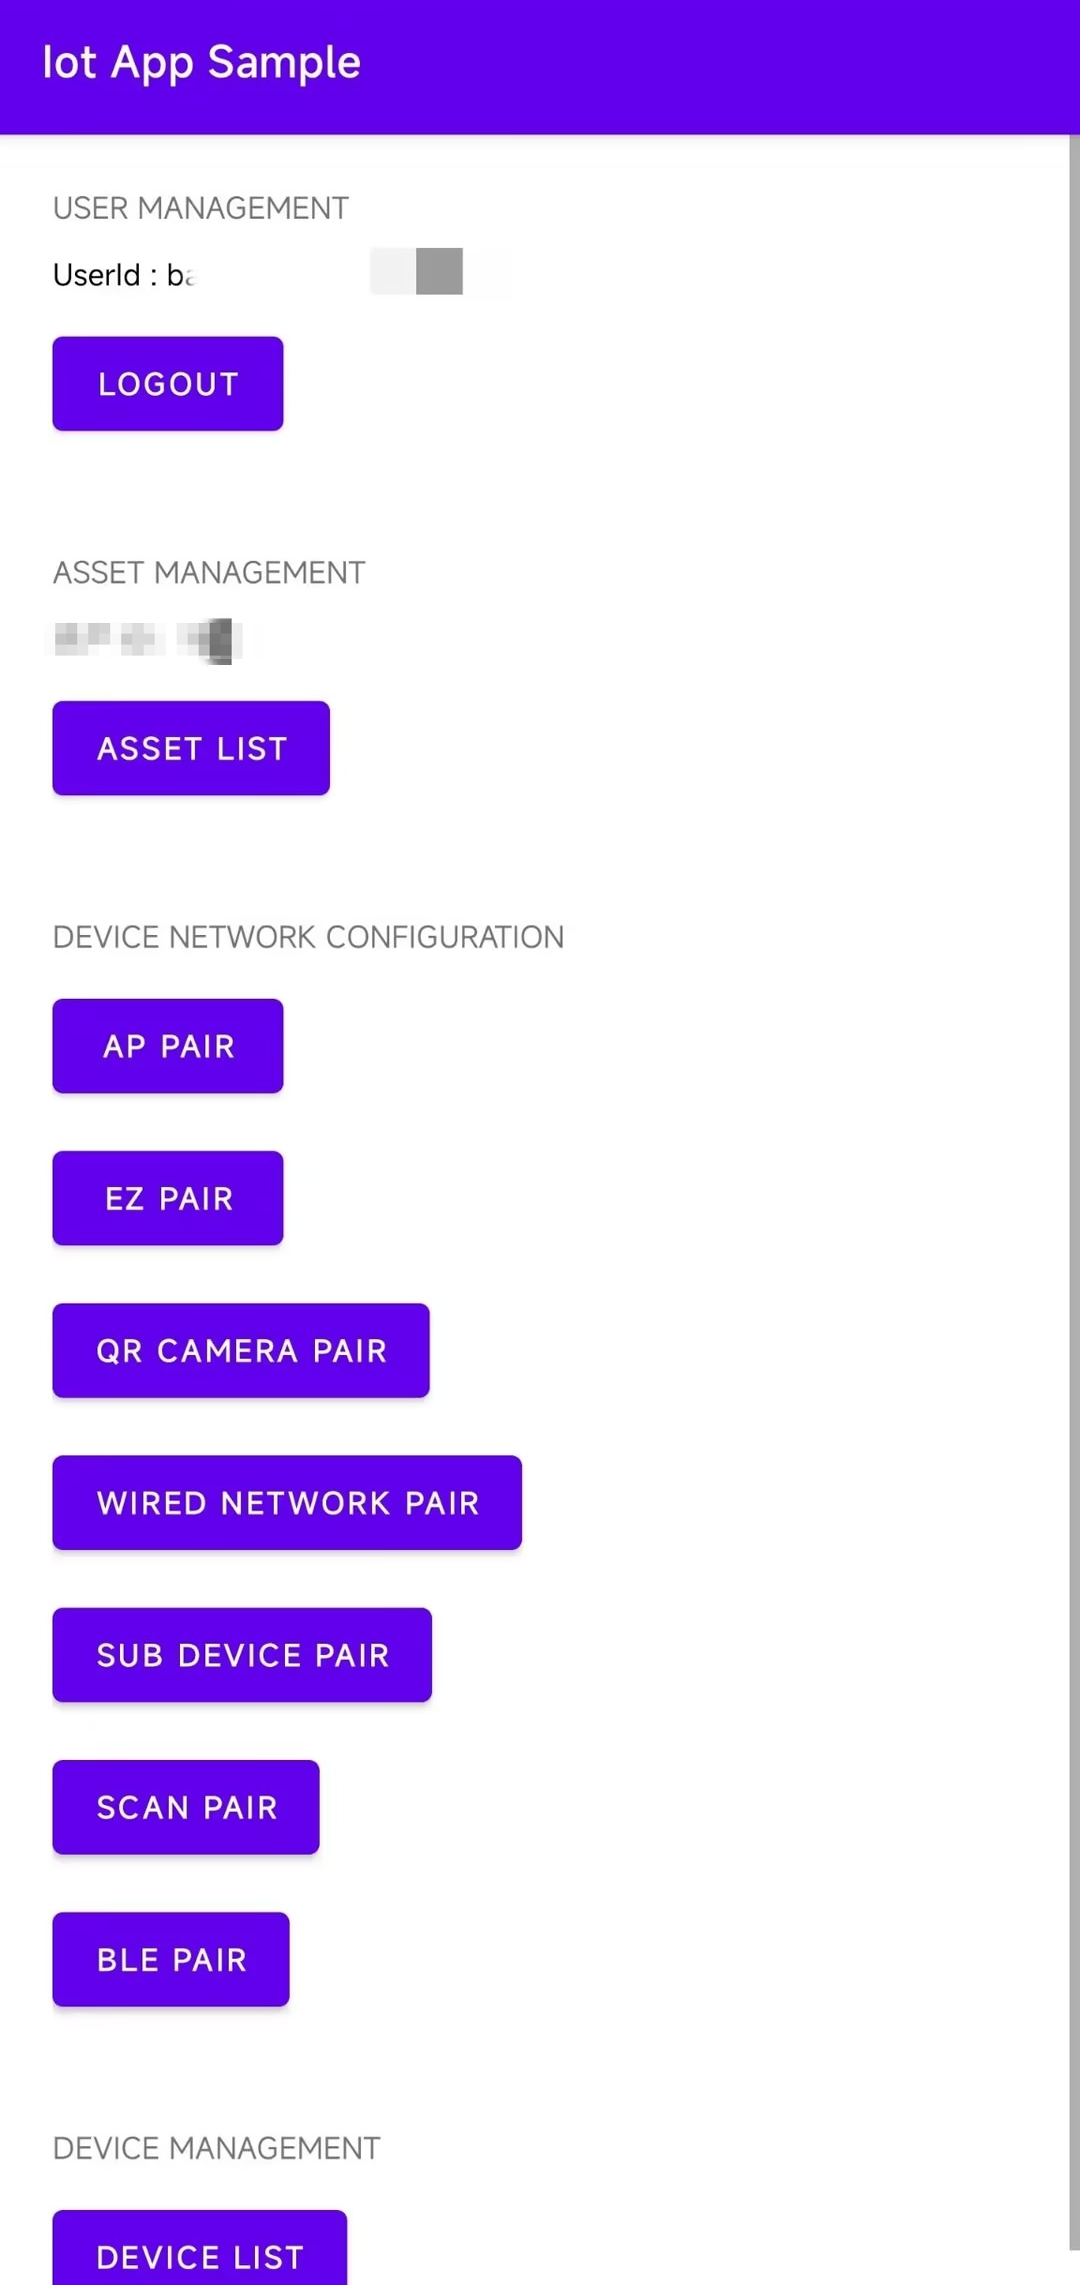
Feature overview
The demo app provides basic features such as registration, login, device pairing, and asset management. Tuya Spatial App SDK forms the backbone of the Tuya SaaS Development Framework. For more information, see the GitHub project tuya-android-iot-app-sdk-sample.
The demo app supports the following features:
-
User management: log in to and log out of the app
-
Asset management: query and select assets
-
Device pairing: Wi-Fi access point (AP) mode, Wi-Fi Easy Connect (EZ) mode, wired mode, Zigbee sub-device pairing, QR code mode, and QR code scanning to pair NB-IoT devices
-
Device management: query and unbind devices
Run the demo
-
According to the signature file of your project, configure
signingConfigsin thebuild.gradlefile of the project. ThestoreFilefile indicates the location where thexxx.jksfile is stored.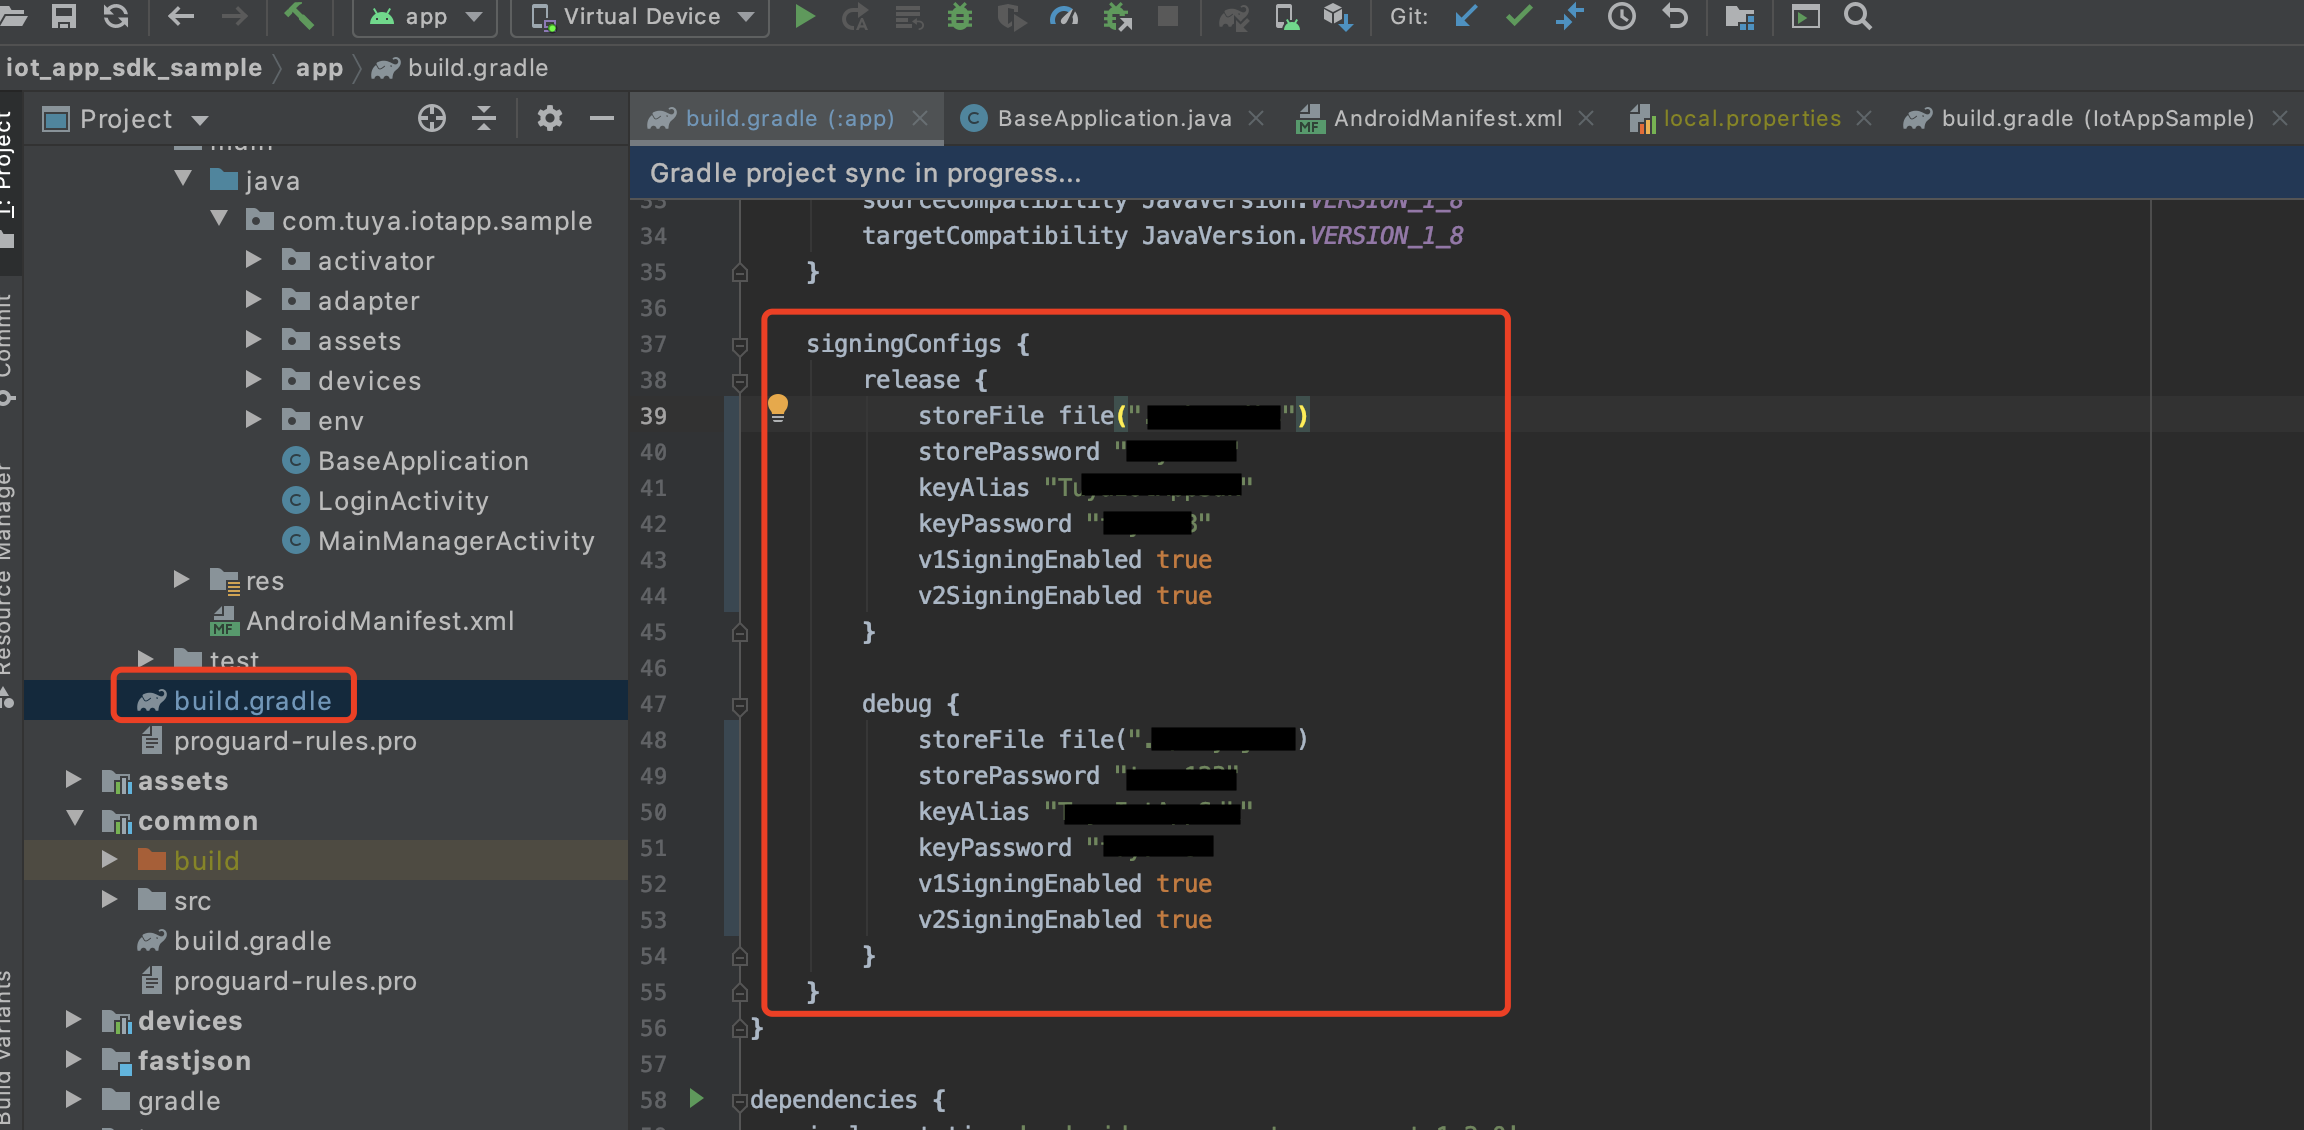
-
Choose
app>build.gradleand change the value ofapplicationIdto your app package name.
-
You have completed Step 3: Integrate with security component, Step 4: Set cloud project certificate signature and get Client ID and Client Secret, and Step 5: Set certificate signature and get AppKey and AppSecret.
-
Run the demo.
Is this page helpful?
YesFeedbackIs this page helpful?
YesFeedback


