Fast Integration
This topic describes how to integrate the Commercial Lighting App SDK for Android into your project.
Integrate with the SDK
- Before you start, make sure that you have performed the steps in Preparation.
- If you have not installed Android Studio, visit the Android Studio official website to download Android Studio.
Step 1: Create an Android project
Create a project in Android Studio.
Step 2: Configure build.gradle
Add dependencies downloaded in the preparation steps to the file build.gradle of the Android project.
android {
    defaultConfig {
        ndk {
            abiFilters "armeabi-v7a", "arm64-v8a"
        }
    }
    packagingOptions {
        pickFirst 'lib/*/libv8android.so'
        pickFirst 'lib/*/libv8wrapper.so'
        pickFirst 'lib/*/libc++_shared.so'
    }
}

 configurations.all {
        exclude group: "com.thingclips.smart" ,module: 'thingsmart-modularCampAnno'
 }

dependencies {
    implementation 'com.facebook.soloader:soloader:0.10.4'
    implementation 'com.alibaba:fastjson:1.1.67.android'
    implementation 'com.squareup.okhttp3:okhttp-urlconnection:3.14.9'
    implementation 'com.thingclips.smart:thingcommerciallightingsdk:2.8.1'
}
Add the Tuya IoT Maven repository URL to the build.gradle file in the root directory.
repositories {
   maven { url 'https://maven-other.tuya.com/repository/maven-releases/' }
   maven { url "https://maven-other.tuya.com/repository/maven-commercial-releases/" }
   maven { url 'https://jitpack.io' }
   google()
   mavenCentral()
   maven { url 'https://maven.aliyun.com/repository/public' }
   maven { url 'https://central.maven.org/maven2/' }
   maven { url 'https://oss.sonatype.org/content/repositories/snapshots/' }
   maven { url 'https://developer.huawei.com/repo/' }
}
Step 3: Integrate with security component
-
Go to SDK Development on the Tuya IoT Development Platform and open the target app. Go to the Get SDK tab, select one or more required SDKs or BizBundles, and then download the App SDK for iOS or Android.

-
Extract the downloaded package, put
security-algorithm.aarin thelibsdirectory of the project, and then make suredependenciesinbuild.gradleof your project include:implementation fileTree(include: ['*.aar'], dir: 'libs').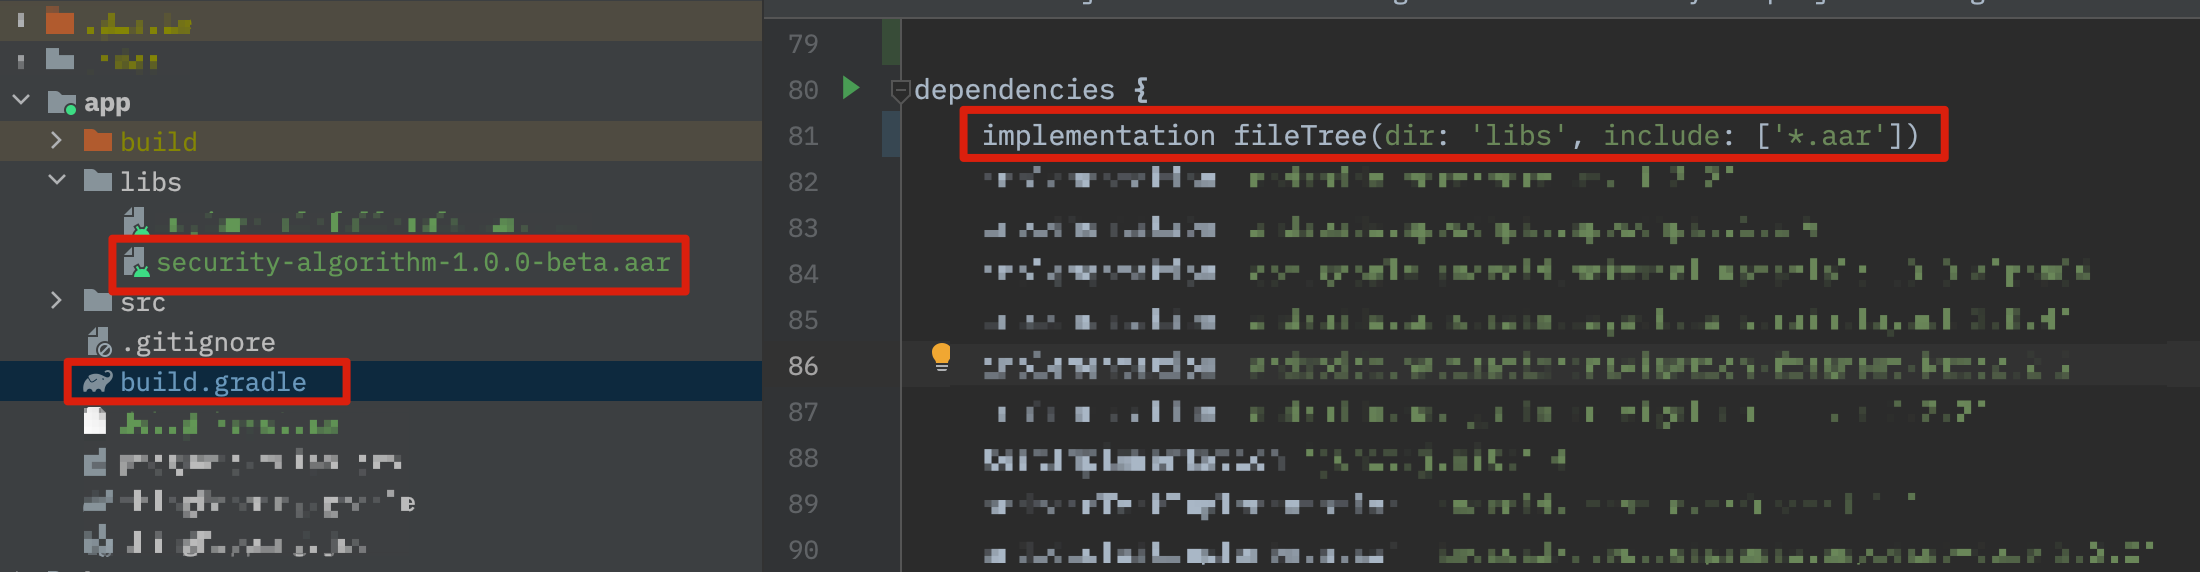
Step 4: Configure AppKey, AppSecret, and certificate signature
-
Go to SDK Development on the Tuya IoT Development Platform and open the target app.
-
In the Get Key tab, find
AppKeyandAppSecretand specify them in theAndroidManifest.xmlfile.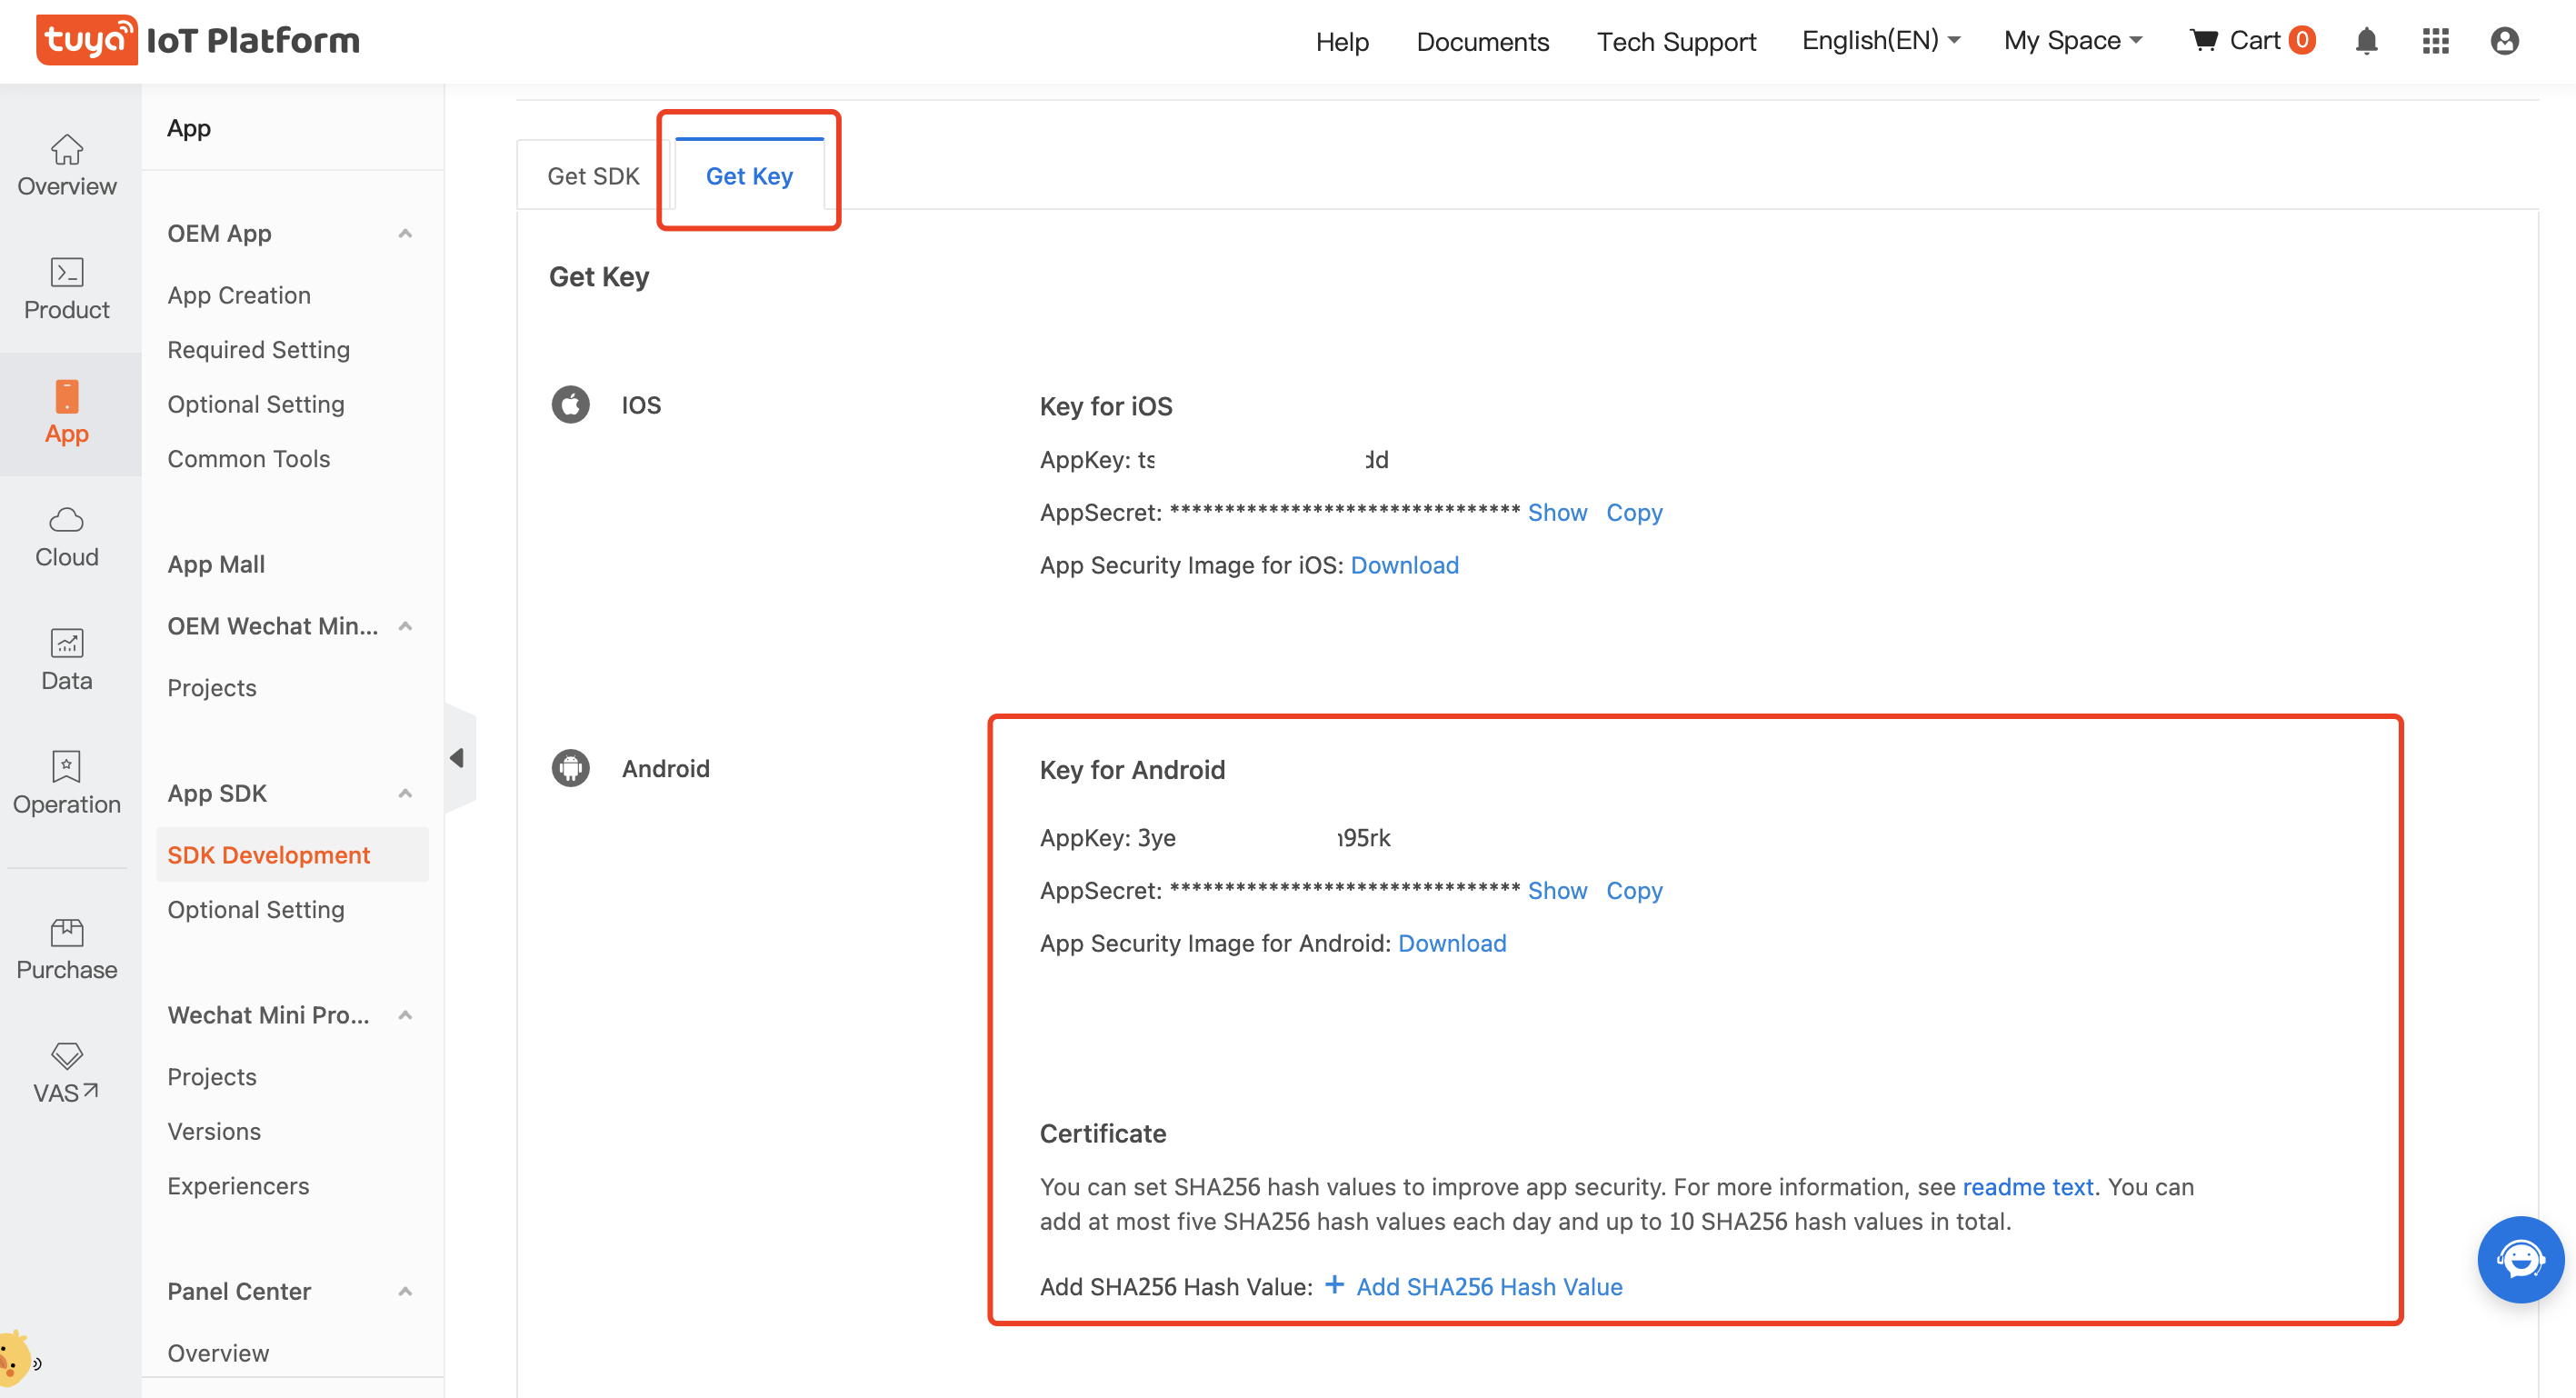
<meta-data android:name="THING_SMART_APPKEY" android:value="Appkey" /> <meta-data android:name="THING_SMART_SECRET" android:value="AppSecret" /> -
Configure the app certificate.
- Generate an SHA-256 hash value. For more information, see Android documentation and How to Get SHA-1 and SHA-256 Keys.
- Enter the SHA-256 key in the certificate.
Step 5: Obfuscate the code
Configure obfuscation in proguard-rules.pro.
#fastJson
-keep class com.alibaba.fastjson.**{*;}
-dontwarn com.alibaba.fastjson.**

#mqtt
-keep class com.thingclips.smart.mqttclient.mqttv3.** { *; }
-dontwarn com.thingclips.smart.mqttclient.mqttv3.**

#OkHttp3
-keep class okhttp3.** { *; }
-keep interface okhttp3.** { *; }
-dontwarn okhttp3.**

-keep class okio.** { *; }
-dontwarn okio.**

-keep class com.thingclips.**{*;}
-dontwarn com.thingclips.**

# Matter SDK
-keep class chip.** { *; }
-dontwarn chip.**

# Keep native methods
-keepclasseswithmembernames class * {
    native <methods>;
}
-keepclassmembers class * {
    native <methods>;
}
Step 6: Initialize the SDK
Initialize the SDK in the main thread of the Application. Make sure that all processes are initialized.
Example:
public class TuyaSmartApp extends Application {
    @Override
    public void onCreate() {
        super.onCreate();
        ThingSdk.init(this);
    }
}
Configure appKey and appSecret in AndroidManifest.xml, or set them during initialization.
ThingSdk.init(Application application, String appkey, String appSerect)
Step 7: Enable or disable logging
-
In debug mode, you can enable SDK logging to facilitate troubleshooting.
-
We recommend that you disable logging in release mode.
ThingSdk.setDebugMode(true);
Run the demo app
After you integrate with the SDK, you can get the AppKey and AppSecret. Make sure the AppKey and AppSecret are consistent with those used on the Tuya IoT Development Platform. Any mismatch will cause the SDK not to work properly. See Step 4: Configure AppKey, AppSecret, and certificate signature for details.
In the following example, a demo app is used to describe the process of developing with the SDK. Before the development of your app, we recommend that you run the demo app.
Feature overview
The demo app supports the following features:
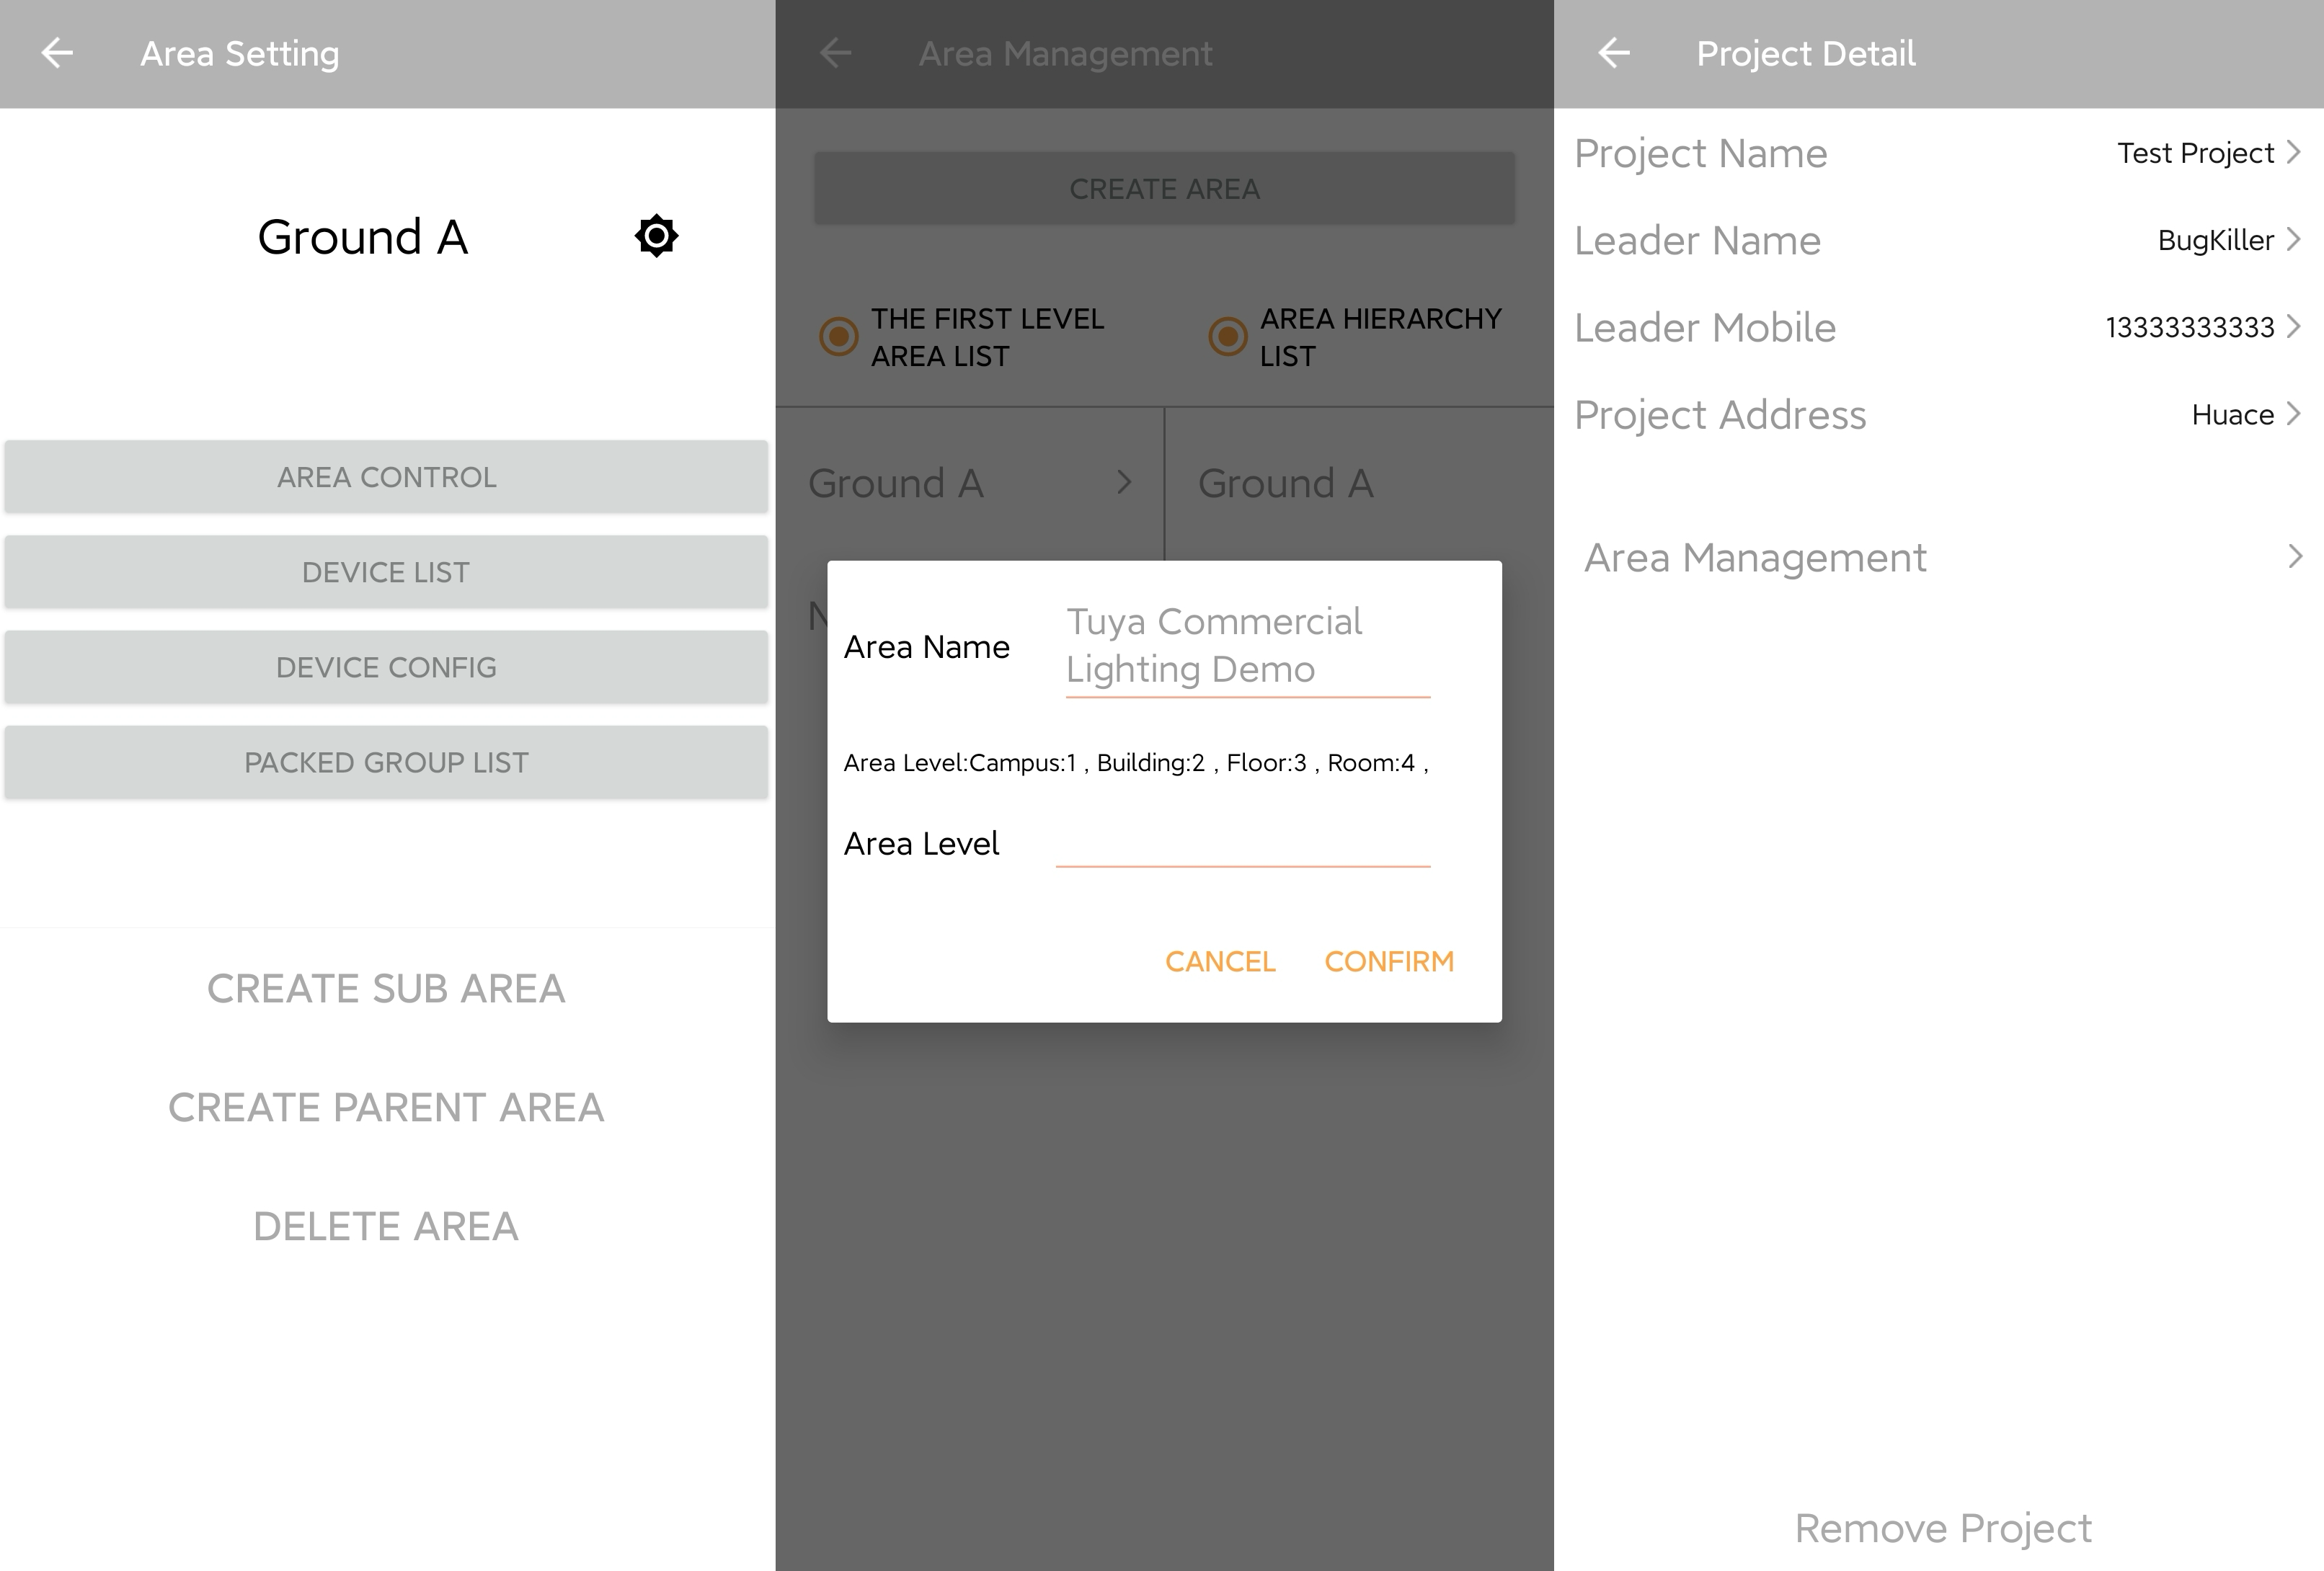
- Project management
- Area management
- Group management
- Account management
- Device pairing
- Device control
- Outdoor project
Demo app:
For more information, go to the GitHub repository.
Run the demo
-
Choose
app>build.gradleand change the value ofapplicationIdto your app package name.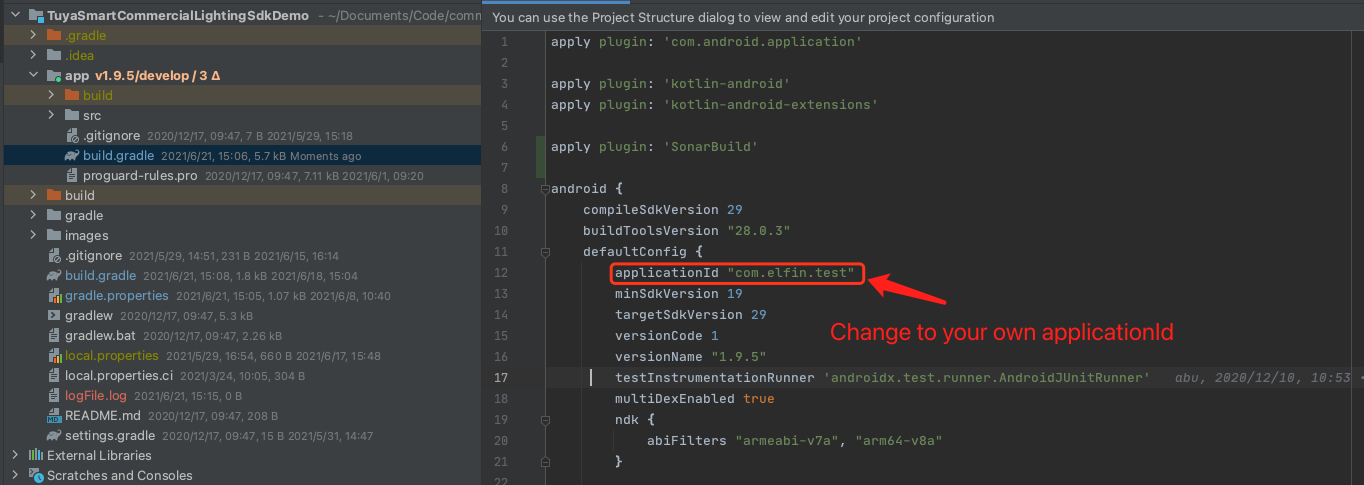
-
Make sure that you have completed Step 3: Integrate with security component and Step 4: Configure AppKey, AppSecret, and certificate signature.
-
Run the code.
Error: Permission Verification Failed
-
Problem: The following error message is thrown when you run the demo.
{ "success": false, "errorCode" : "SING_VALIDATE_FALED", "status" : "error", "errorMsg" : "Permission Verification Failed", "t" : 1583208740059 } -
Solution:
- Check whether the AppKey and AppSecret are correctly configured.
Is this page helpful?
YesFeedbackIs this page helpful?
YesFeedback


