Quick Start
This quick start guide describes how to develop a smart product on top of the MCU SDK.
Create product
Tuya Developer Platform provides one-stop services to help you in the development process from prototype to mass production.
Step 1: Create product
For more information about the detailed processes of product creation, see Create Products.
-
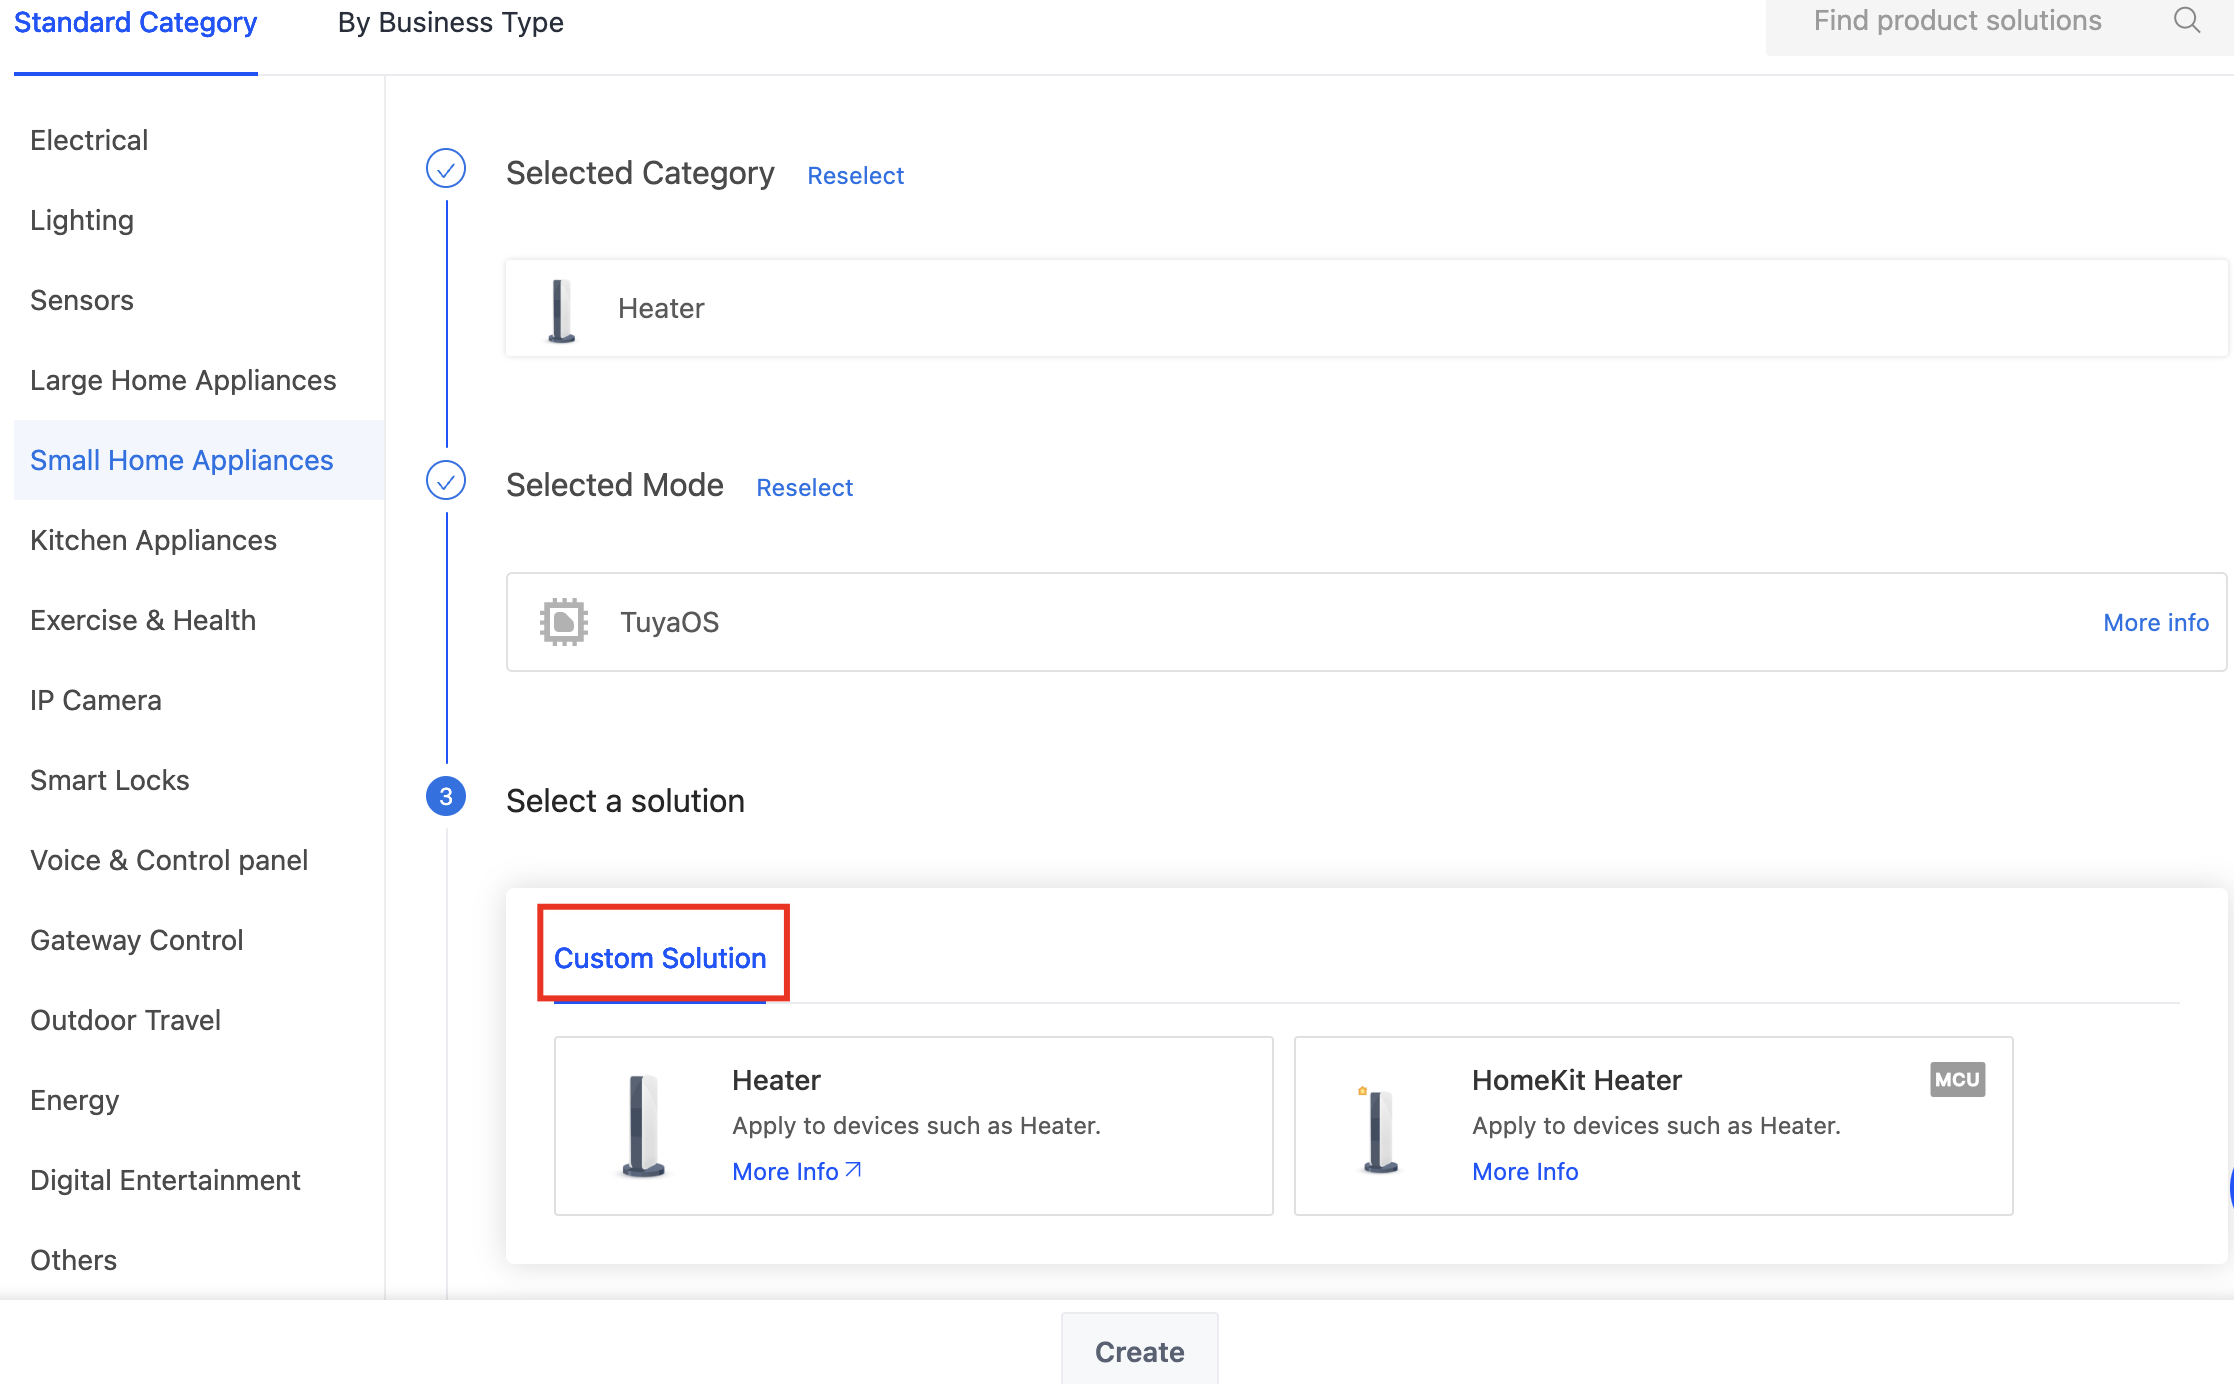
Select a product category in the Standard Category and choose TuyaOS for Smart Mode.

-
Select a Custom Solution. All products based on MCU SDK use a custom solution.
-
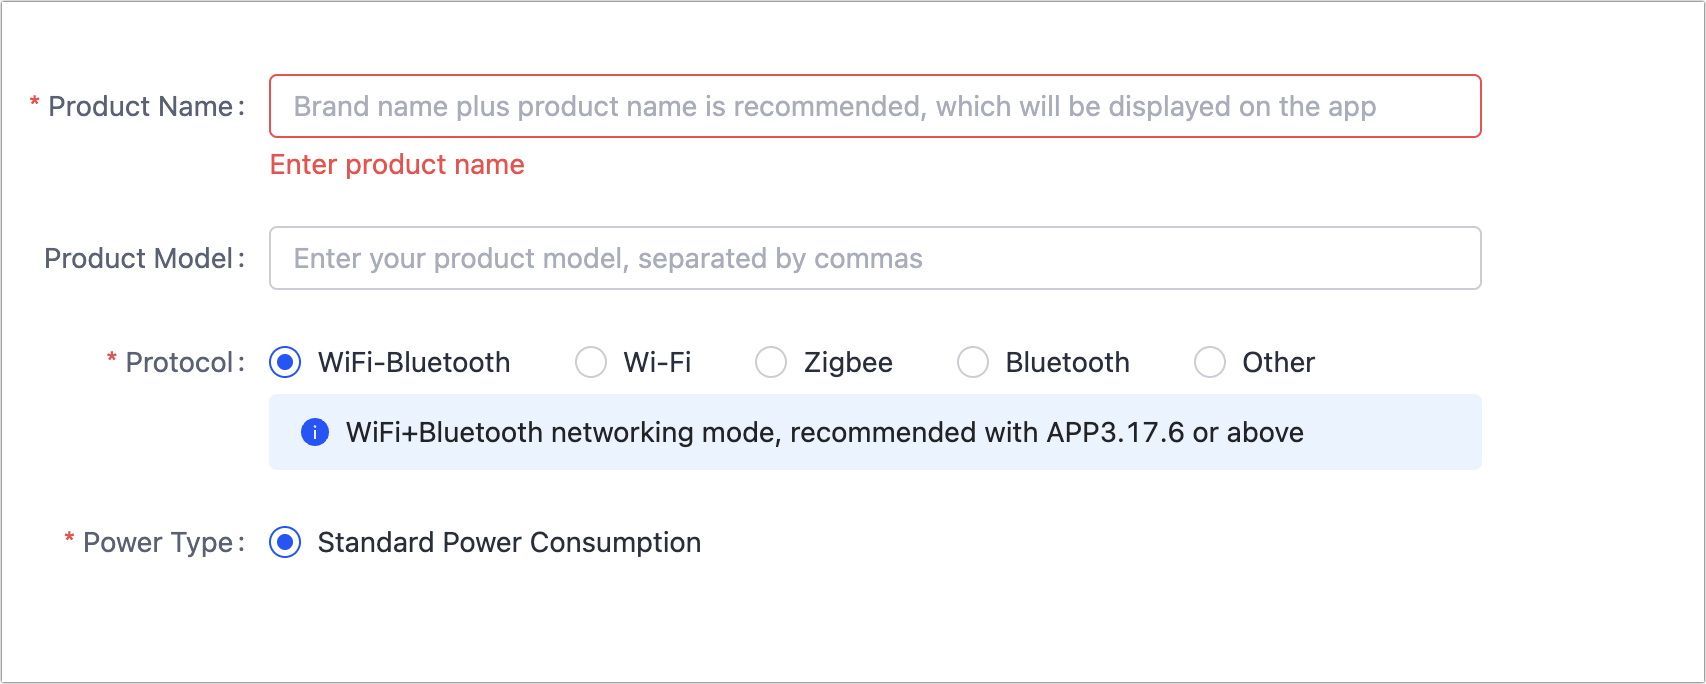
Complete the information about the product name, (optional) product model, protocol, and power type.
-
Protocol: Select a suitable protocol from Wi-Fi, Wi-Fi and Bluetooth combo, Bluetooth, Bluetooth mesh, Zigbee, NB-IoT, LTE Cat.1, and Tuya beacon.
-
Power type: Choose standard power consumption for common devices, and opt for either standard or low power for sensors and security devices.
-
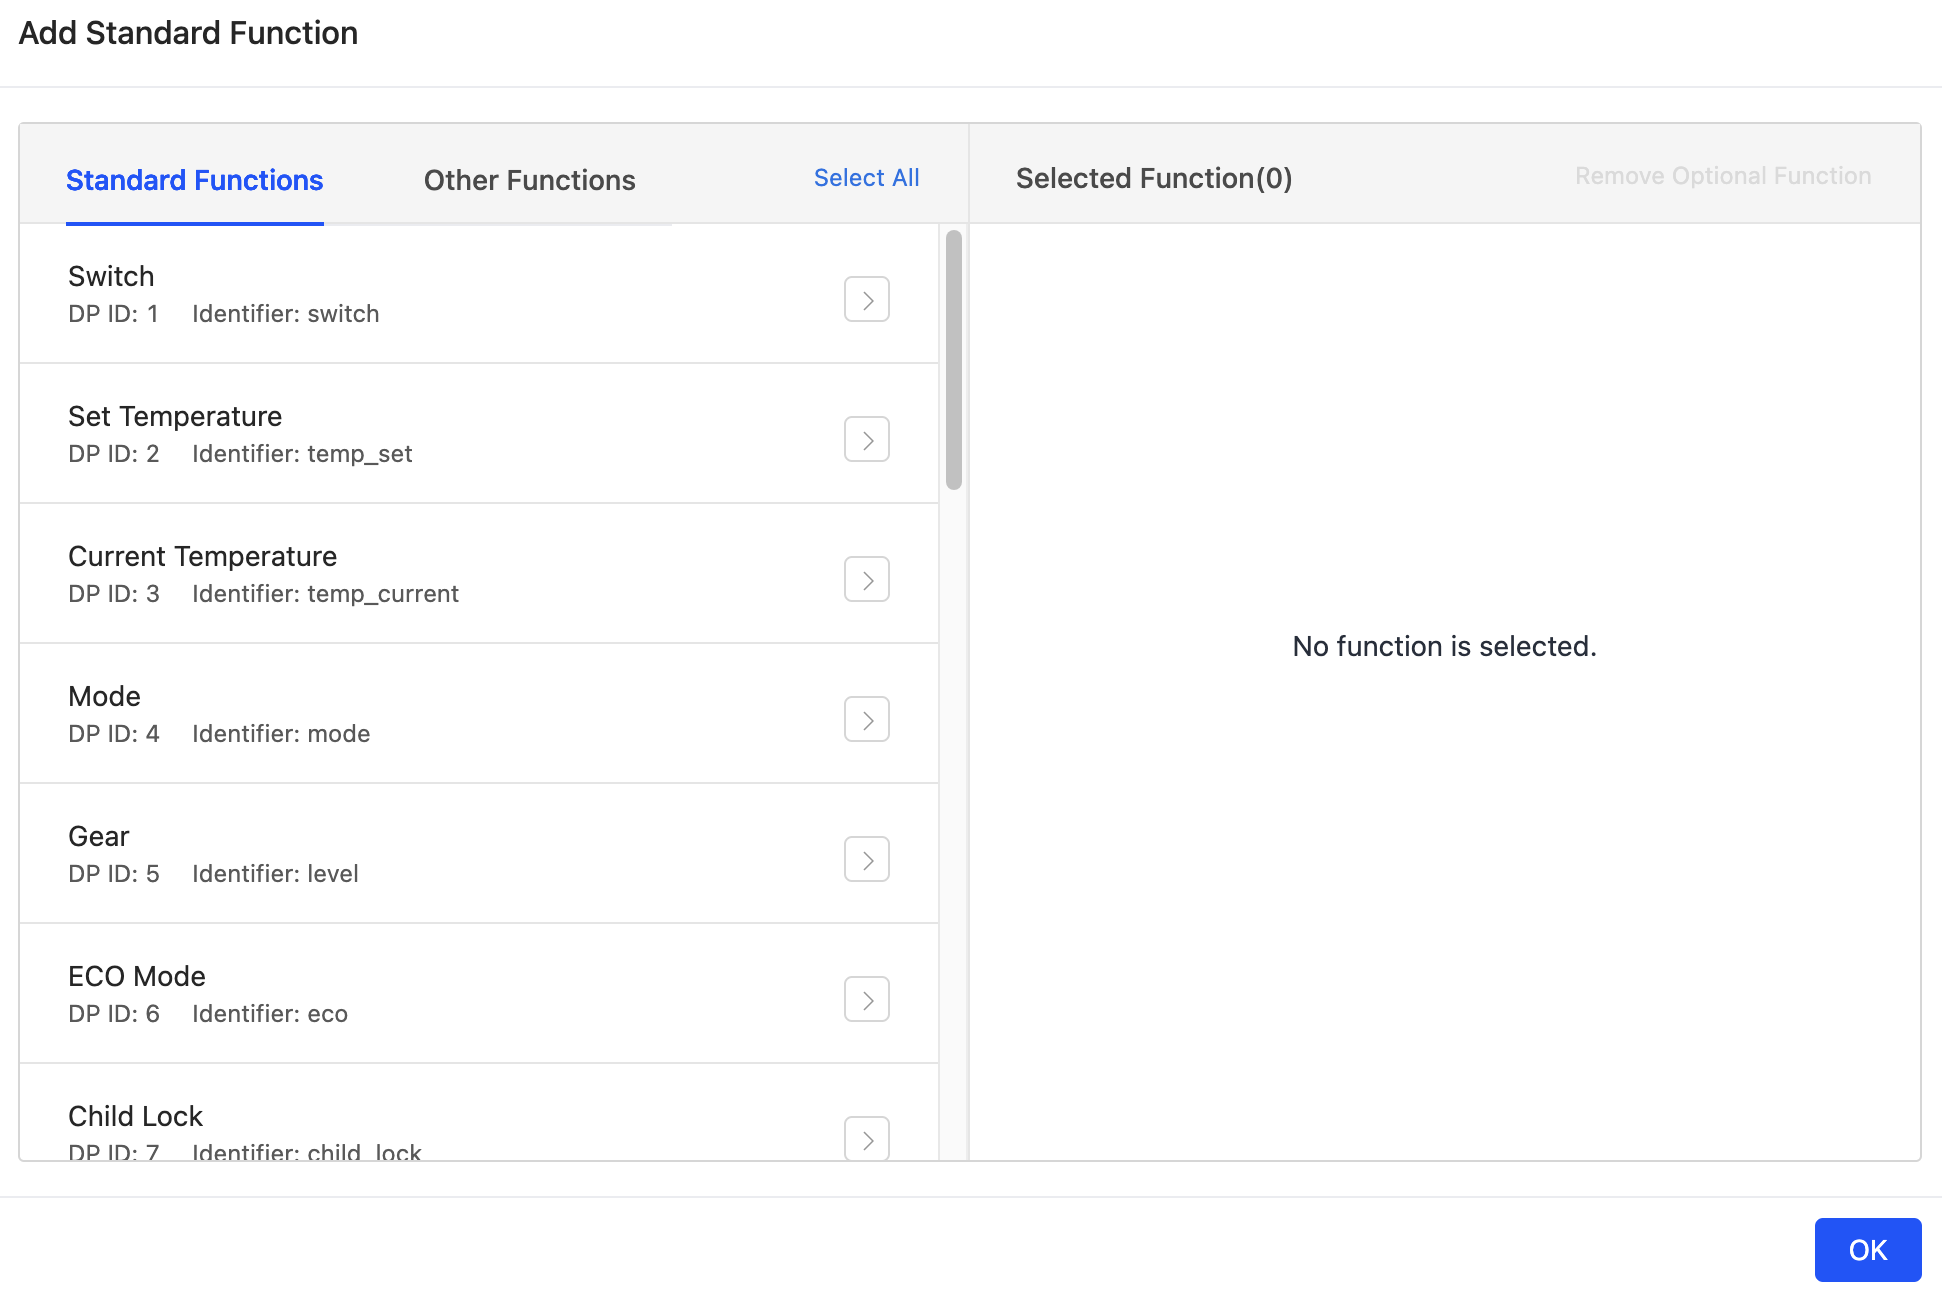
Step 2: Define functions
For more information about how to define functions, see Product Functions.
A data point (DP) is an abstract representation of a product function. Tuya provides all products with standard DPs. You can select DPs based on your requirements. If the standard functions do not meet your needs, you can add a custom function.
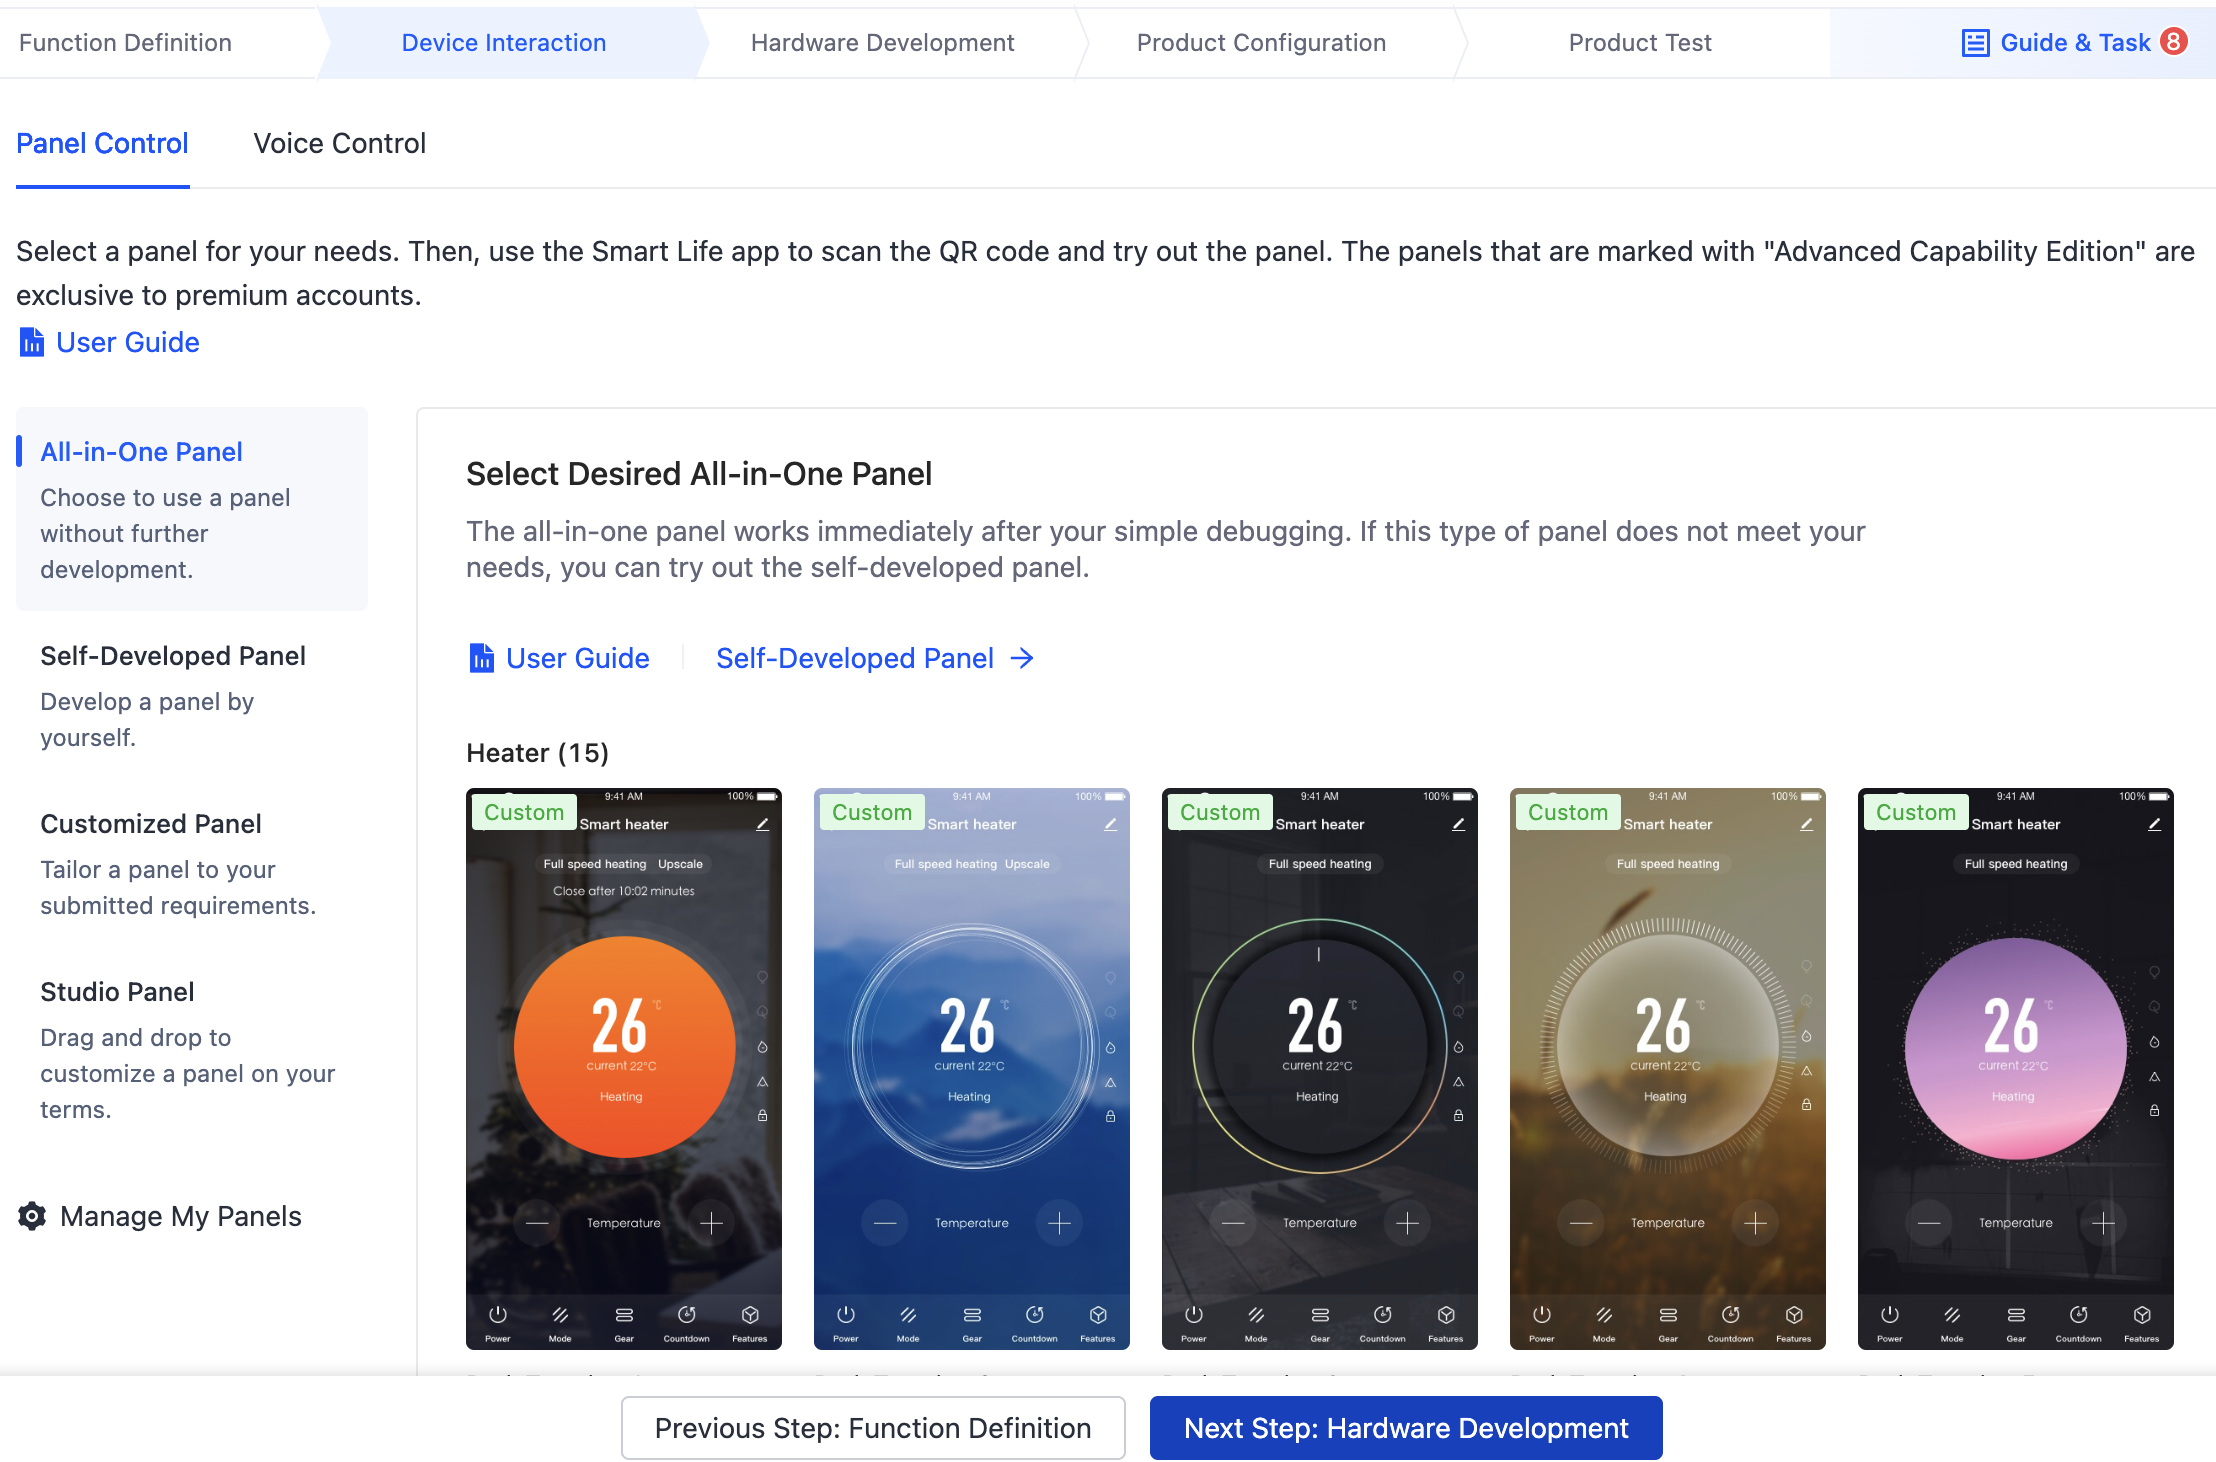
Step 3: Select panel
The interface on the mobile app for users to interact with a smart device is called a panel. Tuya provides a variety of free all-in-one panels that also support personalized editing. For more information, see Design App UI.
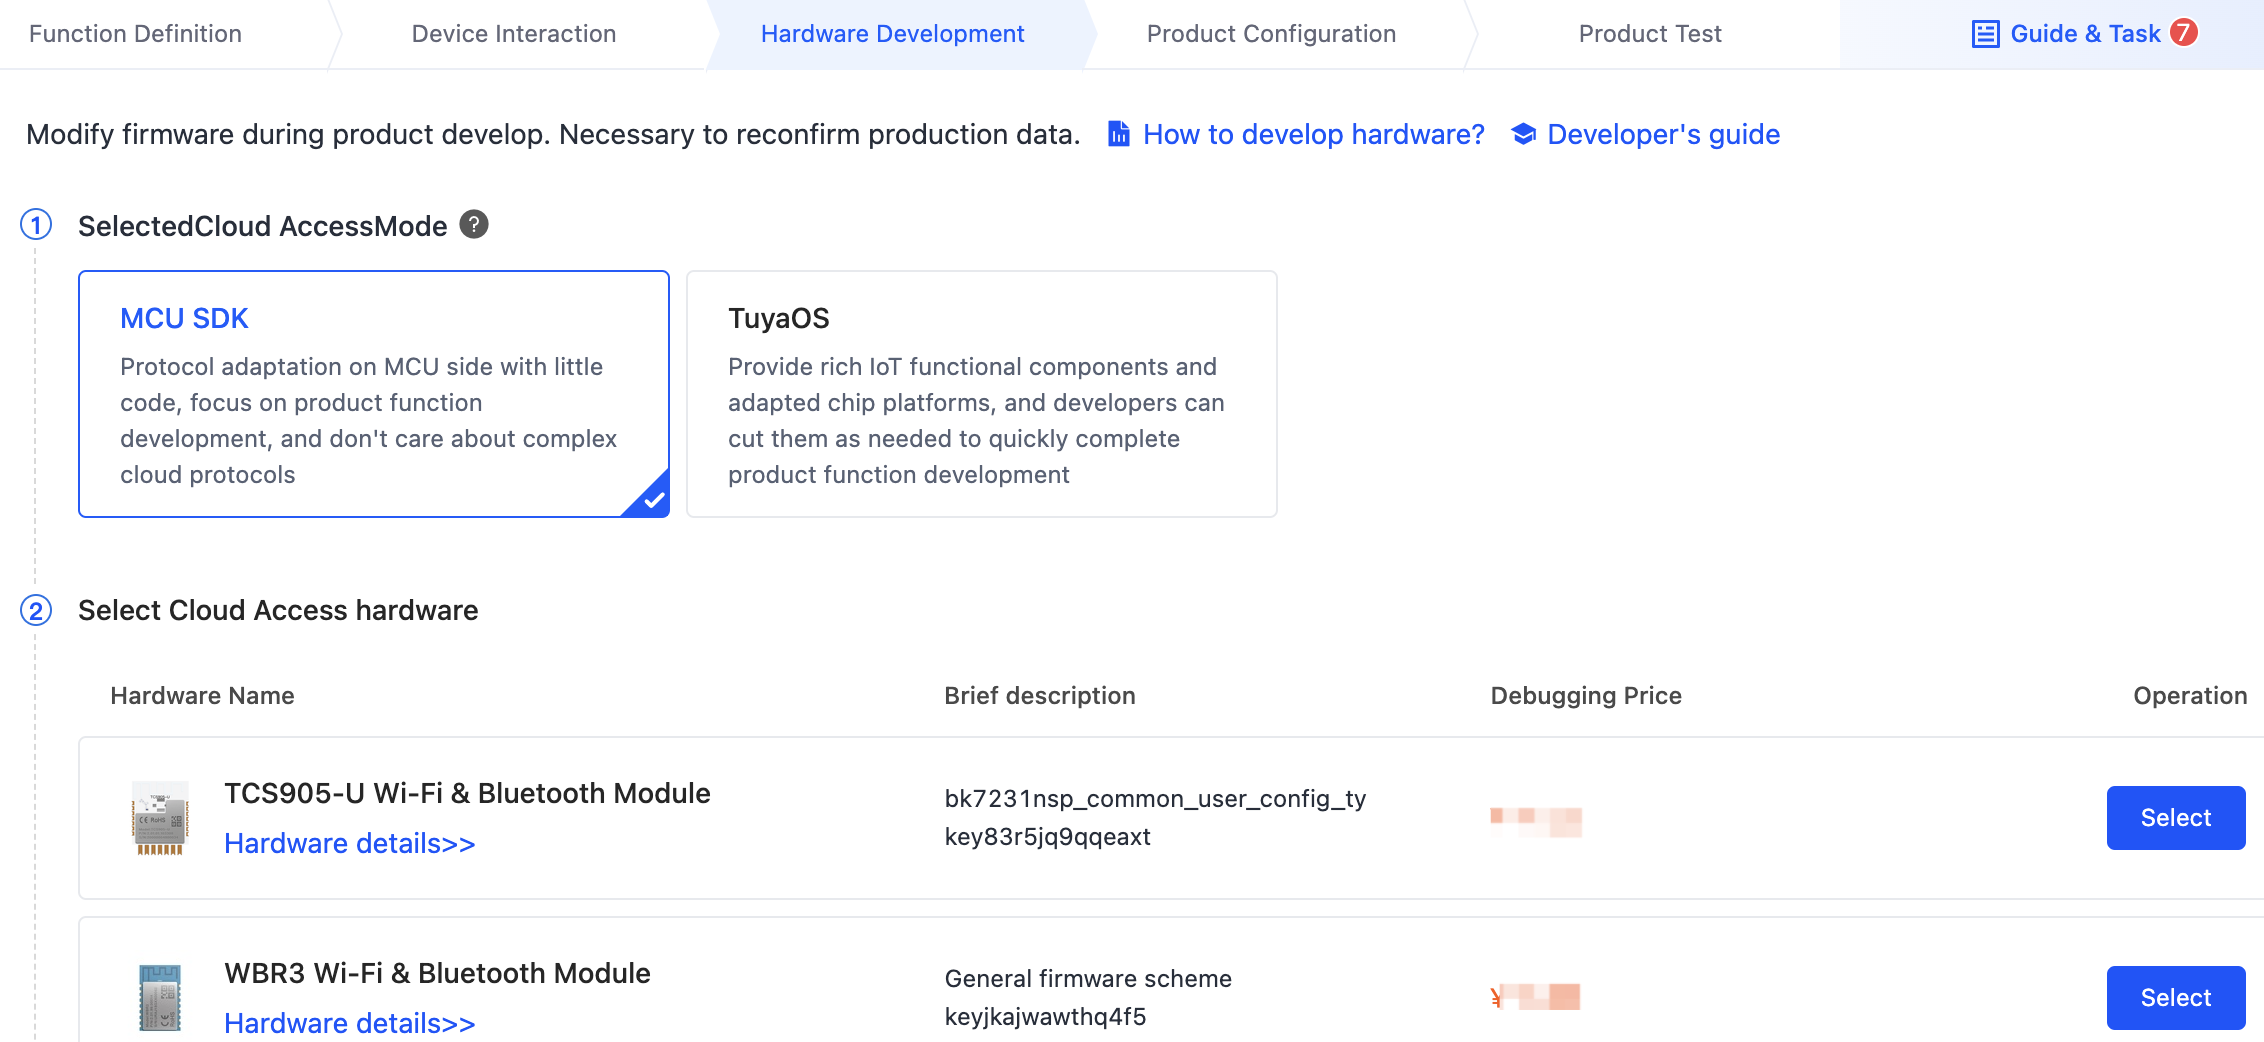
Step 4: Develop hardware
-
MCU SDK and TuyaOS are the two approaches to custom development. To integrate with the MCU standard protocol, choose MCU SDK.
-
Select hardware. The platform provides you with recommended modules for your chosen protocol. You can place an order for the modules online. You can also change the selected modules online as needed. For more information, see Module Datasheet.
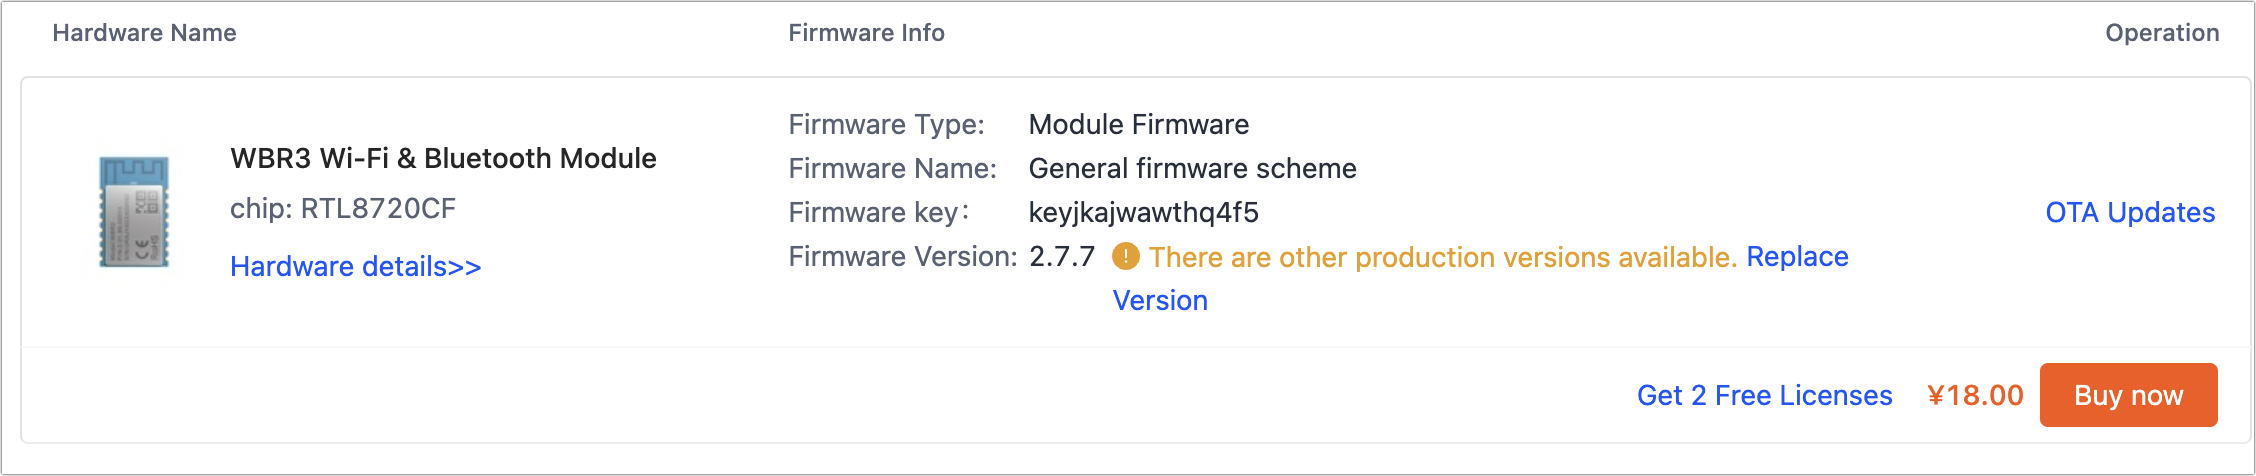
Select a module to show the firmware information. You can Replace Version to choose another firmware version.
-
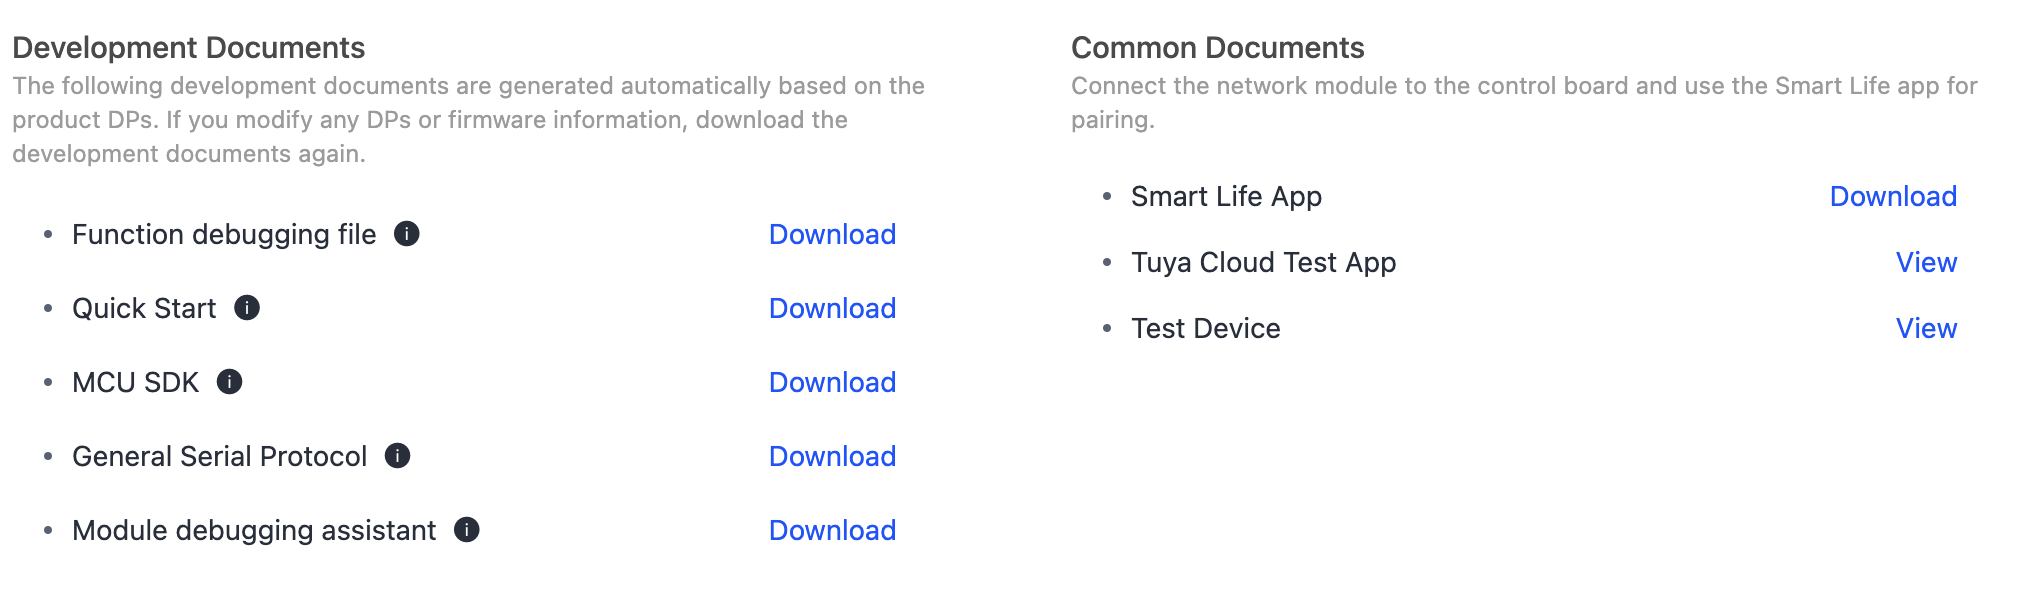
Download development documents.
-
Function debugging file: A file contains information about the product ID (PID) and data points (DPs), used with the debugging assistant.
-
Quick start: A serial communication protocol is automatically generated based on the defined DPs.
-
MCU SDK: The code in C is automatically generated based on the defined DPs. The SDK has implemented the communication architecture and protocol parsing, allowing you to directly import it to your project to proceed with application development.
-
General serial protocol: A protocol automatically generated based on the defined DPs.
-
Module debugging assistant: An integral debugger used to verify the serial communication between the MCU and the module.
-
Develop and debug
After a product is created, you can purchase a sample module, download the SDK, and start programming and debugging.
Step 1: Debug hardware
After you get the sample module, you can build a minimal system to learn how the communication between the MCU, module, and the cloud works as well as the pairing process. For more information, see the following documentation.
Step 2: Debug software
If your MCU has sufficient resources, we recommend you port the MCU SDK for efficiency purposes. You only need to implement the serial communication and the required applications without taking care of the protocol infrastructure. The requirements for MCU resources vary depending on the SDKs. Take the Wi-Fi MCU SDK as an example. Its requirements for hardware resources are as follows.
- 4 KB flash memory.
- About 100 bytes of the RAM, depending on the data length of the DP.
- If you enable OTA updates, it must be greater than 260 bytes. 9-level nested function.
If your MCU does not have sufficient resources, you can refer to the functions in the SDK for interfacing with Tuya’s protocol. For more information, see MCU SDK Porting.
Step 3: Debug functionality
If you get errors, you can view the device logs on the Tuya Developer Platform to locate problems. For more information, see Device Log Service.
If the documentation cannot resolve your questions, you can submit a ticket to request technical support. For more information, see Service and Support.
Is this page helpful?
YesFeedbackIs this page helpful?
YesFeedback


