BizBundle SDK Development Tutorial
This topic provides a step-by-step guide on integrating with the BizBundle SDK. With just a few lines of code, you can create a simple app that enables interaction between home members, homes, and devices.
Preparation
Before you begin, get the environment ready.
- Xcode 14.1 or later
- Apple Developer account
- If you integrate the SDK using CocoaPods, make sure that CocoaPods is installed. See Getting Started for the installation instructions.
- An iPhone running iOS 11 or later.
- An available SmartLife App SDK project. Create an app on the Tuya Developer Platform. For more information, see Preparation.
- Get the
AppKeyandAppSecretof the SDK. - Keep the file extracted from
ios_core_sdk.tar.gzsafe. - Bundle ID for iOS.
- Get the
Create a project
Create an Xcode project by following the steps below.
- See Create a project and create a project. Choose App for Application, Storyboard for Interface, Swift for Language, and set the Bundle Identifier to the bundle ID of the iOS app you created on the Tuya Developer Platform.
- Set the Automatic Signing for your project.
- Set the Deployment Target for your app.
- In the
info.plistfile, add the required permissions.
Integrate the SDK
- Integrate the Tuya SmartLife App SDK into your project using CocoaPods. For more information, see Integrate SmartLife App SDK.
- Integrate the BizBundle SDK into your project using CocoaPods. For more information, see Integrate BizBundle SDK.
Implementation process
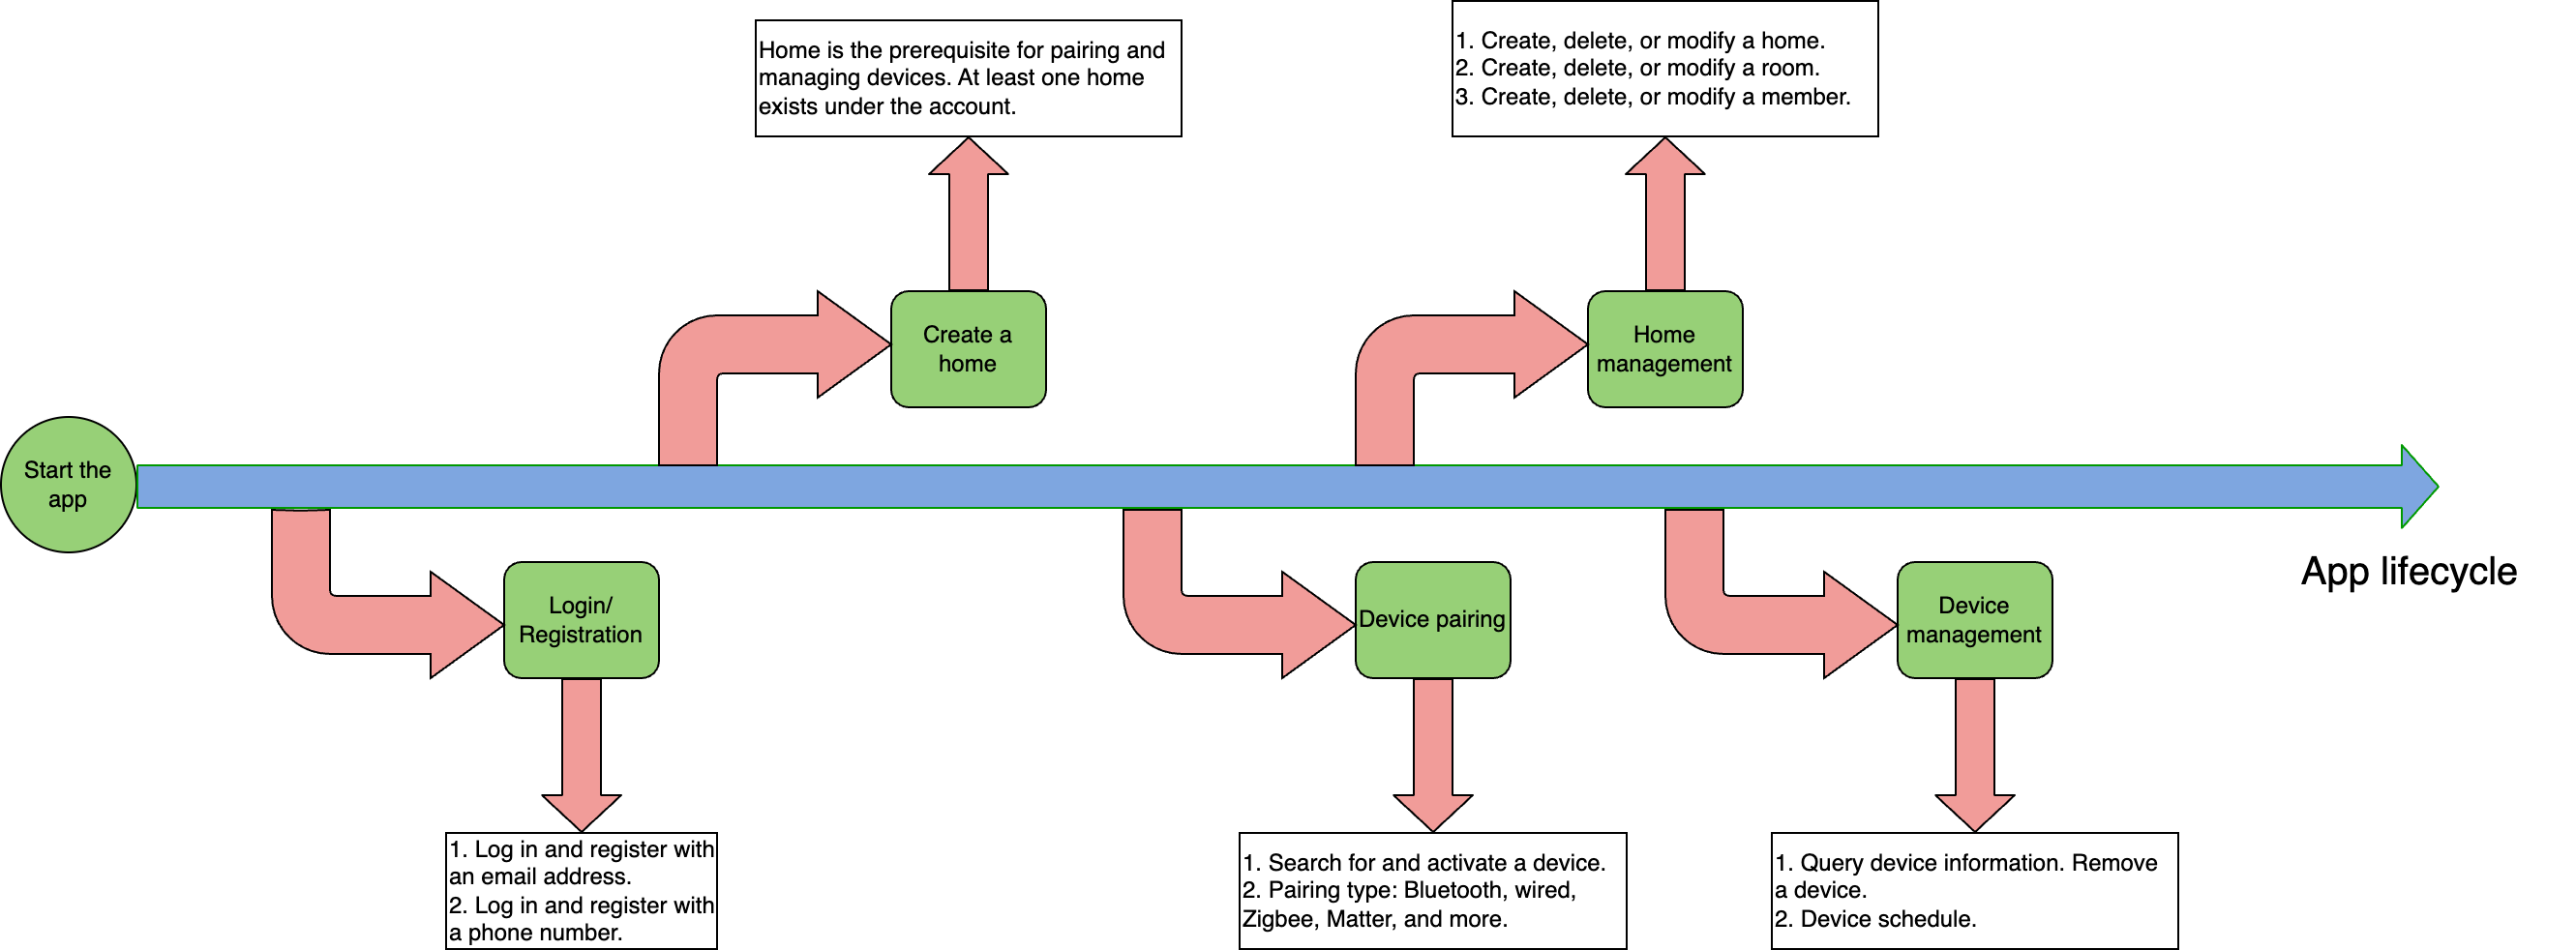
Startup process
Initialize the app in application:didFinishLaunchingWithOptions:.
-
Initialize
ThingSmartSDKwith theAppKeyandAppSecretgenerated on the Tuya Developer Platform. -
Initialize
ThingSmartBusinessExtensionKit. -
To support Matter devices, integrate the Matter SDK into your project using CocoaPods. For more information, see Matter Device.
-
Load the current home. If no home is selected, the first home will be loaded. If
appGroupNameexists, pass in theappGroupNameof your project. -
After the app is launched, check if the user is already logged in. If the user is already logged in, open the app’s homepage. Otherwise, navigate the user to the login and registration page.
func application(_ application: UIApplication, didFinishLaunchingWithOptions launchOptions: [UIApplication.LaunchOptionsKey: Any]?) -> Bool {
    // Initialize ThingSmartSDK
    ThingSmartSDK.sharedInstance().start(withAppKey: AppKey.appKey, secretKey: AppKey.secretKey)

    // Initialize ThingSmartBusinessExtensionKit
    ThingSmartBusinessExtensionConfig.setupConfig()

    // Set your Matter Group ID if your app supports Matter
    ThingSmartMatterActivatorConfig.setMatterKey("your_group_id")

    // Load the last current home info
    ThingSmartFamilyBiz.sharedInstance().launchCurrentFamily(withAppGroupName: "your_app_group_name")

    window = UIWindow(frame: UIScreen.main.bounds)

    if #available(iOS 13.0, *) {
        // Go into scene delegate
    } else {
        if ThingSmartUser.sharedInstance().isLogin {
            // User has already logged. Launch the app with the main view controller.
            let storyboard = UIStoryboard(name: "ThingSmartMain", bundle: nil)
            let vc = storyboard.instantiateInitialViewController()
            window?.rootViewController = vc
            window?.makeKeyAndVisible()
        } else {
            // There's no user logged. Launch the app with the login and register view controller.
            let storyboard = UIStoryboard(name: "Main", bundle: nil)
            let vc = storyboard.instantiateInitialViewController()
            window?.rootViewController = vc
            window?.makeKeyAndVisible()
        }
    }

    return true
}
User registration and login
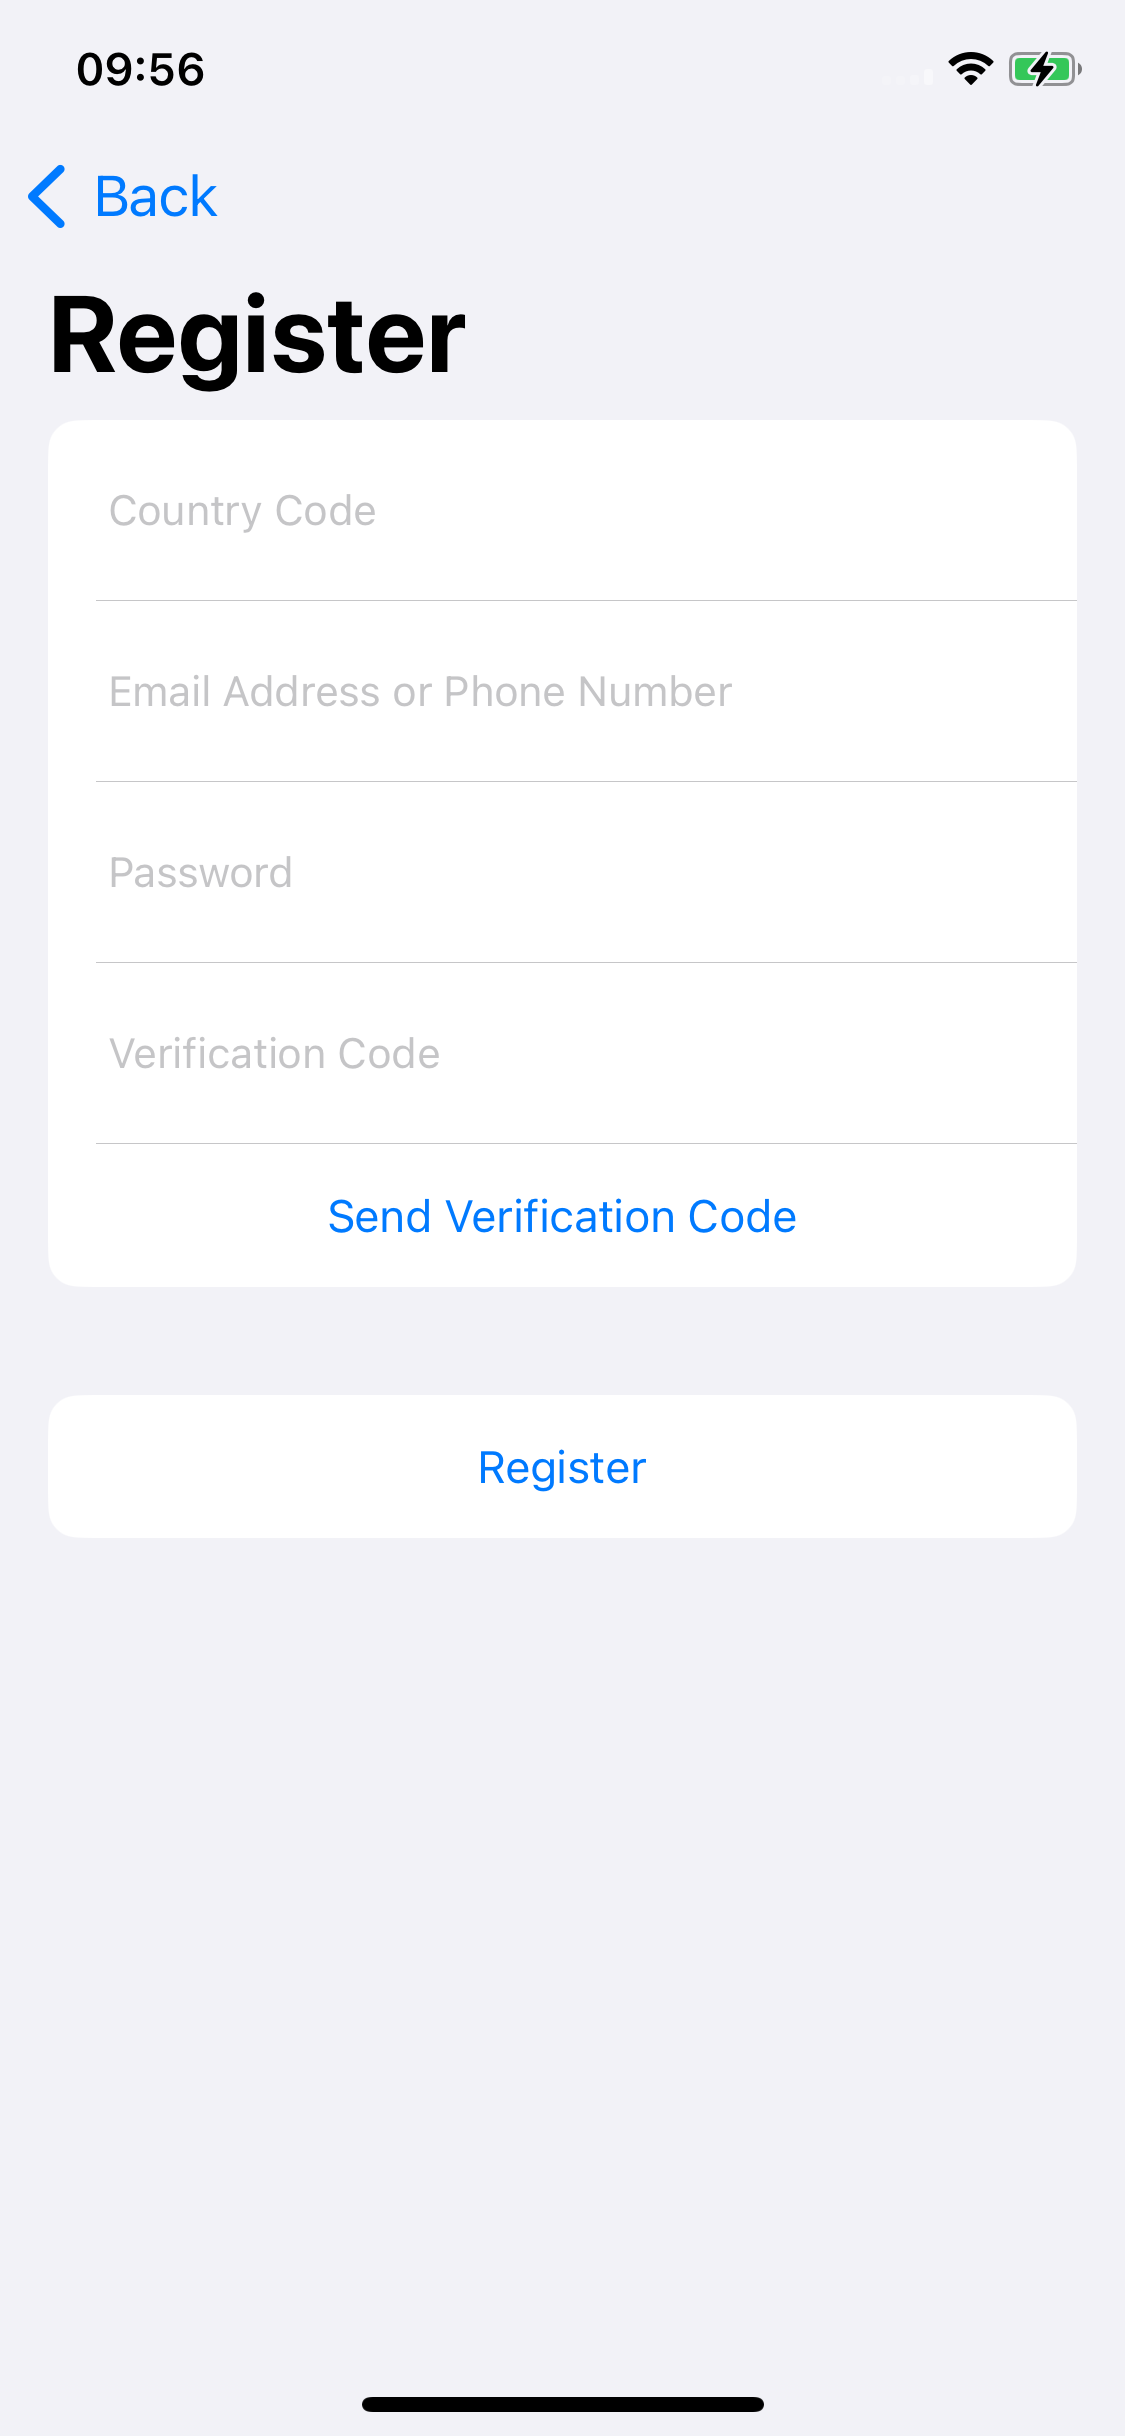
Create a login and registration pages Login.storyboard and Register.storyboard, as shown below.
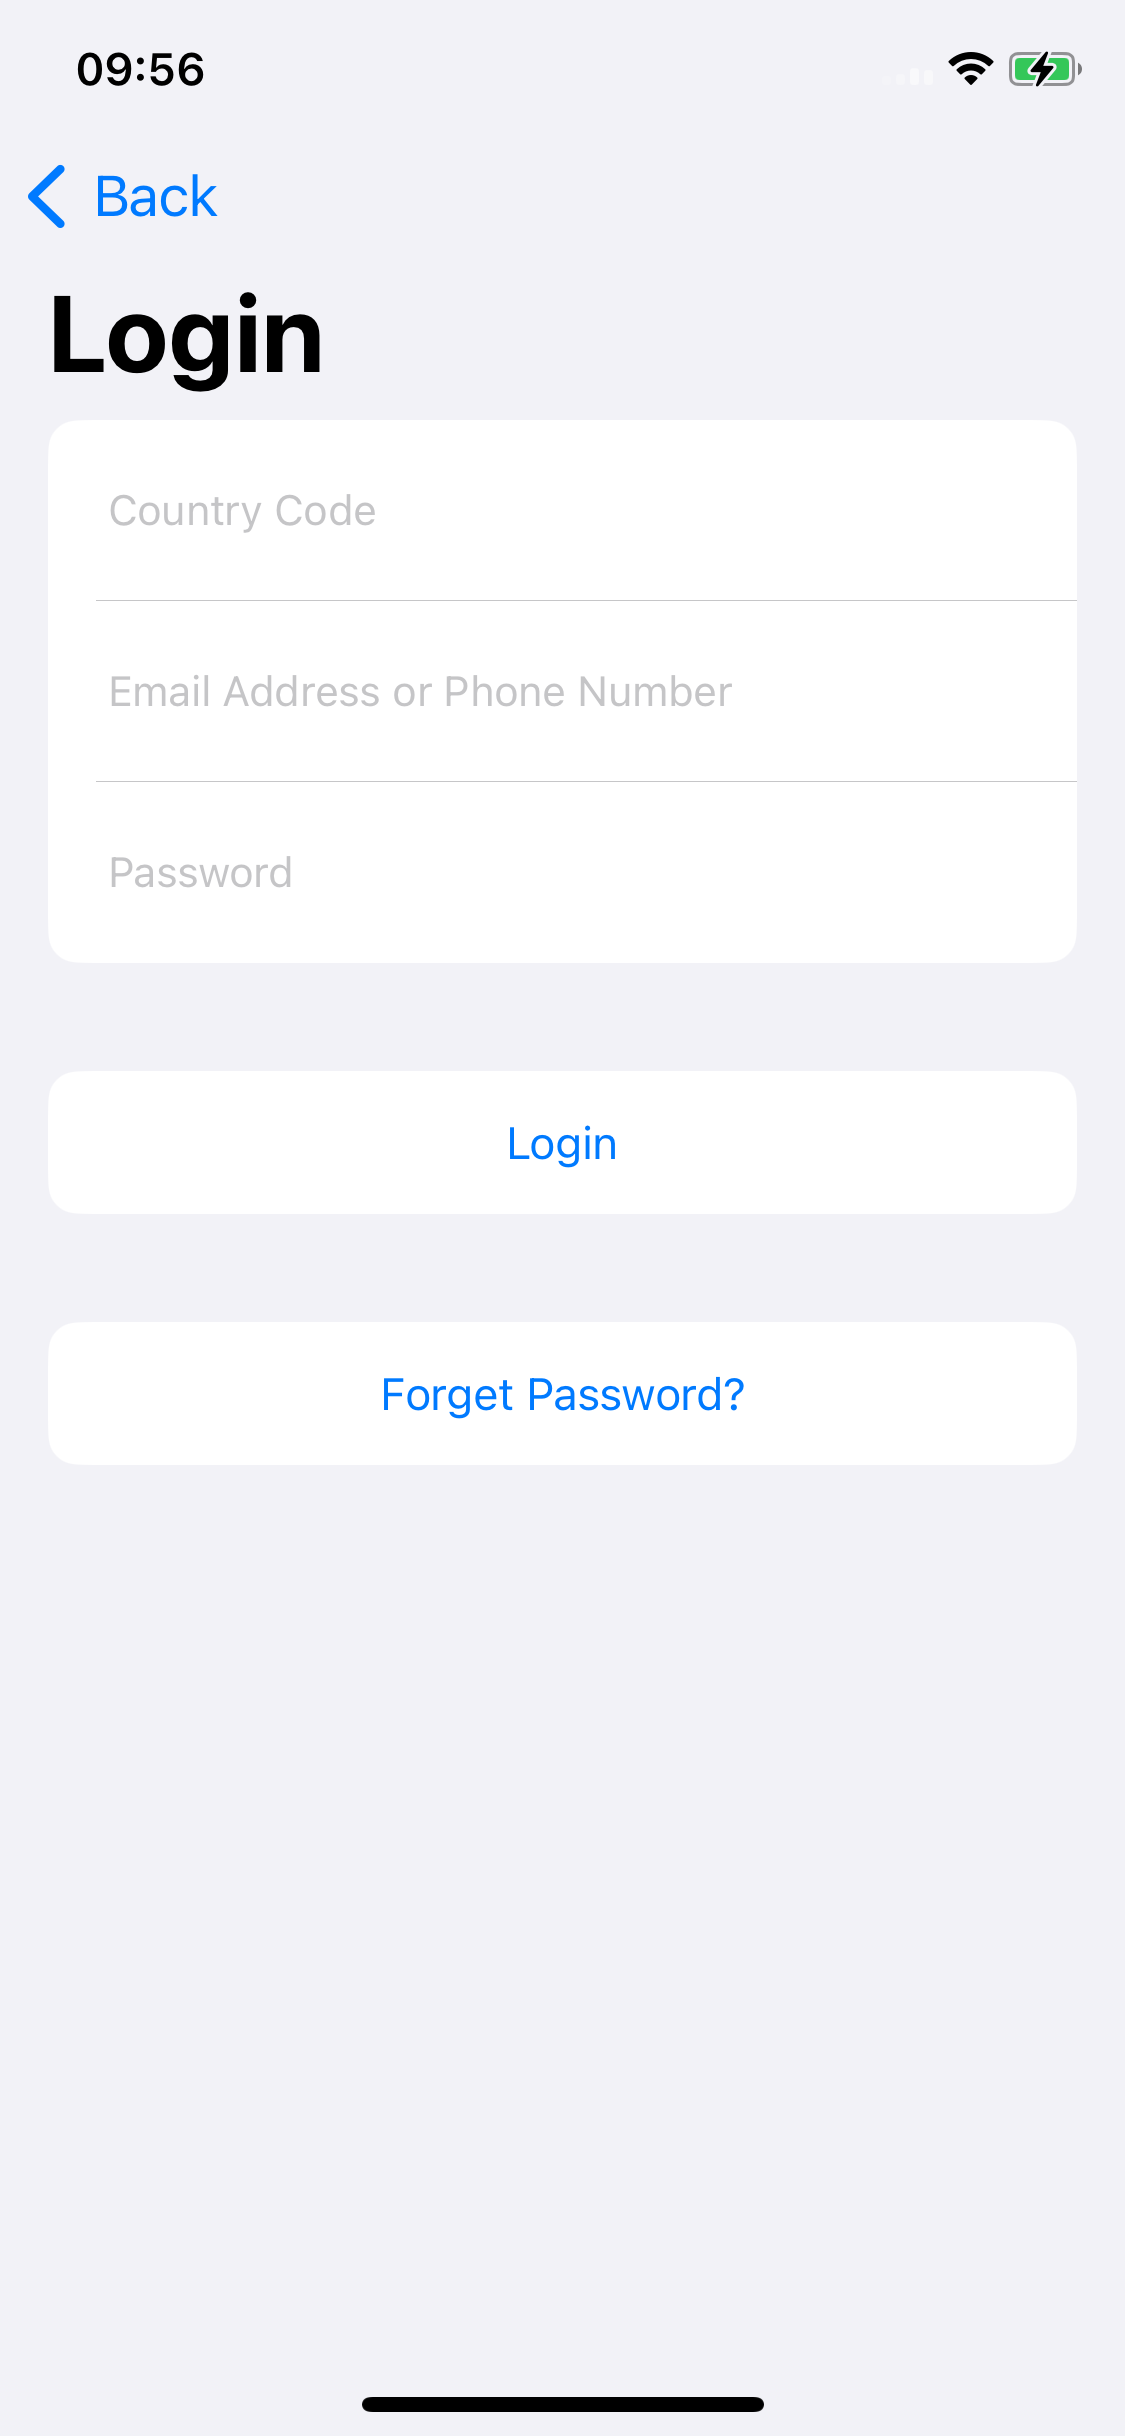
-
After users enter their account and password and tap Log in, call
ThingSmartUser.login. Successful login will direct users to the app’s homepage.ThingSmartUser.sharedInstance().login(byPhone: countryCode, phoneNumber: account, password: password) { [weak self] in guard let self = self else { return } let storyboard = UIStoryboard(name: "ThingSmartMain", bundle: nil) let vc = storyboard.instantiateInitialViewController() self.window?.rootViewController = vc } failure: { [weak self] (error) in guard let self = self else { return } Alert.showBasicAlert(on: self, with: NSLocalizedString("Failed to Login", comment: ""), message: error?.localizedDescription ?? "") } -
After users enter their account, password, and verification code and tap Log in, call
ThingSmartUser.register. Successful registration will direct users to the app’s homepage.ThingSmartUser.sharedInstance().register(byPhone: countryCode, phoneNumber: account, password: password, code: verificationCode) { [weak self] in guard let self = self else { return } let action = UIAlertAction(title: NSLocalizedString("OK", comment: ""), style: .default) { _ in self.navigationController?.popViewController(animated: true) } Alert.showBasicAlert(on: self, with: NSLocalizedString("Registered Successfully", comment: ""), message: NSLocalizedString("Please navigate back to login your account.", comment: ""), actions: [action]) } failure: { [weak self] (error) in guard let self = self else { return } let errorMessage = error?.localizedDescription ?? "" Alert.showBasicAlert(on: self, with: NSLocalizedString("Failed to Register", comment: ""), message: errorMessage) }
Is this page helpful?
YesFeedbackIs this page helpful?
YesFeedback


