Cloud Module Burning Authorization Platform
This topic describes how to flash the firmware and authorize the module with the Cloud Module Burning Authorization Platform.
Prerequisites
Make sure you have downloaded and installed the Production Toolkit.
How to use
Log in
-
Double-click the icon to open the Production Toolkit software.
-
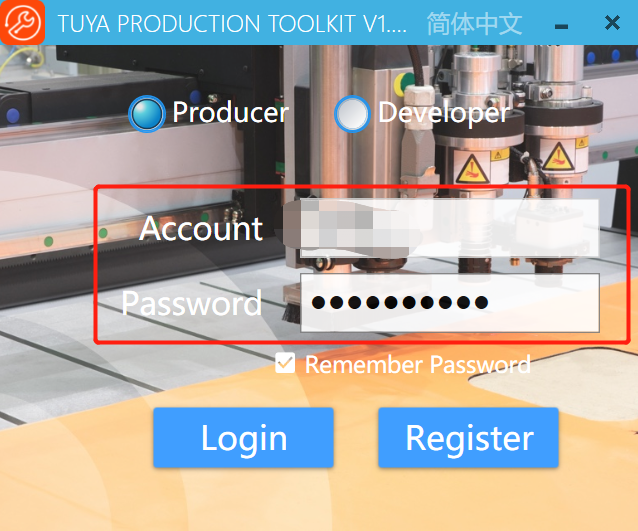
On the login page, enter your Smart PMS (production management system) account and password, and click Log in.
-
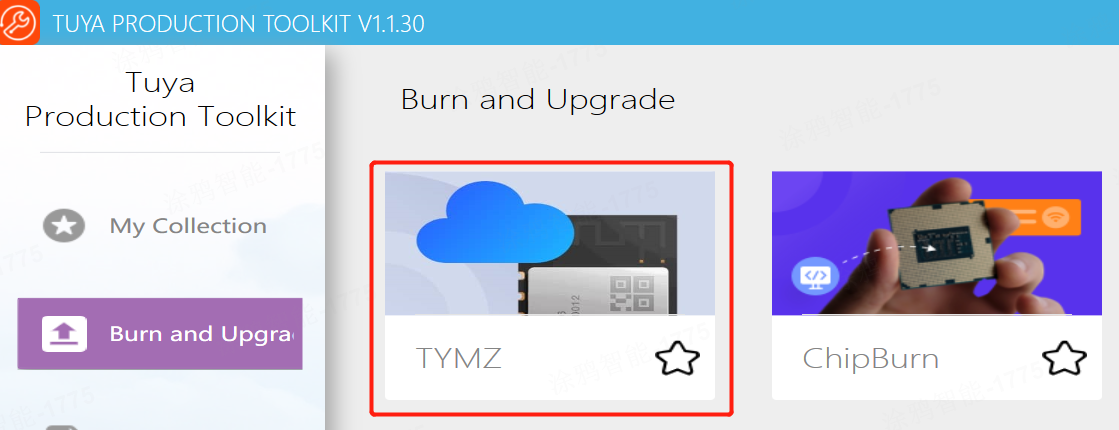
On the homepage, select Burn and Upgrade and double-click TYMZ.
When the program is installed for the first time, it will automatically start downloading, and open once the download is completed.
Determine production test solution
This section describes how to determine the production test solution. For example, flash the firmware and authorize a token to the module based on the BEKEN BK7231N chip platform.
-
In the Test Mode, select Token Mode.

-
In the Token field, enter your token and press Enter. In the Work station, select Burning Authorization and click OK. The program will use the specified production toolkit.

Set parameters
-
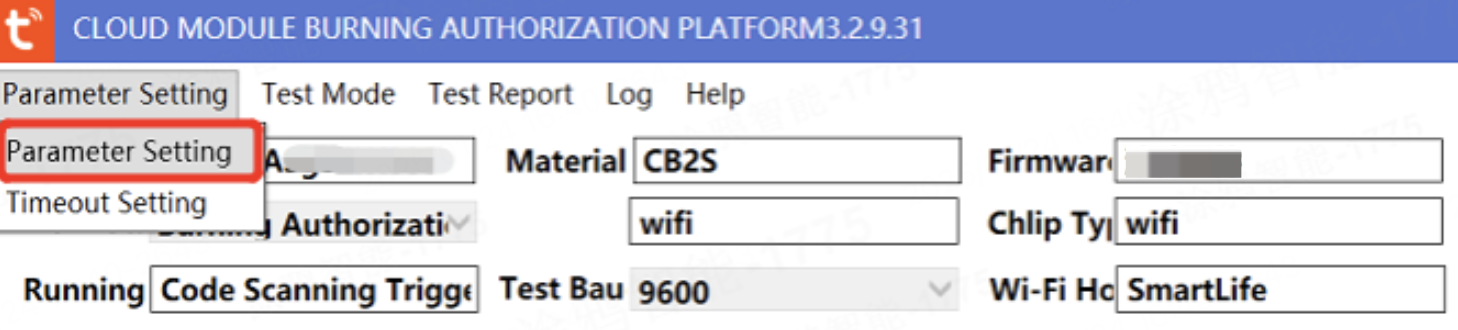
Click Parameter Setting.
-
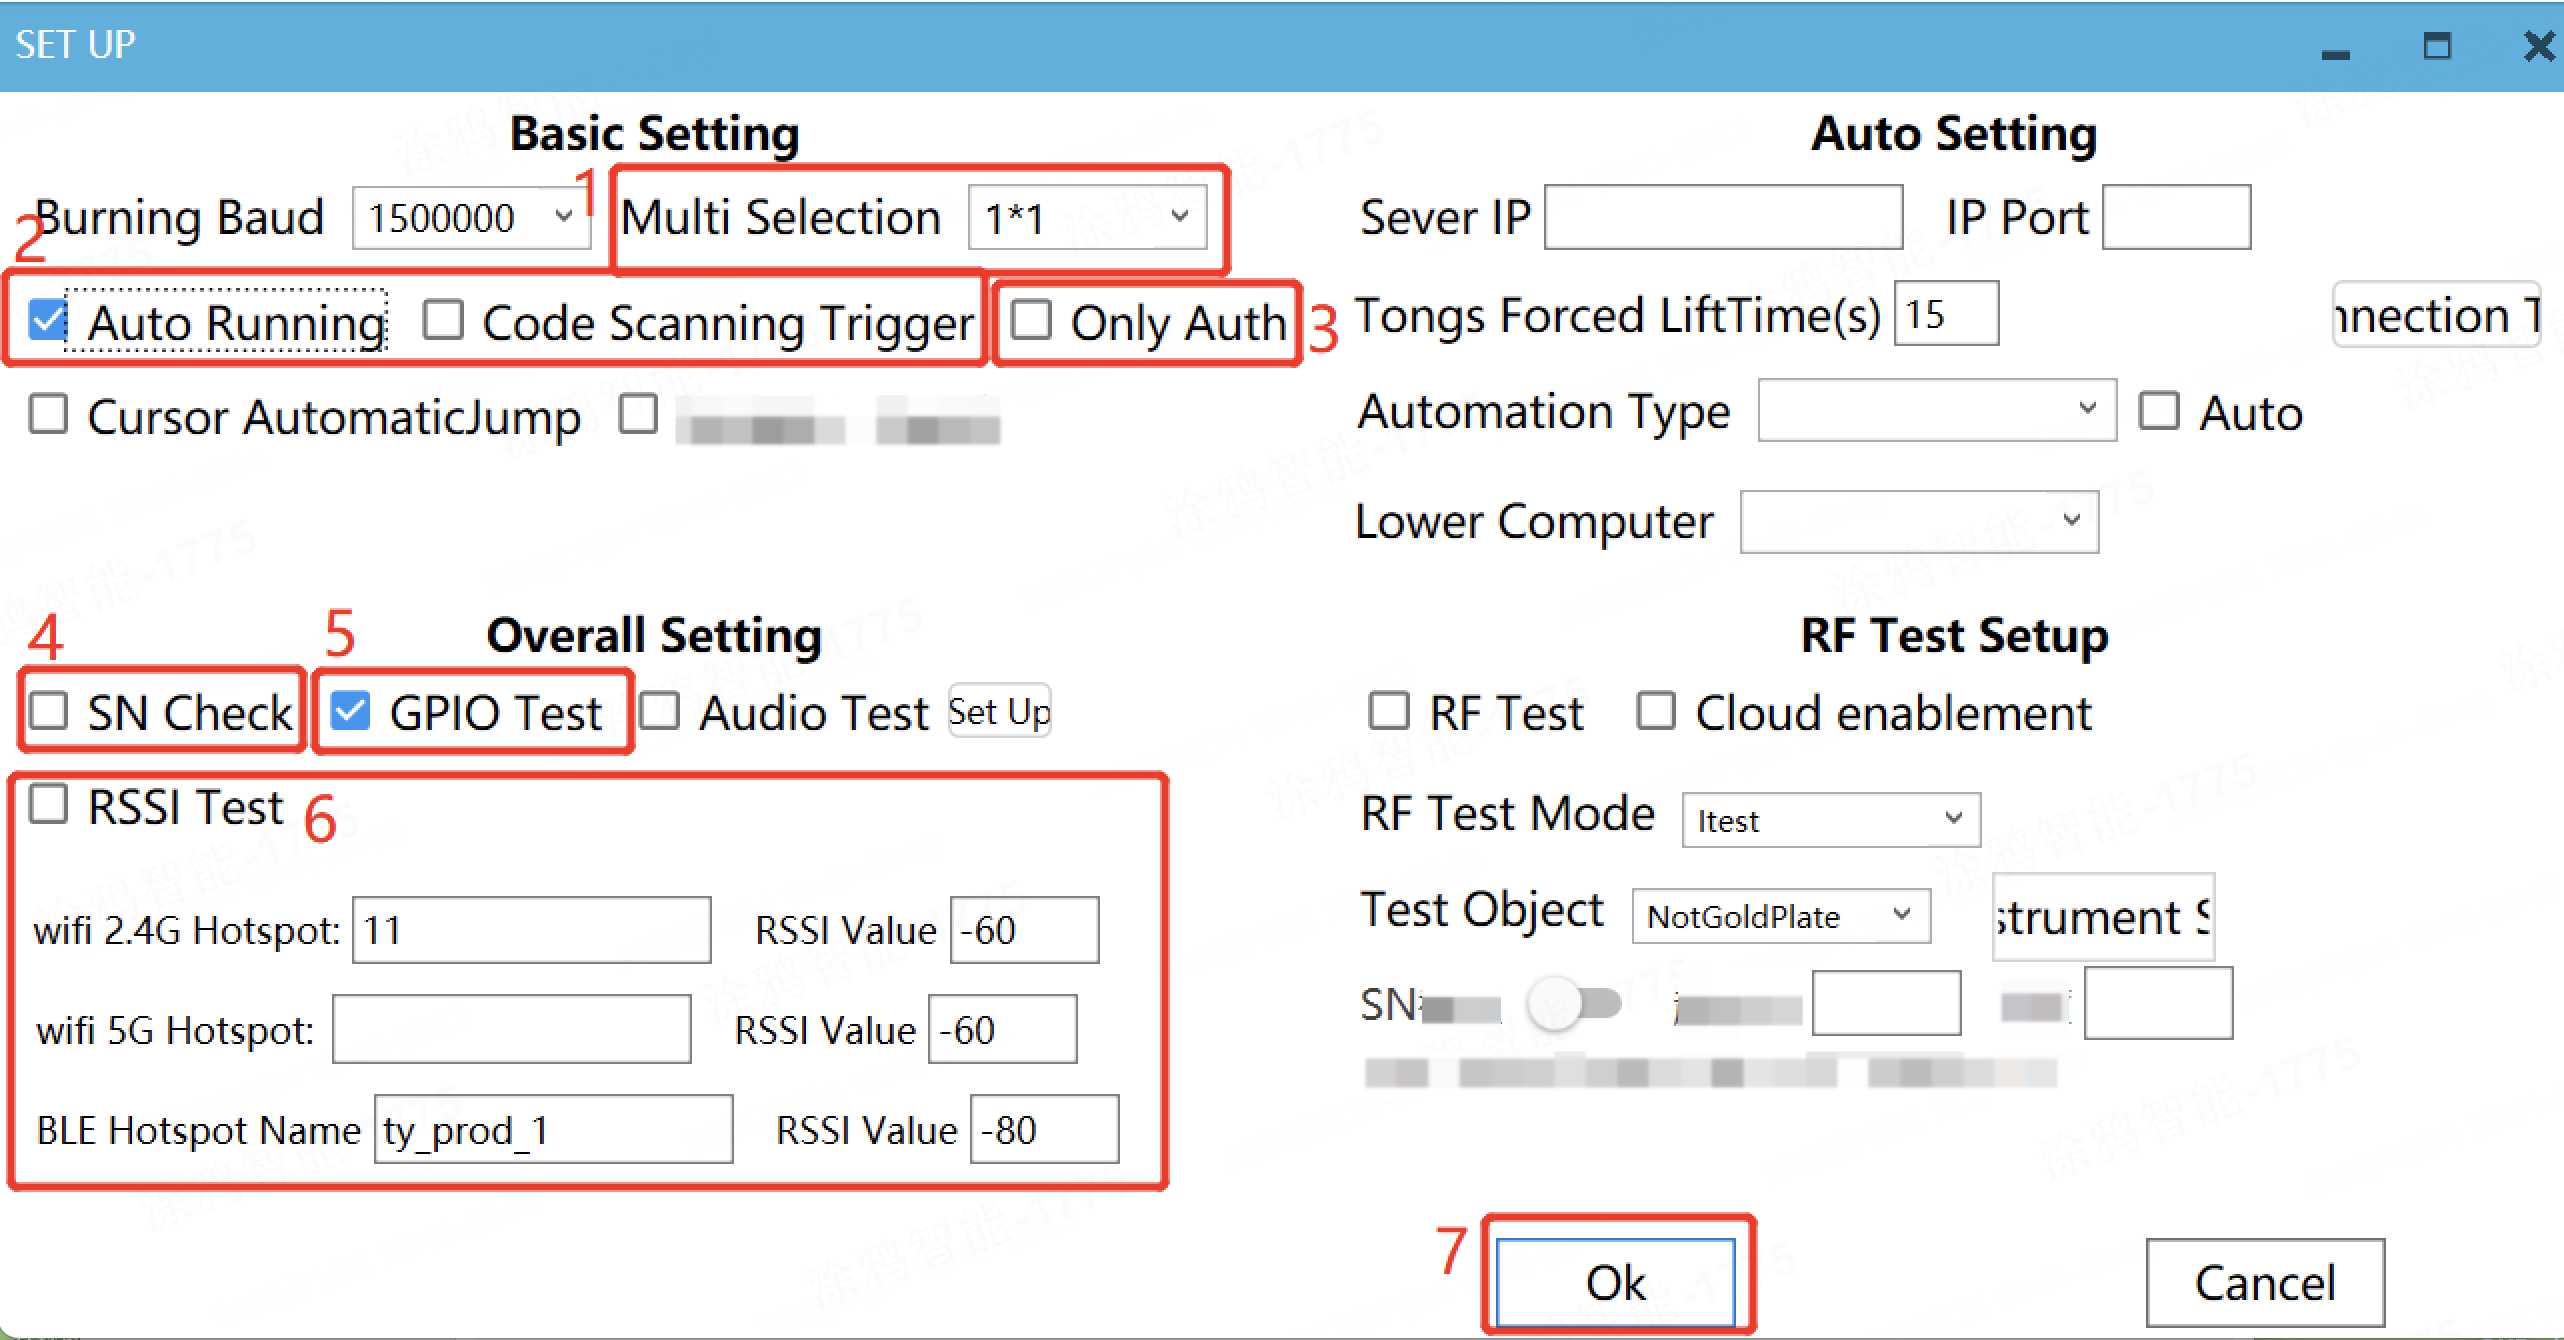
Set the parameters as per your needs.
-
Multi Selection: The setting must be consistent with the actual number of production test channels. For example, if the actual production test has 4 channels, you can configure this field as 2*2.
-
DSR Trigger: When using a test jig with the Data Set Ready (DSR) feature, you can check the box to enable automatic running.
-
Code Scanning Trigger: In order mode, use a QR code scanner with an enter key feature to trigger the test.
-
Only Auth: Check this box if you do not need to flash the firmware and only want to authorize the module. Note that you cannot directly use an empty module without firmware flashed to it.
-
SN Check: Check the box to make it effective. Configure whether to enter an SN for production tests. This option is enabled by default in order mode, and you can configure it as needed in order mode.
-
GPIO Test: The GPIO test is enabled by default when the tool is used for the first time. If no test is needed, you can uncheck it.
-
RSSI Test: The RSSI test is enabled by default when the tool is used for the first time. If no test is needed, you can uncheck it.
When starting the RSSI test, you need to configure the hotspot according to the product specifications.
- Wi-Fi module: set the Wi-Fi 2.4G Hotspot and signal strength.
- Bluetooth module: set the BLE Hotspot Name and signal strength.
- Wi-Fi and Bluetooth combo module: set the Wi-Fi 2.4G Hotspot, BLE Hotspot Name, and signal strength.
-
-
After the settings are completed, click OK.
Device production test
-
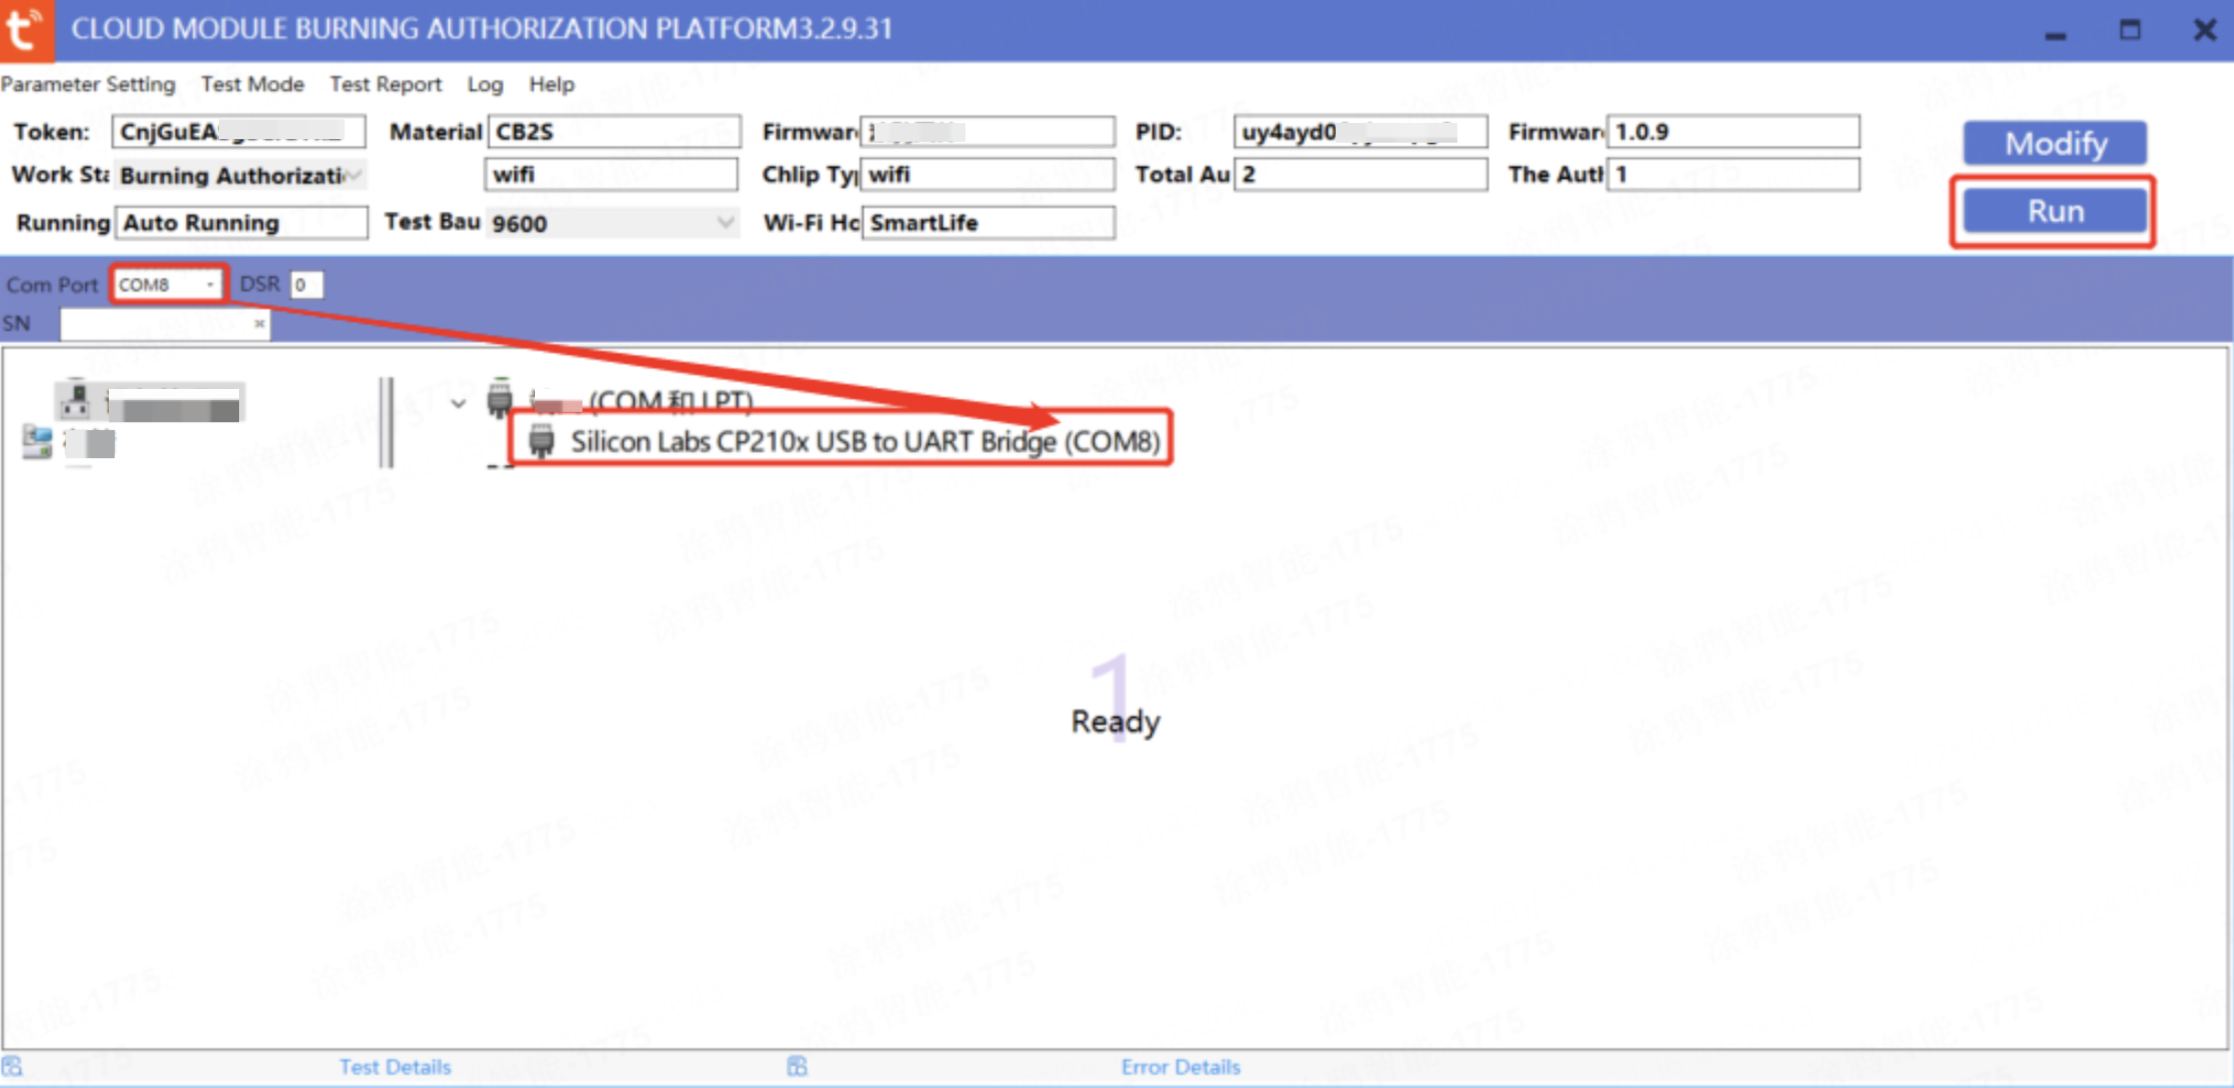
In the field of Com Port, enter the actual serial port number corresponding to the USB to TTL converter. You can check the serial port number in the device manager of your computer.
In the case of multi-channel testing, note that the serial port number corresponds to the actual serial port one by one.
-
After all the serial ports are set, click Run to start the test.
-
When the Running Mode is set to Manual Run:
- Power on the product.
- Click Run to start the test.
- After the test is completed, replace the product and power it on.
- Click Run to start another test.
-
When the Running Mode is set to Code Scanning Trigger:
- Power on the product.
- Scan the code to start another test.
- After the test is completed, replace the product and power it on.
- Click Run to start another test.
-
When the Running Mode is set to Auto Running, that is, DSR trigger:
- Click Run.
- Push down the test jig.
- After the test is completed, replace the product.
- Push down the test jig to start another test.
-
-
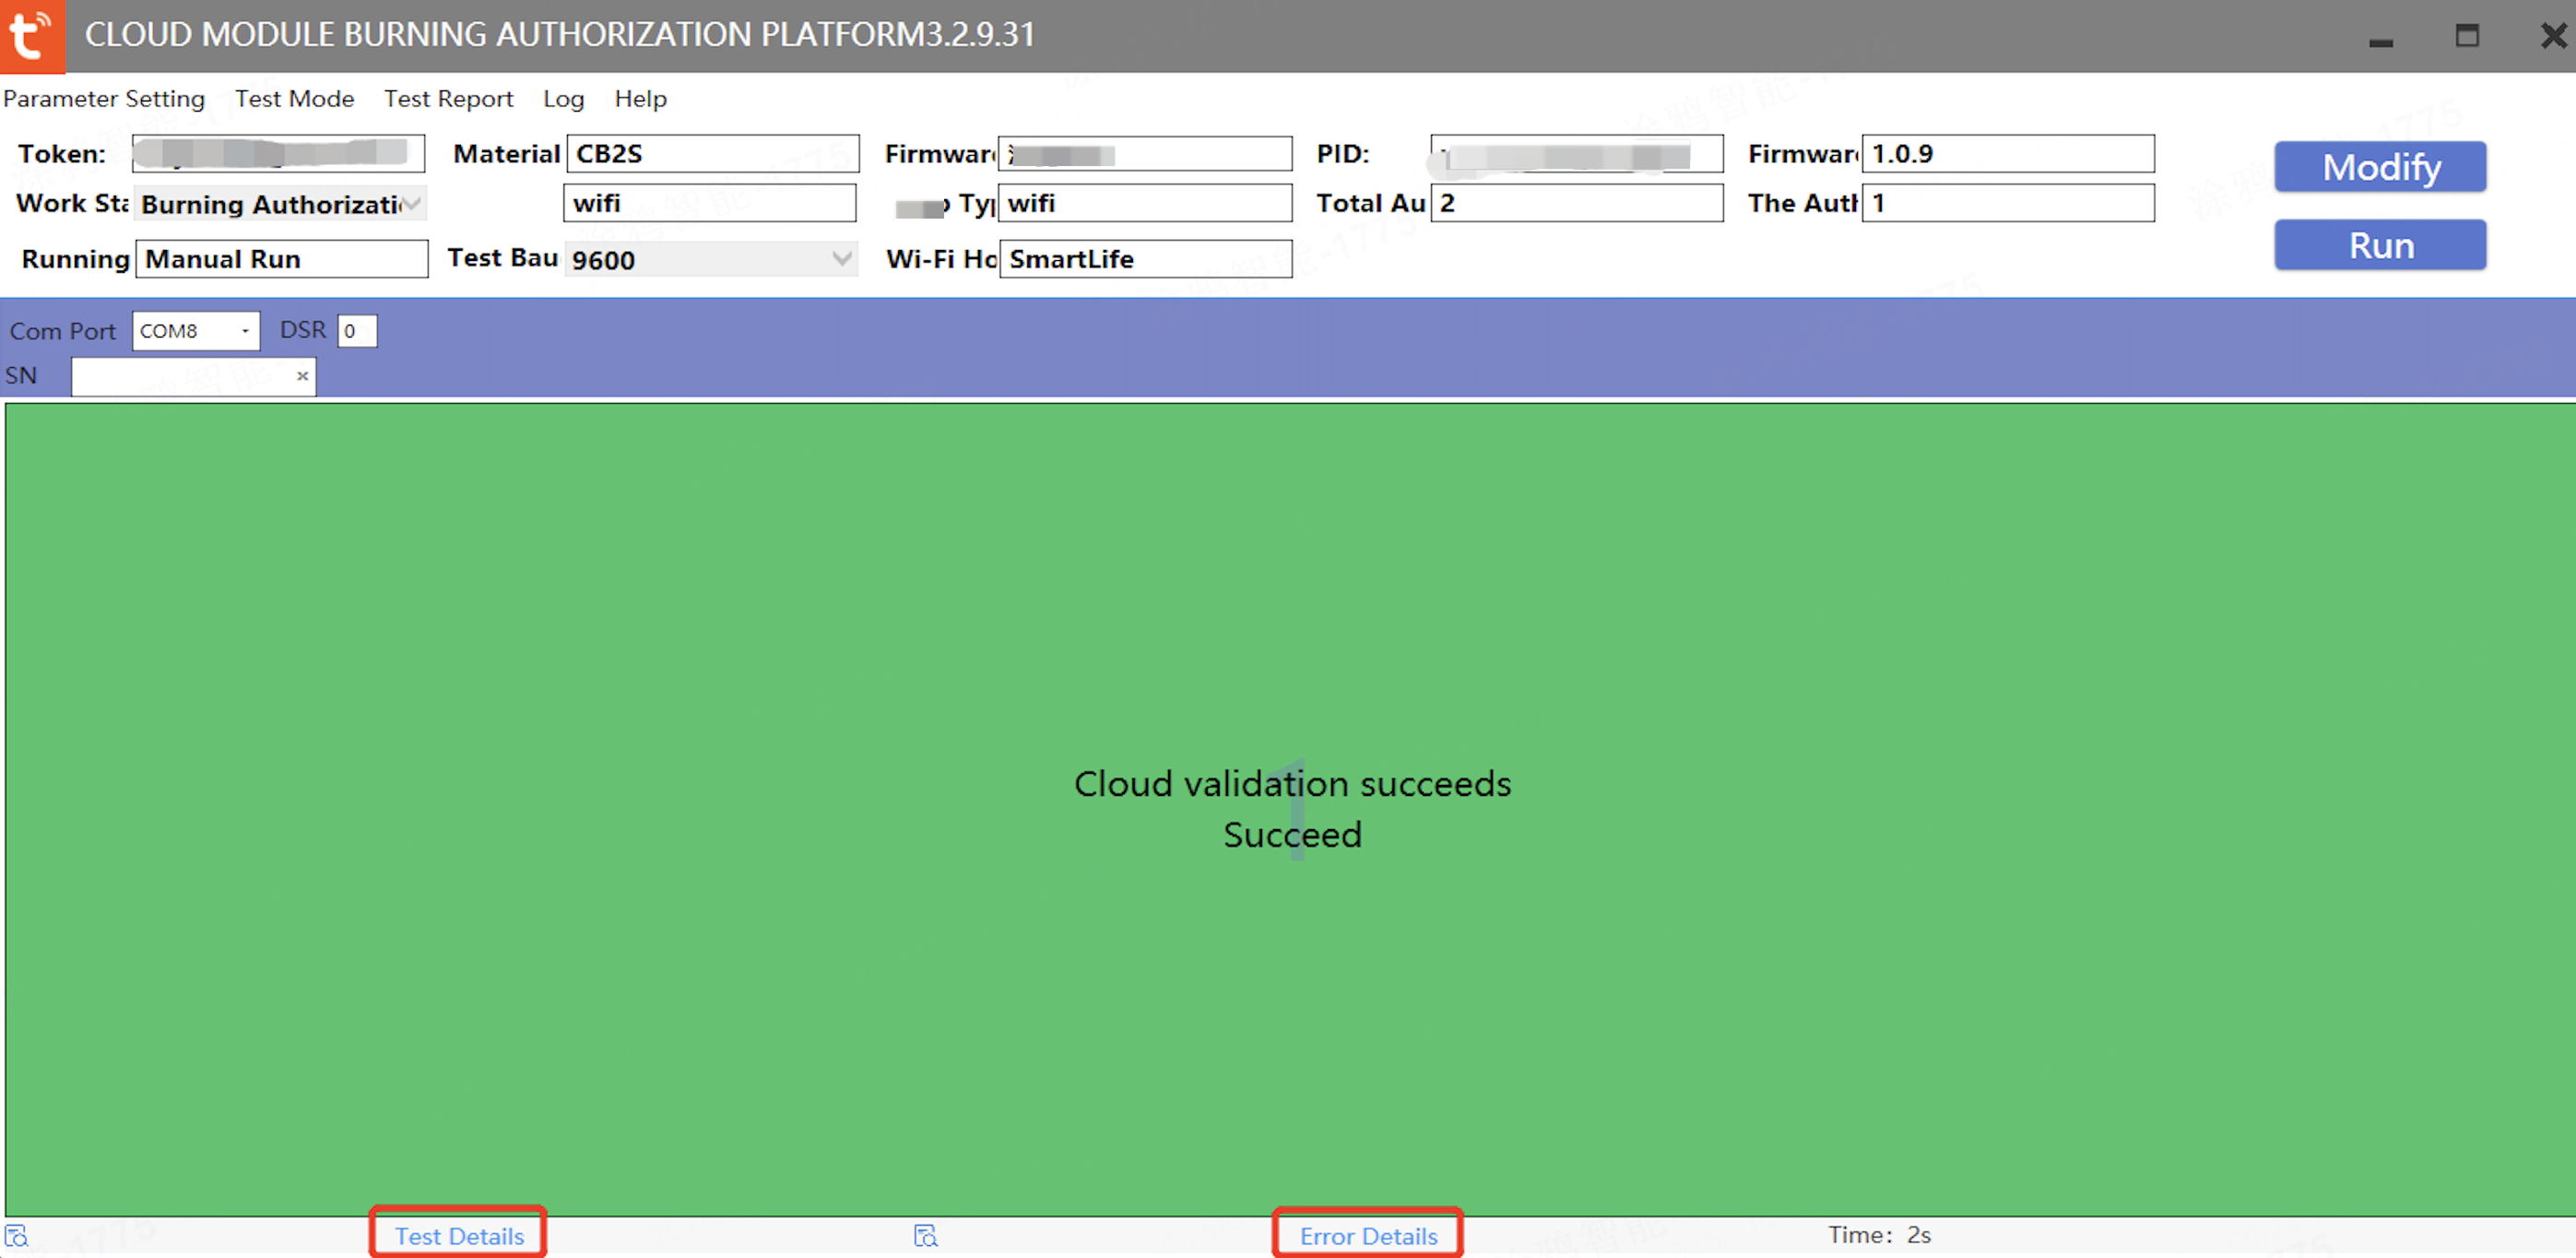
Depending on the test results, you can take different actions.
-
Success: The window shows a green success message, and the production test is completed. Click Test Details to view specific test items.
-
Failure: Click Error Details to view specific error details and handling methods.
-
Is this page helpful?
YesFeedbackIs this page helpful?
YesFeedback


