Operate on OEM App Mall Seller Center
The OEM App Mall provides one-stop e-commerce mall services for global brand owners to manage online transactions, personalize the mall configurations, and make insightful decisions based on data operations. After purchasing the mall service, you can embed in your app an e-commerce mall with end-to-end transaction capabilities, and improve the shipment of your channels.
Subscribe to mall services
-
Log in to the subscription page of mall services. If you do not have an account, register one and log in.
-
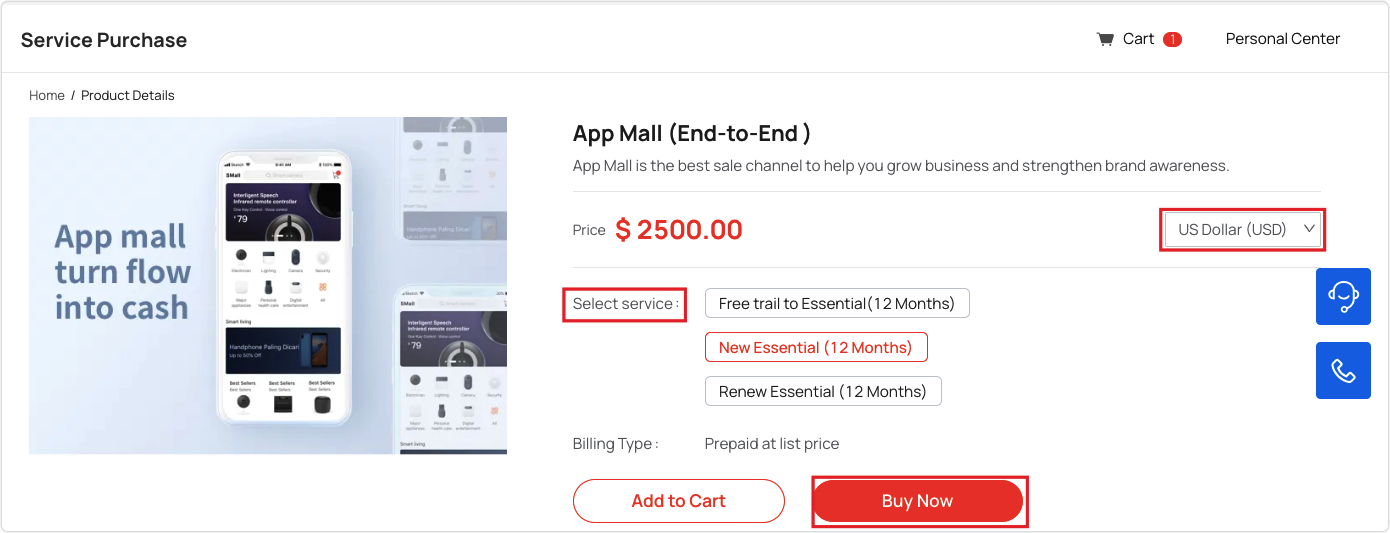
Select your desired service and currency. To upgrade the trial edition to the official edition, you need to select the application object.
-
Click Buy Now. For more information, see How to subscribe to the app mall.
-
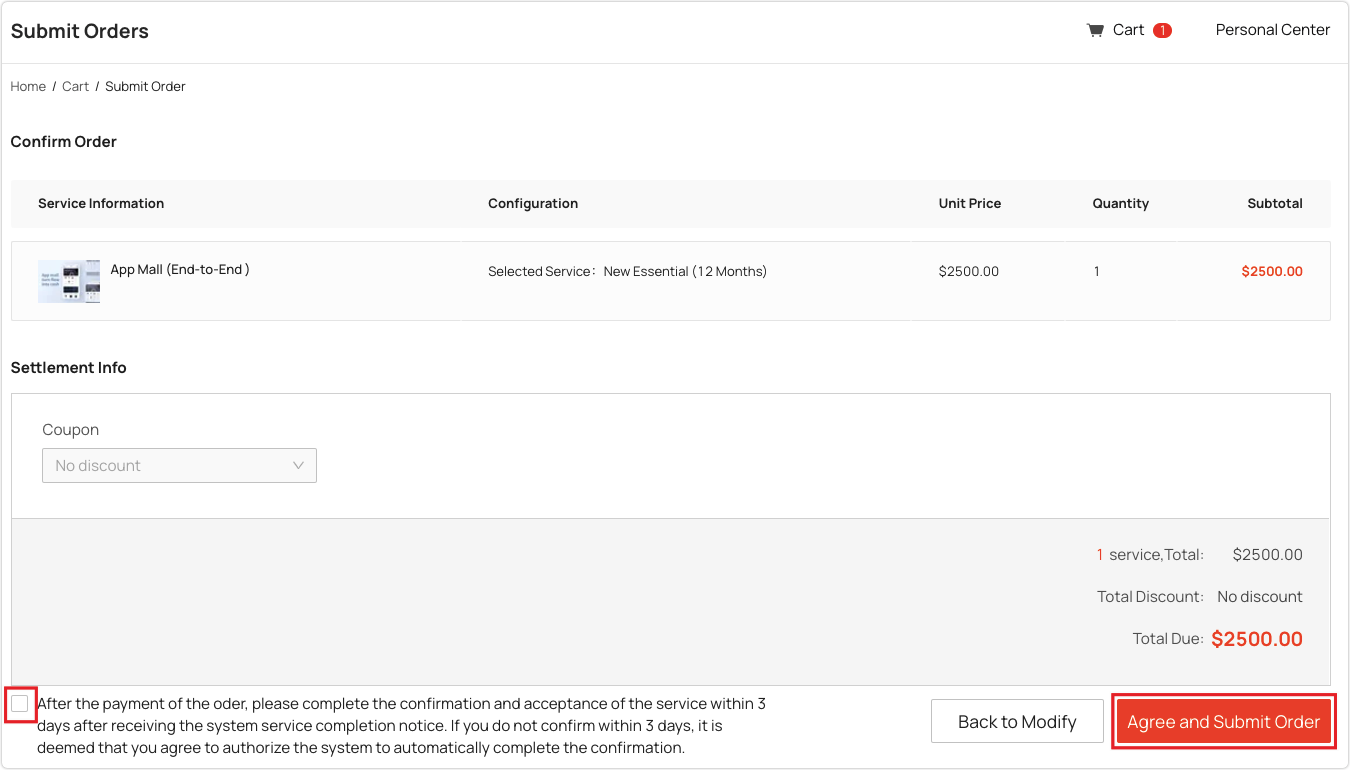
Complete the information, select a coupon (if any), check the order confirmation and acceptance option, and then click Agree and Submit Order.
-
Pay for the order online or (if the remittance has been made offline), submit the order number to the account manager, who will link the order with your remittance account.
-
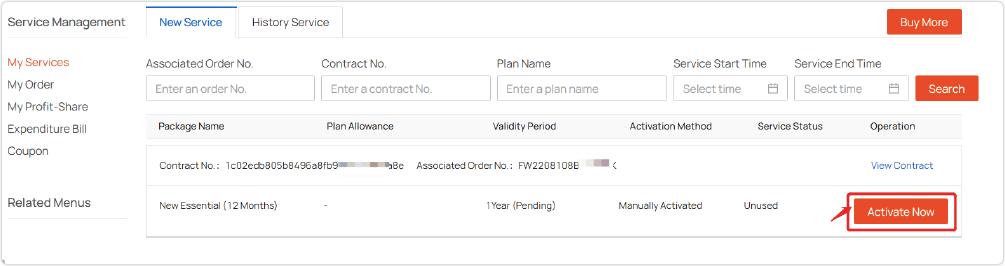
Go to the My Services page, select the specified mall order, and click Activate Now in the Operation column.
- After the free edition expires, you can renew the mall services to extend the validity period. Through multiple renewals, you can extend the services for more years.
- The mall is not automatically activated after an order is placed and linked with your remittance account. You must click Activate Now to activate the mall. After the mall is activated, the validity period of your subscription plan starts to count down.
- If you renew the services before the expiration date, the renewal order will be automatically activated when the previous services expire. You do not need to activate it manually.
Initialization configurations
Add sale regions
-
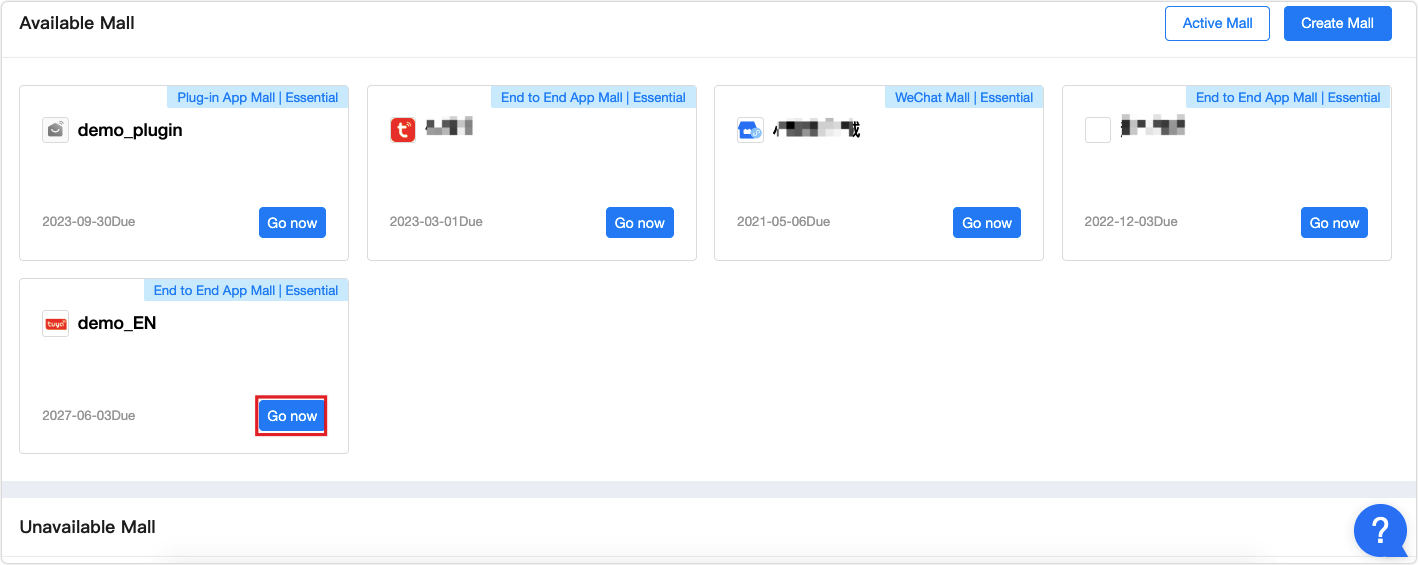
On the page of Available Mall of Seller Center, select your mall and click Go now in the bottom right corner.
-
In the pop-up window of the sale region list, select the country or region where commodities will be sold.
- A green check mark will appear in the top left corner of the country or region you have selected.
- After the mall goes online, you can change or add sale regions.
-
Click Save.
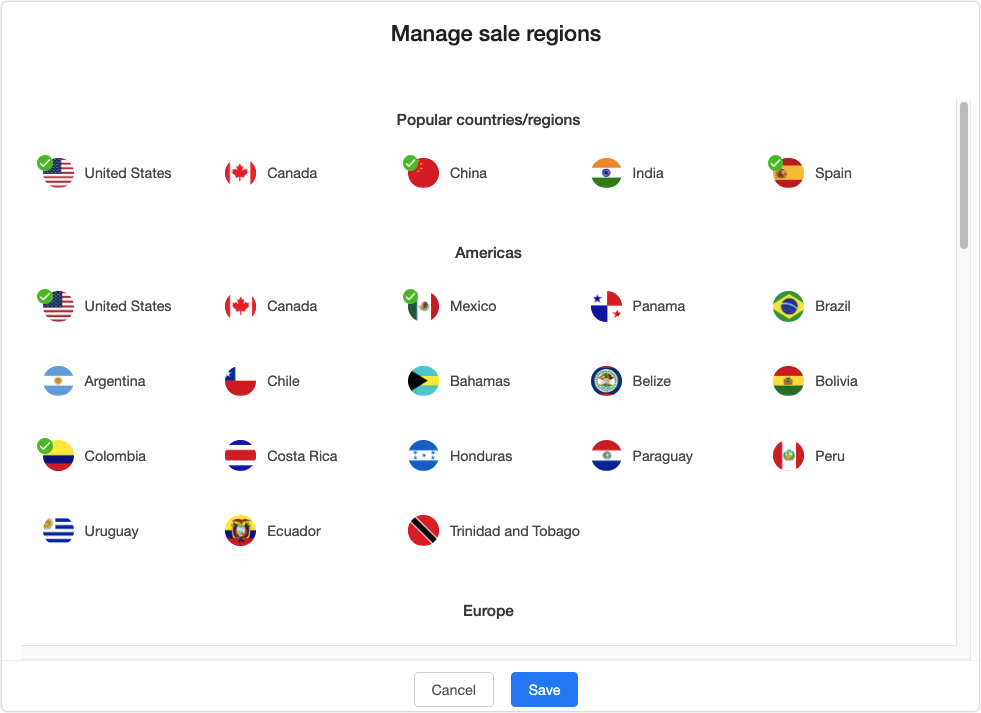
When you register an account on the app, the value of the country or region field shall be the sale region available to the mall. If the two are inconsistent, you will not be able to view the mall on the app.
Bind with an app
After the mall is activated, you can bind the mall with an app. This way, the app will have an entry to the mall.
-
Go to the page of Seller Center, select your mall, and then click Go now in the bottom right corner.
-
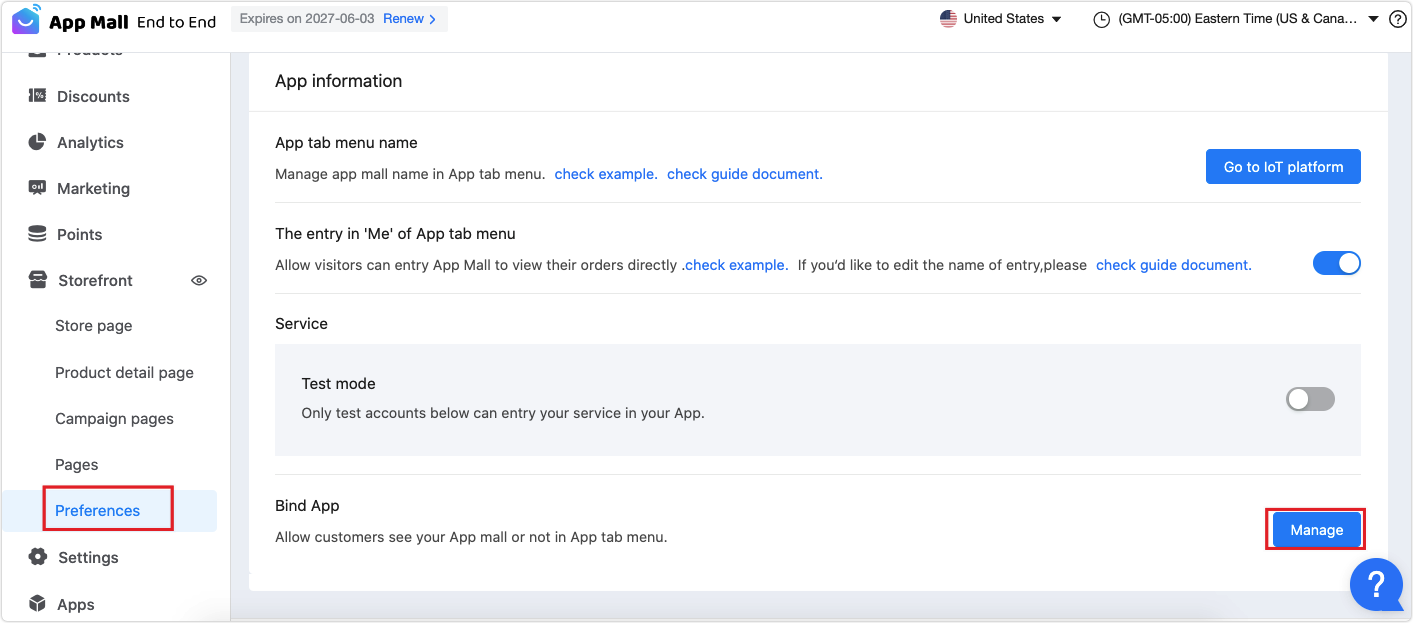
In the left-side navigation bar, choose Storefront > Preferences, and click Manage in the section of Bind App.
-
Click Bind to bind your mall with an app. Restart the app and you will see the mall.

- To close the entry on the app, you need to unbind the app from the mall. After unbinding, the mall will not be displayed on the app.
- Each mall can be bound with multiple apps, and each app can only be bound with one mall. To Unbind the Mall from the App, you need to unbind the app from the previous mall and bind the app with a new mall.
Home
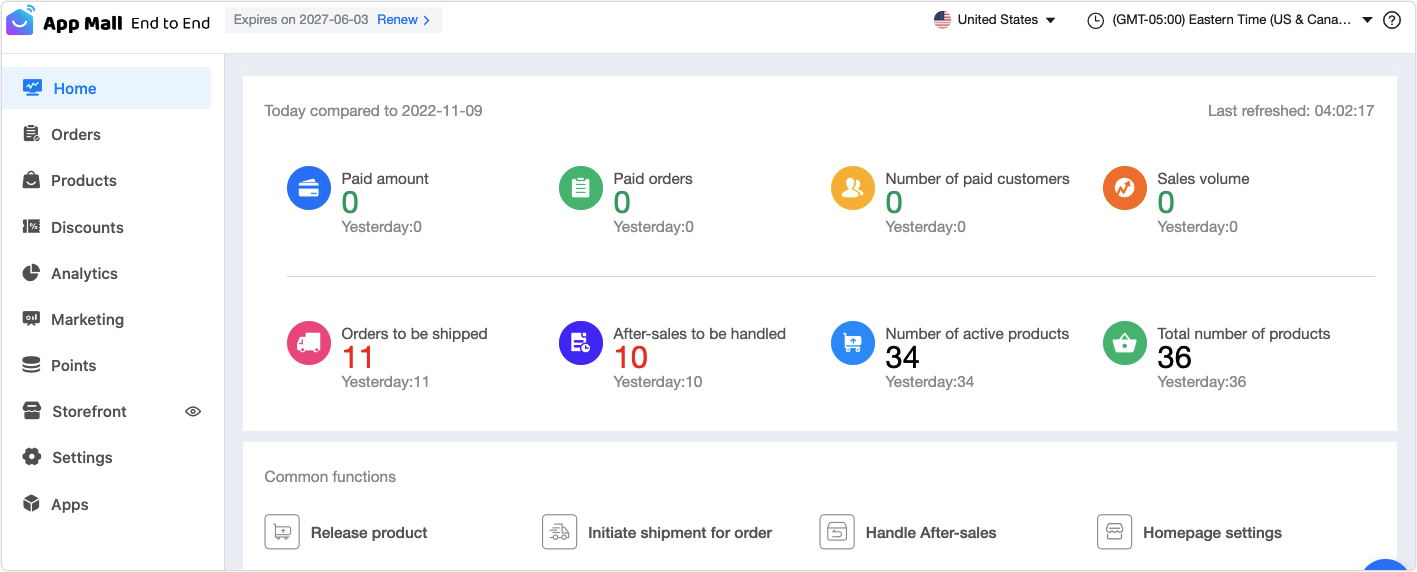
The home consists of overview and common functions.
-
In the overview section, you can view the paid amount, paid orders, number of paying customers, sales volume, orders to be shipped, after-sales to be handled, number of active products, and total number of products.
- The top row is today’s data as of the update time. The data is updated hourly.
- The second row shows the data accumulated for 24 hours yesterday.
-
In the Common functions section, you can release products, initiate shipment for orders, handle after-sales issues, and make homepage settings. You can click any of the functions to go to the desired page.
Store detail
In the left-side navigation bar, choose Settings > Store detail.
-
Contact information: Set the seller’s contact information to facilitate the processing of return and refund orders.
-
Store currency: Select the currency of the country of sale. After the currency is set, you will receive payments in the specified currency. You can set up a different currency for each sale region.
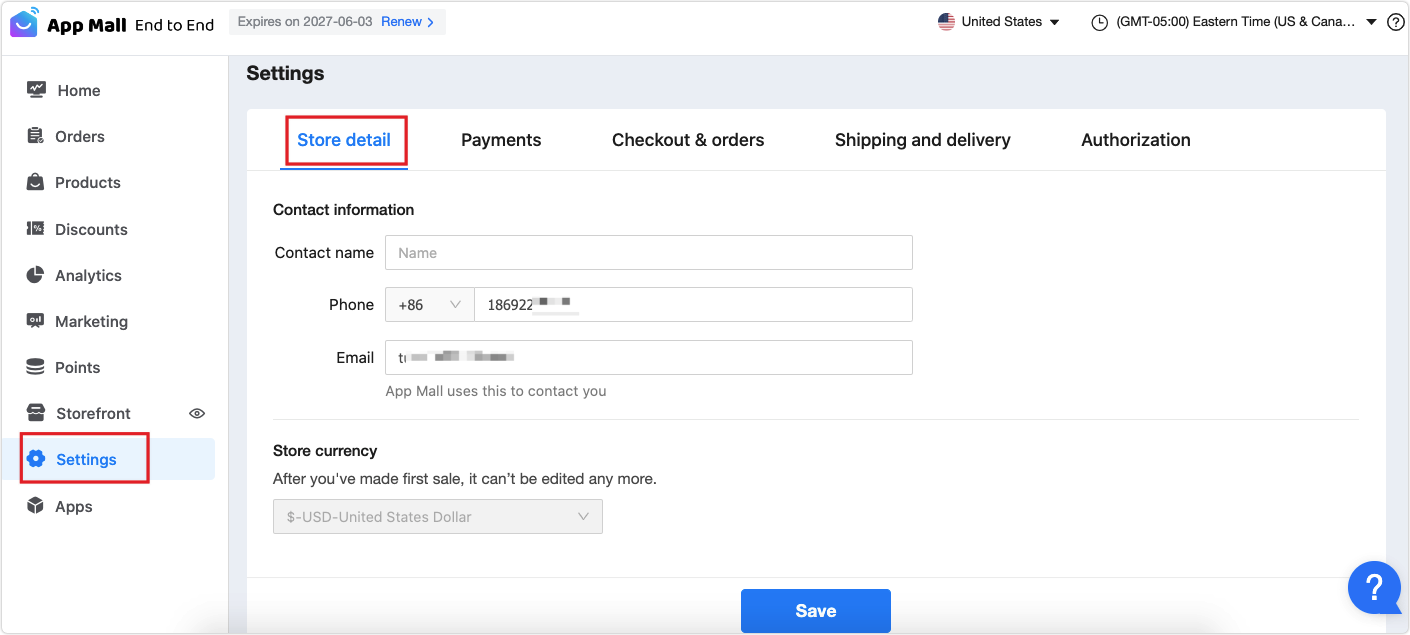
Once you have received payment for the first order, you cannot change the currency again.
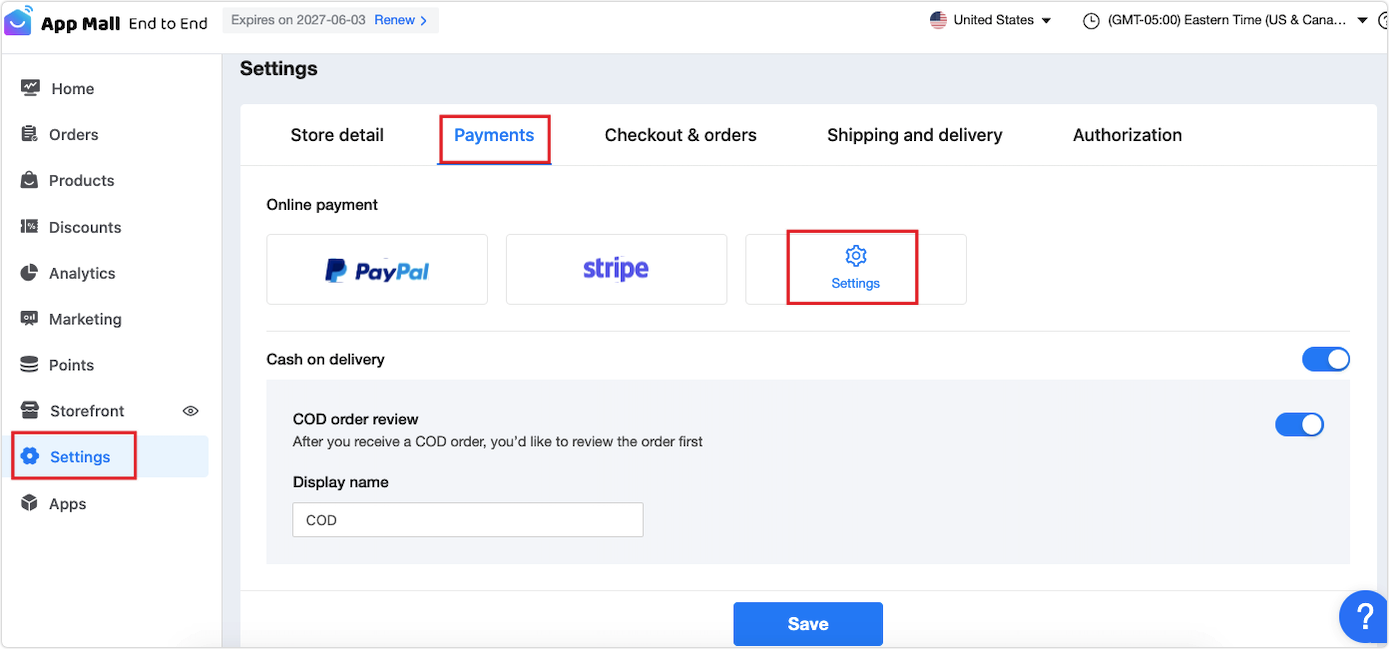
Payments
In the left-side navigation bar, choose Settings > Payments.
-
Online payment: Click Settings beside the payment channels, and you can set the parameters. For more information about configuration, see App Mall Help Center.
-
Cash on delivery: means that the courier company collects the payment on behalf of the seller. The products are delivered to the user. After inspection, the user makes the payment to the courier. You can choose whether to enable it or not. For more information, see How to Set up COD.
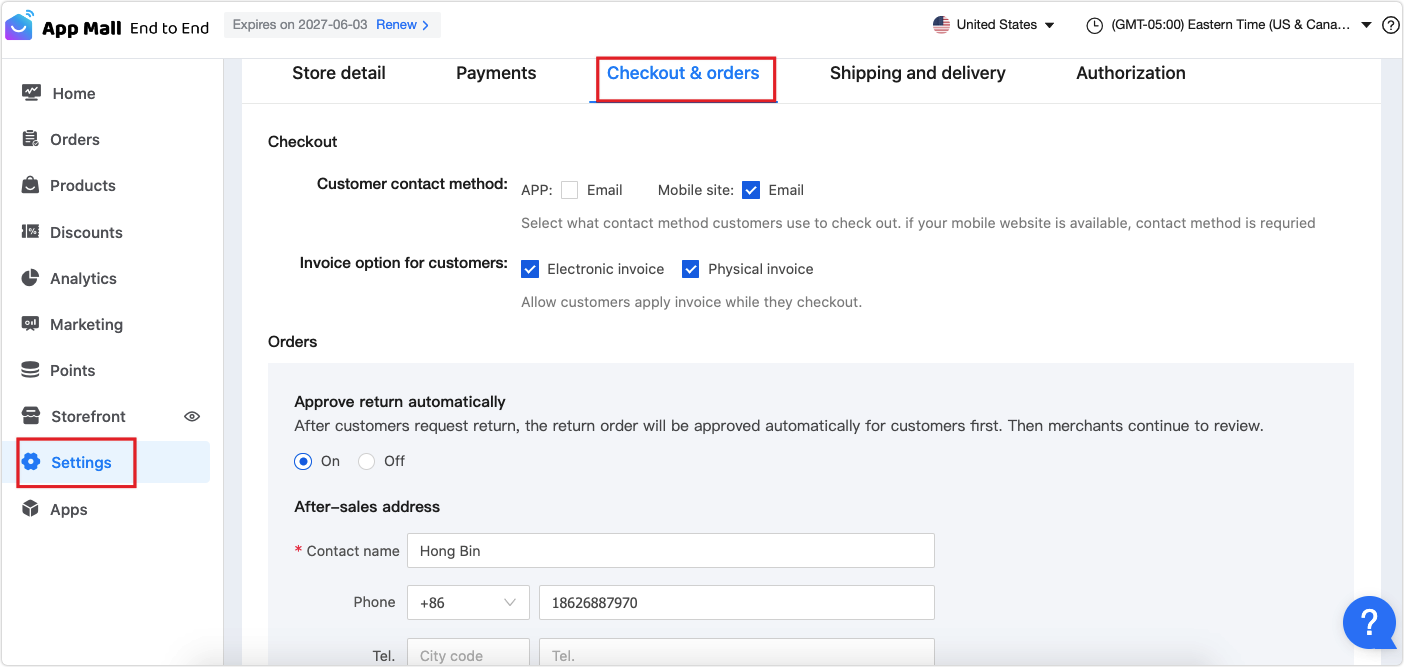
Checkout & orders
In the left-side navigation bar, choose Settings > Checkout & orders.
-
Checkout: When placing an order, users can choose a contact method and invoice type.
-
Orders: You can enable it to automatically approve return and enter an after-sales address.
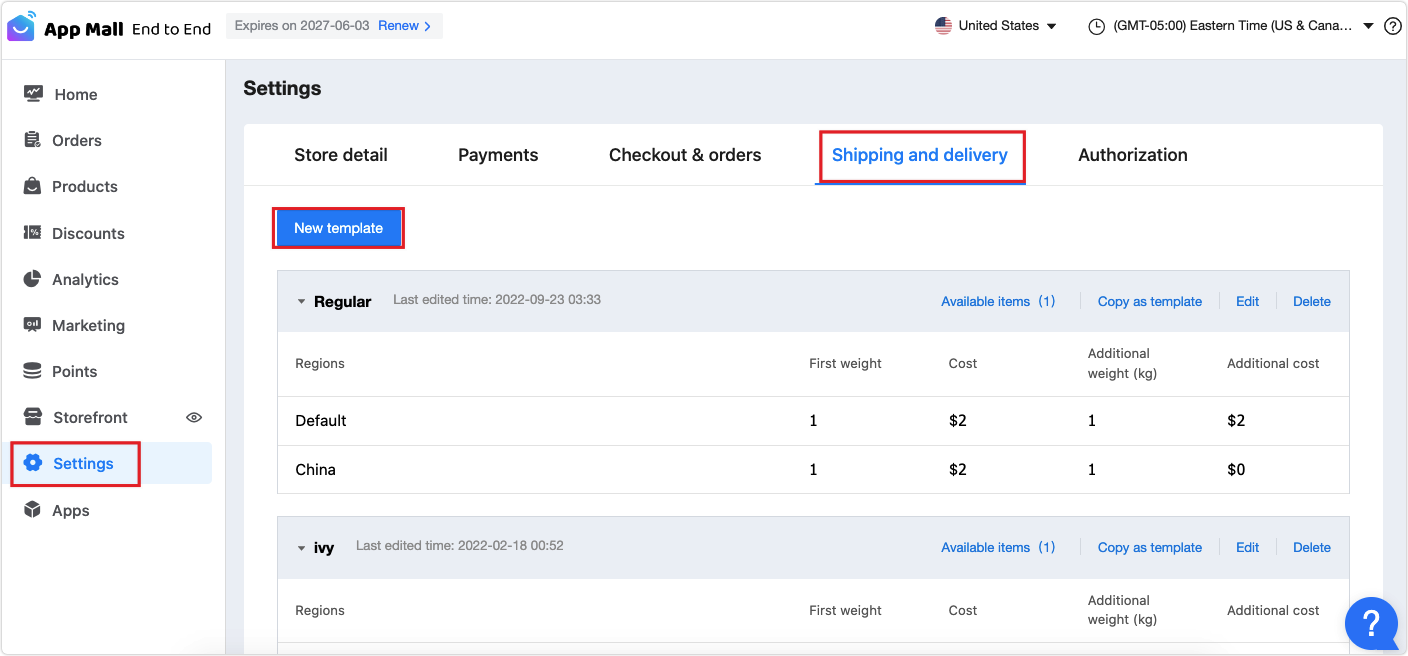
Shipping and delivery
In the left-side navigation bar, choose Settings > Shipping and delivery.
-
You can Copy as template, Edit, and Delete a postage template.
- Available items: View items for which the postage template has been used.
-
Click New template, and set the template title, calculation method, and shipping zone to generate a postage template.
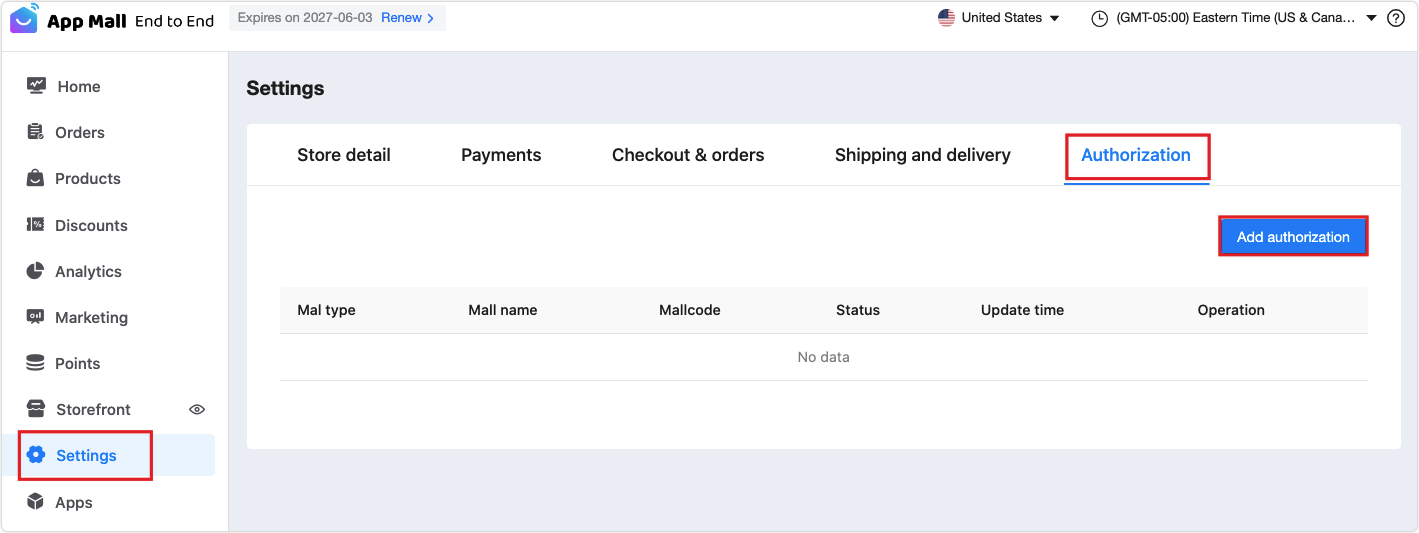
Authorization
In the left-side navigation bar, choose Settings > Authorization.
The App Mall provides open APIs for orders, helping connect to popular e-commerce platforms such as Amazon. Online orders, product inventory, and delivery information are automatically synchronized to the platform, enabling the seller to easily manage stores across platforms.
Implement mall authorization in three steps: Subscribe to the open capabilities of App Mall, get AccessID, and authorize the App Mall. For more information, see Guidelines.
Basic operation
Manage product categories
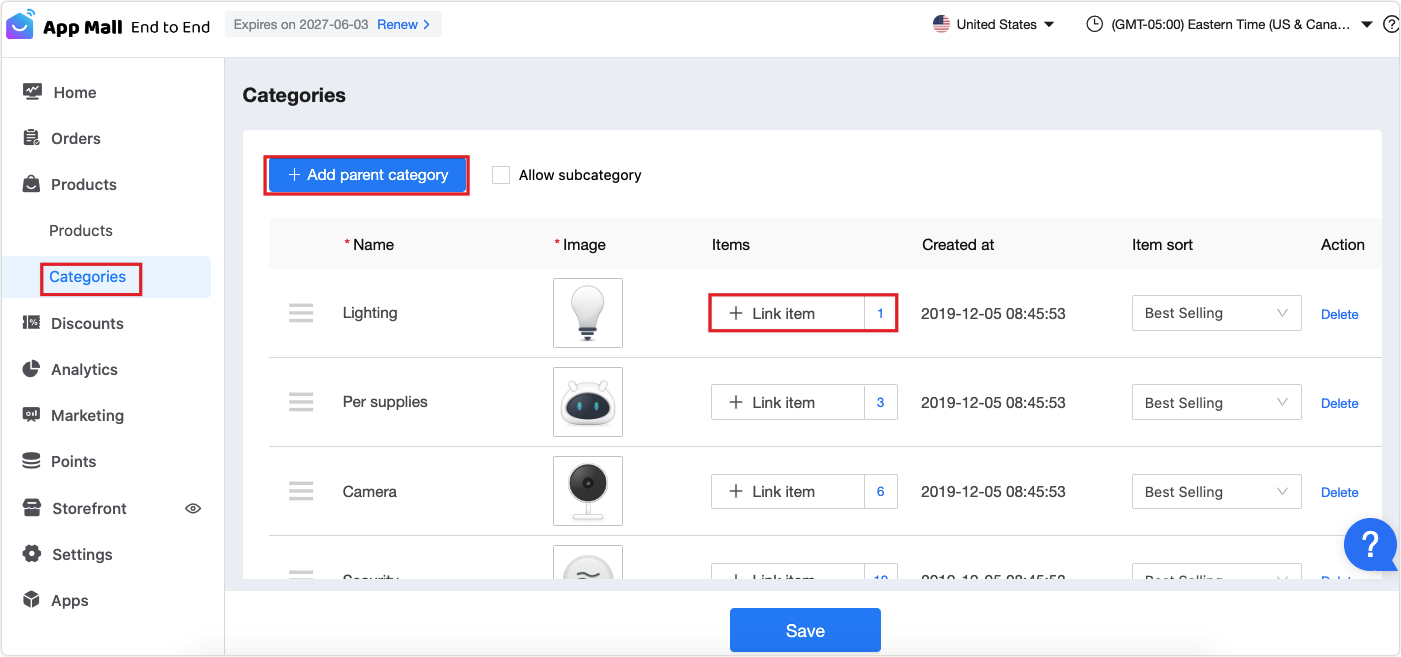
Product categories can be customized based on your operational strategy. Also, you can adjust the frontend display effect as you want. When the user taps the window categories on the app, the product list page will appear.
Procedure:
- Go to Seller Center, select your mall, and then click Go now. In the left-side navigation bar, choose Products > Categories.
- Click Add parent category, enter a category name, and then upload an image. The image size is 80 × 80 pixels.
- Click Link item, select the items to be linked in the pop-up window, and then click OK > Save to complete the category settings.
You can add multiple product categories this way and drag the left-side square to move the specified category. Click Delete in the Action column to delete the specified category. For more information, see Product Category Setting.
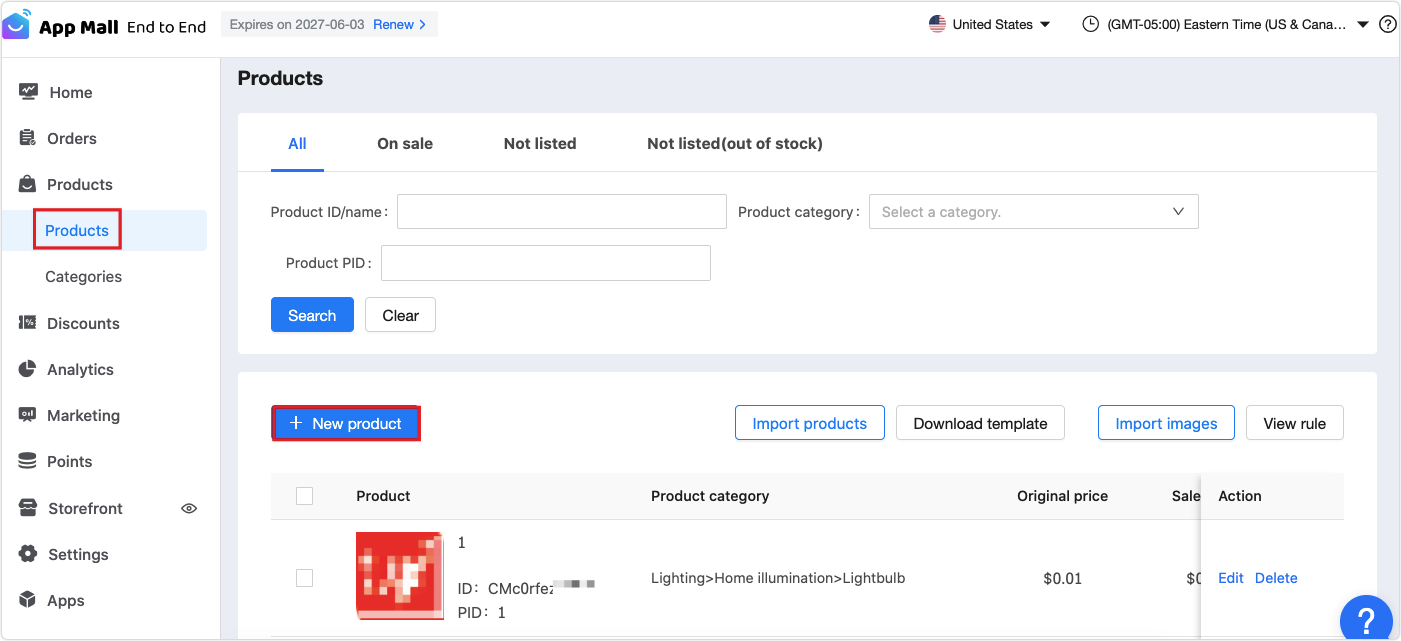
Manage products
You can release new products and select product status.
Procedure:
-
Go to Seller Center, select your mall, and then click Go now. In the left-side navigation bar, choose Products > Products.
-
The product status includes on sale, to be published, and not listed (out of stock). Search for products by product name or ID, category, or product ID (PID).
-
Click New product, enter the basic information, image/video, price/stock, product details, recommended products, and sales service settings. Click Save to create a product. For more information, see Release Product.
-
Moreover, you can import products in bulk. Click Download template, fill in the template, and then import images or documents. For more information, see View Rules.
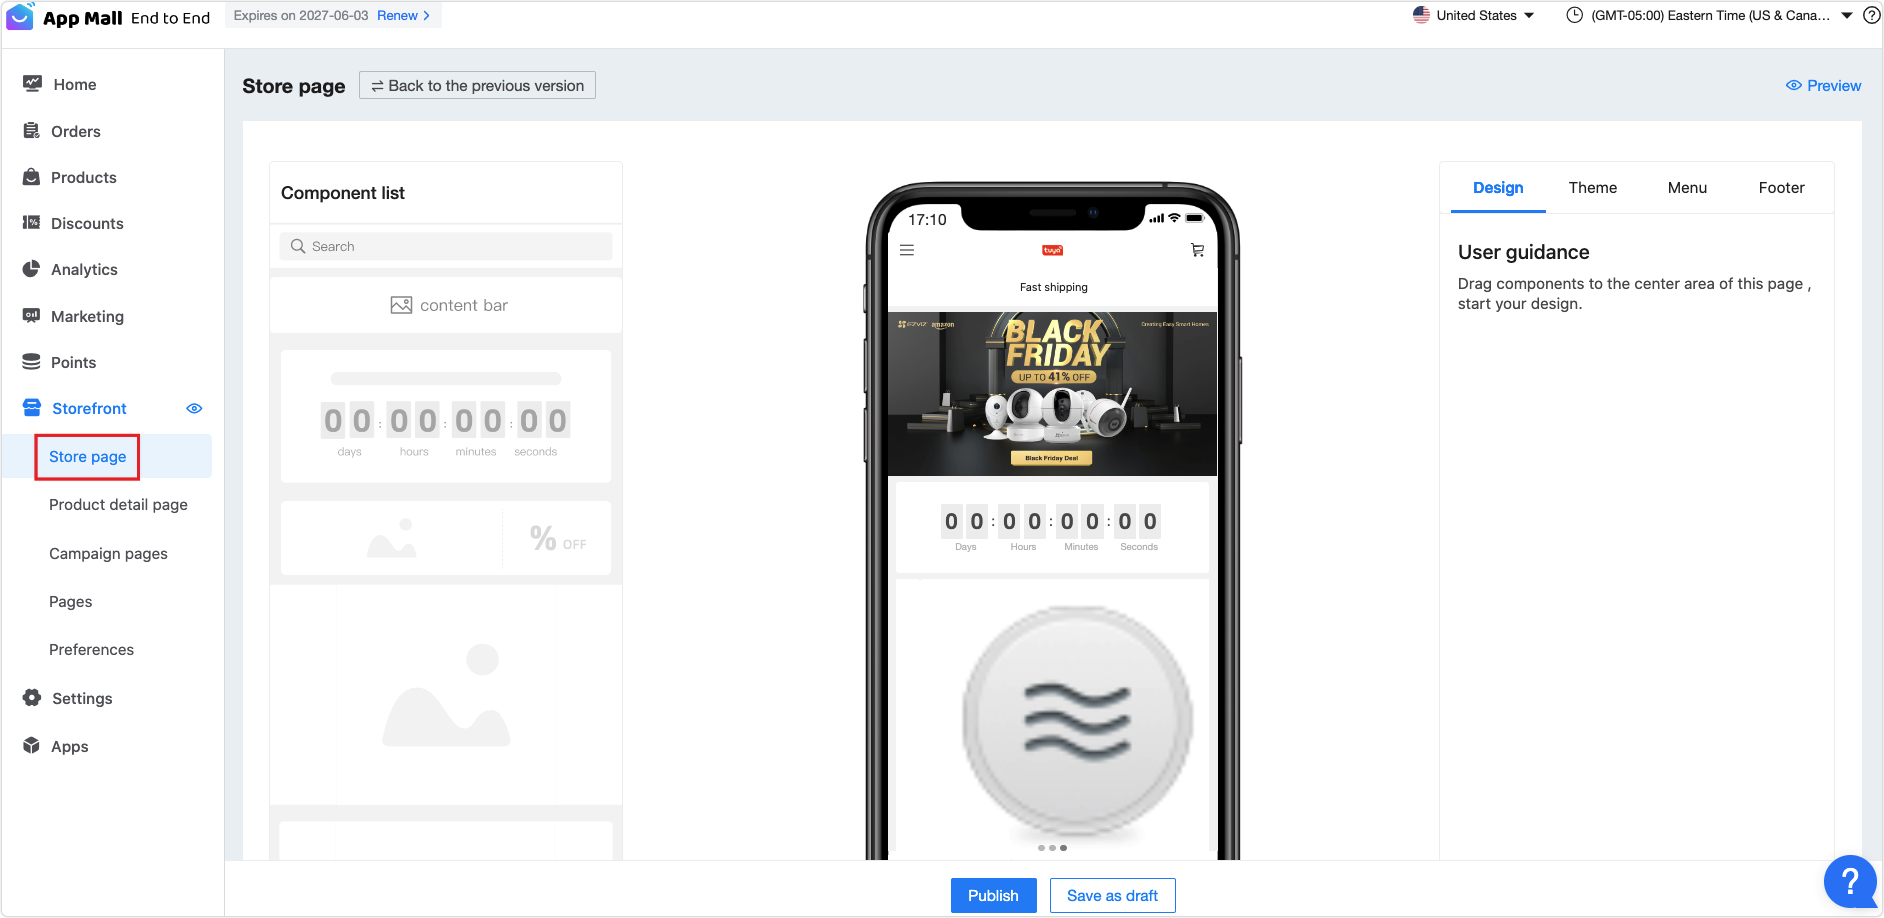
Storefront
Design and layout of the store homepage is the most important part of e-commerce operations. A well-planned and captivating homepage can substantially enhance users’ favorable brand awareness.
-
Go to Seller Center, select your mall, and then click Go now. In the left-side navigation bar, choose Storefront > Store page.
-
On the homepage, you can set up the search bar, advertisement, product categories, scene supermarket, floor images, and recommended products. You can choose to enable or disable the specified function.
-
After the settings are completed, click Save. For more information, see How to Design Homepage.
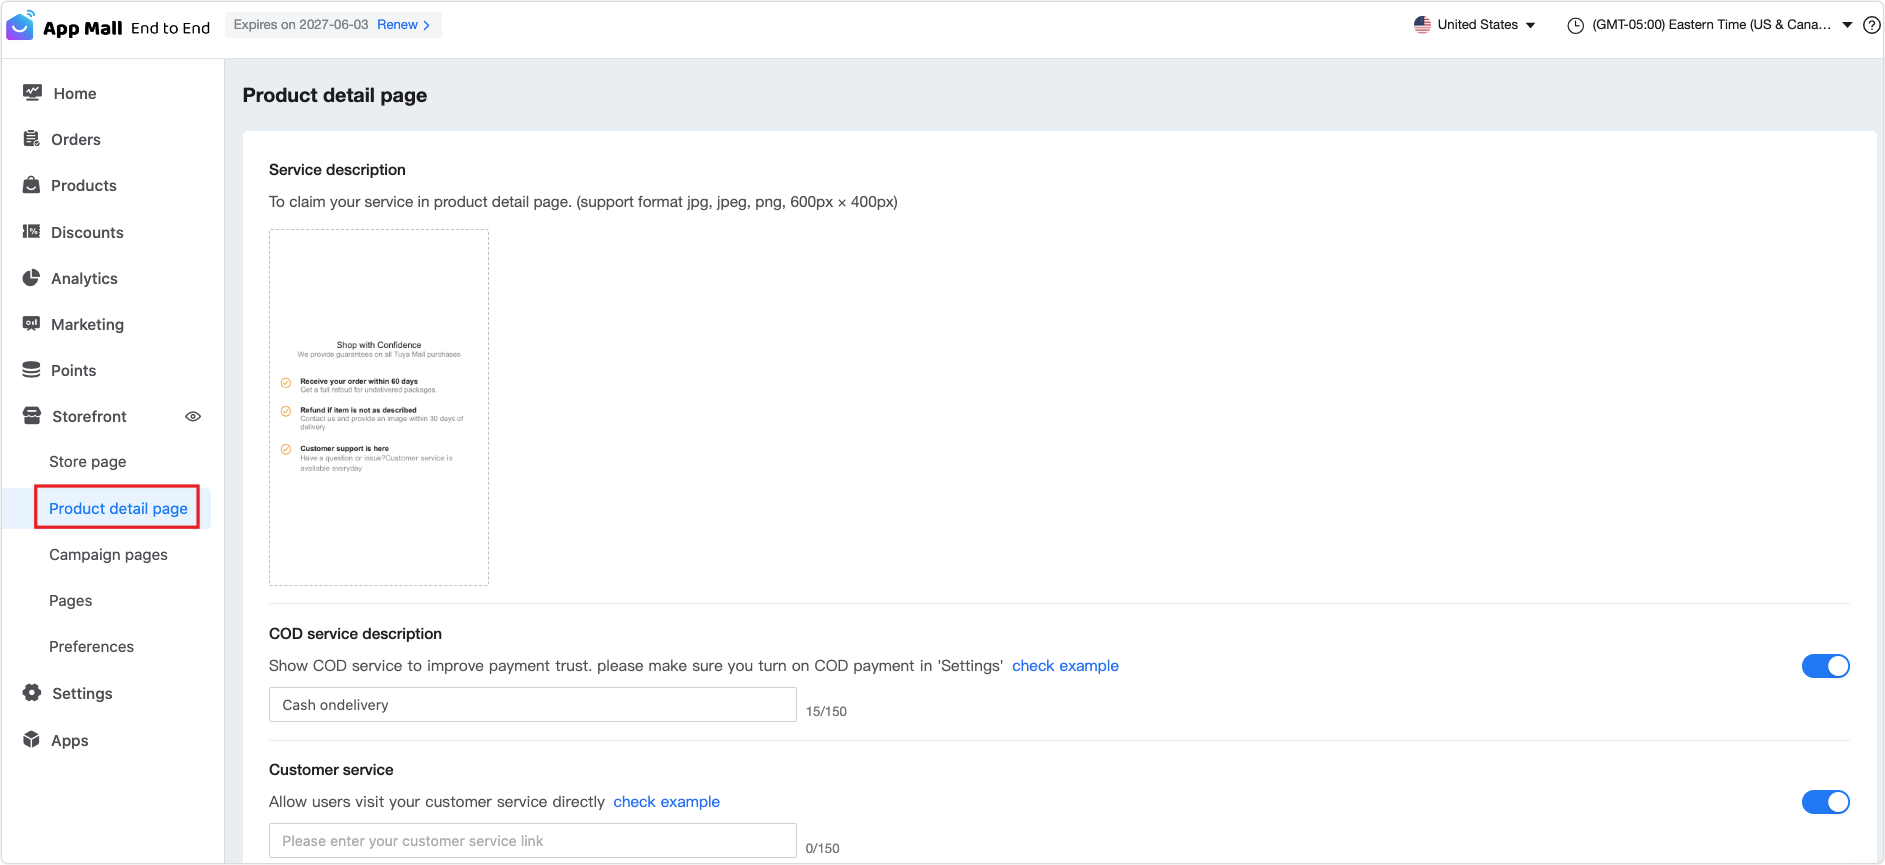
Product detail page
-
Service description: The service description will be displayed on the product detail page.
-
COD service description: Show the COD service to improve payment trust. For more information, see the example.
-
Customer service: Allow users to easily contact your customer service team. For more information, see the example.
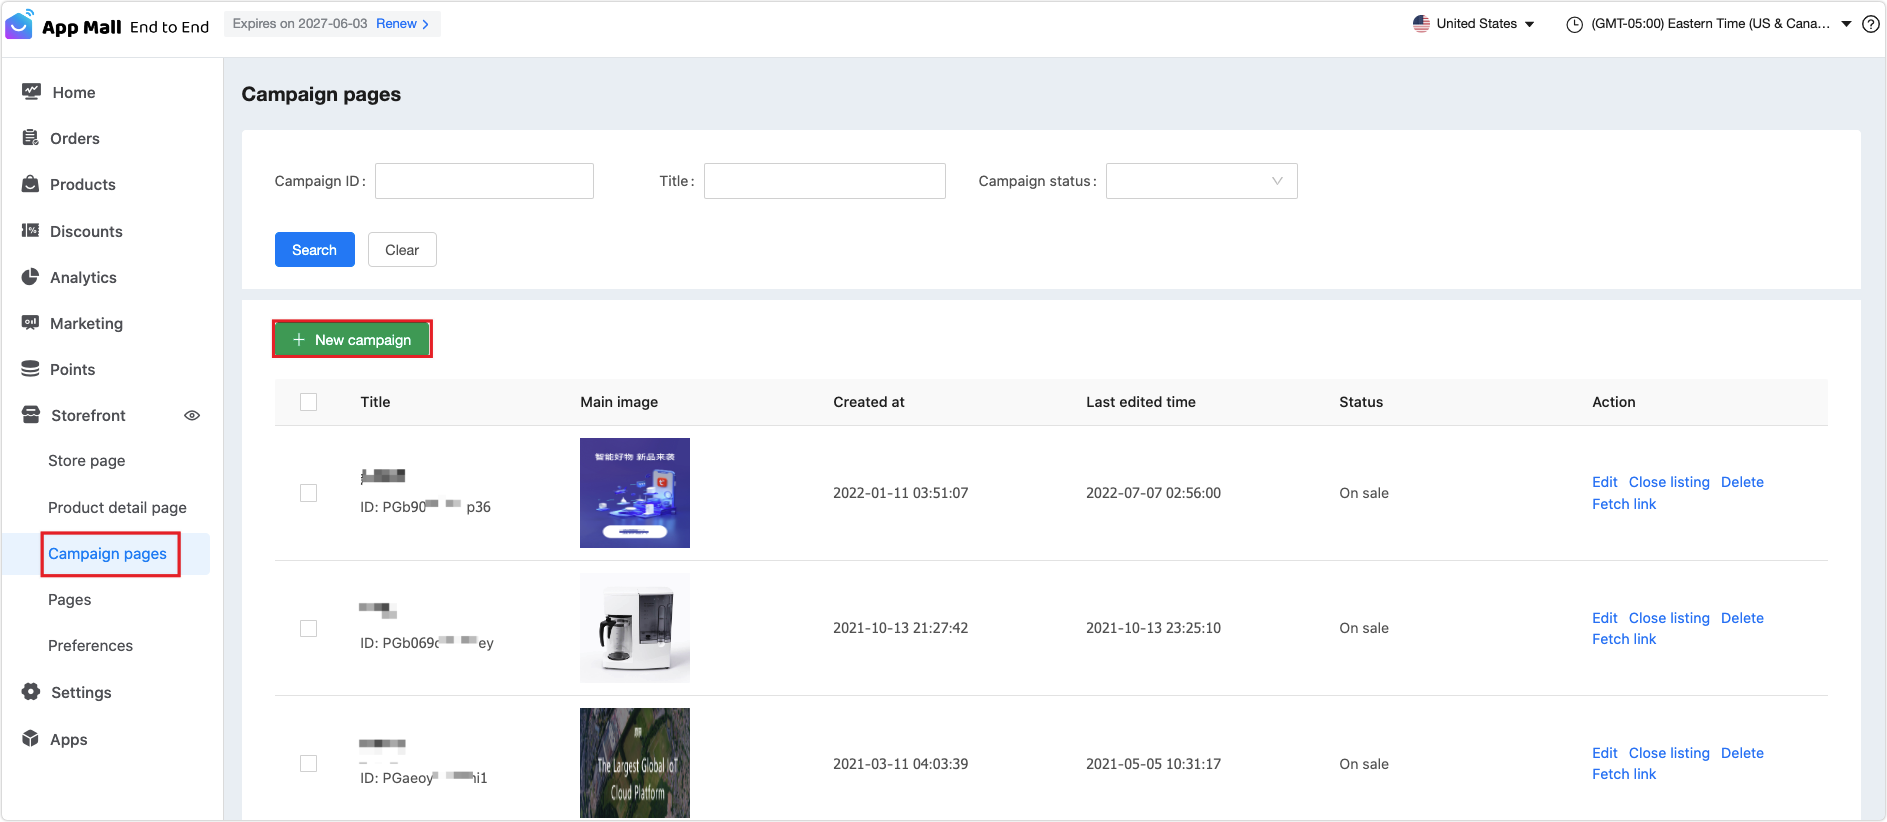
Campaign pages
-
Go to Seller Center, select your mall, and click Go now. In the left-side navigation bar, choose Storefront > Campaign pages.
-
You can search for campaigns based on the campaign ID, title, and status.
-
Click New campaign to complete Basic settings and Content settings.
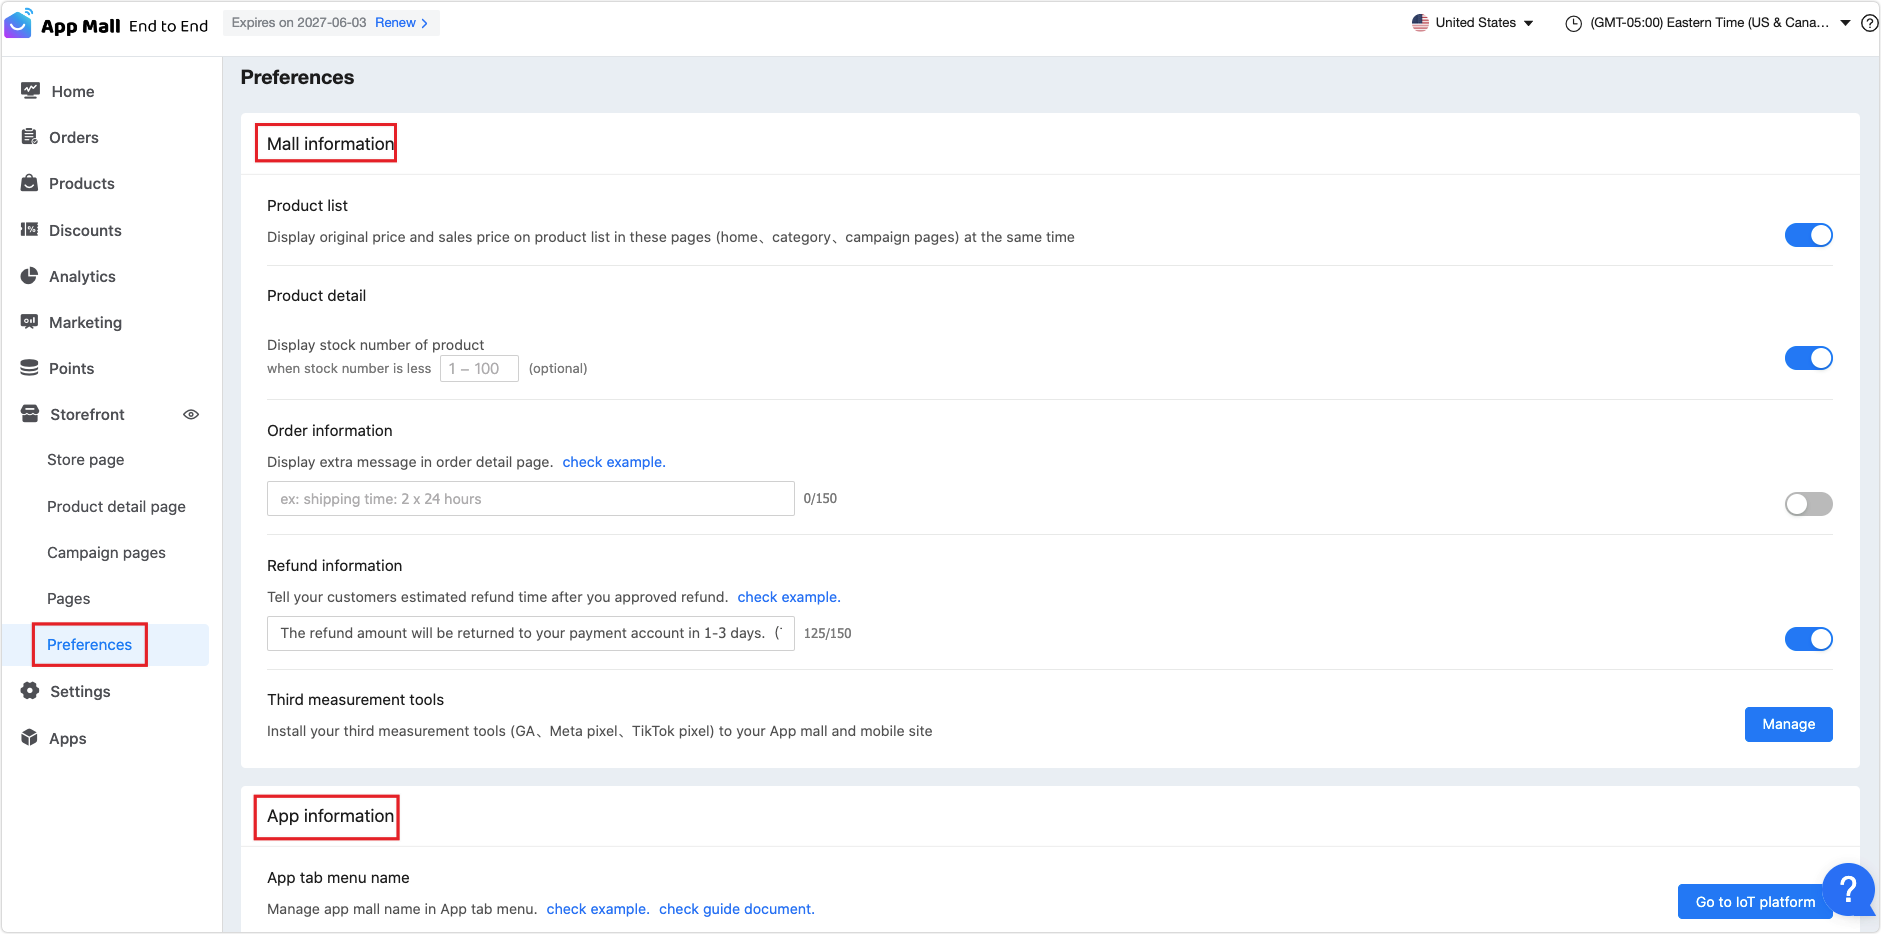
Preferences
Go to Seller Center, select your mall, and click Go now. In the left-side navigation bar, choose Storefront > Preferences. Preferences items include mall information and app information.
Mall information:
- Product list: Specify whether both the original price and the discounted price are displayed on the homepage, category page, and campaign page.
- Product detail: Display the inventory. Valid values range from
1to100. - Order information: See the example.
- Refund information: See the example.
- Third-party measurement tools: Install measurement tools in your App Mall and mobile website. For example, GA, Meta Pixel, and TikTok Pixel.
App information:
-
Service: You can choose whether to enable the test mode or not. In test mode, a test account can be set.
-
Bind App: After your mall is bound with an app, customers can see your mall on the app.
Order management
Procedure
-
Go to Seller Center, select your mall, and click Go now. In the left-side navigation bar, choose Orders > Orders.
-
You can search for orders by order number, order time, item name, order status, payment method, and order source.
-
How to implement shipment: Select the order and products to be shipped, enter the logistics information, and then confirm the shipment. For more information, see Order Management.
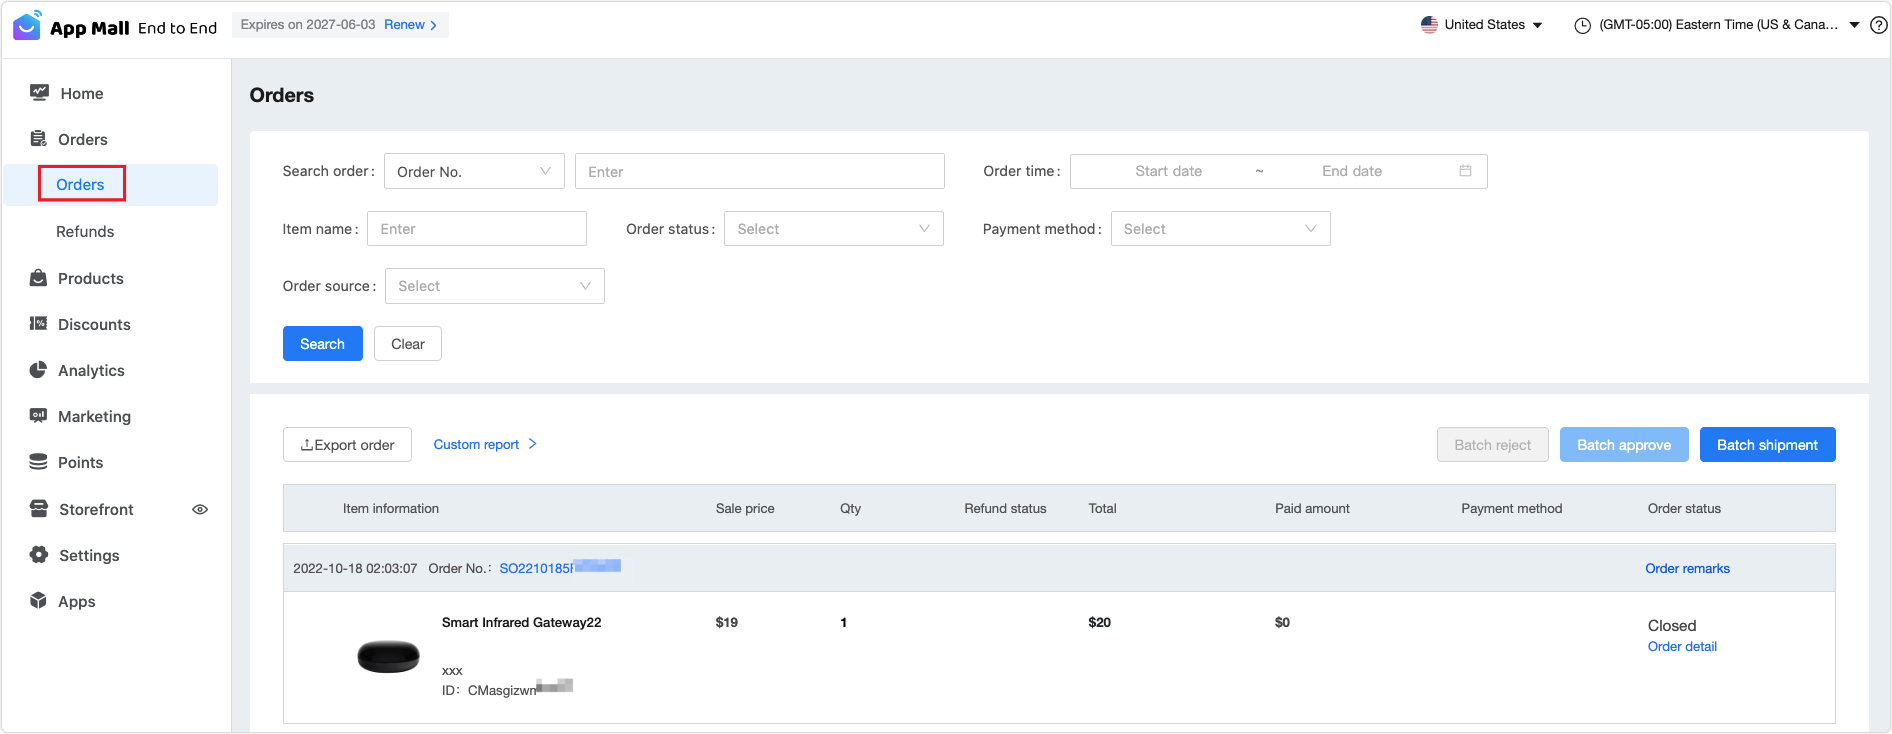
Functions
Export order: The list of orders is sorted by order time in descending order. You can deal with orders based on their status, view and download them in Analytics. The App Mall supports exporting order reports in two formats. For more information, see Manage Orders and Export Report.
- Default report: Export all fields for all orders.
- Custom report: You can customize the report fields (including the sorting of fields) to adapt to the user’s logistics system.
How to perform batch shipment:
-
Click Batch shipment.
-
Download a template.
-
Enter the order number, logistics company code, and tracking number in the template.
-
Click Upload to upload the order file.
-
Click Batch shipment to finish shipment. For more information, see Manage Orders and Export Report.
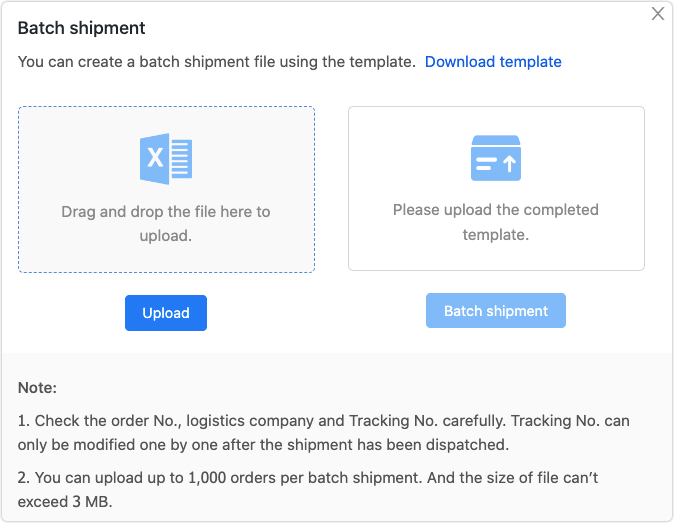
- Check the order number, logistics company, and tracking number. After the shipment is dispatched, you can only modify the tracking number one by one.
- You can upload up to 1,000 orders per batch shipment. Supported formats: .xls and .xlsx. The file size shall not exceed 3 MB.
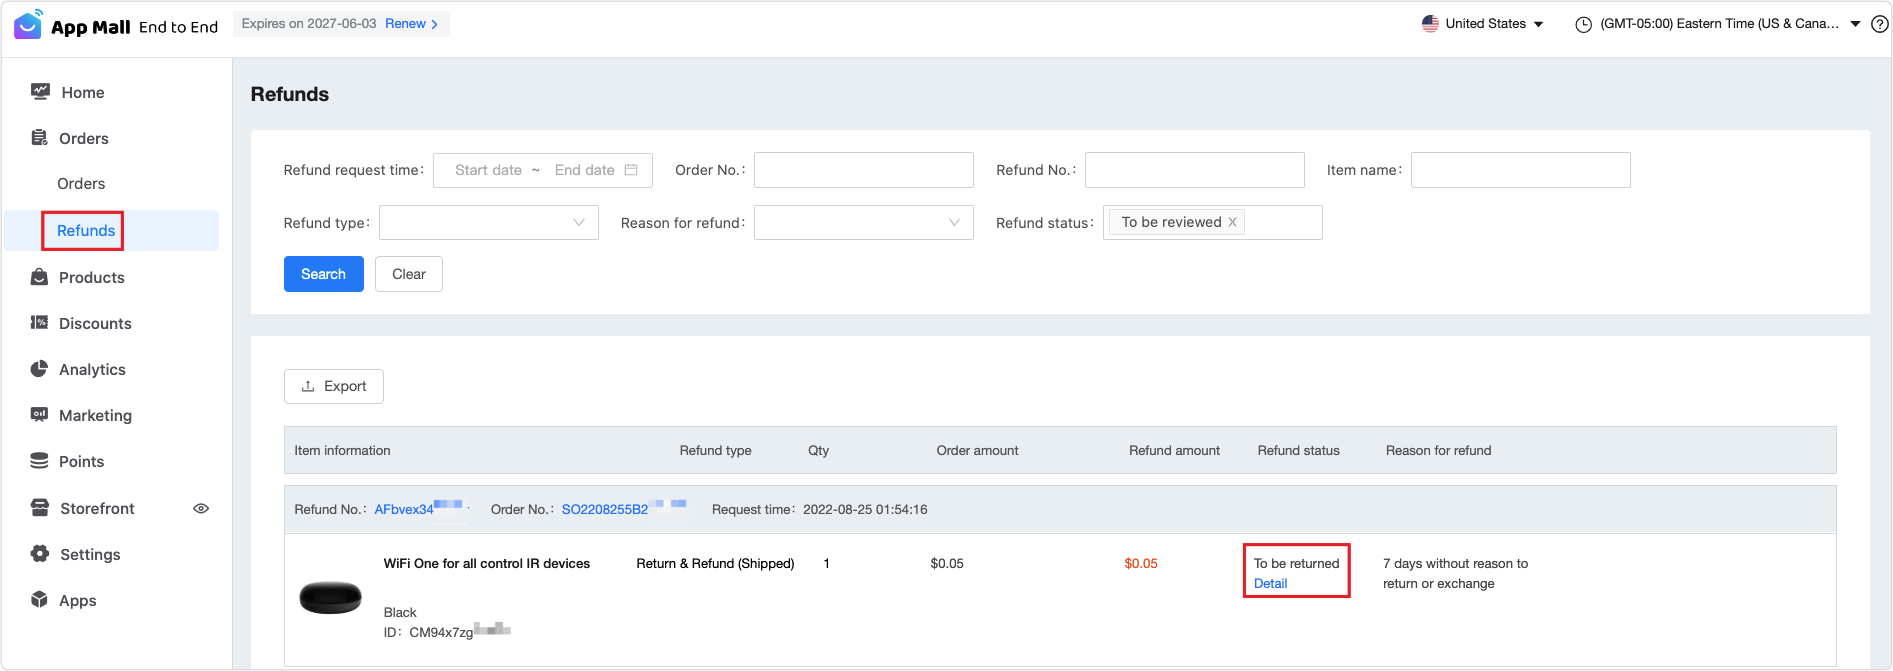
Refund management
-
Go to Seller Center, select your mall, and click Go now. In the left-side navigation bar, choose Orders > Refunds.
-
Filter the specified refund information based on the refund request time, order number, item name, refund type, reason for refund, and refund status.
-
Click Detail to view the refund order details and choose whether to agree to the refund. For more information about configuration, see Refund Management.
Advanced functions
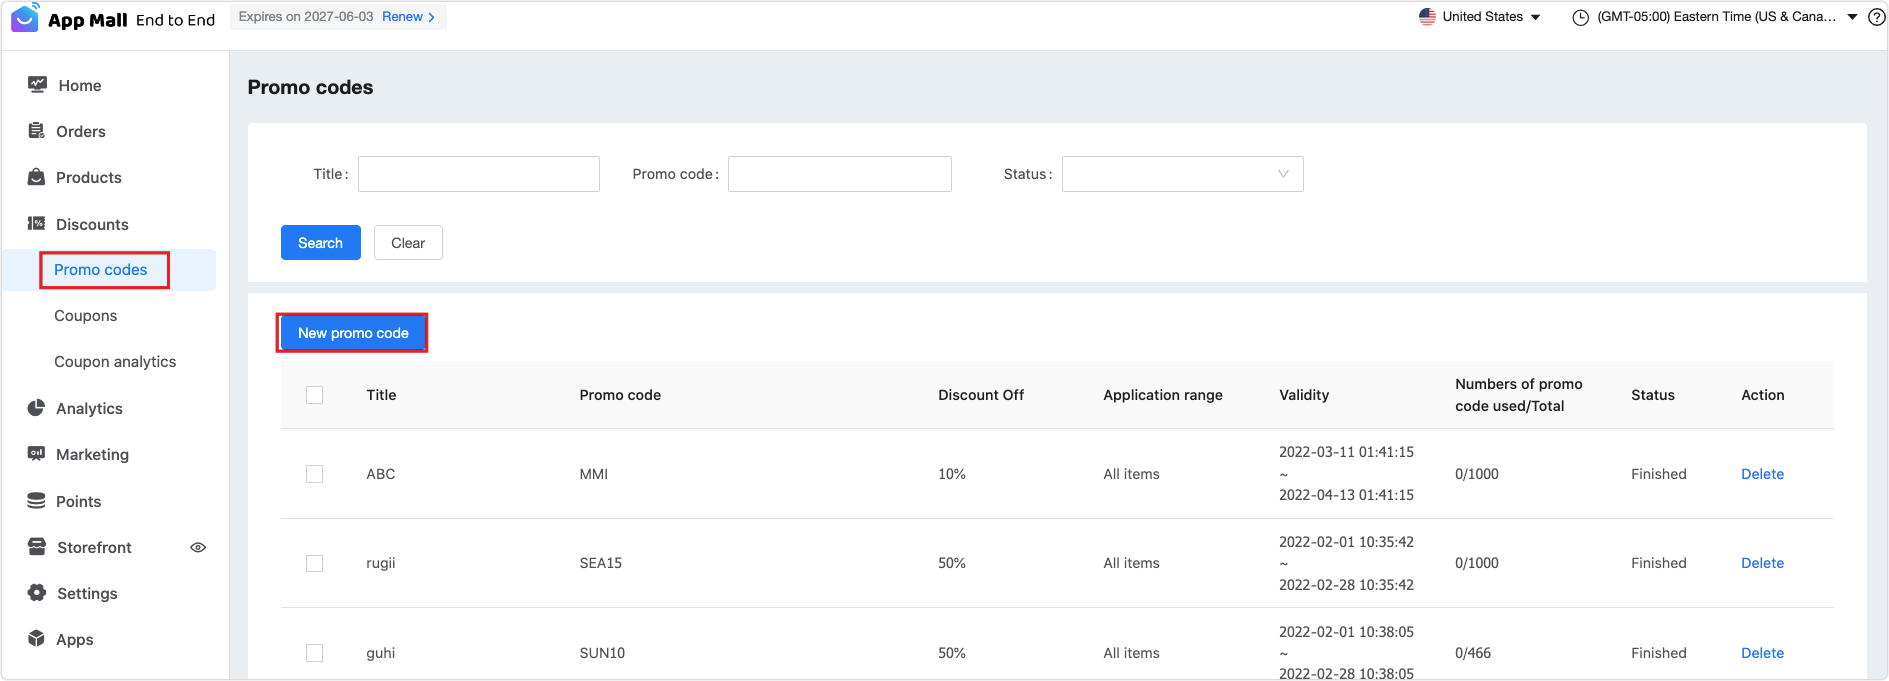
Promo codes
The App Mall provides promotional codes for sellers at home and abroad.
-
Go to Seller Center, select your mall, and click Go now. In the left-side navigation bar, choose Discounts > Promo codes.
-
You can filter by promo code title, promo code, and status.
-
Click New promo code to create a promo code. For more information about configuration, see Promo Codes Setting of the Mall.
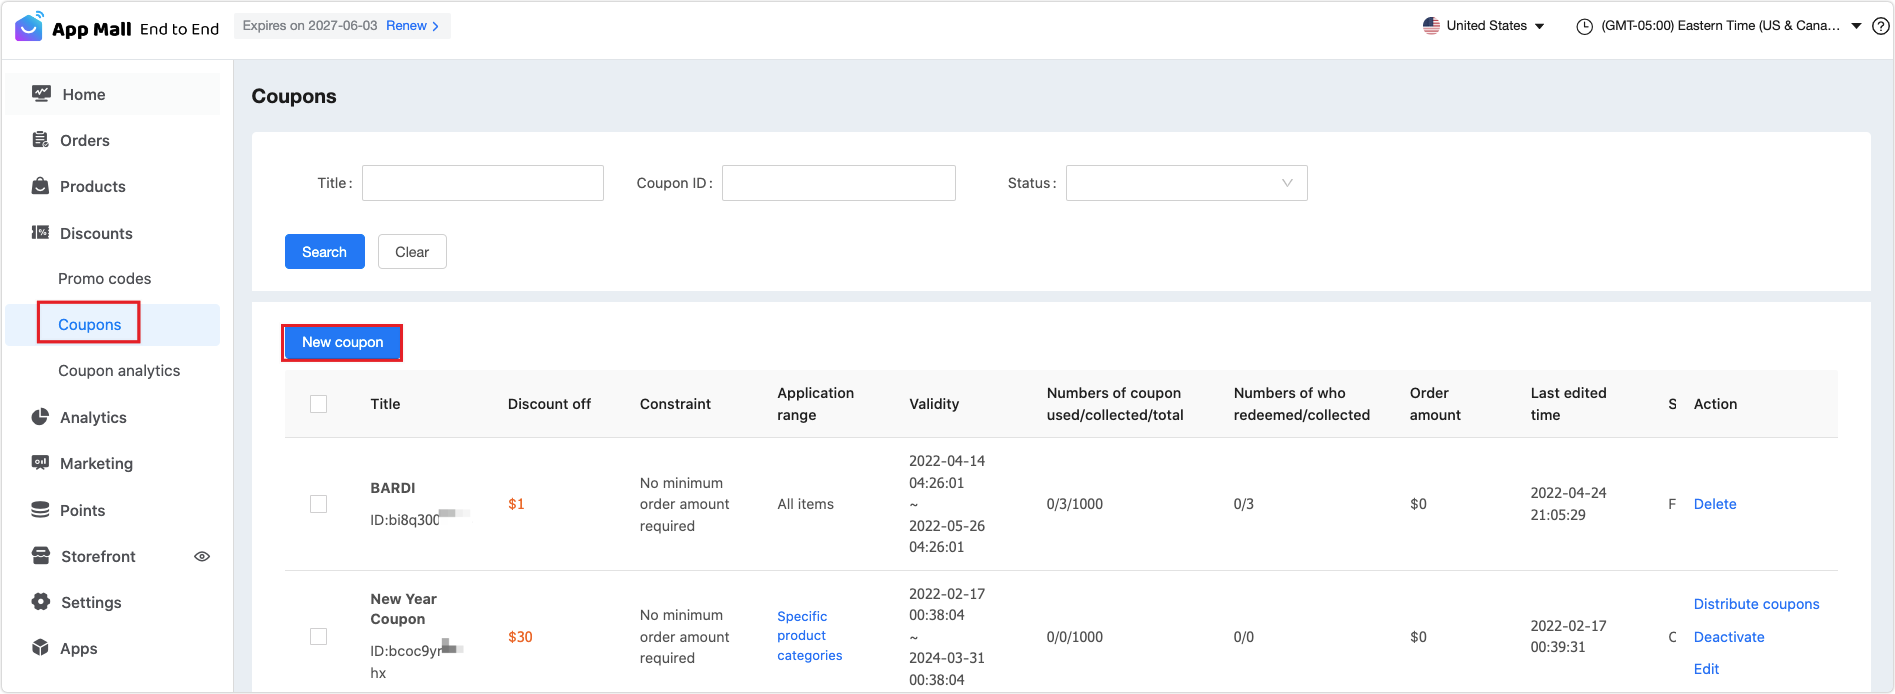
Coupons
-
Go to Seller Center, select your mall, and click Go now. In the left-side navigation bar, choose Discounts > Coupons.
-
You can filter by coupon title, coupon ID, and status.
-
Click New coupon to create a coupon. For more information about configuration, see Coupon Settings of the Mall.
Coupon analytics
-
Go to Seller Center, select your mall, and click Go now. In the left-side navigation bar, choose Discounts > Coupon analytics.
-
You can filter by coupon title, status, source, collection time, coupon ID, order number, account, and validity period.
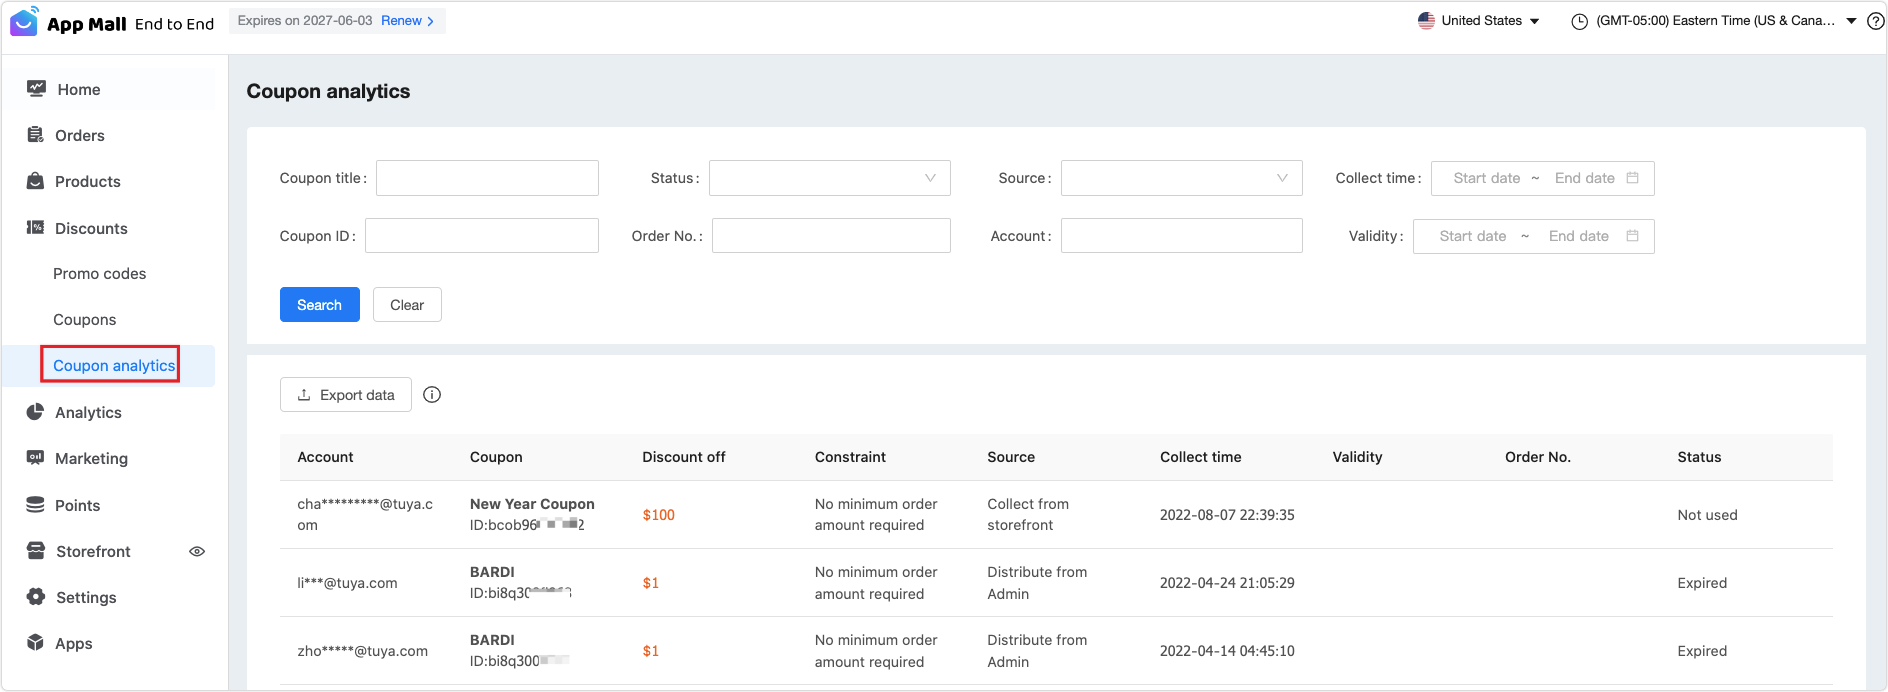
The exported data is a list of the received coupons based on the current filter conditions. Up to 3,000 items of data can be exported at a time. Export in batches if the data items exceed the limit.
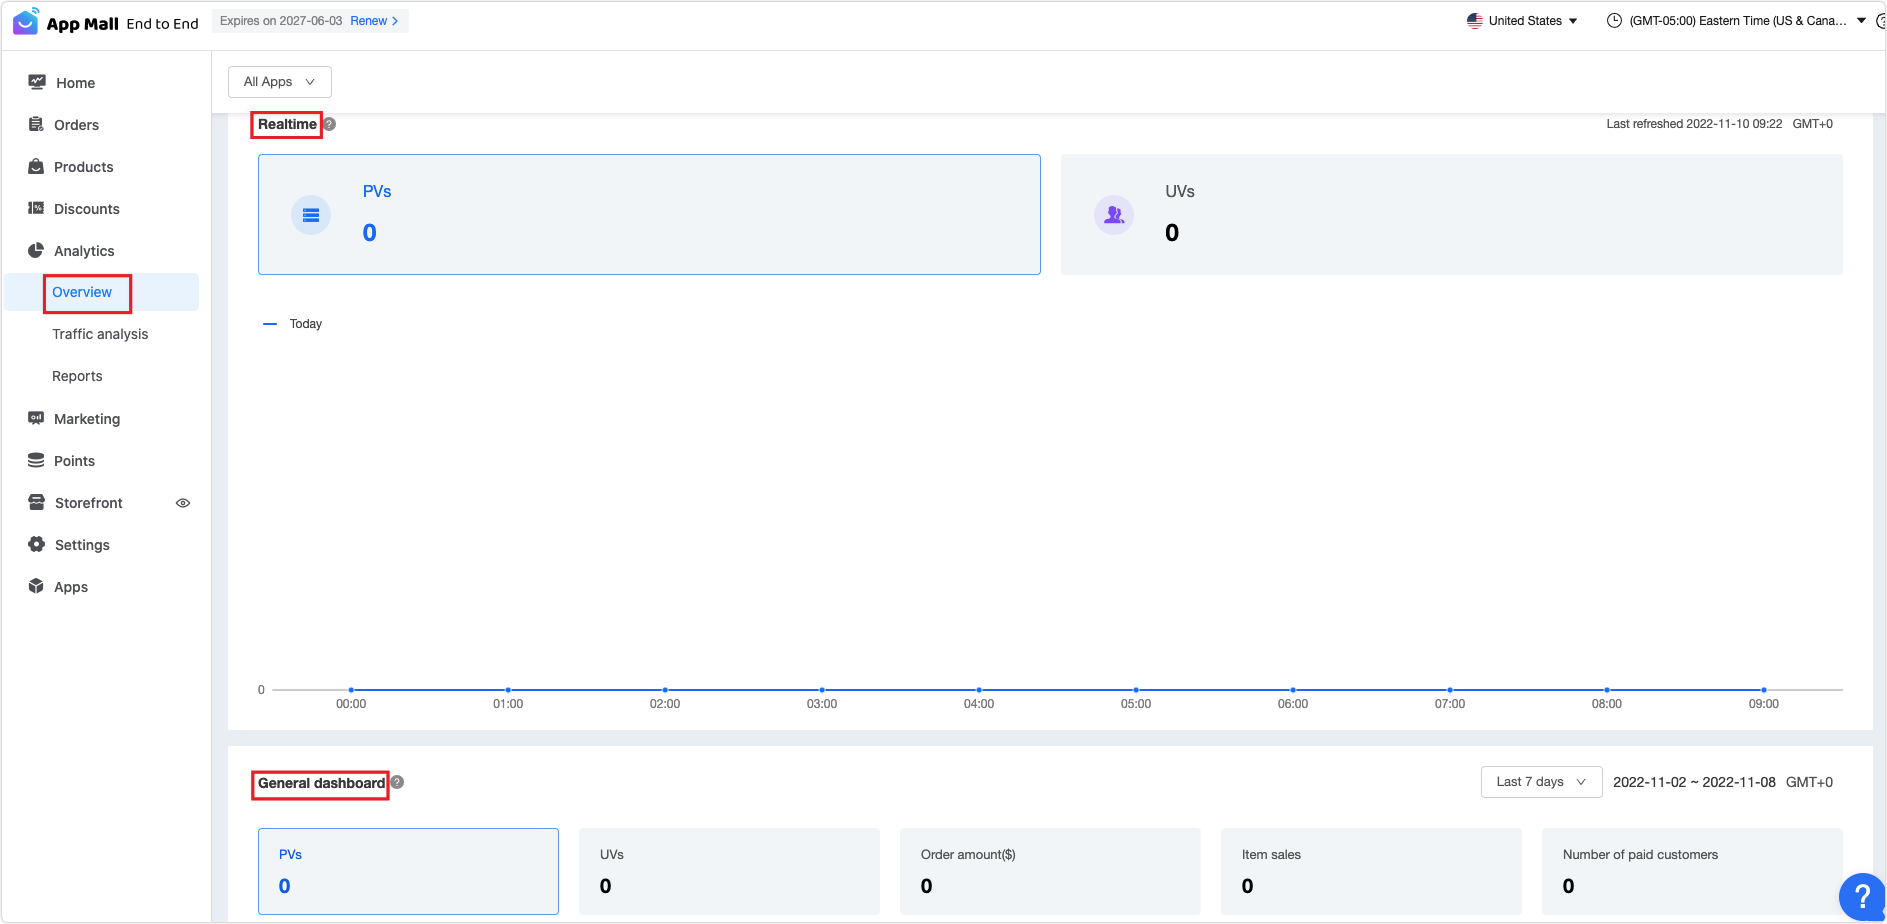
Data overview
Go to Seller Center, select your mall, and click Go now. In the left-side navigation bar, choose Analytics > Overview.
There are two types of data on the overview page.
-
Real-time overview: Show the PV and UV data of the mall in real time. PV refers to the number of page visits. UV refers to the number of unique visitors, and one account is only recorded as one visitor. The figure shows the amount of data generated hourly in a day.
-
General dashboard: Show the mall data for the specified period. By default, the last 7 days are selected. You can also choose to show the data by day, week, or month, and select the specified day, week, or month as you want. The data related to traffic and orders is provided. The line graph at the general dashboard shows you how the data fluctuates over time.
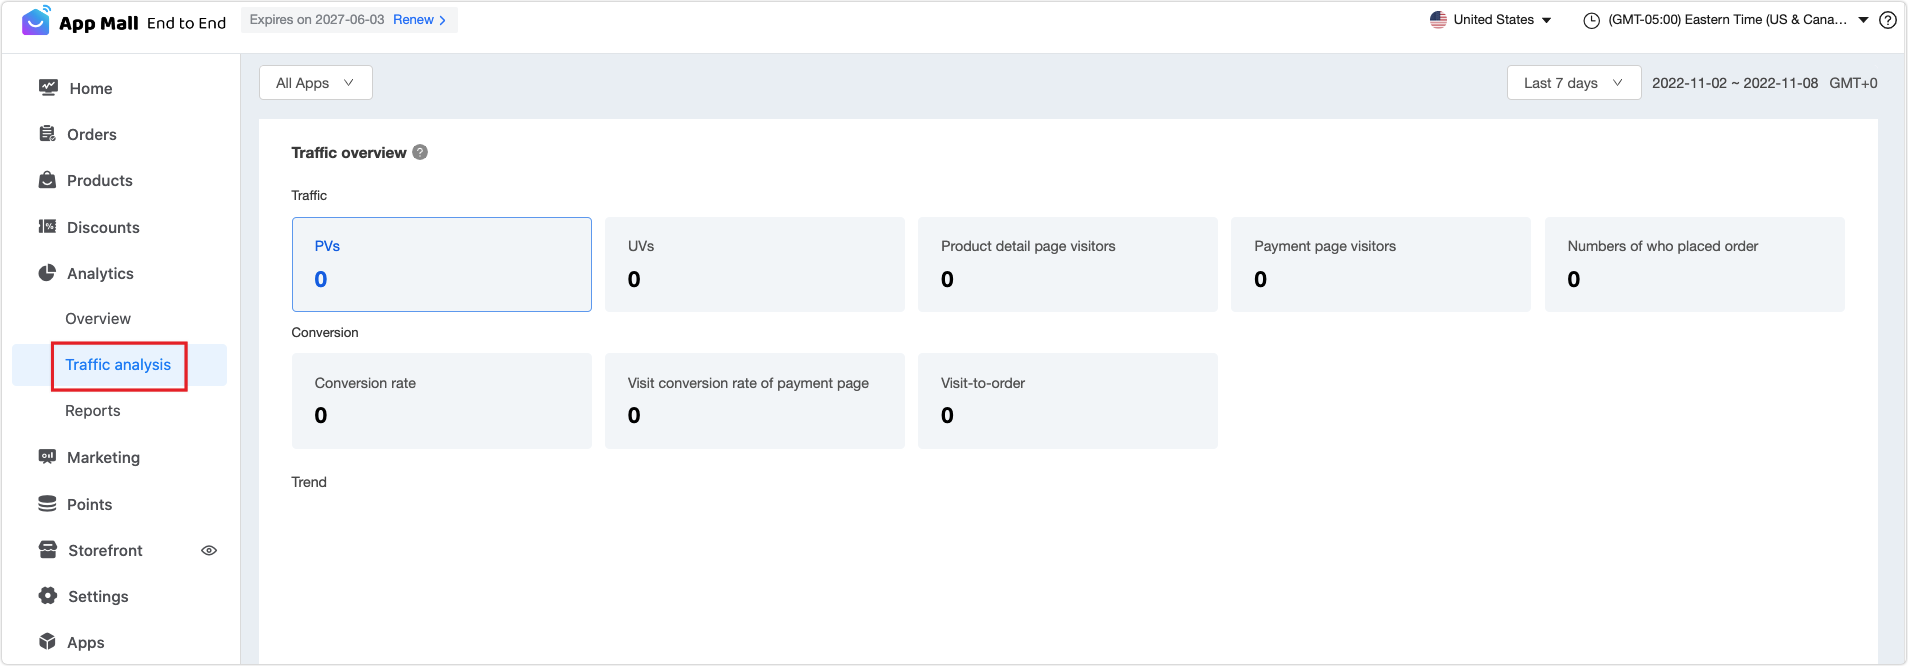
Traffic analysis
-
Go to Seller Center, select your mall, and click Go now. In the left-side navigation bar, choose Analytics > Traffic analysis.
-
The page has three sections, traffic overview, visit analytics of each module on the homepage, and traffic rankings.
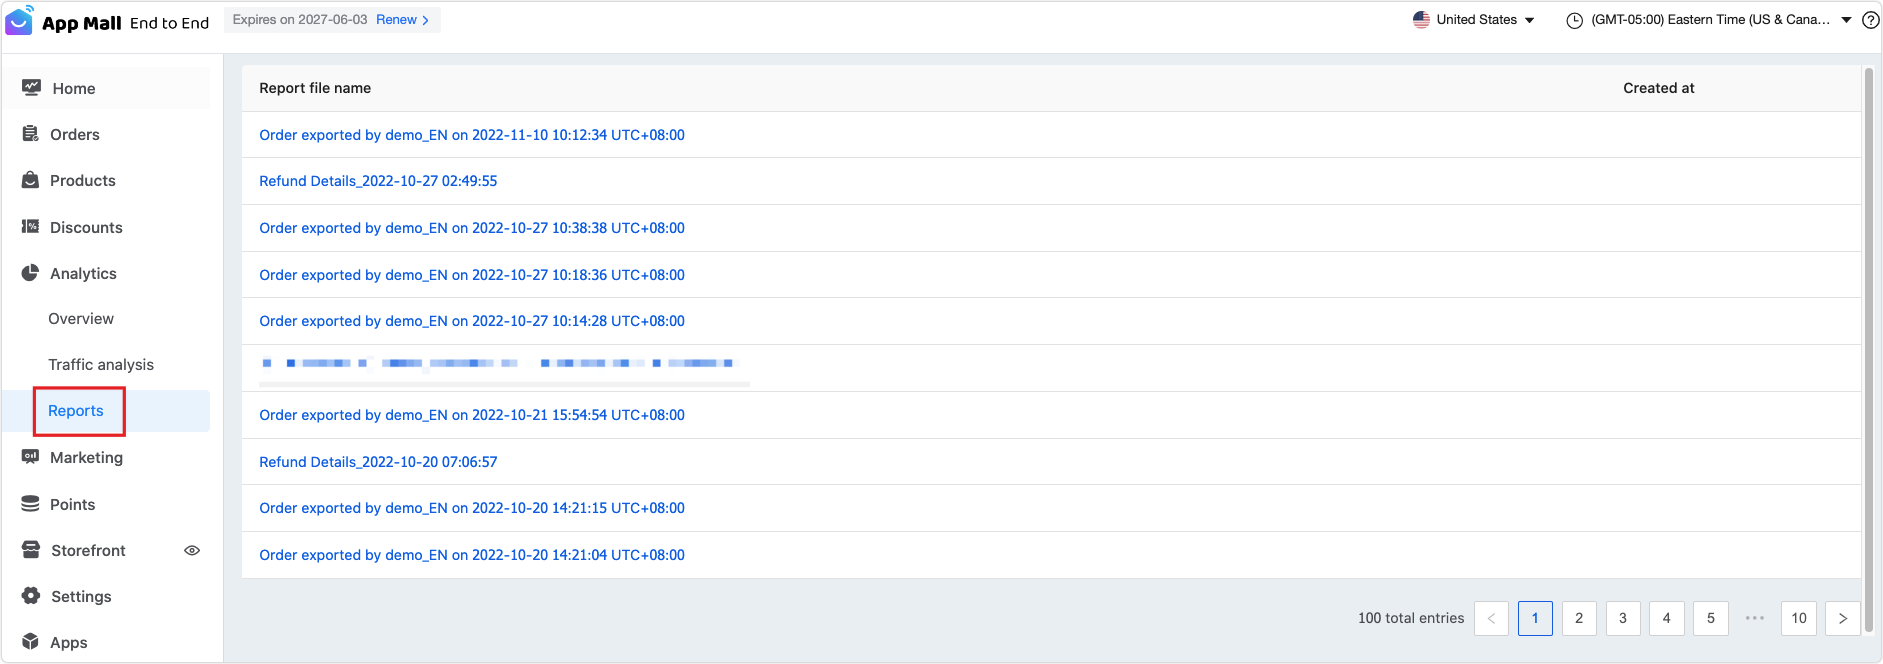
Reports
-
Go to Seller Center, select your mall, and click Go now. In the left-side navigation bar, choose Analytics > Reports.
-
You can export order reports and data reports in bulk.
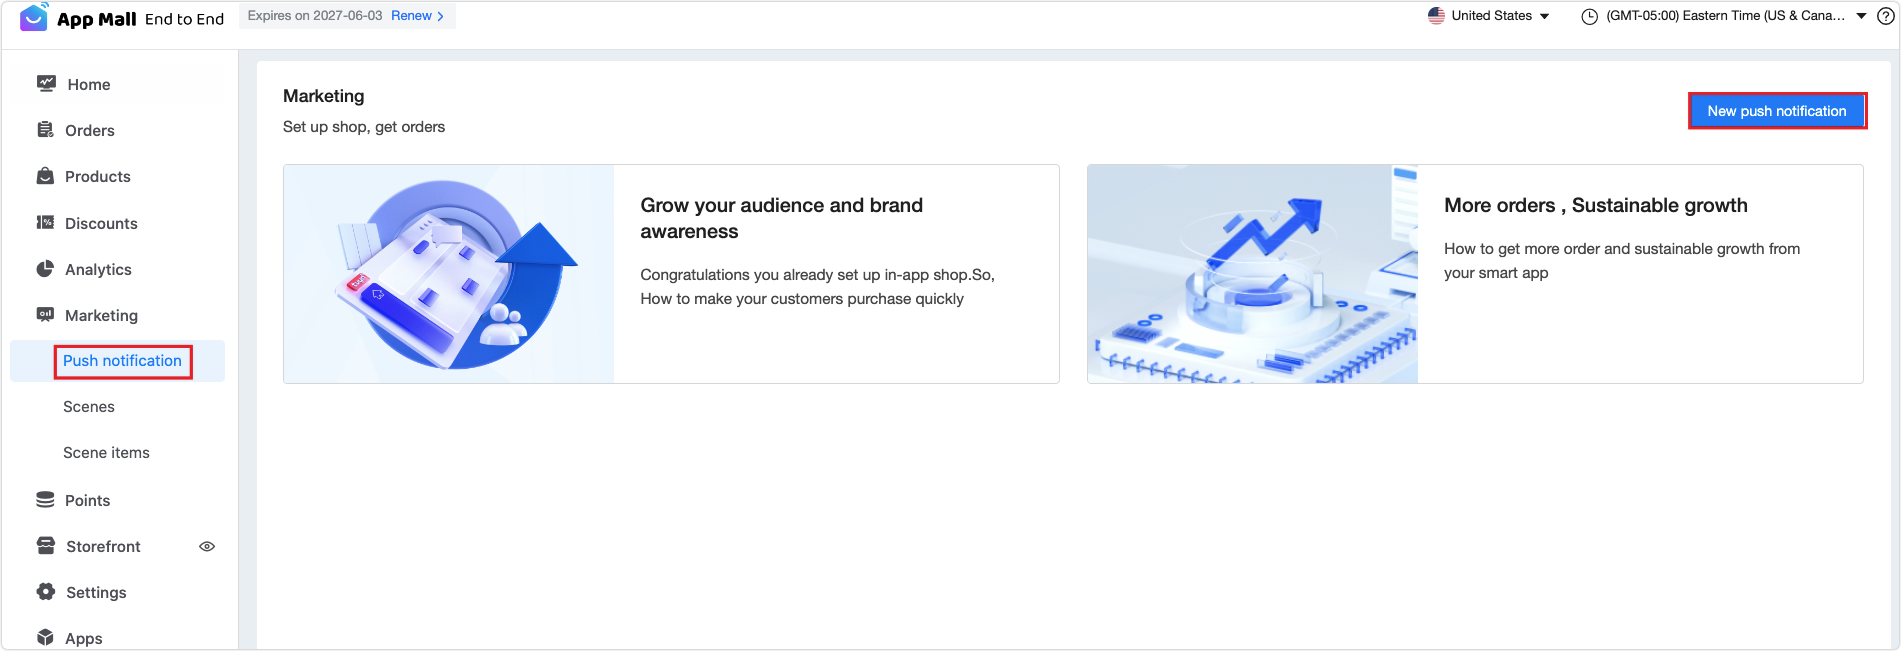
Push notification
-
Go to Seller Center, select your mall, and click Go now. In the left-side navigation bar, choose Marketing > Push notification.
-
You can create marketing campaigns and send push notifications. For more information about marketing, see Set up shop, Get orders and Sustainable Growth.
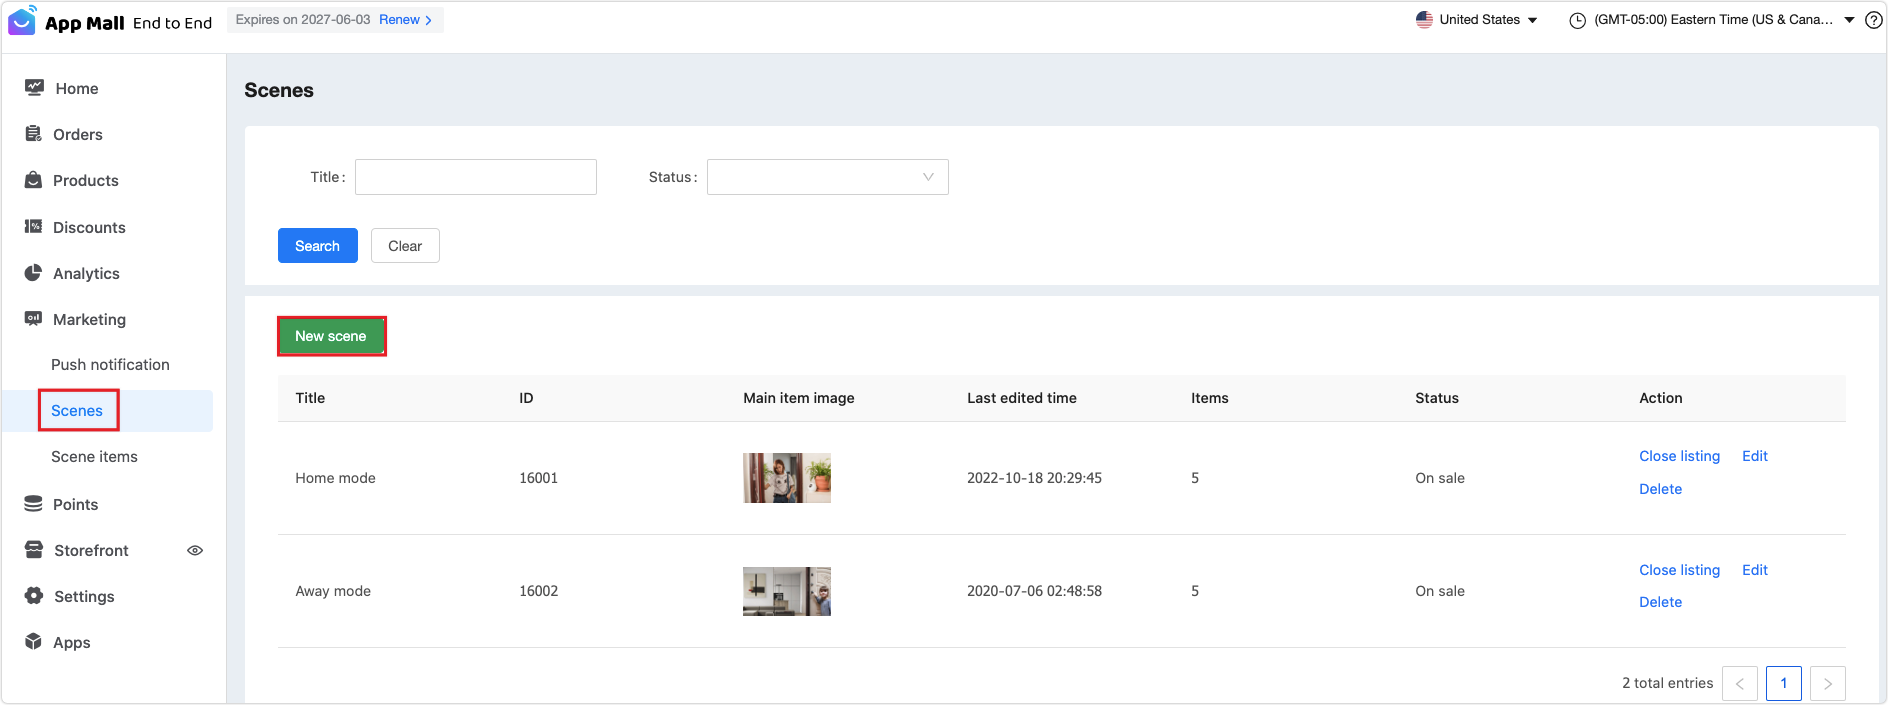
Scenes
-
Go to Seller Center, select your mall, and click Go now. In the left-side navigation bar, choose Marketing > Scenes.
-
You can filter by scene title and status.
-
Click New scene to create a scene.
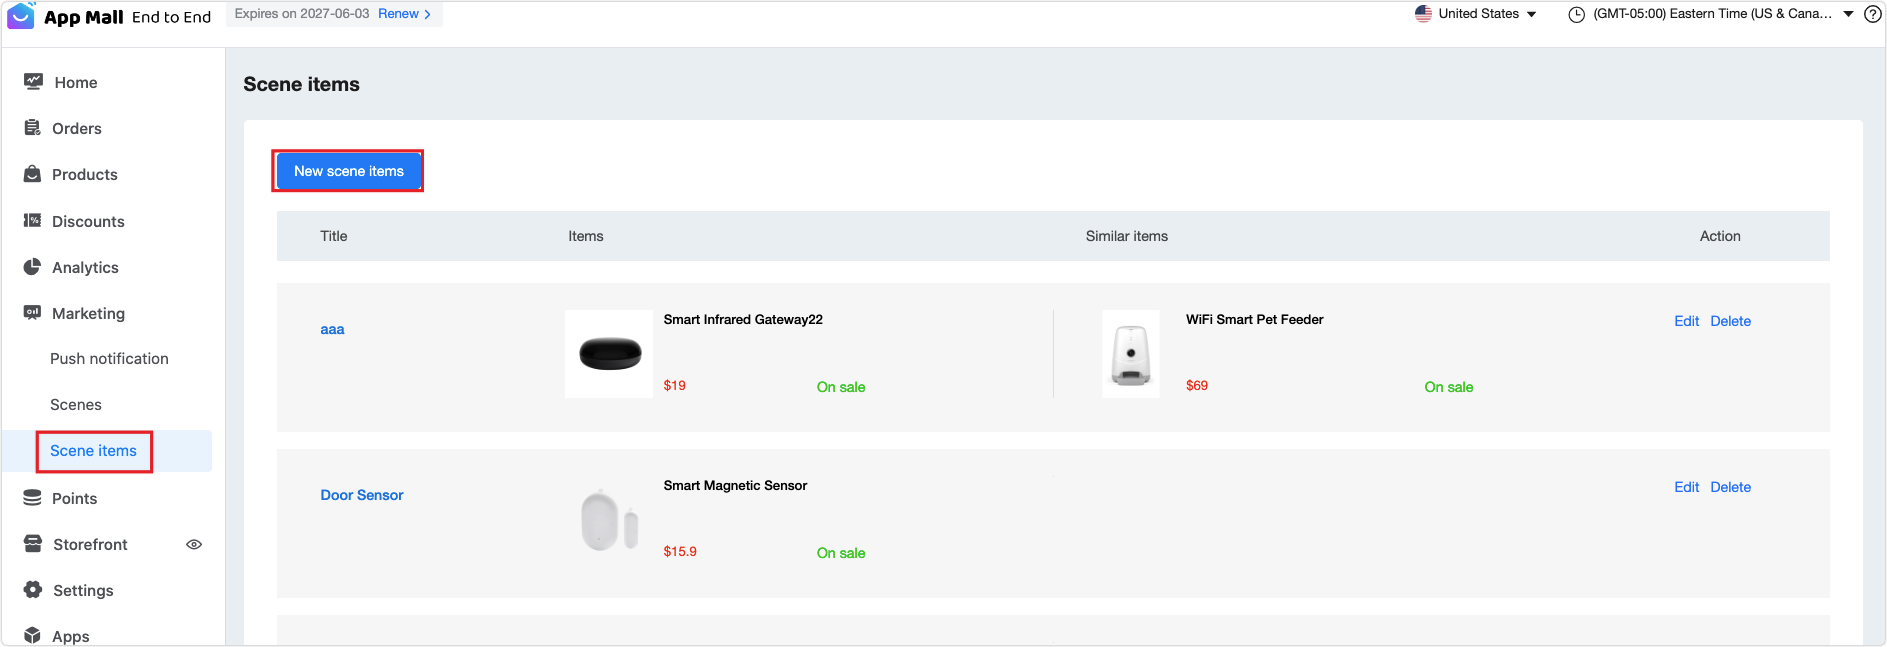
Scene items
Scene items are a specific type of items with the same functionality, providing customers with more matching choices when purchasing scenes. If you have fewer product models, you can also set only one main item.
-
Go to Seller Center, select your mall, and click Go now. In the left-side navigation bar, choose Marketing > Scene items.
-
Click New scene items to create scene items.
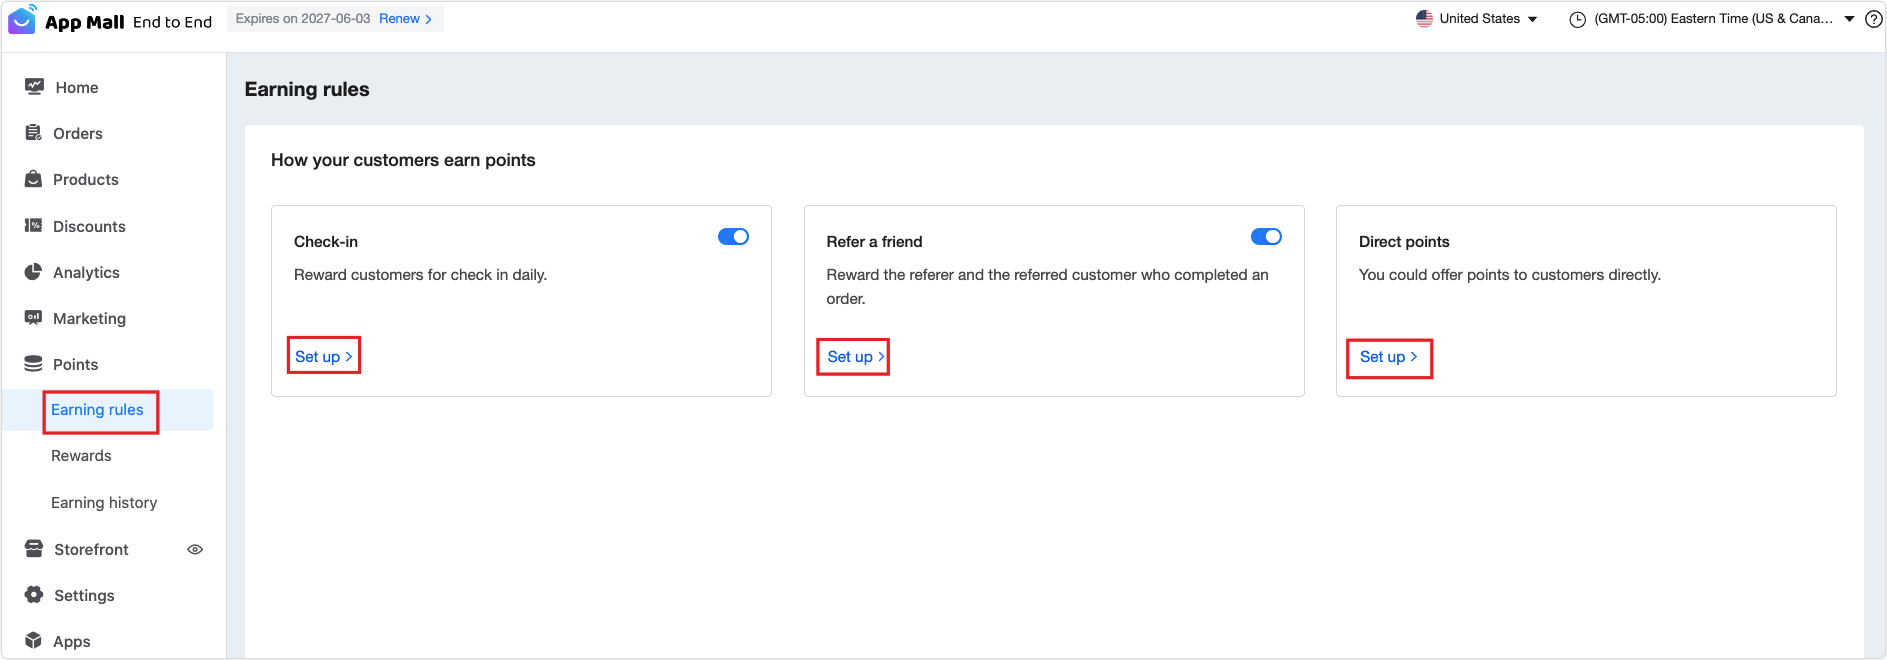
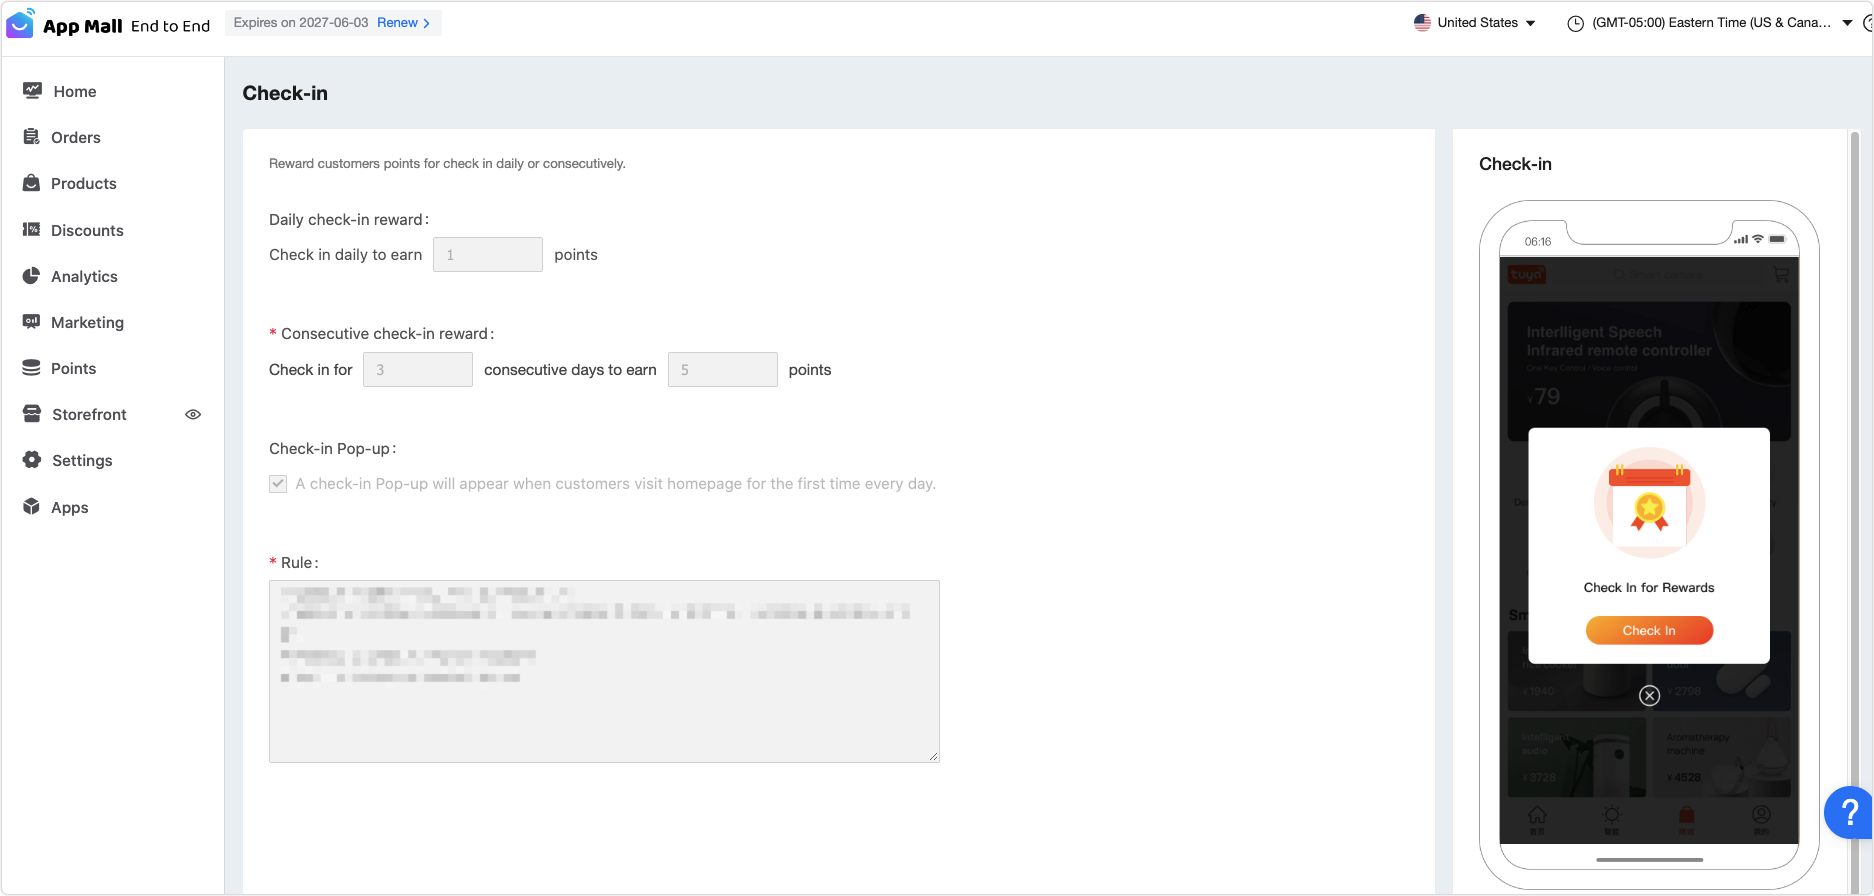
Earning rules
-
Go to Seller Center, select your mall, and click Go now. In the left-side navigation bar, choose Points > Earning rules.
-
Users can earn points by checking in, referring to a friend, and getting points from you.
-
Click Set up to set up the rules.
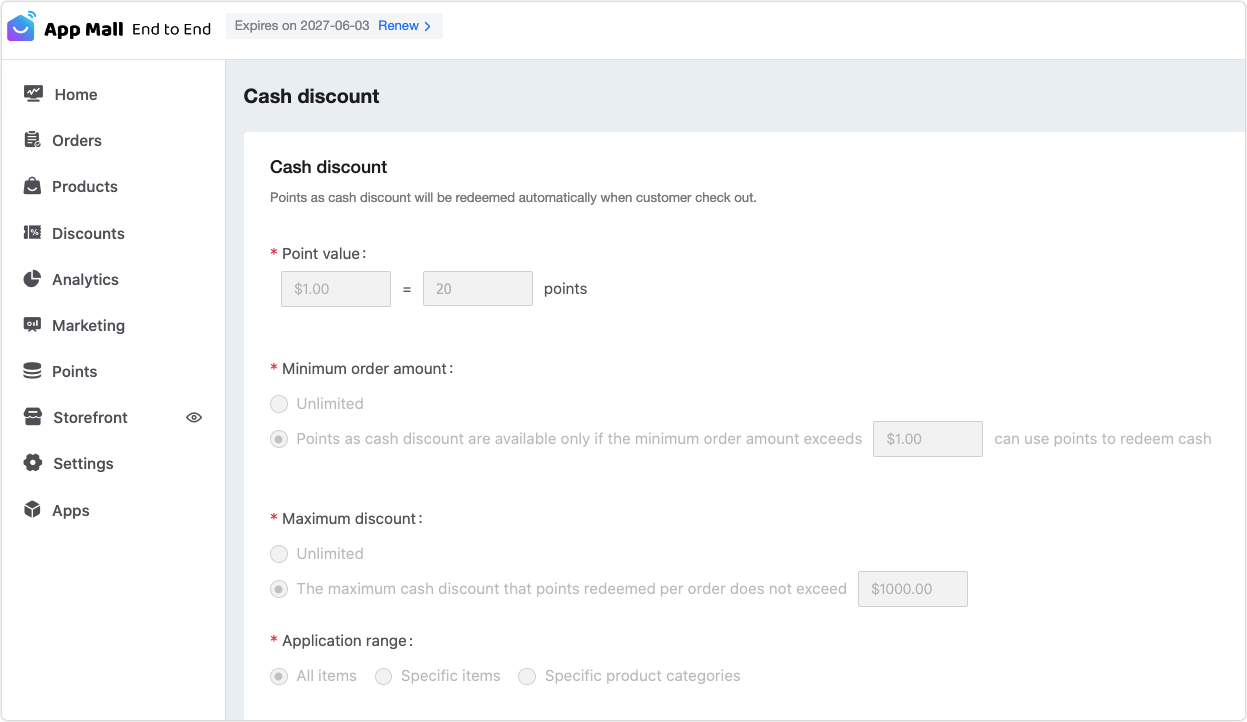
Rewards
-
Currently, rewards refer to cash discount.
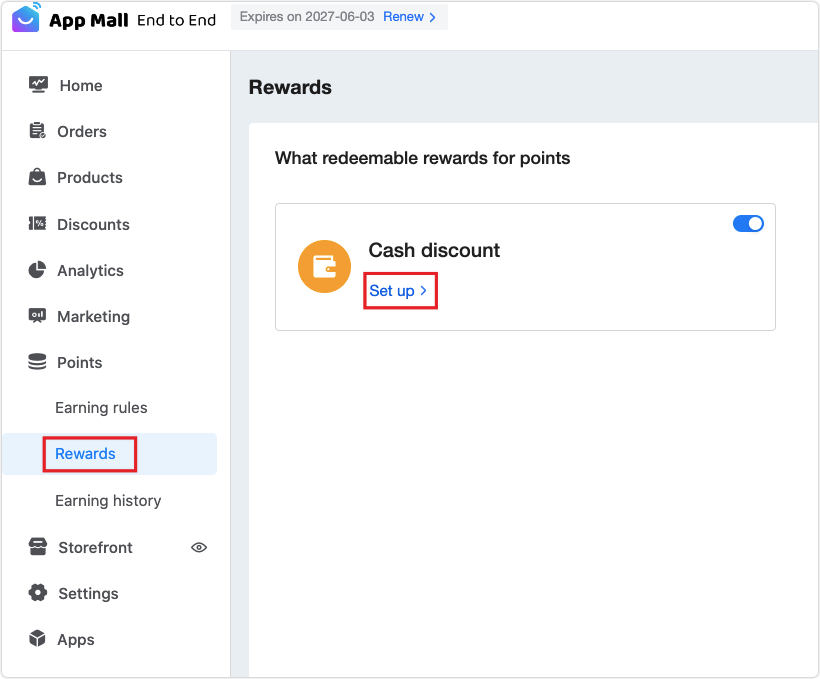
-
Click Set up to set up the rules.
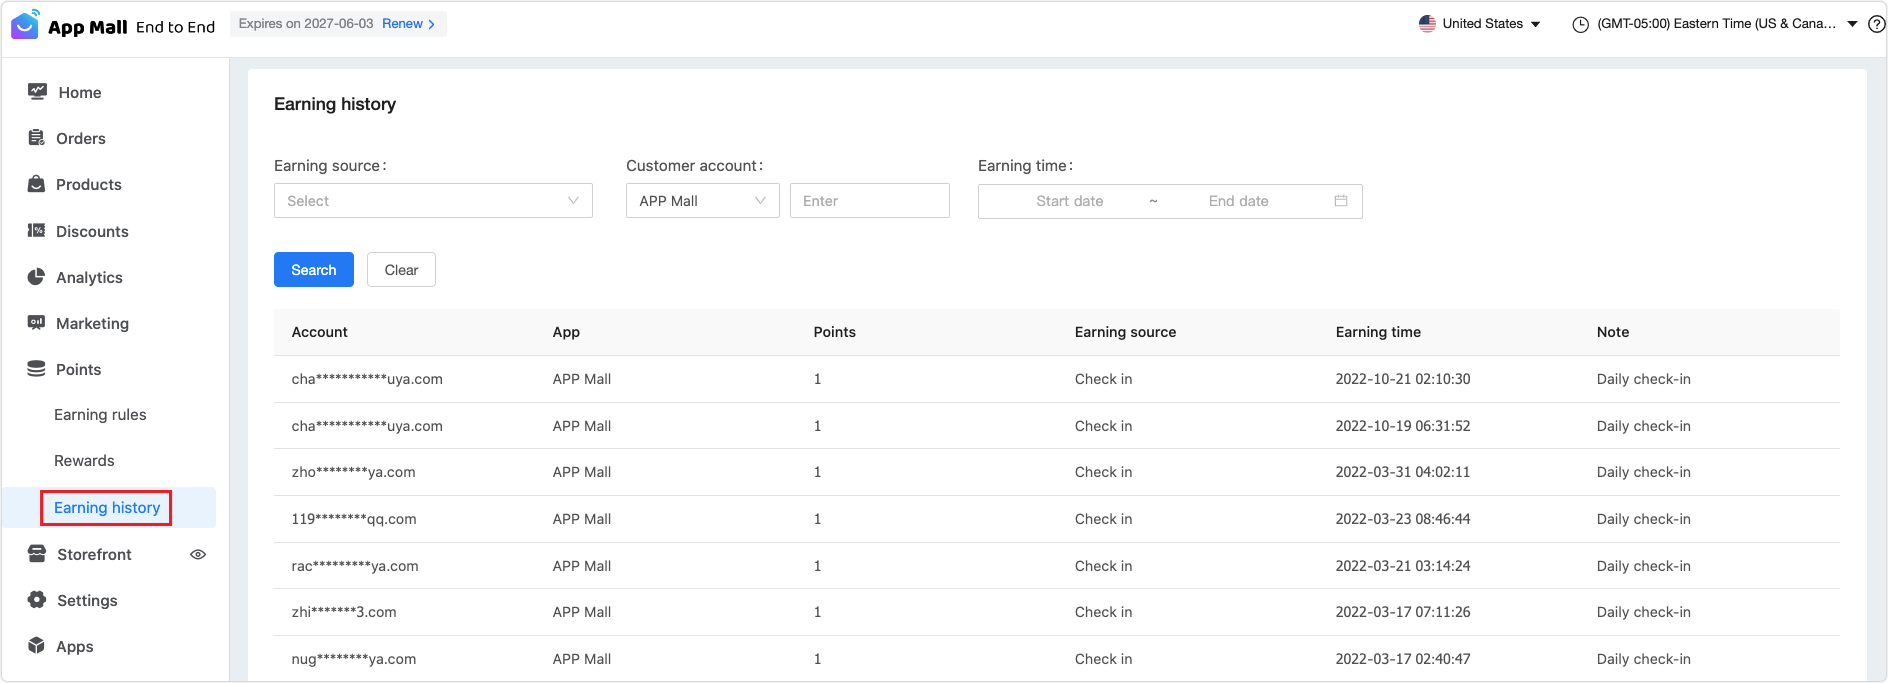
Earning history
You can query the details of points based on the earning source, customer account, and earning time.
For more information about configuration, see App Mall Help Center.
Is this page helpful?
YesFeedbackIs this page helpful?
YesFeedback


