Application Instance (STM32)
This topic uses MCU STM32L431RCT6 and NX1 AT firmware to describe how to port NB-IoT Link SDK to a target platform.
Prerequisites
- MCU: STM32 MCU
- NB-IoT module: NX1-AT
- License: Tuya NB-IoT Link SDK license
SDK footprint
- Flash memory: about 60 KB
- RAM: about 10 KB
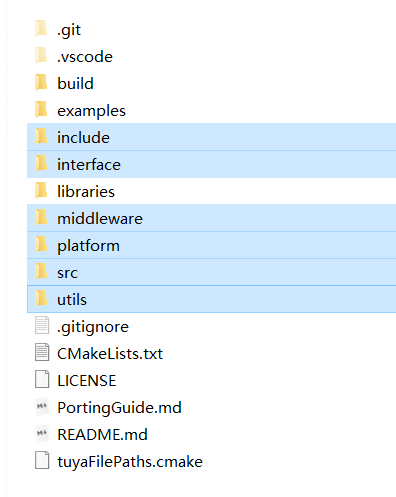
SDK directory
├── examples (Reference routine)
├── include (SDK header and APIs)
├── src (SDK source code)
├── libraries (External dependencies, including CoAP, LwM2M, OneNet, and Mbed TLS)
├── middleware (LwM2M and OneNet middleware)
├── interface (SDK functional interfaces that must be ported)
├── platform (Interface adaptation used for porting)
├── utils (General tools)
├── tuyaFilePaths.cmake
├── CMakeLists.txt
├── PortingGuide.md
├── README.md
└── LICENSE
Porting guide
Create project
Create a project, including operations such as serial initialization.
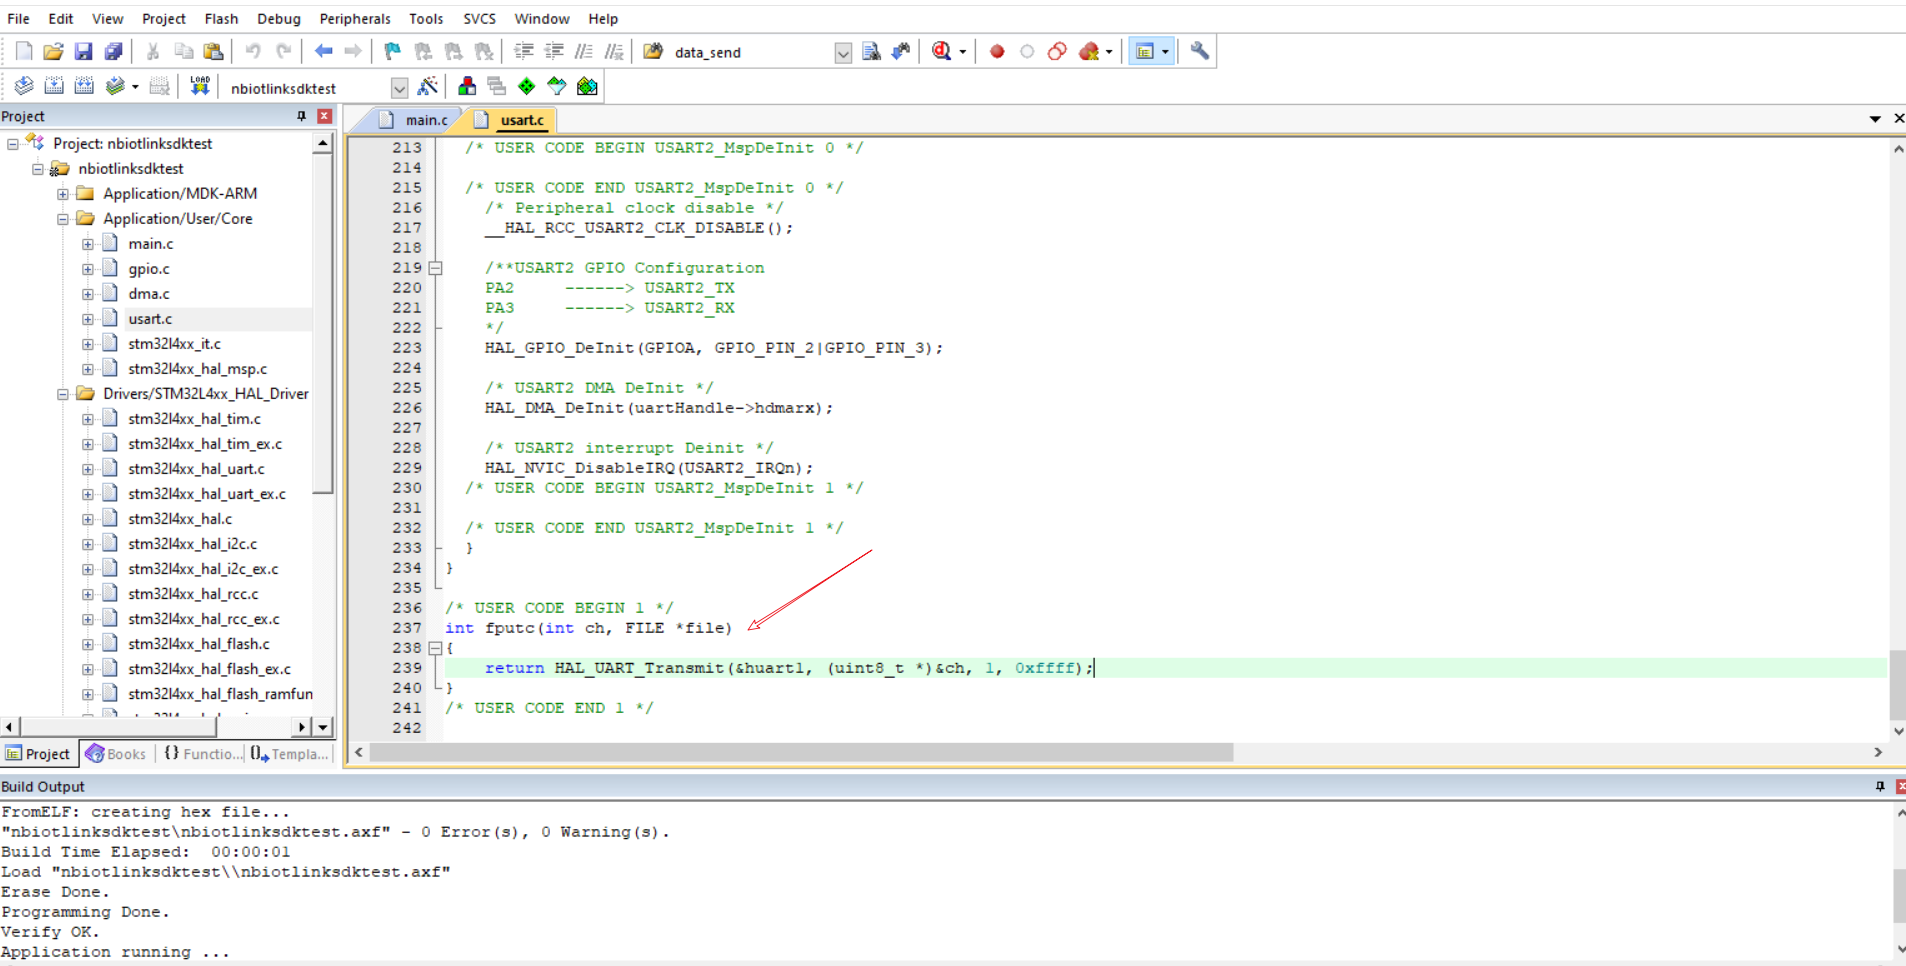
Redirect serial ports
Configure serial port redirection and then set serial port 1 as log printing.
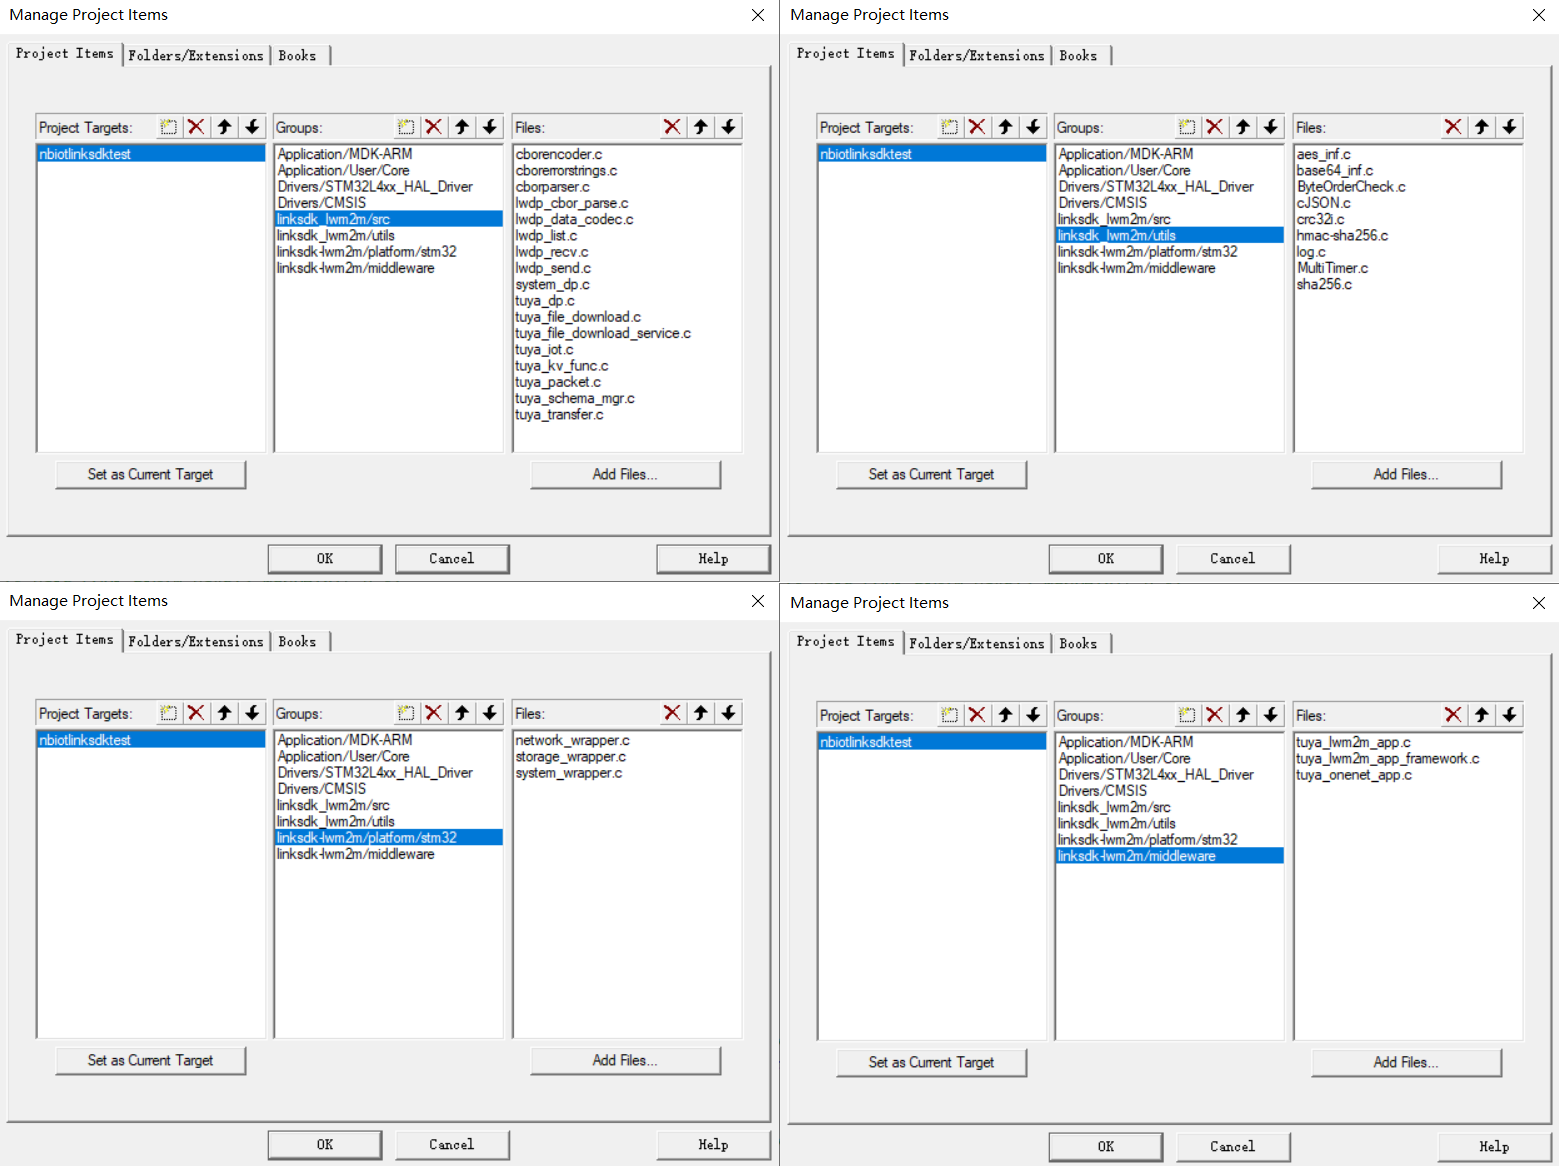
Import files to project
Add the files marked in the following figure to your project.
Configure dependencies
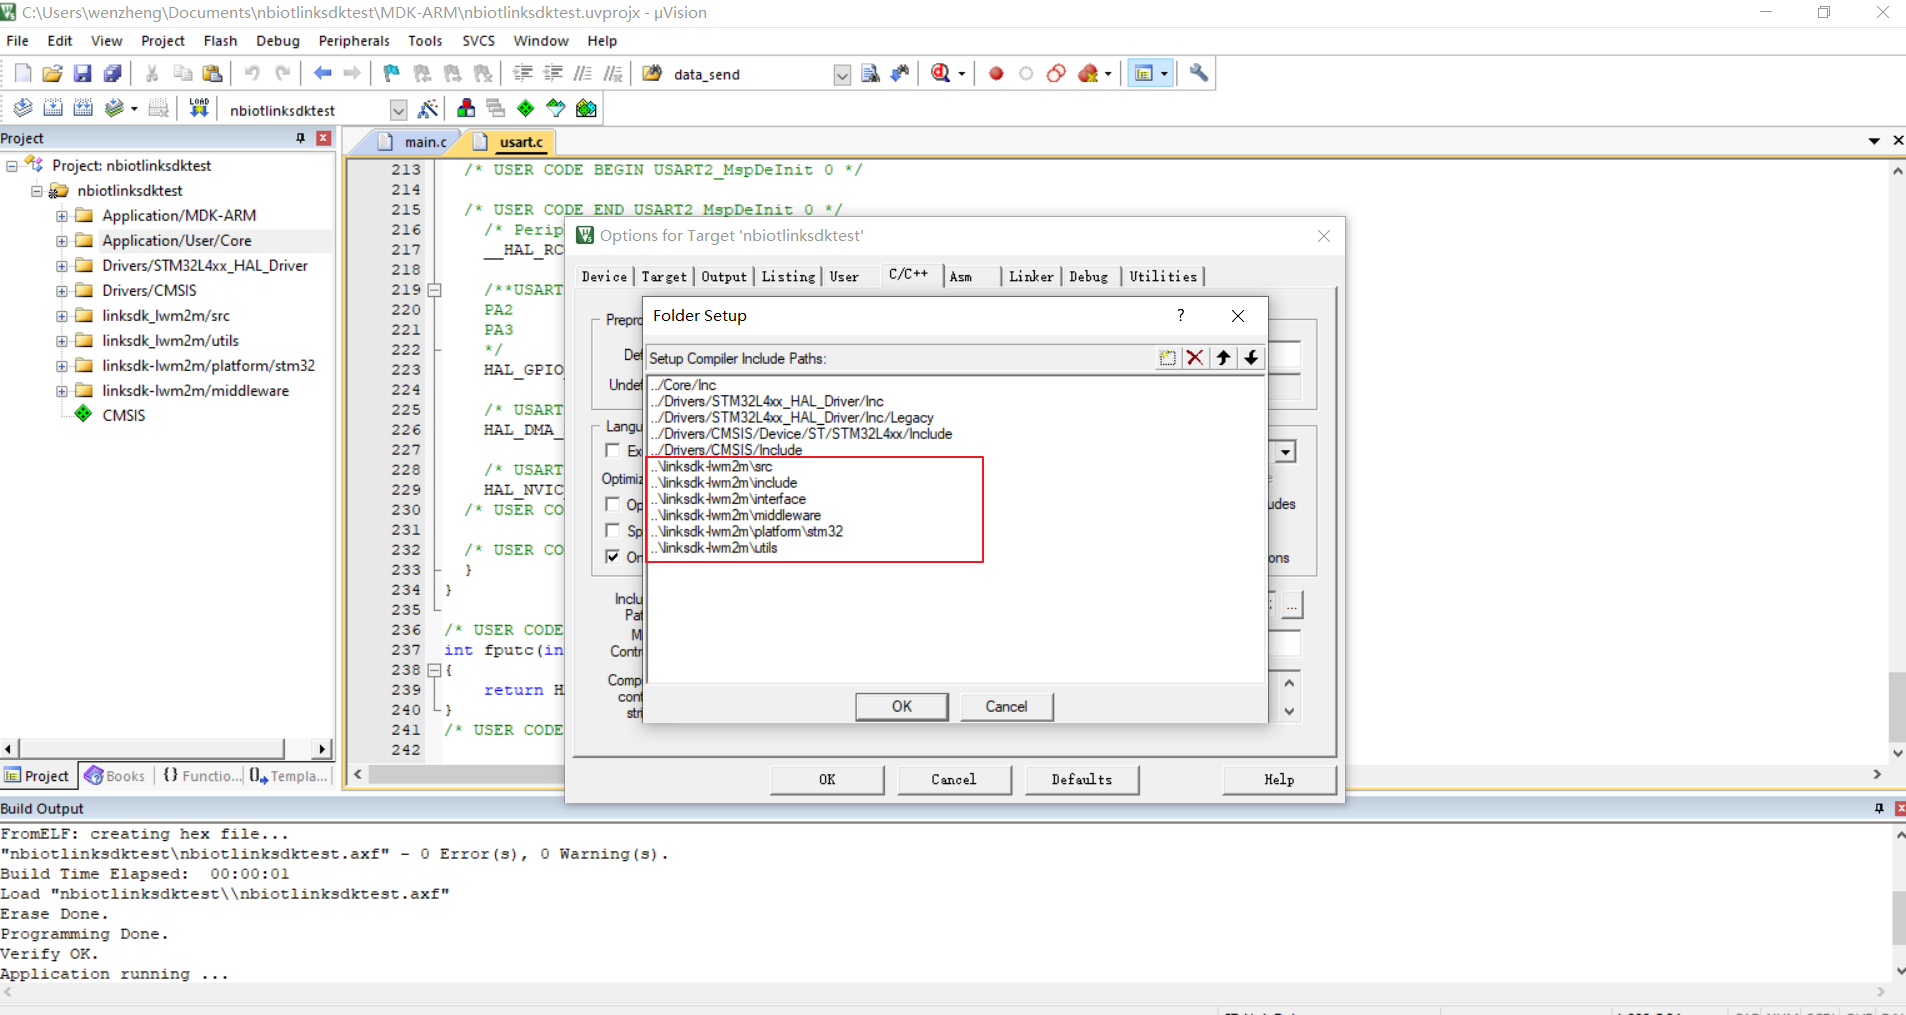
Add the corresponding .c files to your project.
Based on the file example.c, port the necessary interfaces to the file main.c of the STM32 project.
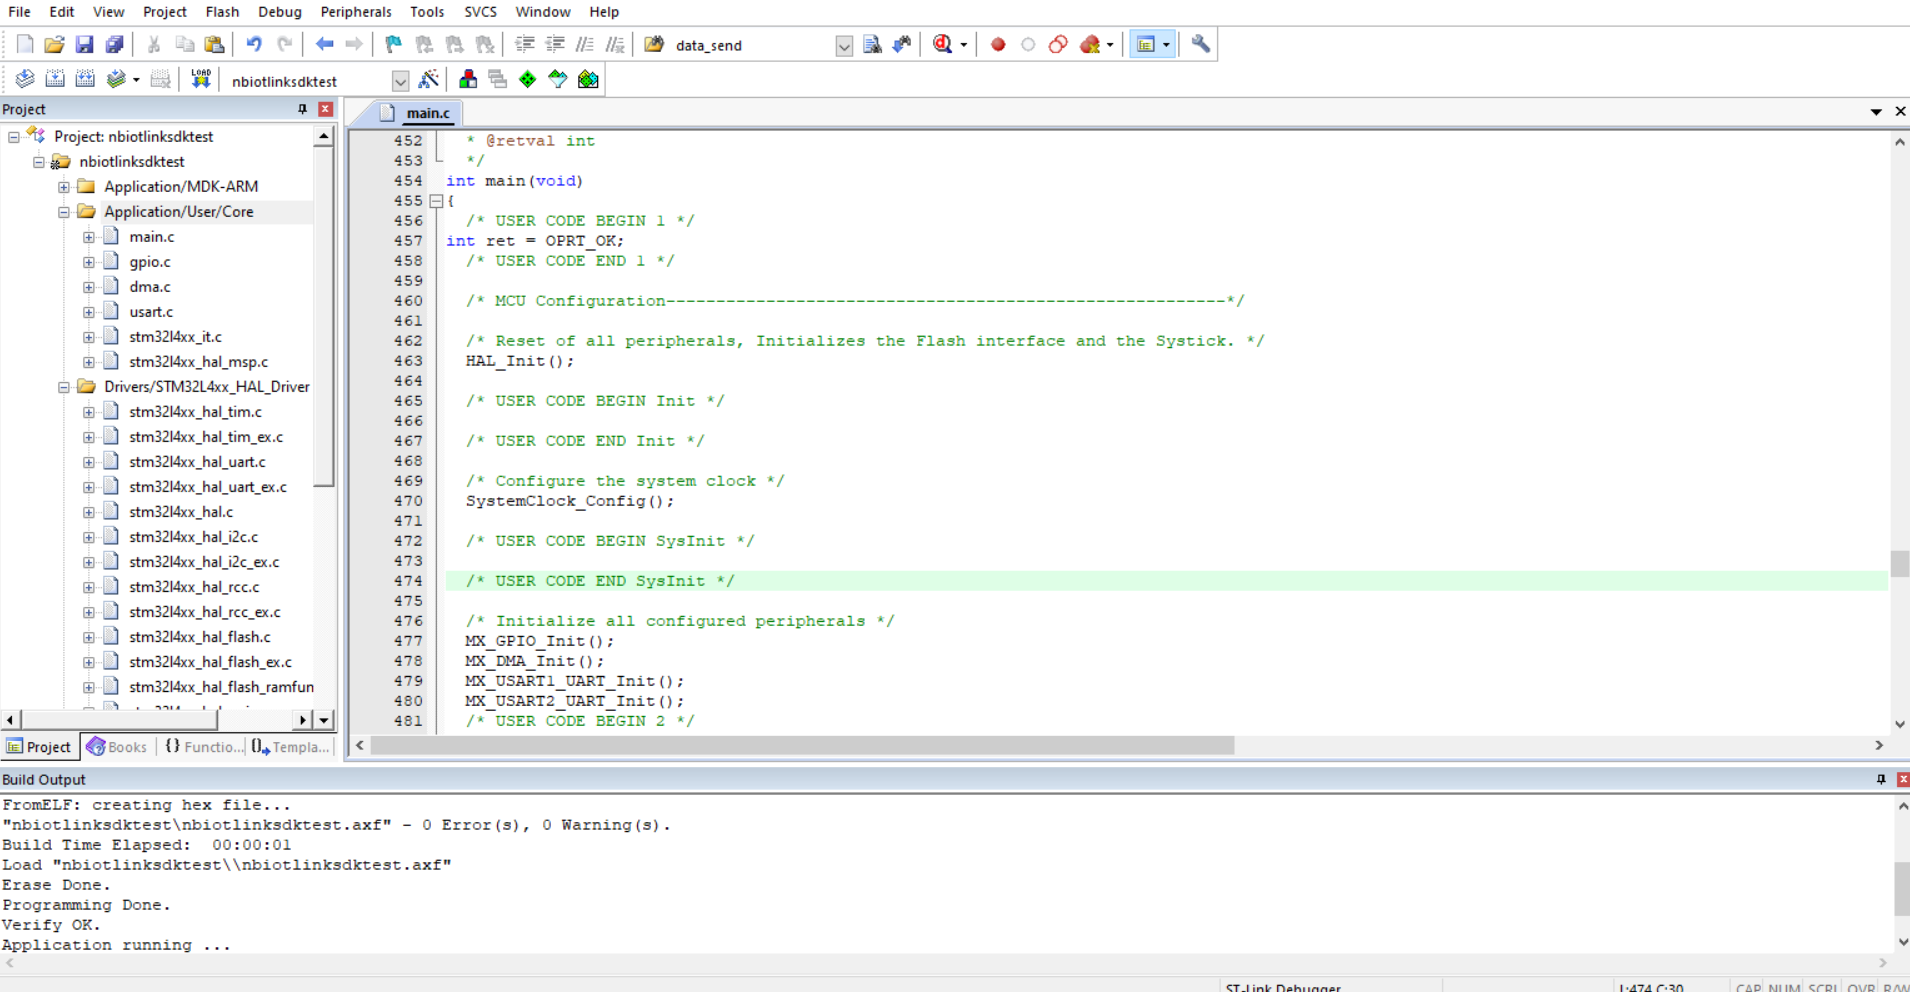
Based on the routine linksdk-lwm2m\examples\tuya_nbiot_demo\tuya_nbiot_demo.c, put the main state machine loop of the SDK in the while(1). To ensure the SDK runs well, do not set a long blocking delay in the main loop.
int main(void)
{
  /* USER CODE BEGIN 1 */
int ret = OPRT_OK;
  /* USER CODE END 1 */

  /* MCU Configuration--------------------------------------------------------*/

  /* Reset of all peripherals, Initializes the Flash interface and the Systick. */
  HAL_Init();

  /* USER CODE BEGIN Init */

  /* USER CODE END Init */

  /* Configure the system clock */
  SystemClock_Config();

  /* USER CODE BEGIN SysInit */

  /* USER CODE END SysInit */

  /* Initialize all configured peripherals */
  MX_GPIO_Init();
  MX_DMA_Init();
  MX_USART1_UART_Init();
  MX_USART2_UART_Init();
  /* USER CODE BEGIN 2 */
  ret = OPRT_OK;
  const tuya_iot_config_t config = {
            .productkey = TUYA_PRODUCT_KEY,
            .software_ver = SOFTWARE_VER,
            .imei = TUYA_DEVICE_IMEI,
            .uuid = TUYA_DEVICE_UUID,
            .authkey = TUYA_DEVICE_AUTHKEY,
            .psk = TUYA_DEVICE_PSK,
            .imsi = TUYA_DEVICE_IMSI,               //International Mobile Subscriber Identity
            .is_test_env = false,                   //env:0(online);1(preview)
            .is_wakeup = false,                     //is woken up from sleep? please invoke tuya_iot_retention_restore() before sleep!
            .lifetime = 120,                        //LIFETIME_DEFAULT,
            .link_mode = NBIOT_LINK_ISP,
            .power_mode = NBIOT_MODE_PSM,
            .apn = "cmnbiot",
            .event_handler = user_event_handler_on,
            .dp_ack_cb = user_dp_report_notify_callback,
            .hb_send_cb = user_heartbeat_send_timeout_callback,
    };
	    /* Initialize Tuya device configuration */
    ret = tuya_iot_init(&client, &config);


    tuya_file_dl_init(&file_dl_handle, &(const tuya_file_dl_config_t){
        .event_cb = user_file_dl_event_cb,
    });

    /* Start tuya iot task */
    tuya_iot_start(&client);
  /* USER CODE END 2 */

  /* Infinite loop */
  /* USER CODE BEGIN WHILE */
  while (1)
  {
    /* USER CODE END WHILE */
		tuya_iot_yield(&client);
    /* USER CODE BEGIN 3 */
  }
  /* USER CODE END 3 */
}
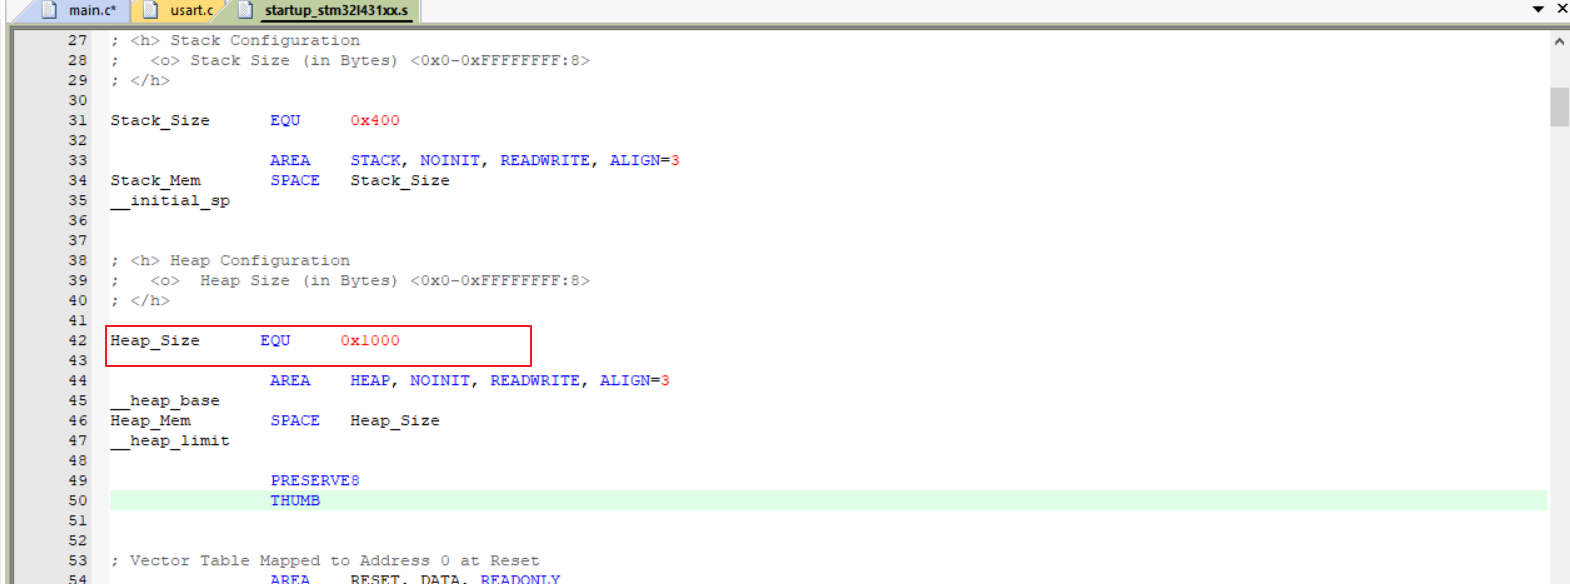
Set Heap_Size to the appropriate size.
Build and verify
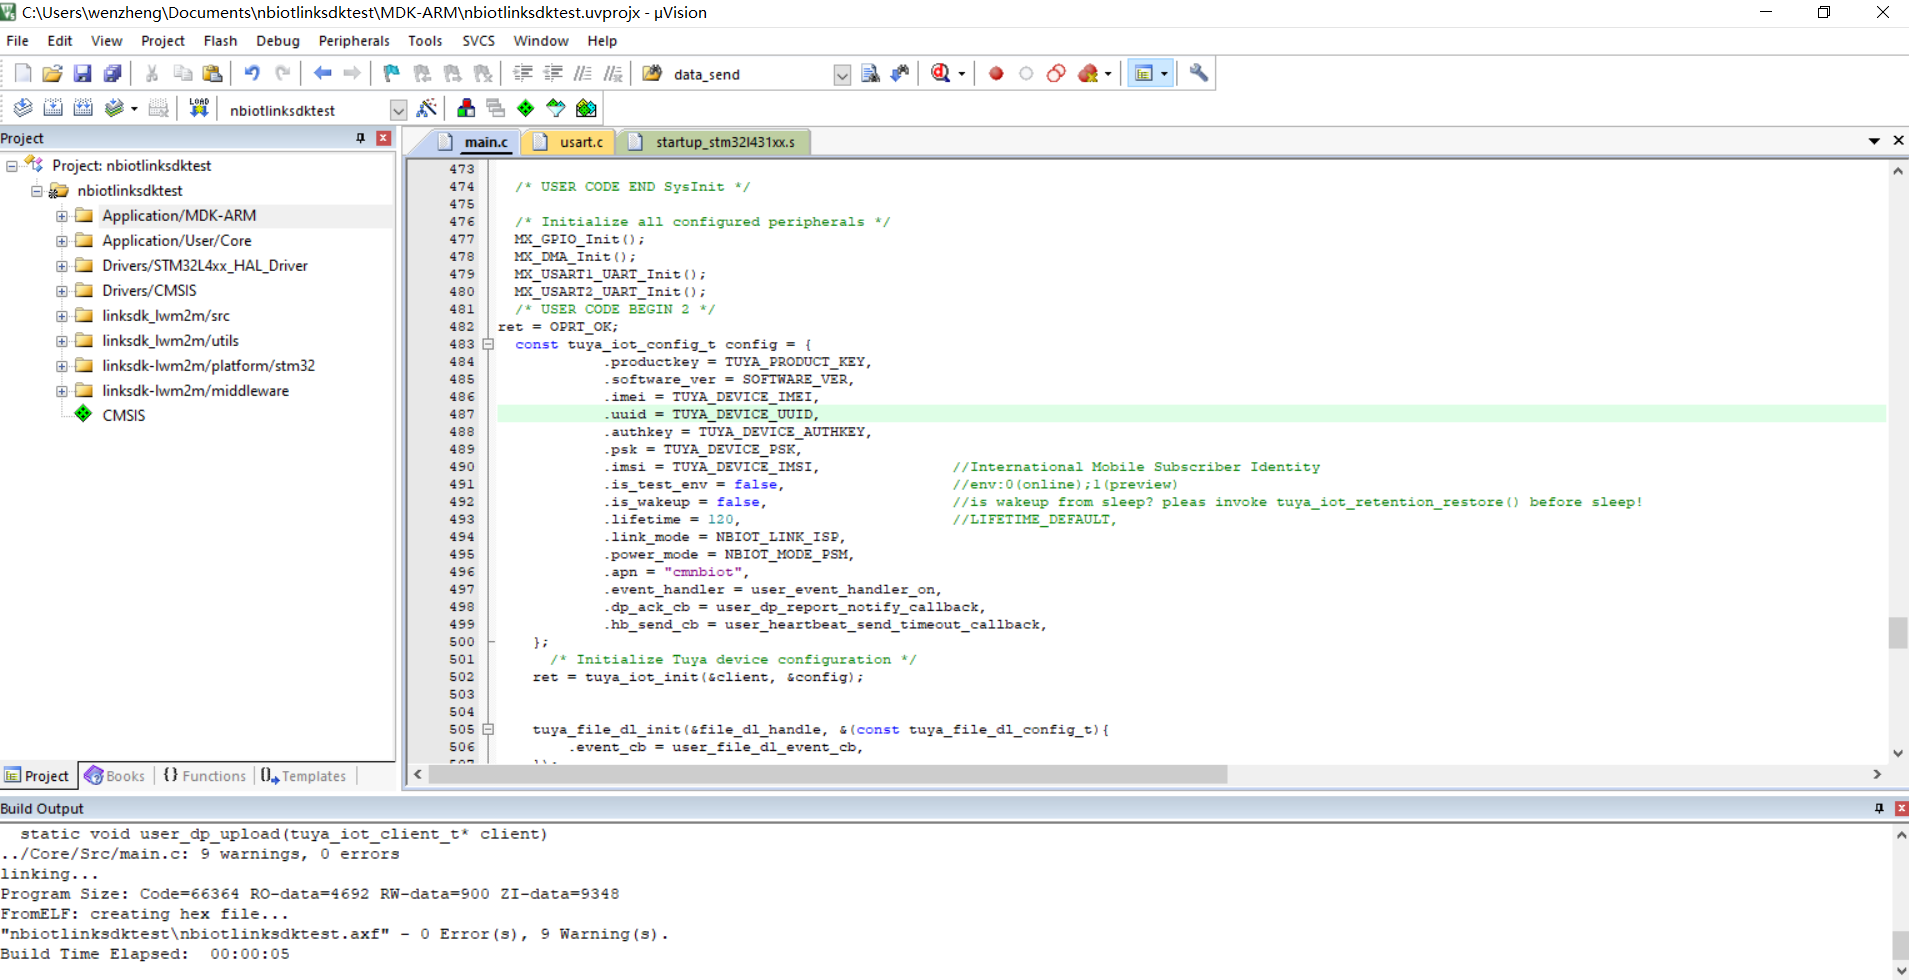
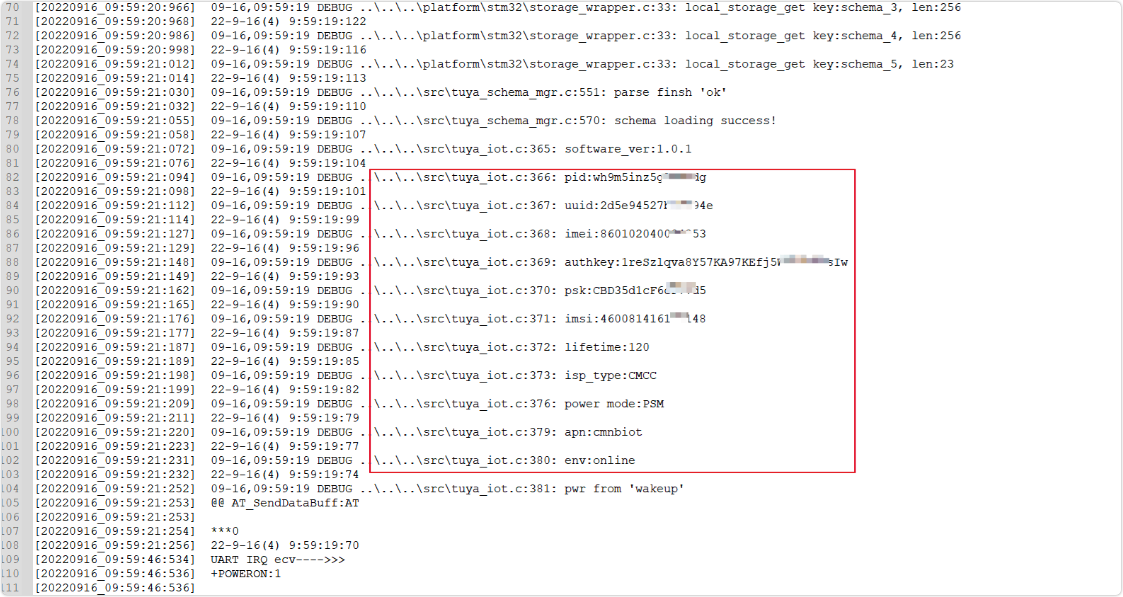
Build the project and flash firmware to the MCU. Open the log to check if the programs run successfully.
If the SDK logs are printed with the authorization information included, it means the device runs well.

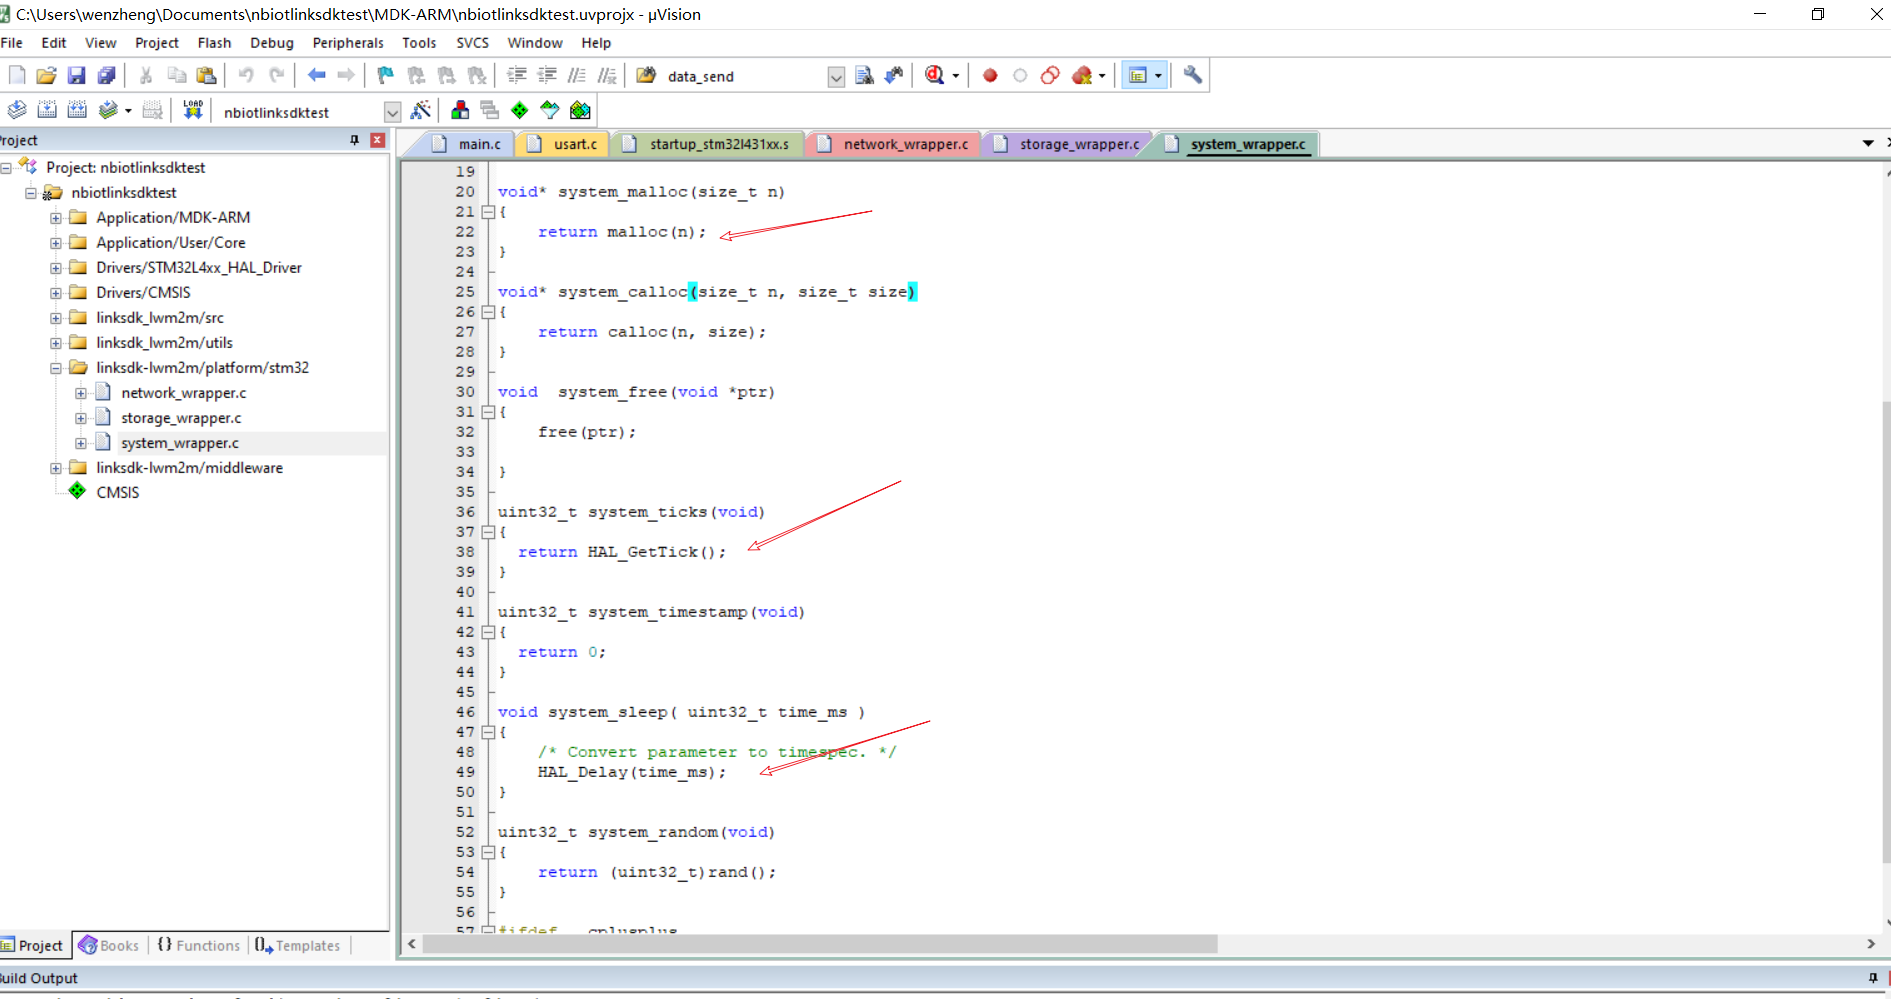
Interface adaptation
Take care of the following three interfaces:
In linksdk-lwm2m\platform\stm32:
network_wrapper.c    // The network interface. The example uses the MCU+AT development method, so we only need to integrate with the API for resolving domain names.
storage_wrapper.c    // The data persistence interface. You can port the open source embedded flash memory library, such as EasyFlash.
system_wrapper.c     // System memory and tick count interface. Adjust it based on the target platform.
Test connection to OneNet with NX1 AT firmware
Product info print on startup
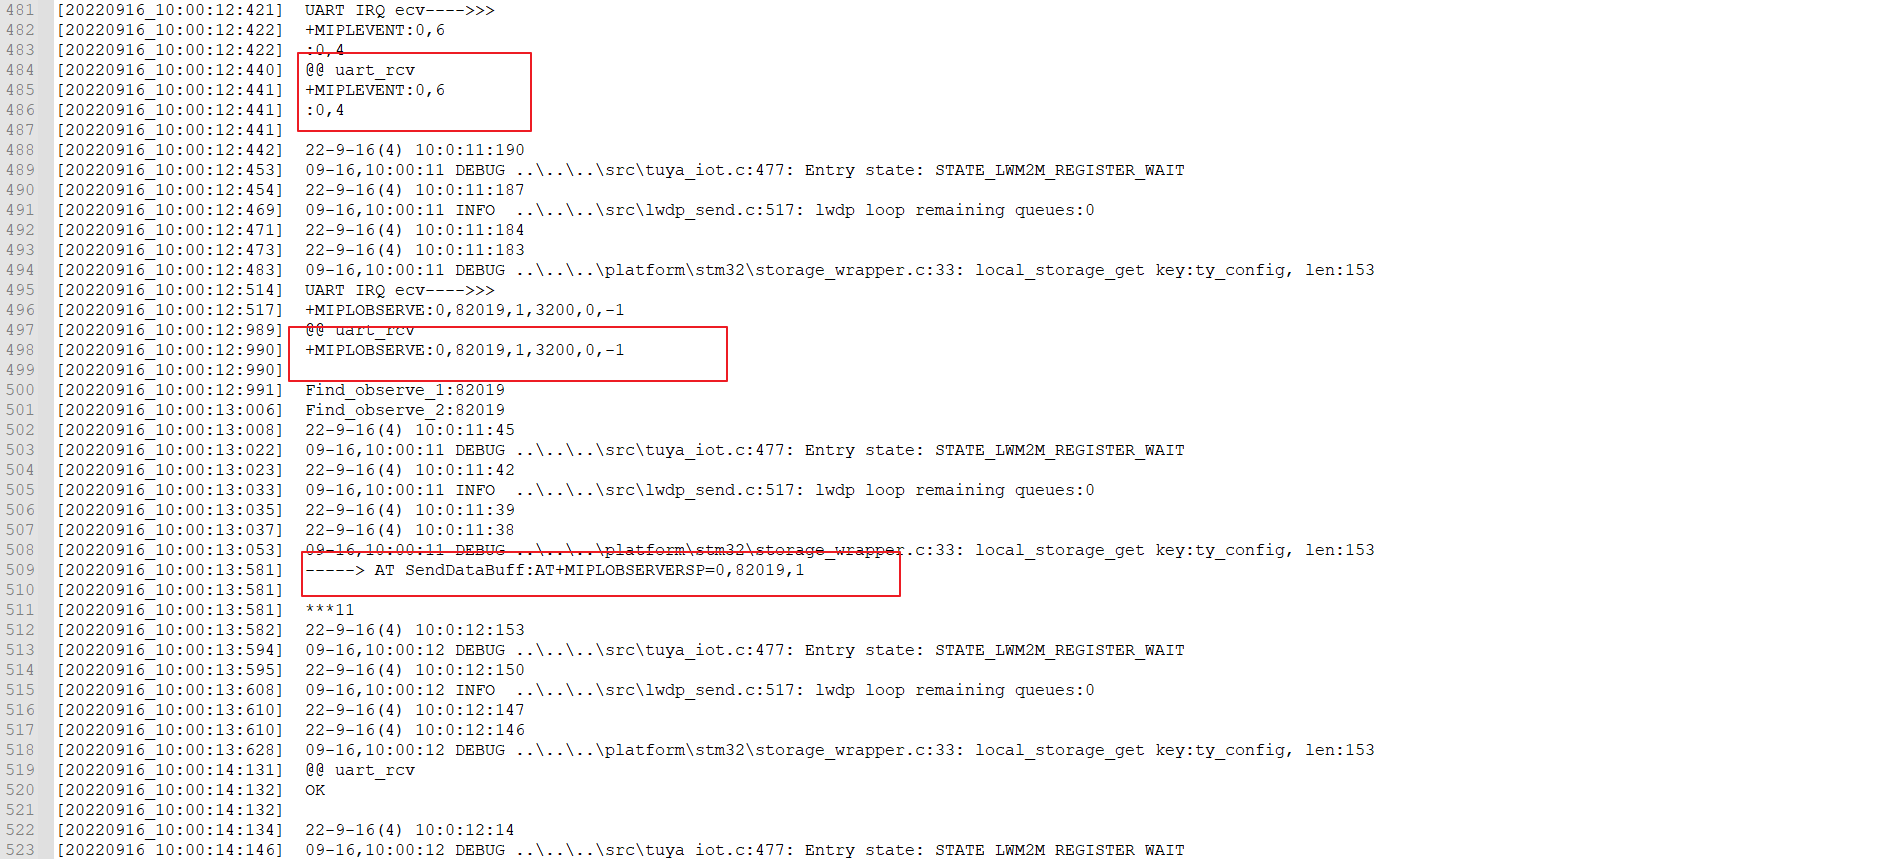
Attached to the network
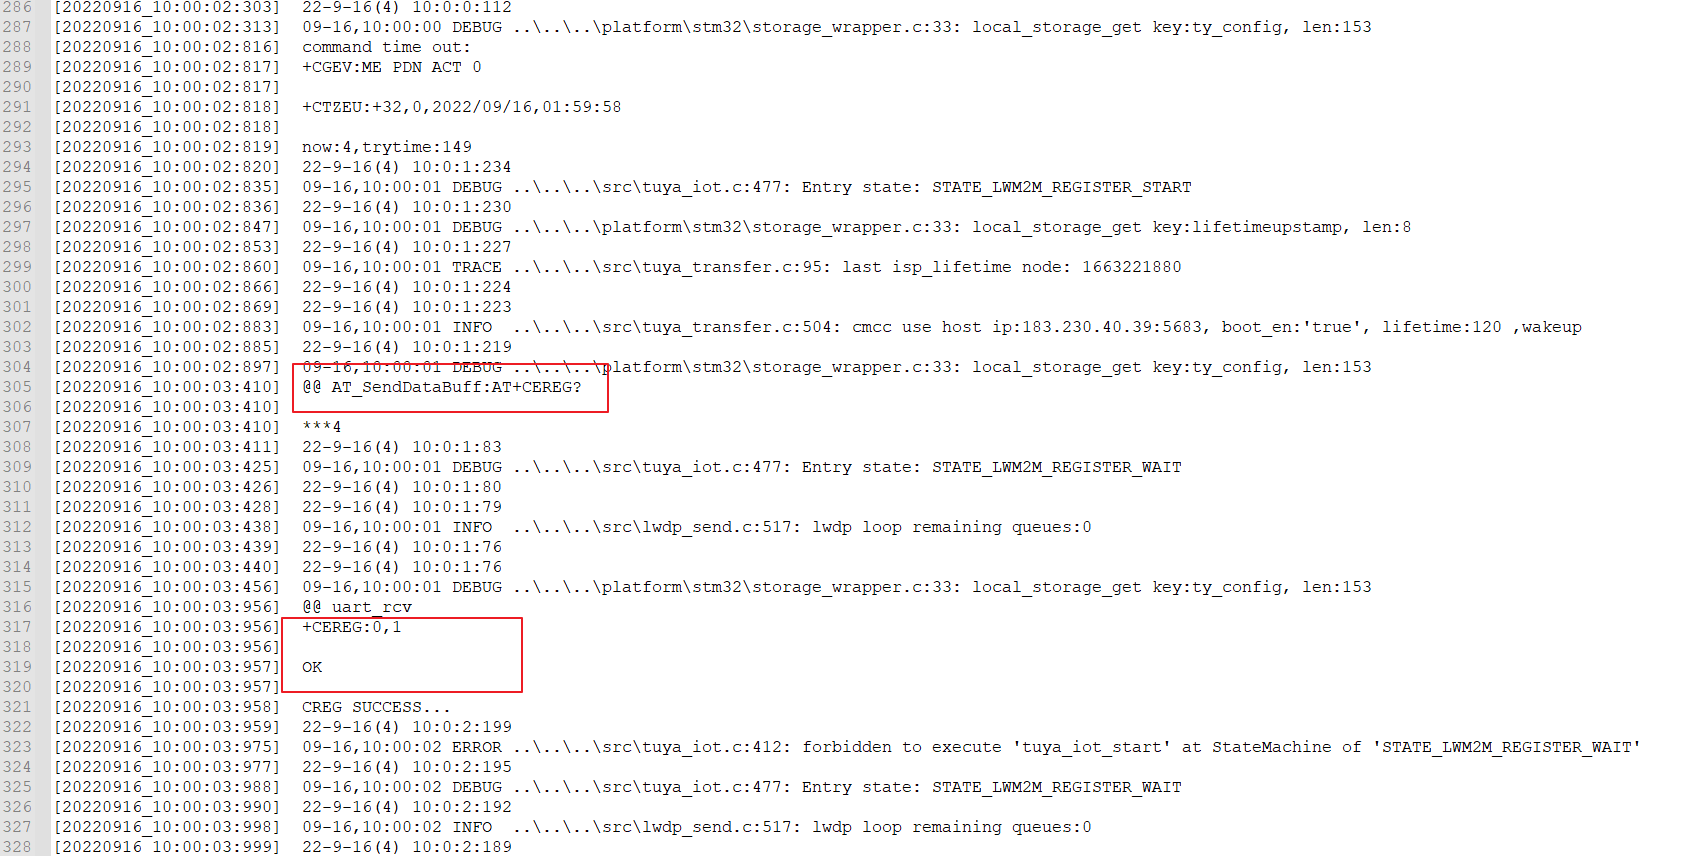
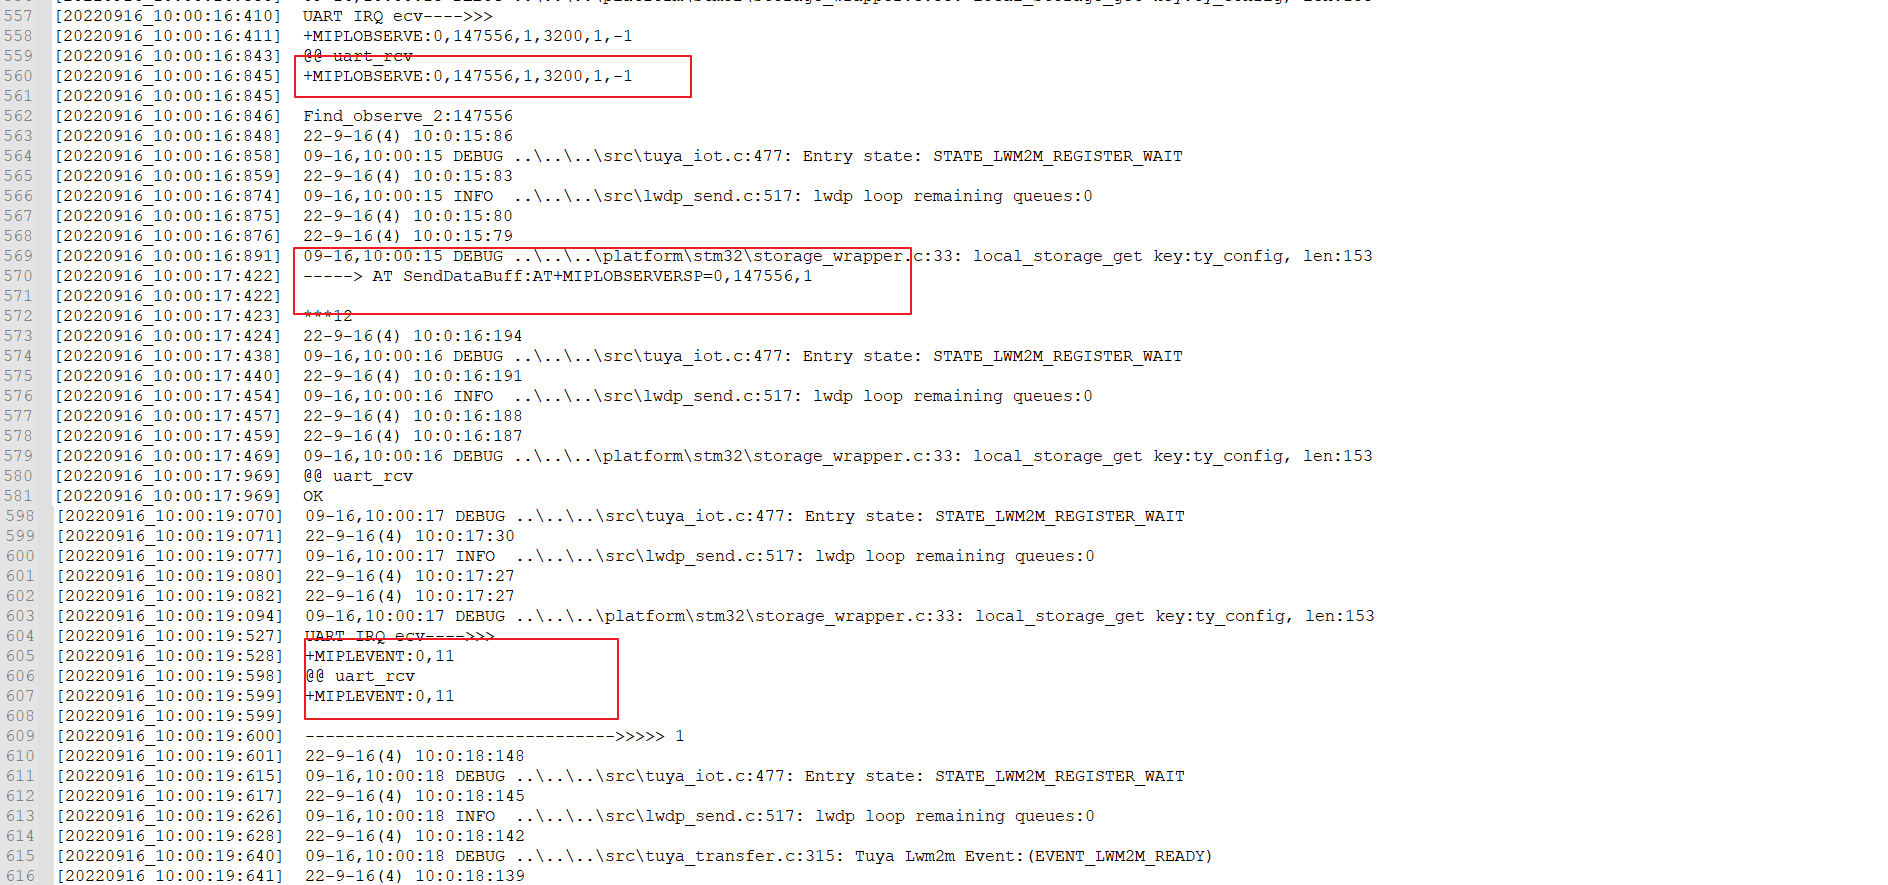
Send a registration request to OneNET
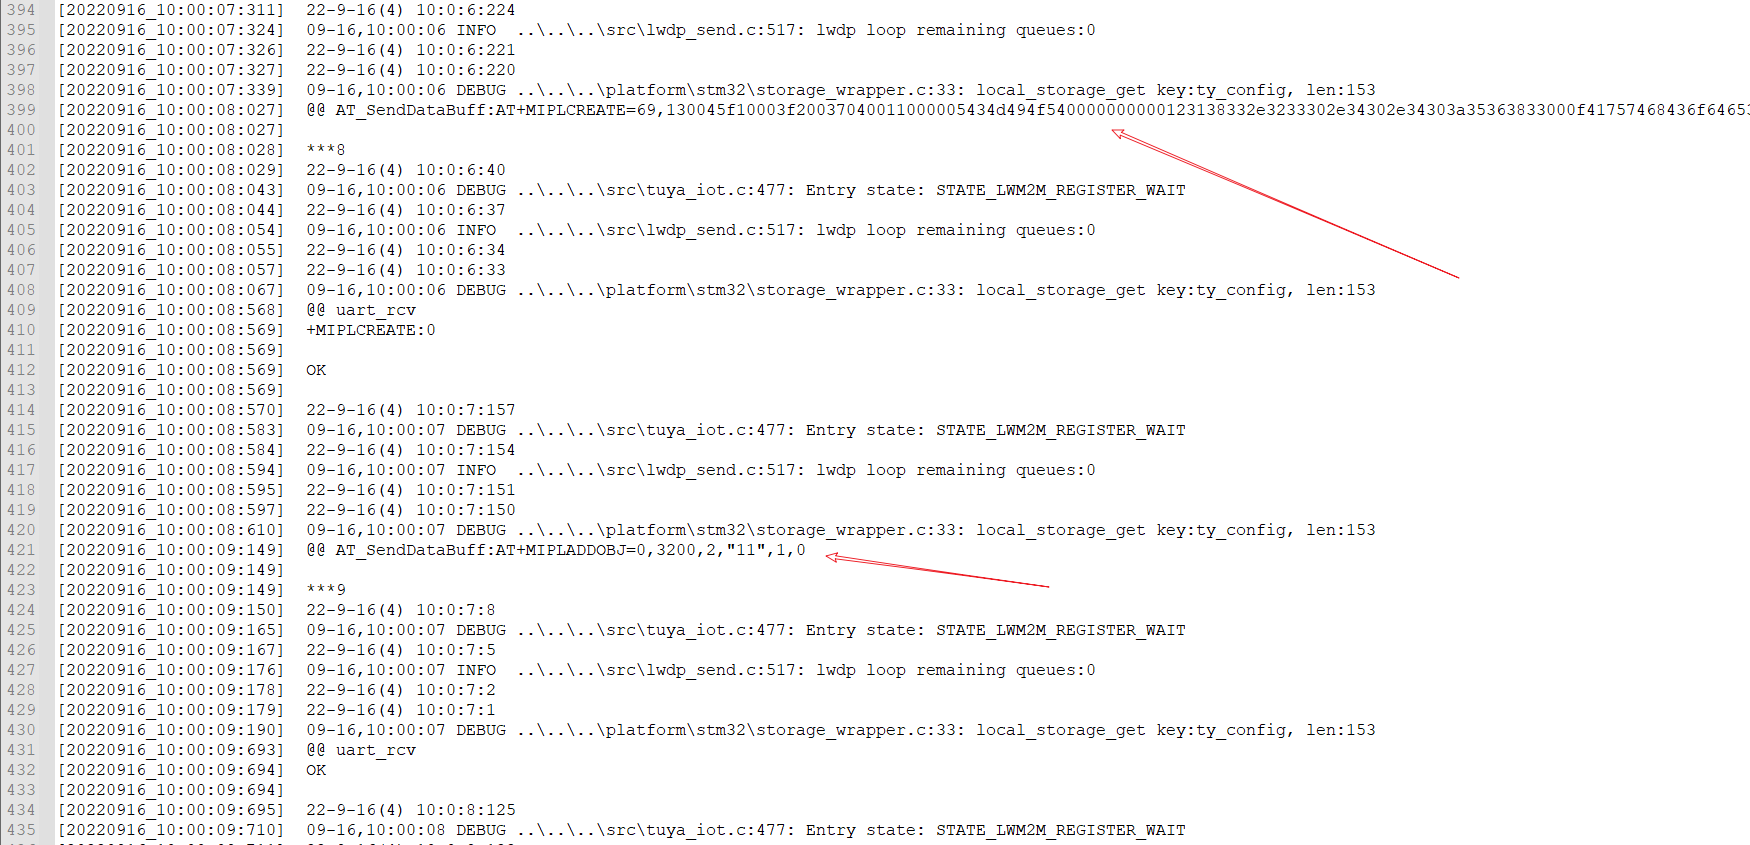
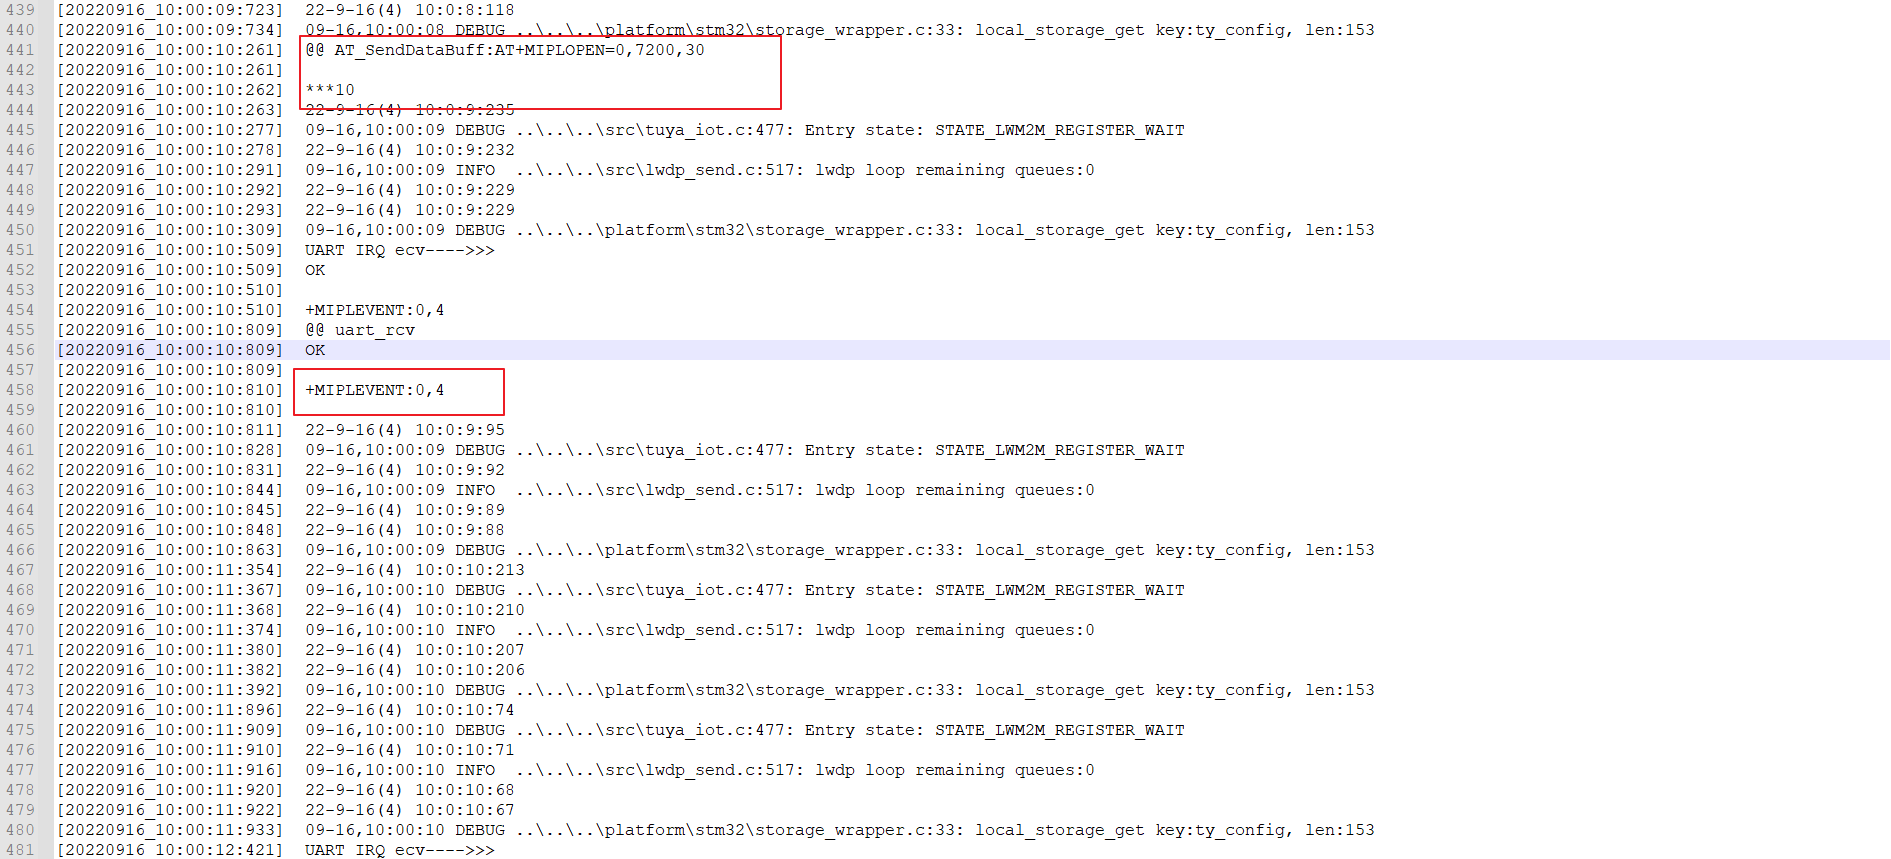
Respond with Observer message
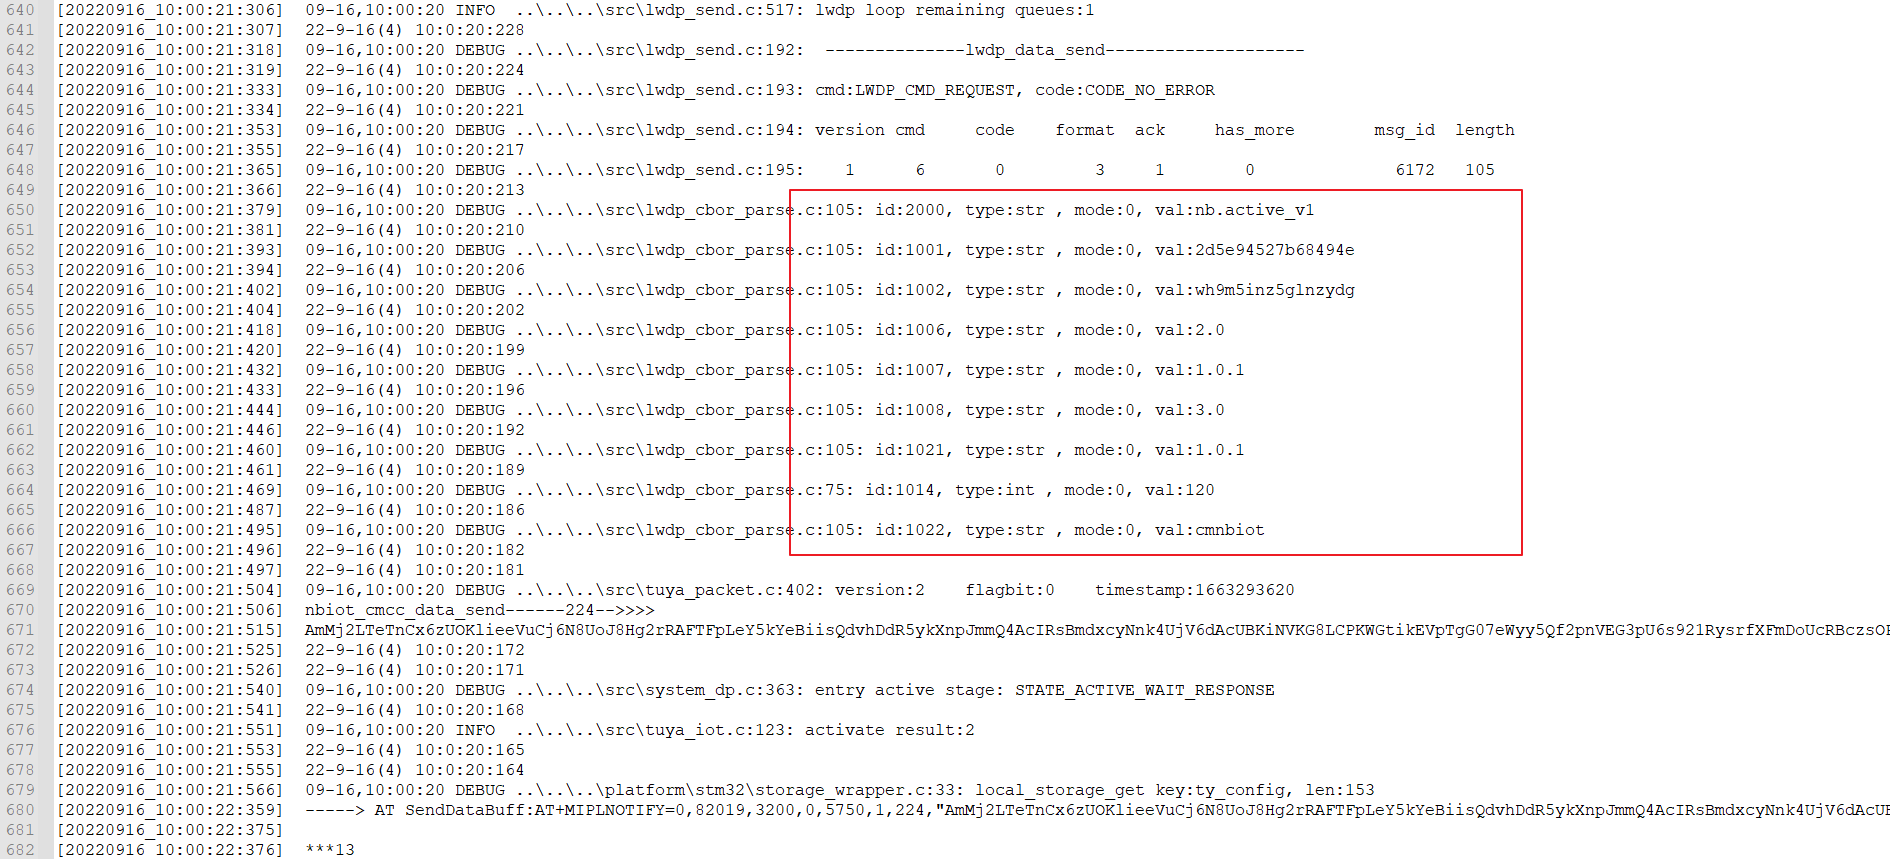
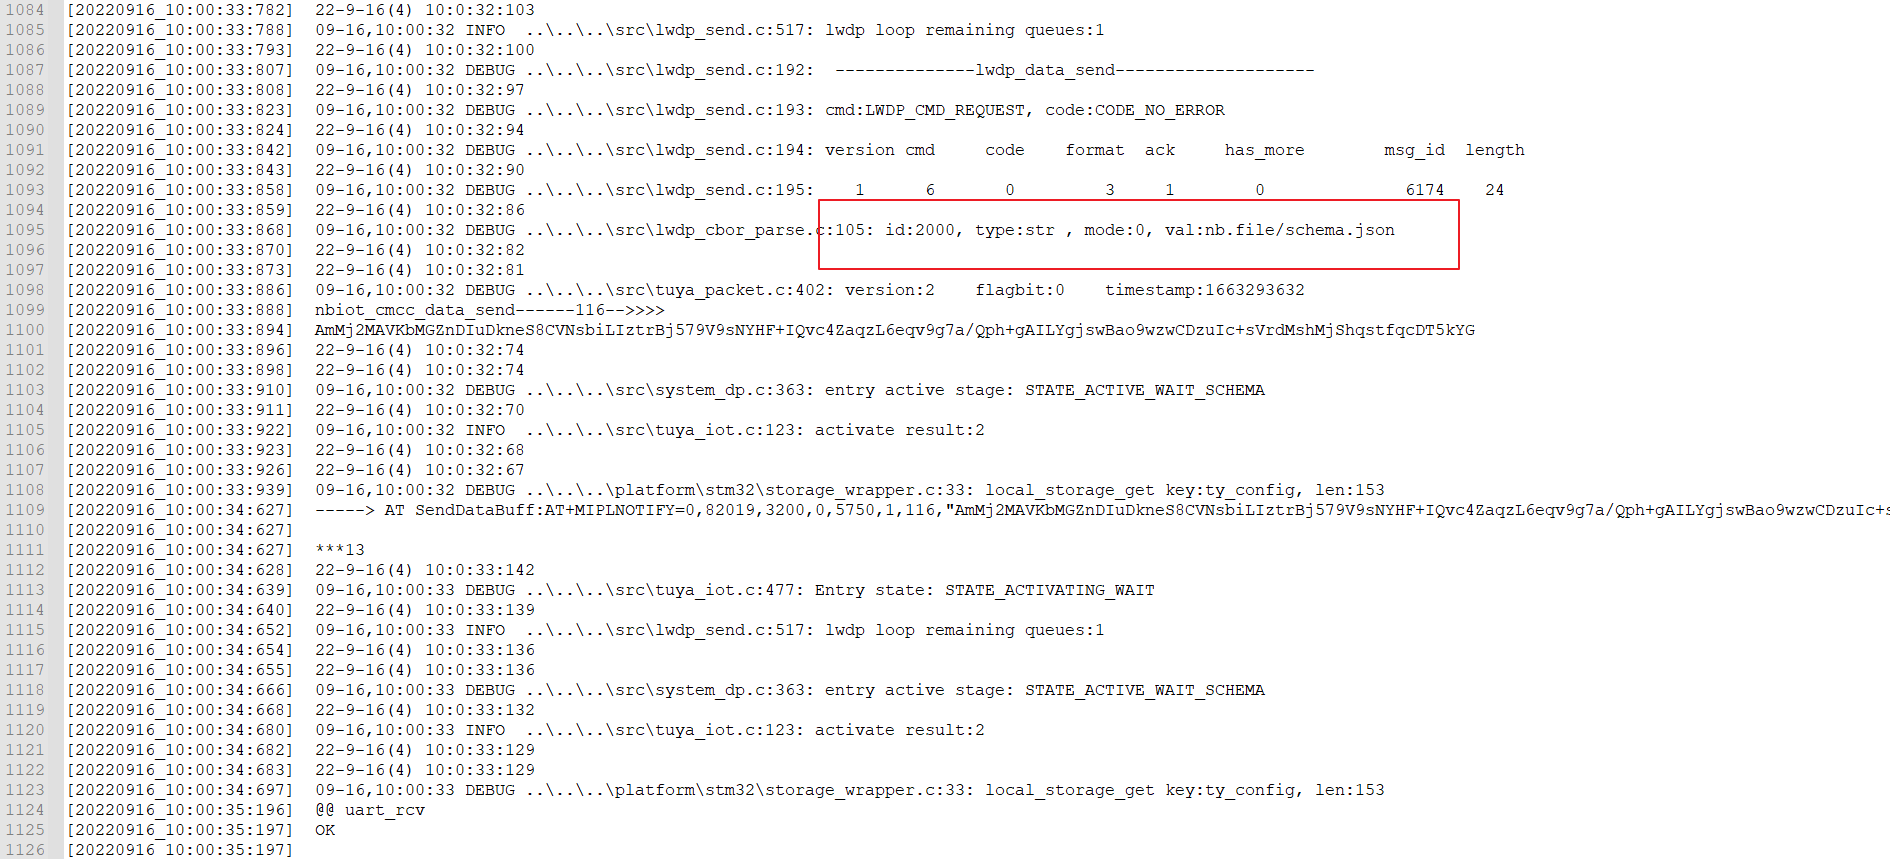
Activate device in Tuya Cloud
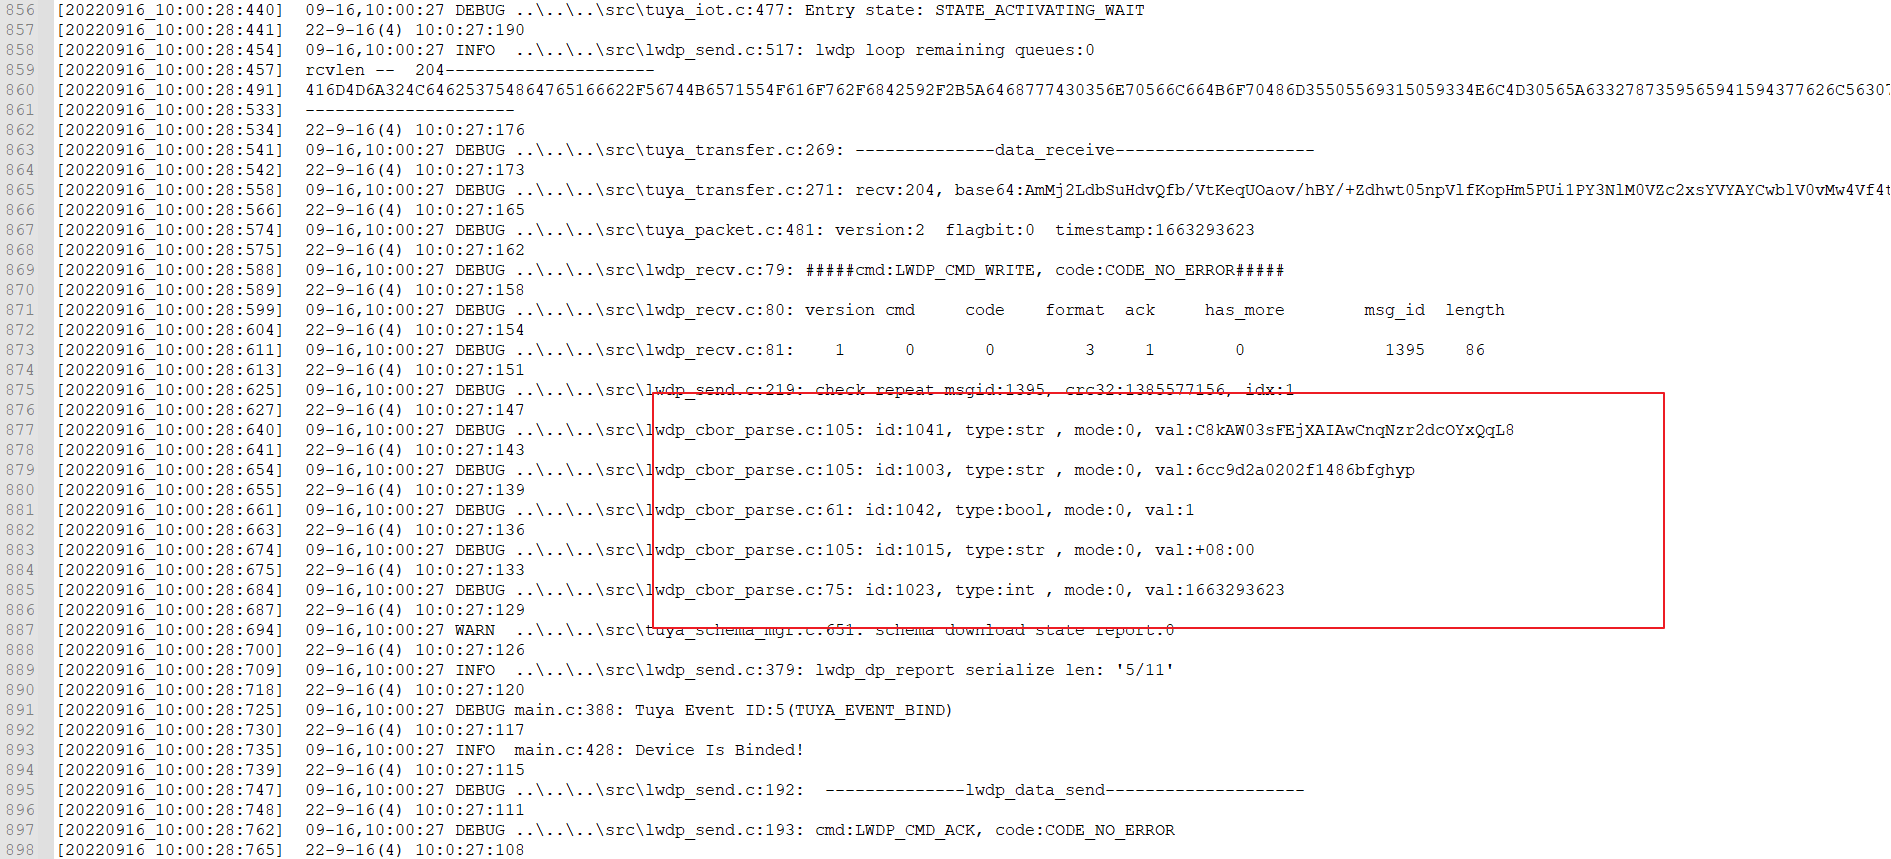
Respond with SecKey and DeviceID
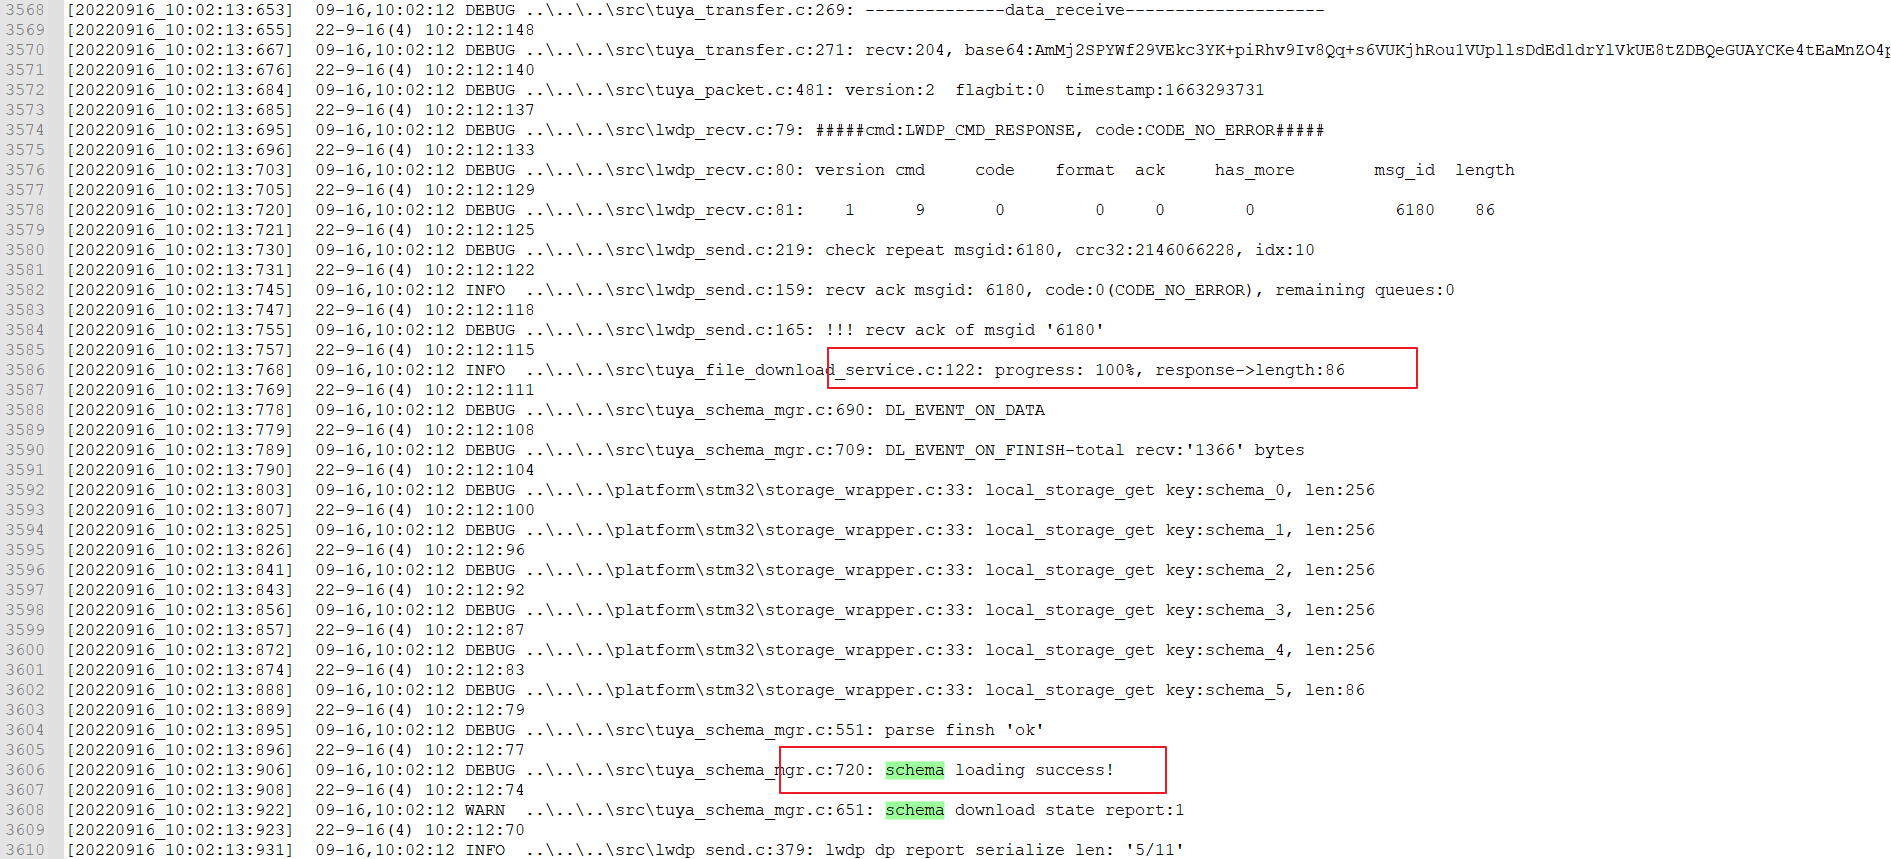
Download Schema file
Schema file is download
Bind with the app
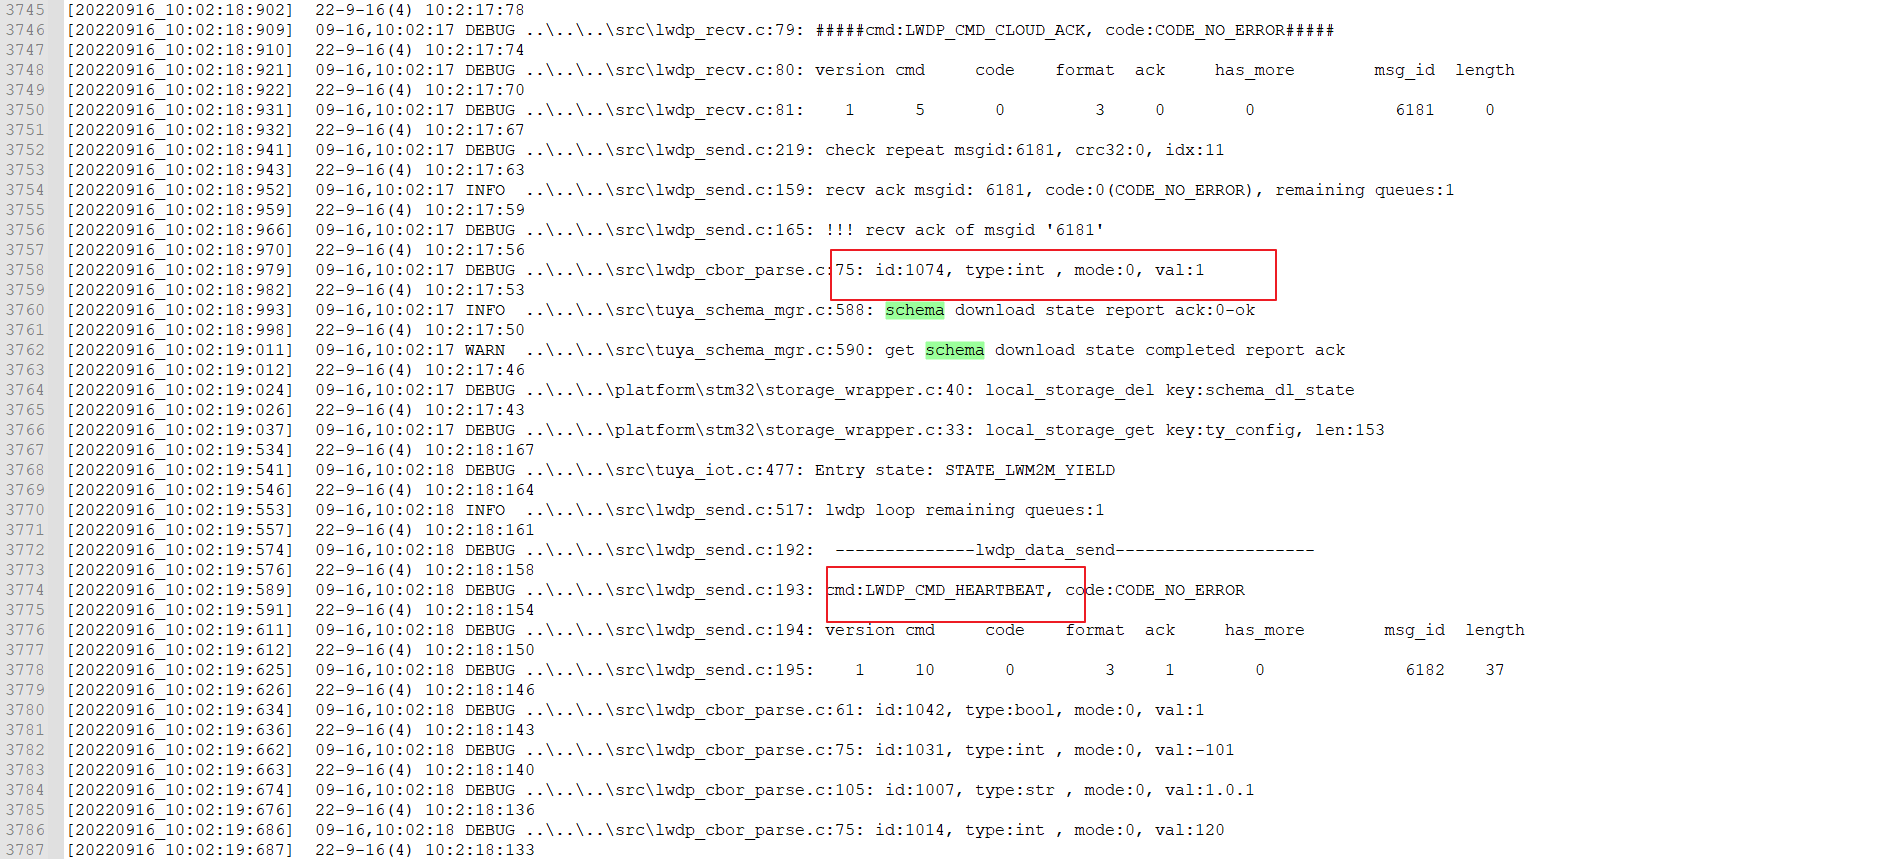
Heartbeat check
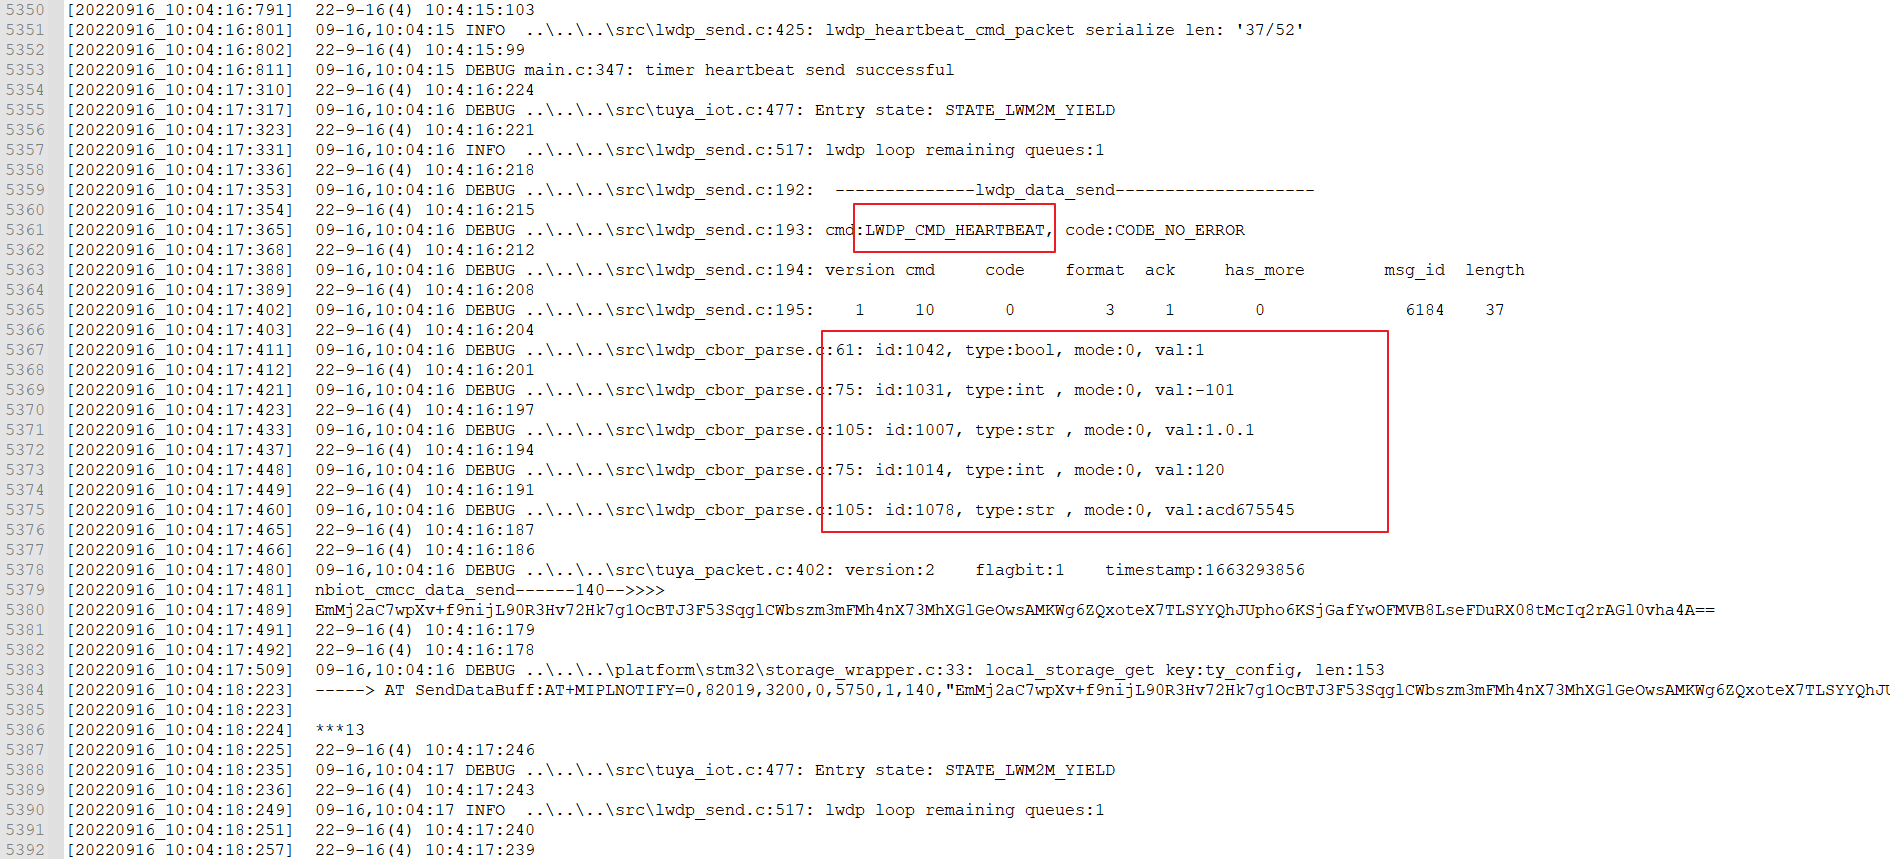
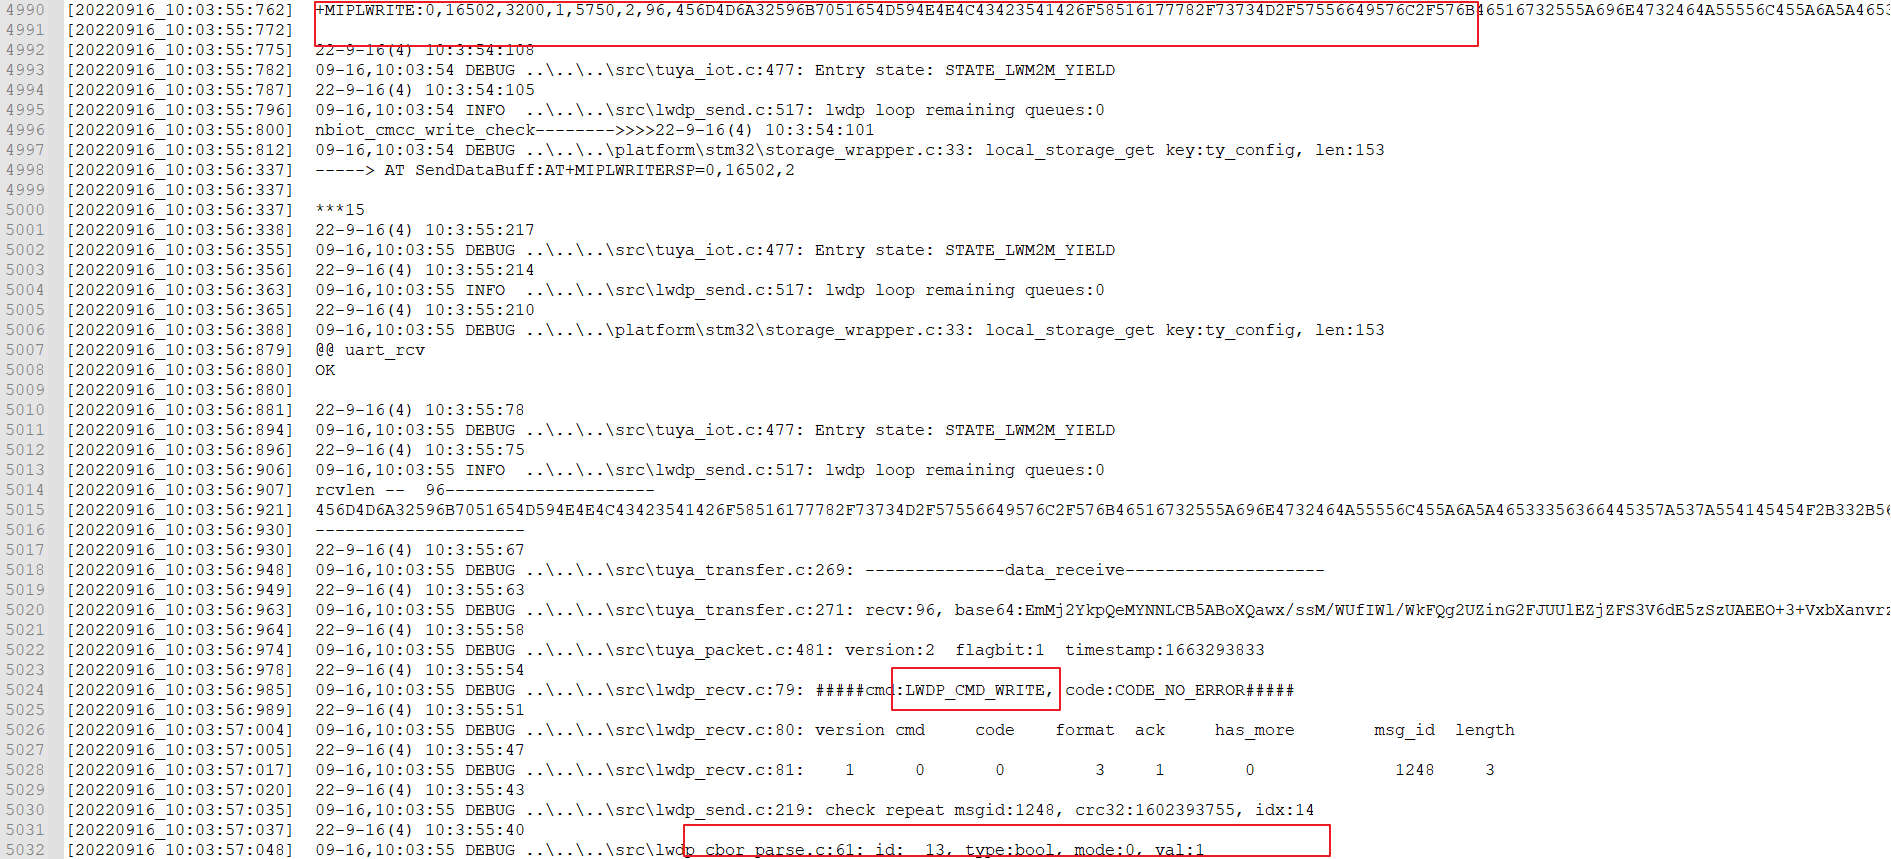
Report and receive data point data

Is this page helpful?
YesFeedbackIs this page helpful?
YesFeedback


