Flash Firmware to and Authorize WBR Modules
This topic describes two solutions about how to flash the firmware to and authorize WBR series modules.
Background information
After the module SDK firmware development is completed, you need to flash and authorize the module to enable connection to the cloud. Tuya provides the following two flashing and authorization methods for different scenarios.
-
An integrated solution for flashing and authorization. This solution flashes and authorizes modules on the Cloud Module Burning Authorization Platform, which is suitable for the release stage.
-
Separated solutions for flashing and authorization. This solution flashes modules with chip flashing tools and authorizes modules on the Cloud Module Burning Authorization Platform, which is suitable for the development stage.
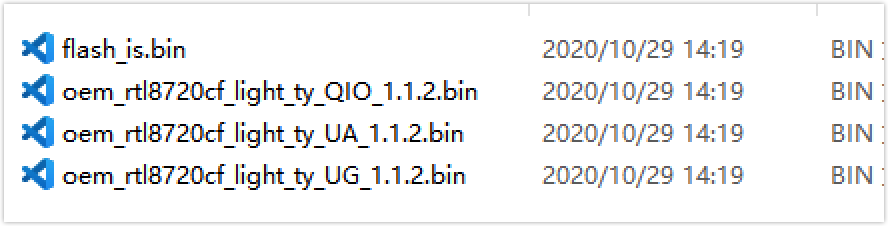
Binaries
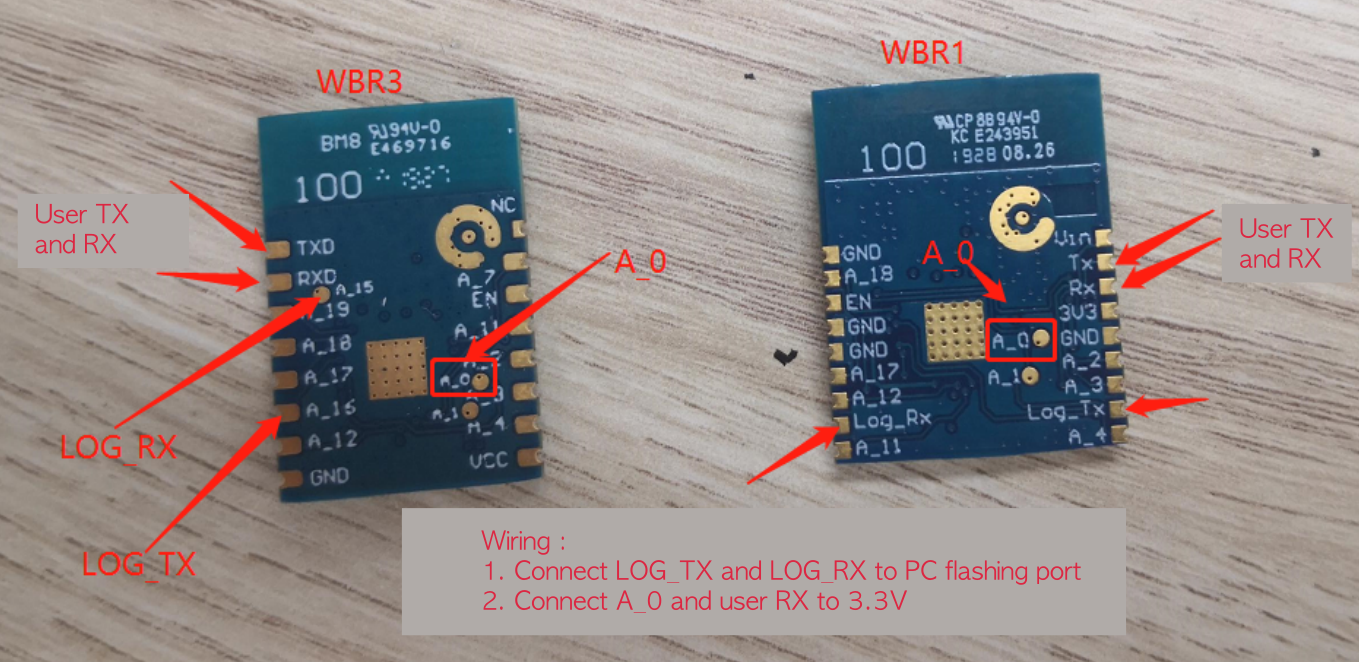
After this type of chip is compiled, four kinds of .bin files are generated as shown below.
flash_is.bin: boot + user area firmware.oem_rtl8720cf_light_ty_QIO_1.1.2.bin(production firmware): boot + user area firmware + detection firmware.oem_rtl8720cf_light_ty_UA_1.1.2.bin: user area firmware.oem_rtl8720cf_light_ty_UG_1.1.2.bin: update area firmware.
Applicable chips
Applicable to the following modules with the core chip of RTL8720CF.
Method 1: An integrated solution for flashing and authorization
This solution is suitable for the release stage. Since the Tuya module must be authorized to connect to the Tuya platform, the authorization step cannot be omitted.
The overall process of this solution is as follows:
- Upload the compiled firmware to the Tuya Developer Platform.
- A firmware key is generated on the platform, and an authorization code is generated based on the firmware key.
- Flash and authorize the modules on the Cloud Module Burning Authorization Platform.
Prepare hardware
Hardware preparation includes serial port assistant, any module equipped with chip platform RTL8720CF, and hardware connection diagram.
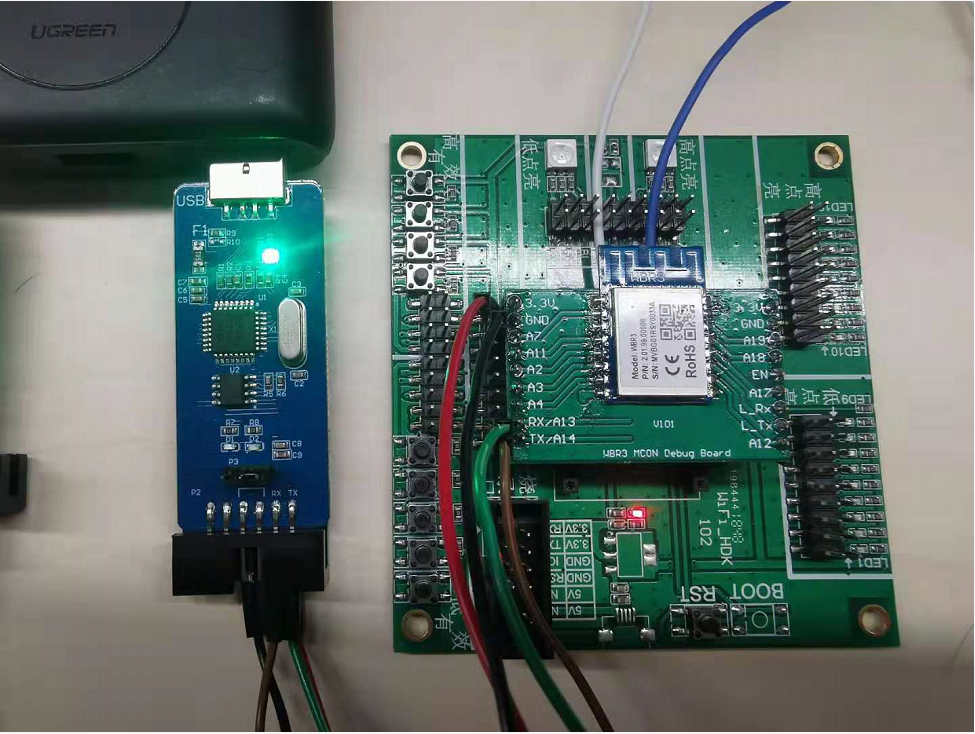
| Module pin | Serial port pin |
|---|---|
| RX/A13 | TX |
| TX/A14 | RX |
| VCC | VCC3.3V |
| GND | GND |
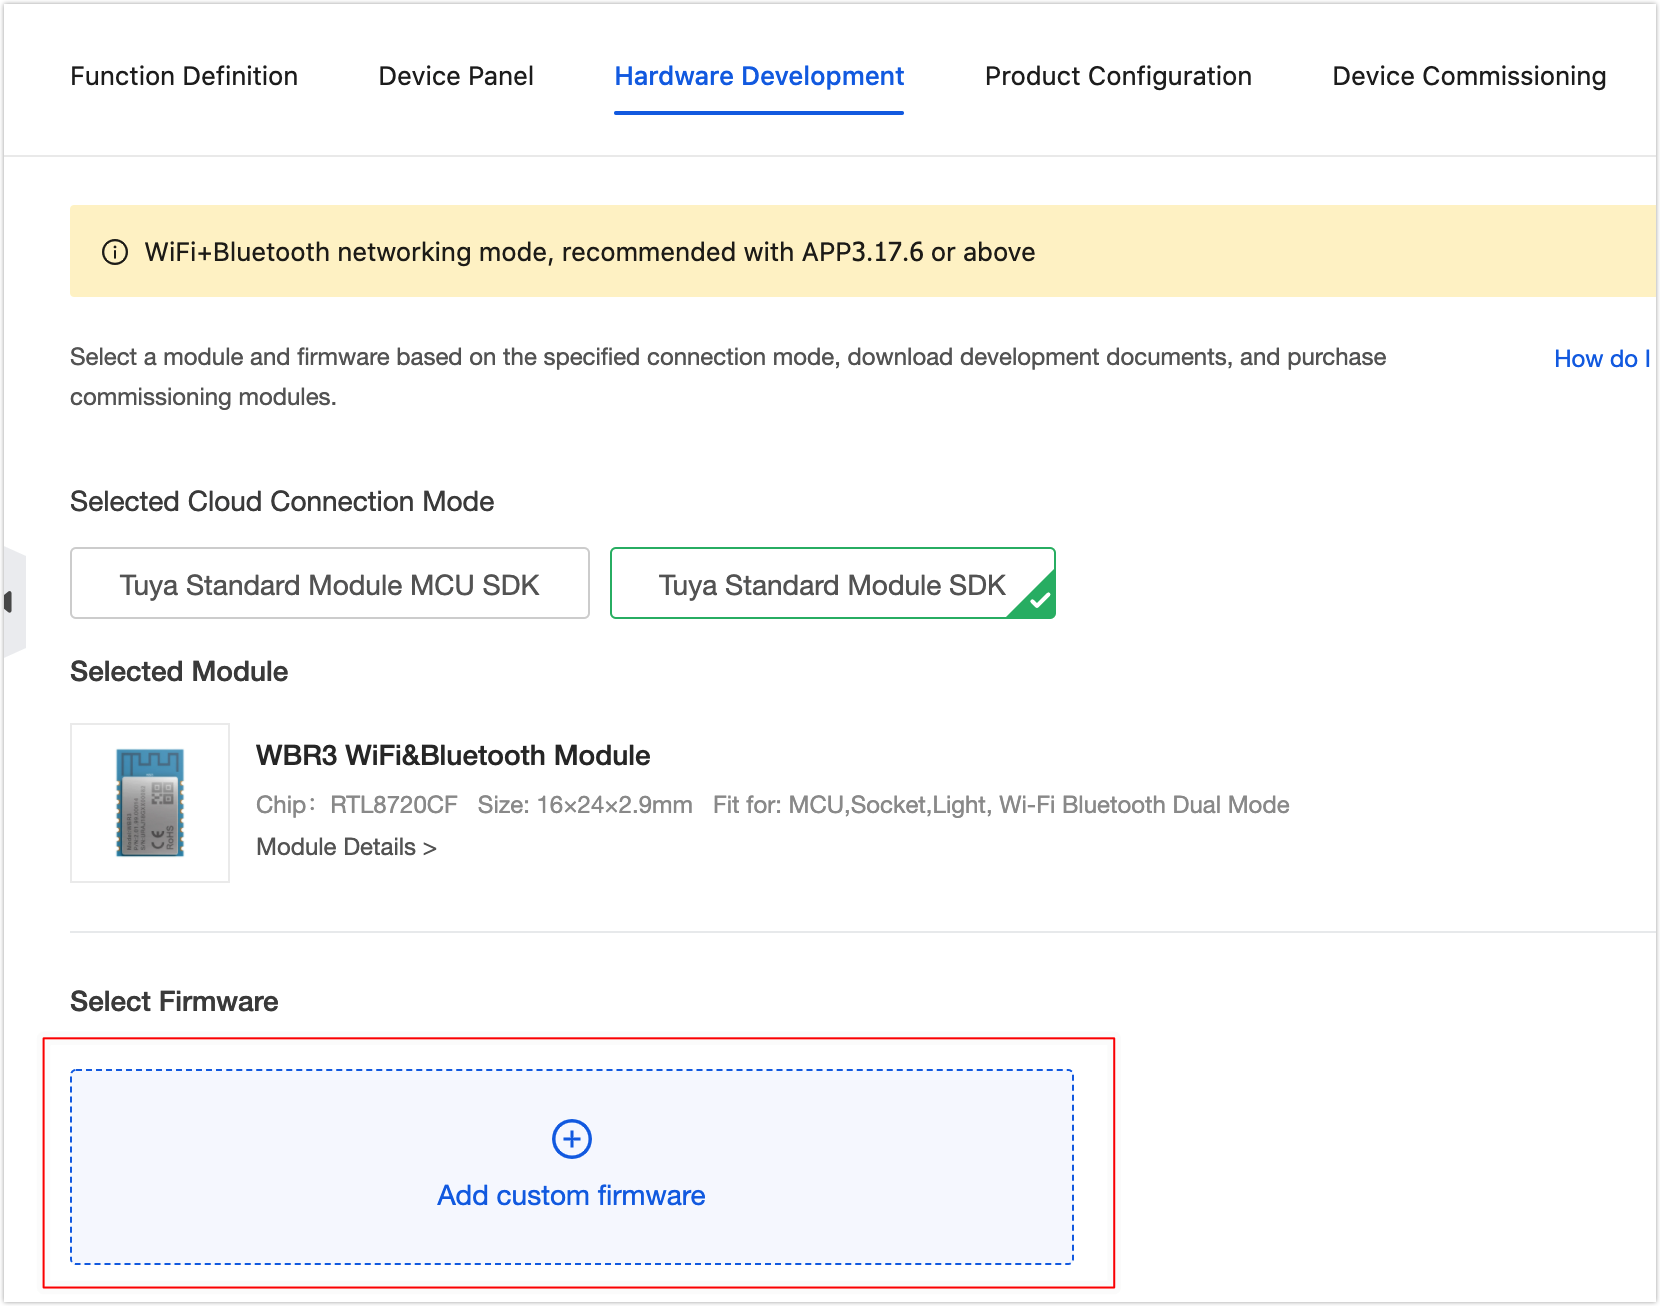
Upload firmware
-
In step 3 Hardware Development of the product development process on the Tuya Developer Platform, click Add custom firmware.
-
Enter the firmware parameters and click OK.
Parameter Description Firmware identifier It must be consistent with the name of the compiled firmware. Firmware type The module firmware. Other parameters Enter as required. 
-
In the Generated Firmware area, click Upload production firmware.
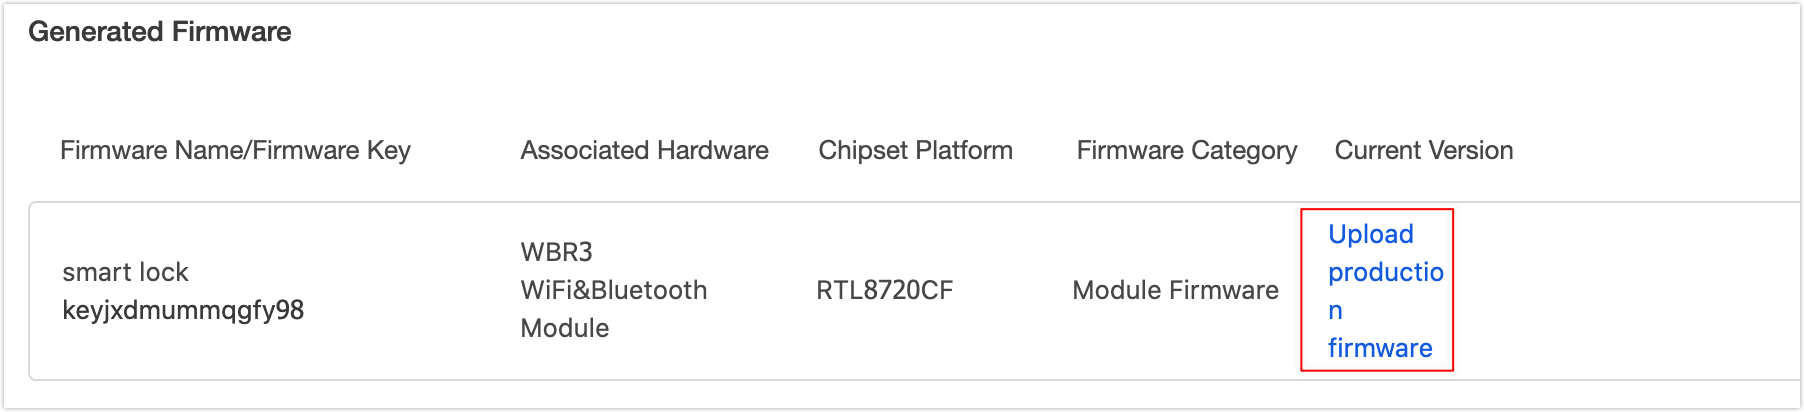
-
Upload the firmware and click Confirm.
- Production firmware: Upload the .bin file with QIO in the file name.
- User area firmware: Upload the .bin file with UA in the file name.
Get the authorization code and flash
Get the authorization code on the platform according to the PID, and download the Cloud Module Burning Authorization Platform in reference to Flash and Authorize.
The flashing steps are:
- Power off the module in the first place.
- On the Cloud Module Burning Authorization Platform, enter the authorization code and click Run.
- After the flashing is completed, power on the module.
Method 2: Separated solutions for flashing and authorization
This solution is suitable for the development stage. The feature of this solution is to authorize once and flash repeatedly. If the module has already been authorized once, you need only to modify and flash the firmware demo to make the module work properly.
Prepare hardware
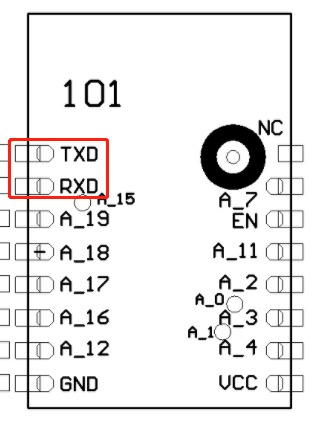
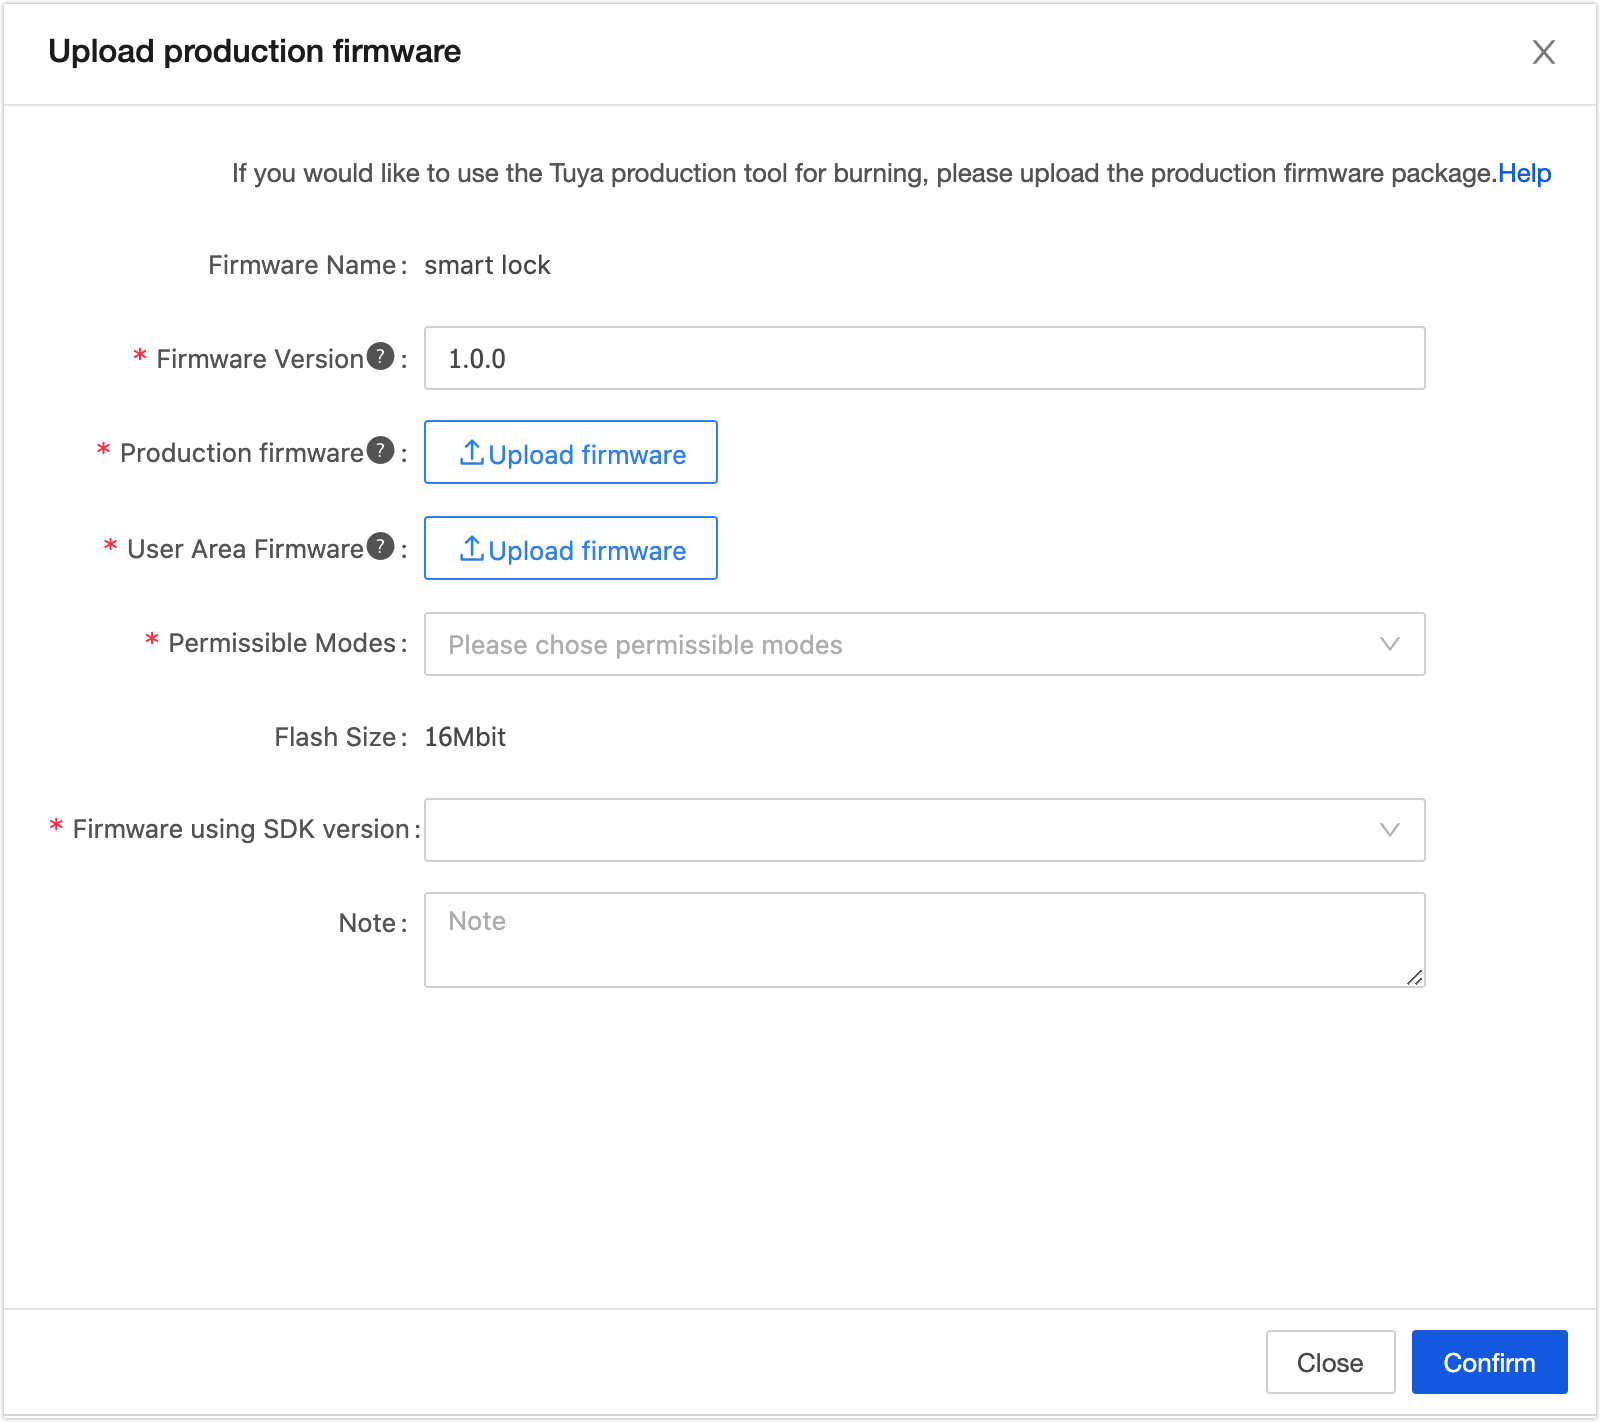
Hardware preparation includes serial port assistant, any module equipped with chip platform RTL8720CF, and hardware connection diagram.
| Module pin | Serial port pin |
|---|---|
| A_0 | VCC3.3V |
| LOG_RX | TX |
| LOG_TX | RX |
| VCC | VCC3.3V |
| GND | GND |
| RXD | VCC3.3V |
Things to note
- After the flashing is completed, you need to unplug A_0 and connect the user RX back to the user serial port RX.
- After the flashing is completed, the module needs to be powered on again before working properly.
Prepare software
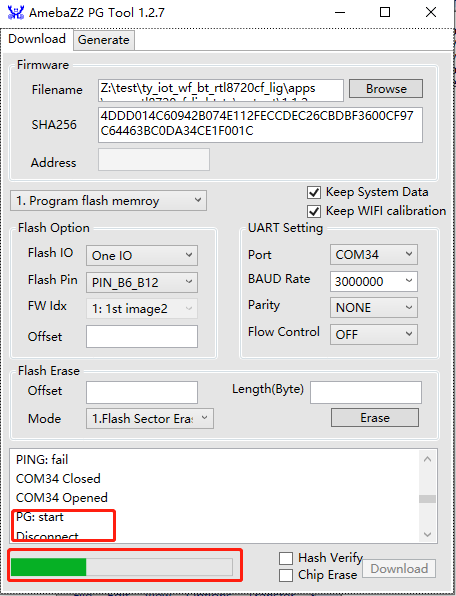
Download and run the RTL8720CF chip burning tool.
Please note the red marked area above:
- Select the port that is actually being used.
- Select 'PIN_B6_B12' as the flash pin.
- Reduce the baud rate appropriately if the flashing fails during the process.

Download
flashing process
-
Power off the module in the first place.
-
After opening the flashing tool, click Browse and select the
flash_is.bin(boot + user area firmware) file to flash.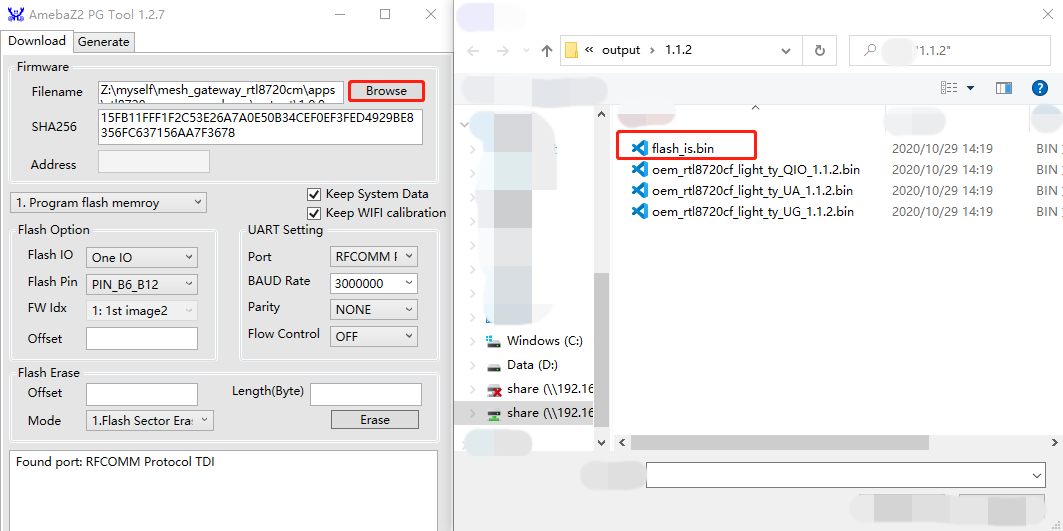
-
After the flashing is completed, power on the module.
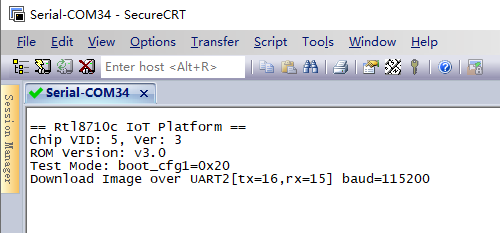
Things to note
It is necessary to determine whether the module is in flashing status after power-off and power-on. If the content shown as follows does not appear, check whether the wiring A_0 and RX are grounded.
Download
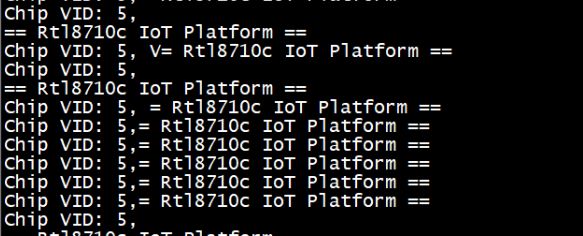
The downloaded screenshot is as follows:
FAQ
When updating the firmware in the RTL8720CF chip flashing tool, you need to click Browse every time. Otherwise, the following status will appear.
Is this page helpful?
YesFeedbackIs this page helpful?
YesFeedback


