Flash Firmware to and Authorize ZS and TYZS Modules
Last Updated on : 2024-06-24 05:49:23download
This topic describes two solutions about how to flash firmware to and authorize ZS and TYZS modules.
Background information
After the module SDK firmware development is completed, you need to flash and authorize the module to enable connection to the cloud. Tuya provides the following two flashing and authorization methods for different scenarios.
-
An integrated solution for flashing and authorization. This solution is made to flash and authorize modules on the Cloud Module flashing Authorization Platform, which is suitable for the release stage.
-
Separated solutions for flashing and authorization. This solution is made to flash modules with chip flashing tools and authorizes modules on the Cloud Module flashing Authorization Platform, which is suitable for the development stage.
Supported chips
This download solution is suitable for the ZS Series Module and TYZS Series Module with the core chips of EFR32MG21A020F768 and EFR32MG13P732F512 respectively. The following models are included.
An integrated solution for flashing and authorization
Solution description
This solution is suitable for the release stage. Since the Tuya module must be authorized to connect to the Tuya Developer Platform, the authorization step cannot be omitted.
The overall process of this solution is as follows:
- Upload the compiled firmware to the Tuya Developer Platform.
- A firmware key is generated on the platform, and an authorization code is generated based on the firmware key.
- flash and authorize the modules on the Cloud Module flashing Authorization Platform.
Prepare hardware
Hardware preparation includes serial port assistant, any module equipped with chip platform EFR32MG21A020F768 (using TYZS5 Module Datasheet as an example in this topic), and hardware connection diagram.
Note: J-Link is for downloading the firmware, and the serial port tool is for authorizing.
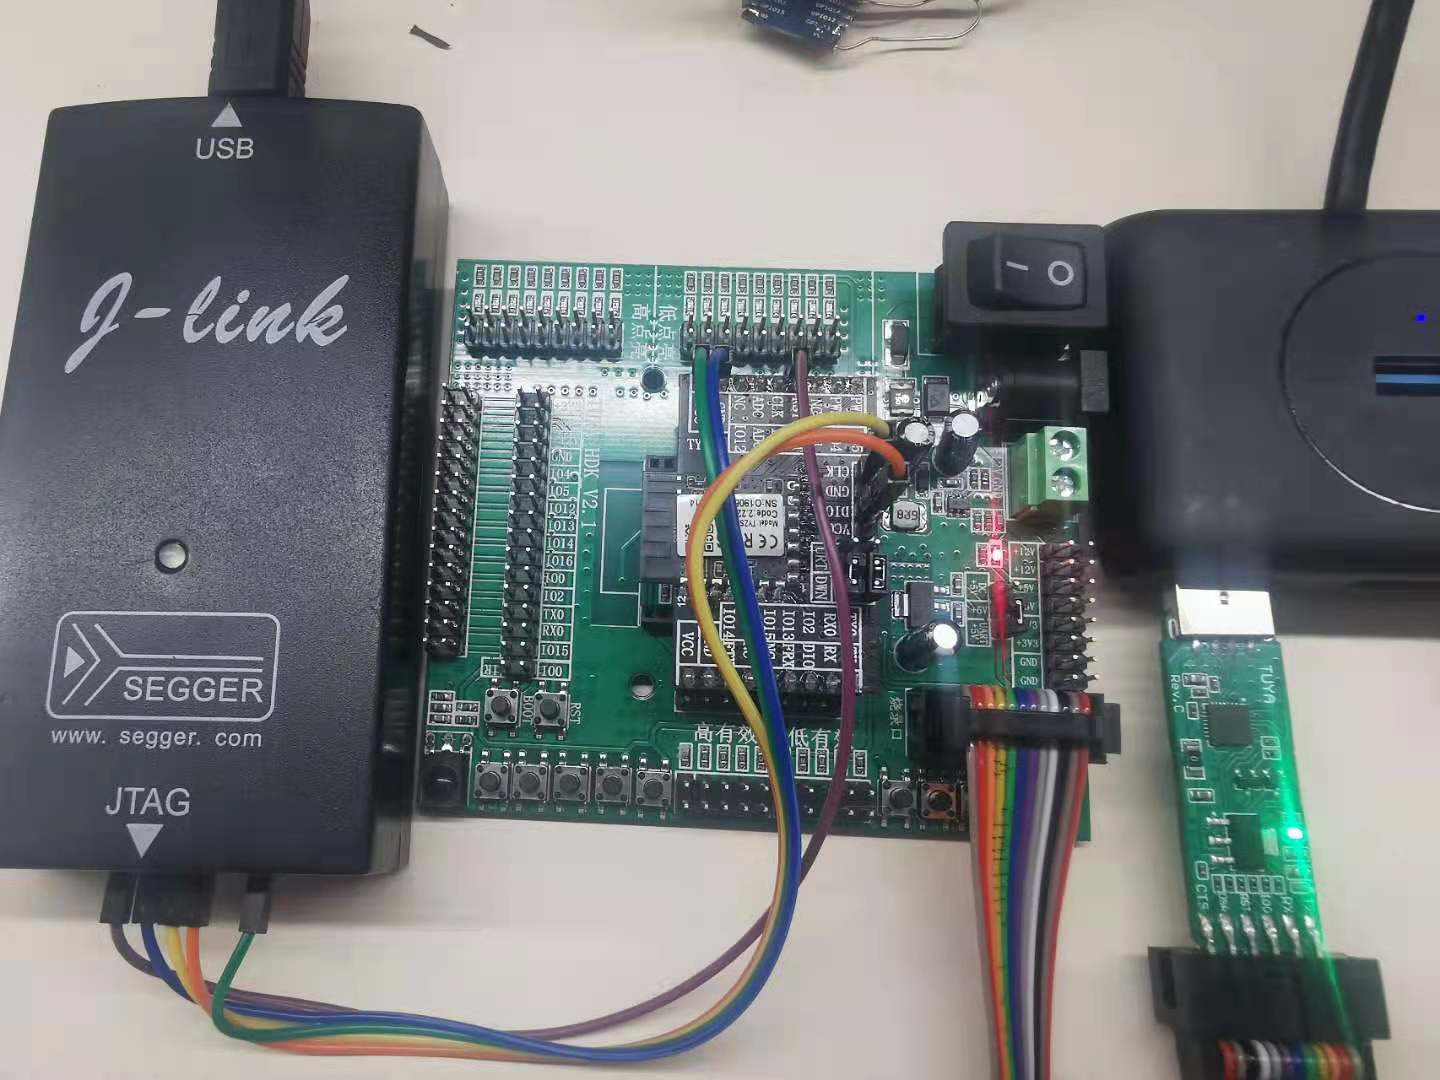
Pin correspondence
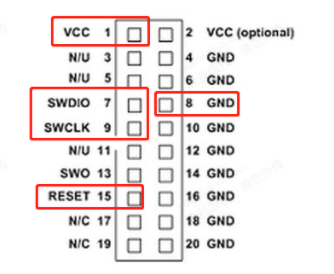
The J-Link pin diagram is as follows:
The following figure shows the pin numbers of TYZS5. For more information about the pin definition, see TYZS5 Module Datasheet.
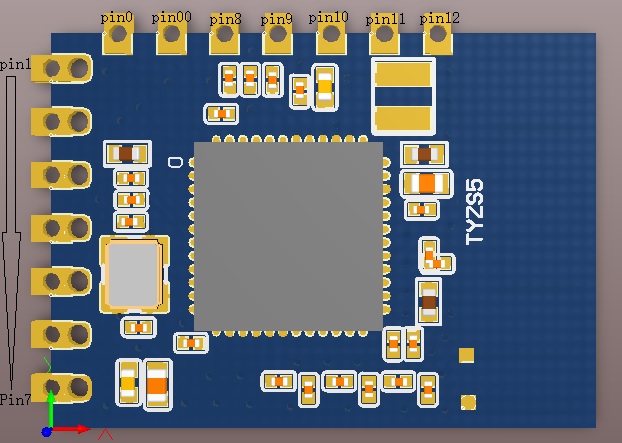
For the pin correspondence between TYZS5 module and J-Link, see the table below:
| Module pin | J-Link pin diagram |
|---|---|
| pin00 (SWCLK) | SWCLK (9 pin) |
| pin0 (SWDIO) | SWDIO (7 pin) |
| pin10 (VCC) | VCC |
| pin7 (GND) | GND |
| pin9 (nRST) | RESET (15 pin) |
For the pin correspondence between TYZS5 module and serial port connection, see the table below:
| Module pin | Serial pin |
|---|---|
| pin3 (UART-TX) | RX |
| pin4 (UART-RX) | TX |
| VCC | VCC3.3V |
| GND | GND |
Upload firmware
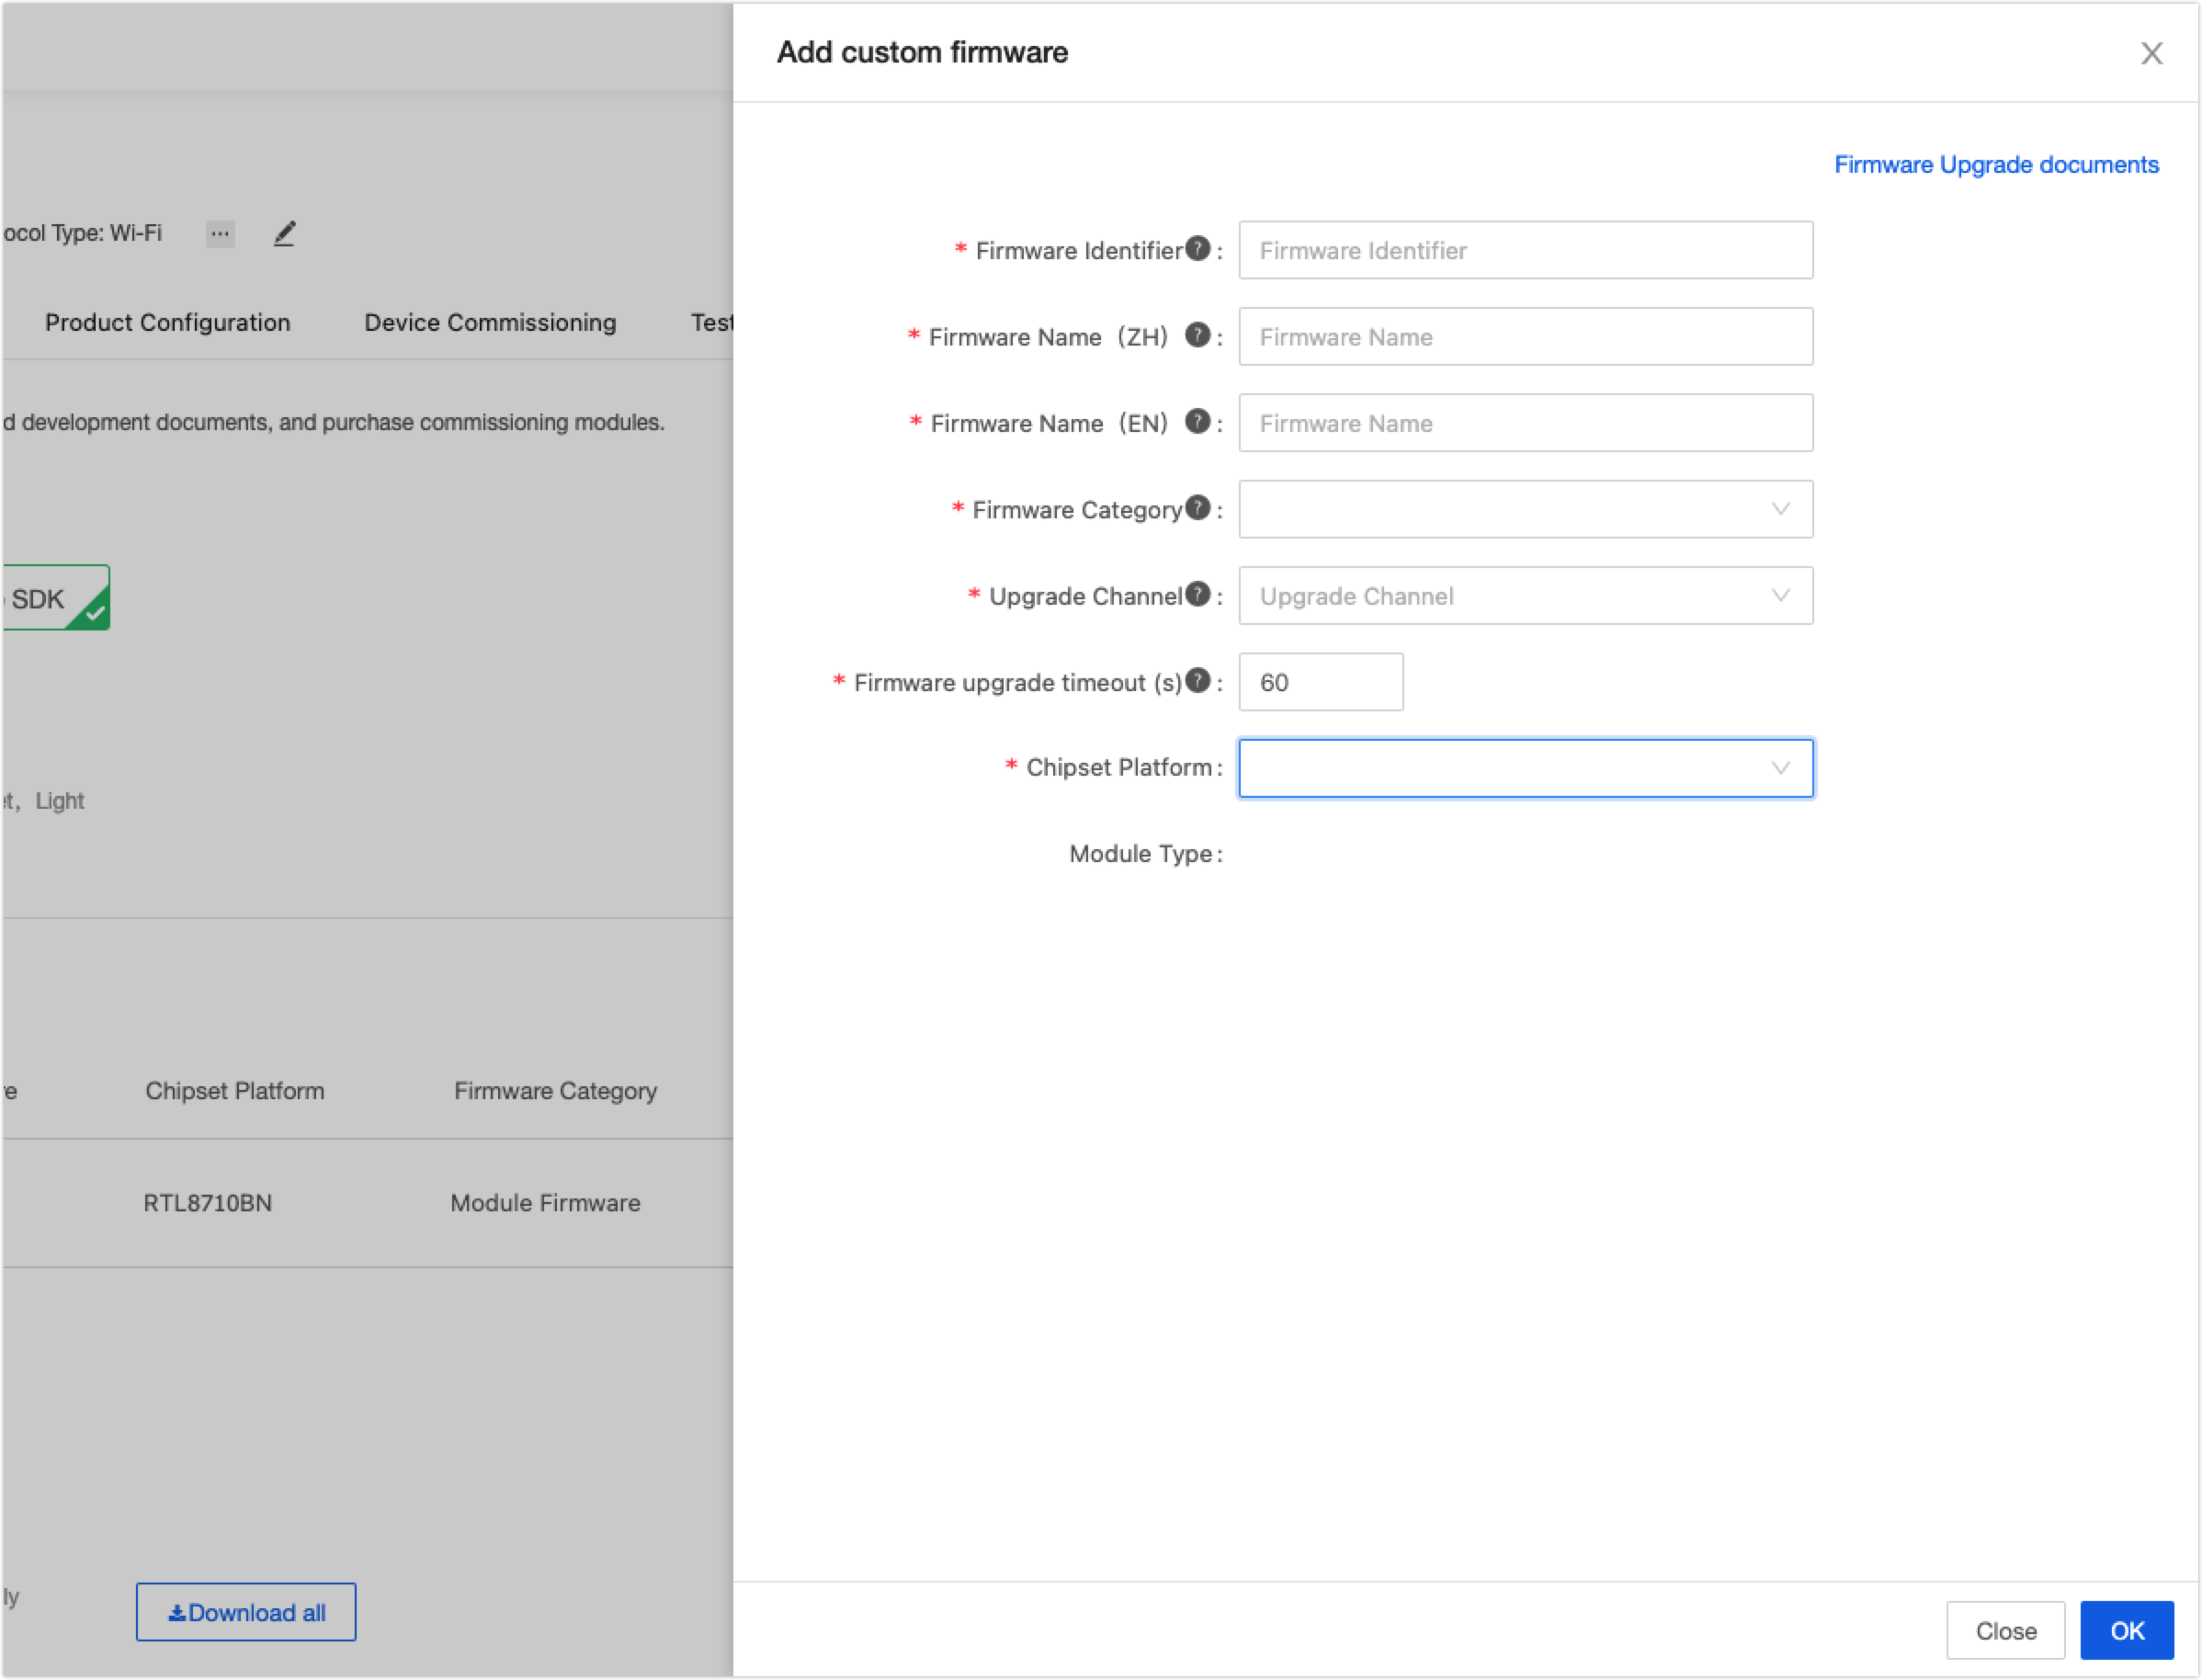
In the third step Hardware Development of the product development process on the Tuya Developer Platform, click Add custom firmware to upload the compiled firmware. Enter the firmware parameters as per the prompts and click OK. In the Generated Firmware area, click Upload production firmware.
Get the authorization code and flash firmware
Get the authorization code on the platform according to the PID, and download the Cloud Module Burning Authorization Platform in reference to Burning and Authorization.
The flashing steps are:
- Select the port number of the USB-to-TTL converter and J-Link device.
- Enter 11 in the channel.
- Click Run.

Separated solutions for flashing and authorization
This solution is suitable for the development stage. You will flash the compiled firmware into the device through J-Link.
Note: In this solution, the device can only operate properly for one week, after which it will not be able to connect to the cloud due to the absence of authorization information. If you need long-term testing, you can use the integrated solution for flashing and authorization, and authorize on the Cloud Module Burning Authorization Platform.
Prepare hardware
According to the hardware connection diagram below, connect J-Link and any module equipped with chip platform EFR32MG21A020F768. (using TYZS5 Module Datasheet as an example in this topic).
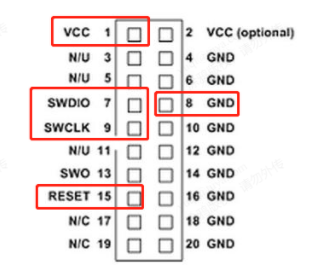
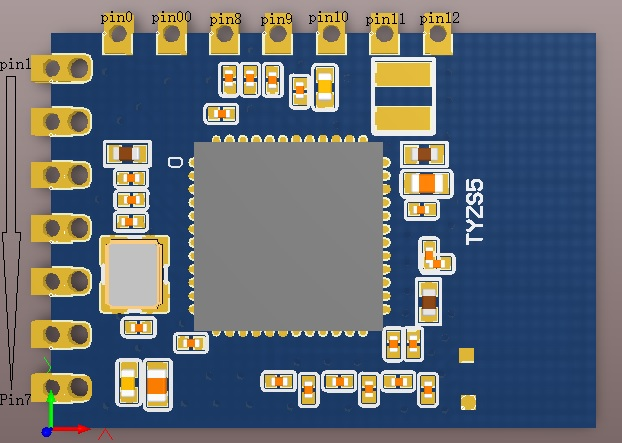
| Module pin | J-Link pin |
|---|---|
| pin00 (SWCLK) | SWCLK (9 pin) |
| pin0 (SWDIO) | SWDIO (7 pin) |
| pin10 (VCC) | VCC |
| pin7 (GND) | GND |
| pin9 (nRST) | RESET (15 pin) |
Prepare software
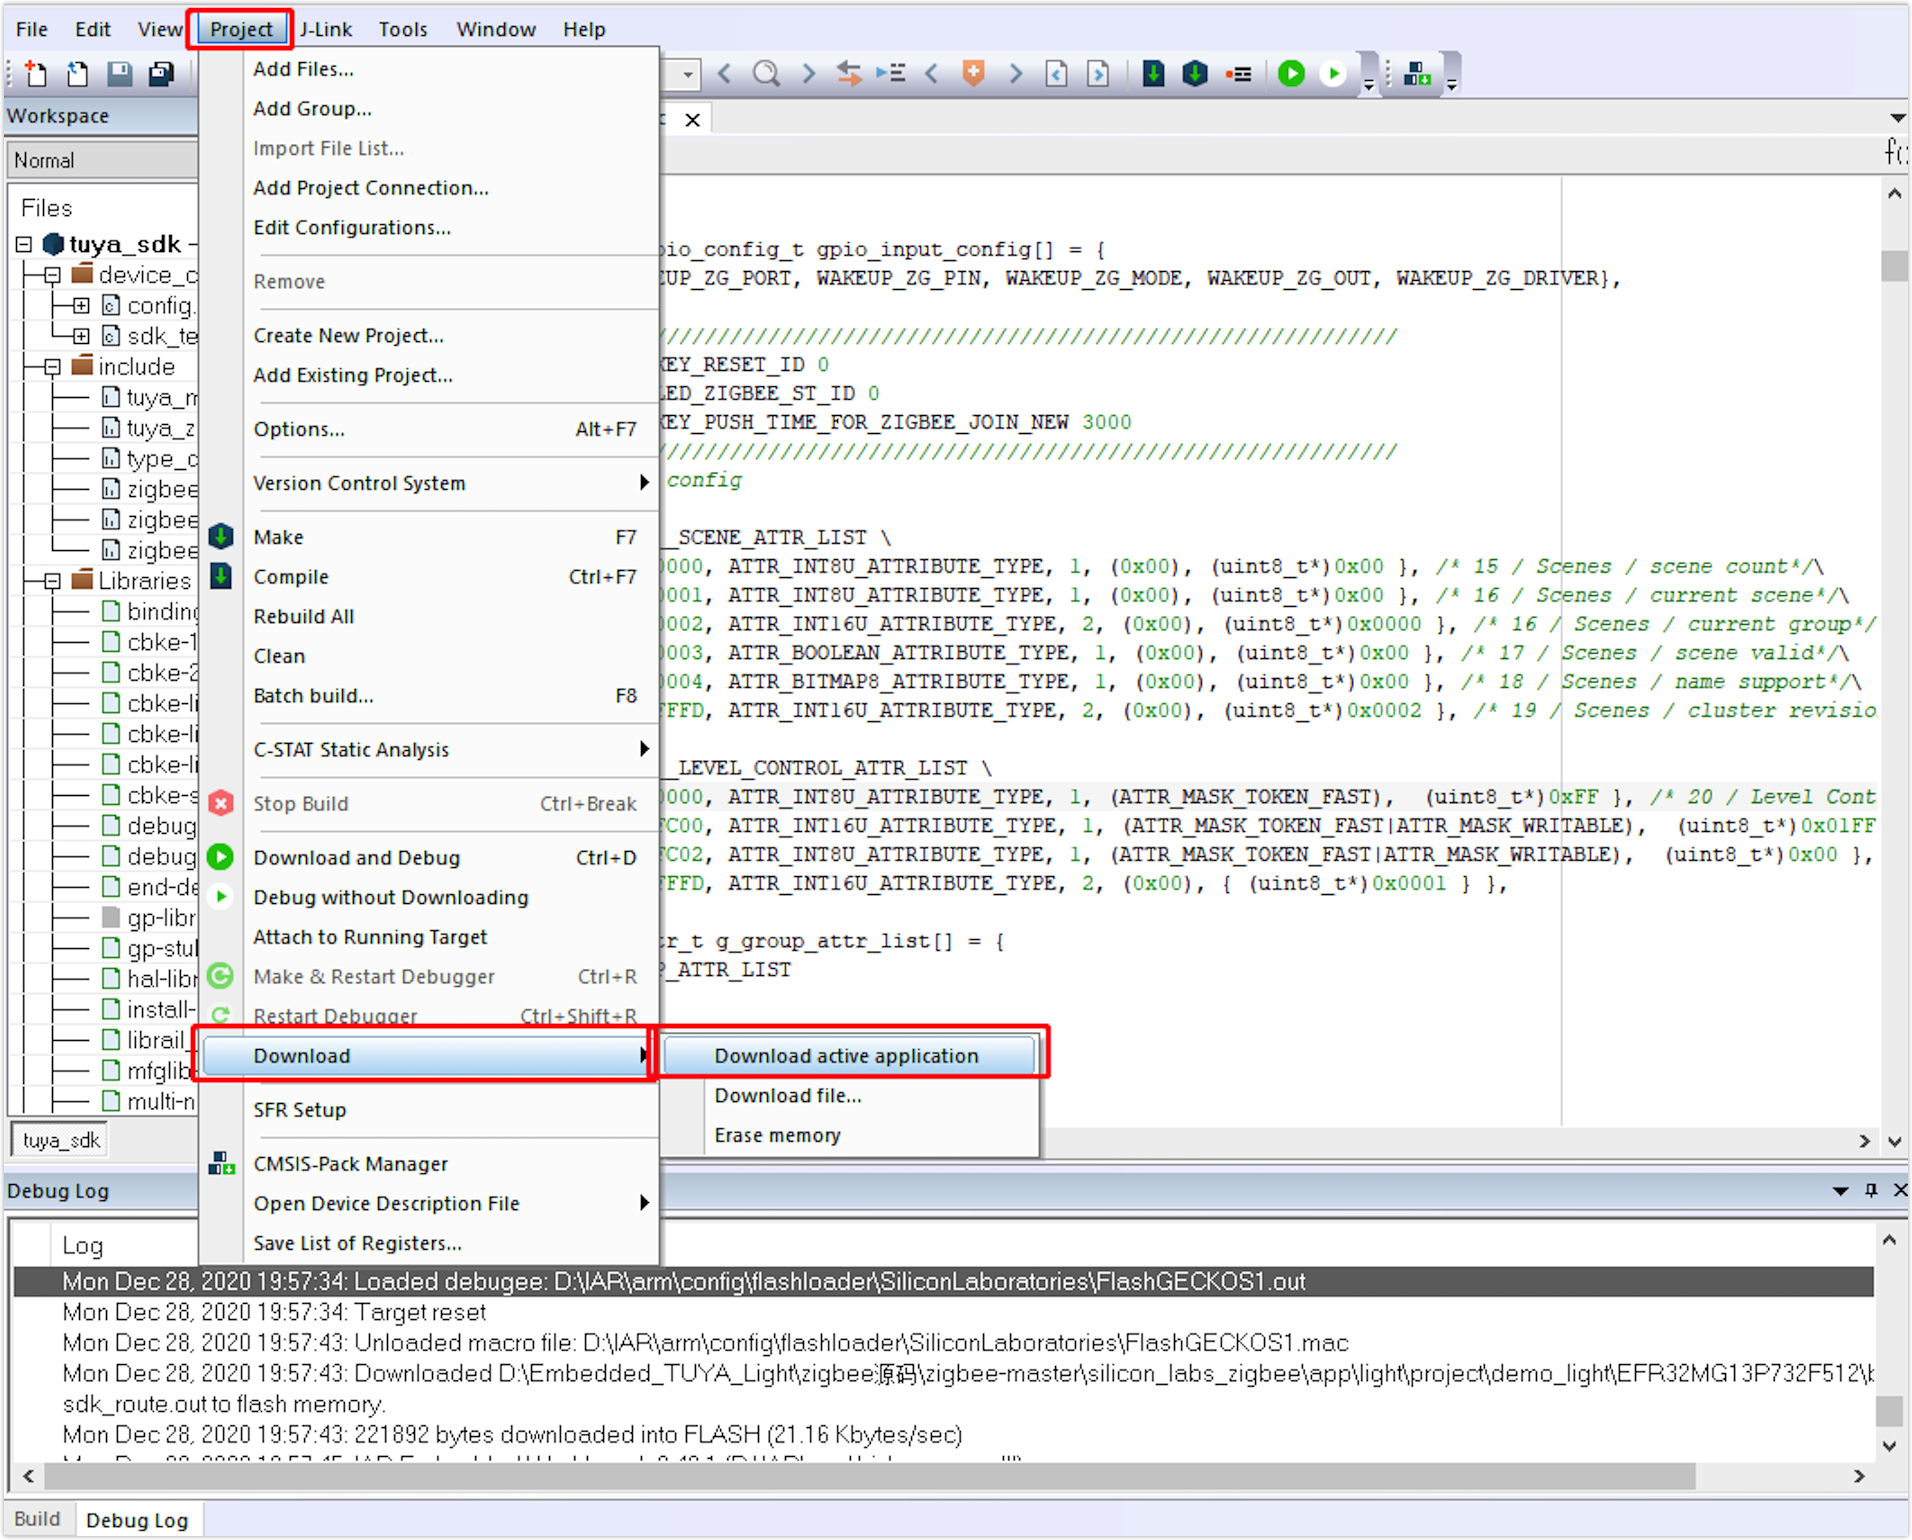
Open the IAR compilation environment. After the compilation is completed, select Download active application under the Project option, and wait for the indication of completed flashing.
Is this page helpful?
YesFeedbackIs this page helpful?
YesFeedback


