TuyaOS Link SDK for Python
TuyaOS Link SDK for Python is written in Python, aiming to help developers connect their proprietary hardware to the Tuya Developer Platform.
This SDK contains the implementation of essential IoT capabilities including smart device activation, bidirectional data exchange between the cloud and devices, and OTA updates. It is independent of platforms and operating systems (OS) and can run on a single-tasking operating system.
If your devices support the TCP/IP protocol stack, you can develop with this SDK to connect your devices to the platform.
Procedure
Step 1: Create product
Log in to the Tuya Developer Platform and create a product to get the PID.
-
Choose Standard Category > Others > Custom Category.
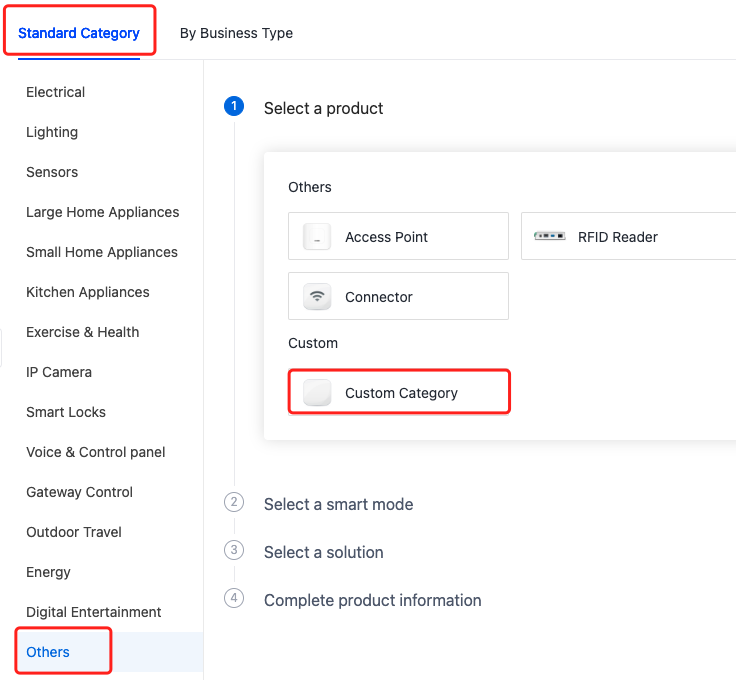
-
Choose TuyaOS for smart mode.
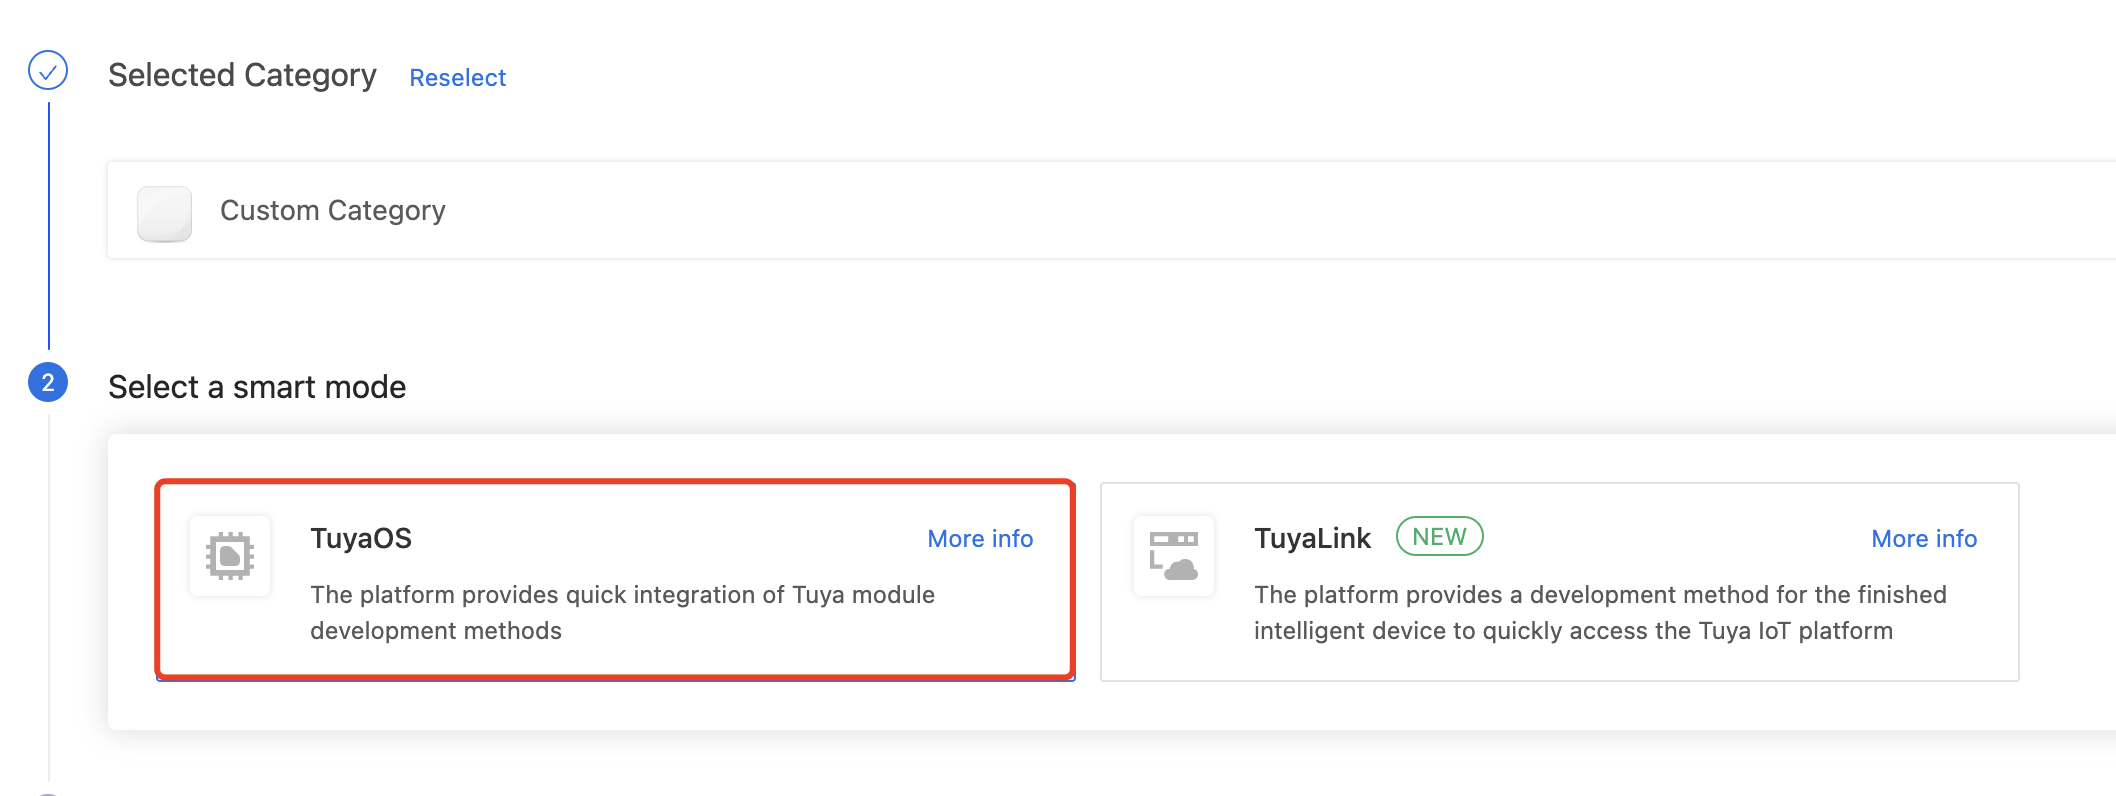
-
Choose Custom Solution.
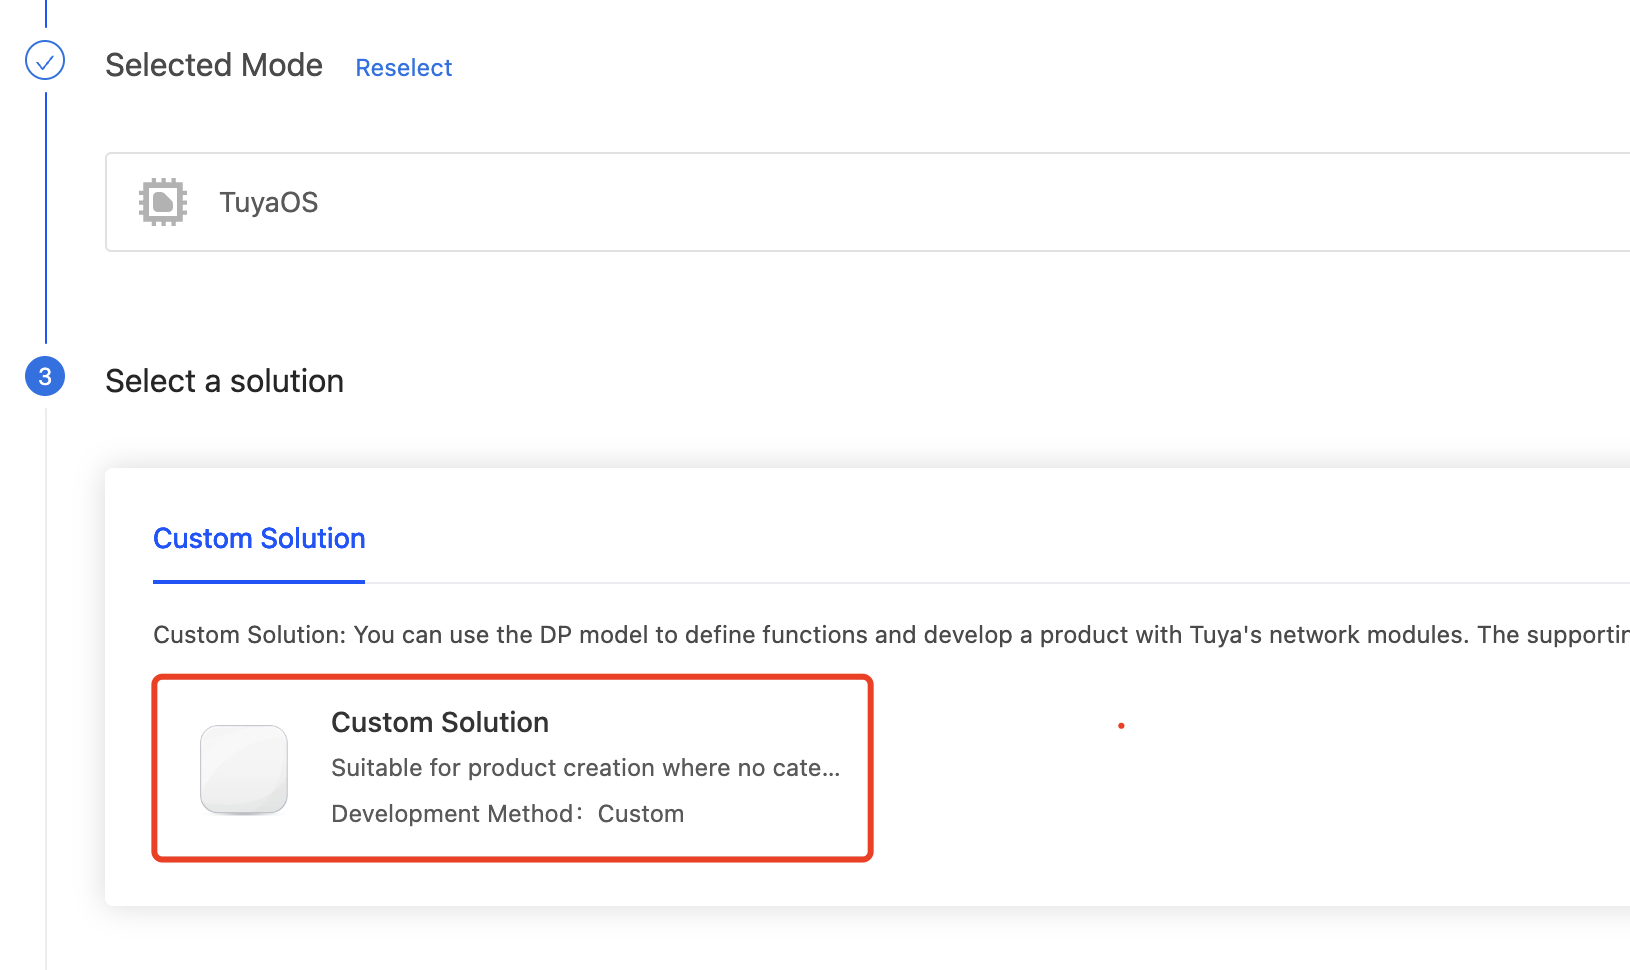
-
Complete the information about Product Name, (optional) Product Model, Product Description, Protocol, and Power Type.
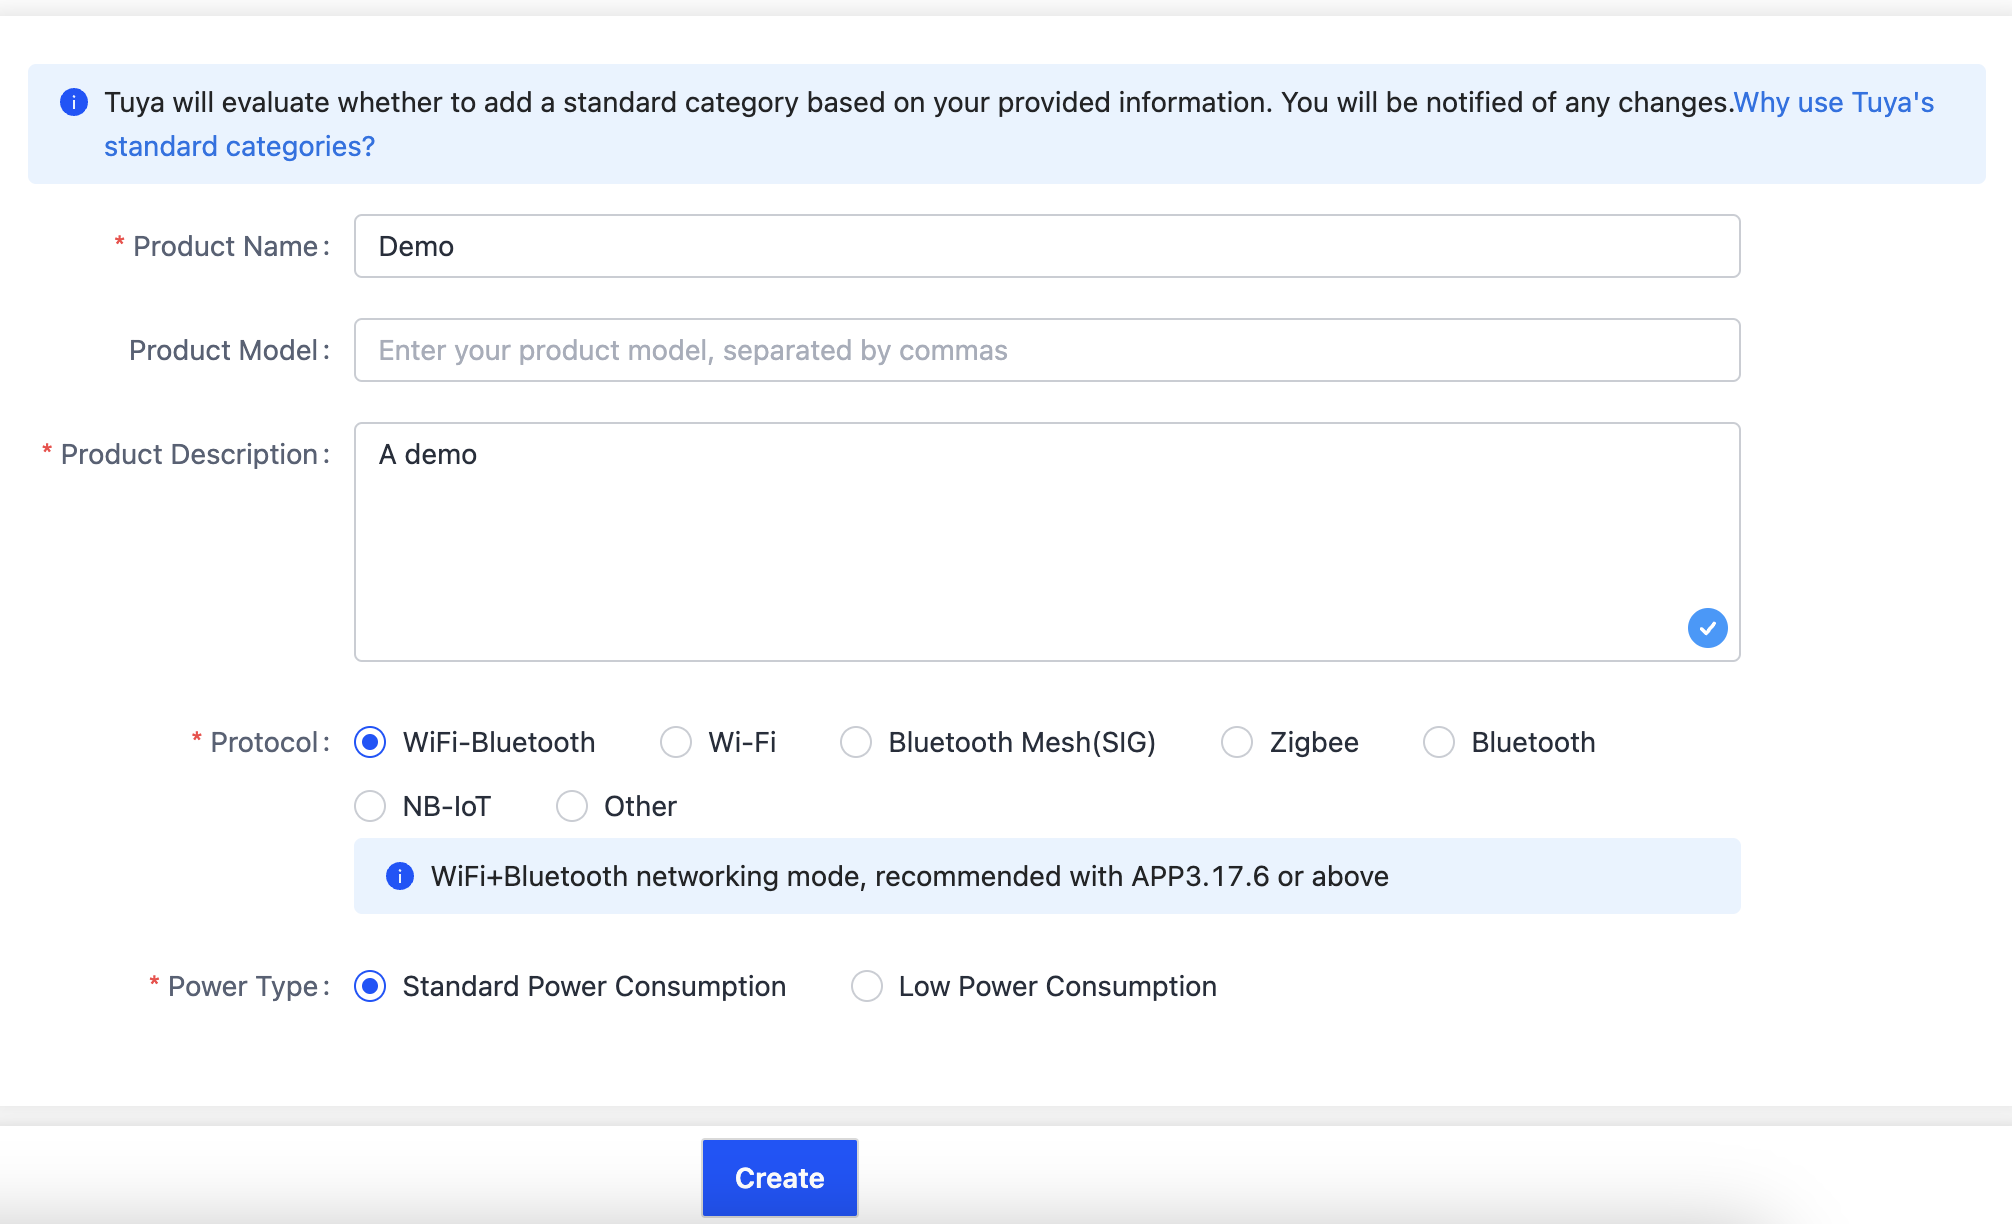
Click Create. For more information, see Create Products.
Step 2: Define functions
You need to add or create required data points (DPs). A DP is an abstract representation of a feature you want to apply to a physical device, which can be defined by various data types.
The platform supports six data types, including Boolean, value, enum, fault, string, and raw. For more information, see Function Definition.
Step 3: Get the license
A license is composed of UUID and authKey, which serves as the credential to connect to the platform. You can get the license in the step of Hardware Development.
-
In Hardware Development, choose Link SDK and then General CPU.
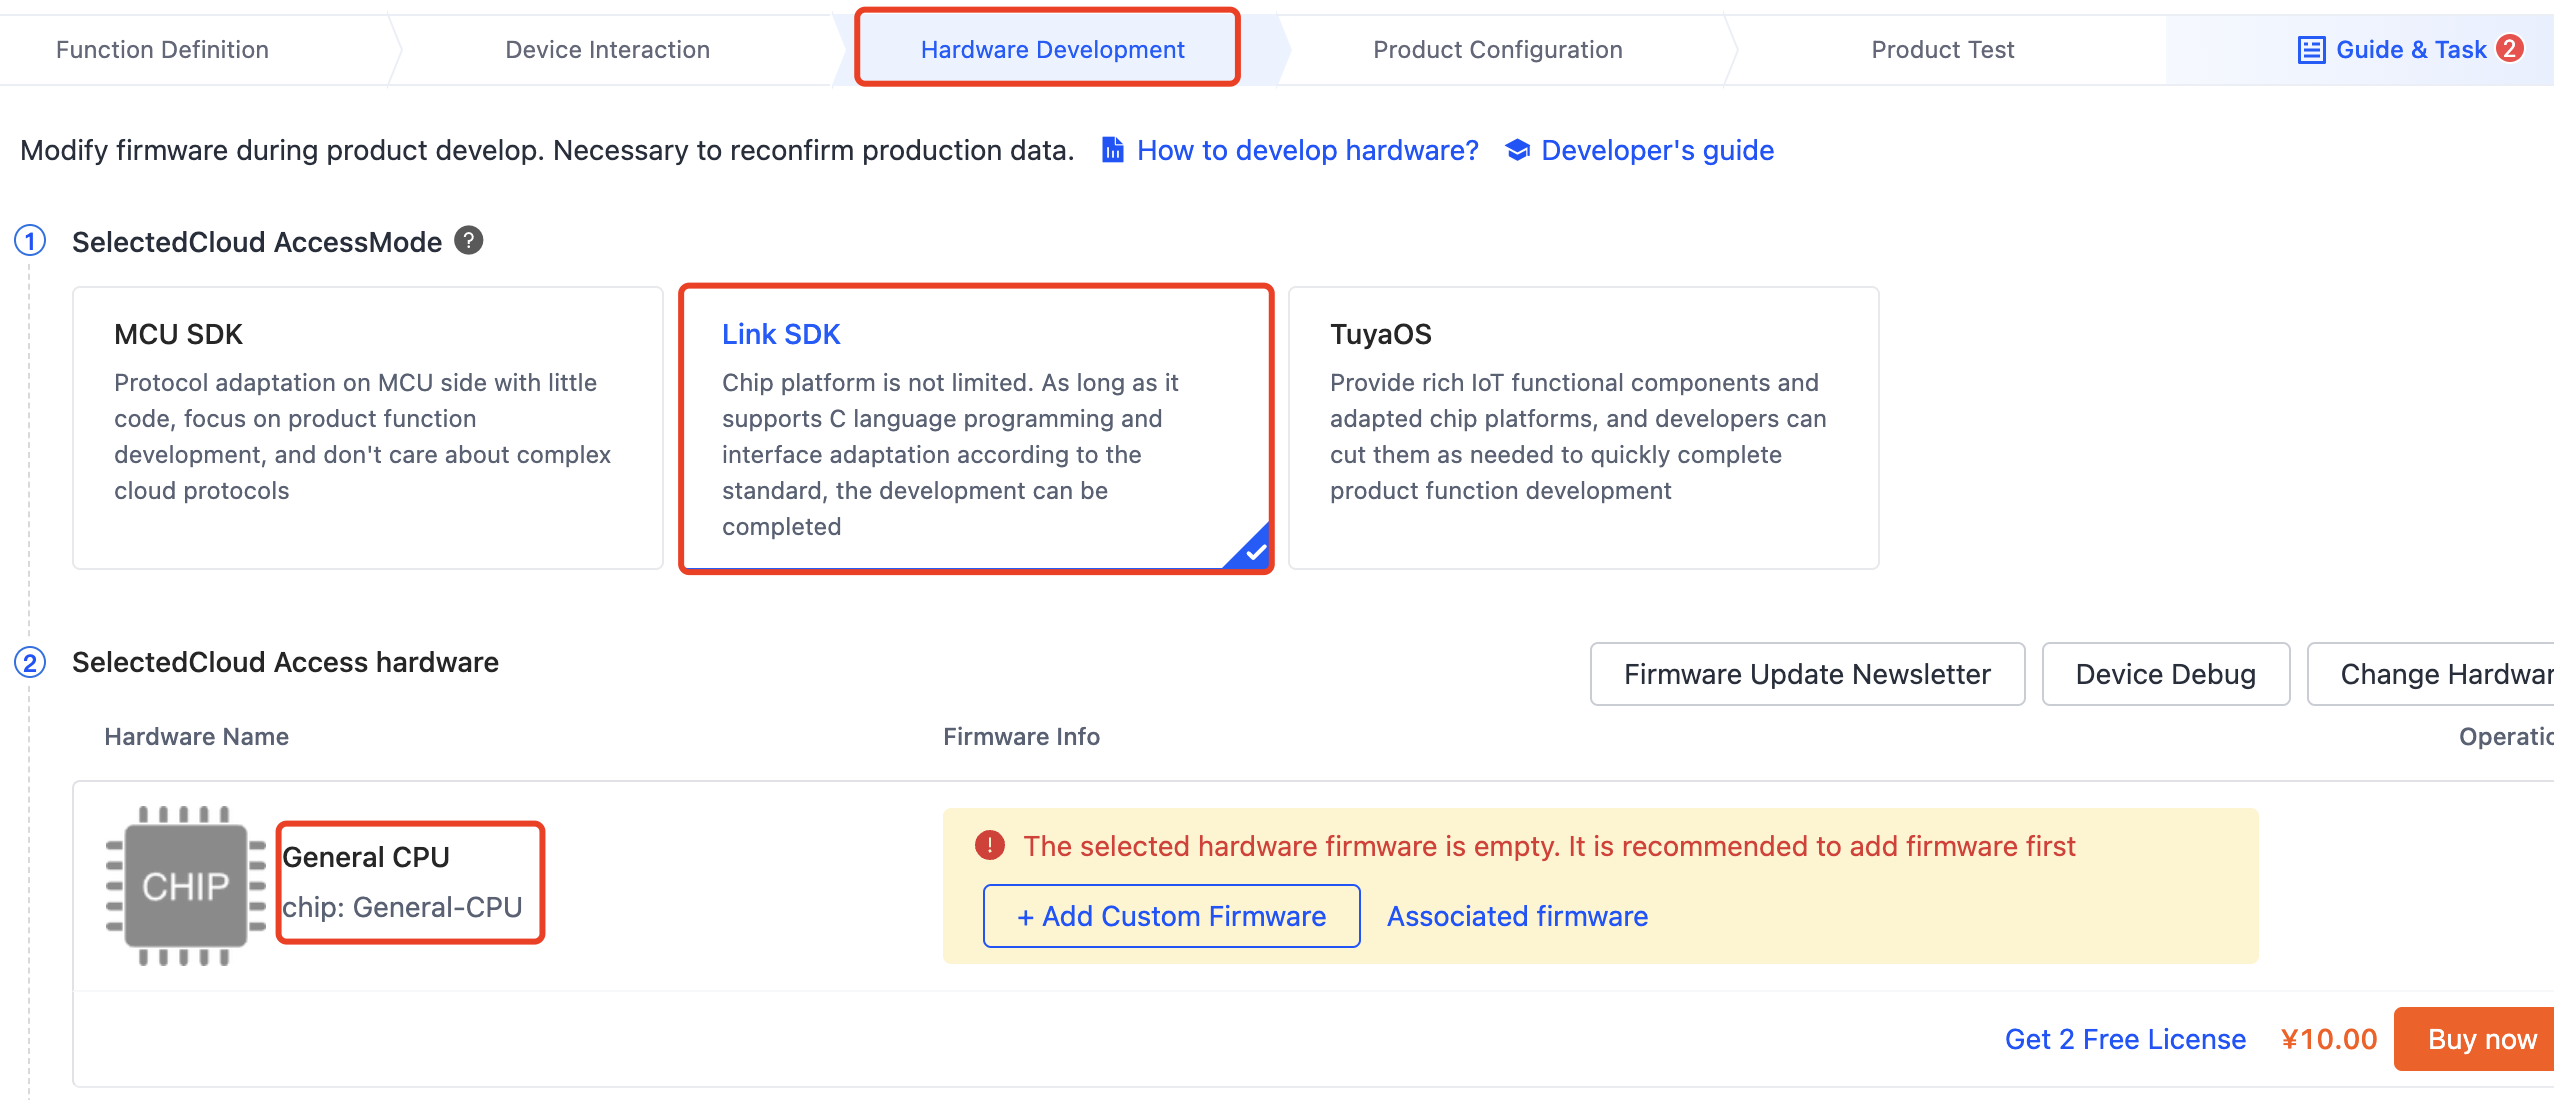
-
Click Get 2 Free Licenses.

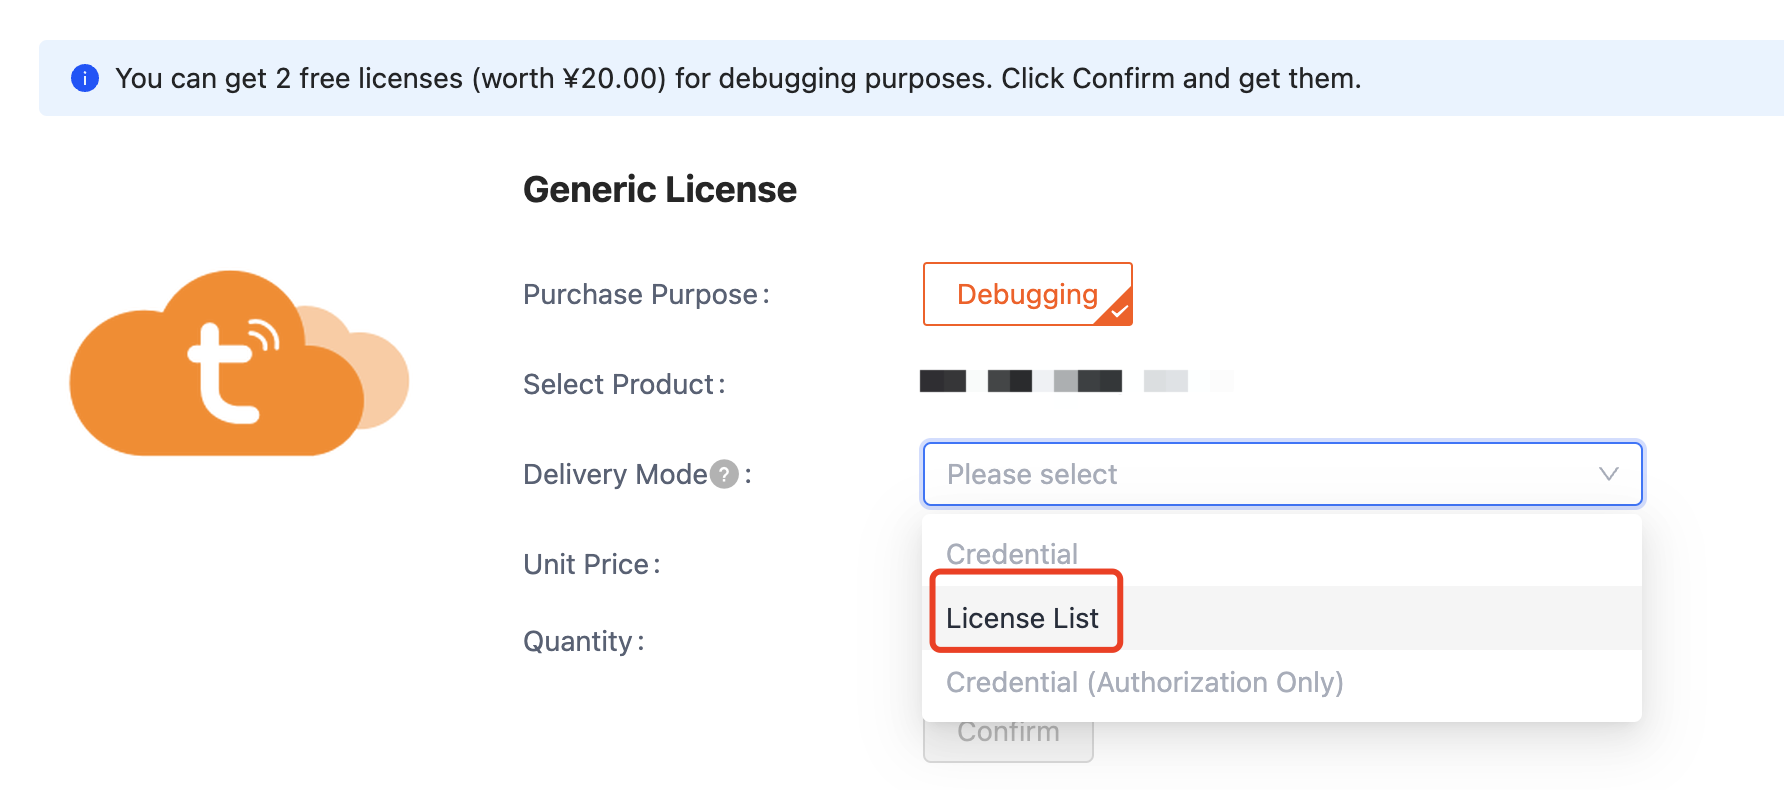
-
Select License List as the delivery form.
Step 4: Download the SDK
Download TuyaOS Link SDK for Python from PyPI repository.
The following describes the structure of the SDK directory:
examples: Routines.tuyalinksdk: Functions
Step 5: Configure device information
In the examples/outlet.py file, find TuyaClient. Update productid, uuid, and authkey to values you obtained in the previous steps.

Step 6: Run the demo
-
Enter
python3 outlet.pyunder the demo directory to run the code. -
Bind your device with the mobile app.
Scan the QR code shown on the terminal by using a Tuya-enabled mobile app such as Smart Life. Your device will appear on the homepage after it is successfully added.
(Optional) Step 7: Generate device QR code
Use a QR code generator to make a QR code for your device.
-
The URL format for making QR code
https://smartapp.tuya.com/s/p?p=<PRODUCT_KEY>&uuid=<UUID>&v=2.0PRODUCT_KEY: The PID of the product you create on the Tuya Developer Platform.UUID: The UUID of your device to be added.
-
URL example:
https://smartapp.tuya.com/s/p?p=U0fxNCEnZptKnQ **&uuid=f2ef8b136911f4**&v=2.0
Sample application
-
Instantiate and initialize a device object
clientto assign initial values, such as product ID (PID) and authorization information, for this object.from tuyalinksdk.client import TuyaClient # instantiate the config client = TuyaClient(productid='ndo5dfkaiykh****', uuid='tuyae53b389a45a0****', authkey='RUgfPmGAyv3J8nfQ75fPDDic1Tx4****') # initialize the client tuya_iot_init(&client, &config); -
Define event callbacks in the application layer, used to receive the event notifications from the SDK, such as the DP data from the cloud or cloud connection status.
# Tuya SDK event callback def on_connected(): print('Connected.') def on_qrcode(url): qrcode_generate(url) def on_reset(data): print('Reset:', data) def on_dps(dps): print('DataPoints:', dps) client.push_dps(dps) -
Start the Tuya IoT SDK service.
client.connect() client.loop_start() // Tuya IoT SDK service tasks such as handling data and keepalive mechanism. -
Example of reporting DP data to the cloud.
client.push_dps(dps)
Example
#!/usr/bin/env python
import time
import coloredlogs
from tuyalinksdk.client import TuyaClient
from tuyalinksdk.console_qrcode import qrcode_generate

coloredlogs.install(level='DEBUG')

client = TuyaClient(productid='ndo5dfkaiykh****',
                    uuid='tuyae53b389a45a0****',
                    authkey='RUgfPmGAyv3J8nfQ75fPDDic1Tx****')

def on_connected():
    print('Connected.')

def on_qrcode(url):
    qrcode_generate(url)

def on_reset(data):
    print('Reset:', data)

def on_dps(dps):
    print('DataPoints:', dps)
    client.push_dps(dps)

client.on_connected = on_connected
client.on_qrcode = on_qrcode
client.on_reset = on_reset
client.on_dps = on_dps

client.connect()
client.loop_start()

while True:
    time.sleep(1)
Is this page helpful?
YesFeedbackIs this page helpful?
YesFeedback


