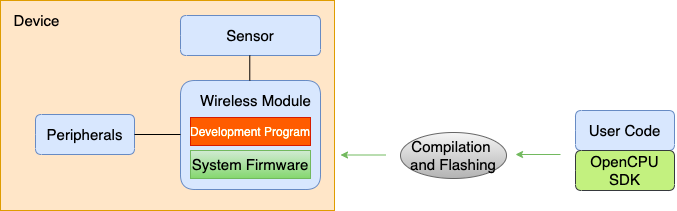
OpenCPU SDK of LZ201 Module
OpenCPU is the open CPU of a module. You can develop and compile programs in the development environment of the OpenCPU SDK, and flash the program as the firmware to the CPU of the module by using the flashing tool.
This topic also applies to the OpenCPU SDK of the LZ211 module.
Build a development environment
This section describes how to install the operating system on which the OpenCPU SDK depends.
Get the Ubuntu image
-
Download the Ubuntu operating system image file in the Ubuntu Downloads area.
-
Find and download the
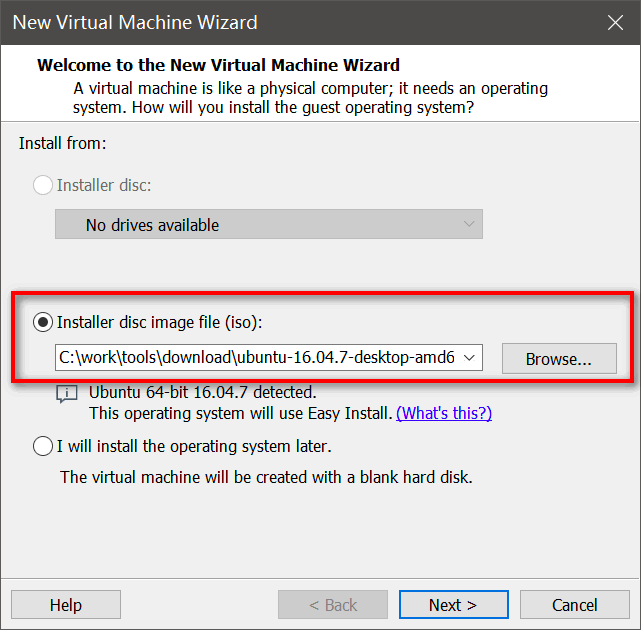
ubuntu-16.04.7-desktop-amd64.isoimage file.Note: Ubuntu16 must be selected for download, other versions may be missing some system library files.
Install Ubuntu
You can install the Ubuntu image file by using the following methods:
- Method 1: Use the
UltraISO.exetool to make the .iso file into a bootable USB flash drive, and install it on the computer. - Method 2 (frequently used): In the Windows operating system, use a virtual machine such as VMware to install the image file.
To install the image by using Method 2, perform the following steps:.
-
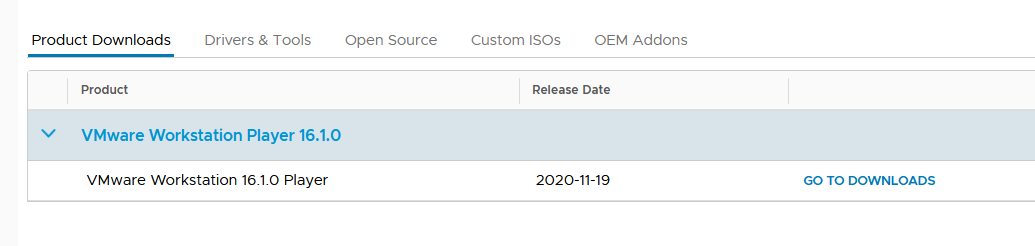
Download and install VMware Workstation Player.
-
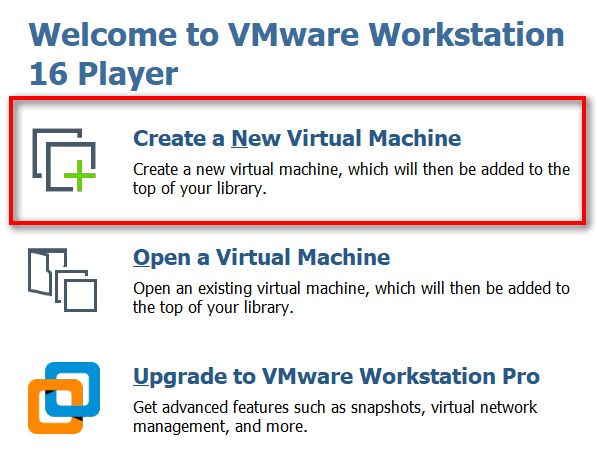
Open the software VMware Workstation Player and choose to create a new virtual machine.
-
Select the downloaded .iso file.
-
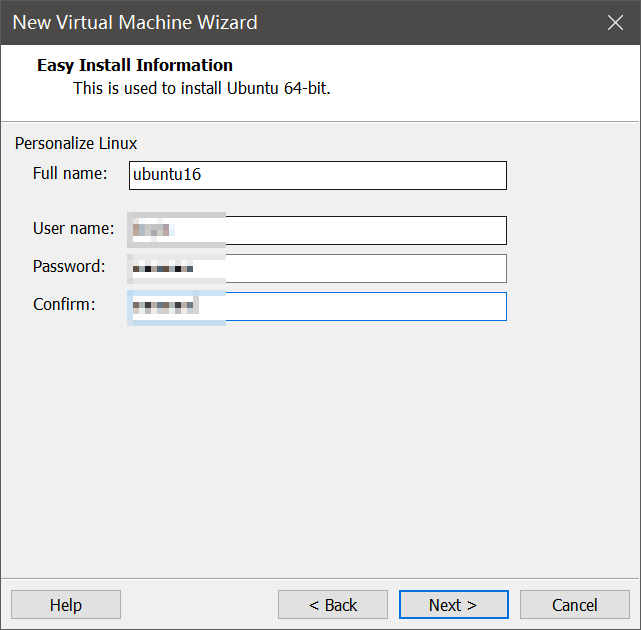
Enter the required user information in the dialog box and click Next to continue with following steps. Keep the default settings until the Specify Disk Capacity step.
-
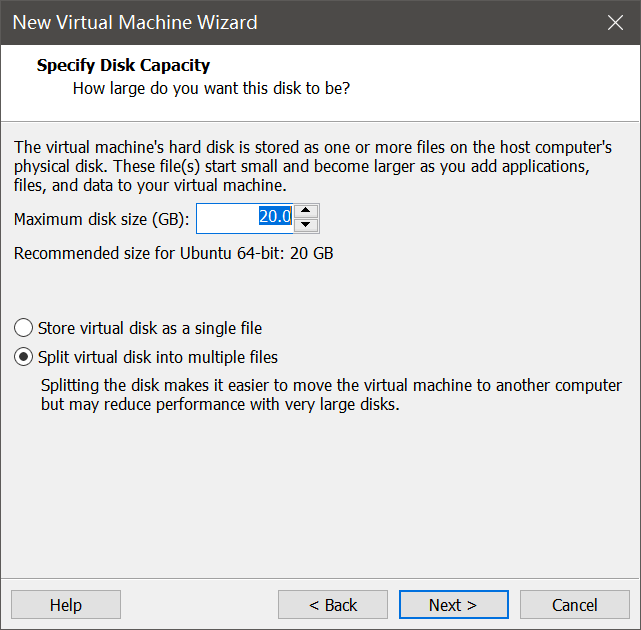
In the Specify Disk Capacity step, if the disk space of the computer is sufficient, we recommend that you specify a disk capacity as large as possible. Then, define the hardware resources such as the memory, processor, and network adapter.
-
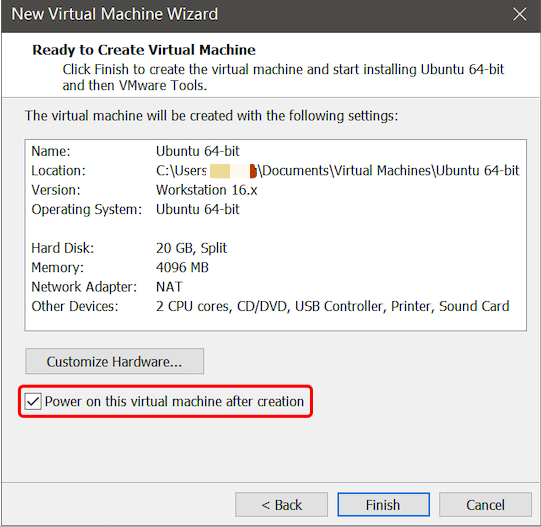
Click Finish. Now, the virtual machine is created and started.
-
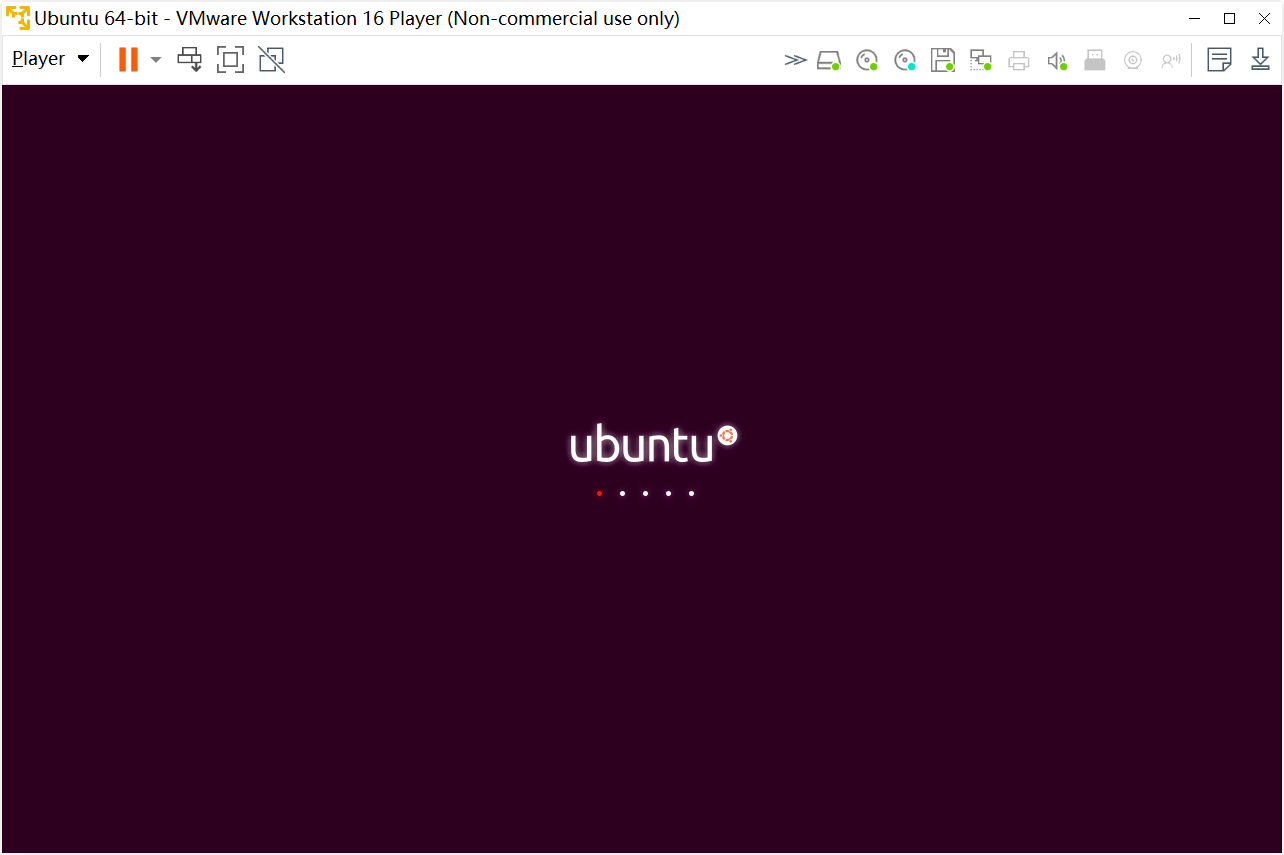
Wait for the computer to automatically install Ubuntu.
-
After Ubuntu is installed, enter the system and open the Linux terminal.
System configuration and update
-
Configure the virtual machine network to support the bridged or NAT mode. This way, the virtual machine can be connected to the Internet. For more information, see specific configuration tutorials
-
After the virtual machine is networked, configure the Samba sharing environment. For more information, see related tutorials on the specific configuration methods.
-
Execute the following command to install the development environment dependent software:
sudo apt install build-essential python3 python3-tk qtbase5-dev

sudo apt install libc6:i386 libstdc++6:i386 zlib1g:i386
Get the OpenCPU firmware and SDK
Before you use the LZ201 module to develop embedded applications, create a product that uses the LZ201 module on the Tuya Developer Platform and complete the hardware development. During the development, the following tools are required:
- OpenCPU basic firmware
- OpenCPU SDK
- Flashing and debugging tools
Build an OpenCPU environment
To build an OpenCPU environment, perform the following steps:
-
In the Ubuntu environment, extract the downloaded OpenCPU SDK.
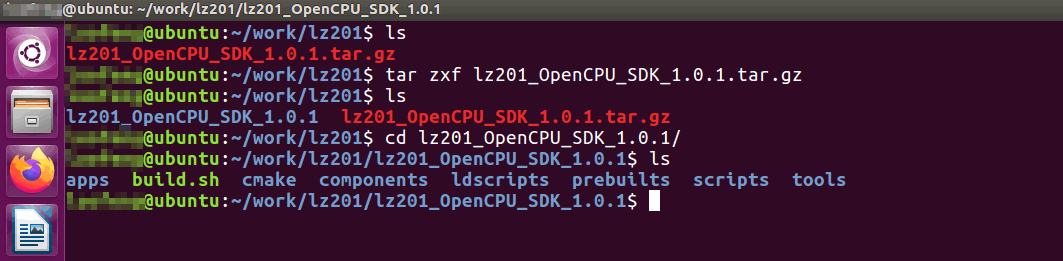
The OpenCPU development environment is ready. The following directories are included:
Directory Description apps Application code cmake Compilation script components Header files and libraries of OpenCPU SDK ldscripts Link script prebuilts Cross-compilation toolchain scripts Project script tools Firmware creation tool build.sh One-click compilation script of the project -
Execute
build.sh, follow the instruction to select the app to be compiled and start automatic compilation.
-
After the compilation, the firmware is generated in the
apps/hello/output/0.0.1directory.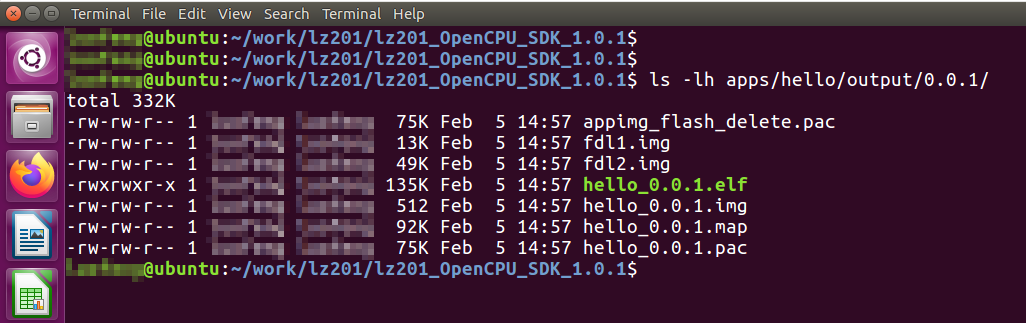
The following firmware is used in flashing.
hello_0.0.1.pac: your application firmware. Flash this firmware to the module and build your application.hello_0.0.1.img: the firmware to update your application. Upload the firmware to the Tuya Developer Platform, and update the program via OTA.appimg_flash_delete.pac: the firmware to erase your application. This firmware can be used to erase your application in the flash memory of the module.
-
Extract the
LZ201-tools.rartoolkit downloaded from the Tuya Developer Platform to get the flashing and debugging tools.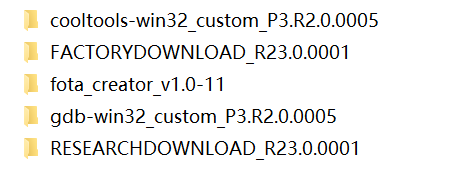
Directory Description cooltools Debugging and log viewing tool FACTORYDOWNLOAD Manufacturing flashing tool of the production line fota_creator FOTA update package creation tool gdb GDB debugging tool RESEARCHDOWNLOAD R&D flashing tool
Develop your app
This section describes how to build an application development project in the SDK, and complete code development, compilation, flashing, and debugging. TuyaOS APIs are integrated in the SDK. They can be used to develop IoT applications. For more information, see OpenCPU SDK Demo of LZ201 Module.
Build a project
Follow the demo project directory structure in the SDK and build your project directories.

user_app is the project name that can be customized. CMakeLists.txt is the project compilation script. You can copy the compilation script of the demo project and modify the script based on your needs. The src directory stores the source file and the include directory stores the header file.
Develop the project
-
Add the application source file and header file to the project to complete code development.

-
Modify
CMakeList.txtand add the source file to the compilation script.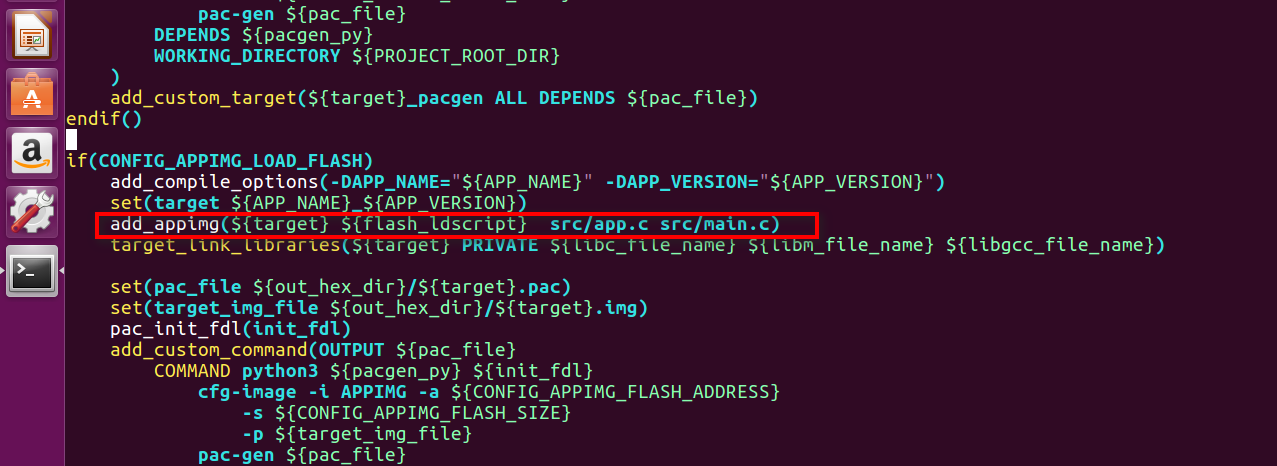
Compile the project
-
Execute
./build.sh, select the created project, and then start compiling.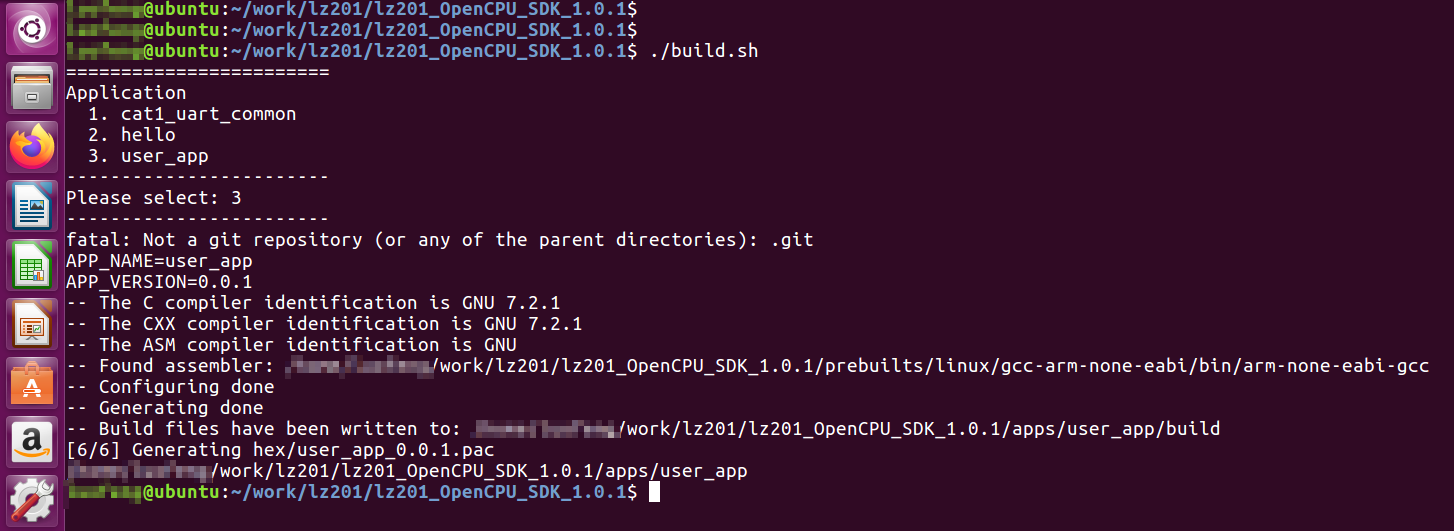
Note: During development, the flash space occupied by the application cannot exceed 192 KB, and the RAM space cannot exceed 64 KB.
-
After the project is compiled, the firmware is generated in the
apps/user_app/output/xxxdirectory.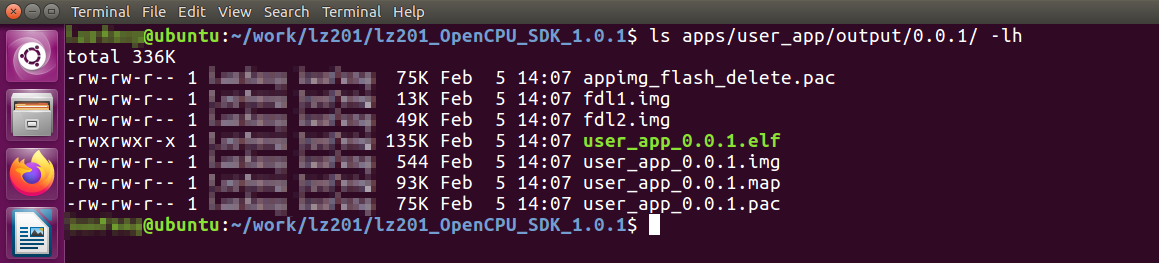
xxxis the version number, which can be customized during compilation. For more information, see the instructions inbuild.sh.
Flash the firmware
-
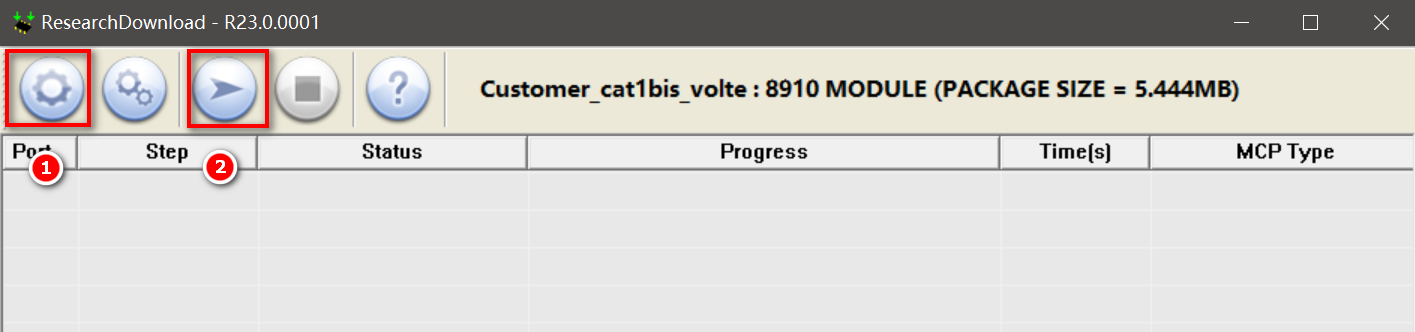
After compilation, flash the firmware to the module by using the RESEARCHDOWNLOAD tool.
-
Click Button 1 in the following figure to select the flashing file, and click Button 2 to start flashing.
Debug the module
-
After the flashing is completed, start the application firmware, connect the module USB to the computer, open the coolwatcher_usb.exe tool, view the log, and then implement online debugging.
-
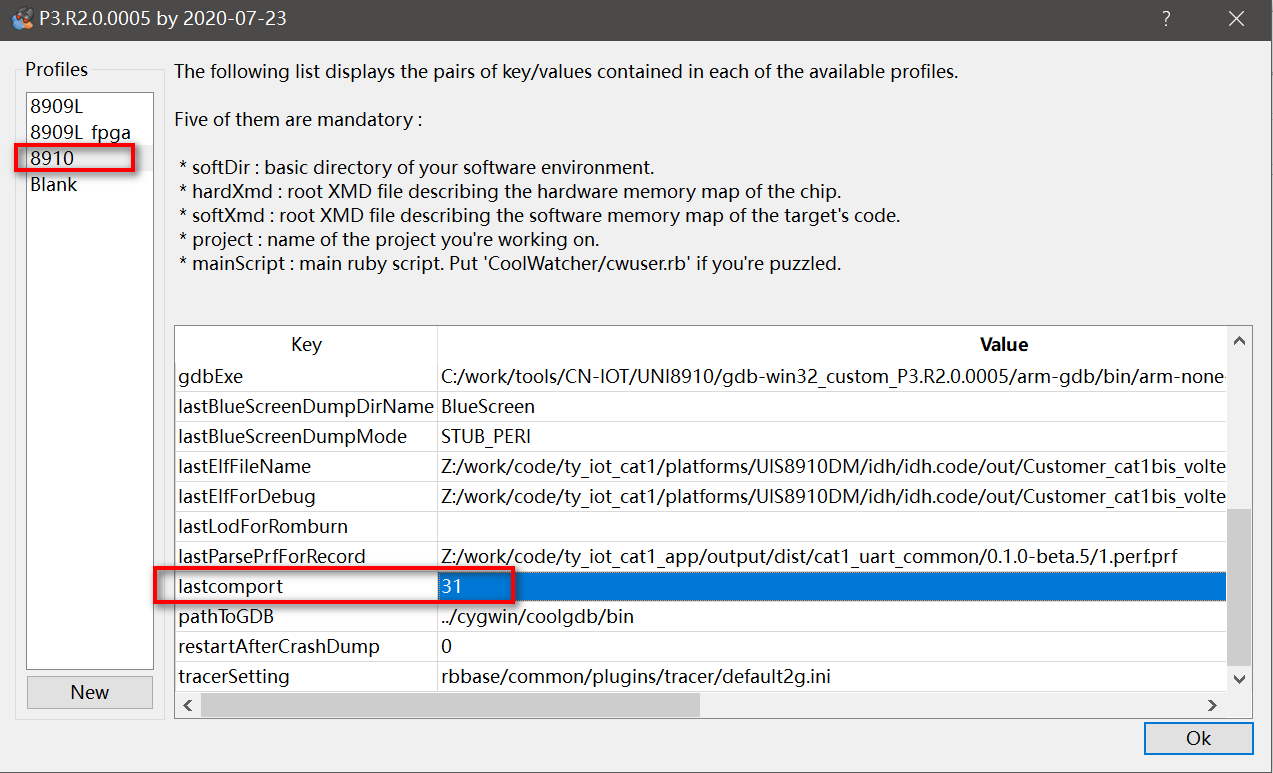
Enter the port number of Unisoc Usb Serial Port 4 in the
lastcommport.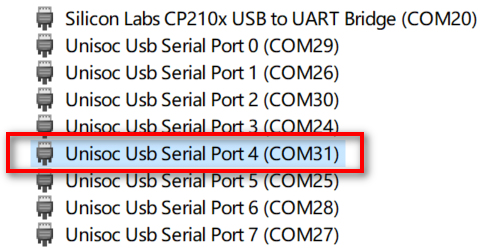
-
After
CoolWatcheris opened, choose Plugins > Activate Tracer to open the log tracer interface, and choose Tracer > Start Tracer to show the log information.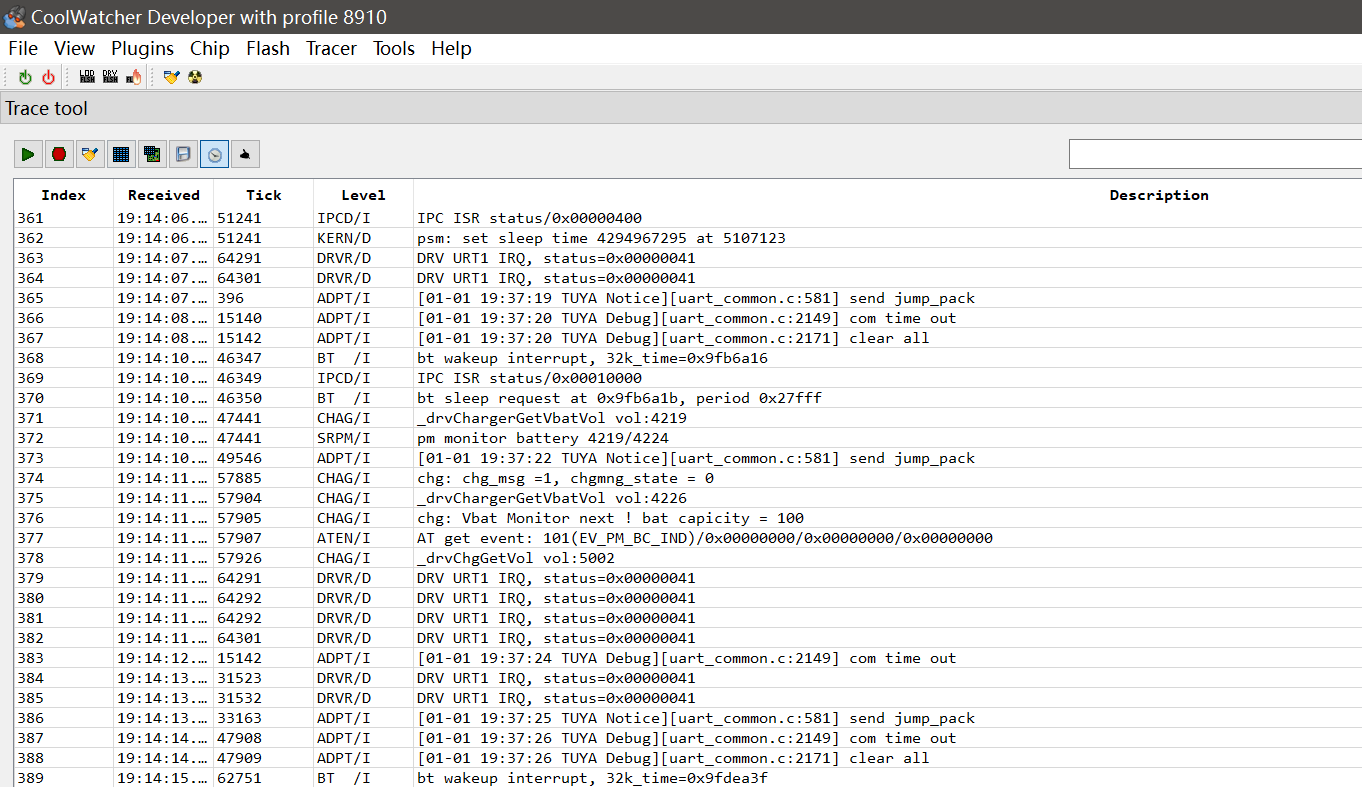
Note: The log function might not be enabled by default. You can use the serial debugging assistant to connect to the serial port of
Unisoc Usb Serial Port 0. This port supports the following settings: Baud 9600, data bit 8, stop bit 1, no parity, and no flow control. Enterat^tracectrl=0,1,2to enable the log function.
Flash the authorization information
Flash the authorization information on the Cloud Module Burning Authorization Platform. For more information, see General Wi-Fi SDK Burning and Authorization Instruction.
Firmware OTA update
For more information, see OTA Update Guide of Wi-Fi Common Solution.
Is this page helpful?
YesFeedbackIs this page helpful?
YesFeedback


