Flash Firmware and Authorize Module
After embedded firmware development, you need to flash the firmware to the module and authorize the module to connect to the cloud.
Flashing methods
The approaches to firmware flashing vary depending on the development methods. This topic describes three options to flash the firmware and authorize the module.
-
Custom development: applies to the product release stage. Your product is developed with custom solution.
-
Sandwich development board: only applies to flashing firmware to and authorizing the Sandwich development board. If you develop with the Sandwich development board, we recommend that you use the Cloud Module Burning Authorization Platform software to flash the firmware.
-
Flashing tool from the chip vendor: applies to the development stage. You can authorize the module once and then flash firmware to it multiple times.
In this topic, a credential, a license, and a token denote the same thing.
Prerequisite
Before you flash the firmware and authorize the module, you need to have the following items ready:
- Smart PMS (production management system) account
- Production Toolkit software
- Beken Writer from the chip vendor
- USB to UART converter
Step 1: Register with the PMS
Visit Smart PMS and register an account. Select Personal Developer and complete the required information as instructed. Then, you will receive an email after registration.
Step 2: Install Production Toolkit
-
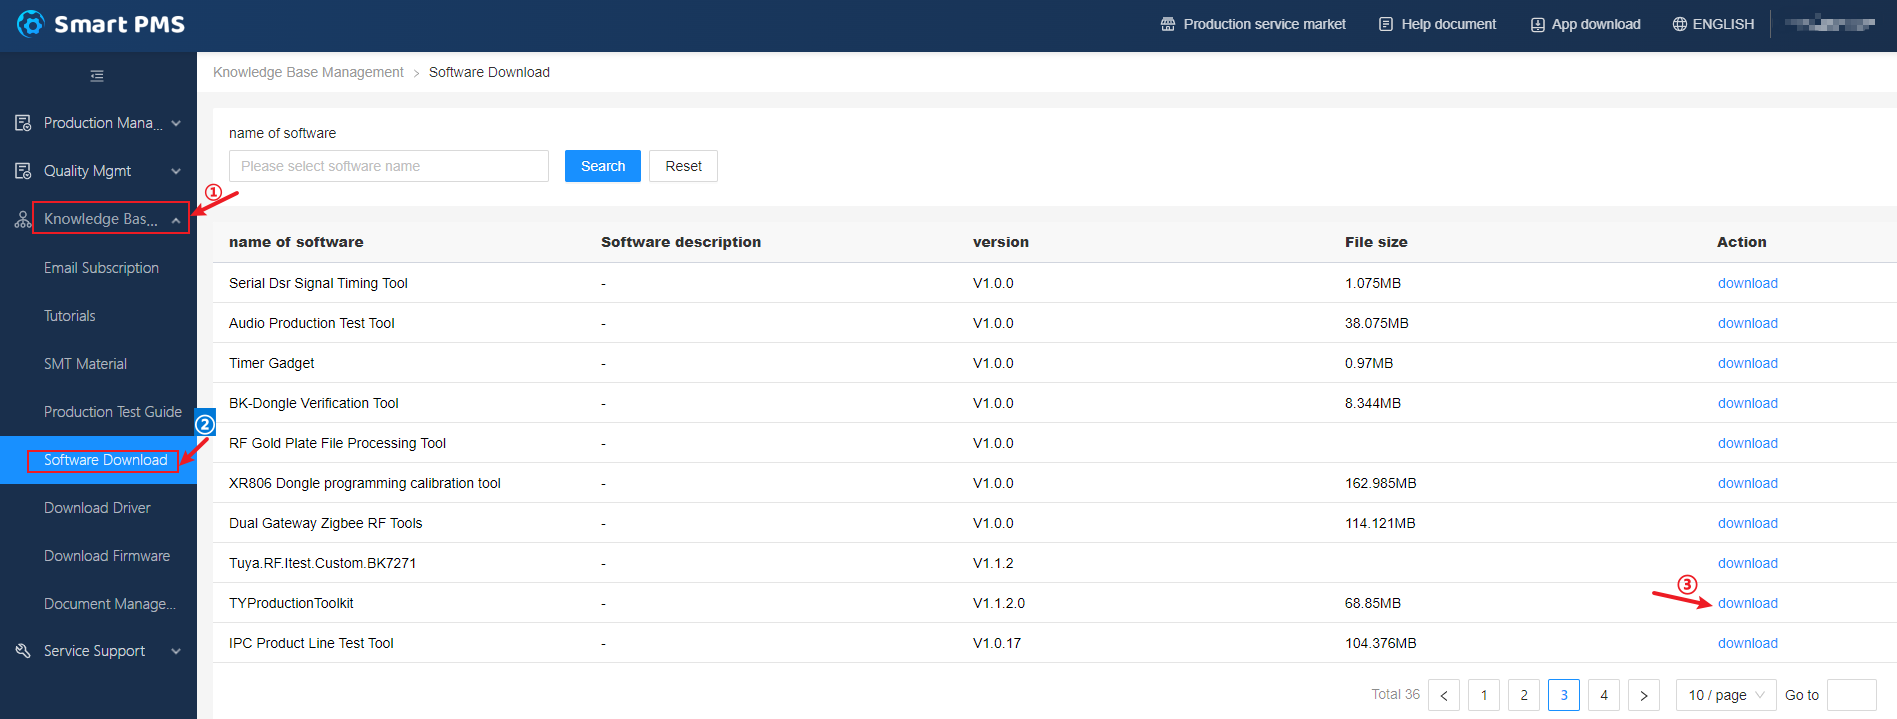
Log in to the PMS.
-
Choose Knowledge Base Management > Software Download. Find TYProductionToolkit and download it.
-
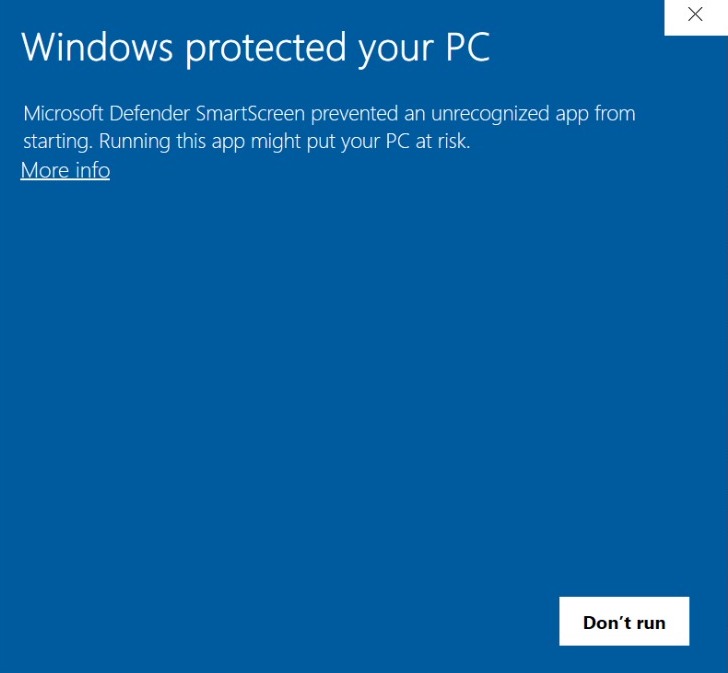
Open the TYProductionToolkit installer. When you are prompted with the following window, click More info.
-
Click Run anyway.
-
Follow the onscreen instructions to begin installing. You can specify an installation directory as needed.
-
Open TYProductionToolkit after installation. Log in with your Smart PMS account and password.
-
Click TYMZ.

Step 3: Download Beken Writer
Click bk_writer_gui.exe to download Beken Writer.
For custom development
This method applies to the product release stage for the custom development solution. Specifically, upload the compiled firmware to the Tuya Developer Platform, get the credential (token), and then use the Cloud Module Burning Authorization Platform software to flash the firmware and authorize the module.
Only the authorized module can be connected to the Tuya Developer Platform. You can use the Beken Writer to flash existing or updated firmware to an authorized module.
Step 1: Upload firmware
-
Log in to the Tuya Developer Platform, click the target product, and then go to the Hardware Development step.
-
Click Add custom firmware and complete the required information.
Parameter name Description Firmware Identifier The Firmware Identifier must be identical to the name of the project folder under the appsdirectory. Assume that the firmware identifier iswifi_one_light. You should upload the production file of the projectwifi_one_lightunder theappsdirectory.Flash Size The Flash Size is 16 Mbit, equal to 2 MB. See the datasheet for the flash size of the network module you use.Description:
- 1 byte = 8 bits
- 16 Mbit ÷ 8 = 2 MB
Parameters not framed in red Use the default settings. 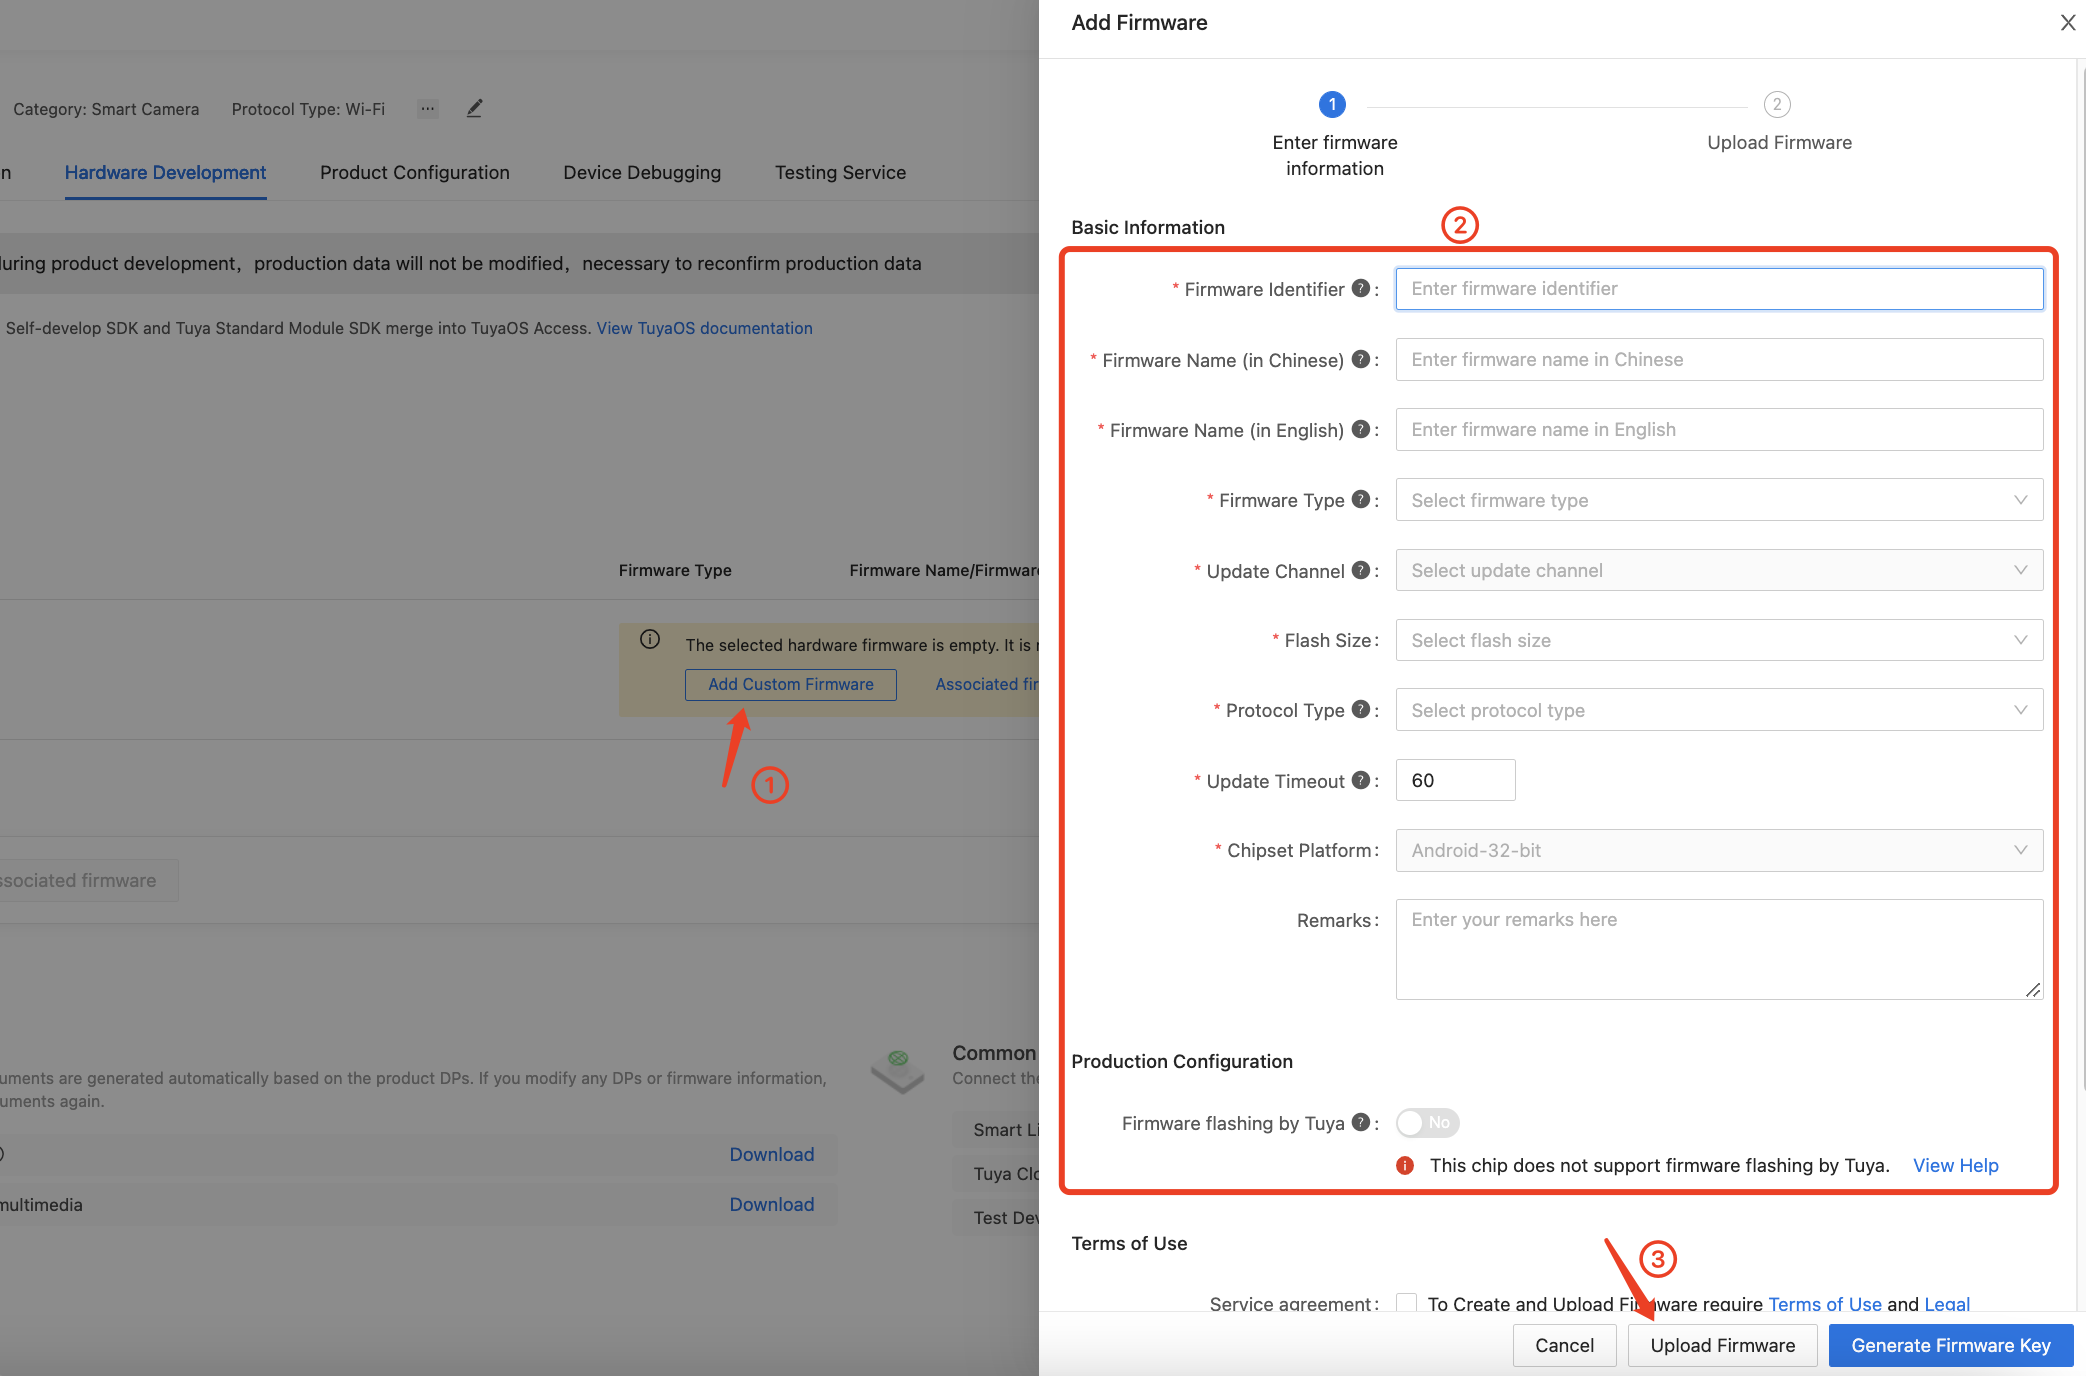
-
Click Upload Firmware to upload the firmware in the next step. Set the following parameters and click Save.
Parameter name Description Firmware Version The Firmware Version must be identical to the one used for compilation. Production Firmware Upload the binary file with the suffix QIO.User Area Firmware Upload the binary file with the suffix UA.Firmware Updates Upload the binary file with the suffix UG.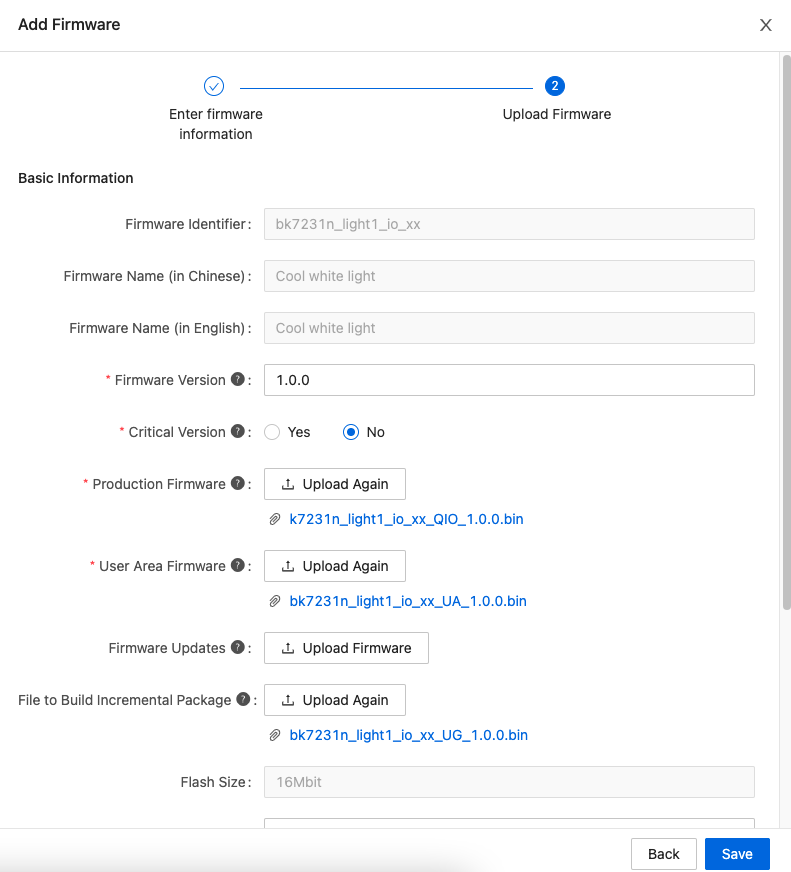
-
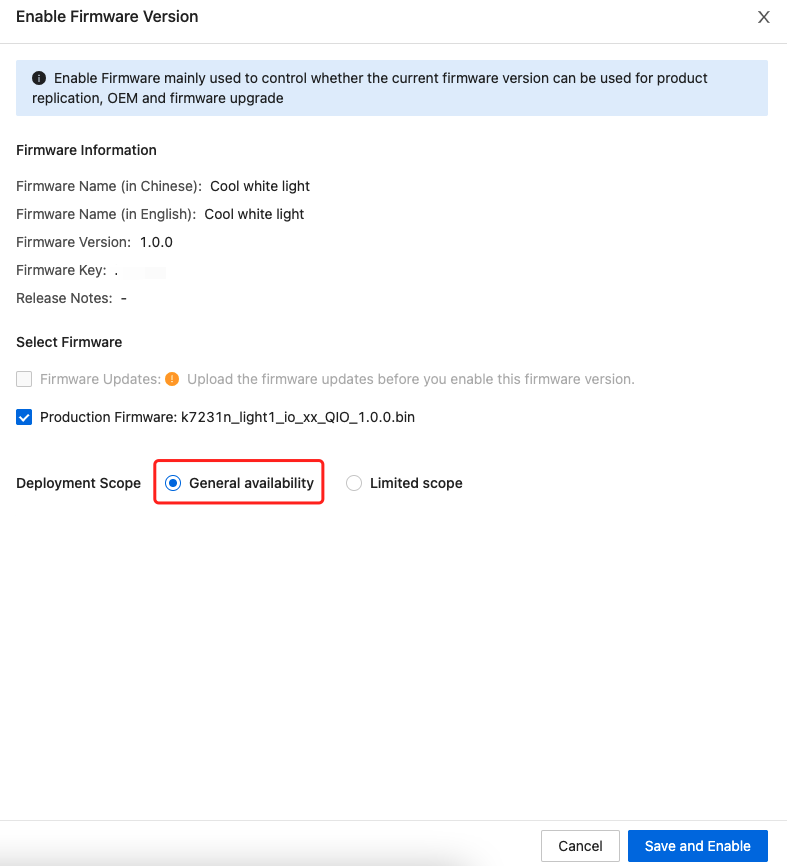
Click Enable Firmware.

-
Choose General availability for deployment scope and click Save and Enable.
- General availability is selected to facilitate product management for you as an individual developer.
- If your product is built for mass production, proceed with caution when choosing the development scope.
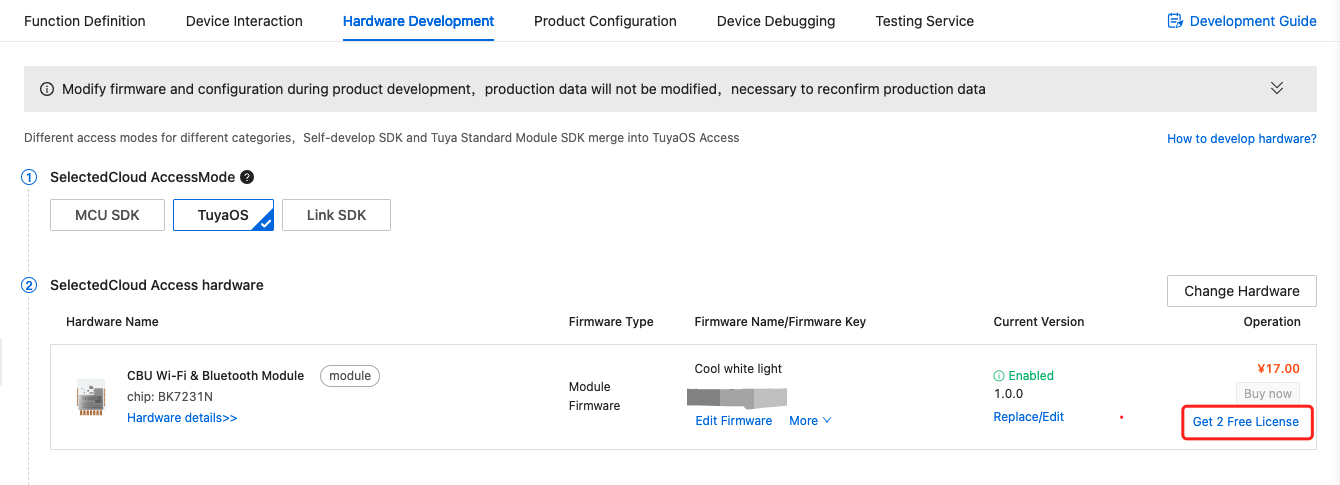
Step 2: Get credential (token)
After the firmware is uploaded to and enabled on the Tuya Developer Platform, you can get free licenses. They are required when you flash the firmware and authorize the module by using the Cloud Module Burning Authorization Platform software.
-
Click Get 2 Free Licenses.
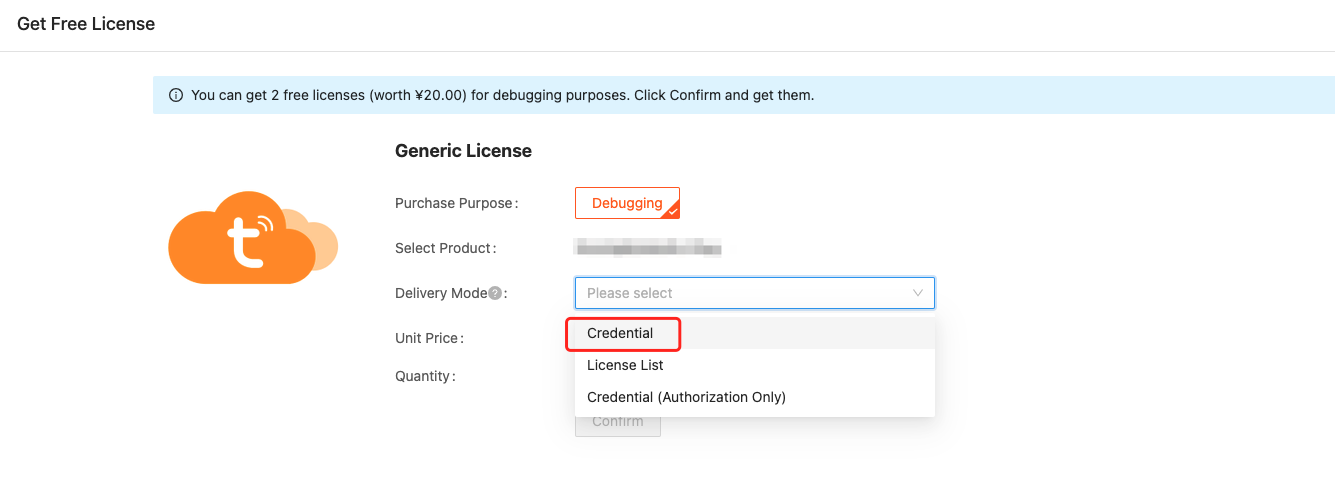
-
For Delivery Mode, choose Credential and click Submit.
-
Credential: The Cloud Module Burning Authorization Platform software writes a unique credential to a device along with firmware flashing. It can read the specified numbers of credentials and write them to devices in bulk. To use credentials, make sure you have uploaded the production firmware to the Tuya Developer Platform.
-
License List: A list provides license information in plain text, which should be written to devices manually one by one.
-
Credential (Authorization Only): The Cloud Module Burning Authorization Platform software writes a unique credential to a device for the purpose of authorization only without the need for firmware.
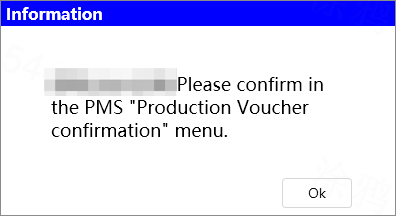
-
-
Click View Order List.
-
Check the order. Click Download Credential.
-
Extract the downloaded file and open the
Token_information.txtfile. Copy the credential. -
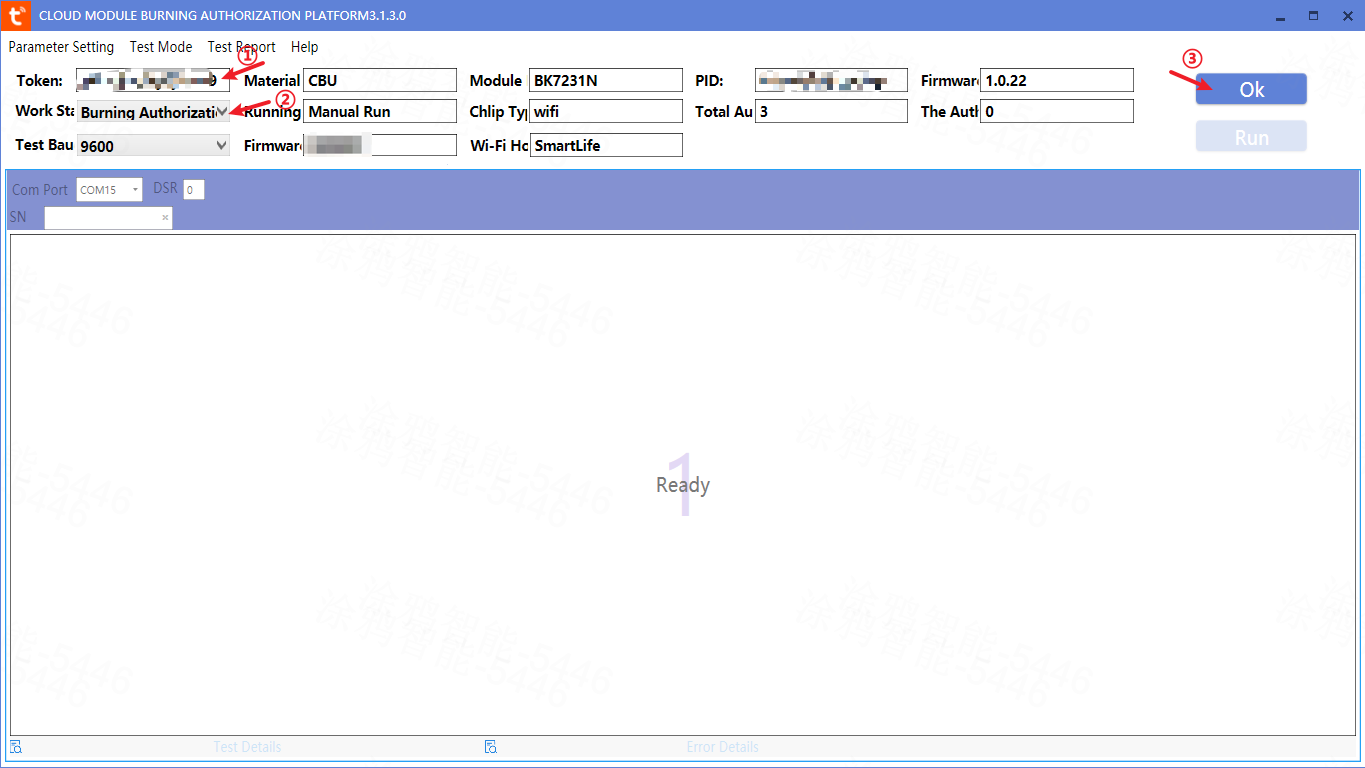
Open the Cloud Module Burning Authorization Platform software, enter your credential in the token input box, and select Burning Authorization for the work station.
If you get an error message saying Failed to get token, no permissions for actions, follow the instructions in the FAQs section to troubleshoot the problem.
Step 3: Flash firmware and authorize chip
-
Open the Cloud Module Burning Authorization Platform software, enter your credential in Token, and hit the Enter key. Select Burning Authorization for the work station, and click OK.
-
Connect your board to your computer by using a USB to UART converter. The pin connection table is as below:
USB to UART converter pins Sandwich SoC board pins VCCVCCGNDGNDTXRXRXTX -
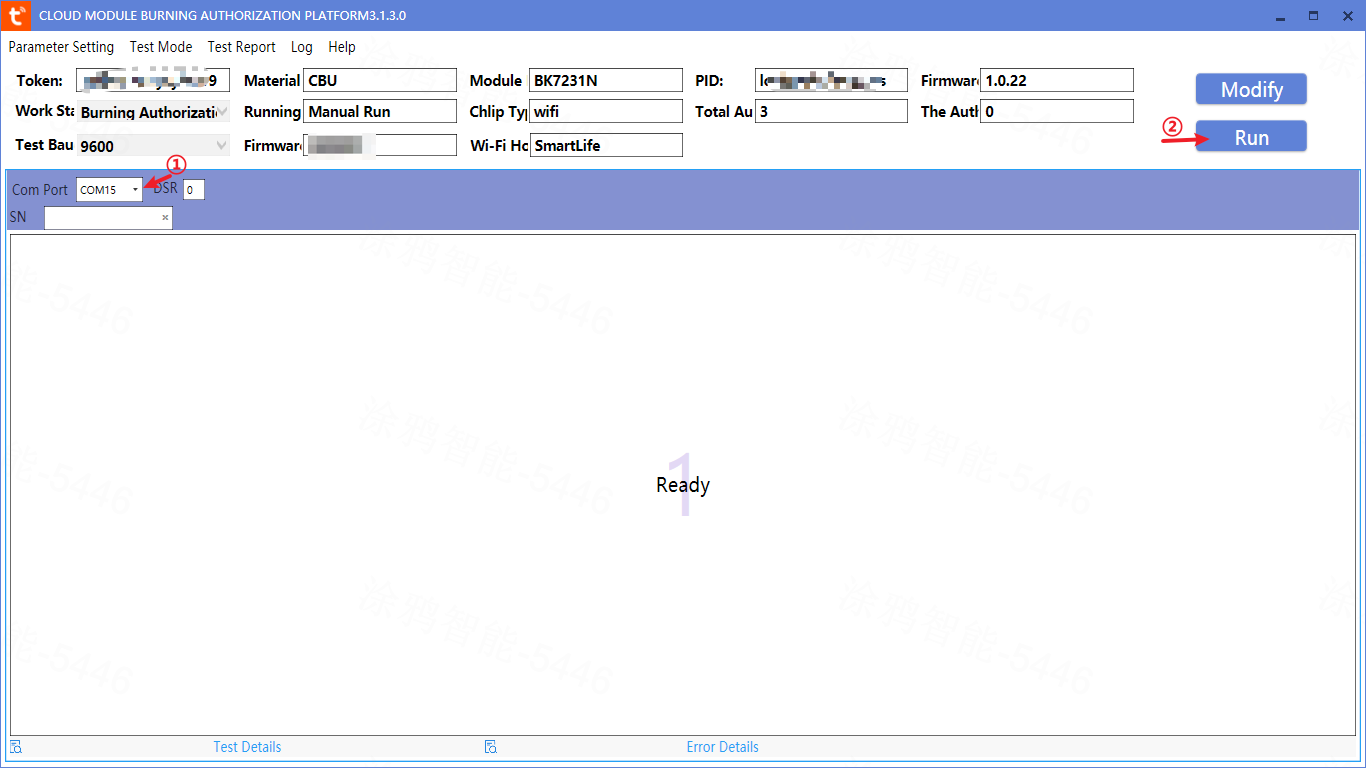
Select the correct COM Port and click Run. Immediately power off the board and power on it again. Alternatively, you can directly press the reset button to restart the board.
- To restart the board, do not directly disconnect the USB to UART converter from your computer. Otherwise, flashing will fail. You should disconnect the VCC and GND jumper wires between the board and the USB to UART converter and connect them again.
- The CBU board comes with a USB to serial CH340 chip. After you click Run on the software, press the reset button on the board to restart it.
-
(Optional) If you failed to enter the production test, it might be because the board has been connected to the network for more than 15 minutes during the previous flashing process and the testing channel has been shut down. For more information about this issue, see Failed to enter production test.
For Sandwich development board
This method applies only when you flash the firmware to and authorize the Sandwich development board.
For the products created based on the no-code development solution on the Tuya Developer Platform, they must be bound with the Sandwich SoC microcontroller board. This way, you can request licenses as the credentials (tokens) from the Tuya Sandwich Evaluation Kit. Otherwise, if your account is not bound with a Sandwich SoC microcontroller board, the network module cannot be granted a token for the product in the no-code development solution. Thus, flashing and authorization cannot be implemented for the module.
Step 1: Bind Sandwich development board
-
Log in to the Tuya Developer Platform.
-
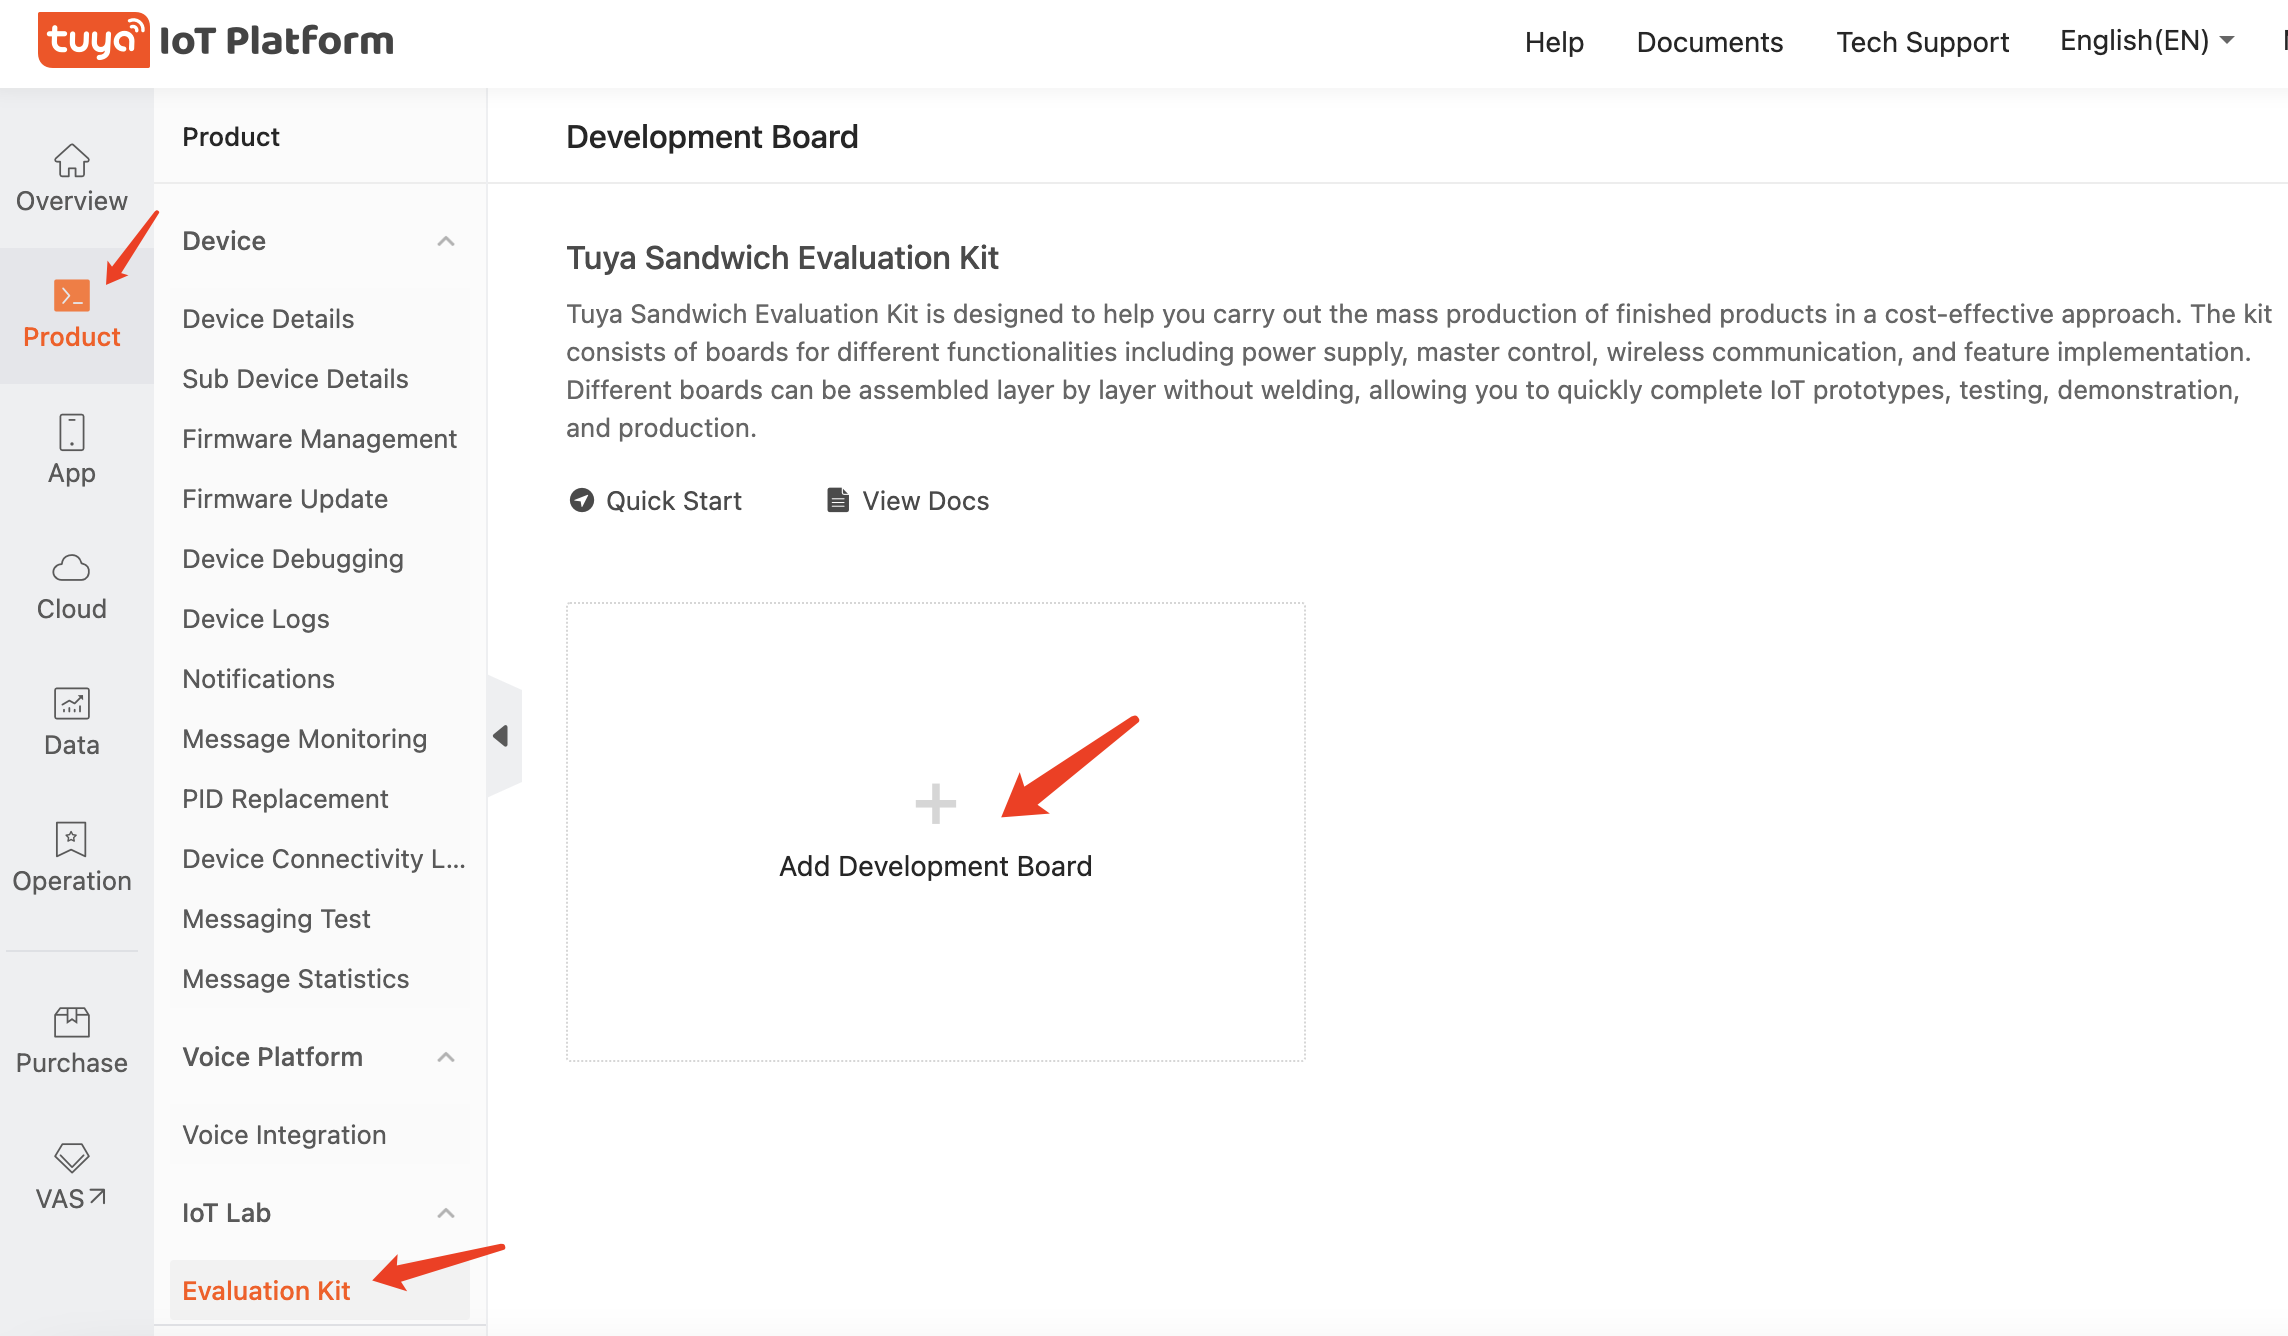
Choose Product > IoT Lab > Evaluation Kit, and click Add Development Board.
-
In the dialog box that appears, enter the ID and password of the board.
Step 2: Get token
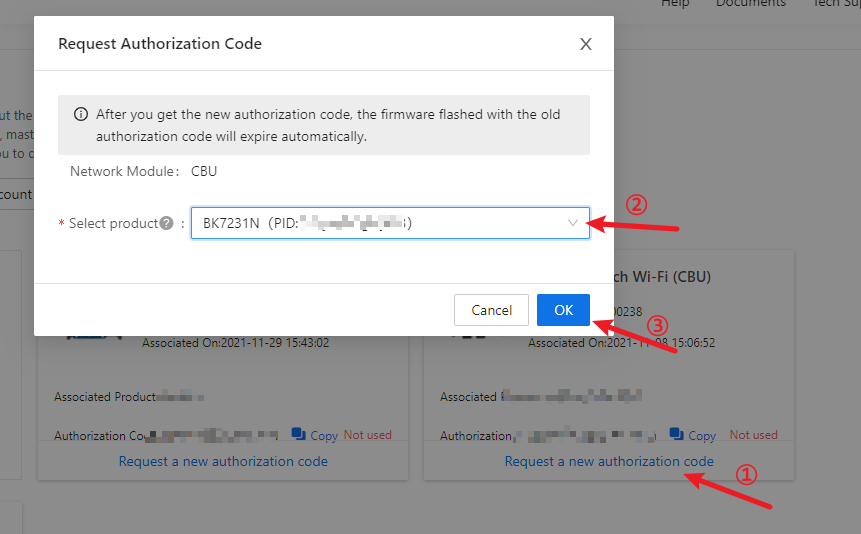
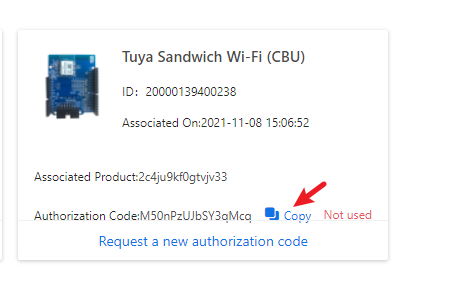
After the board is bound, click Request a new authorization code for the board, and in the dialog box that appears, select the target product to get the token.
Step 3: Flash firmware and authorize chip
-
Copy the token from the Tuya Developer Platform and open the Cloud Module Burning Authorization Platform software.
-
For more information about flashing and authorization, see Flash firmware and authorize chip.
Flashing tool from chip vendor
This method applies to the development stage. You can authorize the module once and then flash firmware to it multiple times. The module must be authorized before flashing. Select the correct flash partition to ensure writing to the right section. Otherwise, the program cannot run as expected.
During development, flashing and authorization is always required each time the Cloud Module Burning Authorization Platform software is used. To improve efficiency, you can use the flashing tool from the chip vendor to flash firmware to an authorized module multiple times.
Beken Writer
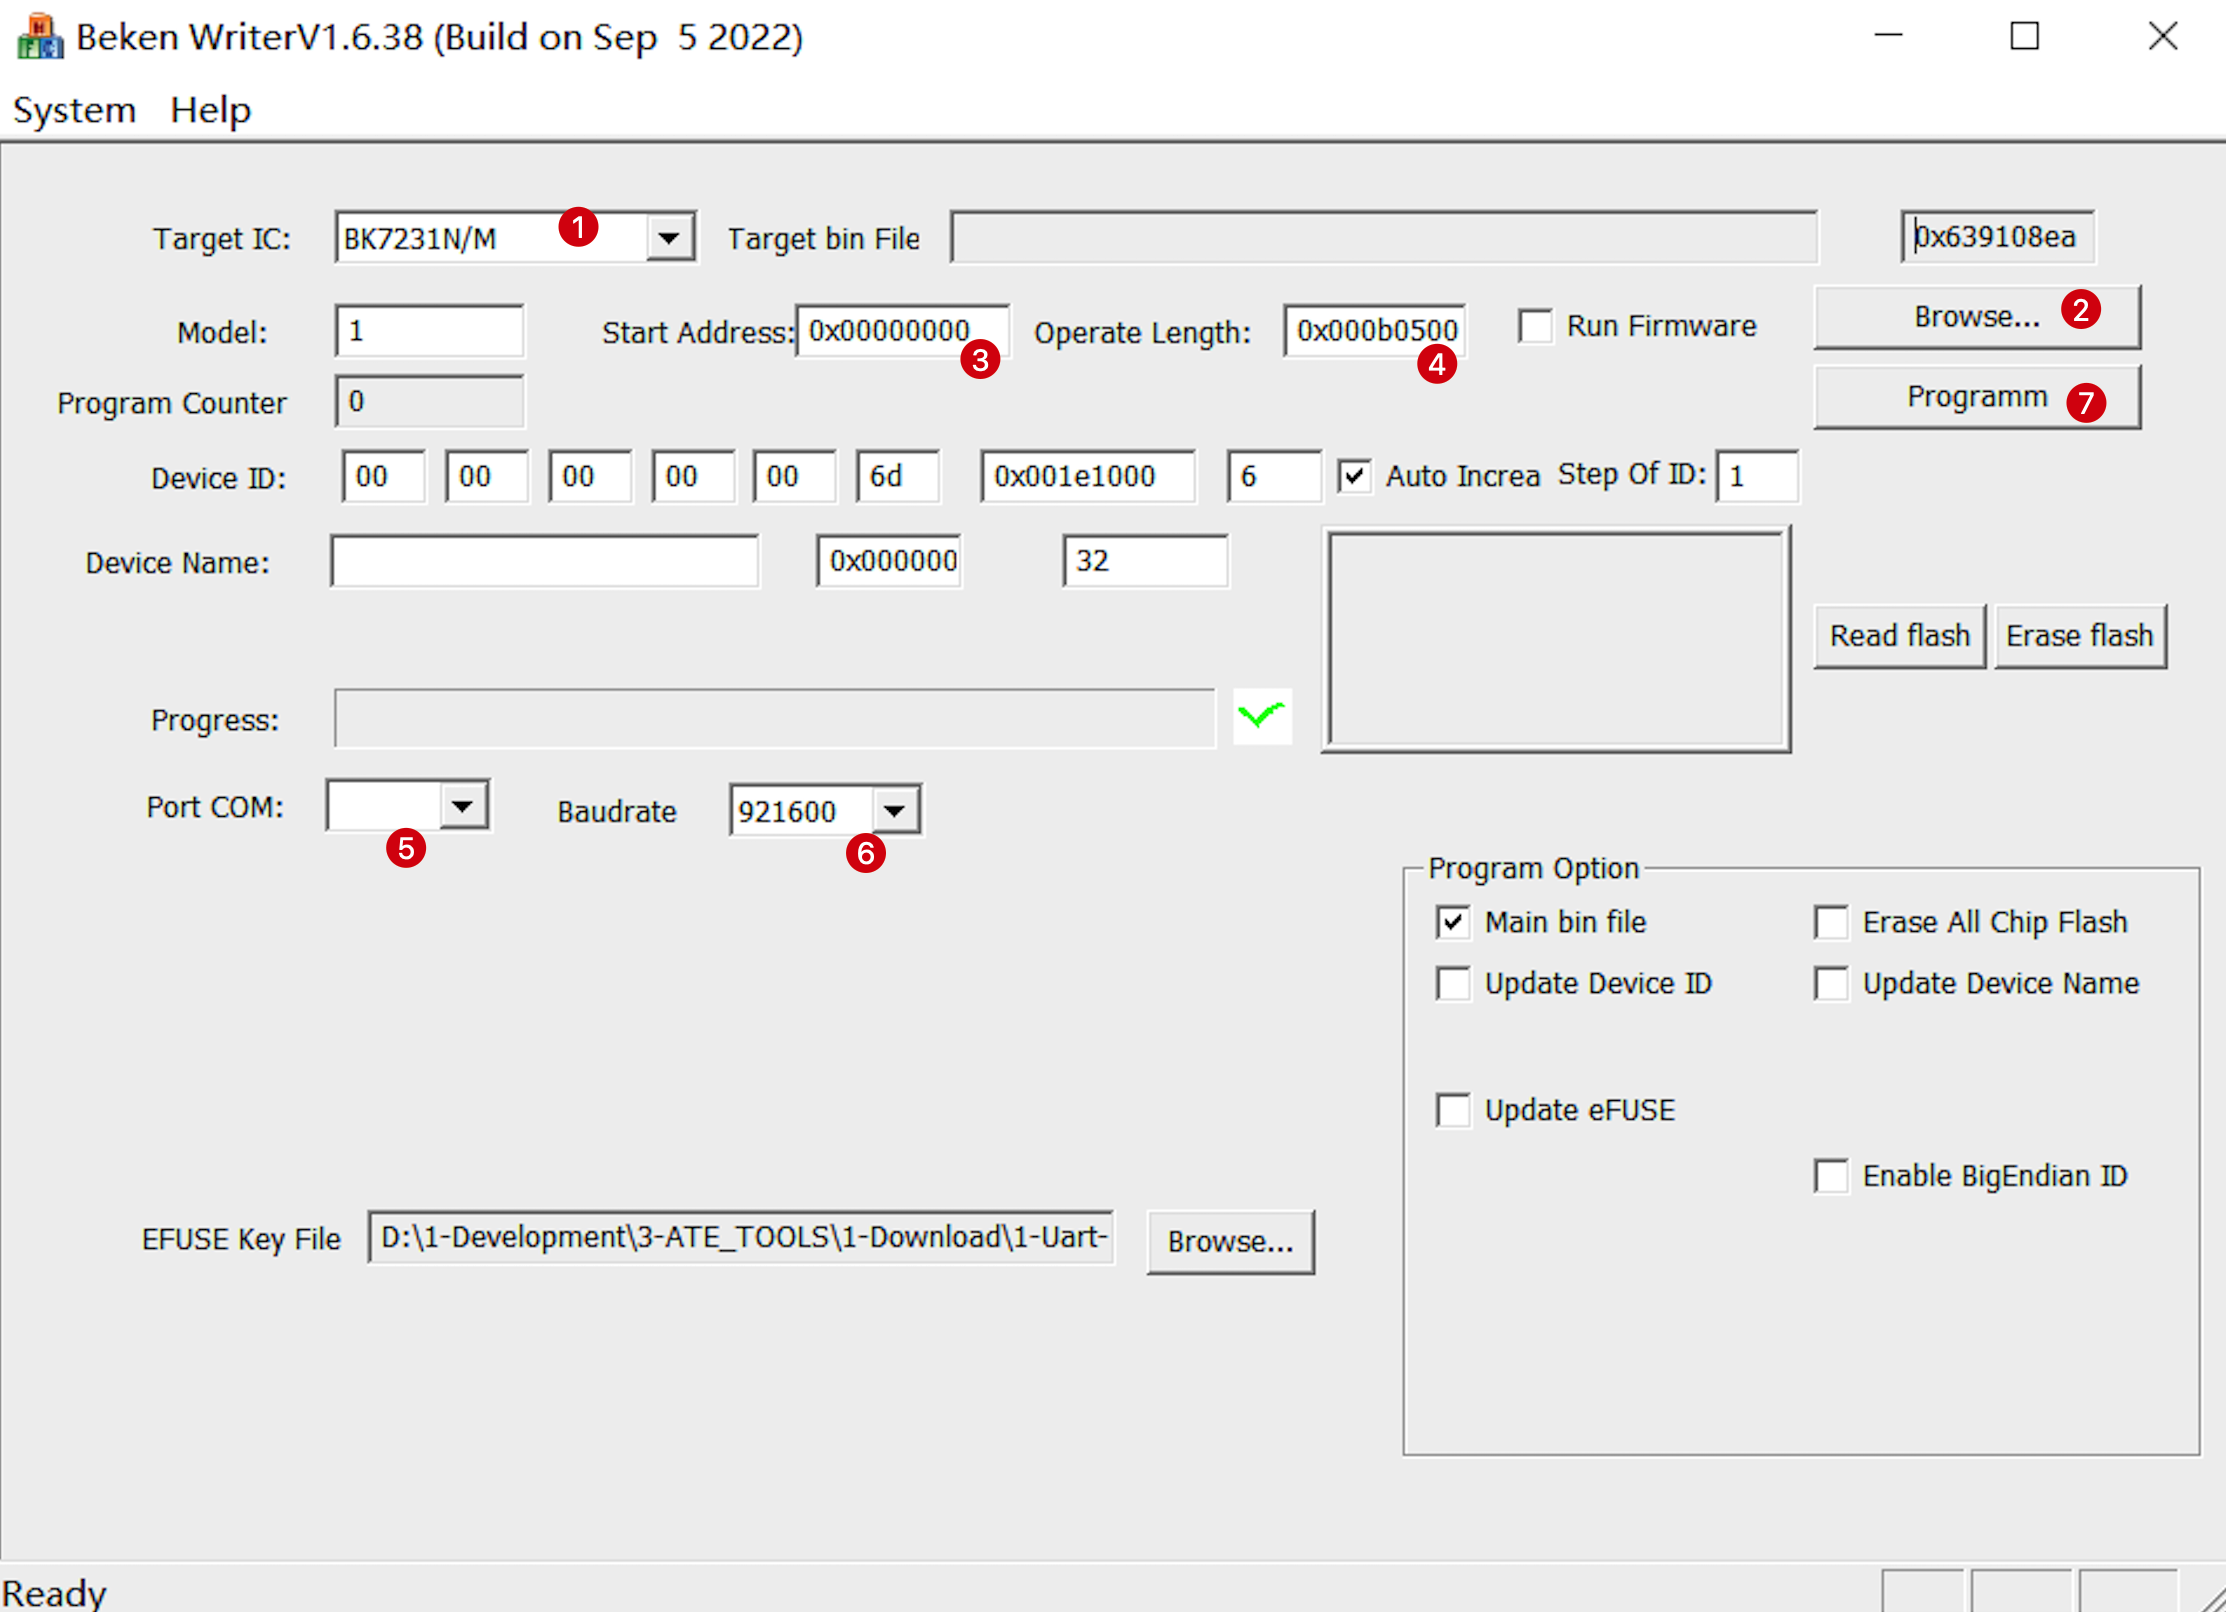
The Beken Writer tool is used only to flash the firmware to the application area and is unable to authorize the module. You can use this tool to flash an authorized module. Therefore, each time your code is updated, you do not need to upload the latest firmware to the Tuya Developer Platform and perform flashing and authorization with the Cloud Module Burning Authorization Platform software.
-
Select the chip model of the target module from the Target IC (①) drop-down list. For more information, see the Datasheet of the module you use.
-
Click Browse (②) and select the binary file with the suffix
UA. -
Set Start Address (③) to
0x00011000and set Operate Length (④) to0x00119000. -
Select the correct serial port from Port COM (⑤) and set the Baudrate (⑥) to the maximum value to accelerate the flashing speed.
-
Click Program (⑦). Immediately power off the board and power on it again to start flashing. The updated firmware will be flashed to the module. There is no need to authorize the module with the Cloud Module Burning Authorization Platform software again.
FAQs
Failed to get token, no permissions for actions
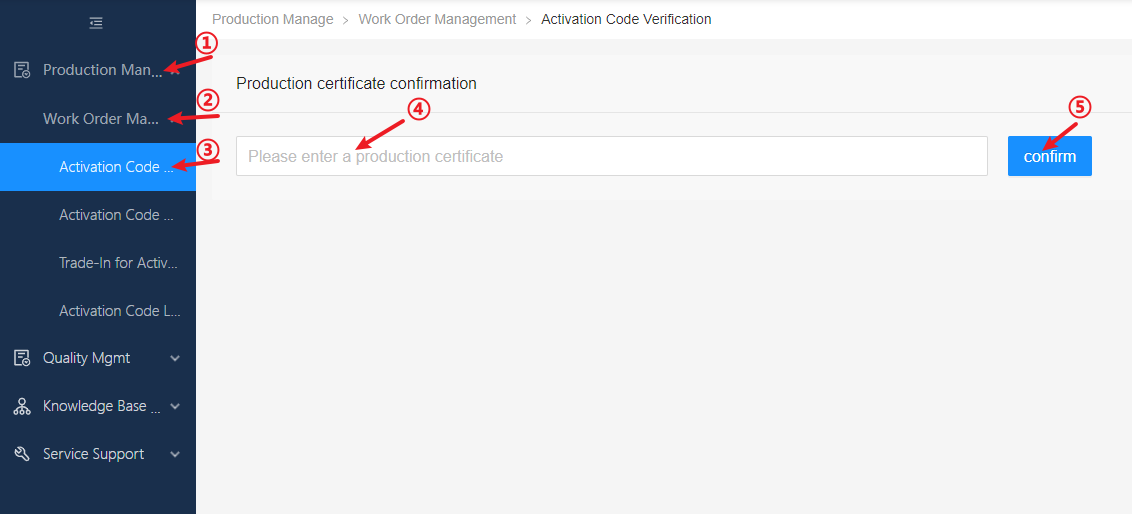
When you enter the credential, an error message saying Failed to get token, no permissions for actions is returned.
Troubleshooting
Log in to the Smart PMS. Choose Production Manage > Work Order Management > Activation Code Verification. Enter your credential with issue and click OK. Go back to the Cloud Module Burning Authorization Platform software. Enter your credential again and you should be good to go.
Bus contention error
This error occurs possibly because other software occupies the required serial port for flashing.
Troubleshooting
Close all flashing tools, or plug off the USB to TTL converter and plug it into the computer.
Fail to get firmware fingerprint
In the authorization-only scenario, the failure to get the firmware fingerprint might occur. The possible cause is that the flashed firmware name or version number does not match the authorized firmware name or version number.
Troubleshooting
-
Enter the token that matches the firmware fingerprint and then run authorization.
-
Try flashing and authorization again. This method does not apply to Authorization Only credentials.
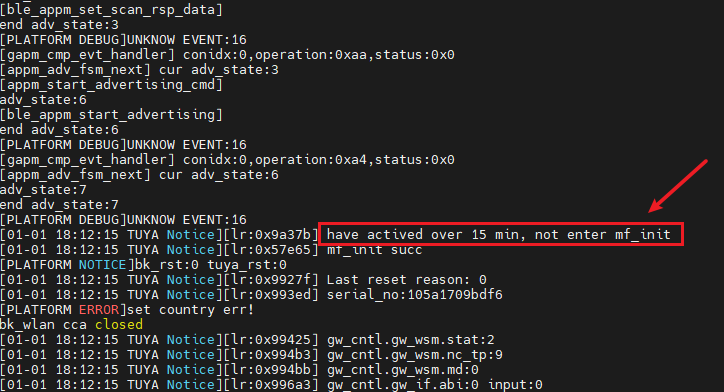
Fail to enter production test
If the module has been connected to the network for more than 15 minutes, the testing channel will be shut down. During flashing and authorization, if the failure of entering the production test occurs and a message saying have activated over 15 min, not enter mf_init is logged, this means the device has disabled the production test mode.
Troubleshooting
You need to erase the flashing data before the authorization is successful.
-
Modify code (generic method)
If the failure of entering the production test occurs, you can call
mf_test_ignore_close_flag() ;ofpre_device_init()in the filetuya_device.cto ignore the flag that disables the production test. This avoids the authorization failure caused by the disabled production test.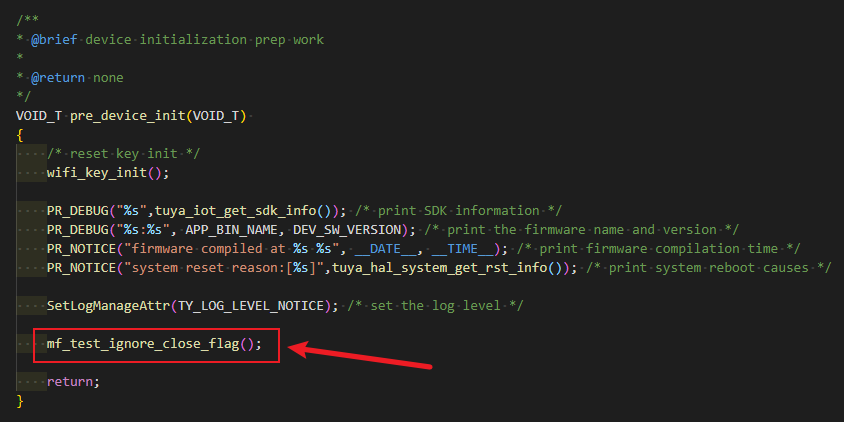
-
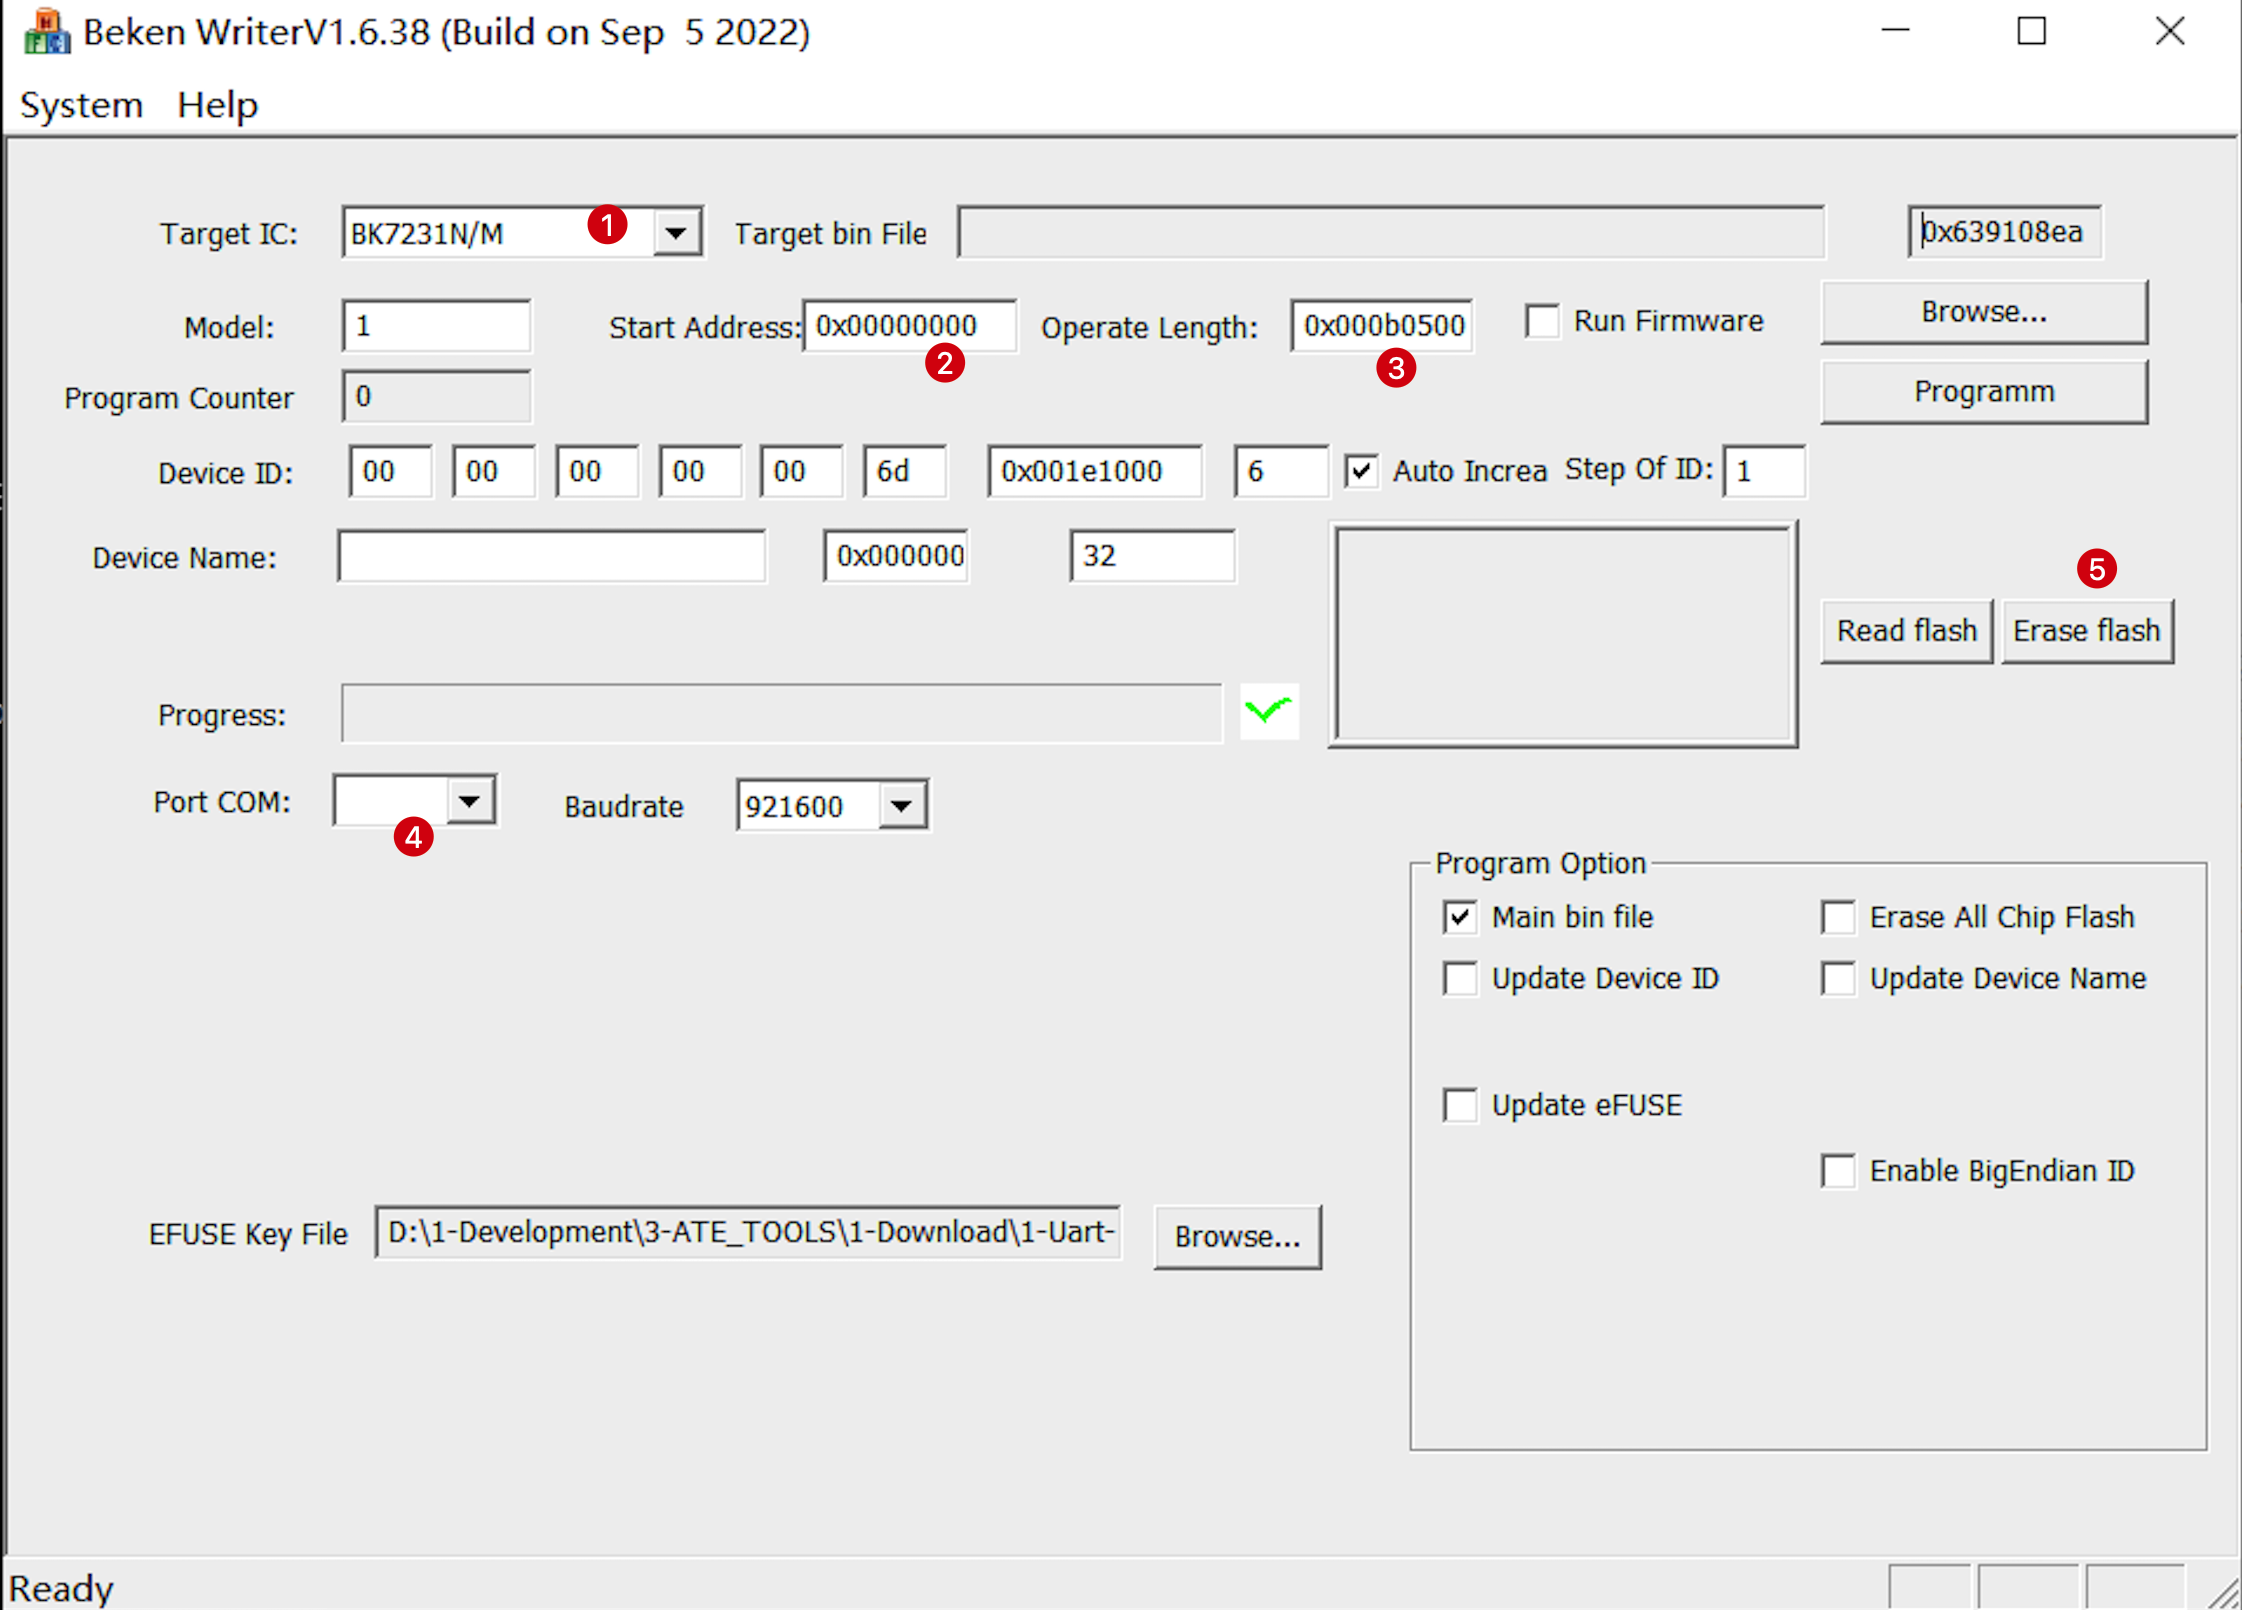
Erase data with Beken Writer
Open
Beken Writerand change Target IC (①) to the required chip. For more information, see Datasheets of Network Modules.Settings for development boards with Beken chips:
- WB3S: Select BK7231 from the Target IC drop-down list.
- CBU: Select BK7231N from the Target IC drop-down list.
- Enter
0x001EE000in Start Address and0x00012000in Operate Length.
Select the Port COM, click Erase Flash (⑤), and then restart the module to start erasing the memory data.
Is this page helpful?
YesFeedbackIs this page helpful?
YesFeedback


